
📆 Revision Date:
These instructions are for connecting a cash drawer to a receipt printer that is already configured and ready to use.
Note: The following steps are the same for iOS and Android alike, only the images shown here are demonstrated on an iOS device
|
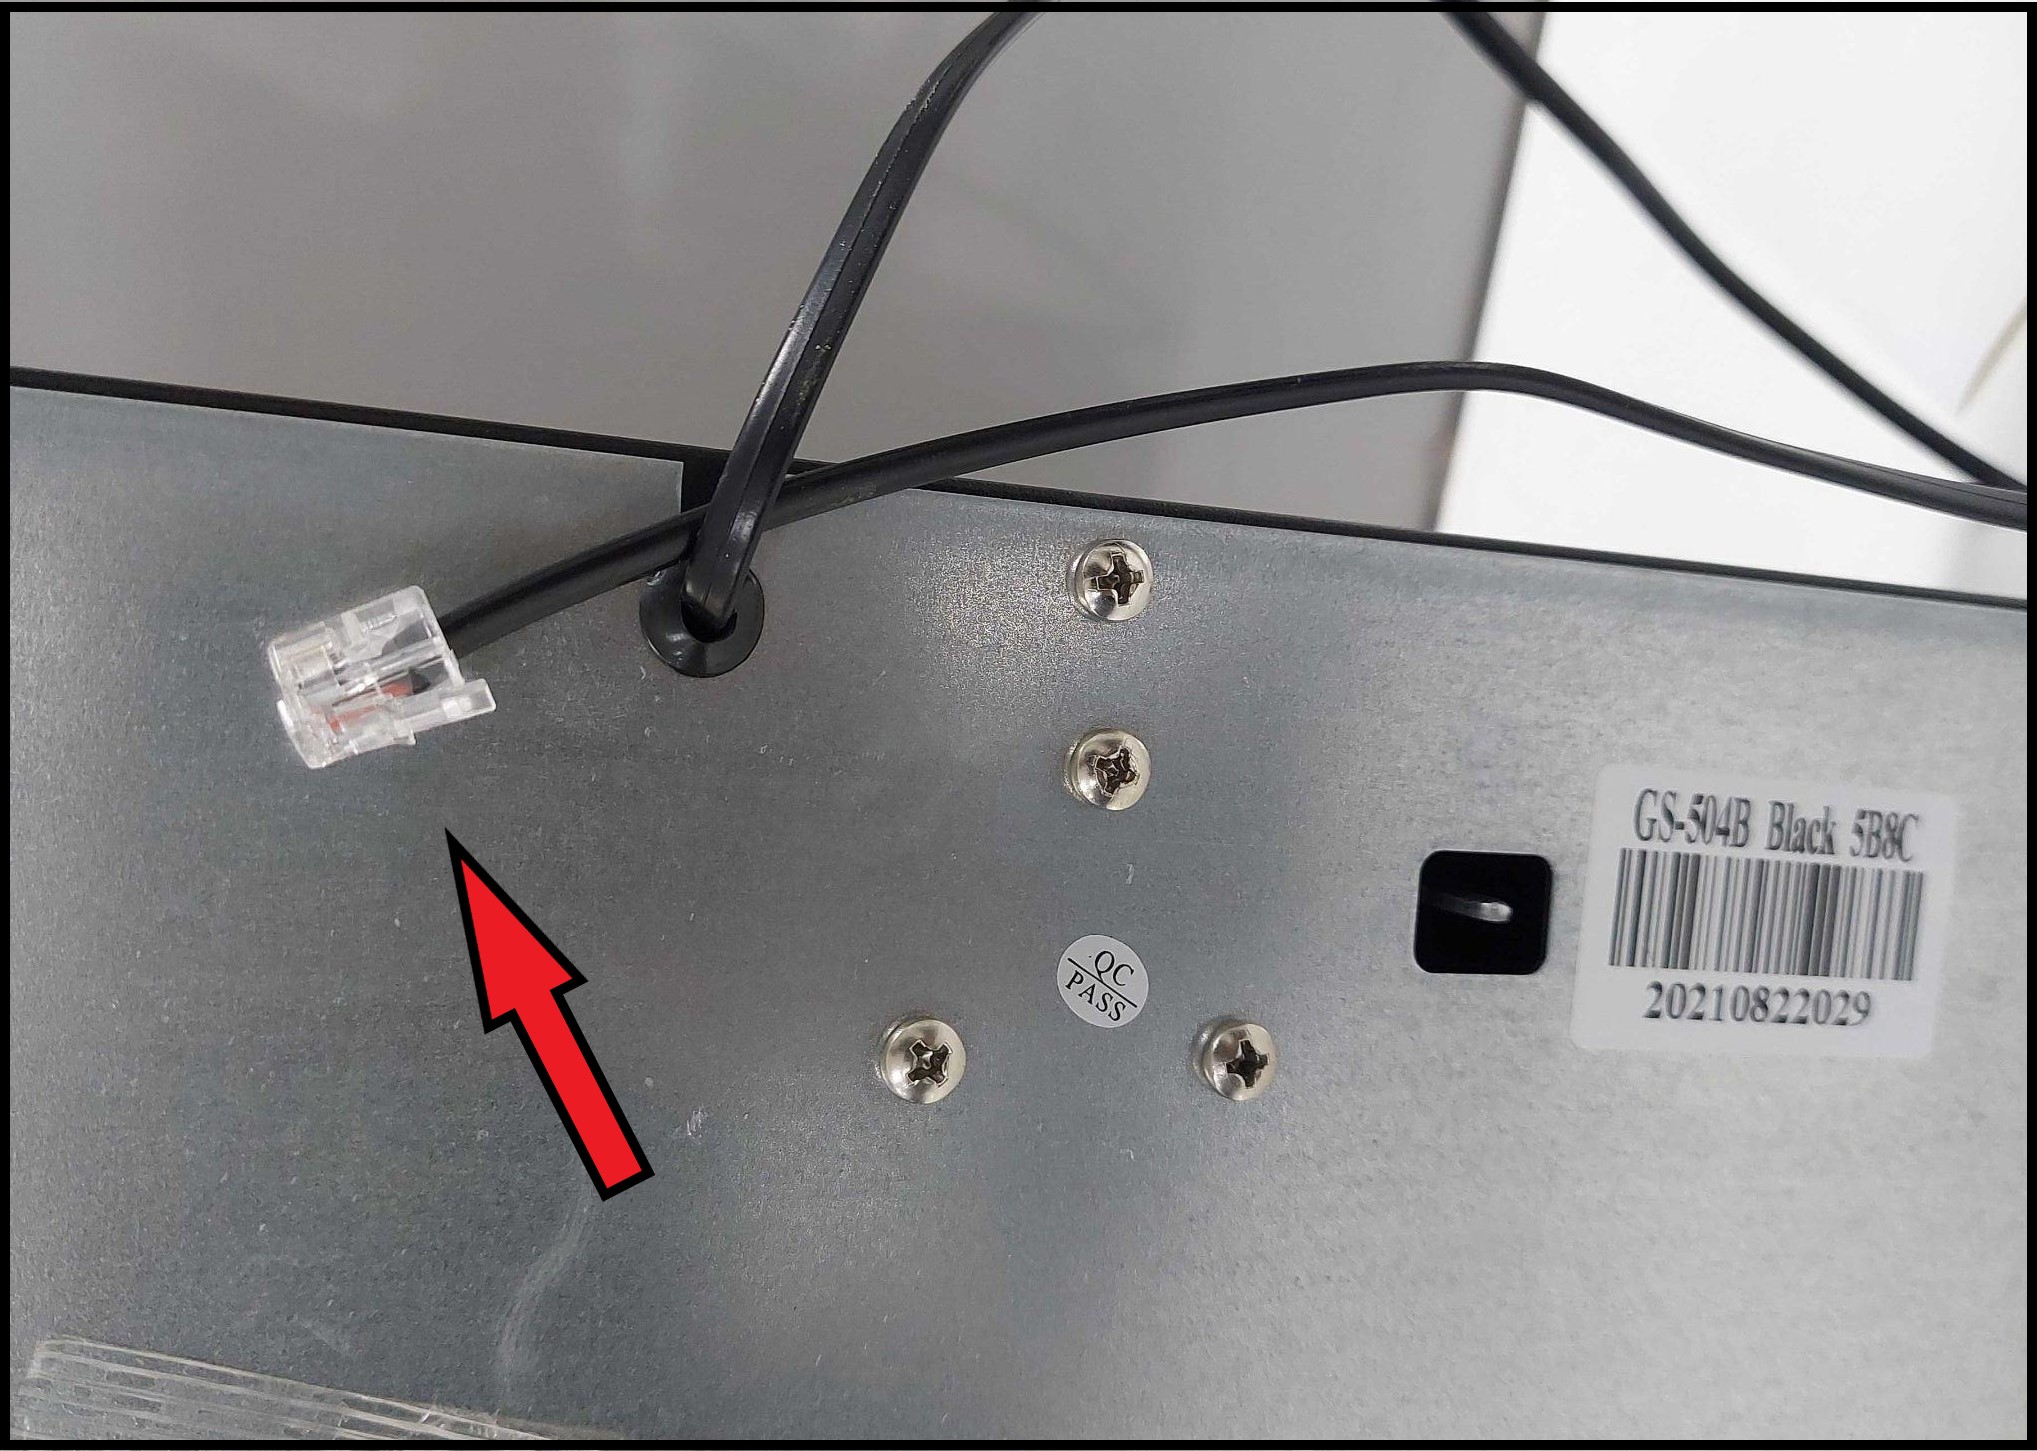
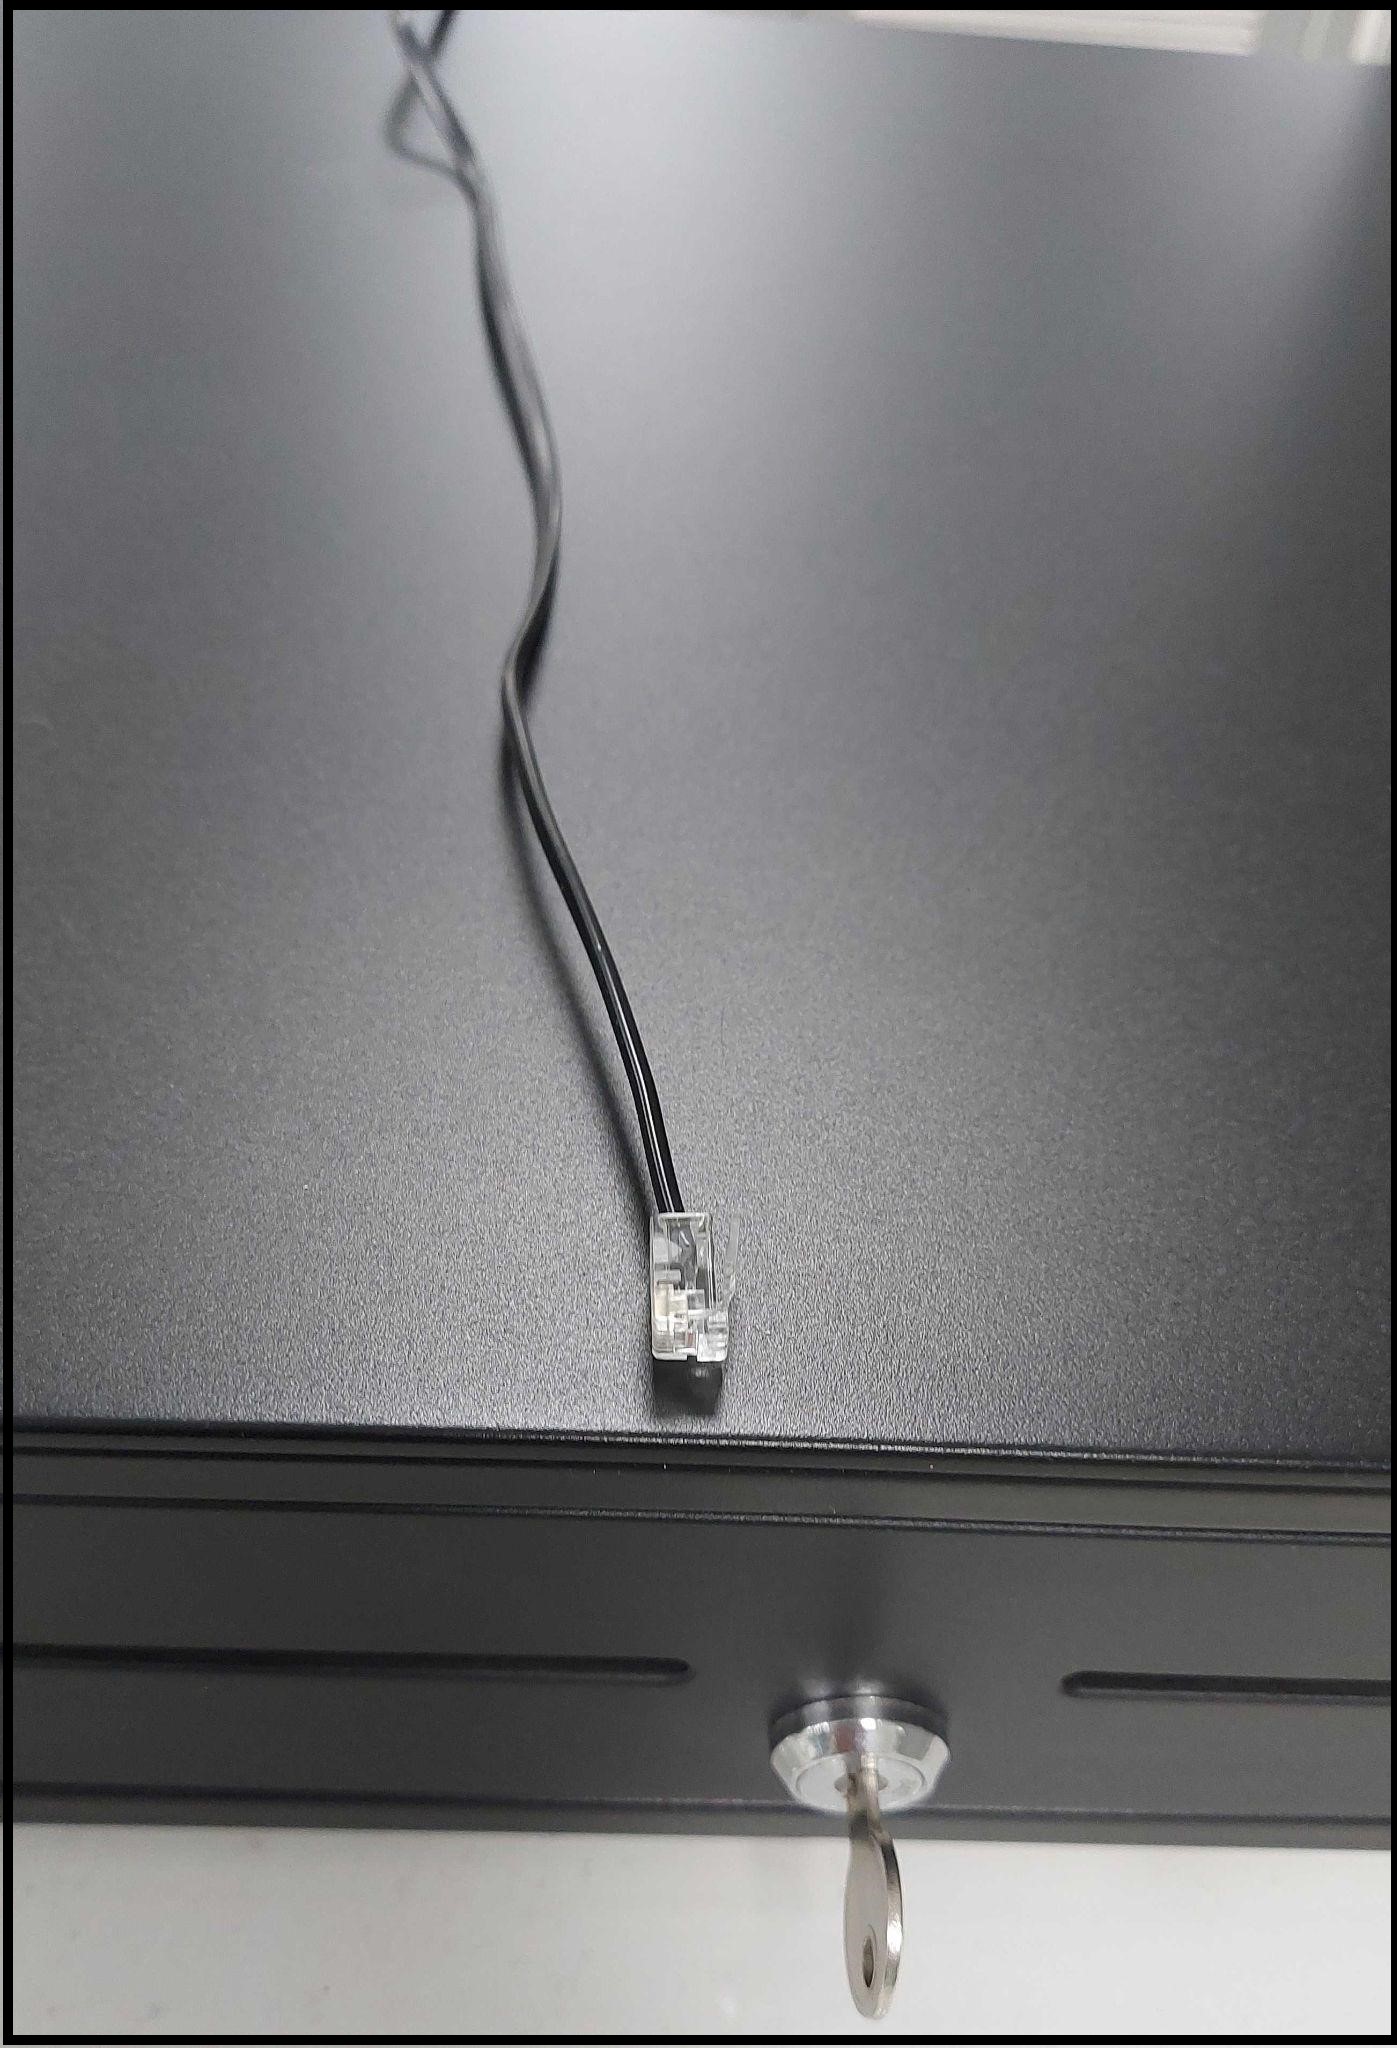
Locate the cable at the back of the cash drawer and extend it toward the front of the drawer, as shown. |
|
|
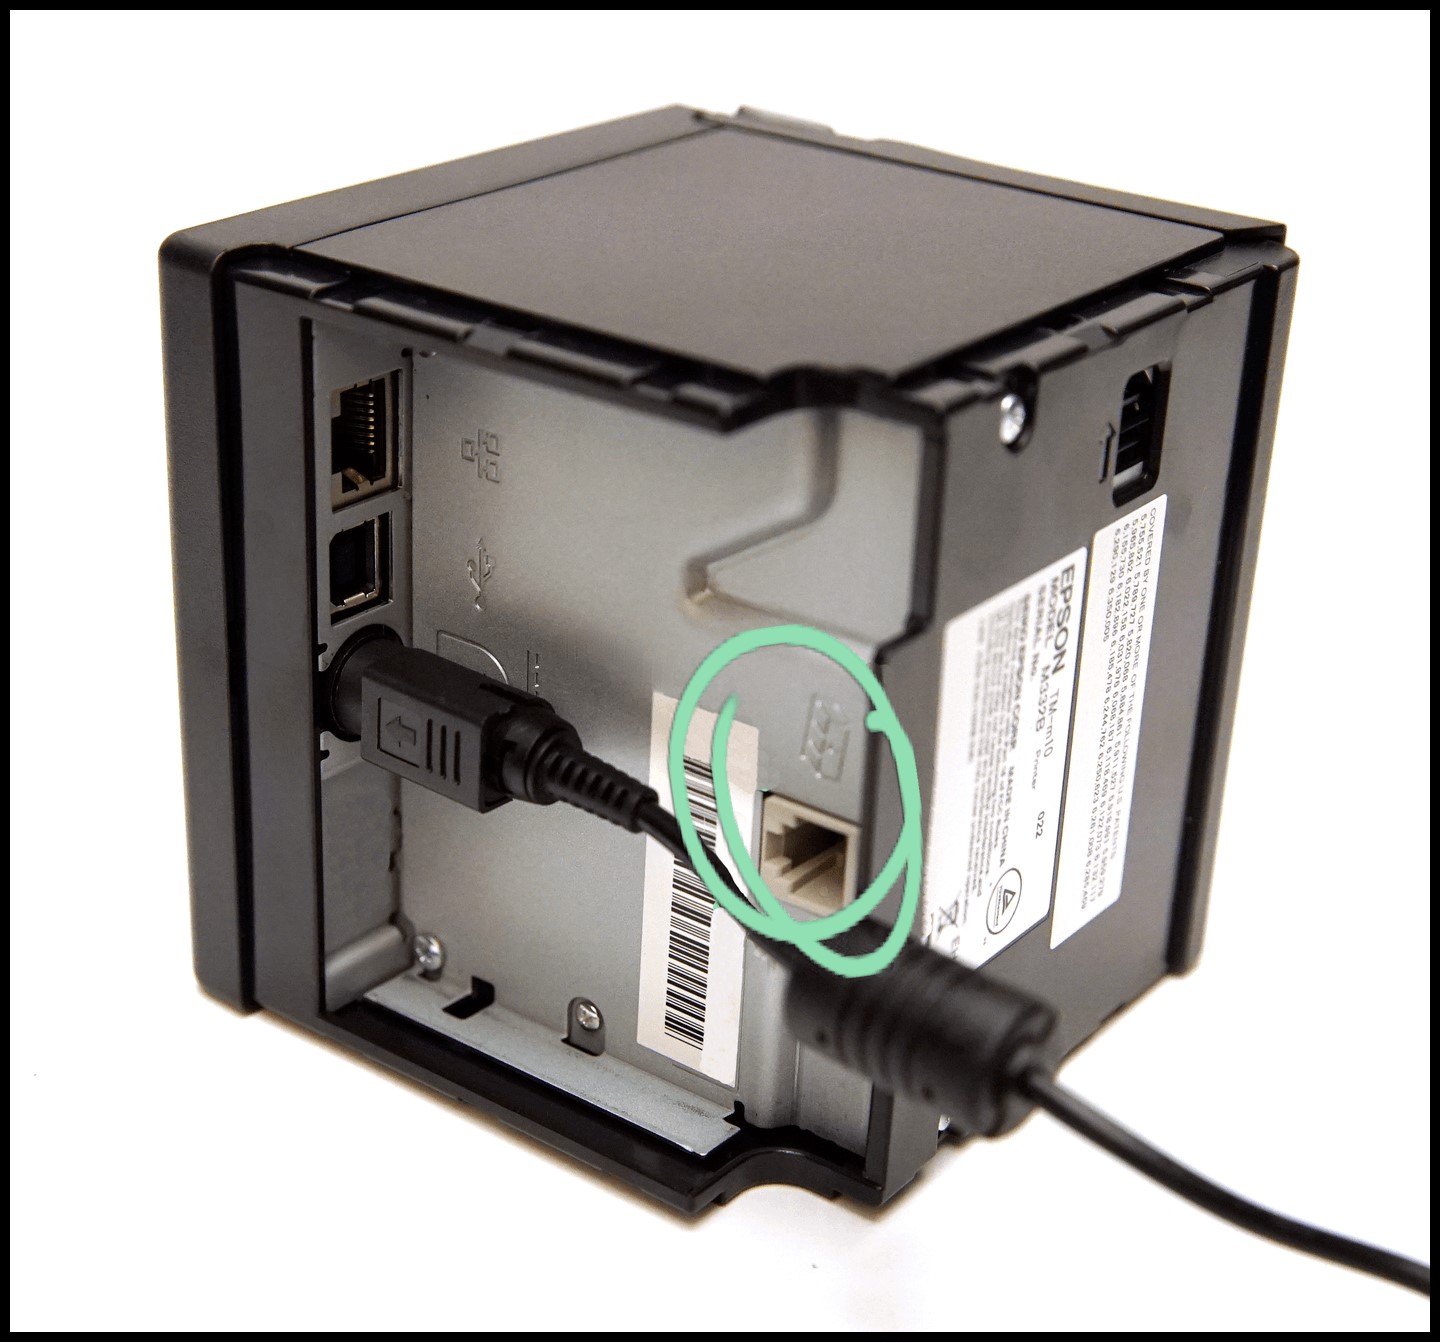
Plug the cable into the the back underside of the printer in the port shown. Note that this port is not in the same area as the other ports. Plug in the printer’s power cable. |
|
|
Restart the printer to generate an informational receipt that includes the printer’s IP address. Note that it can take up to several minutes for the system to gather all the information and print this receipt. Compare the IP address shown on the receipt to the IP address of the iPad that’s being used with the printer to confirm that they match. Note that the full IP addresses must match, not just the last 2 or 3 numbers. |
(no image) |
|
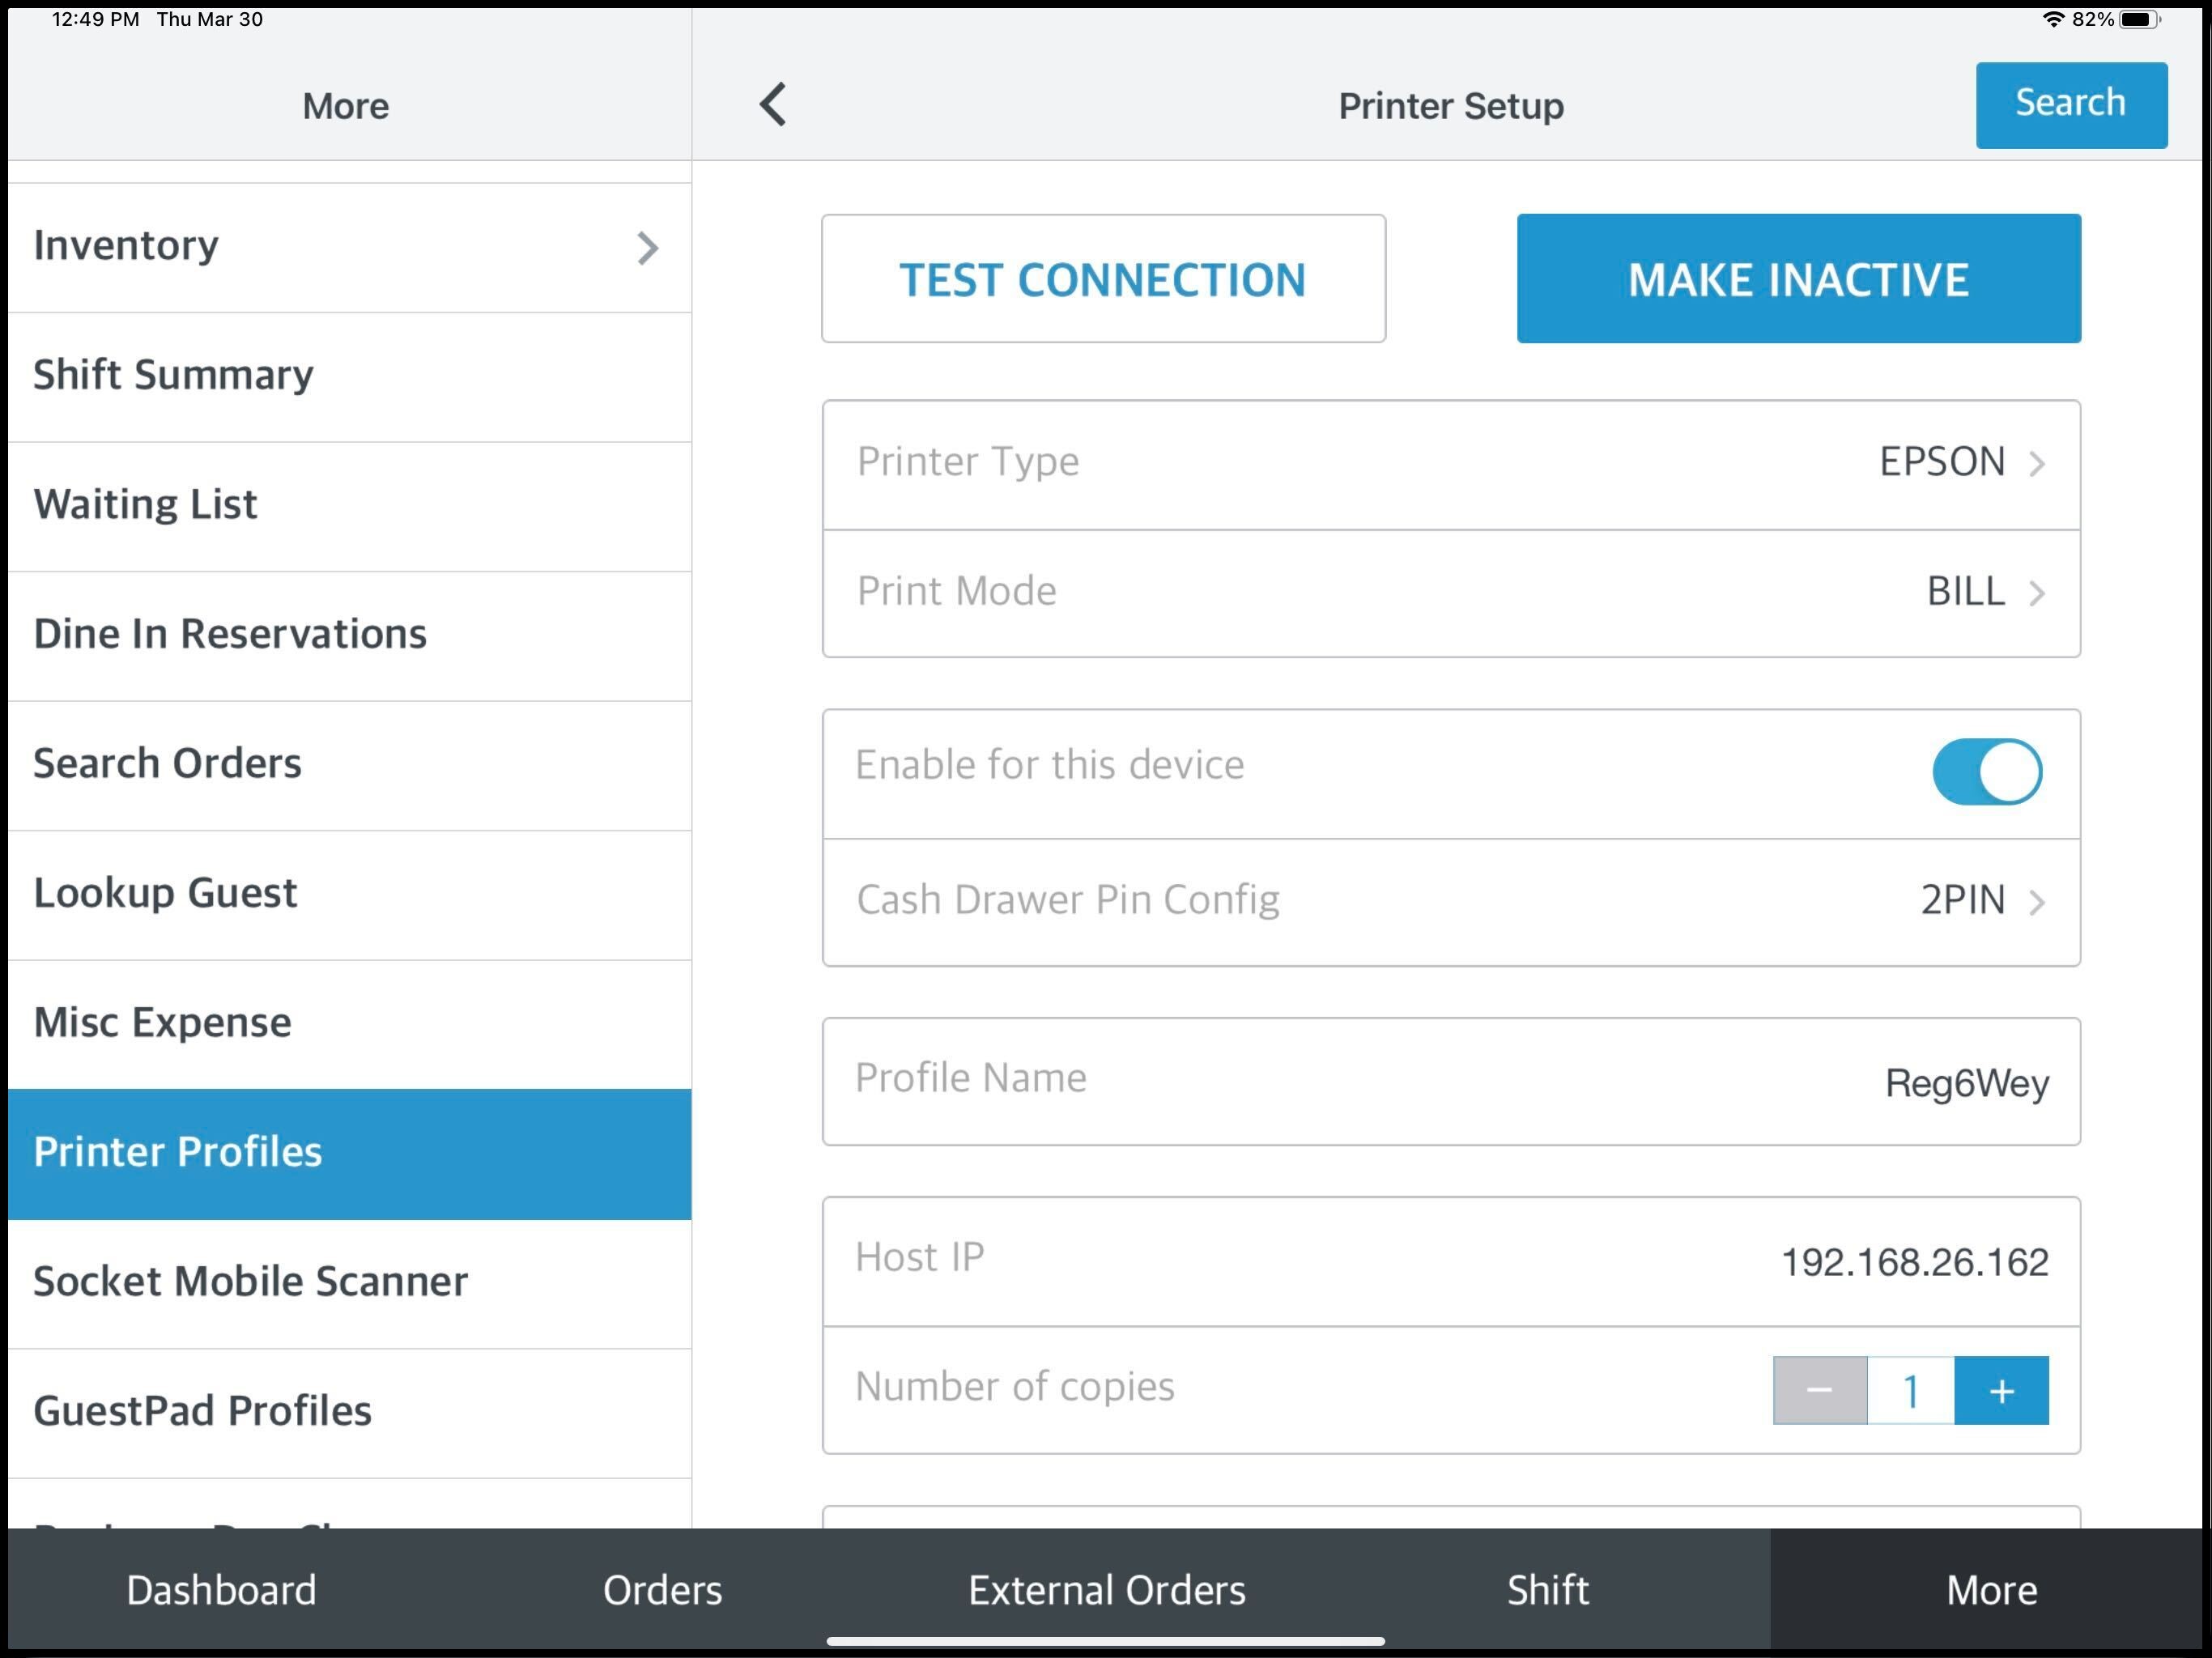
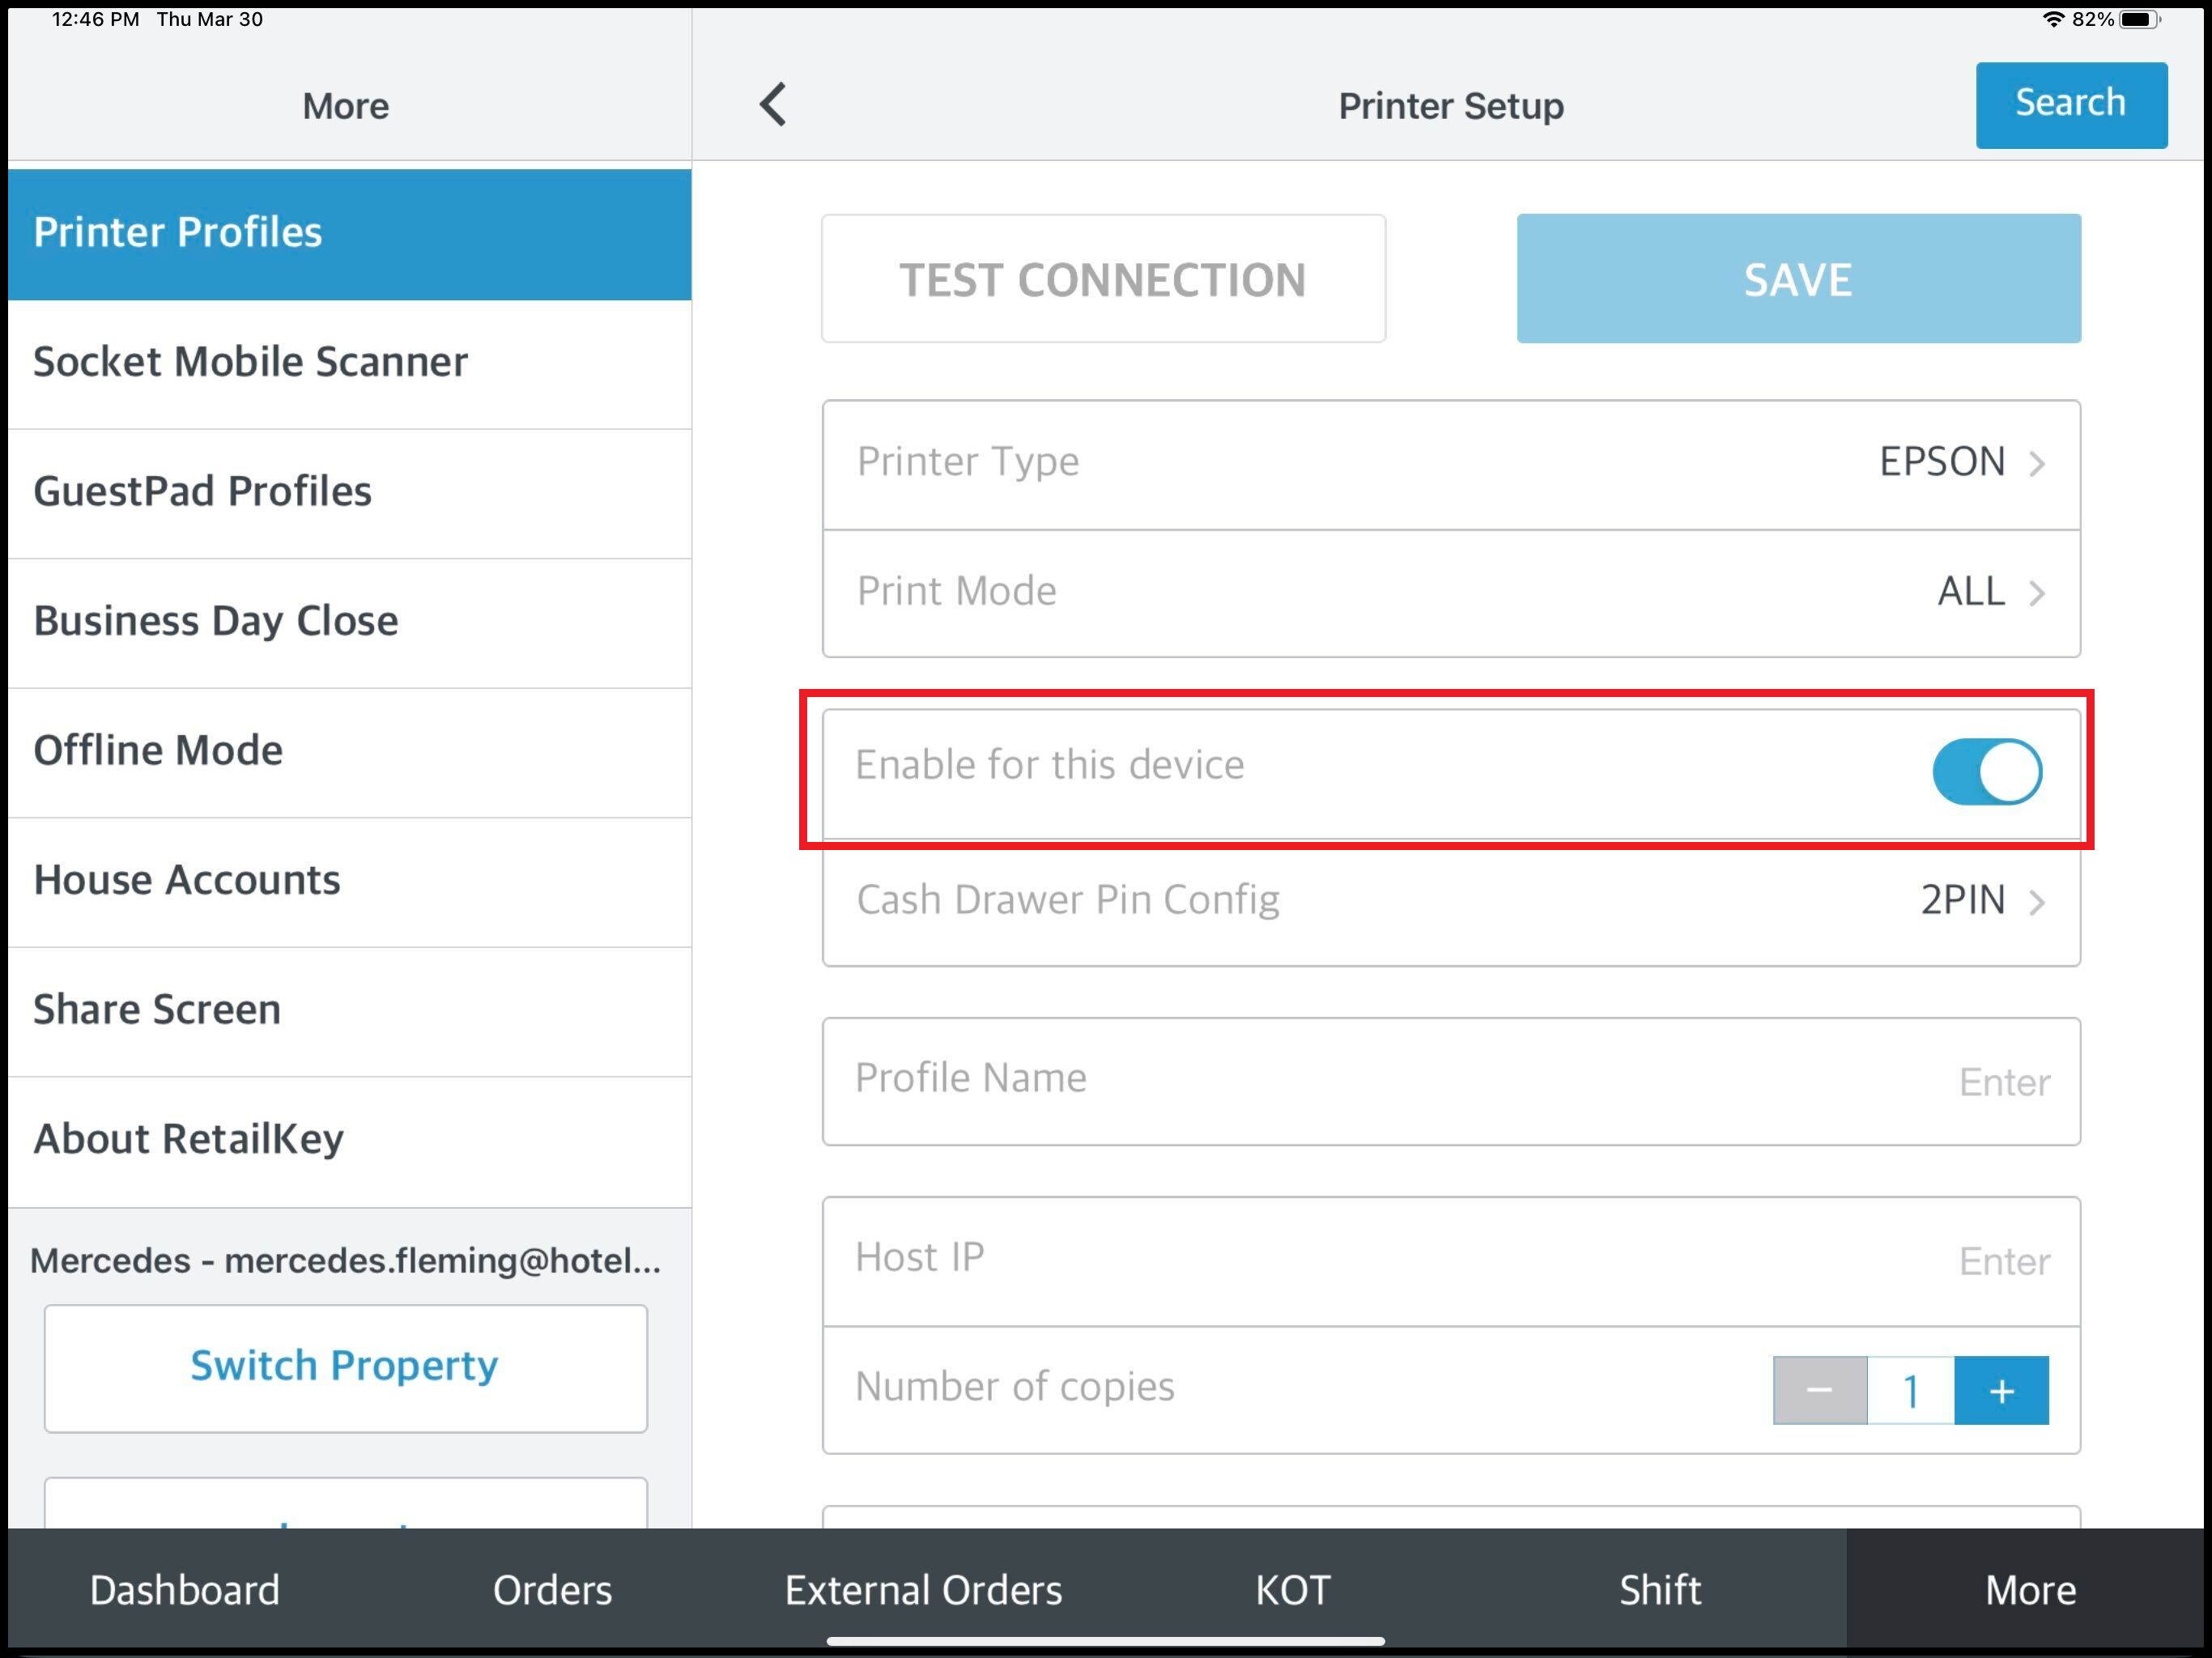
In the RK POS app, navigate to MORE > Printer Profiles and create a new profile, selecting the printer brand (EPSON). Note that more fields are located further down in the panel, scroll down to reach them. Select the applicable Print Mode option (varies by property):
For Host IP, enter the IP address from the printer’s informational receipt. Select TEST CONNECTION:
|

|
|
Navigate to a recent order in the GuestPad app and print its receipt. If the receipt prints from the wrong printer, verify that "ENABLE for this device" is selected for the desired station. |
|