
📆 Revision Date:
|
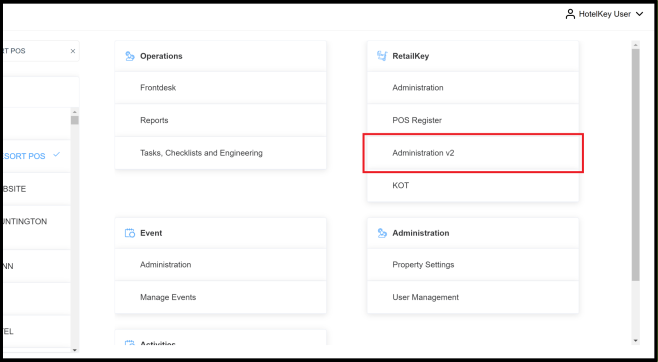
On the home page of the HotelKey administration web application (admin.hotelkeyapp.com), select the Administration v2 link in the RetailKey section. |
|
|
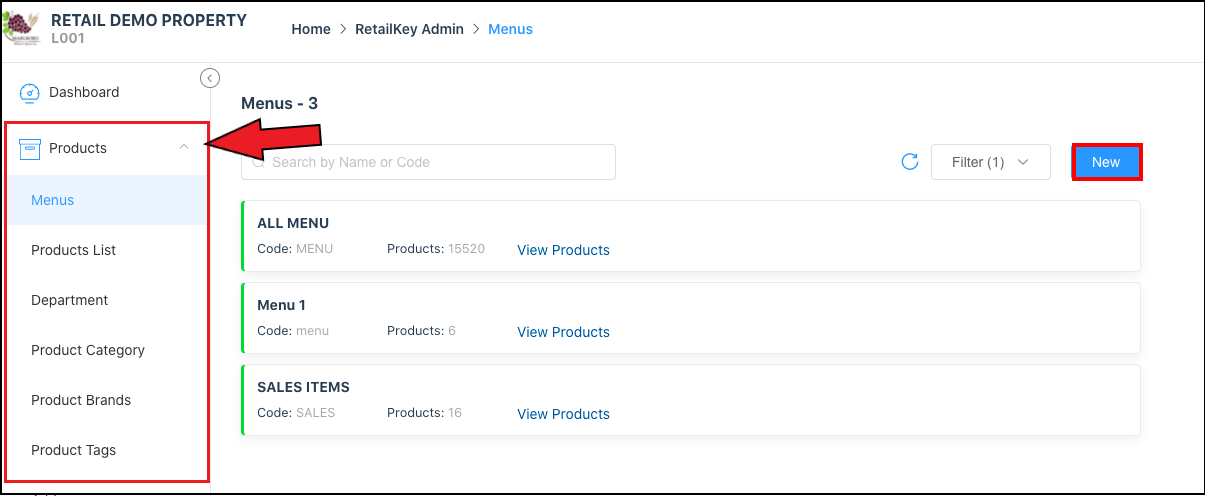
Expand the Products sidebar section and select Menus. Select New. |
|
|
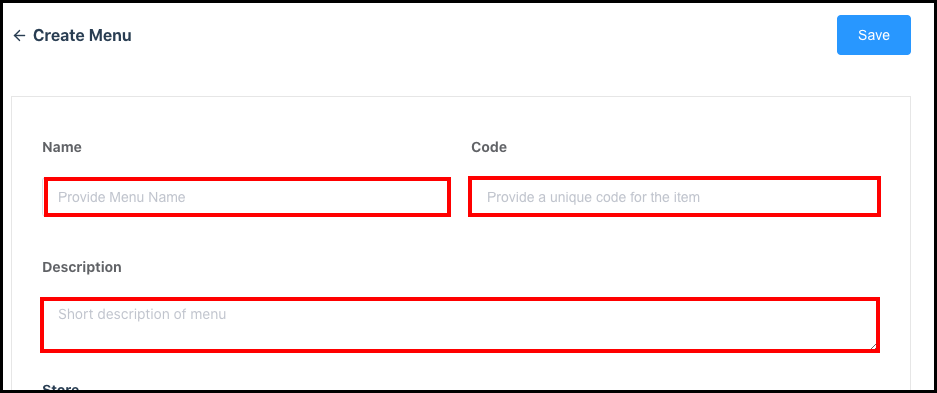
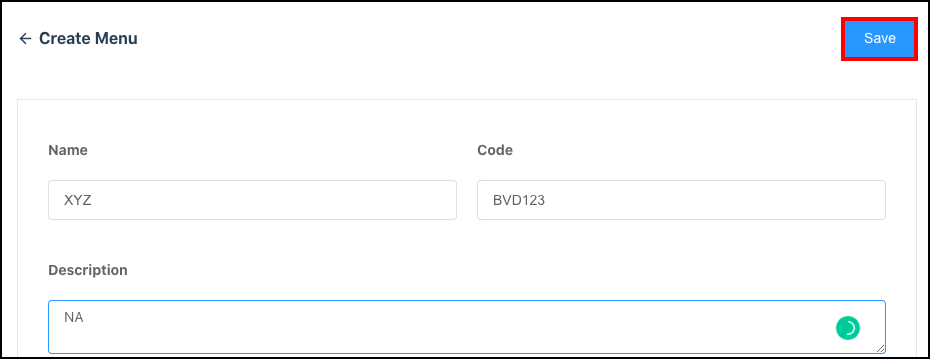
A Create Menu panel loads. Enter the menu Name, Code and Description. Scroll down to continue completing the panel. |
|
|
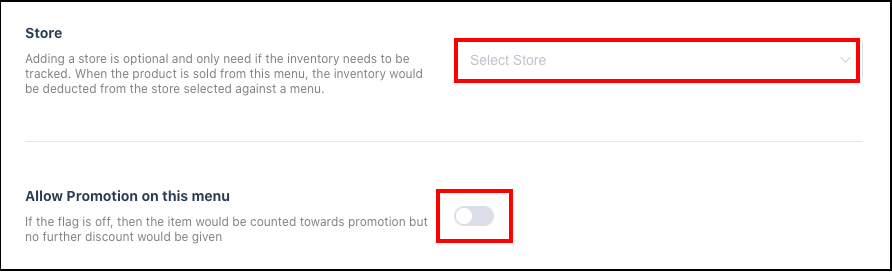
Select the Store. When a product is sold from this menu, the inventory is deducted from the store selected here. Toggle Allow Promotion on this menu on, if applicable. Note that promotion is enabled automatically for all menus, this field determines whether additional discounts can be applied to items in the menu when orders are processed. Toggle ON to enable additional discounts, leave it toggled OFF (default setting) to disable additional discounts. Scroll down to continue completing the panel. |
|
|
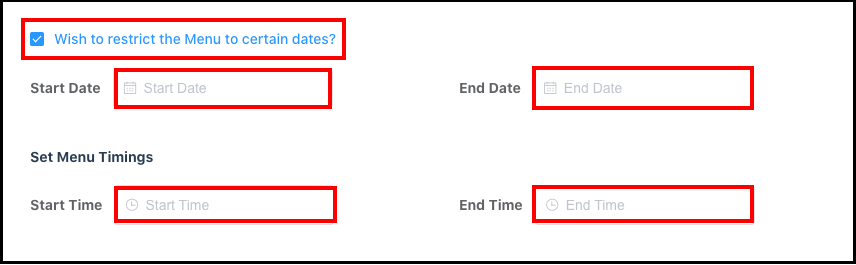
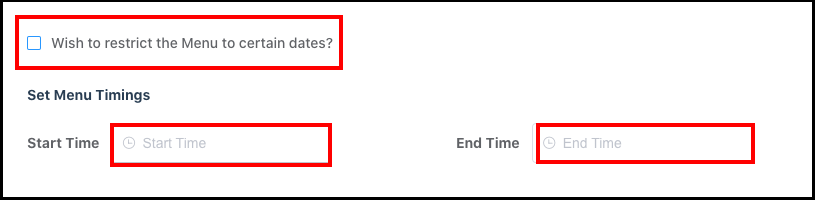
Select Wish to restrict the Menu to certain dates? to have the make the new menu available for a limited time. Enter Start Date and End Date for the time period when the new menu is available. Note that when Wish to restrict the Menu to certain dates? is not selected these fields do not populate. In the Set Menu Timings section, enter the Start Time each day to make this menu is available and the End Time each day, when the menu is made unavailable. Scroll down to continue completing the panel. |
|
|
The Active toggle is turned on by default, leave it on.
|

|
|
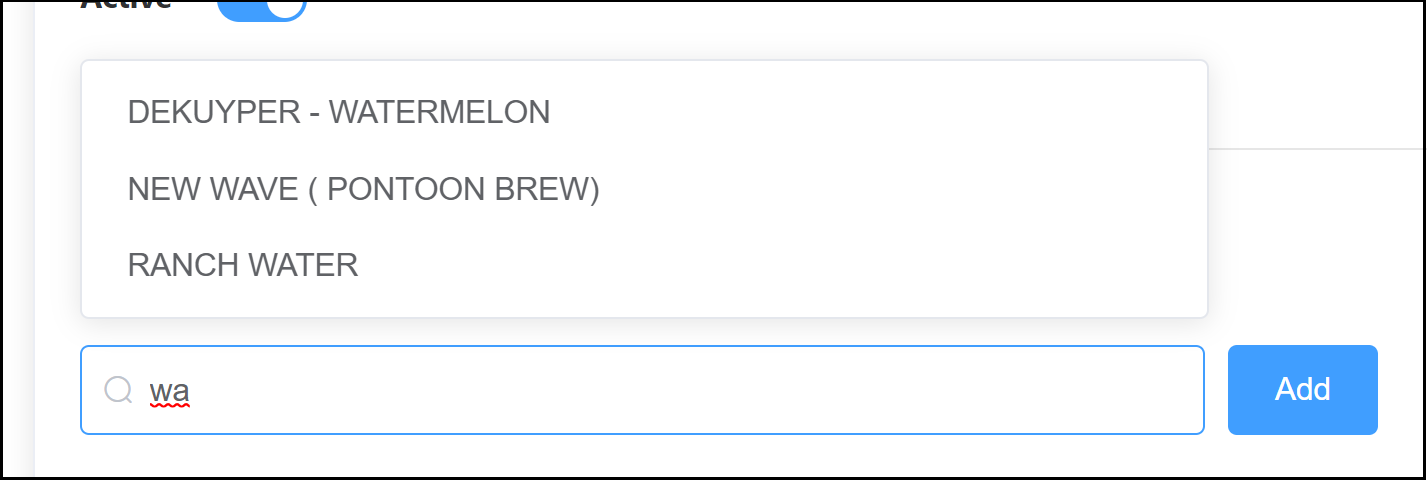
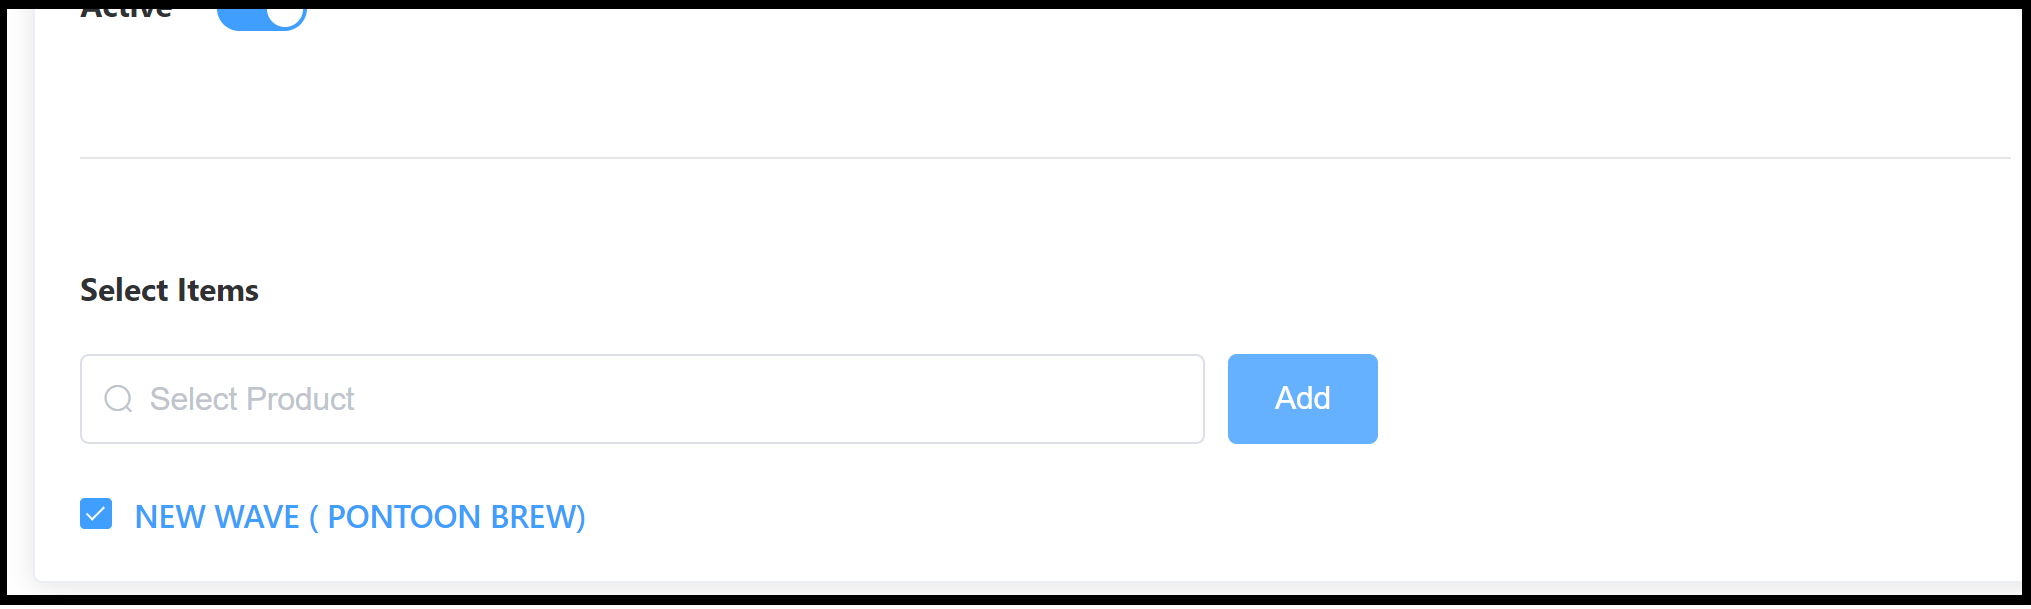
Enter the first few characters of the applicable item in the Select Name field. When the item appears in the drop down list select it and select Add. Added items are listed beneath the Select Name field. If an item is added in error select its checkbox to remove it. |
|
|
When all items are added to the menu scroll back to the top of the panel and select Save to close the panel and create the menu. |
|