
📆 Revision Date:
|
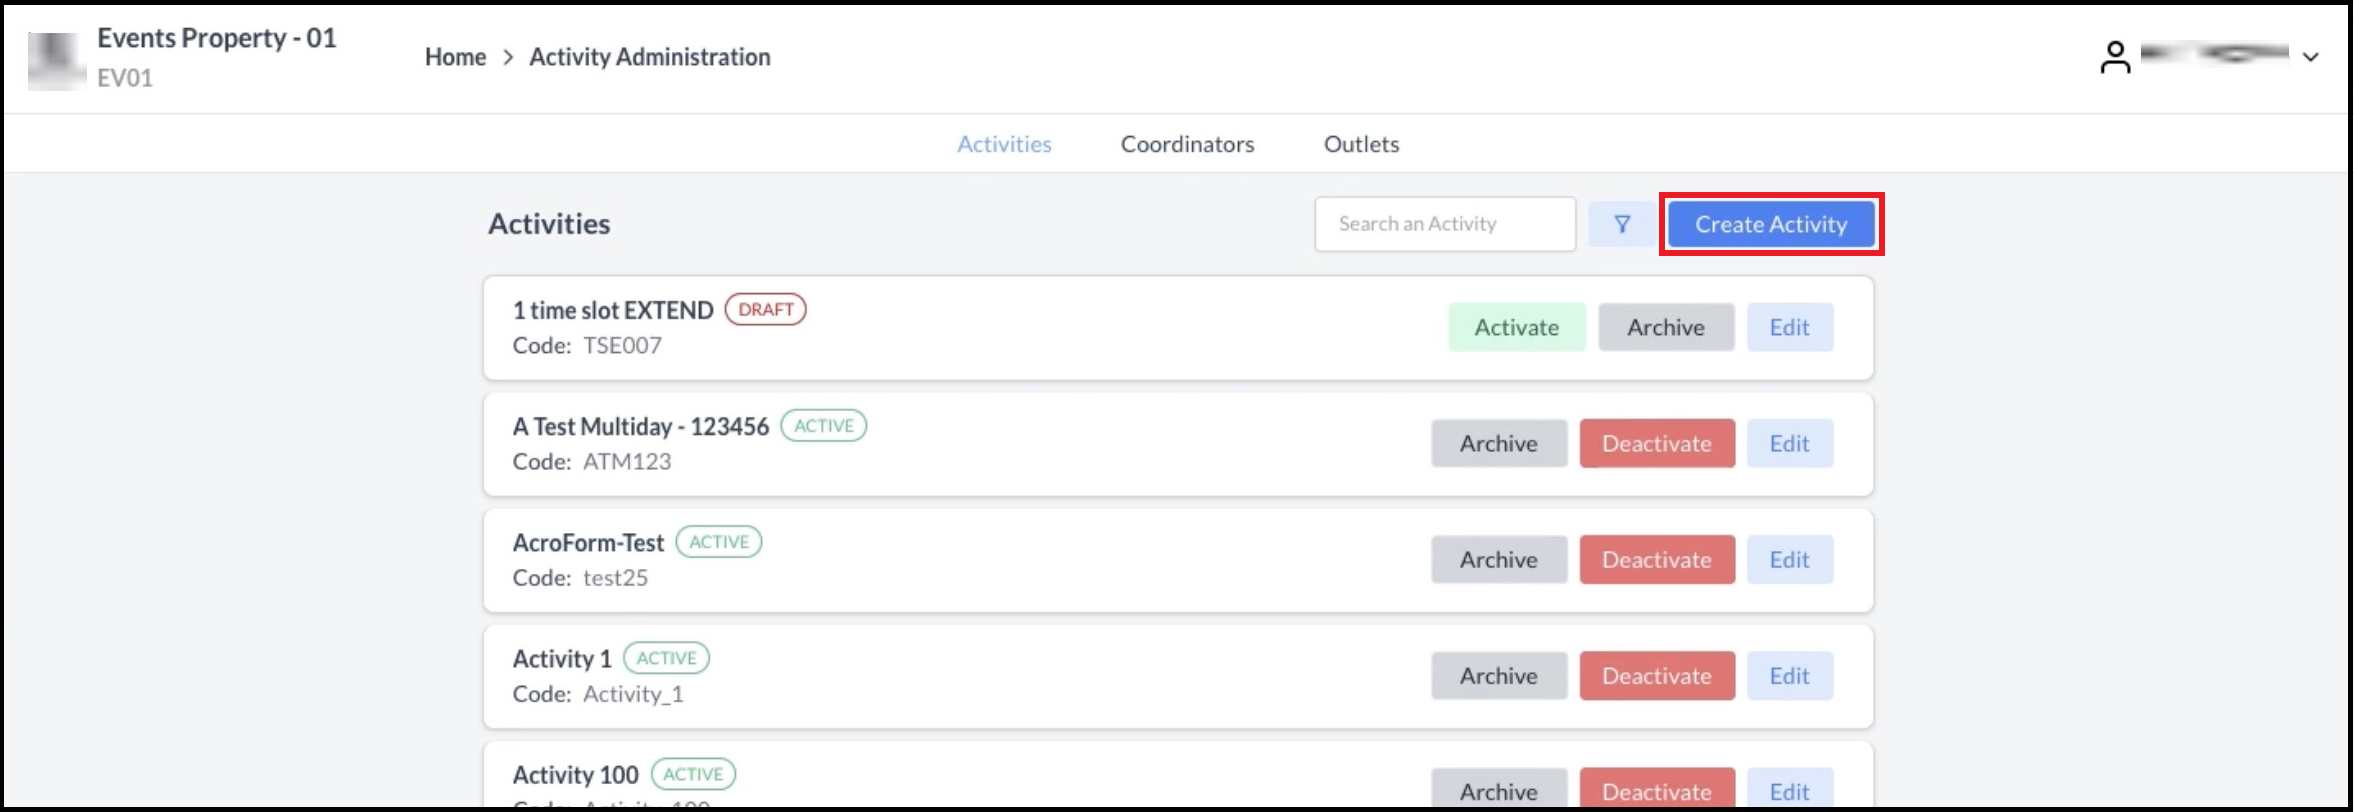
Navigate to Home > Activity Administration and select the Activities tab. Select Create Activity. |
|
|
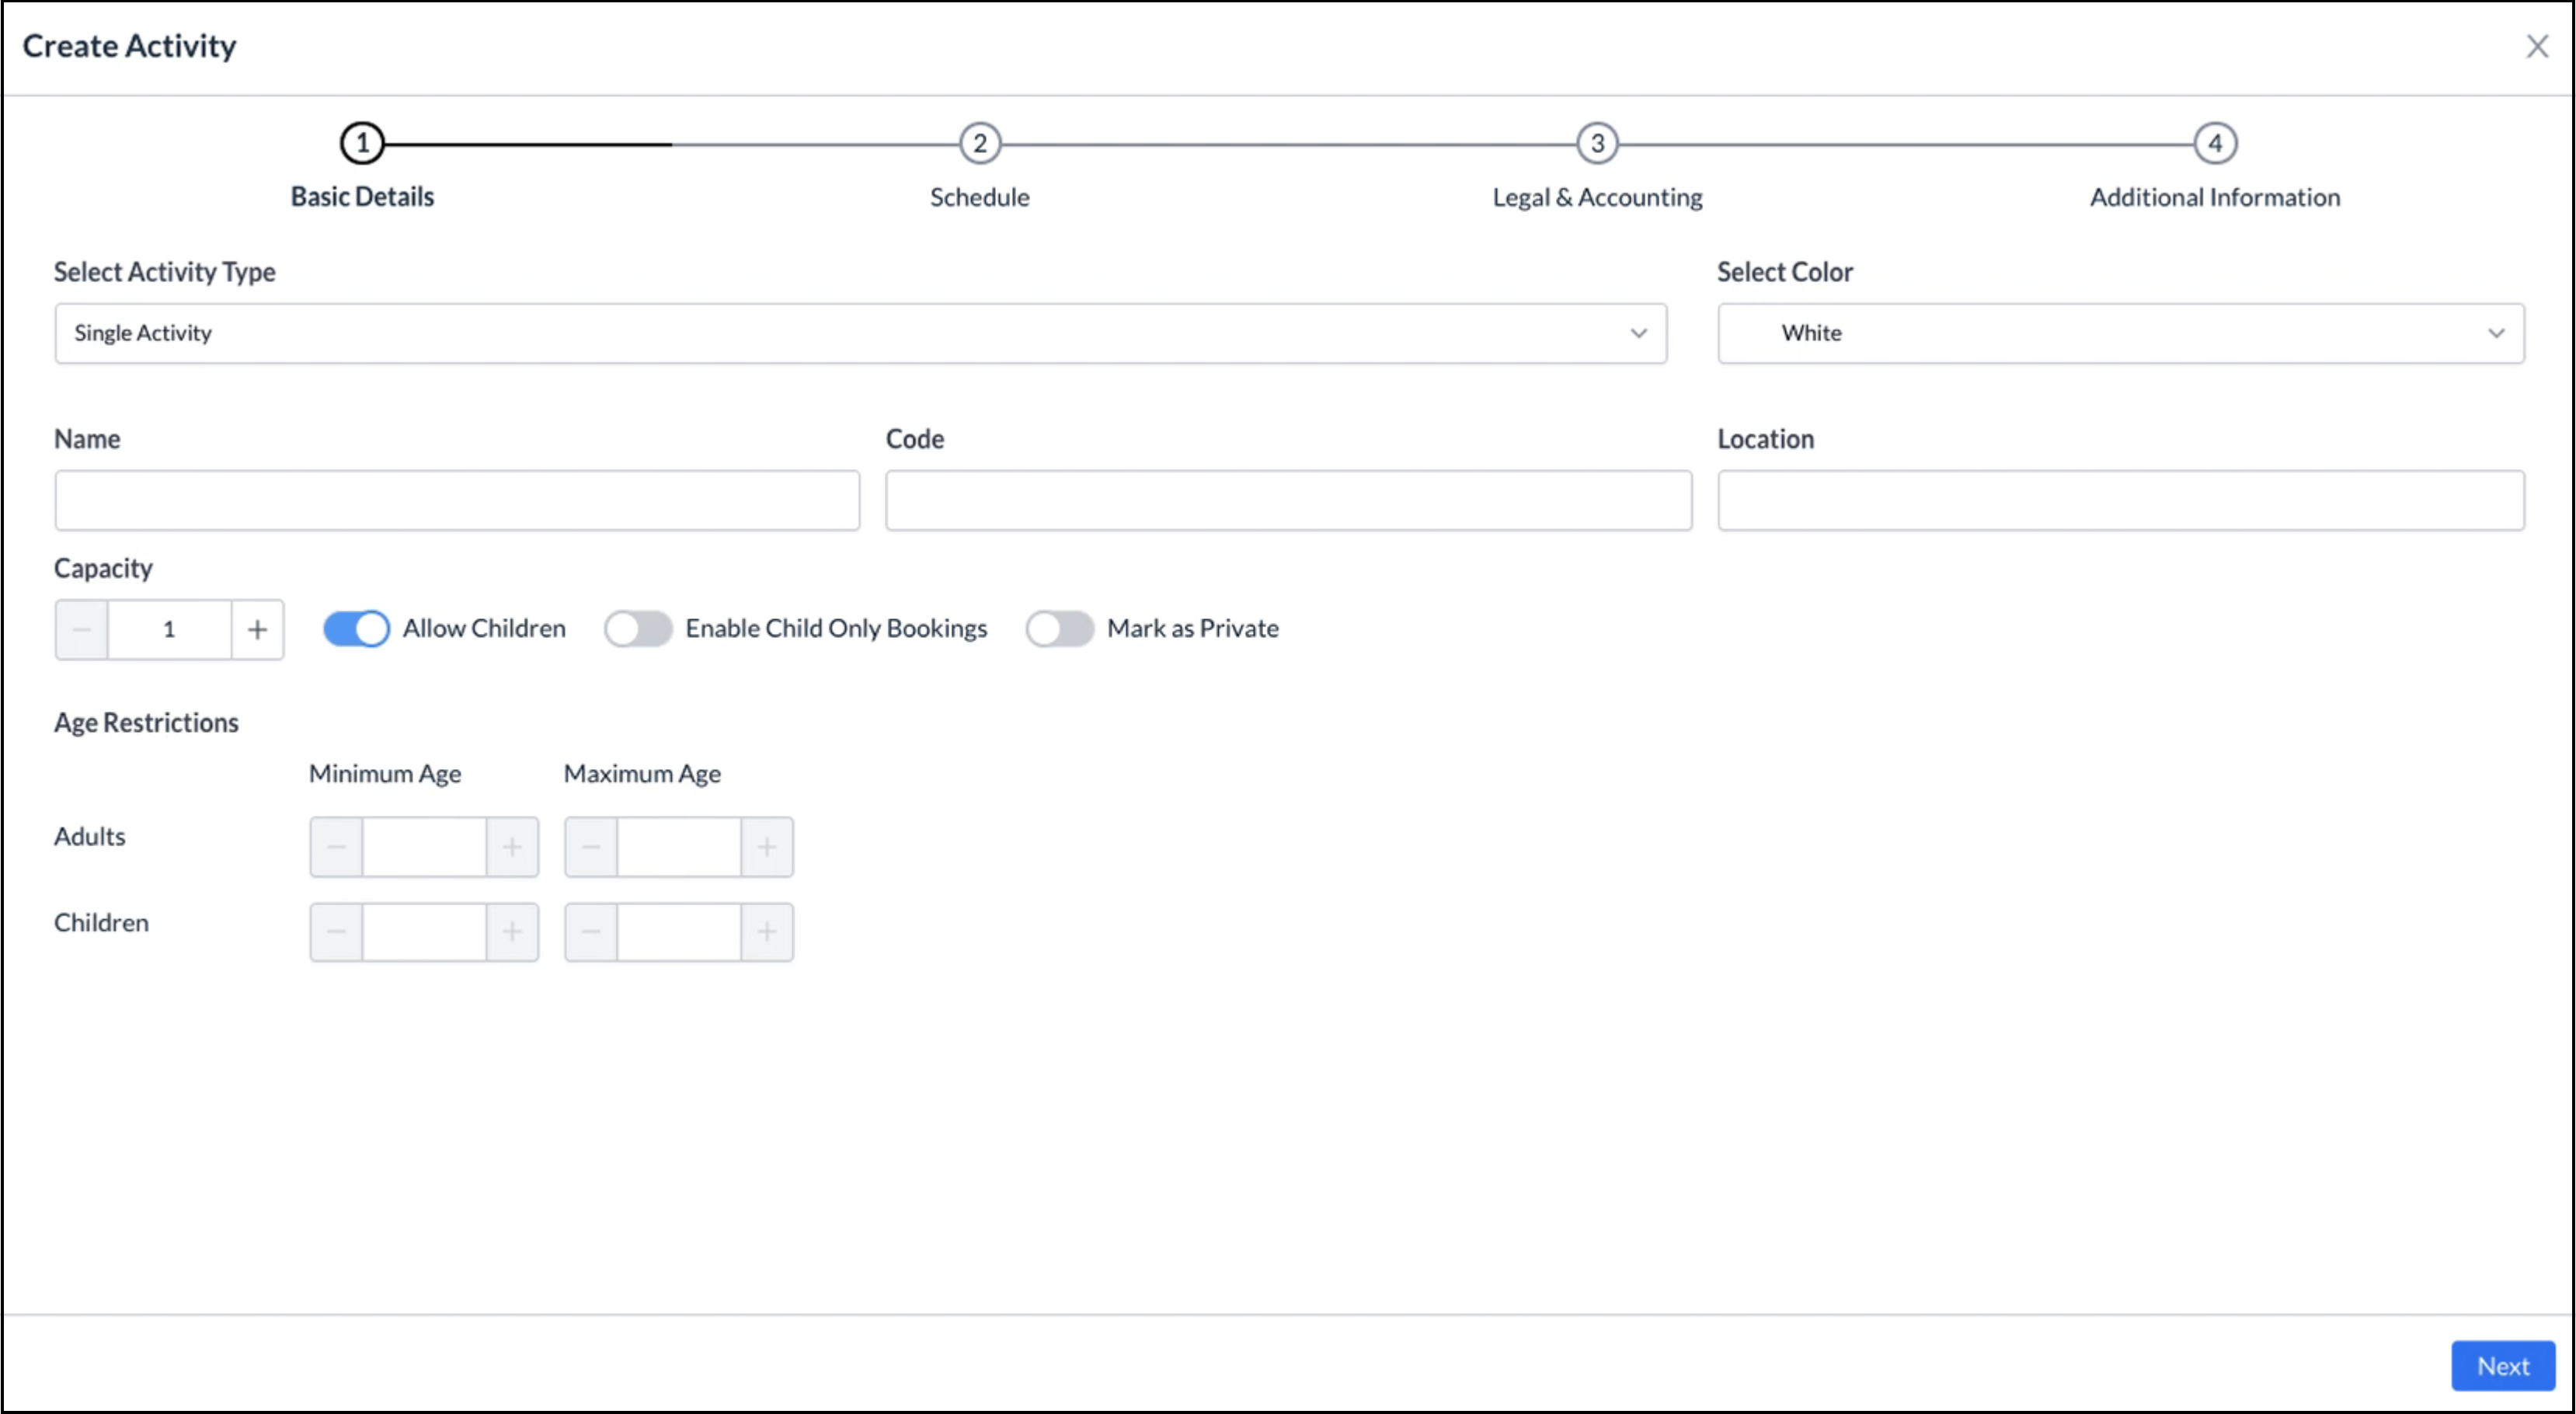
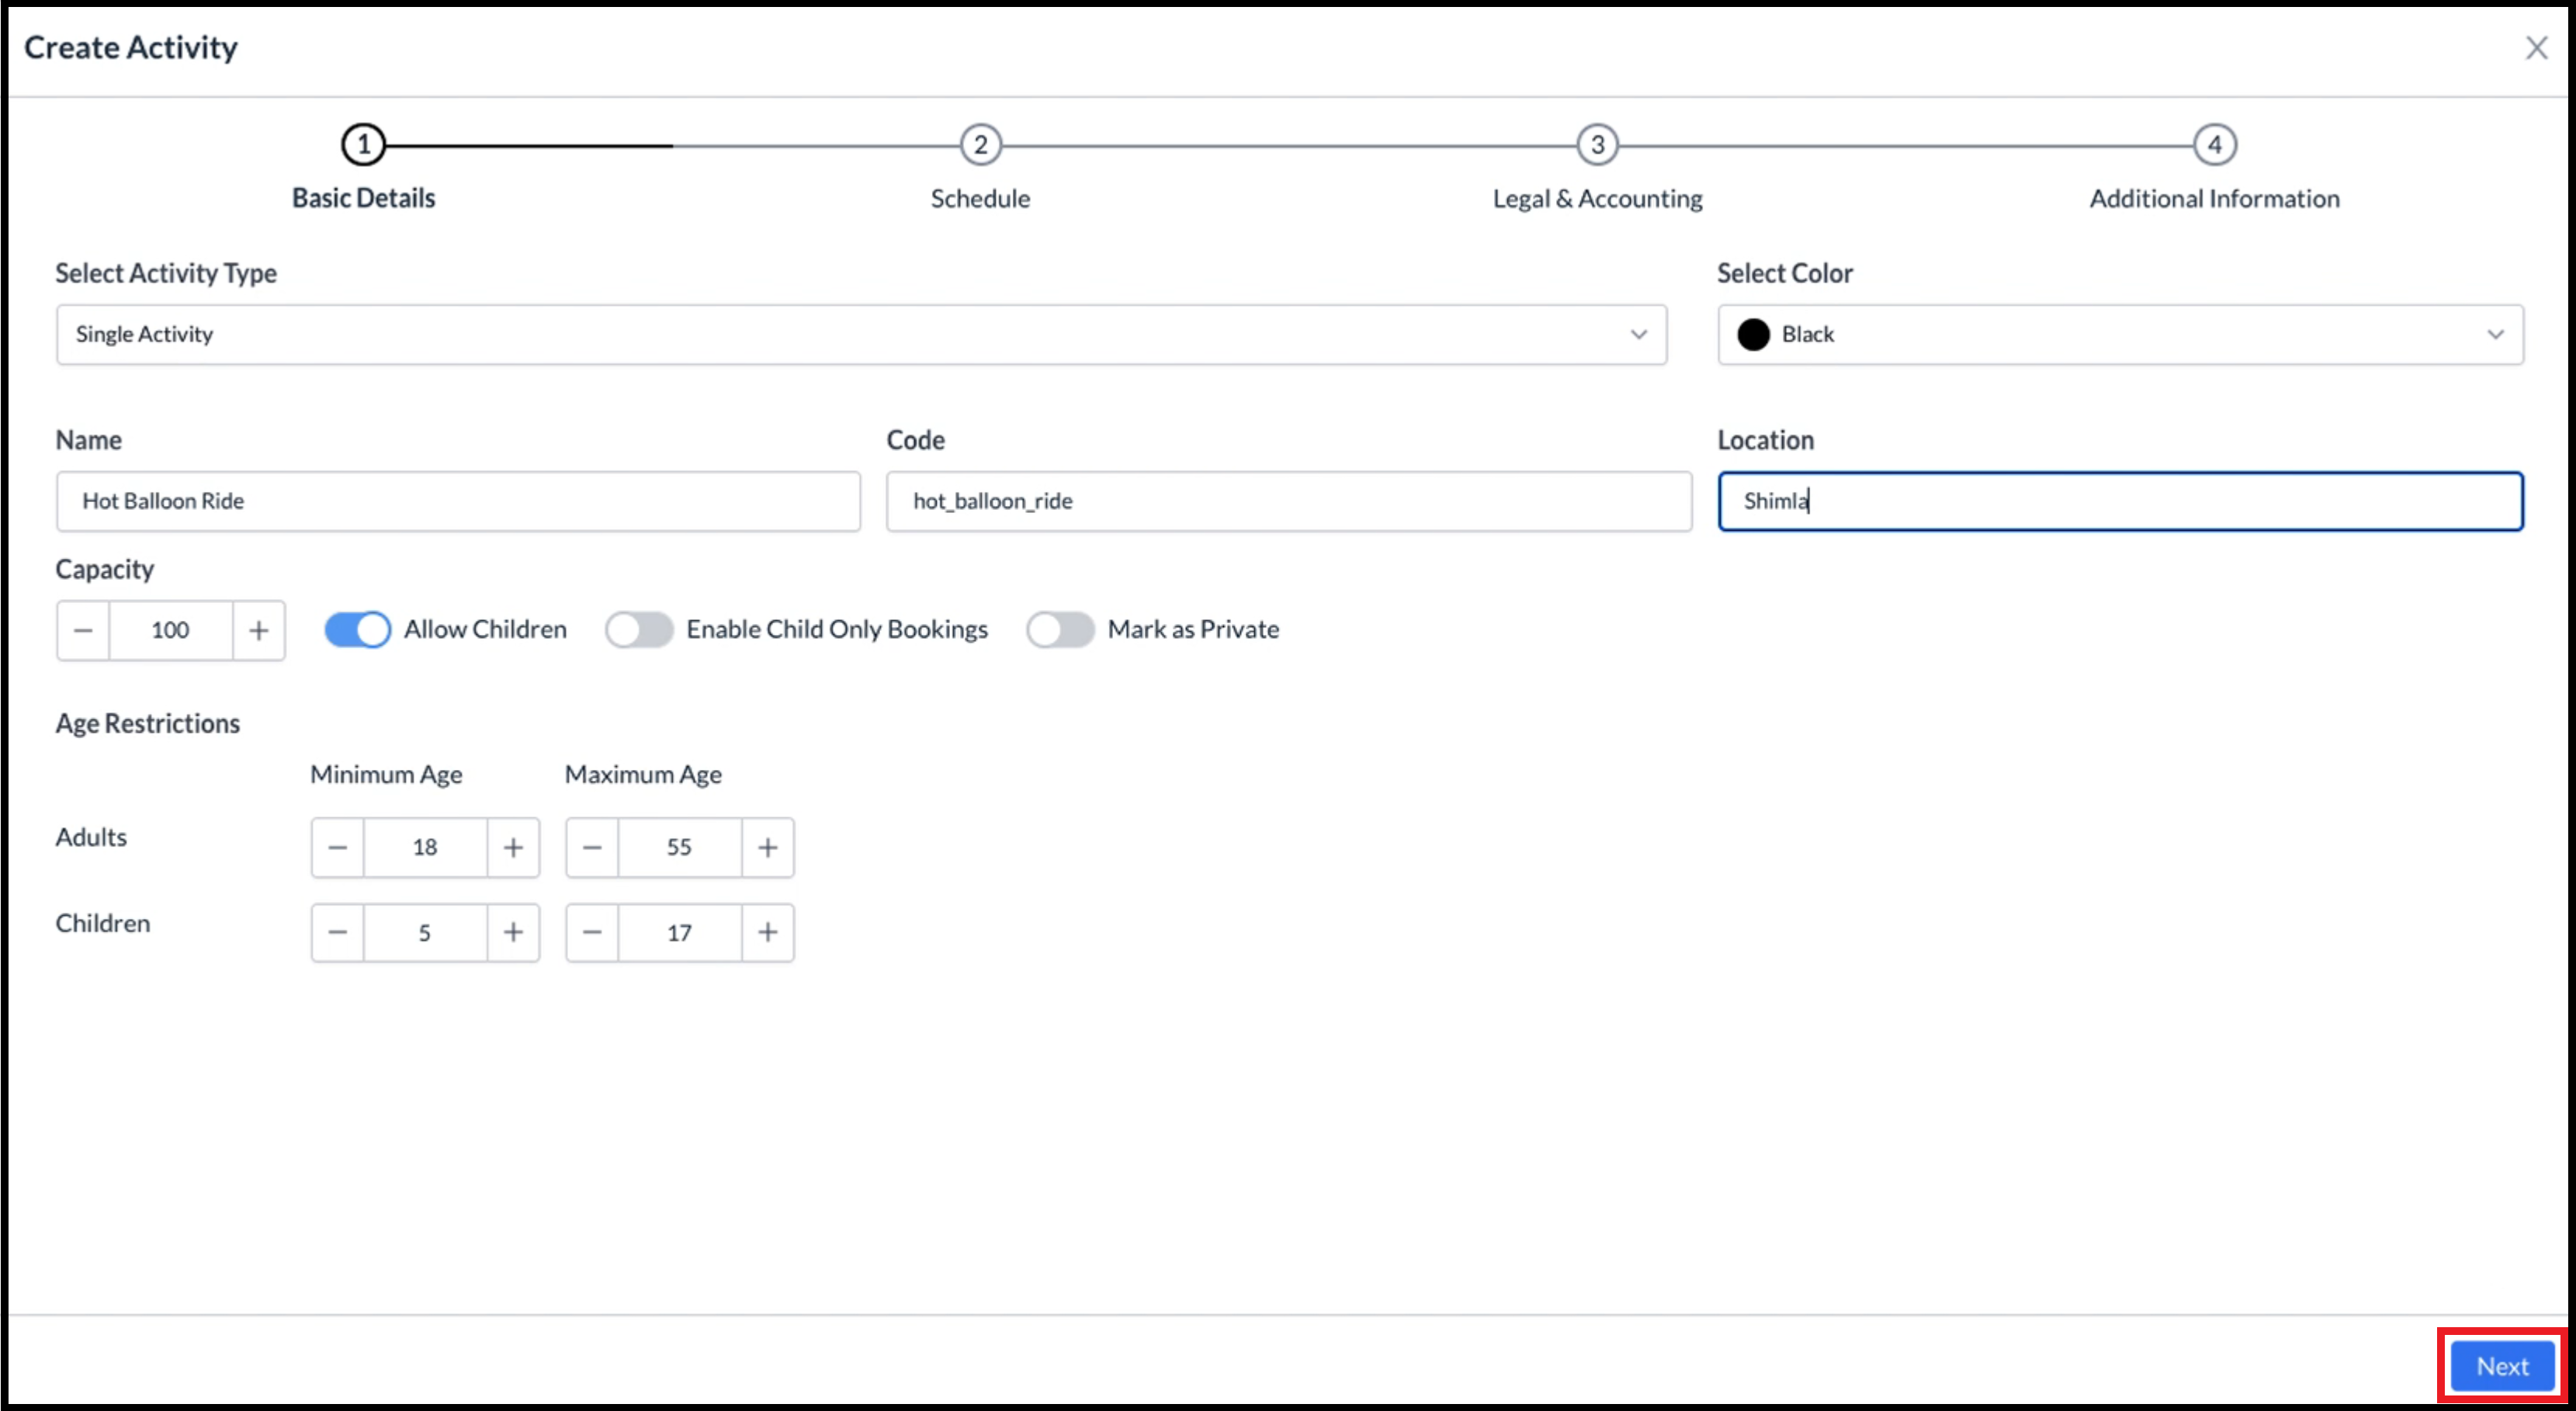
The Create Activity wizard activates. Note that as steps are completed the wizard advances through each of the four panels listed in the number line at the top of the wizard. Complete the Basic Details panel, as shown in the example at right. Select Activity Type, Select Color for color-coding on this activity, enter the activity Name, Code and Location. Use the plus and minus controls to set a Capacity (maximum number of attendees) for this activity. Select Allow Children, Enable Child Only Bookings and/or Mark as Private to toggle each option on where applicable. Use the plus and minus controls to set Minimum Age and Maximum Age settings for Adults and Children. Select Next to continue. |
|
|
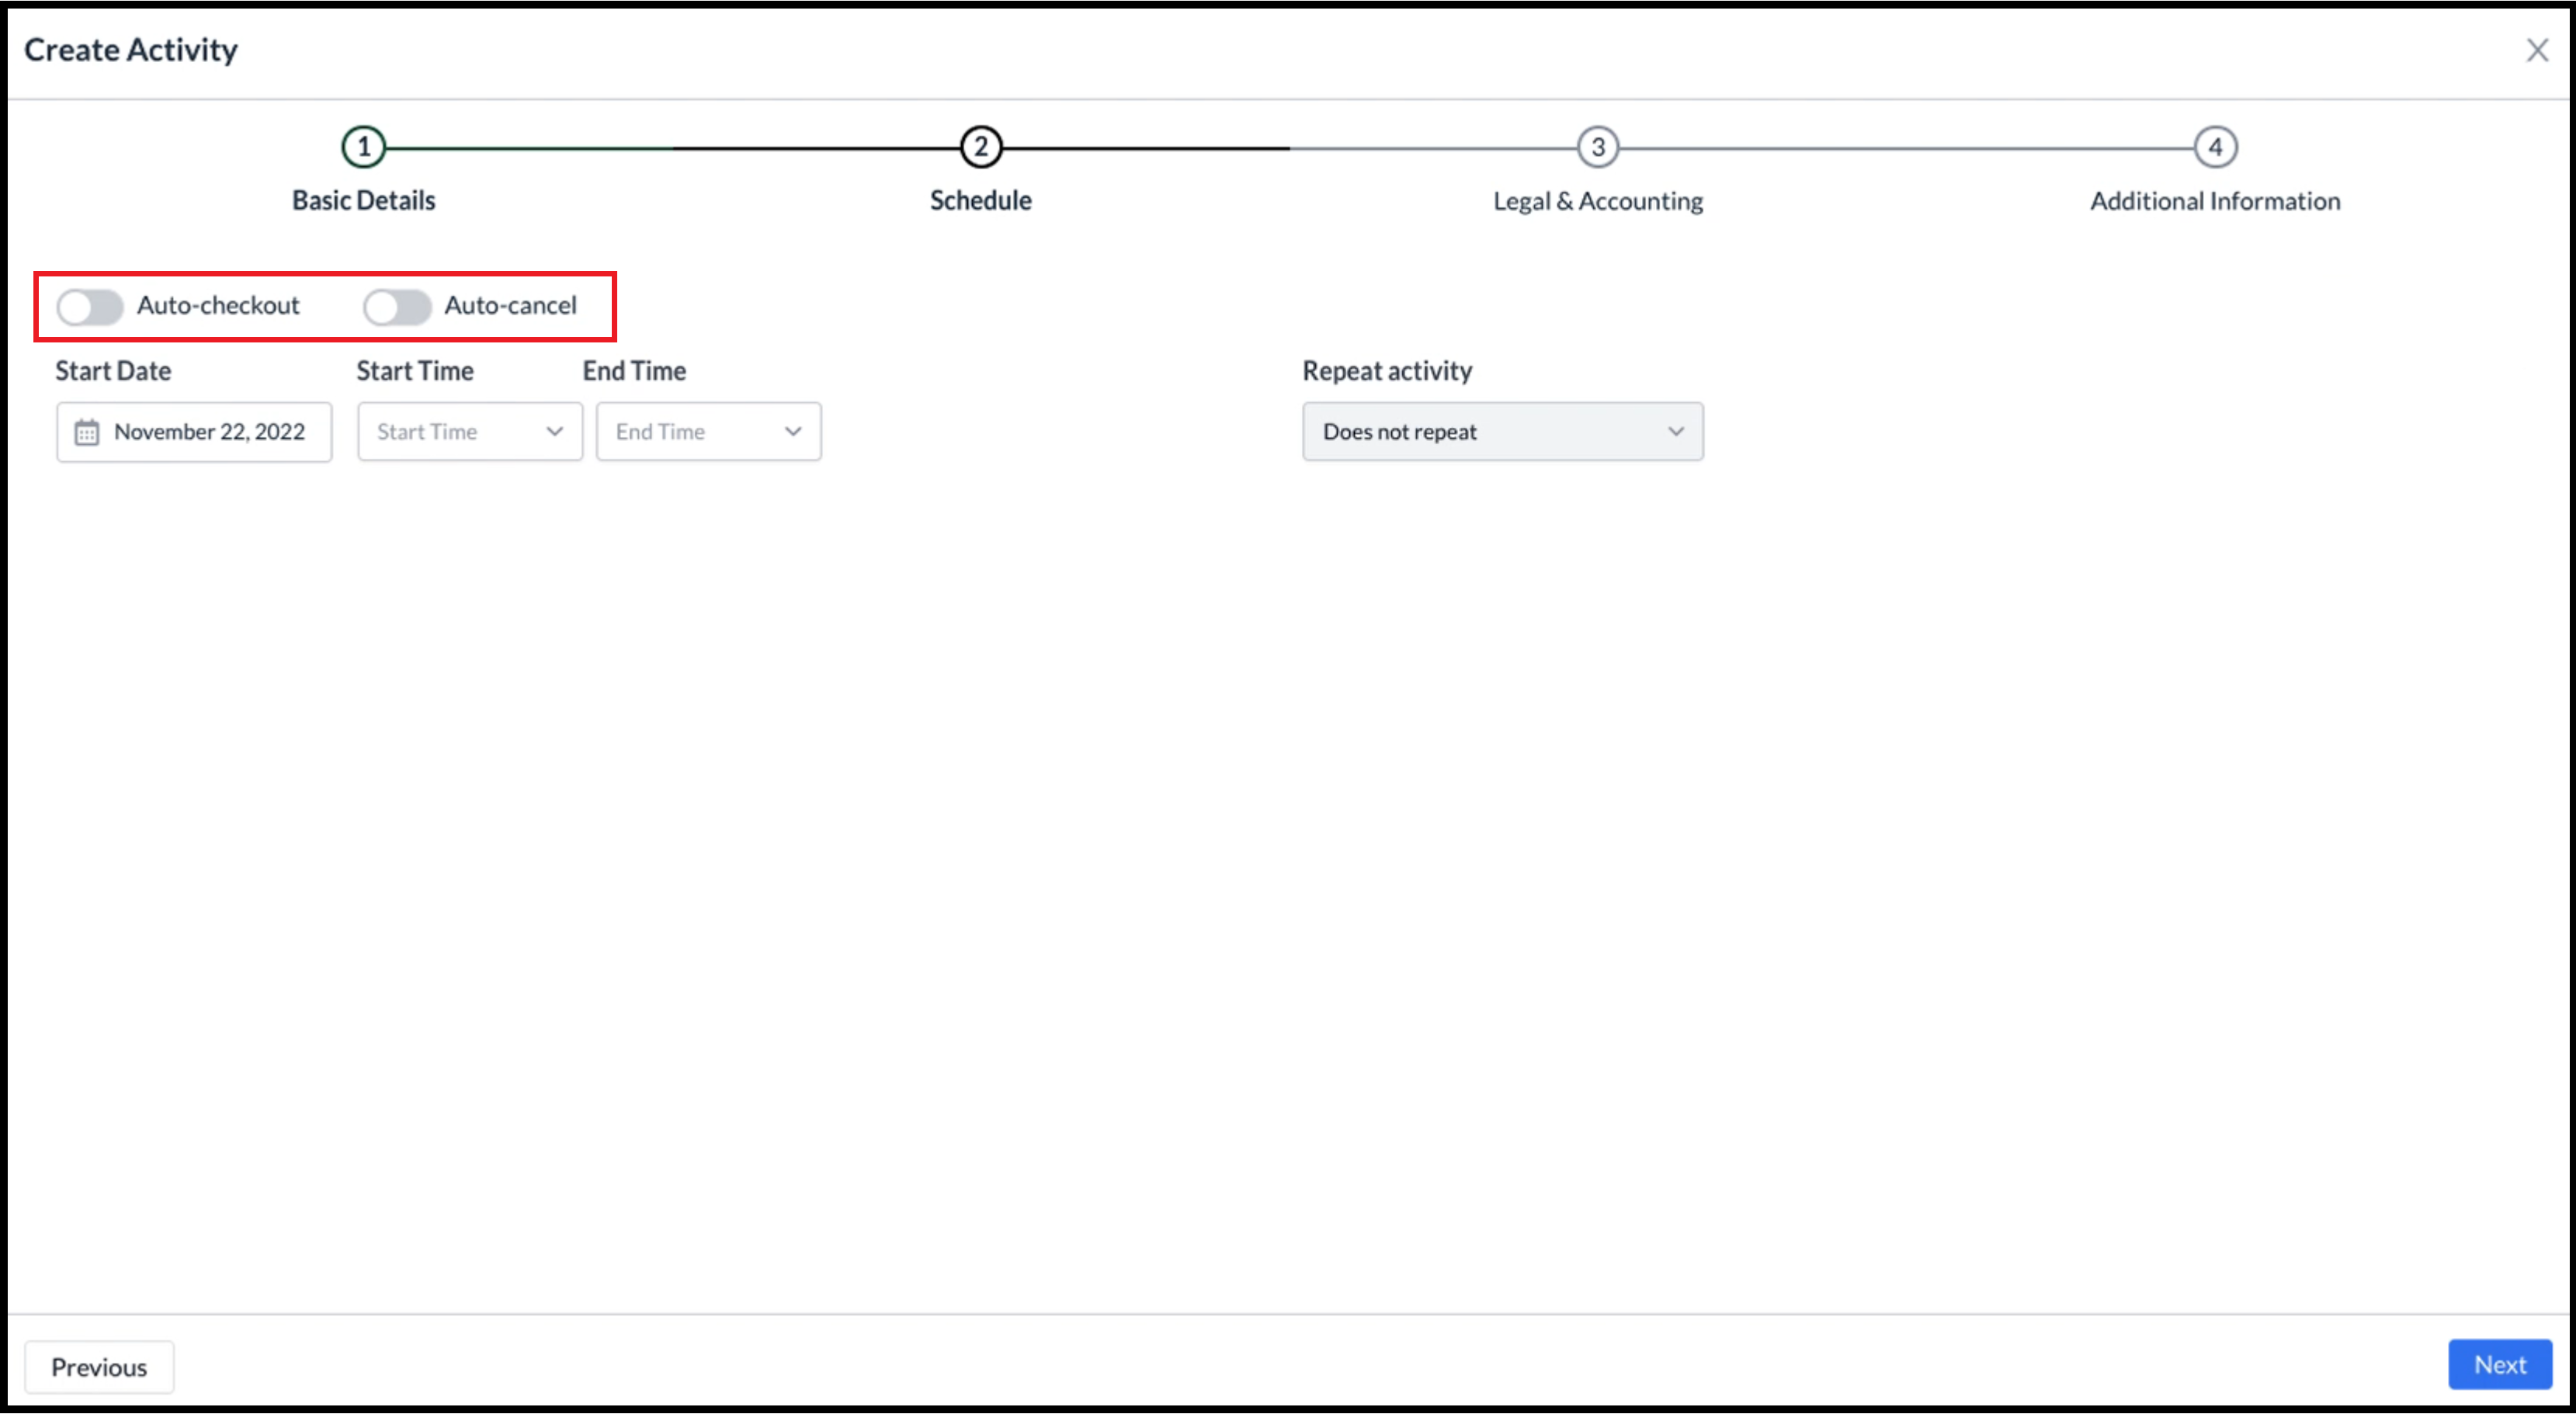
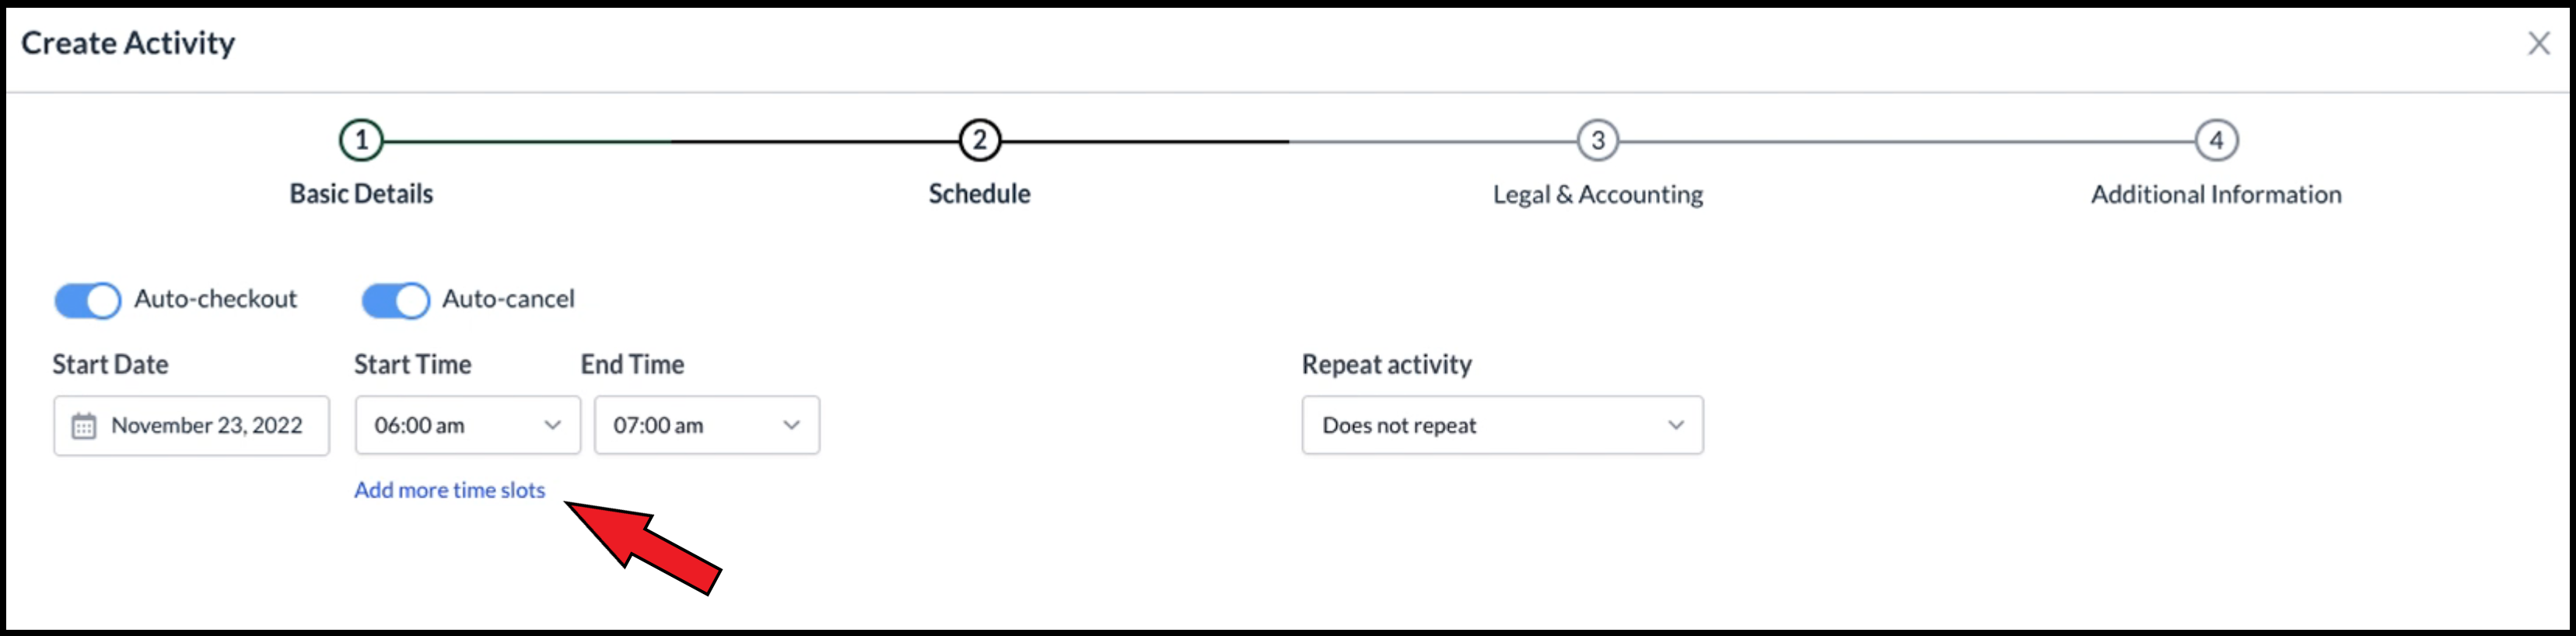
The wizard advances to the second panel, Schedule. Select Auto-checkout and/or Auto-cancel to toggle each option on where applicable.
|
|
|
Enter a Start Date, Start Time and End Time for the activity. An Add more time slots link populates. Select the link to add more time slots for this activity, if applicable. |
|
|
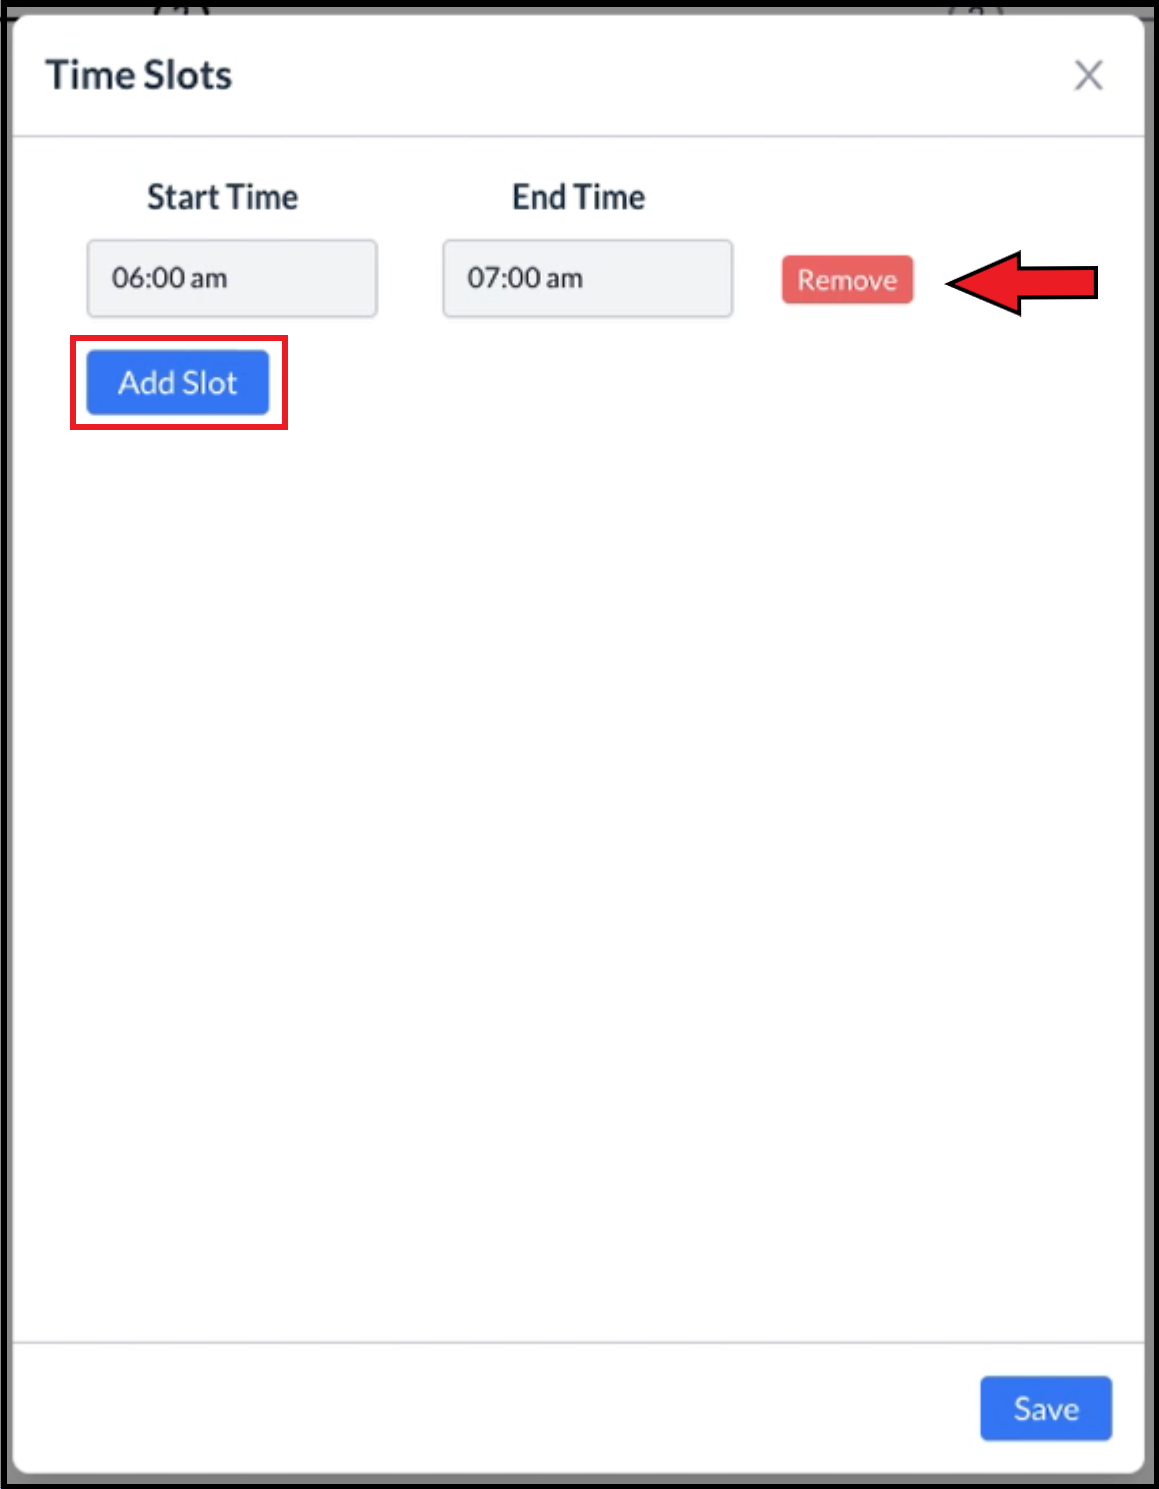
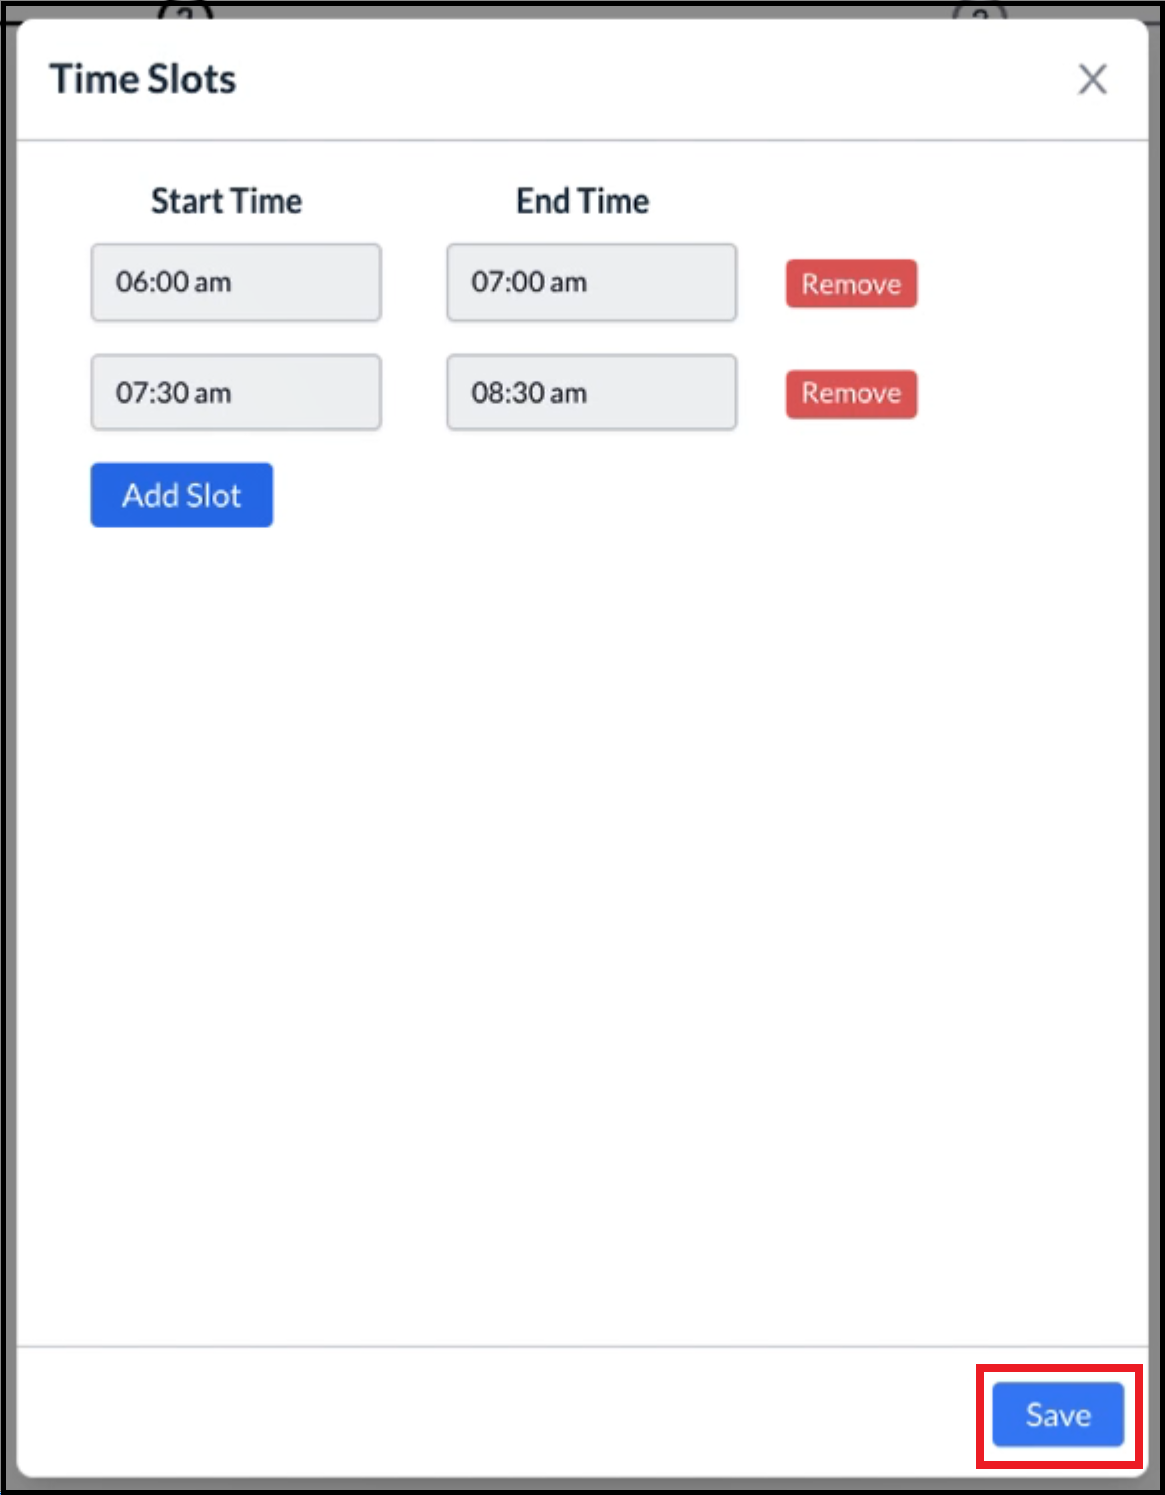
The Time Slots popup activates. The time slot previously entered is pre-populated in the popup. Select Add Slot. As shown, a new row is added to the popup. Enter the applicable Start Time and End Time for this time slot. Repeat the steps above as needed to add as many time slots as are applicable. When all time slots are added select Save, as shown in the second screenshot at right. |
|
|
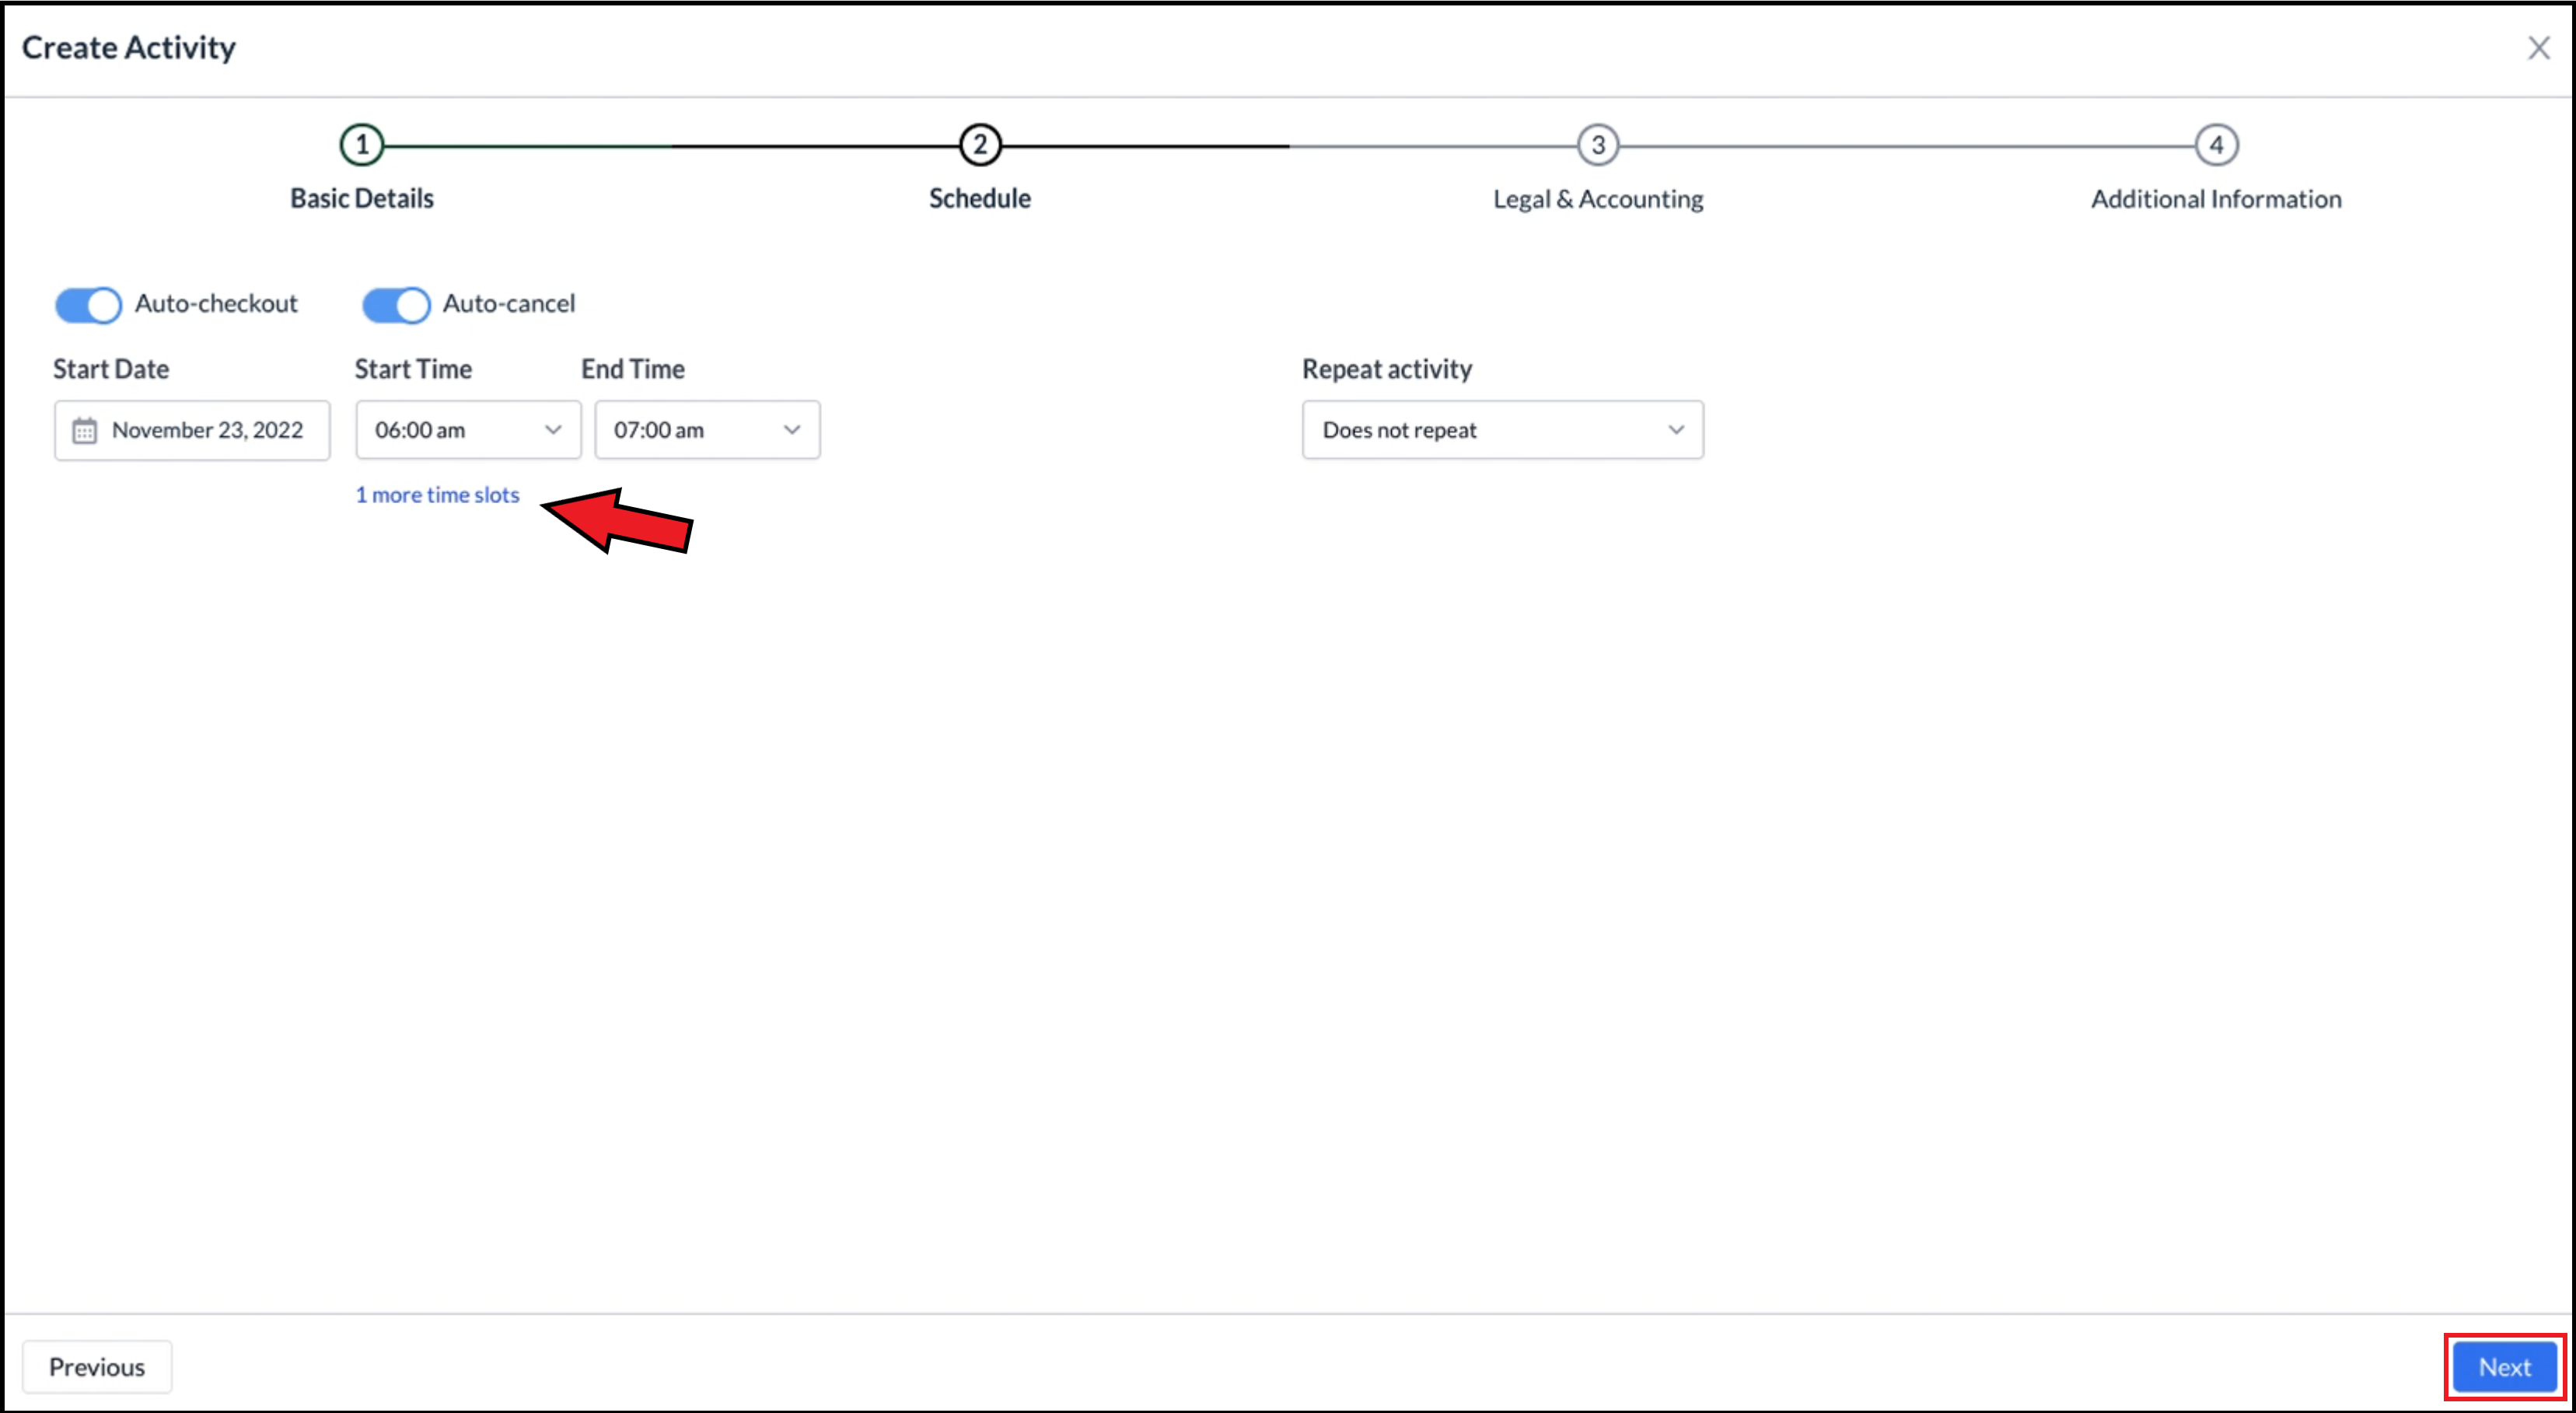
The popup closes and the Schedule panel updates to indicate more time slots were added. Select Next to continue. |
|
|
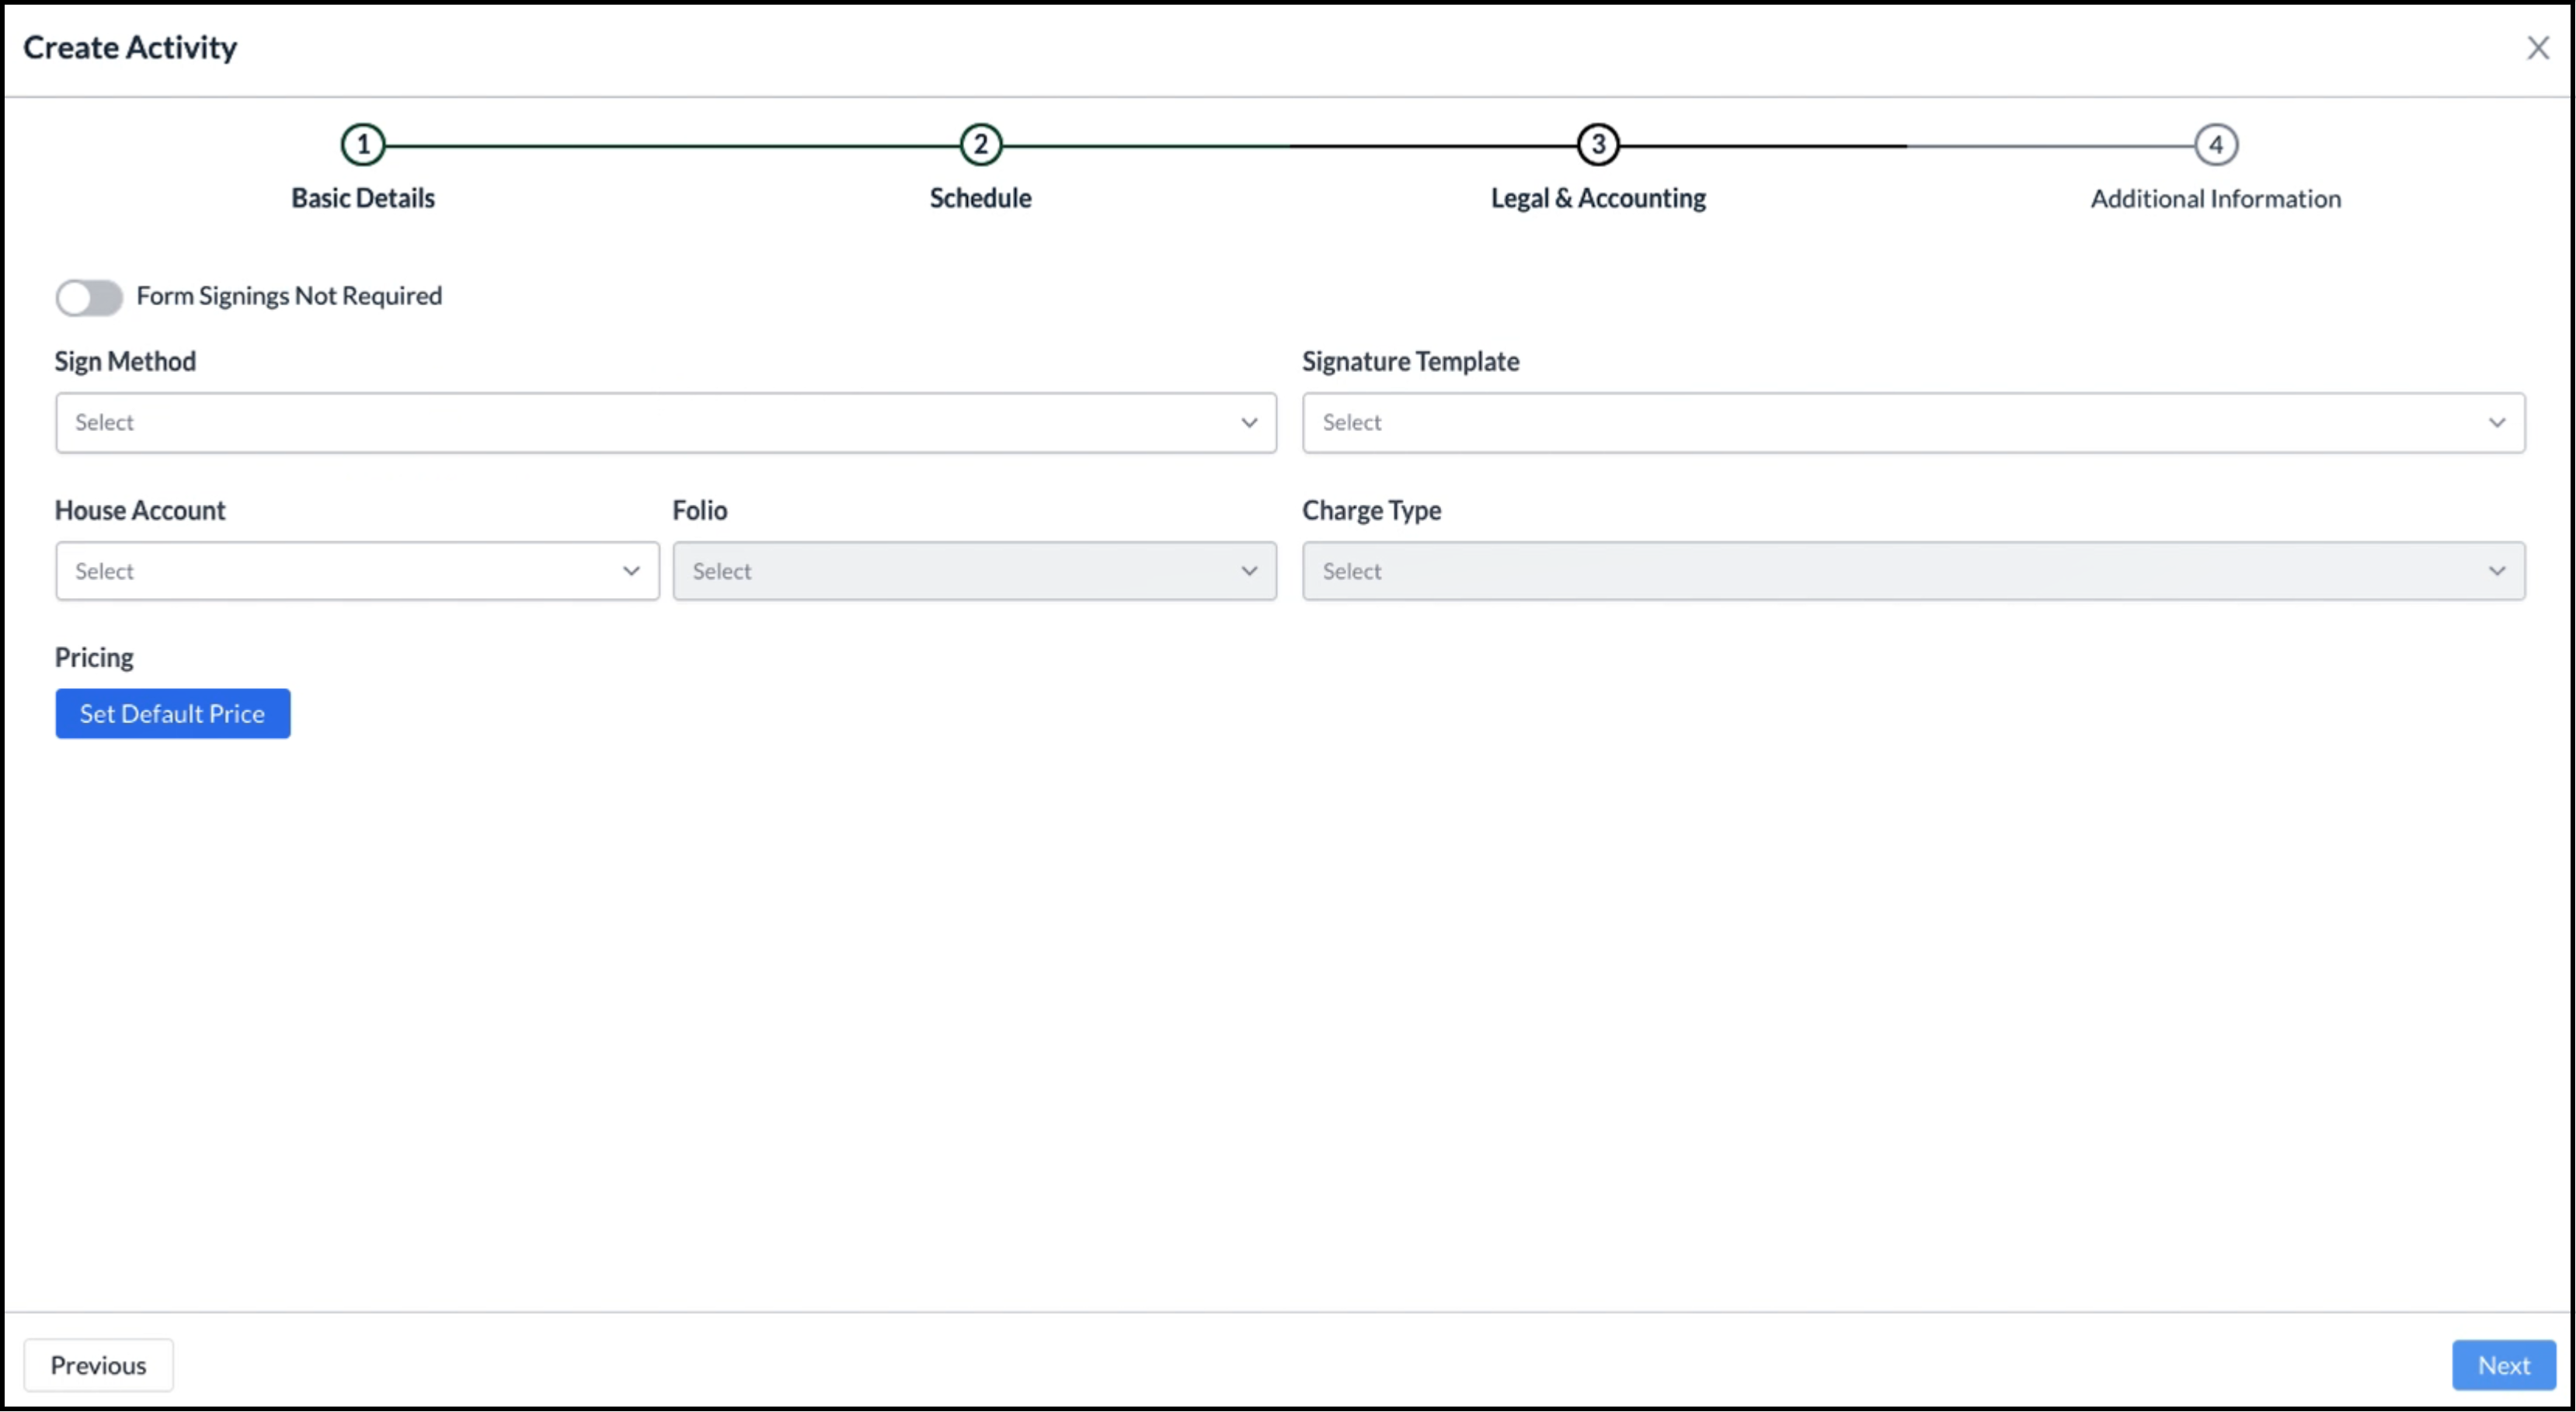
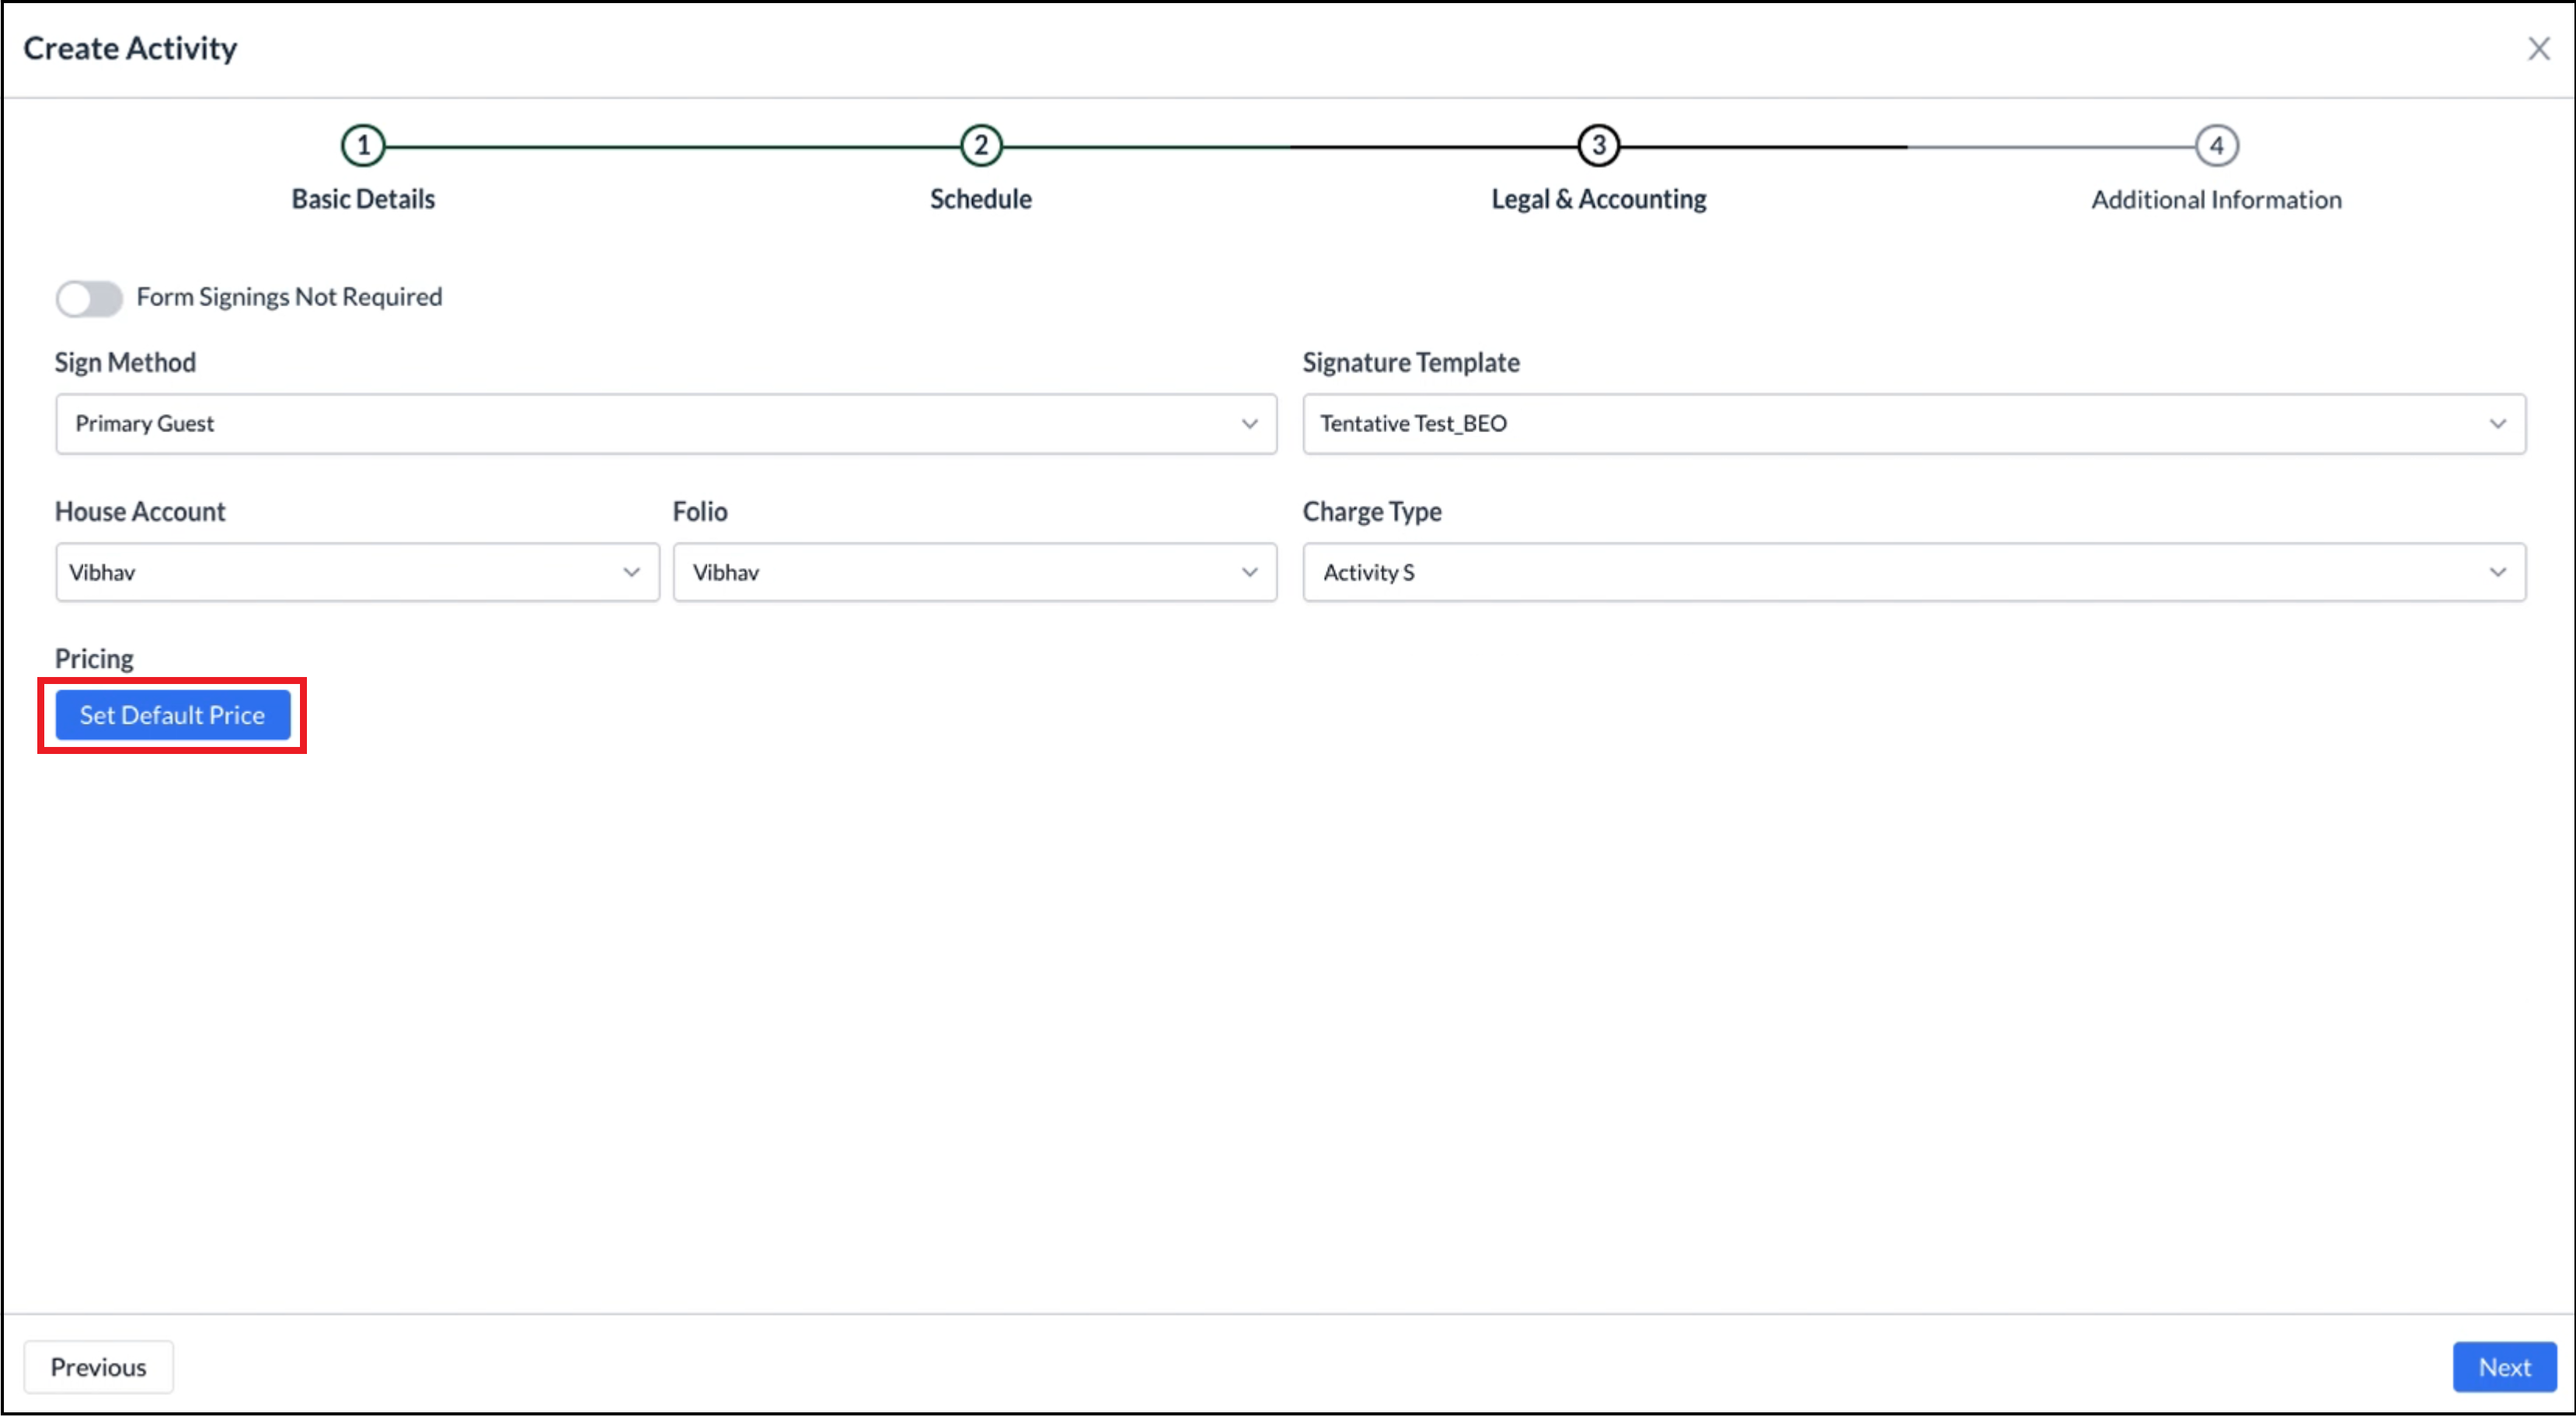
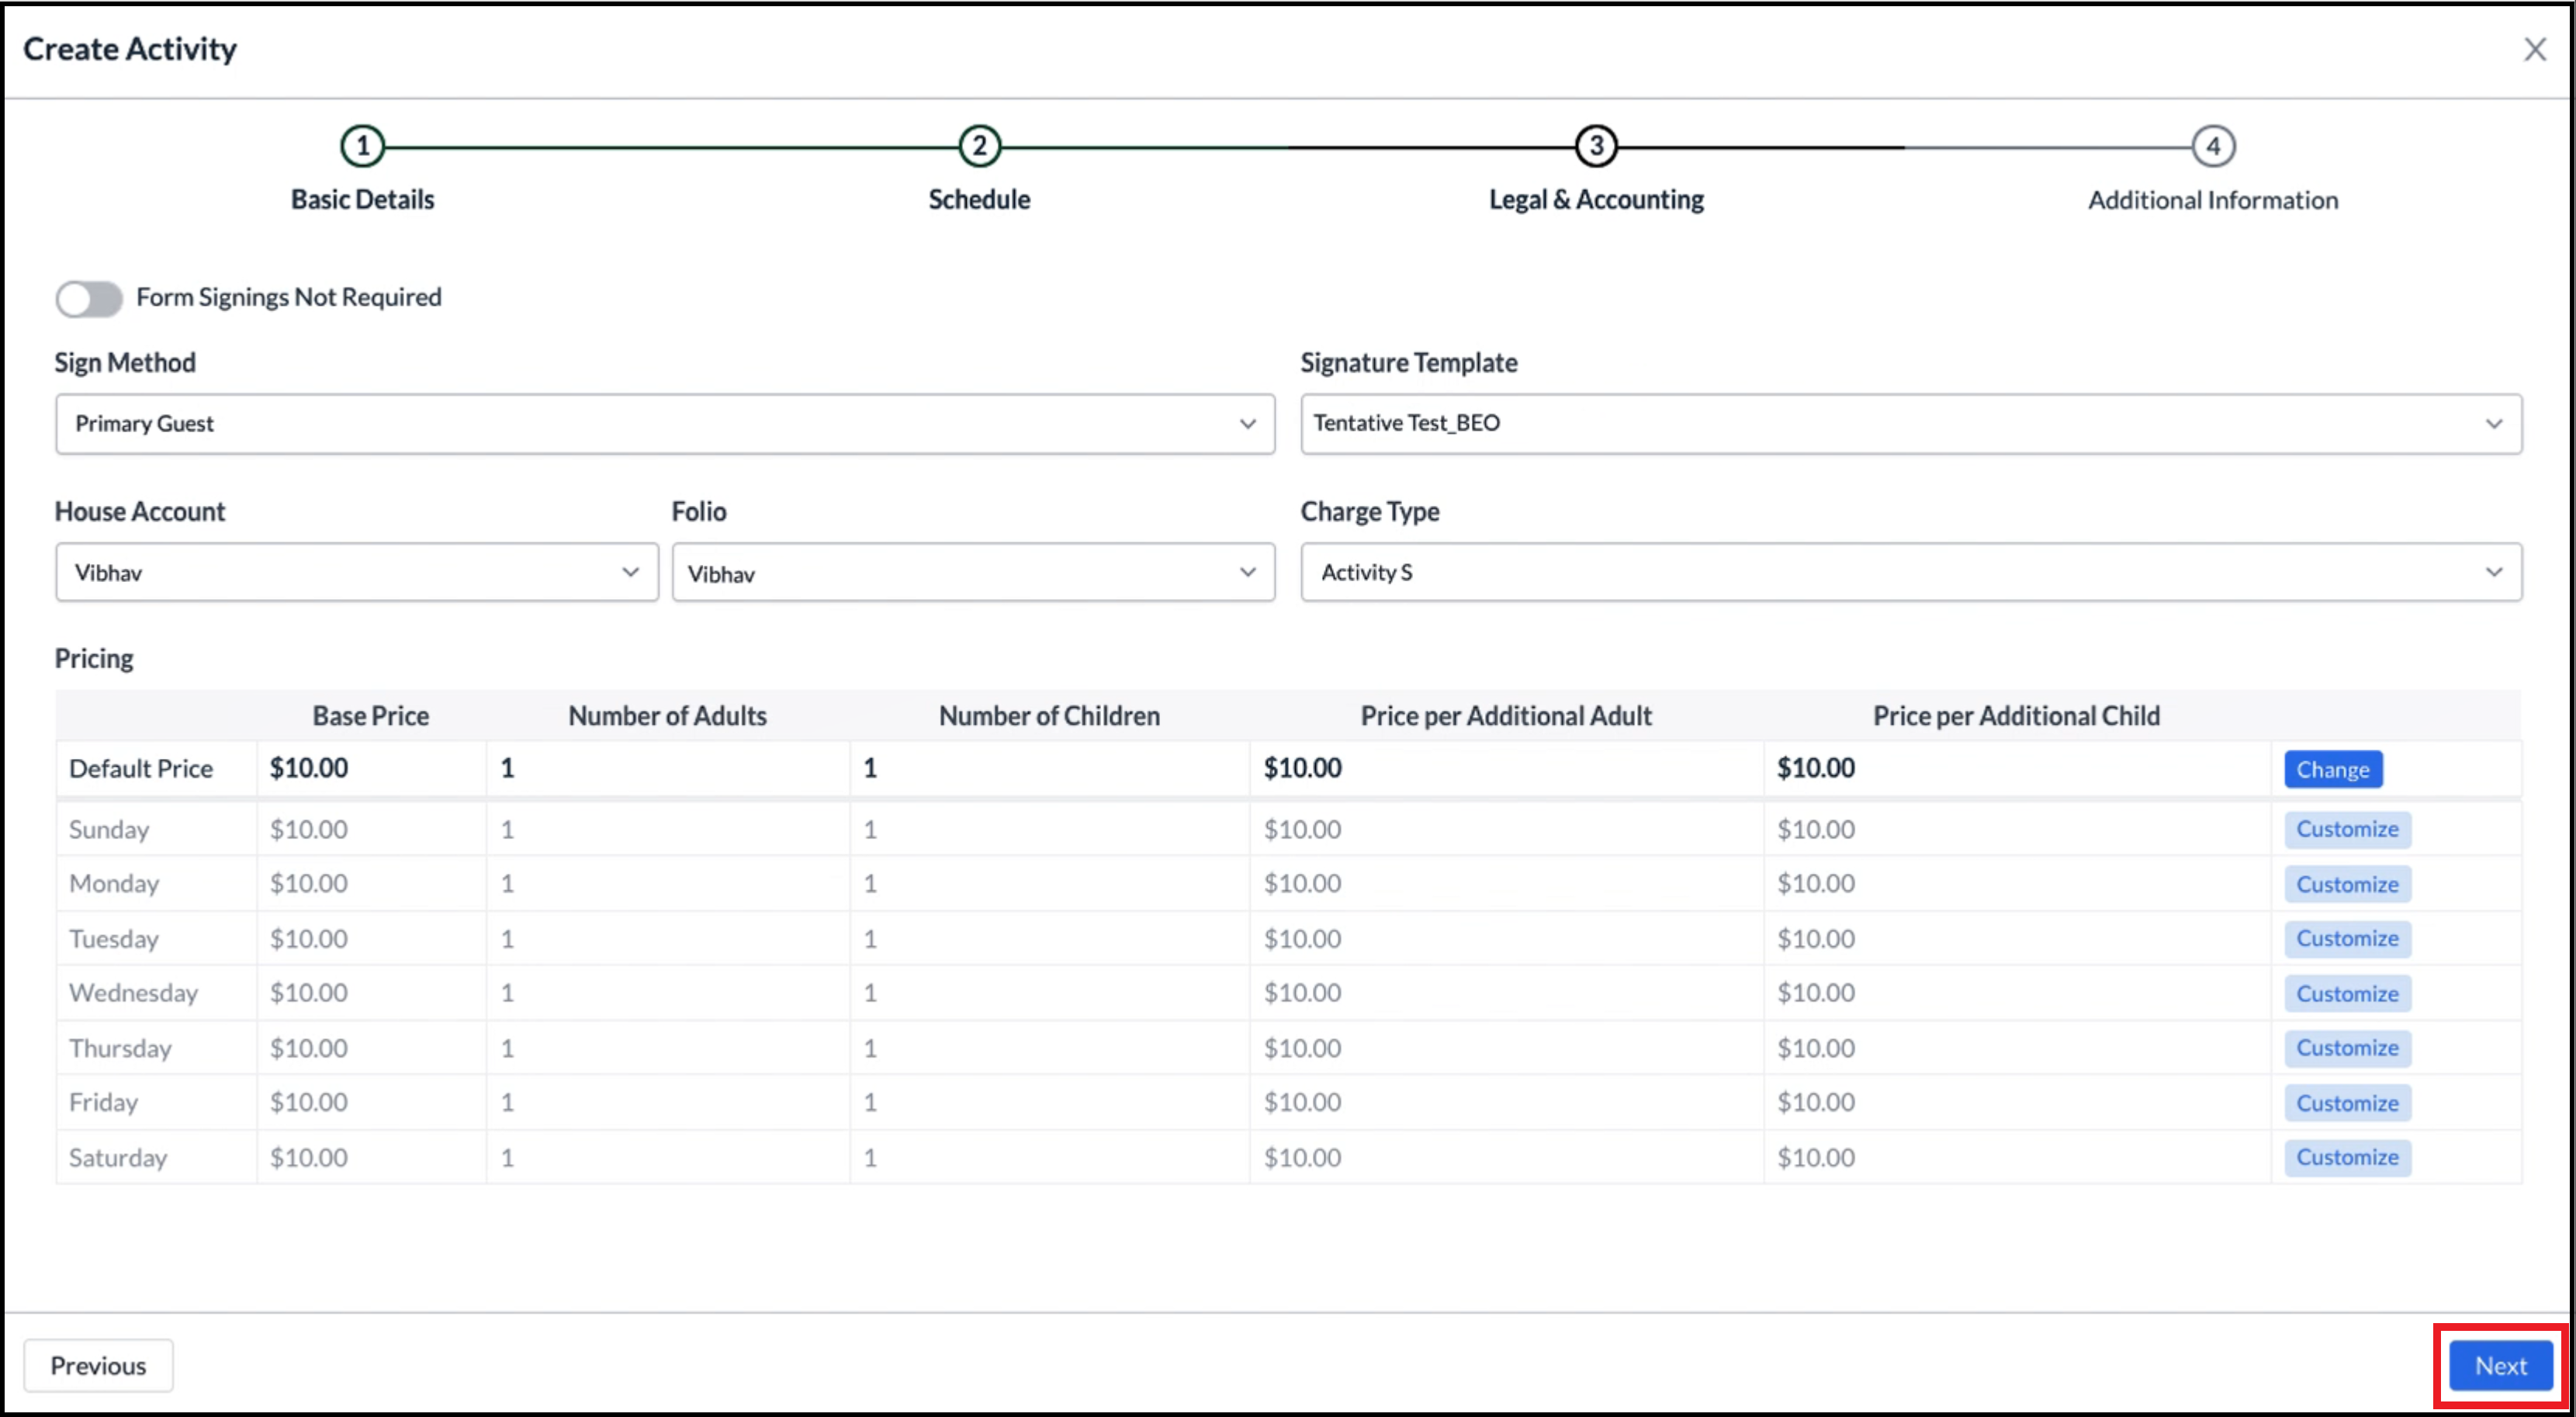
The wizard advances to the third panel, Legal & Accounting. Complete the top portion of the panel as shown at right. Select a Sign Method, Signature Template and Home Account (with associated Folio and Charge Type) to which the fee for this activity will be charged. Select Set Default Price. |
|
|
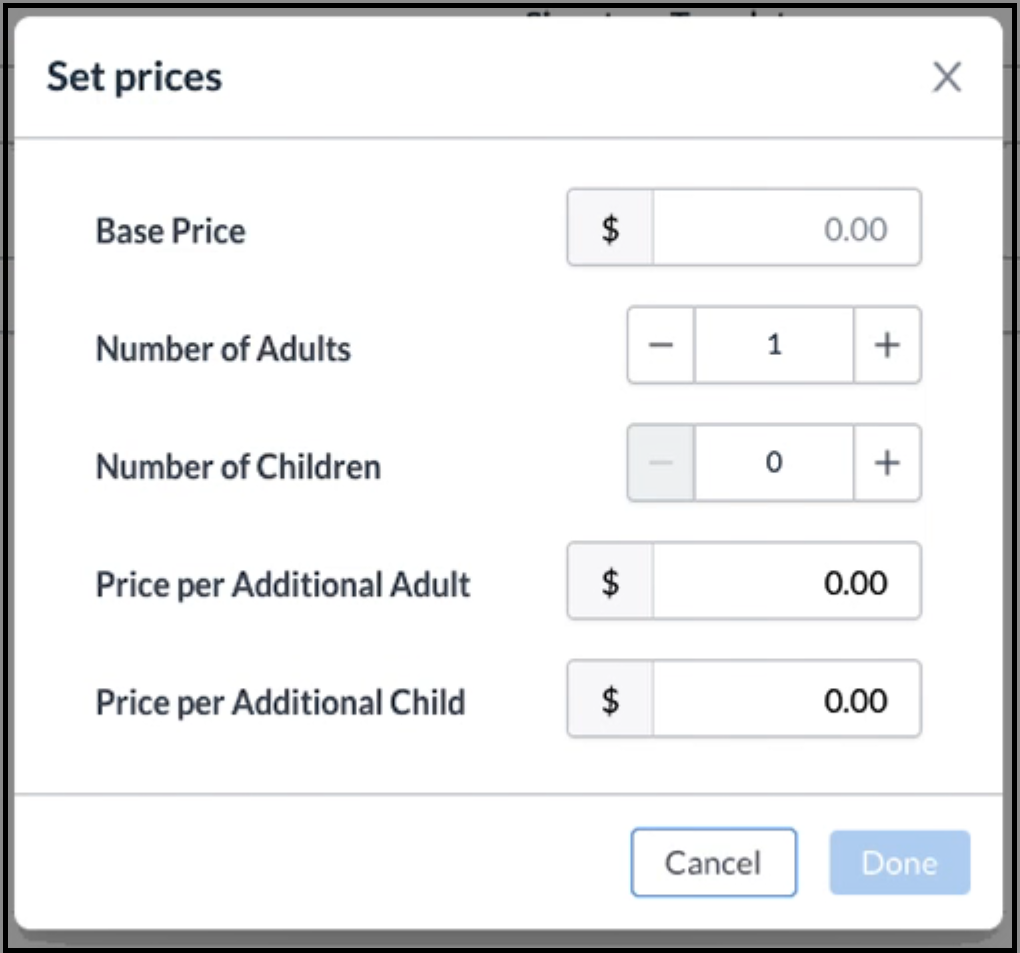
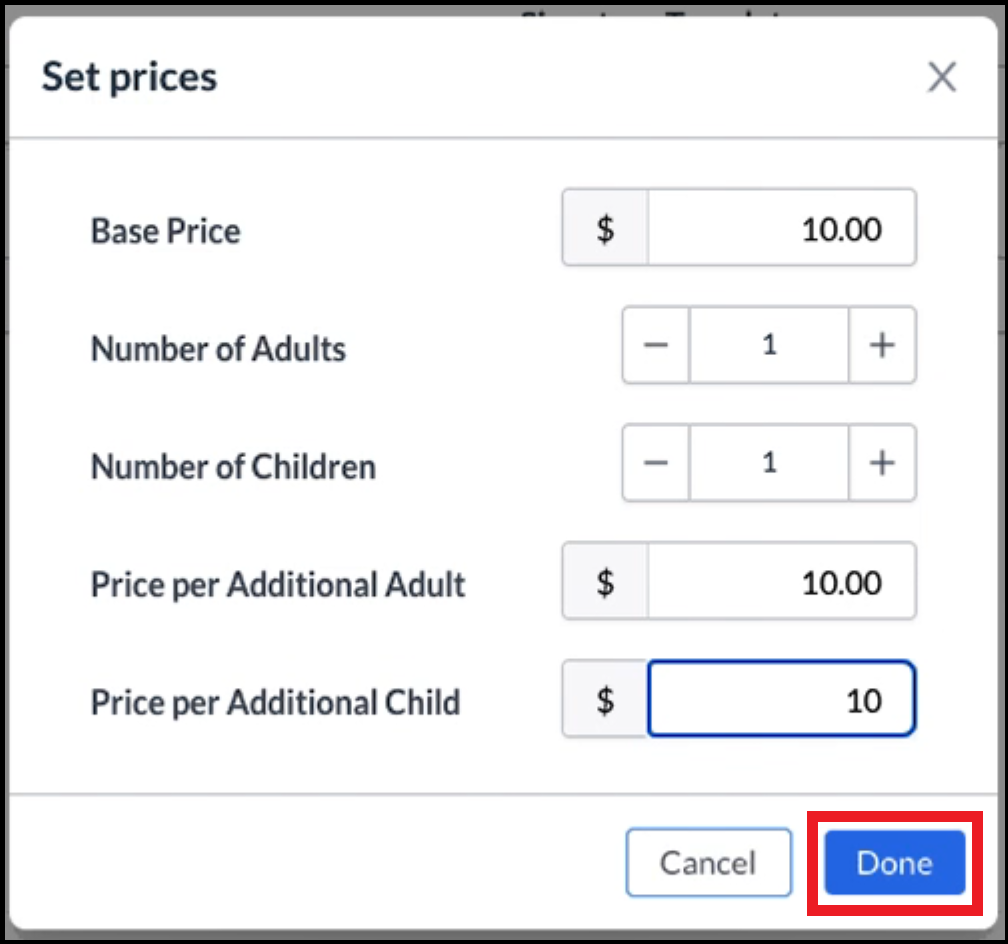
The Set prices popup activates. Complete the fields in the popup with applicable pricing and attendee details as shown in the example at right. When all details are complete, select Done. |
|
|
The Legal & Accounting panel updates with a pricing section, including the Default Price details entered in the popup above. Note that links are provided to adjust activity pricing by the day of the week. Select Next. |
|
|
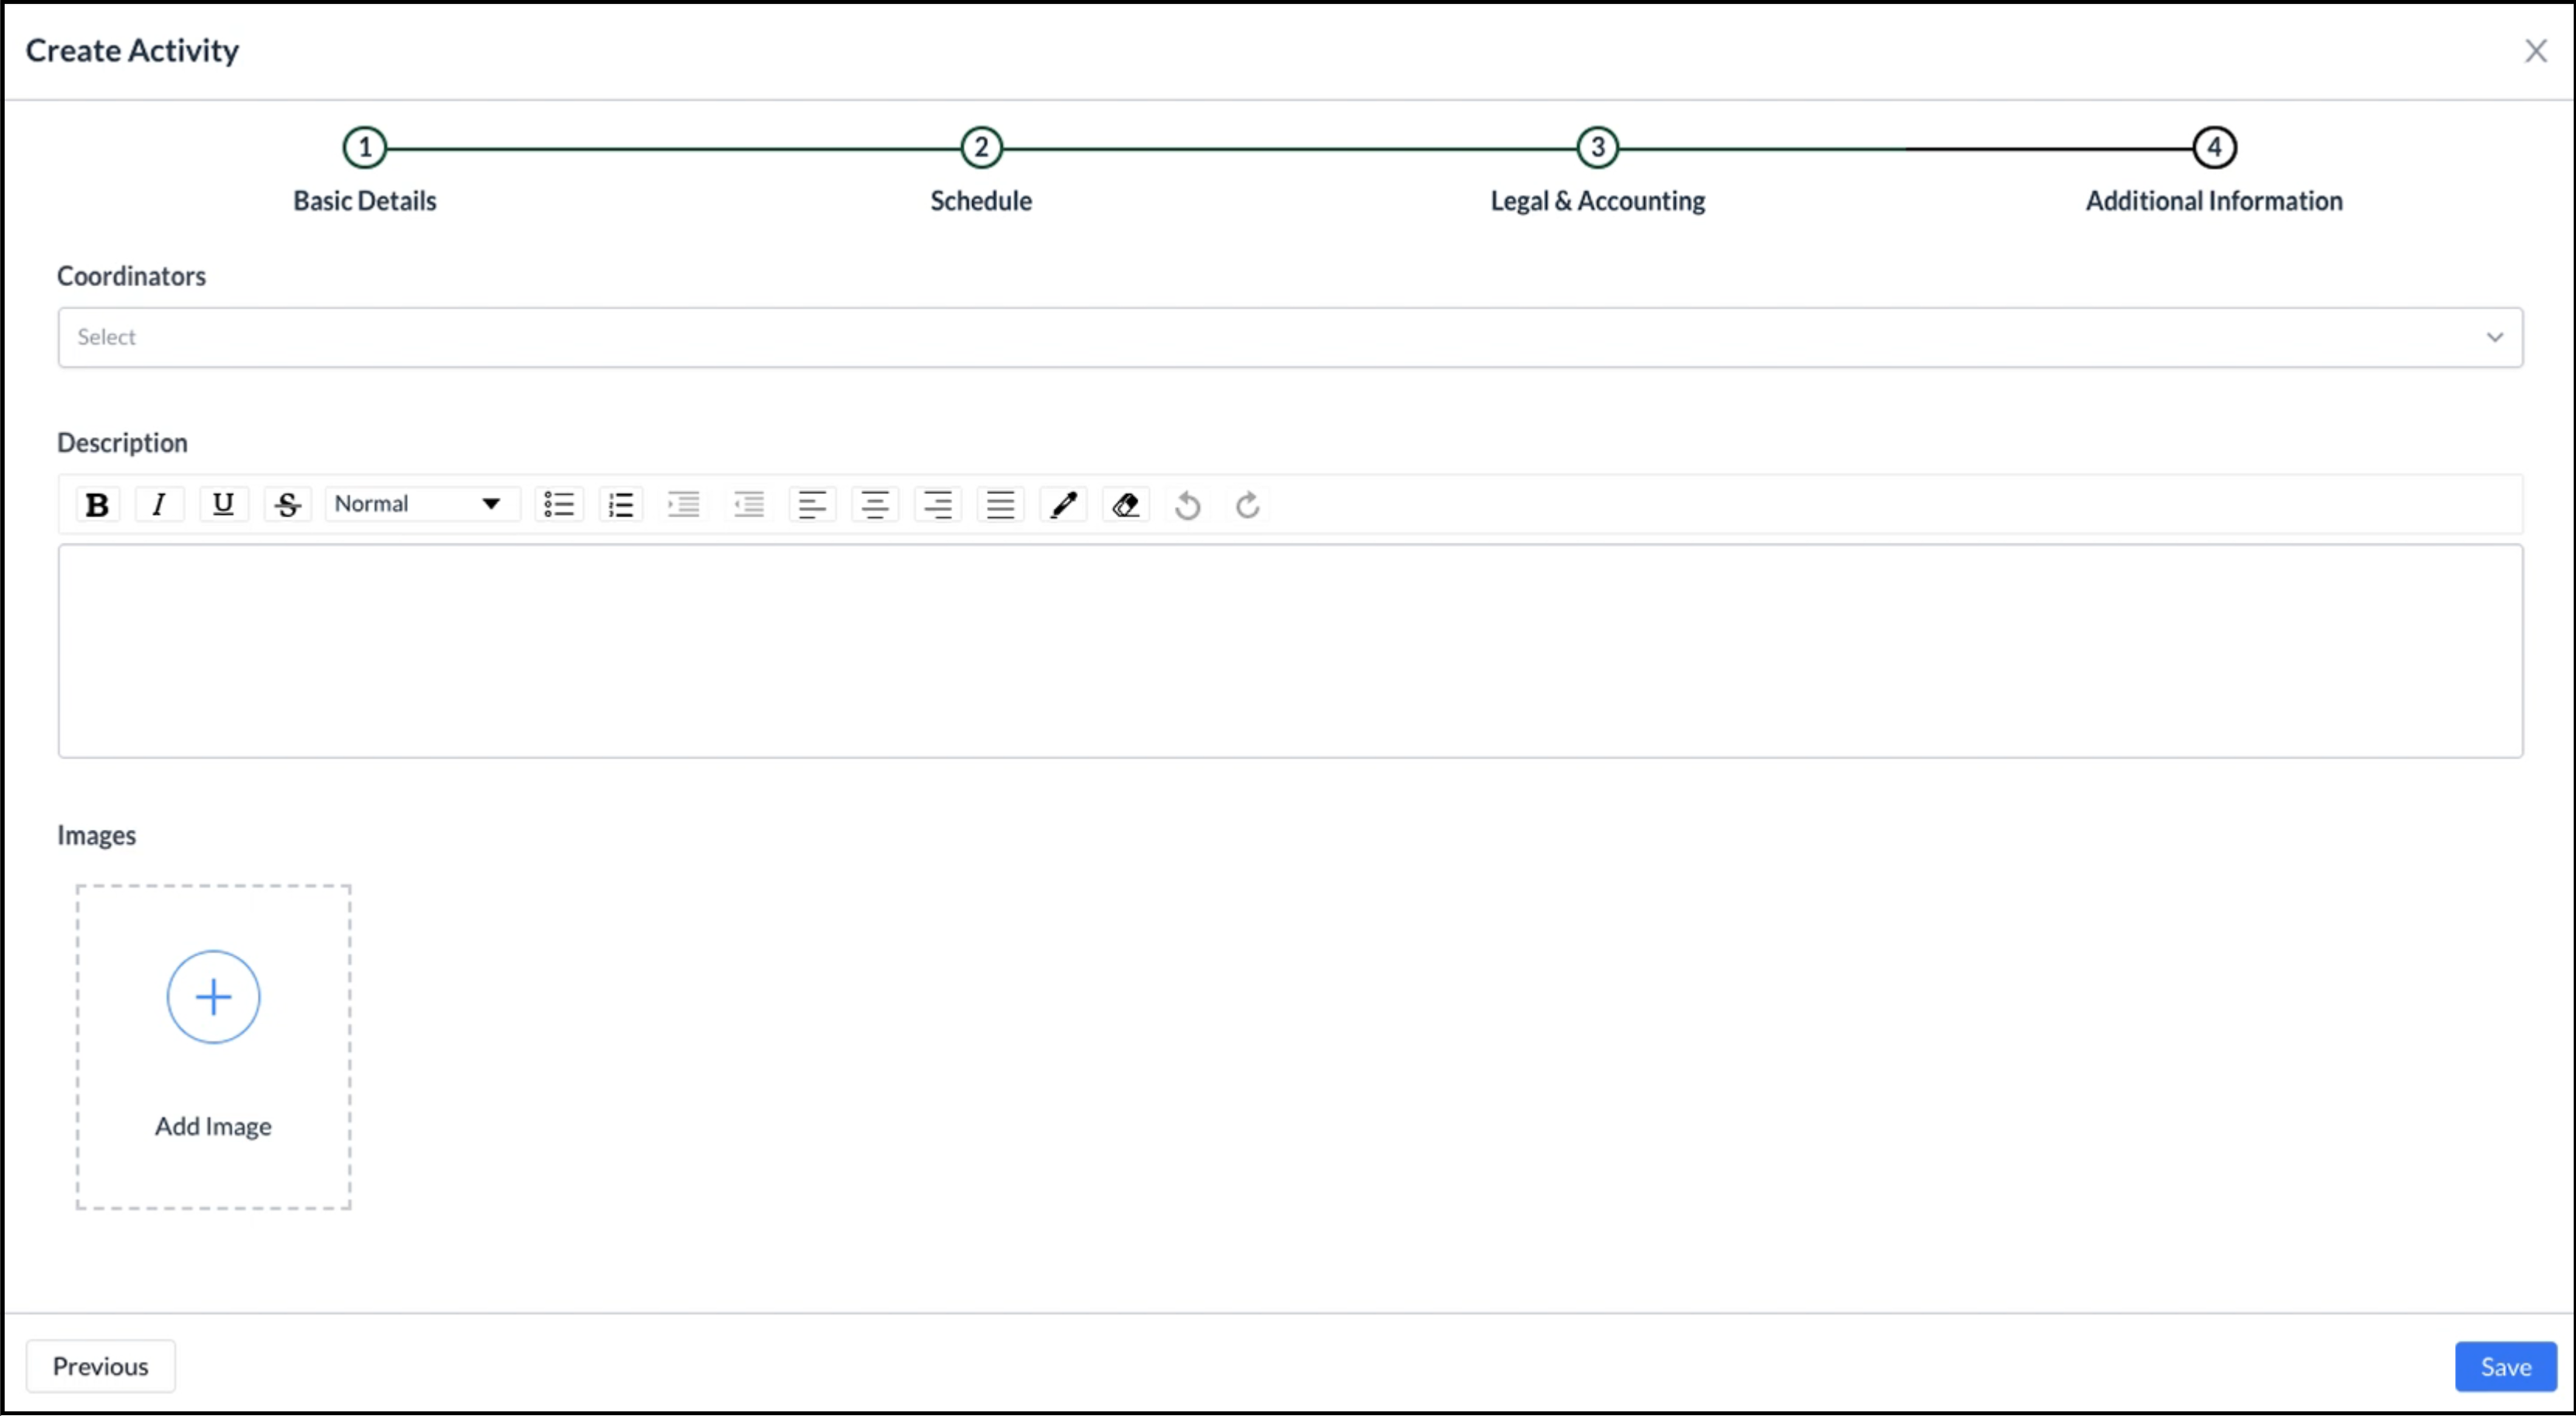
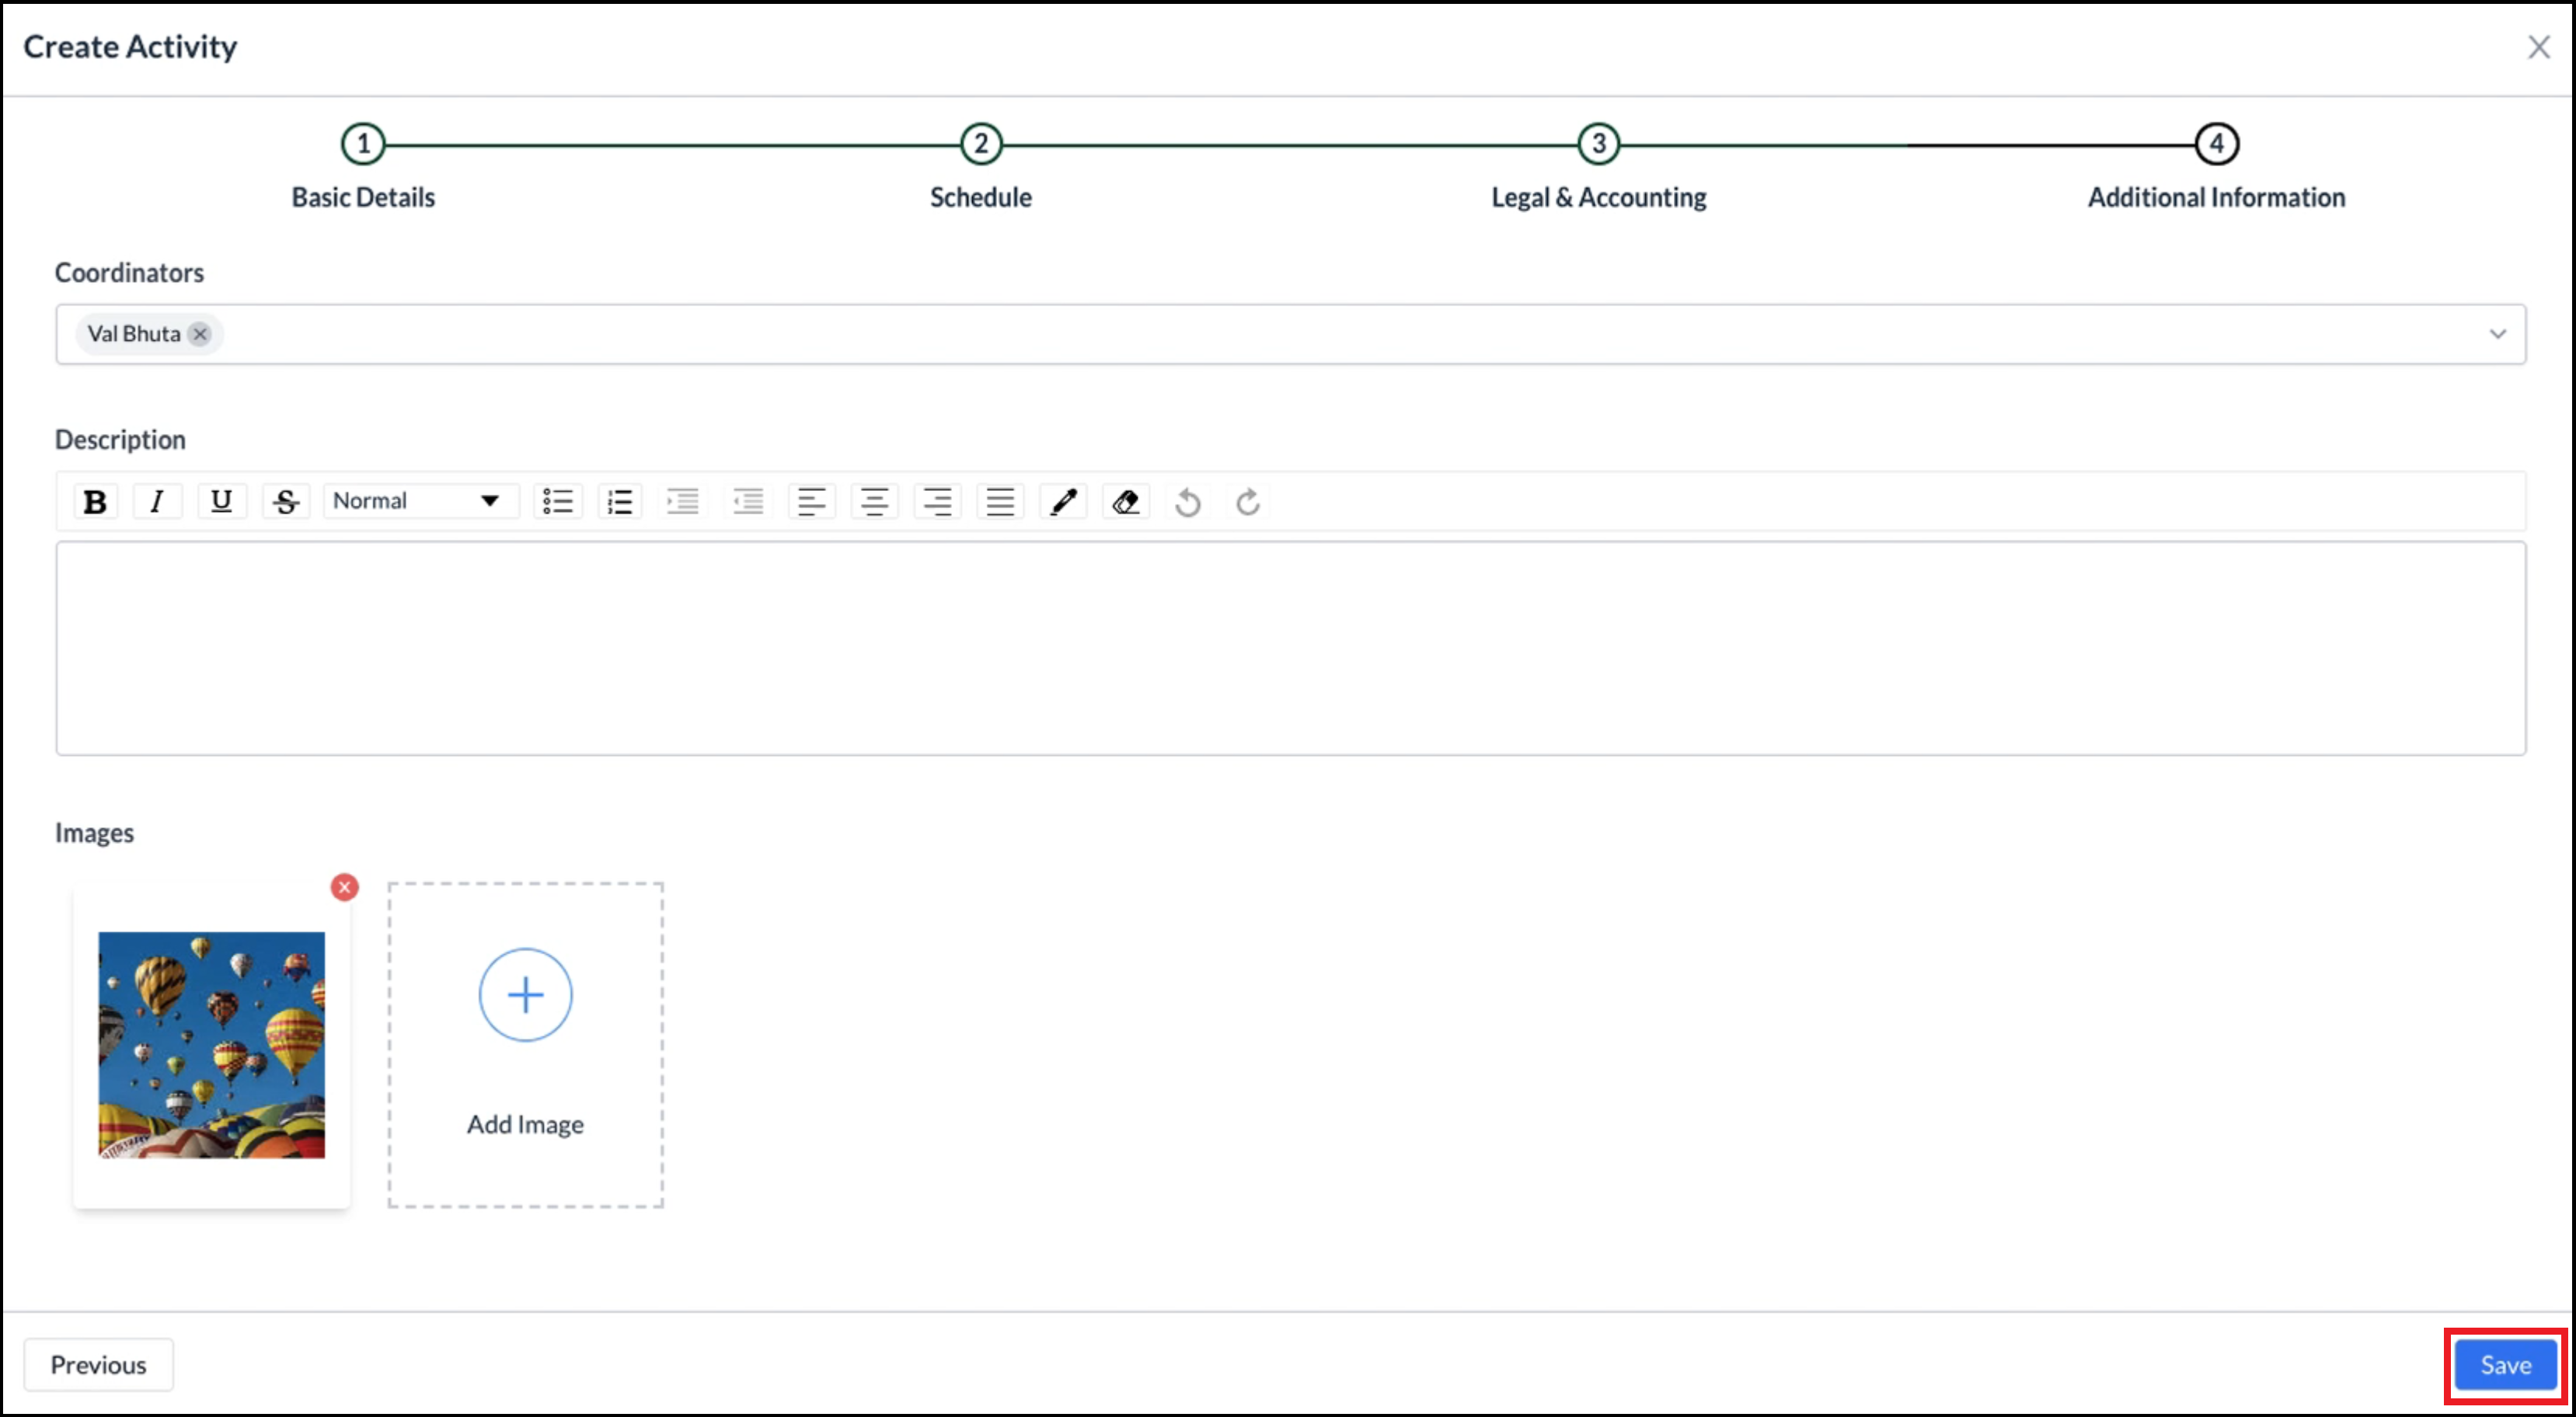
The wizard advances to the Additional Information panel. Select a Coordinator for the activity, and optionally enter an activity Description. Select the plus sign in the Add image box to upload an image to associate with the activity. Note that additional image upload boxes populate as each image is uploaded, multiple image uploads are possible. Select Save to create the activity. |
|
|
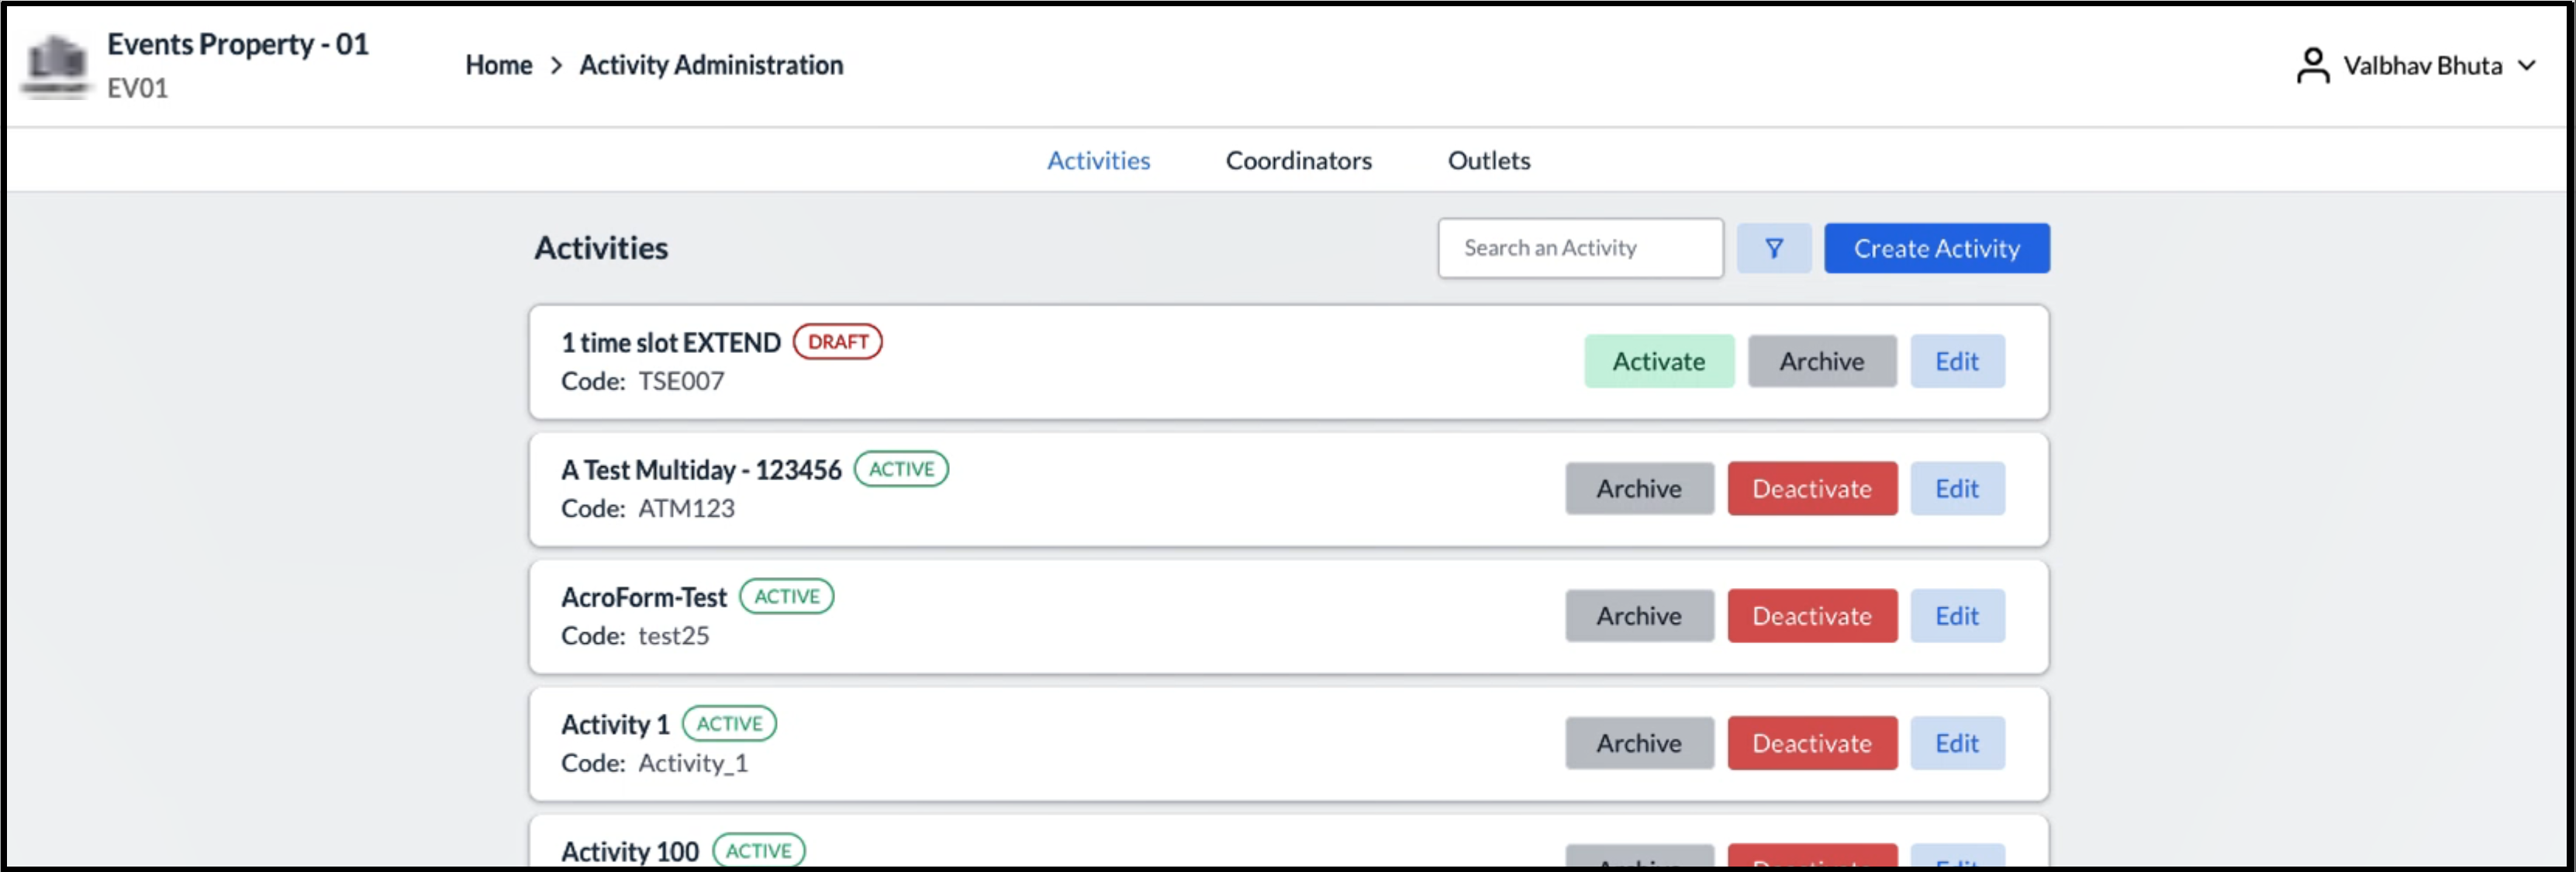
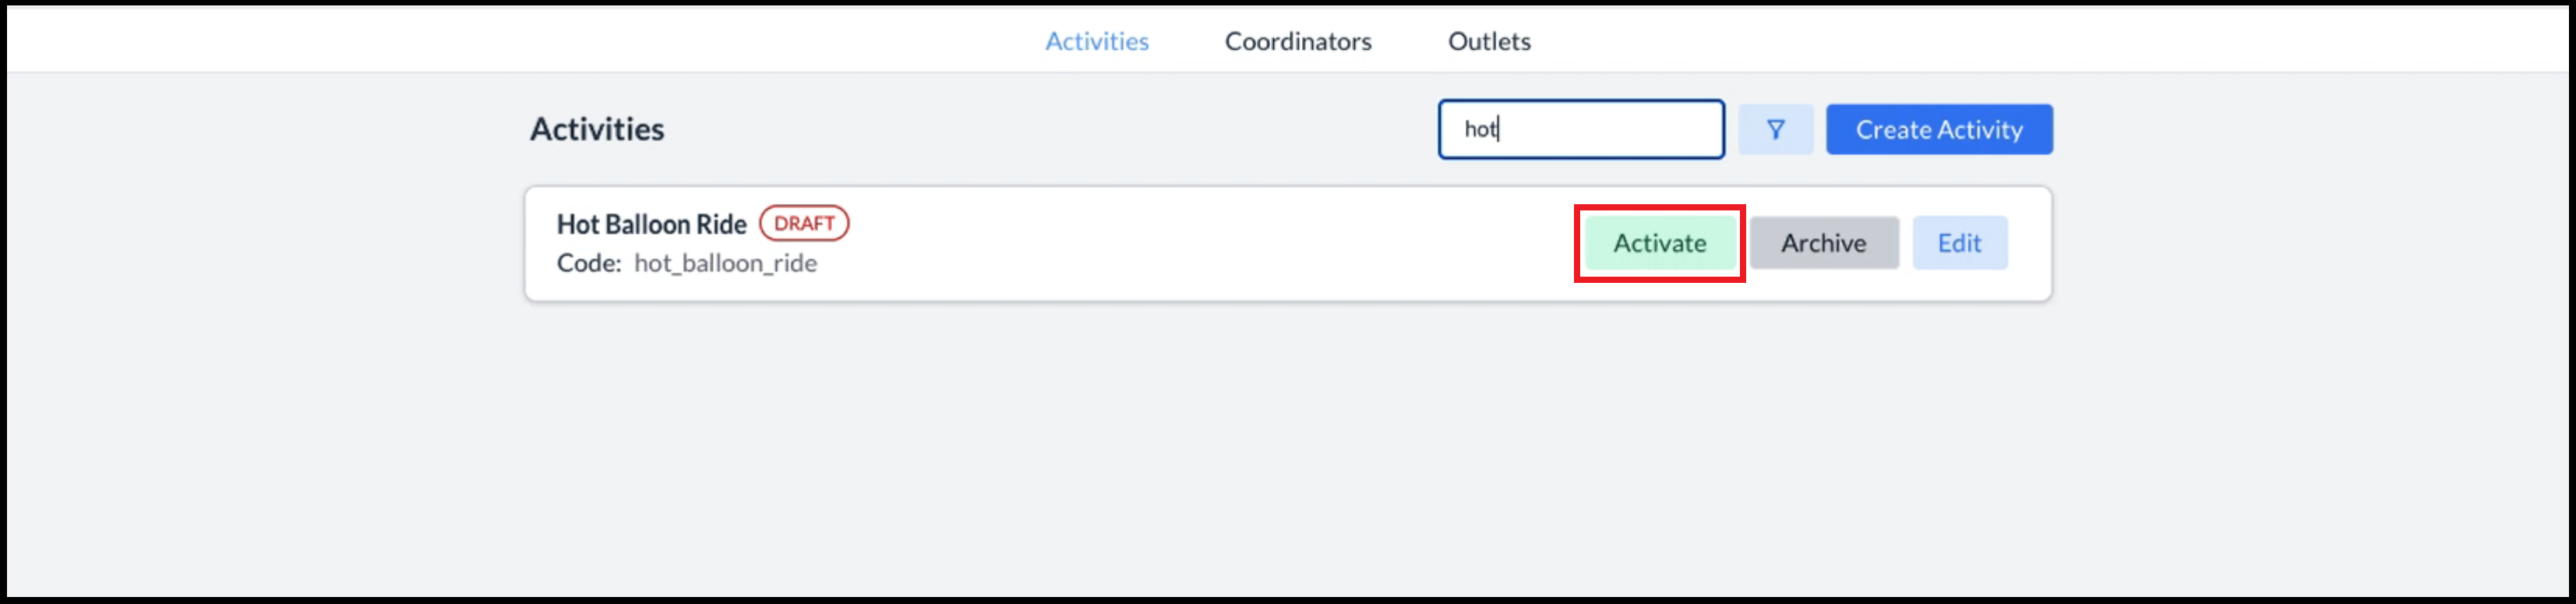
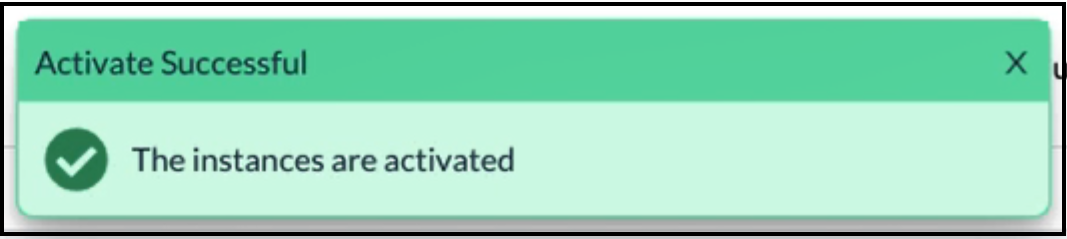
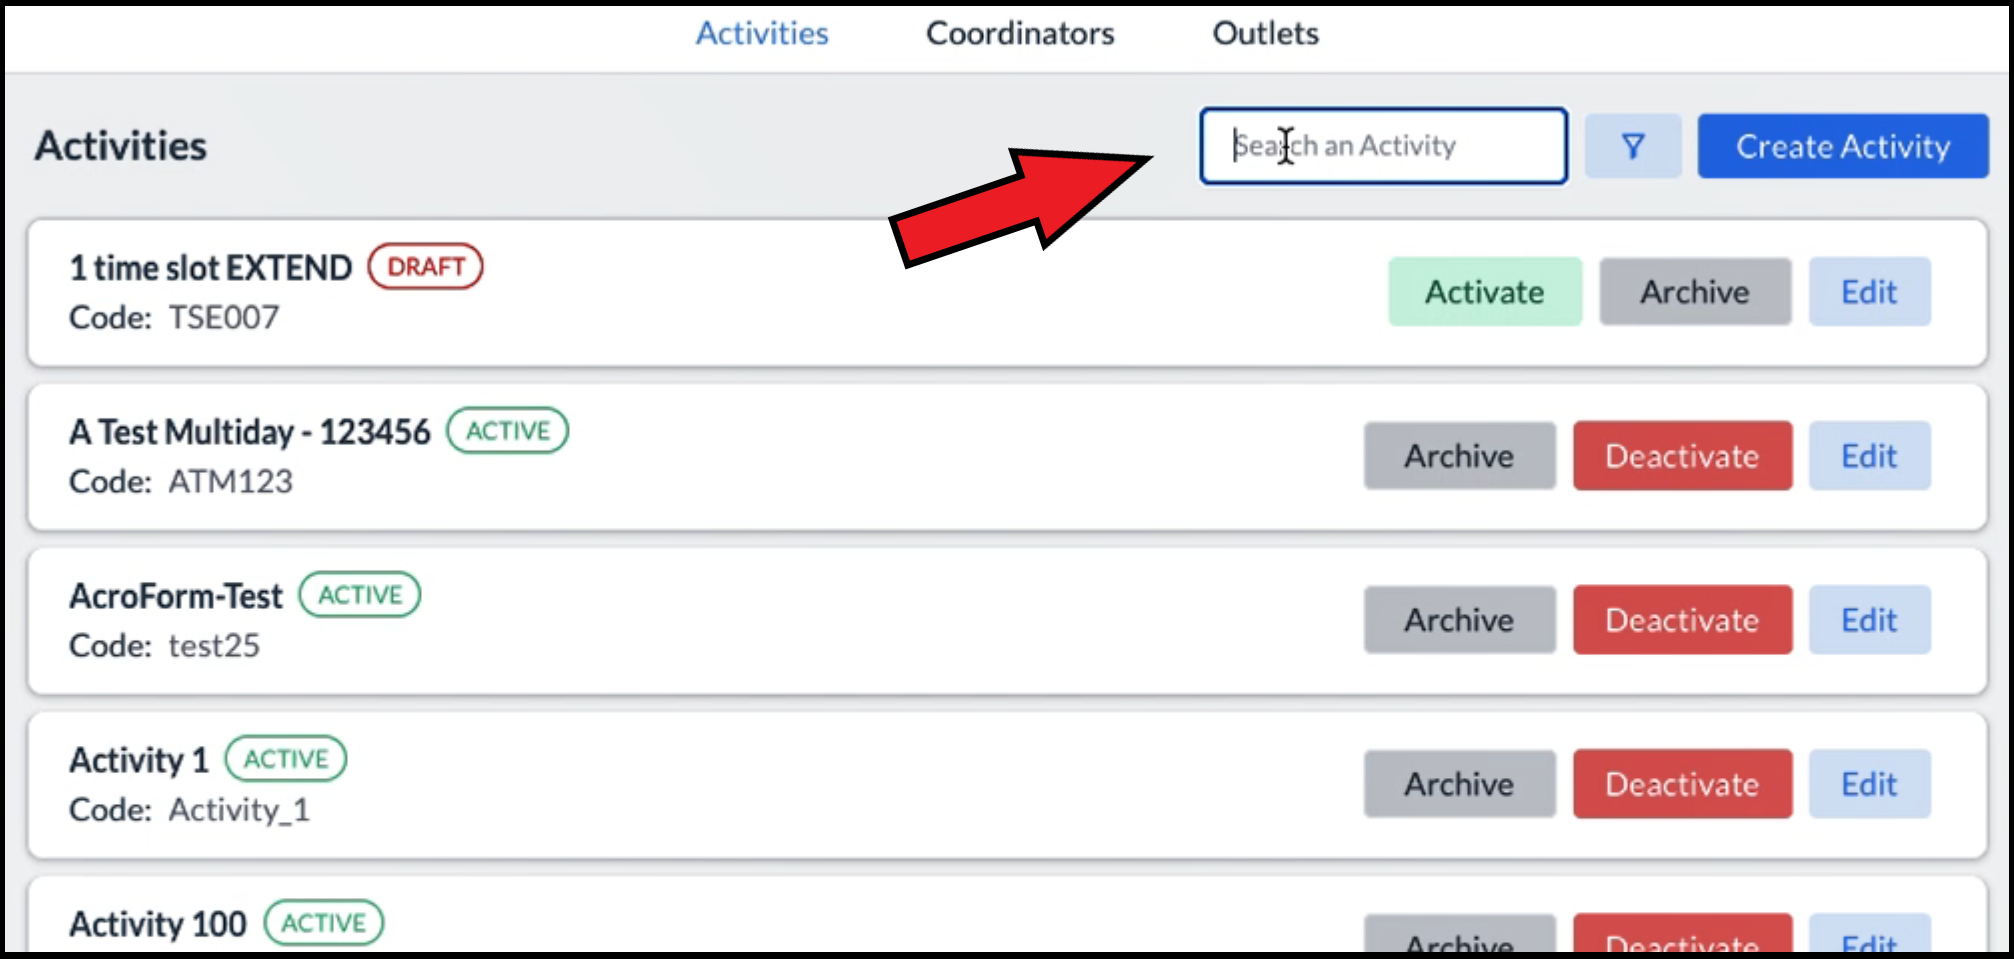
The activity wizard closes and the list of activities assigned to the Coordinator selected in the step above loads. Because the list is sorted alphabetically, it may be necessary to use the search box to look up the newly created activity. As shown at right, the newly created activity is set to a DRAFT status by default. Select its Activate link to set it to active. An activated success popup briefly displays. |
|
|
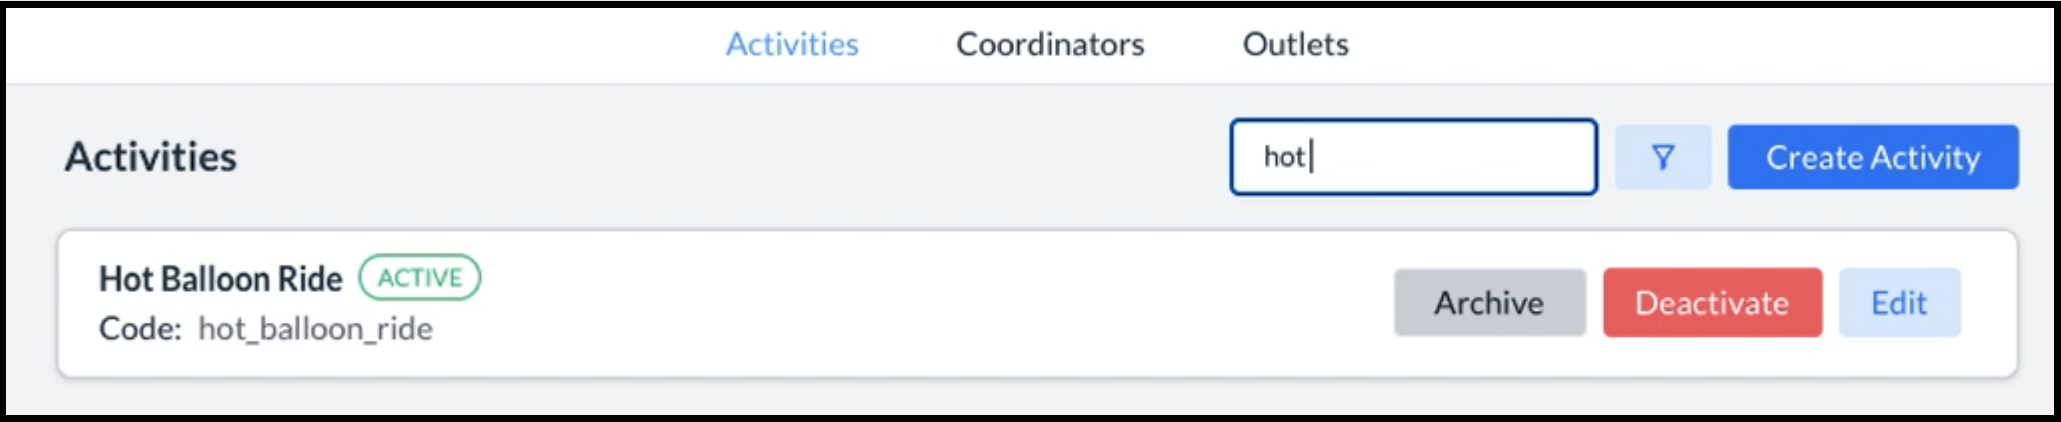
Back on the Activities tab, look up the activity again if desired, to confirm its status. |
|
|
The activity status is set to ACTIVE. |
|