
📆 Revision Date:
Note that this process is completed entirely in the HotelKey administration web app, no separate mobile device setup is required.
|
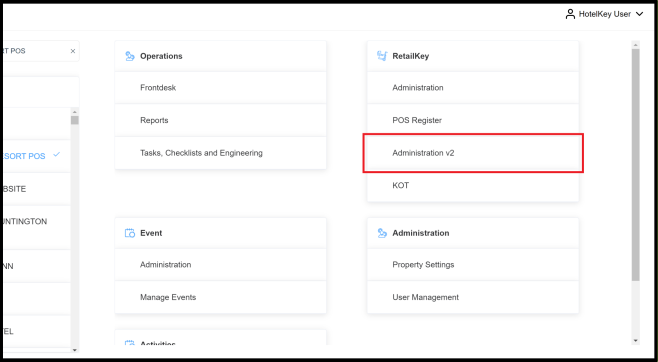
On the home page of the HotelKey administration web application (admin.hotelkeyapp.com), select the Administration v2 link in the RetailKey section. |
|
|
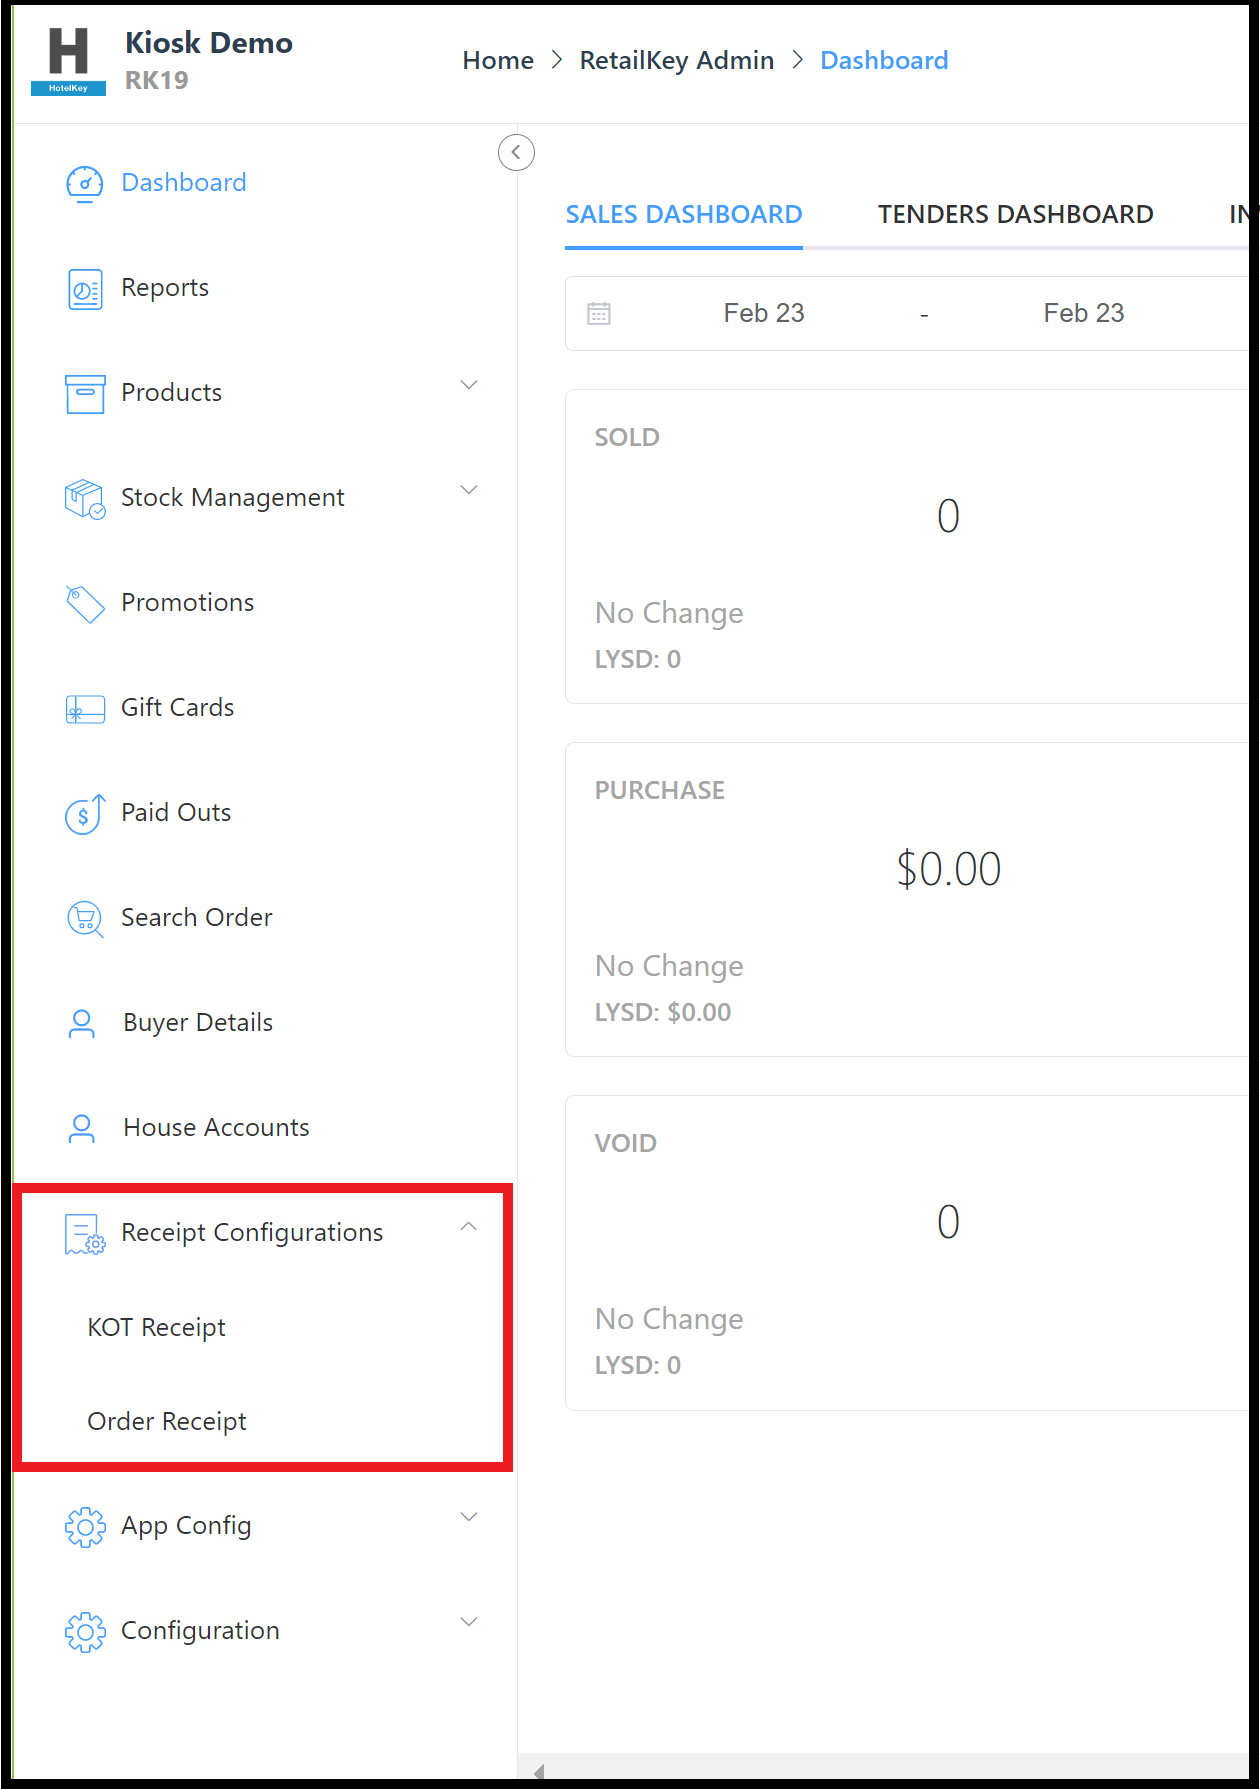
Expand the Receipt Configurations menu in the left sidebar and select Order Receipt. |
|
|
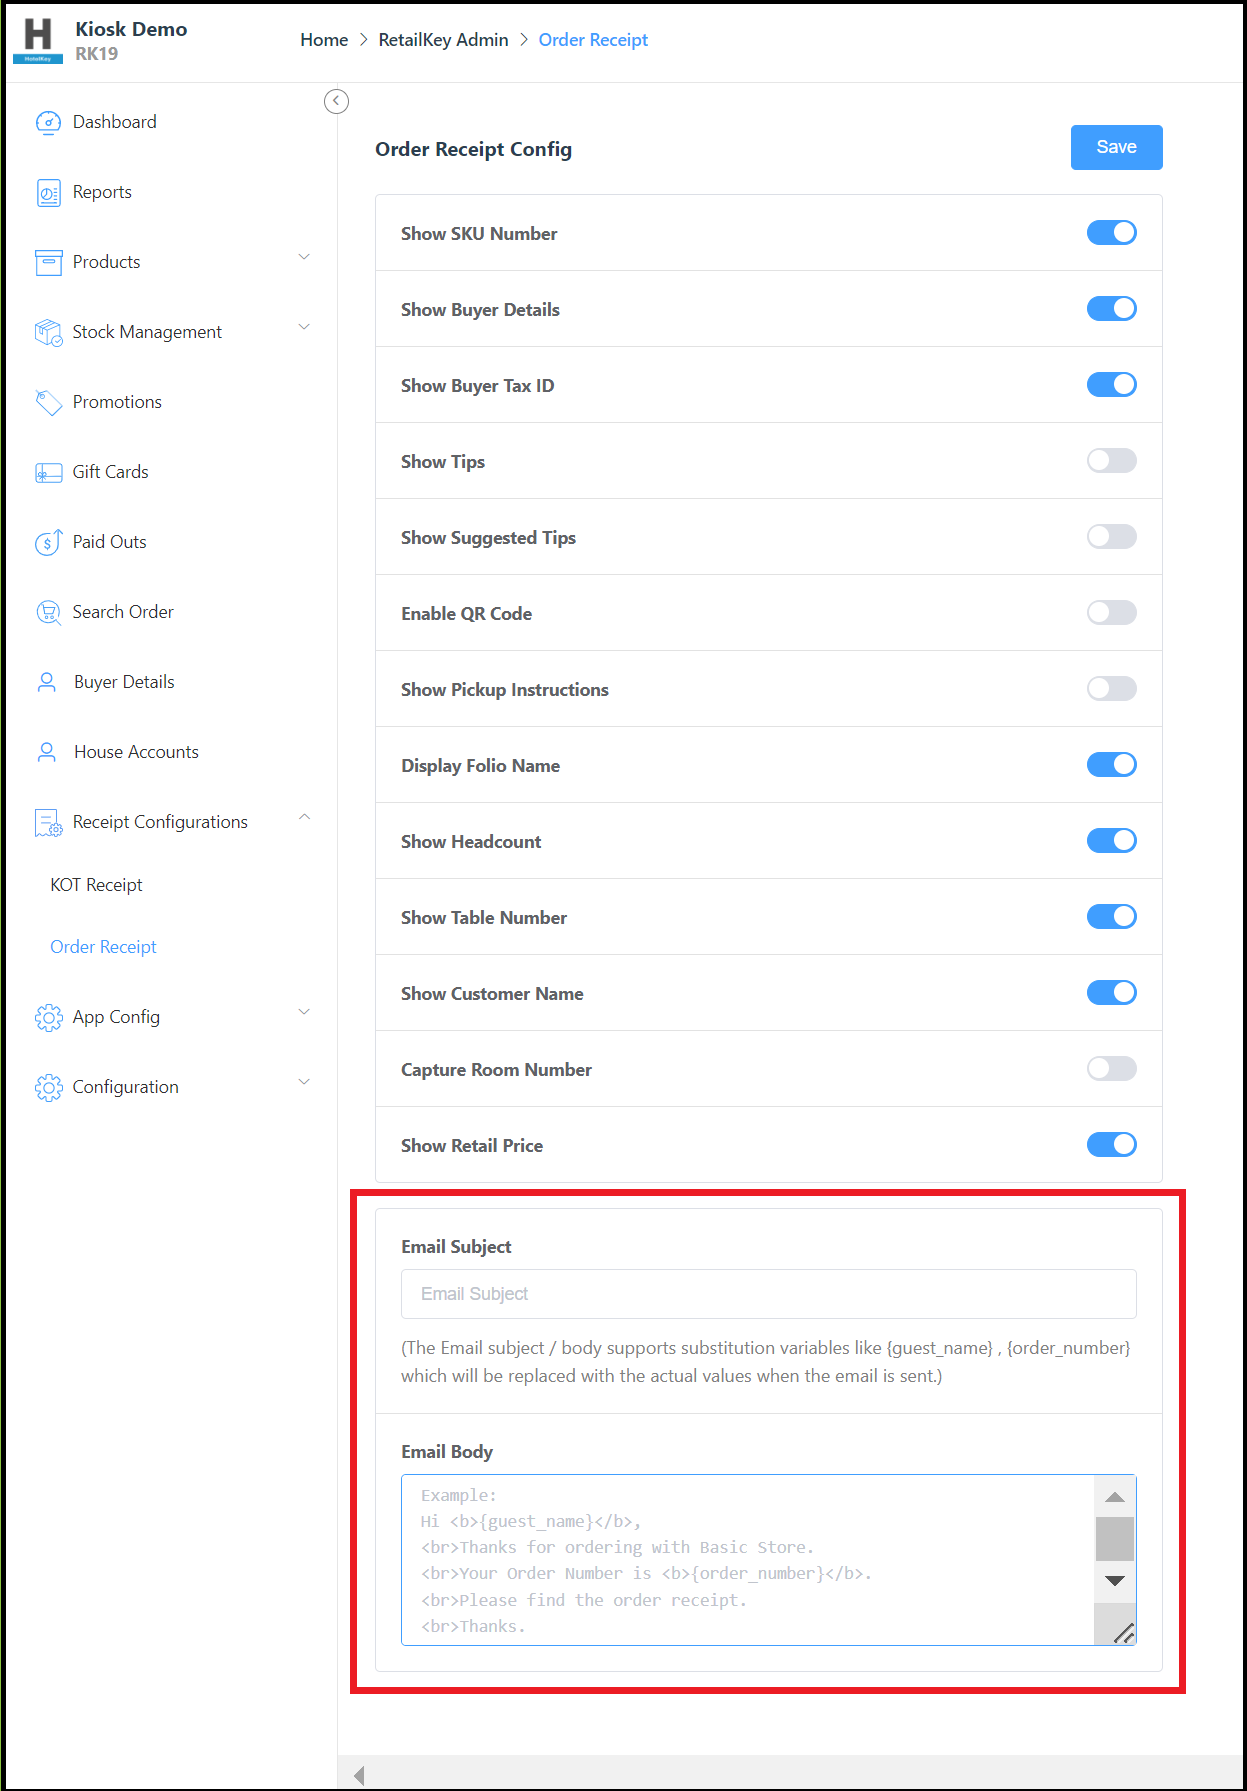
The Order Receipt configuration panel opens. Items to be included on the receipt are toggled ON (blue in image at right), items to be excluded from the receipt are toggled OFF (gray in image at right). Leave the default toggle selections in place. Beneath the option toggles, enter the boilerplate Email Subject line and boilerplate Email Body text to be included in every emailed receipt. Note that the Email Body field can accept basic HTML formatting and can include system substitution variable fields such as {guest_name} and {order_number}, as shown in the example at right. When field entries are complete select Save to save changes.
|
|
|
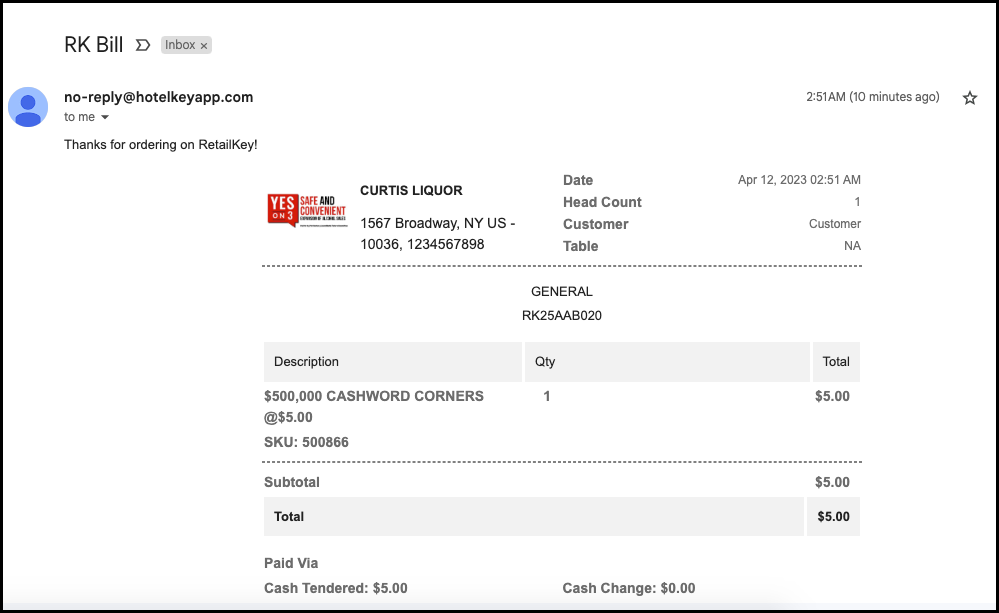
The image at right shows a sample of an emailed receipt generated via this process. In the example, the Email Subject line is “RK Bill” and the Email Body text is “Thanks for ordering on RetailKey!” |
|
|
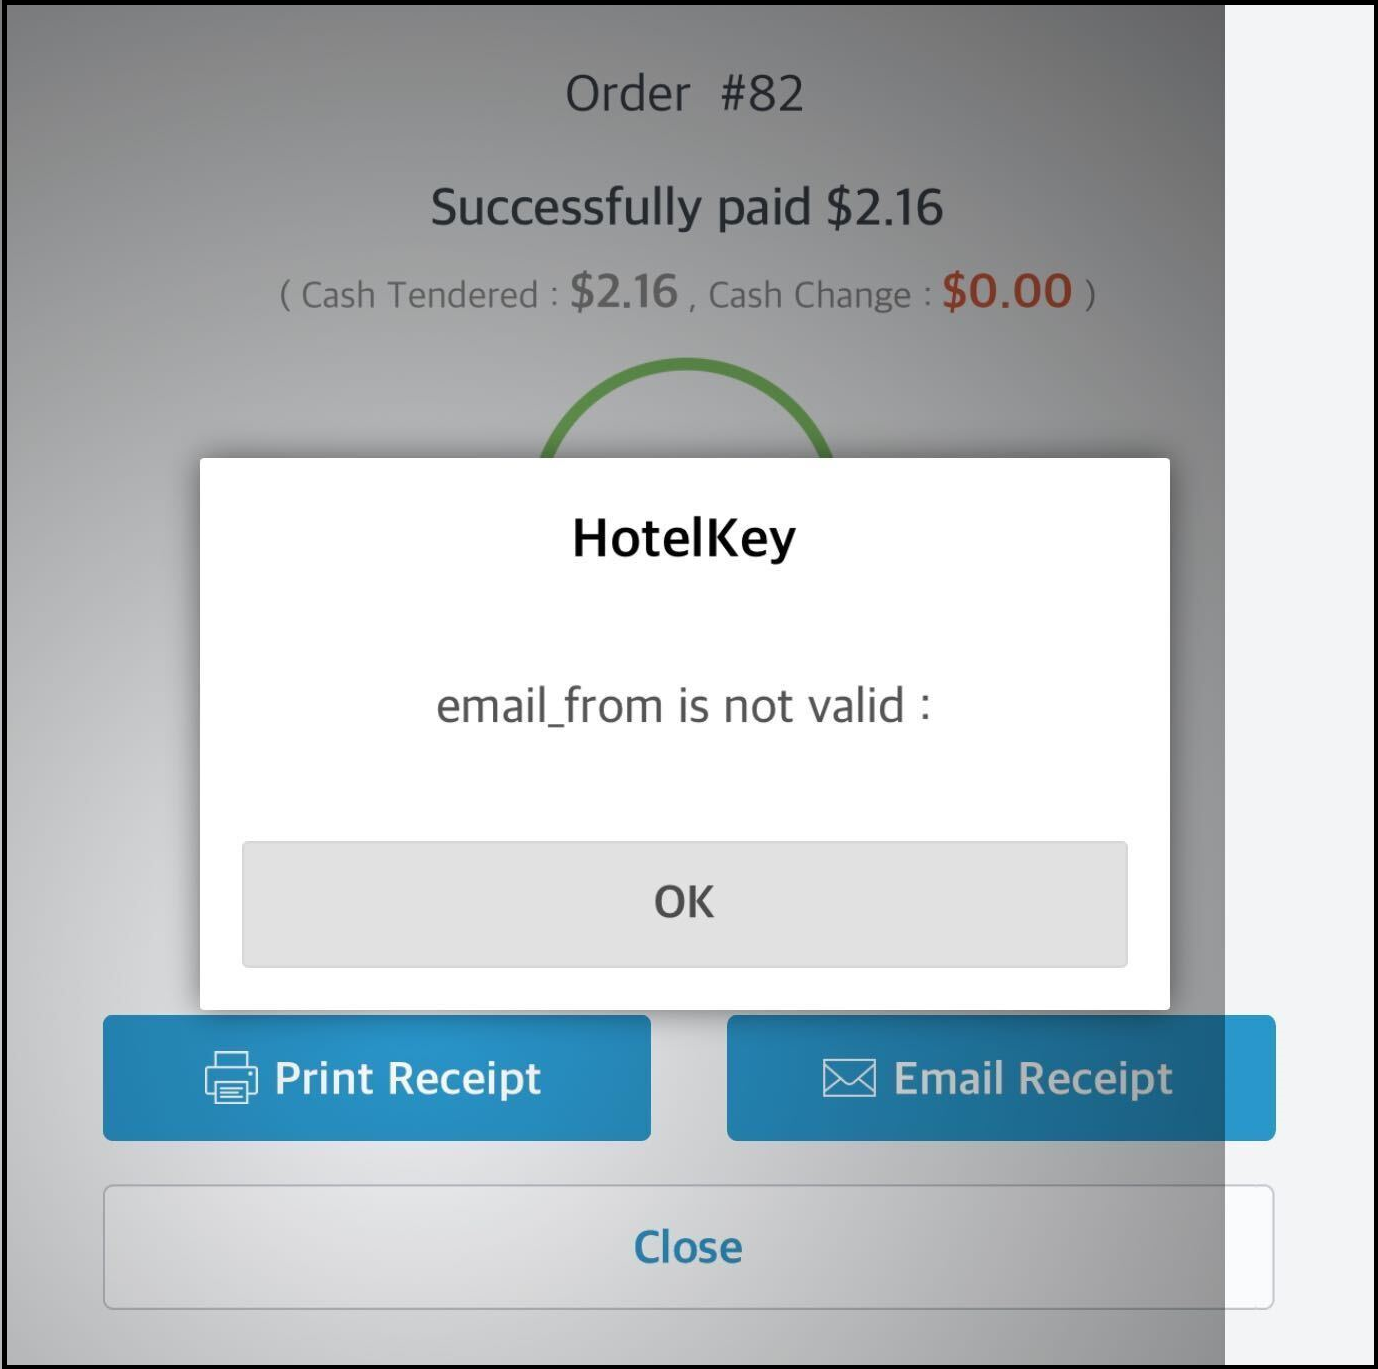
If the error shown at right is displayed when attempting to email a receipt, there’s a problem with the email return address for the property. Send a support request to support@hotelkeyapp.com with the message shown (“email_from is not valid : ") included in either the subject line or body of the email. |
|