
Enterprise Use and Build Guide
📆 Revision Date:
This guide is in place to explain how TrainKey works from both the client UI application (frontend) and administration view (development and creation of Tracks and Topics) for enterprises that use their own standalone HotelKey environment.
The overall goal of this document is to establish a baseline of knowledge of how different portions of TrainKey interact with each other and how they function inside of the HotelKey application itself.
TrainKey Basics and Definitions
Each environment and application has their own TrainKey segment. This means, as an example, TrainKey Tracks and Topics that are built in HK Frontdesk are only available inside the Frontdesk application and are not accessible when in the Rate Calendar or other non-Frontdesk applications.
Access and Use
To access TrainKey as an end user, log into your environment and select the application (Frontdesk, Companies & Direct Bill, etc.), then locate the TrainKey text and click on it. A list of Tracks will appear, and selecting one will populate the associated training Topics, select one and begin the walkthrough. A search box is also available for users to search by Topic name.
If a user has multiple Tracks available, the user will pick a Track, then a list of Topics will appear.
To access TrainKey as a creator, log into your environment, then select TrainKey and follow the steps outlined in the Building TrainKey items section.
TrainKey Administration View: Overview
1 | First, select a Client Application. This determines how the TrainKey items can be accessed. As an example, HK Frontdesk would show all Frontdesk-related items. The Client Application can be selected by selecting Configuration > App Selection. Alternatively, if you select a Track or Topic before selecting an application, you’ll be prompted to select a Client Application. |
2 | TrainKey is organized by Tracks (containers) and Topics (scenarios). |
3 | Tracks are containers that hold Topics. You’re able to name the Track (the name that users will see when they go to run it), give it a Code (only visible to TrainKey Creators) and see what Topics are included as part of this Track. Note: For all of the available options on a Topic, please refer to the Topics section of this document. User roles or permission roles can be assigned to a Track to limit which groups of users have specific Topics available to use. Likewise, Tracks can be allocated to specific properties by selecting the Applicable to Property button, then selecting properties by selecting Add Properties and adding the relevant properties. Tracks can also be aligned on a Country or Brand level by selecting the relevant toggle. |
4 | Topics are what drive TrainKey. They’re the scenarios that users are able to walk themselves through. Topics function as HotelKey’s self-paced training walkthroughs. Note: For all of the available options on a Topic, please refer to the Topics section of this document. |
Note: TrainKey is enterprise-wide, Tracks can be enabled on specific properties or by Brand, from the admin screen. What is most important to note, any editing of active Topics will reflect on all properties where the Topic is applied. If a Track and its associated Topics are active on all properties or all Brands, any editing of the Topics and/or Track will reflect on those specific properties/Brands. The Creator should be careful to remove the Topic from the Track or change the status of the Topic/Track to inactive while making updates or changes to the flow. Then return the Topic to Active status and/or add back to the Track for use. This process will allow for the least amount of disruption on the User end.
Tracks: Building
1 | Tracks are the selectable walkthrough packages that a user can select. Tracks can contain one or many Topics. |
2 | Access can be assigned at the Track level based on user role. |
3 | Access can also be assigned at the property level. As a best practice, have standard processes defined and aligned to a single Track. If certain properties differ from the norm (e.g., using and returning keycards is a standard practice, but some places use a keypad and keycode system, so they need to confirm checkout and then change the code), separate Tracks should be created. The Track Names should be the same for the best UX, but the Track Codes should differentiate between the Topic types (e.g., Frontdesk (standard), Frontdesk (physical key), Frontdesk (passcode), etc.) |
4 | In the Track list, all Tracks for the selected application can be viewed. Selecting a Track will open it to show its details. At the bottom of the Track is the Topic list that contains the Topics that are aligned to that Track. |
5 | A Topic can be added to a Track by clicking the + icon and then selecting the relevant Topic from the list.; 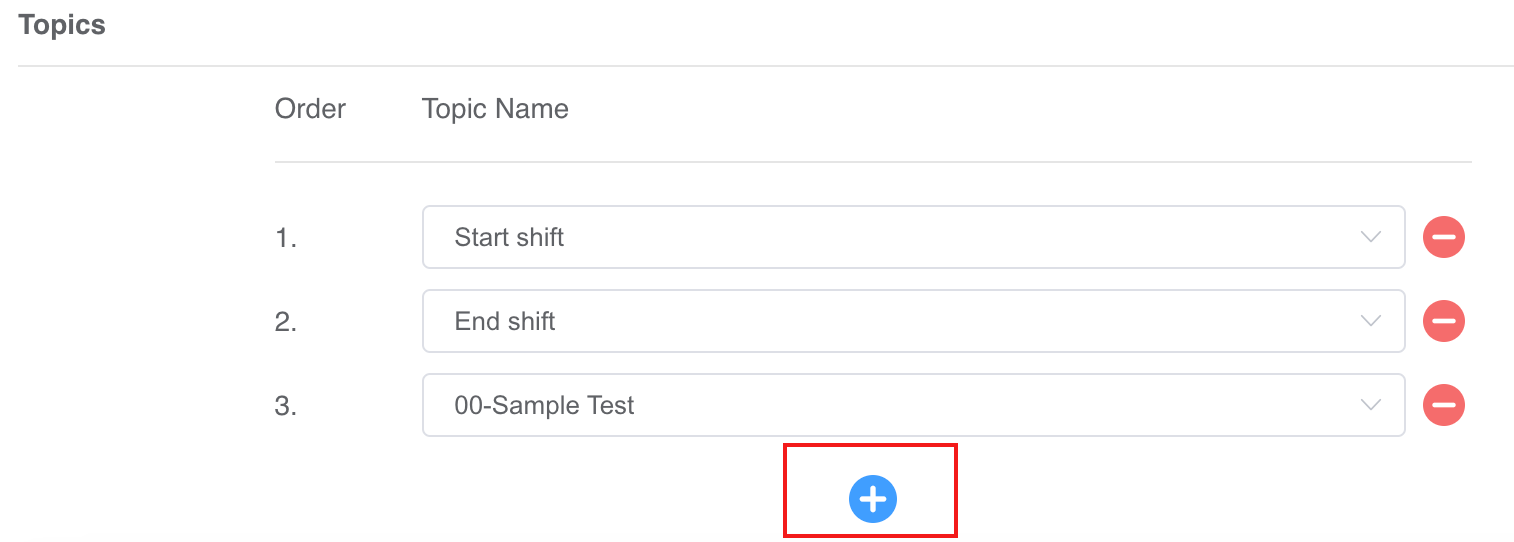 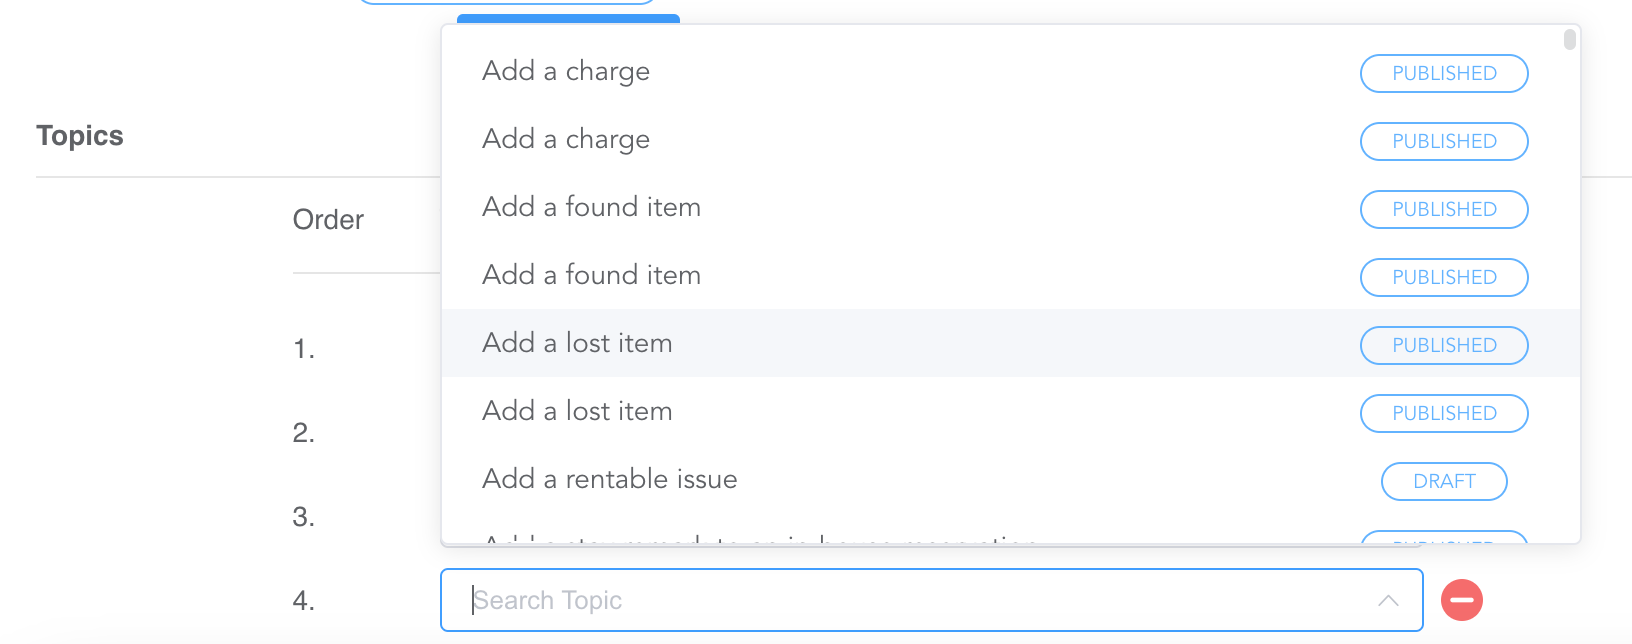 |
6 | The Topics in that list can be reordered by dragging and dropping between their placement number and the Topic name. 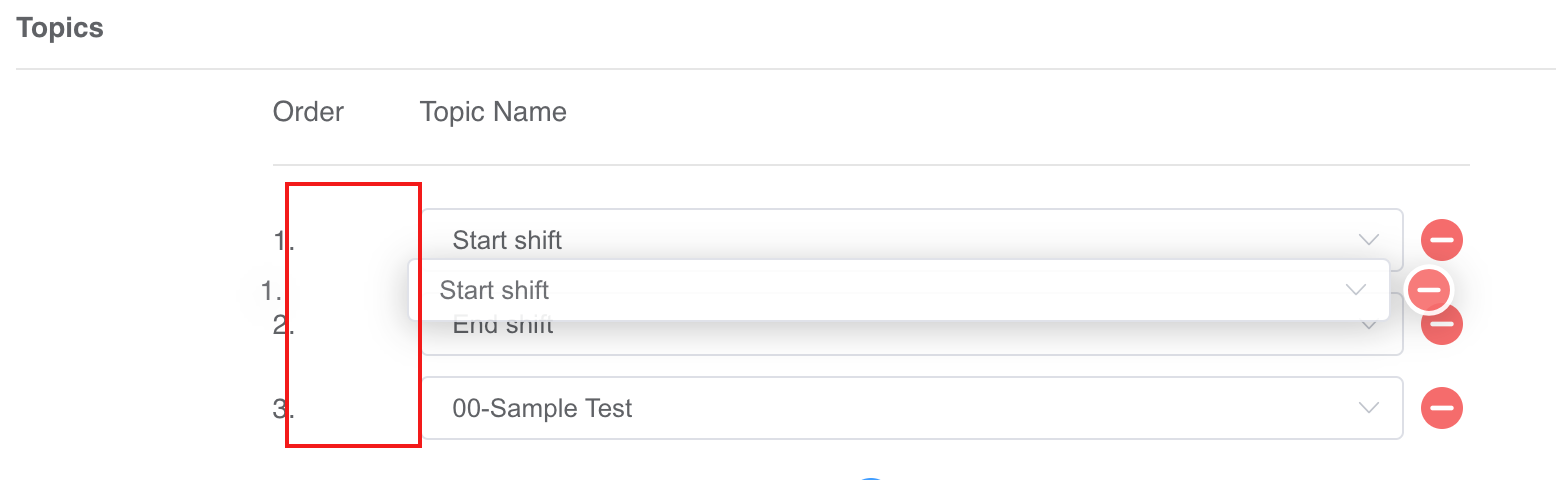 |
Topics (Administration View Setup)
1 | The Topic Name is the display name of the Topic that users will see. The Topic Code acts as a unique identifier for the individual Topic. Why do we have both? Different properties may have different processes or different requirements, but we want their look and feel to be consistent from a UX perspective. If the process to book a room varies from one property to another, we want the UX to be seamless between properties, even if processes vary. So, we’ll keep the Topic Name as Book a room. But, on the administration view, we’ll add a unique identifier for property-specific items as Topic Codes, like (Base) Book a room for baseline process or (Property Name) Book a room for a property-specific process or (Physical key) Book a room or (Keypad entry) Book a room for process-specific distinctions. |
2 | State can be Draft or Published. Users who are non-TrainKey admins will only see Published Topics on the UI. Note: This is largely an organizational preference on using Draft or Published to dictate what’s currently being worked on and what’s been vetted and approved. As a good practice, when a Topic is being created, keep it in a Draft state until all steps and verbiage has been completed, then move to Published. |
3 | A Topic should always be marked as Active, unless it’s no longer in use. |
4 | If needed, Notes can be added to explain what the Topic is for or a use case for a specific process. These Notes are only accessible on the administration view of the system; regular UI users will not see these Notes. |
5 | Once a new Topic is created, select Save. Then, go to Tracks and select the Track that the new Topic will be visible in. Add the Topic to the Track, then click Save. |
Topics (UI Creation After Administration Setup)
1 | After a new Topic is loaded onto a Track, select Home and then select a property . Note: Generally speaking, the property selection only matters if processes and screens are set up differently from one property to another. Example: If Property X follows the same process as Property Y and Z, creating a Topic on Property X will work for Properties X, Y and Z. |
2 | Select the appropriate application to open the UI. In this example, we’ll use Frontdesk:  |
3 | Select TrainKey: 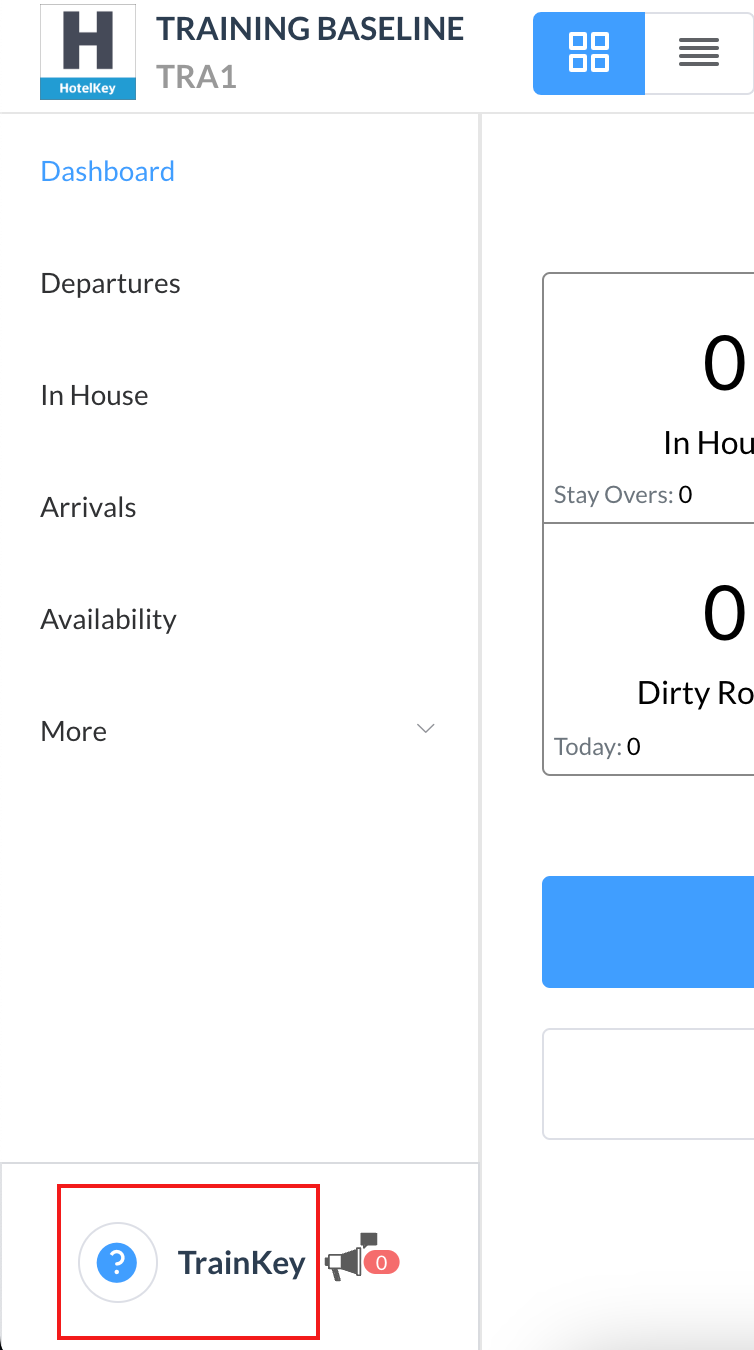 |
4 | Ensure Show TrainKey Designer is enabled: 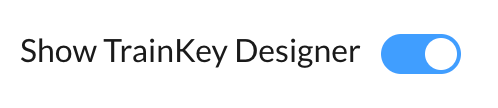 |
5 | Select a Track to view its Topics. 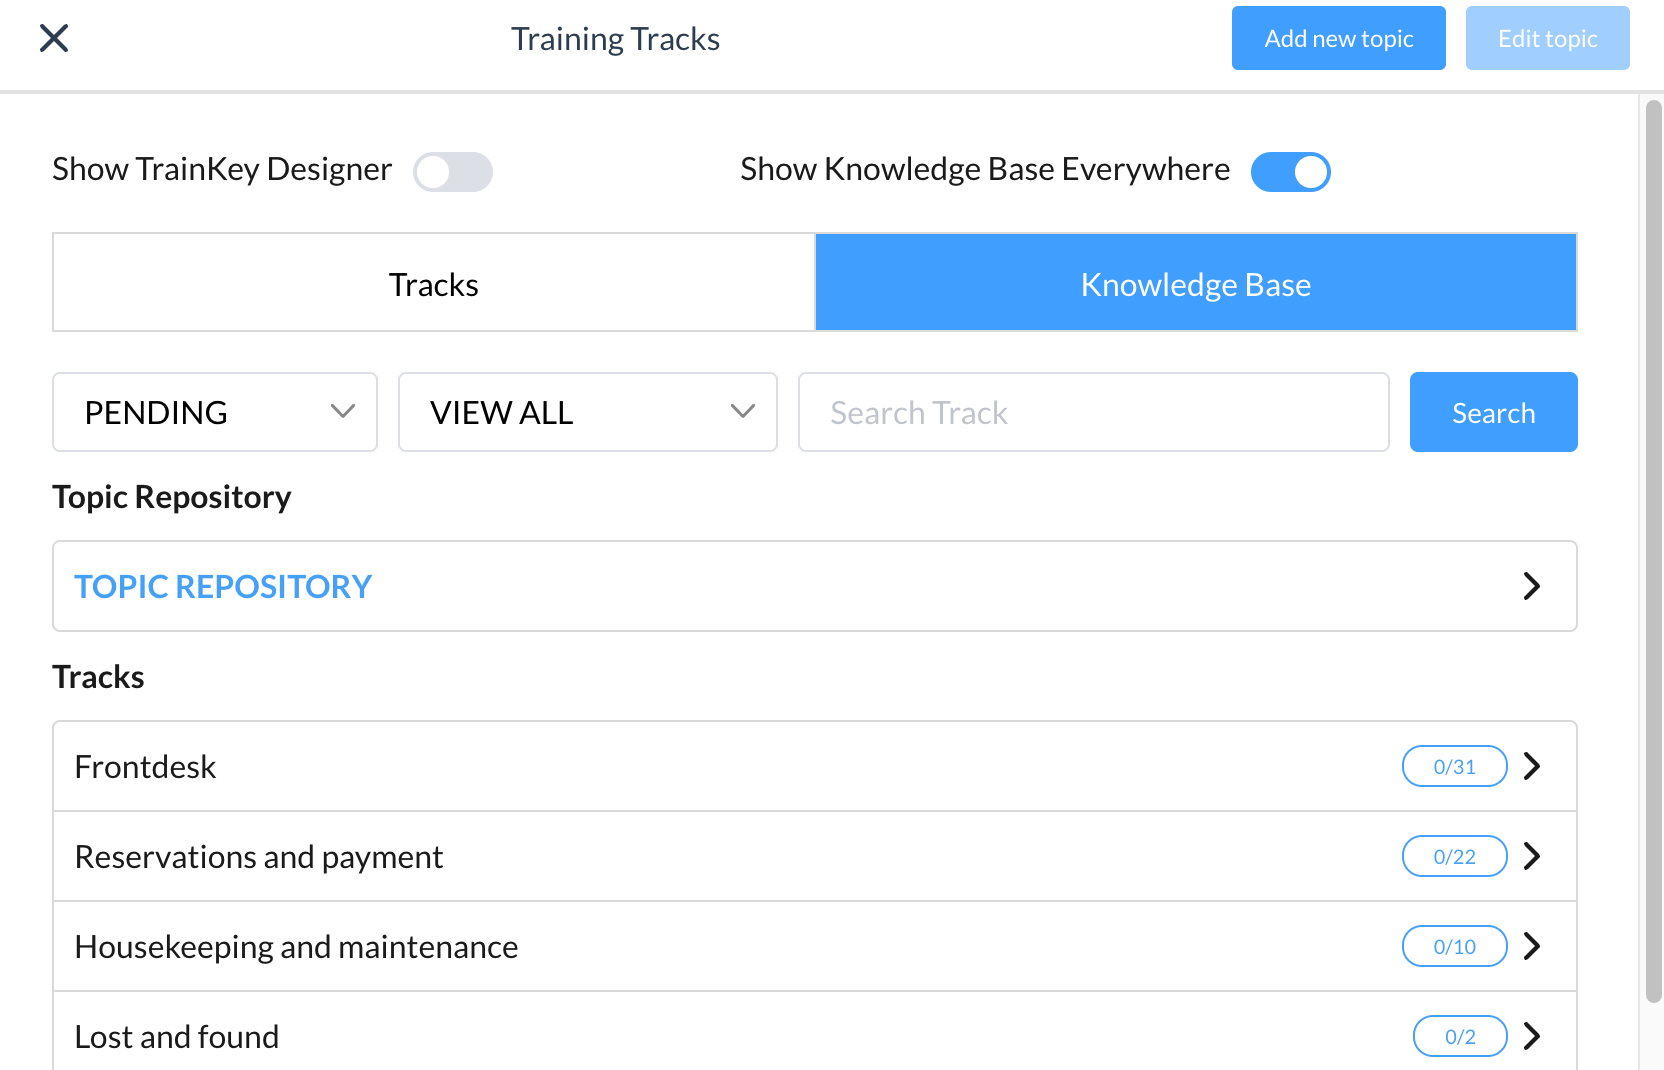 Note: If there is only a single Track for an application, the Topic list will be displayed instead of the Track list. |
6 | Select a Topic to open the TrainKey walkthrough: 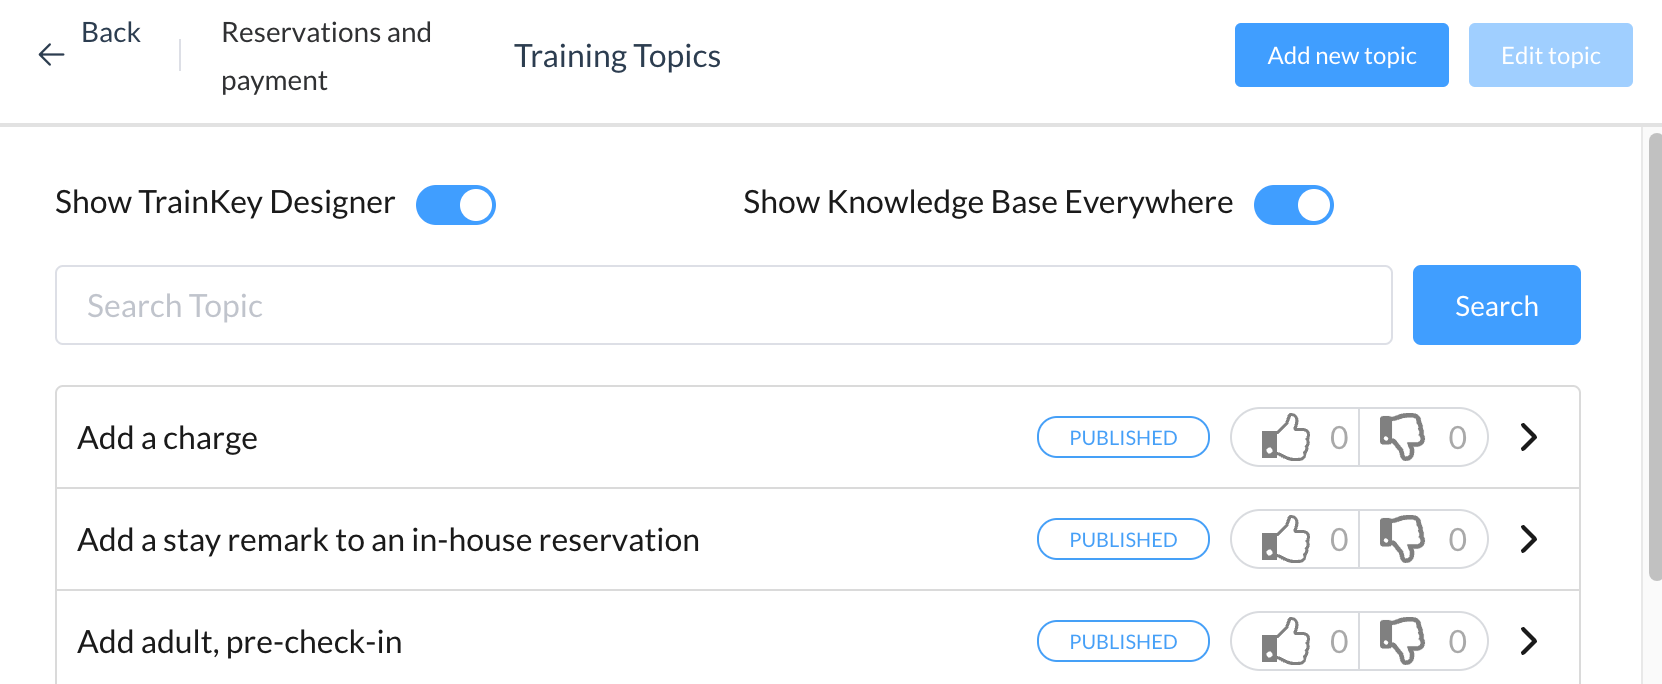 |
7 | Hover the cursor over the section or field that you want users to select. After a moment, the label name and an Add to Topic button will appear. Click or tap on Add to Topic, then click or tap on the section or field to continue the process. 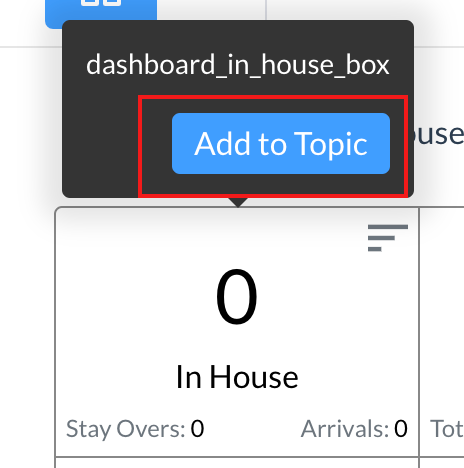 |
8 | Continue Adding to Topic until all of the steps are complete for the process. |
9 | Click the TrainKey Designer icon at the bottom-right of the screen to open the designer: 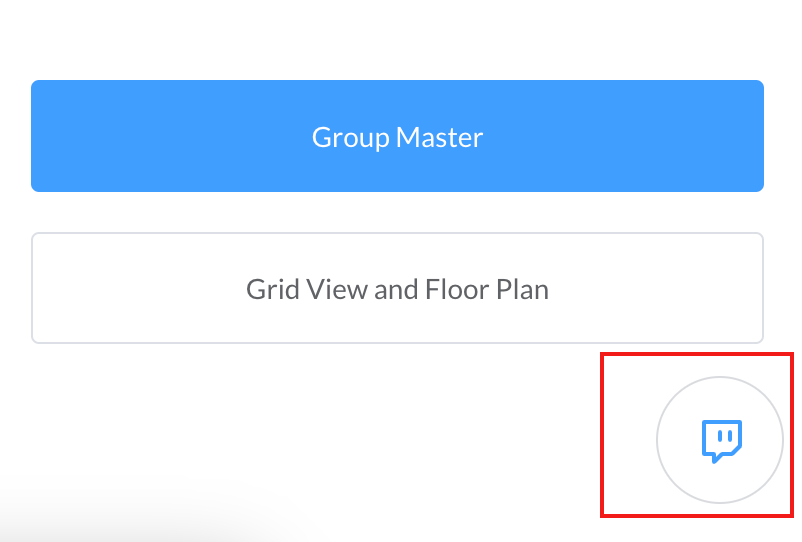 |
10 | In each step, you’re able to enter text that will guide users through the process. 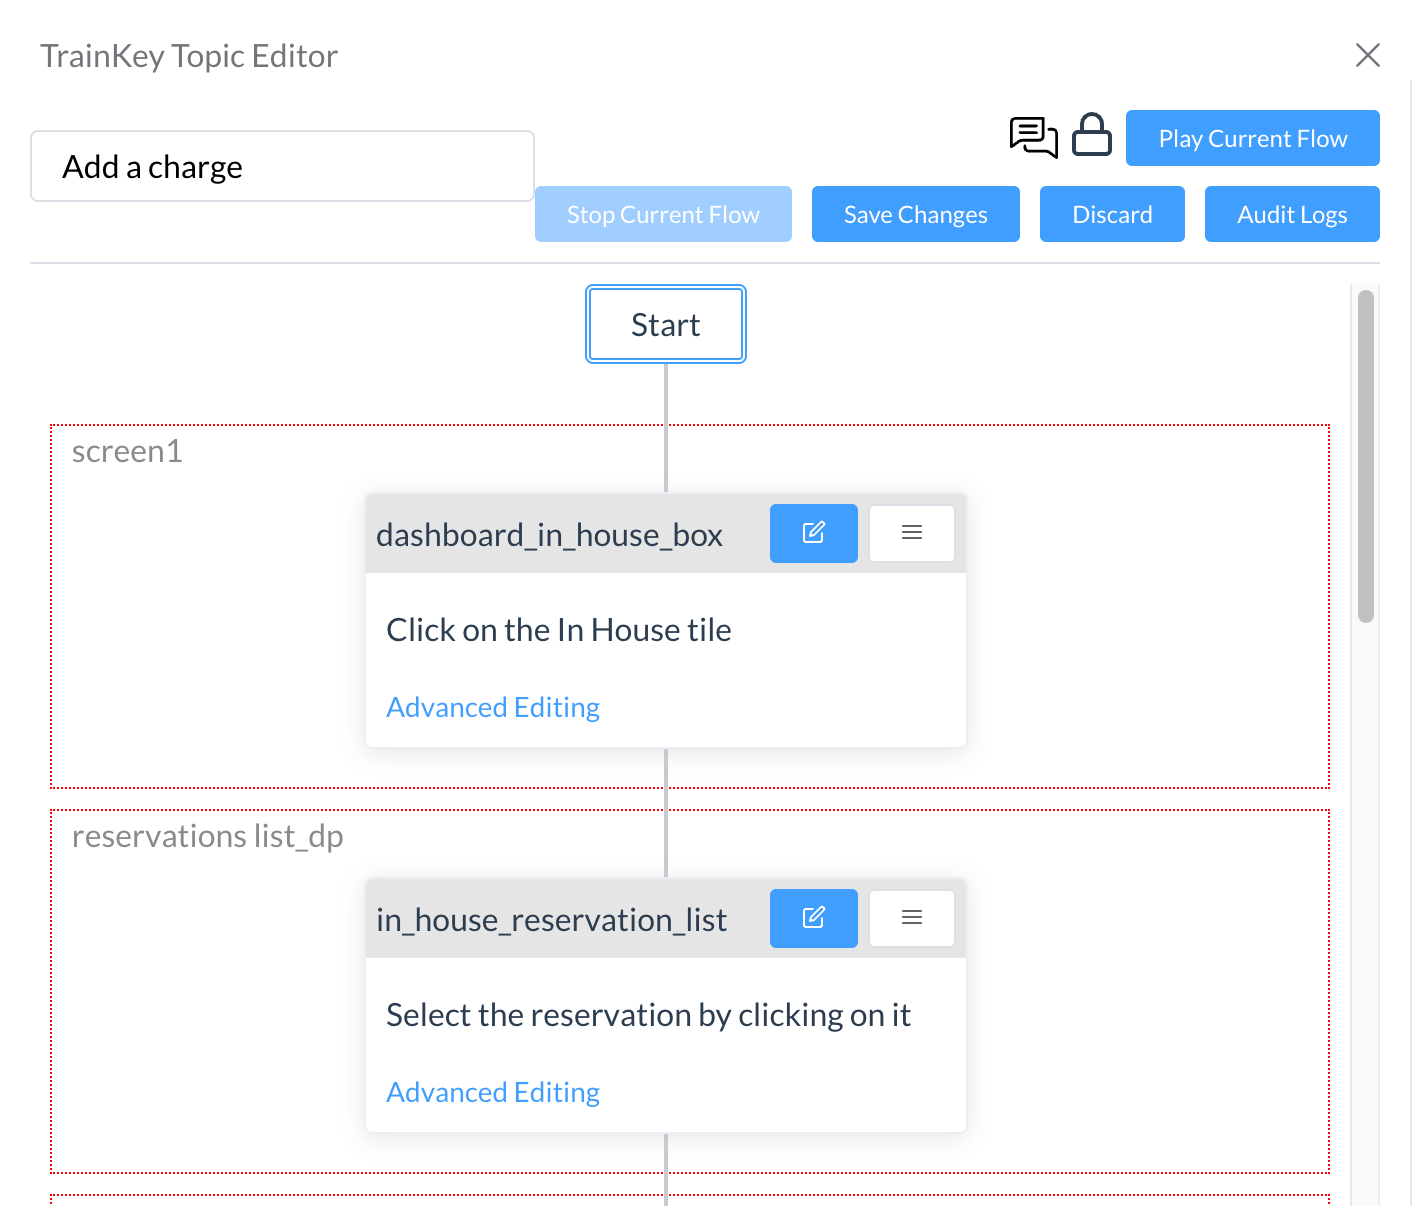 |
11 | Clicking the Edit button will unlock the basic text editor: 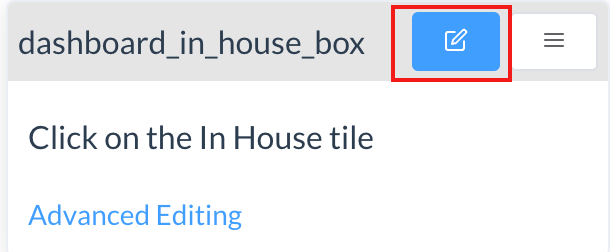 |
12 | When you’re finished with the walkthrough steps, click Save. 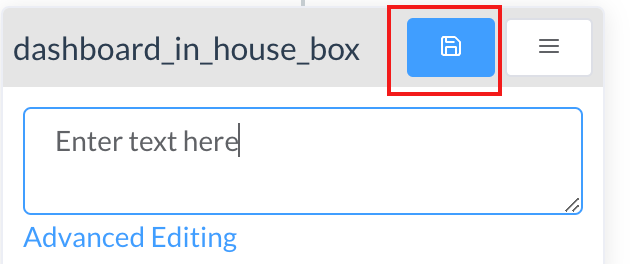 |
13 | Continue adding walkthrough text throughout the process. When you’re finished, click the Save Changes button to save your work. 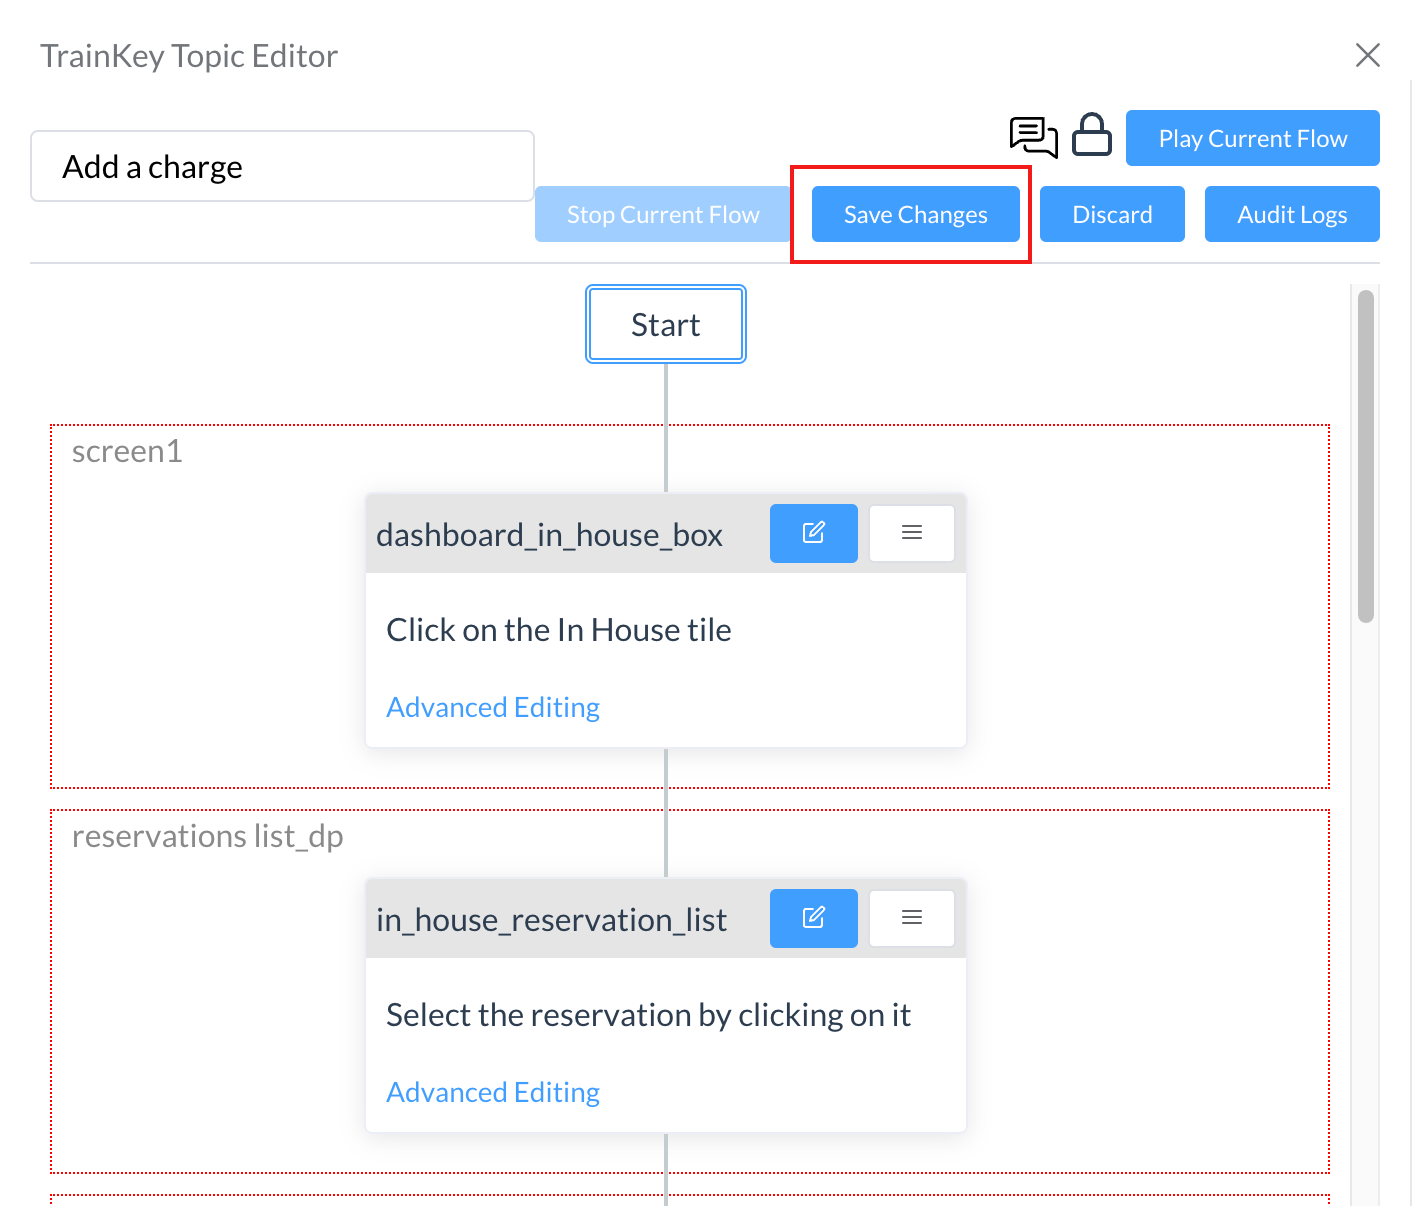 |
Advanced Topic Editing
1 | There is also an Advanced Editing button available to easily add formatting, images, etc. to the steps: 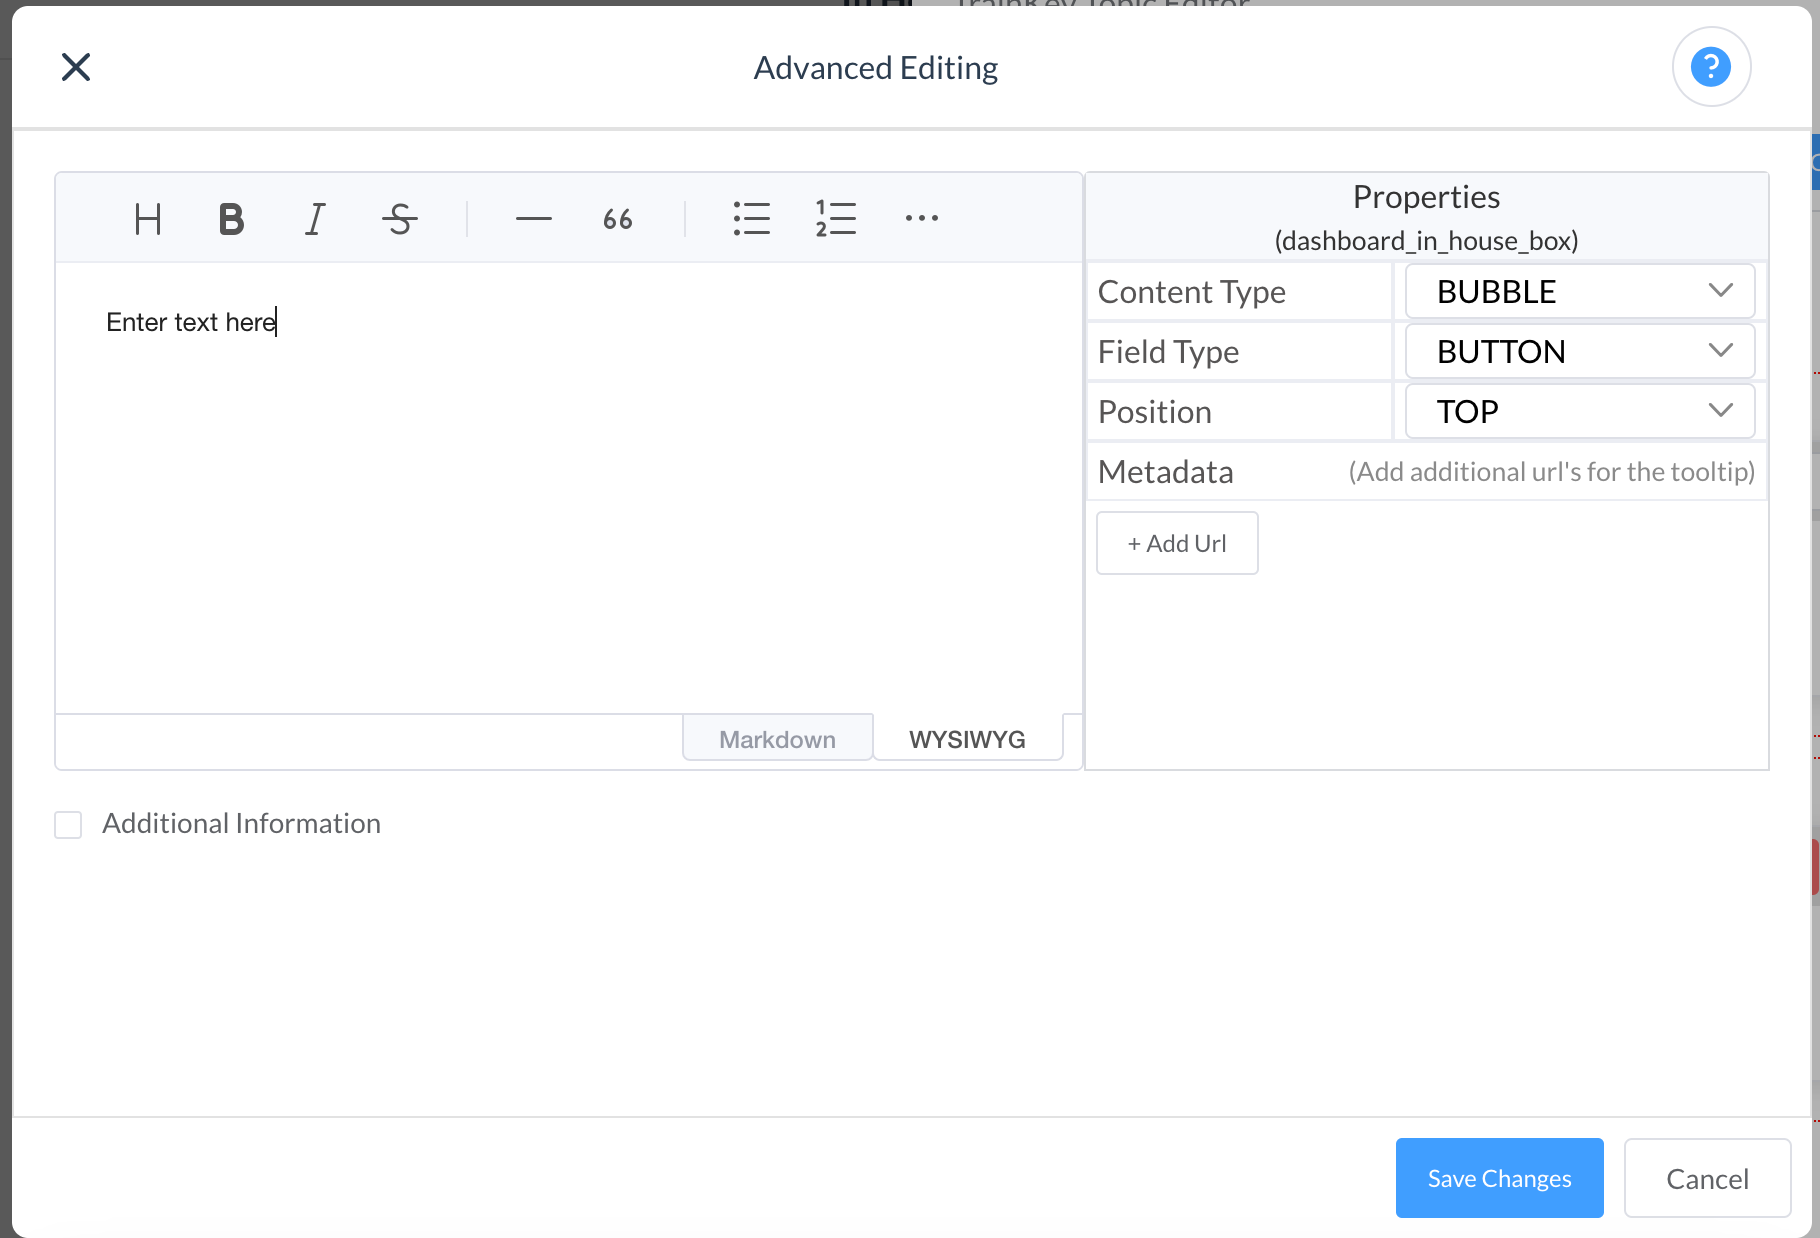 |
2 | The Markdown section allows HTML code to be used, just like in the default editor. The WYSIWYG (what you see is what you get)editor functions like a word processor, where you can select different styles to be applied without any knowledge of code. |
3 | Under Properties, there are three settings that control the popup behavior: Content Type: Informative setting that doesn’t alter functionality. Bubble (default) Field Type: Button (default behavior): Clicking or tapping on this item automatically moves to the next step in the process. Textbox: This generates a NEXT button on the pop-up. The step persists on-screen until the NEXT button is clicked or tapped. Position: This adjusts the placement of the pop-up window that contains the instructions. |
4 | Selecting Additional Information will expand the Advanced Editing window and show new options for alert messages: BAR: This is display a bar at the bottom of the screen with the message Show before: The alert will show before the walkthrough text appears Show after: The alert will show after the walkthrough text appears 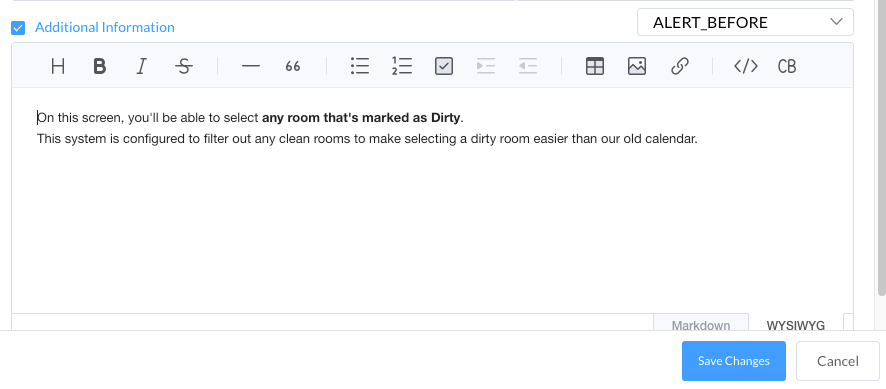 |
5 | An alert displays on a walkthrough like the below screenshot:  |
Notifications
1 | On the client UI application, there is a megaphone icon next to TrainKey. Clicking that icon will open Notifications. Notifications are a great place to populate process reminders or upcoming events for your team: 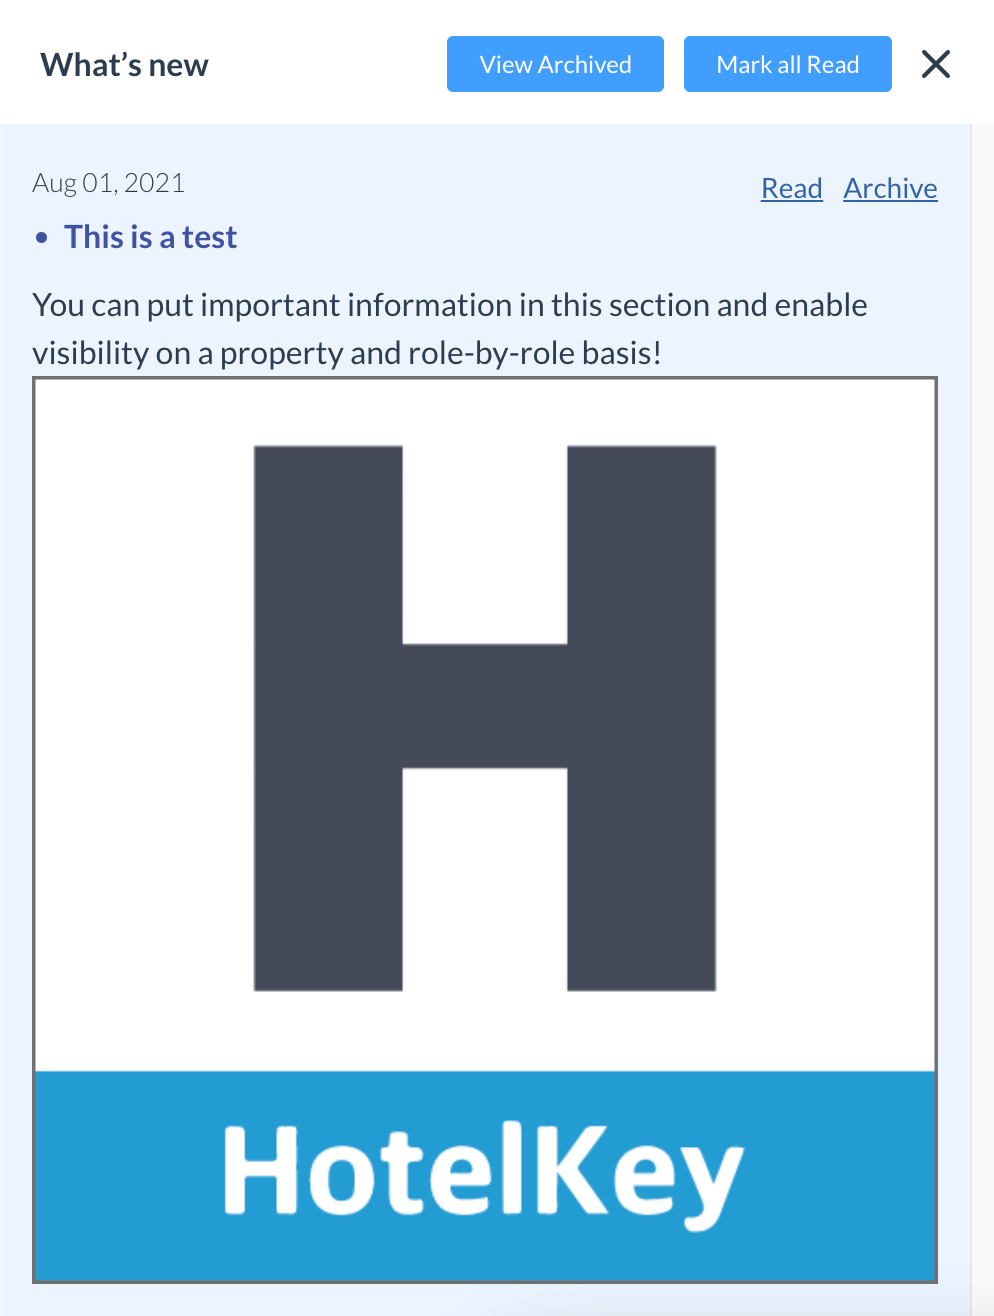 |
2 | The top notification is the newest Notification. Clicking Read will mark the notification as Read. Any existing notifications that haven’t been archived will be shown here, as well. |
3 | Creating Notifications is very similar to creating a Topic. Switch to the administrator view, open TrainKey, then select Notifications. |
4 | Click New, then give our Notification a Title. It’s important to note that if a Notification is in a Draft state, it will not be displayed. It needs to be published in order for it to be viewed. You can select a date for this Notification to be published, as well as expired. Just like for the Tracks, we’ll be able to select the roles that can see these Notifications, and we can also select which properties see the notification by selecting an entire country, brand or just specific properties. We can give the alert a color by selecting one from the color picker. This will alter the color of the title when users view it from the client UI application. Finally, enter the content of the Notification. We can also include images or external links in the builder 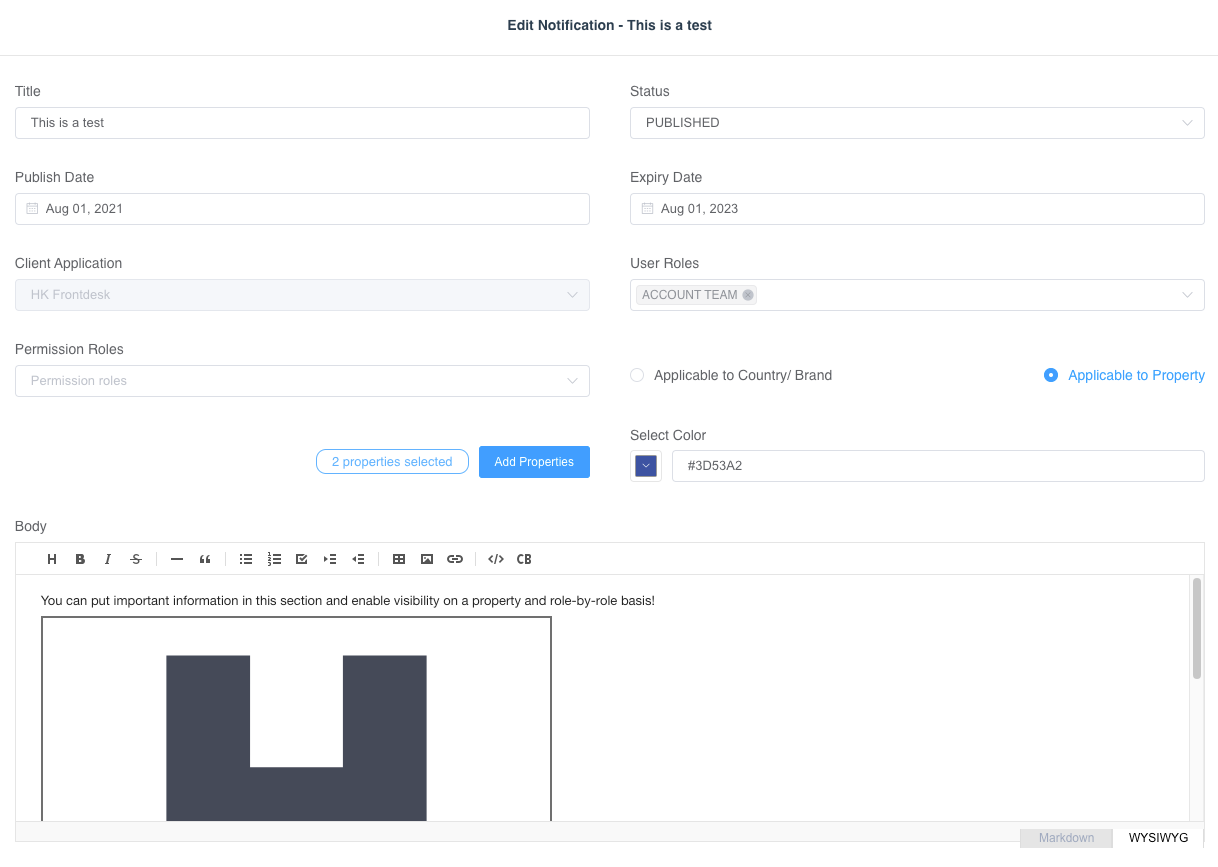 |
5 | When the Notification is finished, click Save. |
6 | The Notification will then be visible on the properties that were selected and for the roles that were selected. |