
📆 Revision Date:
Here, we can follow the process of a Direct Billed Invoice from its beginning to the end - receipt of payment and closure of the outstanding invoice on the account.
|
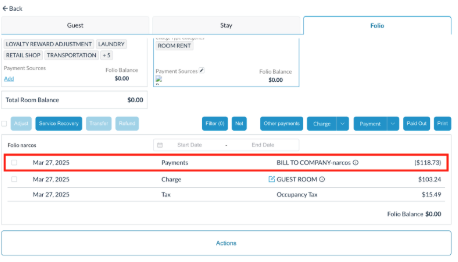
The life cycle of a Direct Bill begins within the reservation process. When a folio is designated for Direct Bill and assigned to a company, the corresponding folio (invoice) is linked to the company's account and processed through the Companies and Direct Bill platform in HotelKey |
|
|
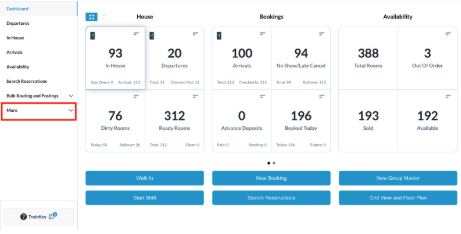
To access Companies and Direct Bill from the Front Desk Dashboard, click on the "More" dropdown menu located on the left side of the screen. |
|
|
From the dropdown, scroll to the bottom to select Local Companies. Once selected, a separate window will open with the Companies and Direct Bill platform. |
|
|
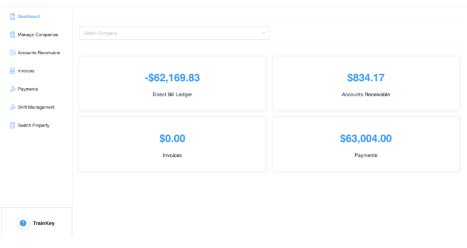
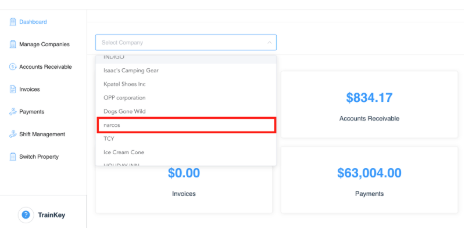
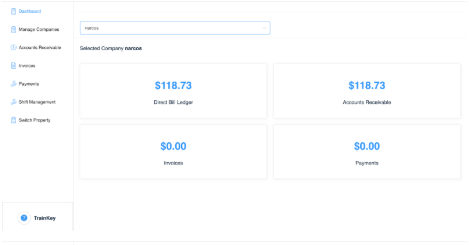
The Companies and Direct Bill dashboard provides an overview of all direct bill accounts, including the total balance across all accounts. To view details for a specific company, use the dropdown menu at the top and select the desired company. |
|
|
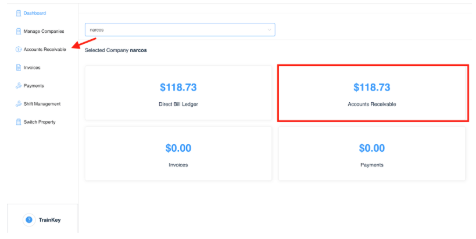
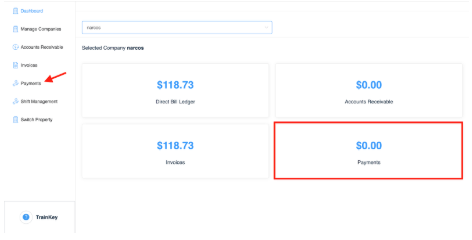
All direct-billed folios (invoices) are initially stored in the Accounts Receivable section of the platform. From this section, invoices (statements) must be generated and sent to the respective companies. In this example, the company Norcos currently has an outstanding balance in Accounts Receivable. The Direct Bill Ledger represents the total balance of Accounts Receivable, plus any outstanding invoices, minus any payments received. To generate an invoice, navigate to the Accounts Receivable section by selecting the corresponding tile or choosing Accounts Receivable from the left-hand menu. |
|
|
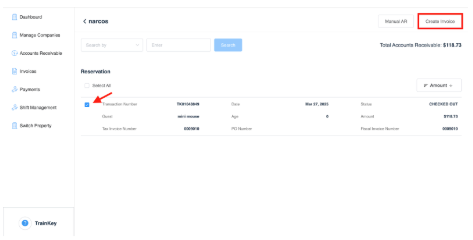
From the Accounts Receivable screen, select the folio (invoice) for which you would like to generate a statement by checking the box to the left of the reservation. Then, click Create Invoice.
|
|
|
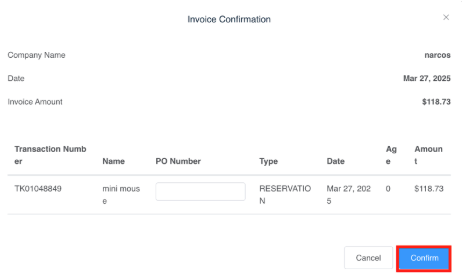
An Invoice Confirmation page loads, where you may enter a PO number, if applicable. Once all details are verified, select Confirm to proceed.
|
|
|
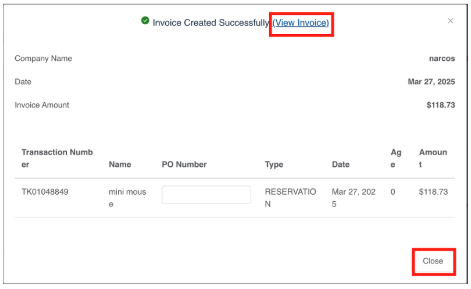
After confirmation, you will have the option to view the generated invoice or close the window. In this example, we will select Close. |
|
|
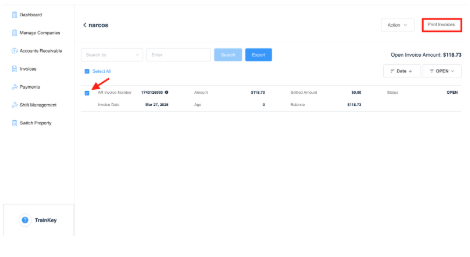
From the Dashboard, the previously recorded amount in Accounts Receivable will now be reflected in the Invoice section. To print an invoice, navigate to the Invoice section by either selecting the corresponding tile or choosing Invoice from the left-hand menu. Next, check the box to the left of the invoice (statement) you wish to print and click Print.
|
|
|
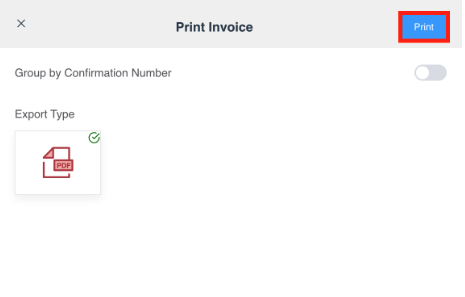
The Print Invoice page will load, allowing you to generate a printable invoice (statement) by selecting the Print button. |
|
|
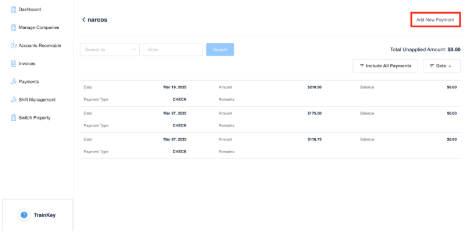
The final stage in the Direct Bill Life Cycle is receiving and processing payment from the respective company. Once you have received payment, from the Dashboard, navigate to the Payment section by either selecting the corresponding tile or choosing Payment from the left-hand menu.
|
|
|
From the Invoice page, select Add New Payment. |
|
|
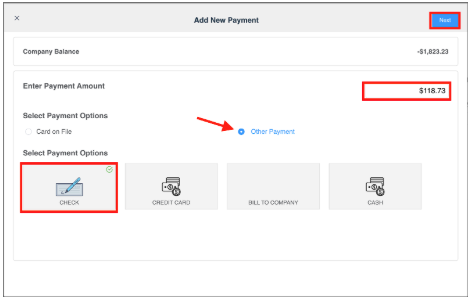
In the Add New Payment screen, enter the payment amount received and select the appropriate payment source.
A Confirmation Page will then load, requiring a check number. Enter the check number and select Confirm to proceed.
|

|
|
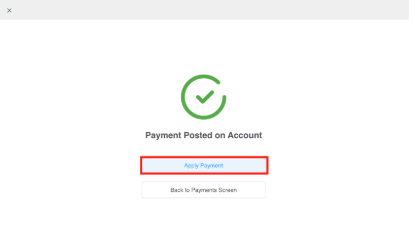
Once confirmed, the Payment Posted to Account page will appear. From this screen, you may choose to Apply Payment or return to the Payments screen.
|
|
|
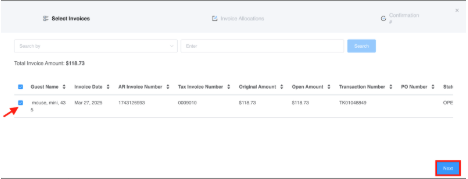
When the Select Invoices page loads, choose the appropriate invoice (statement) by checking the box to the left of the invoice, then select Next.
|
|
|
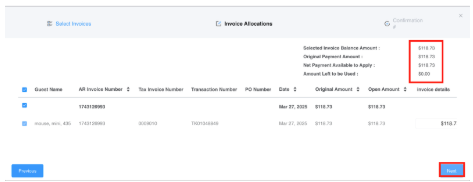
The Invoice Allocations page loads, allowing you to review the allocation details. If the information is accurate, proceed by selecting Next. |
|
|
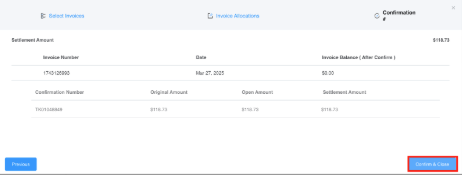
A Confirmation page will then load.
Click Confirm and Close to finalize the process.
|
|
|
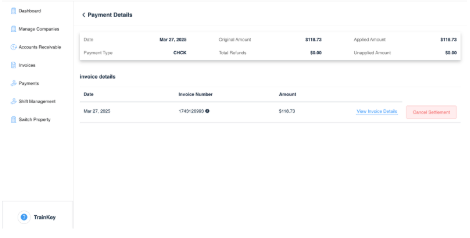
The Payment Details screen will display, providing a summary of the invoice payment.
This step marks the completion of the Direct Bill Life Cycle. |
|