
📆 Revision Date:
Note that pantry returns may be called “menu” or “market” returns at some properties.
|
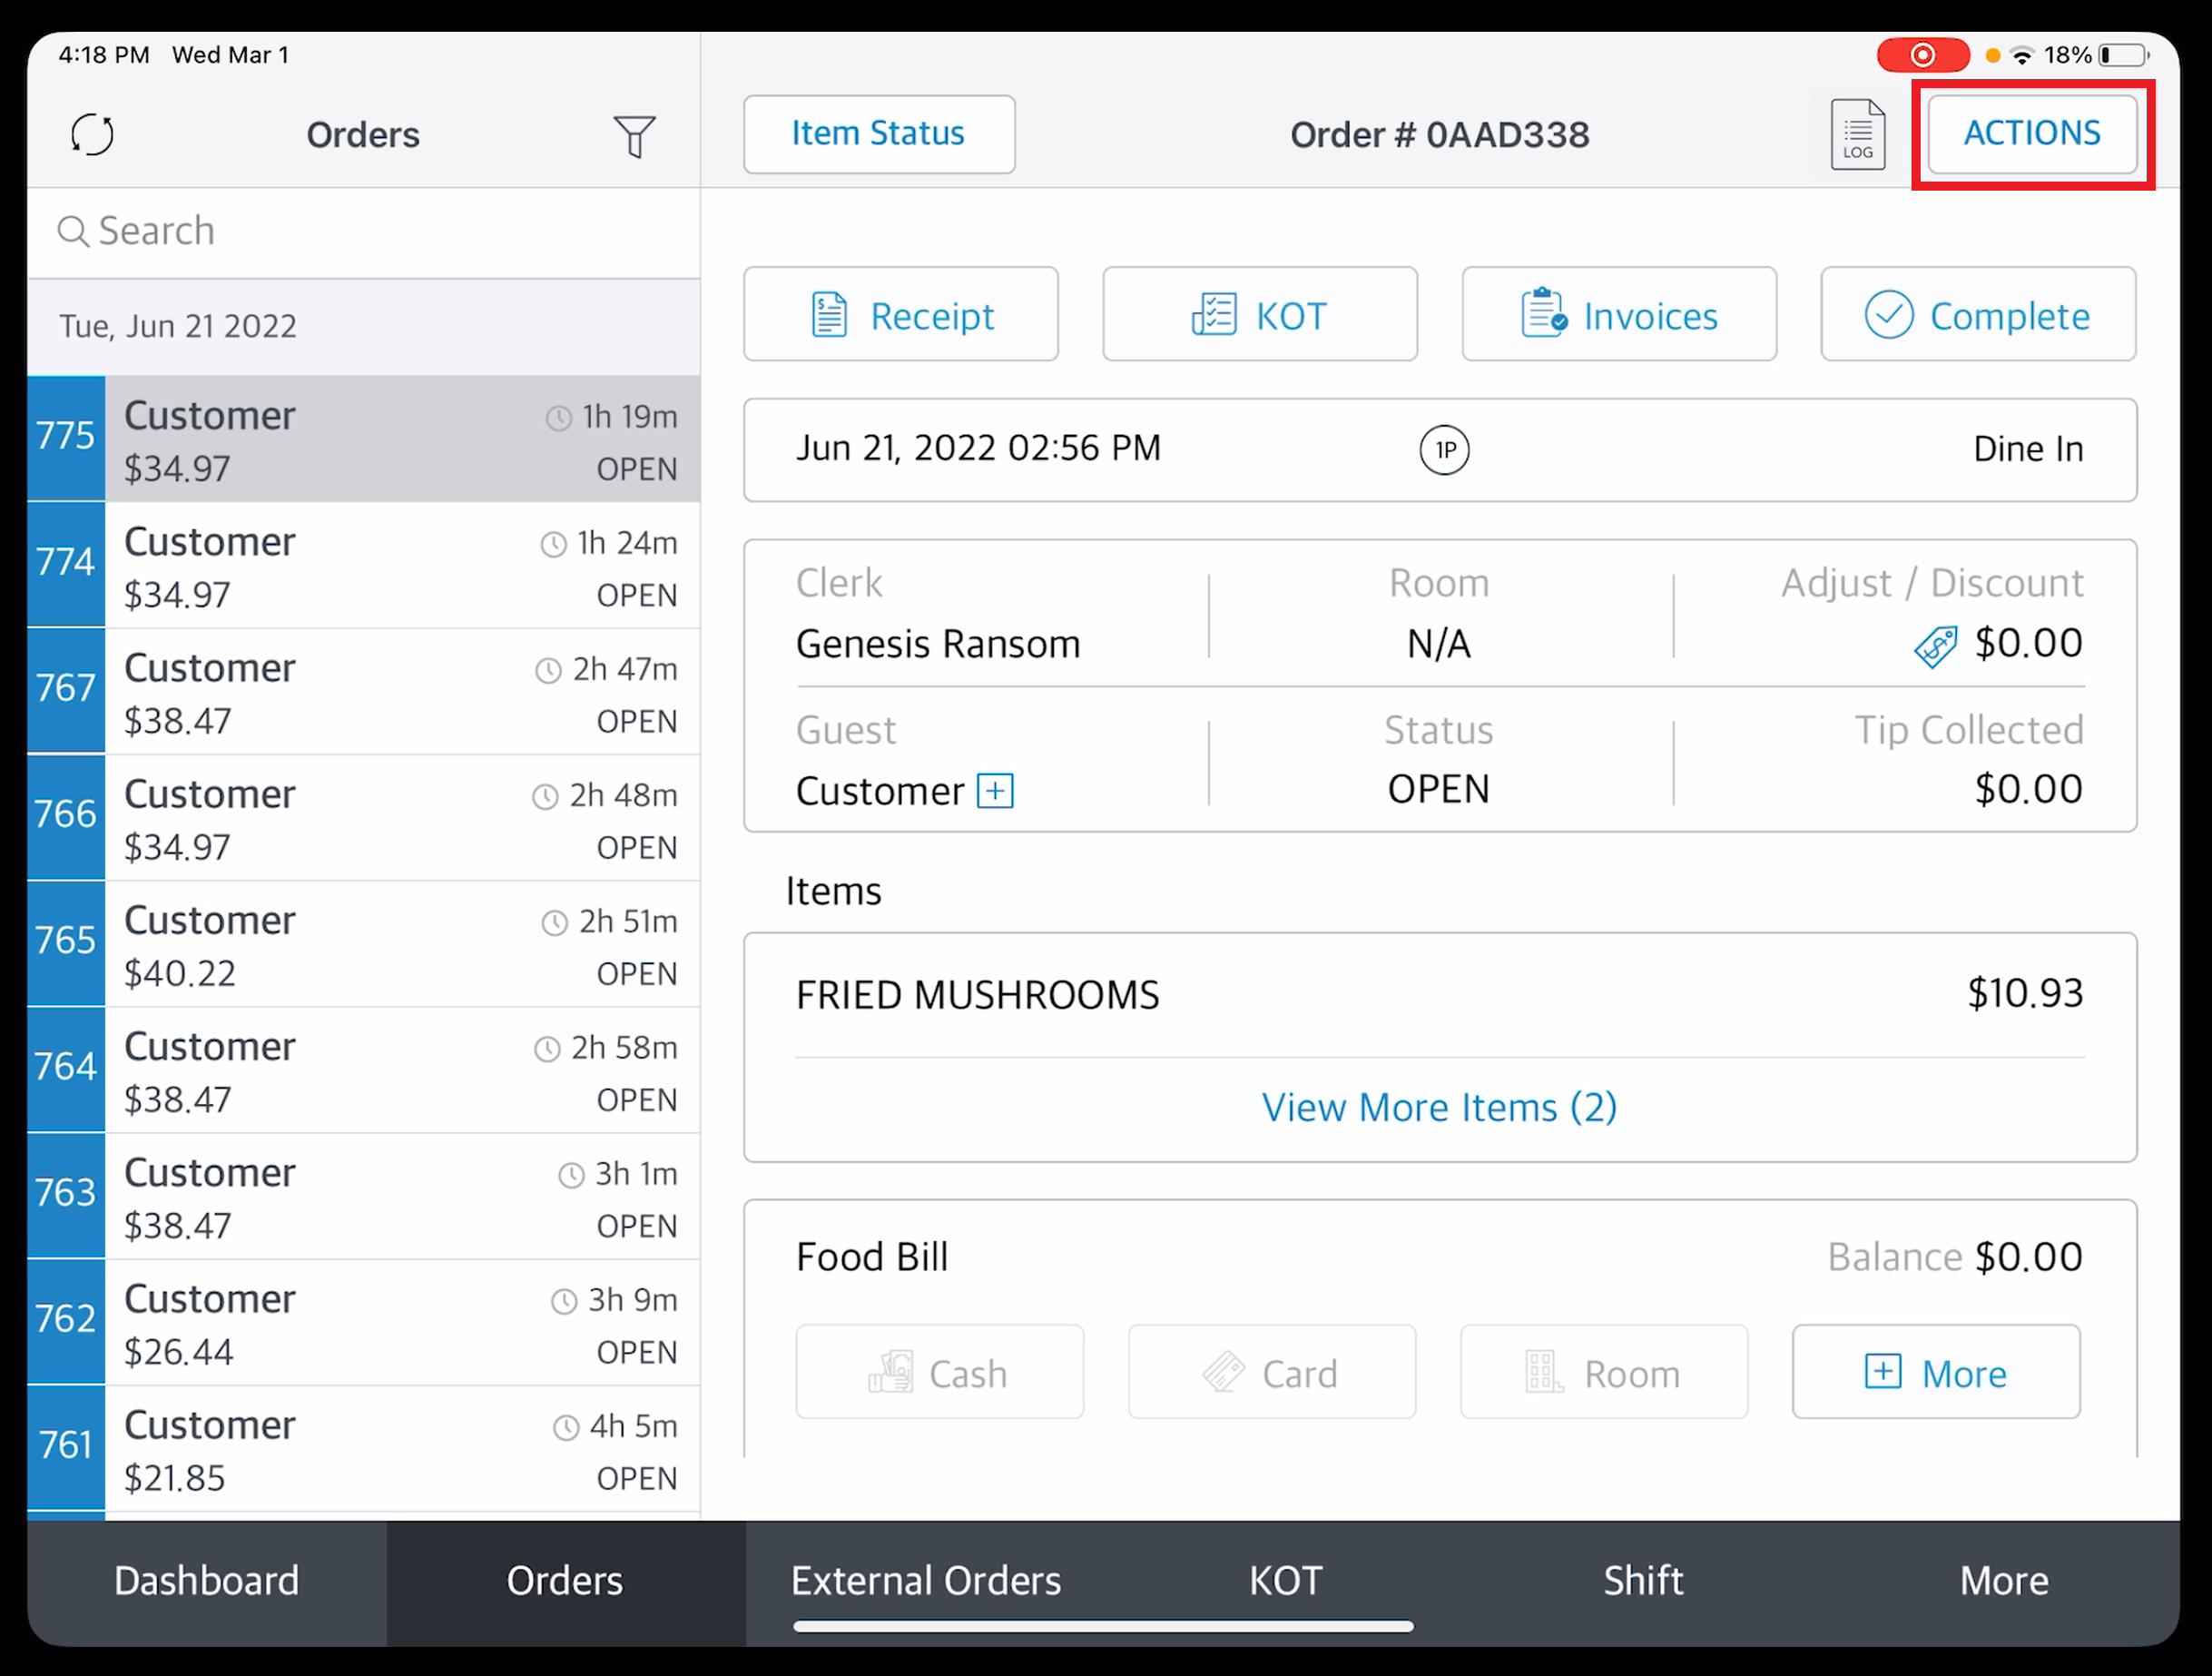
Navigate to the order where a return is needed and select the ACTIONS menu link. |
|
|
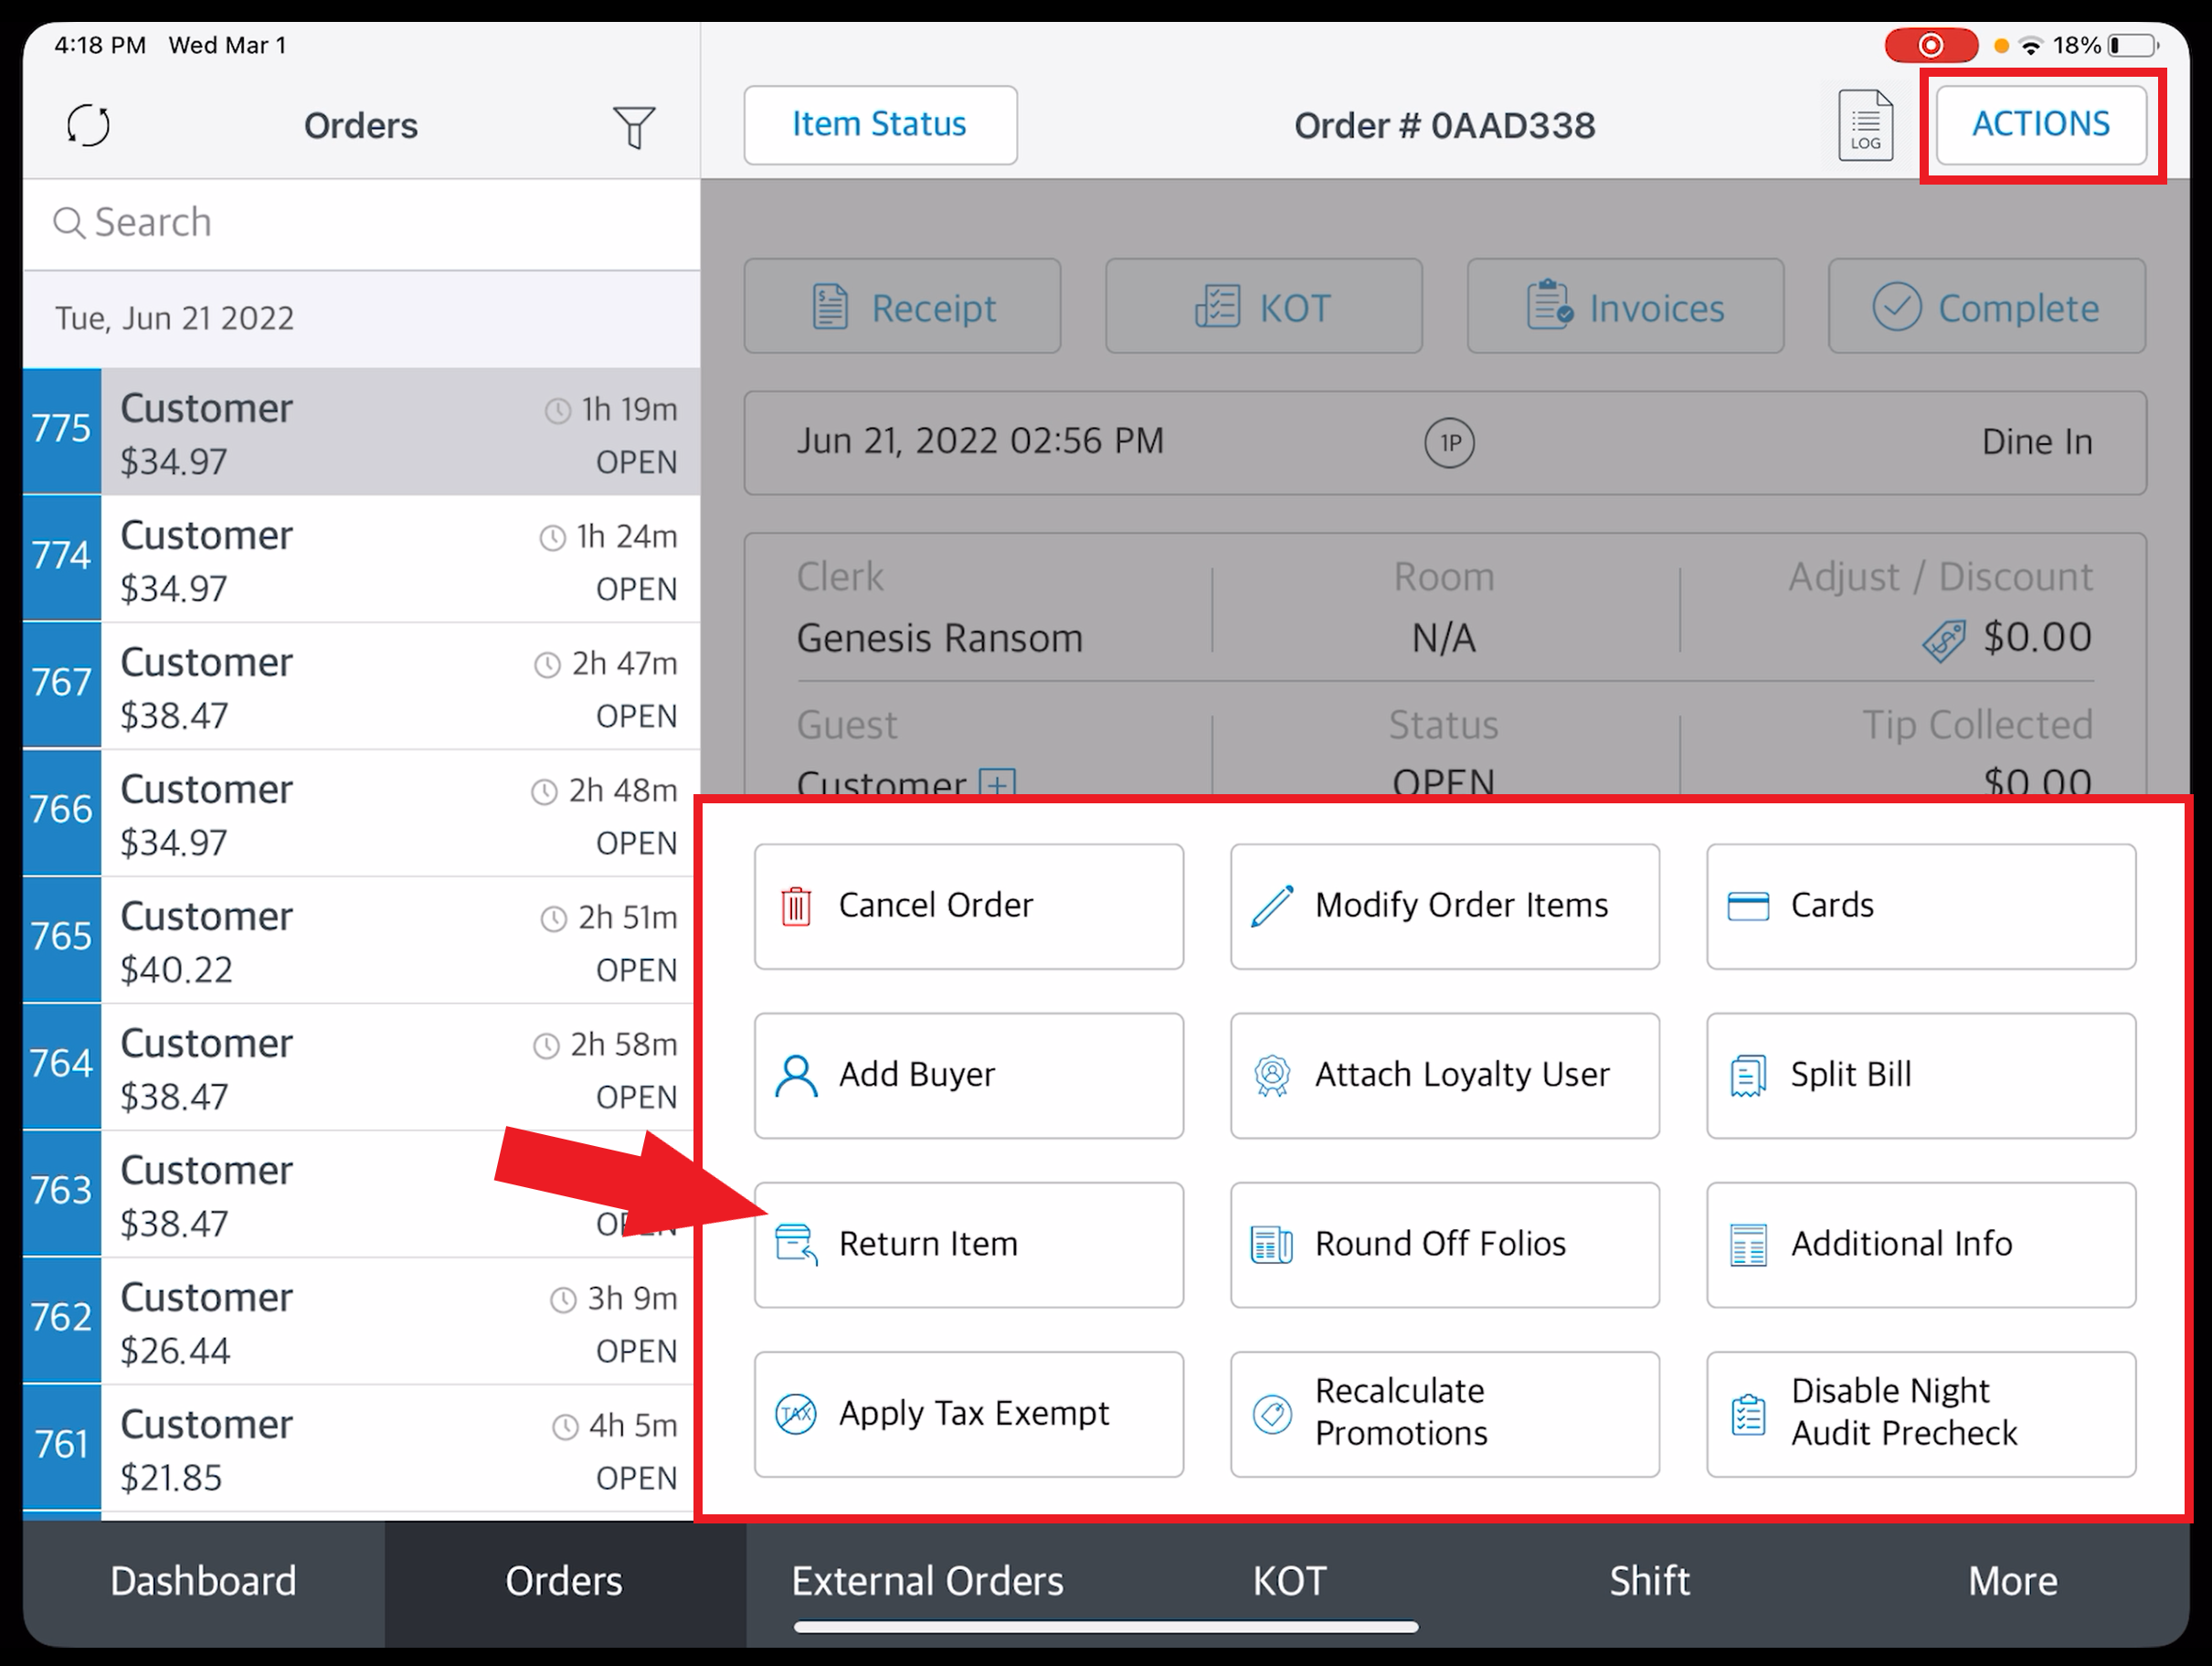
The ACTIONS menu expands. Select Return Item. |
|
|
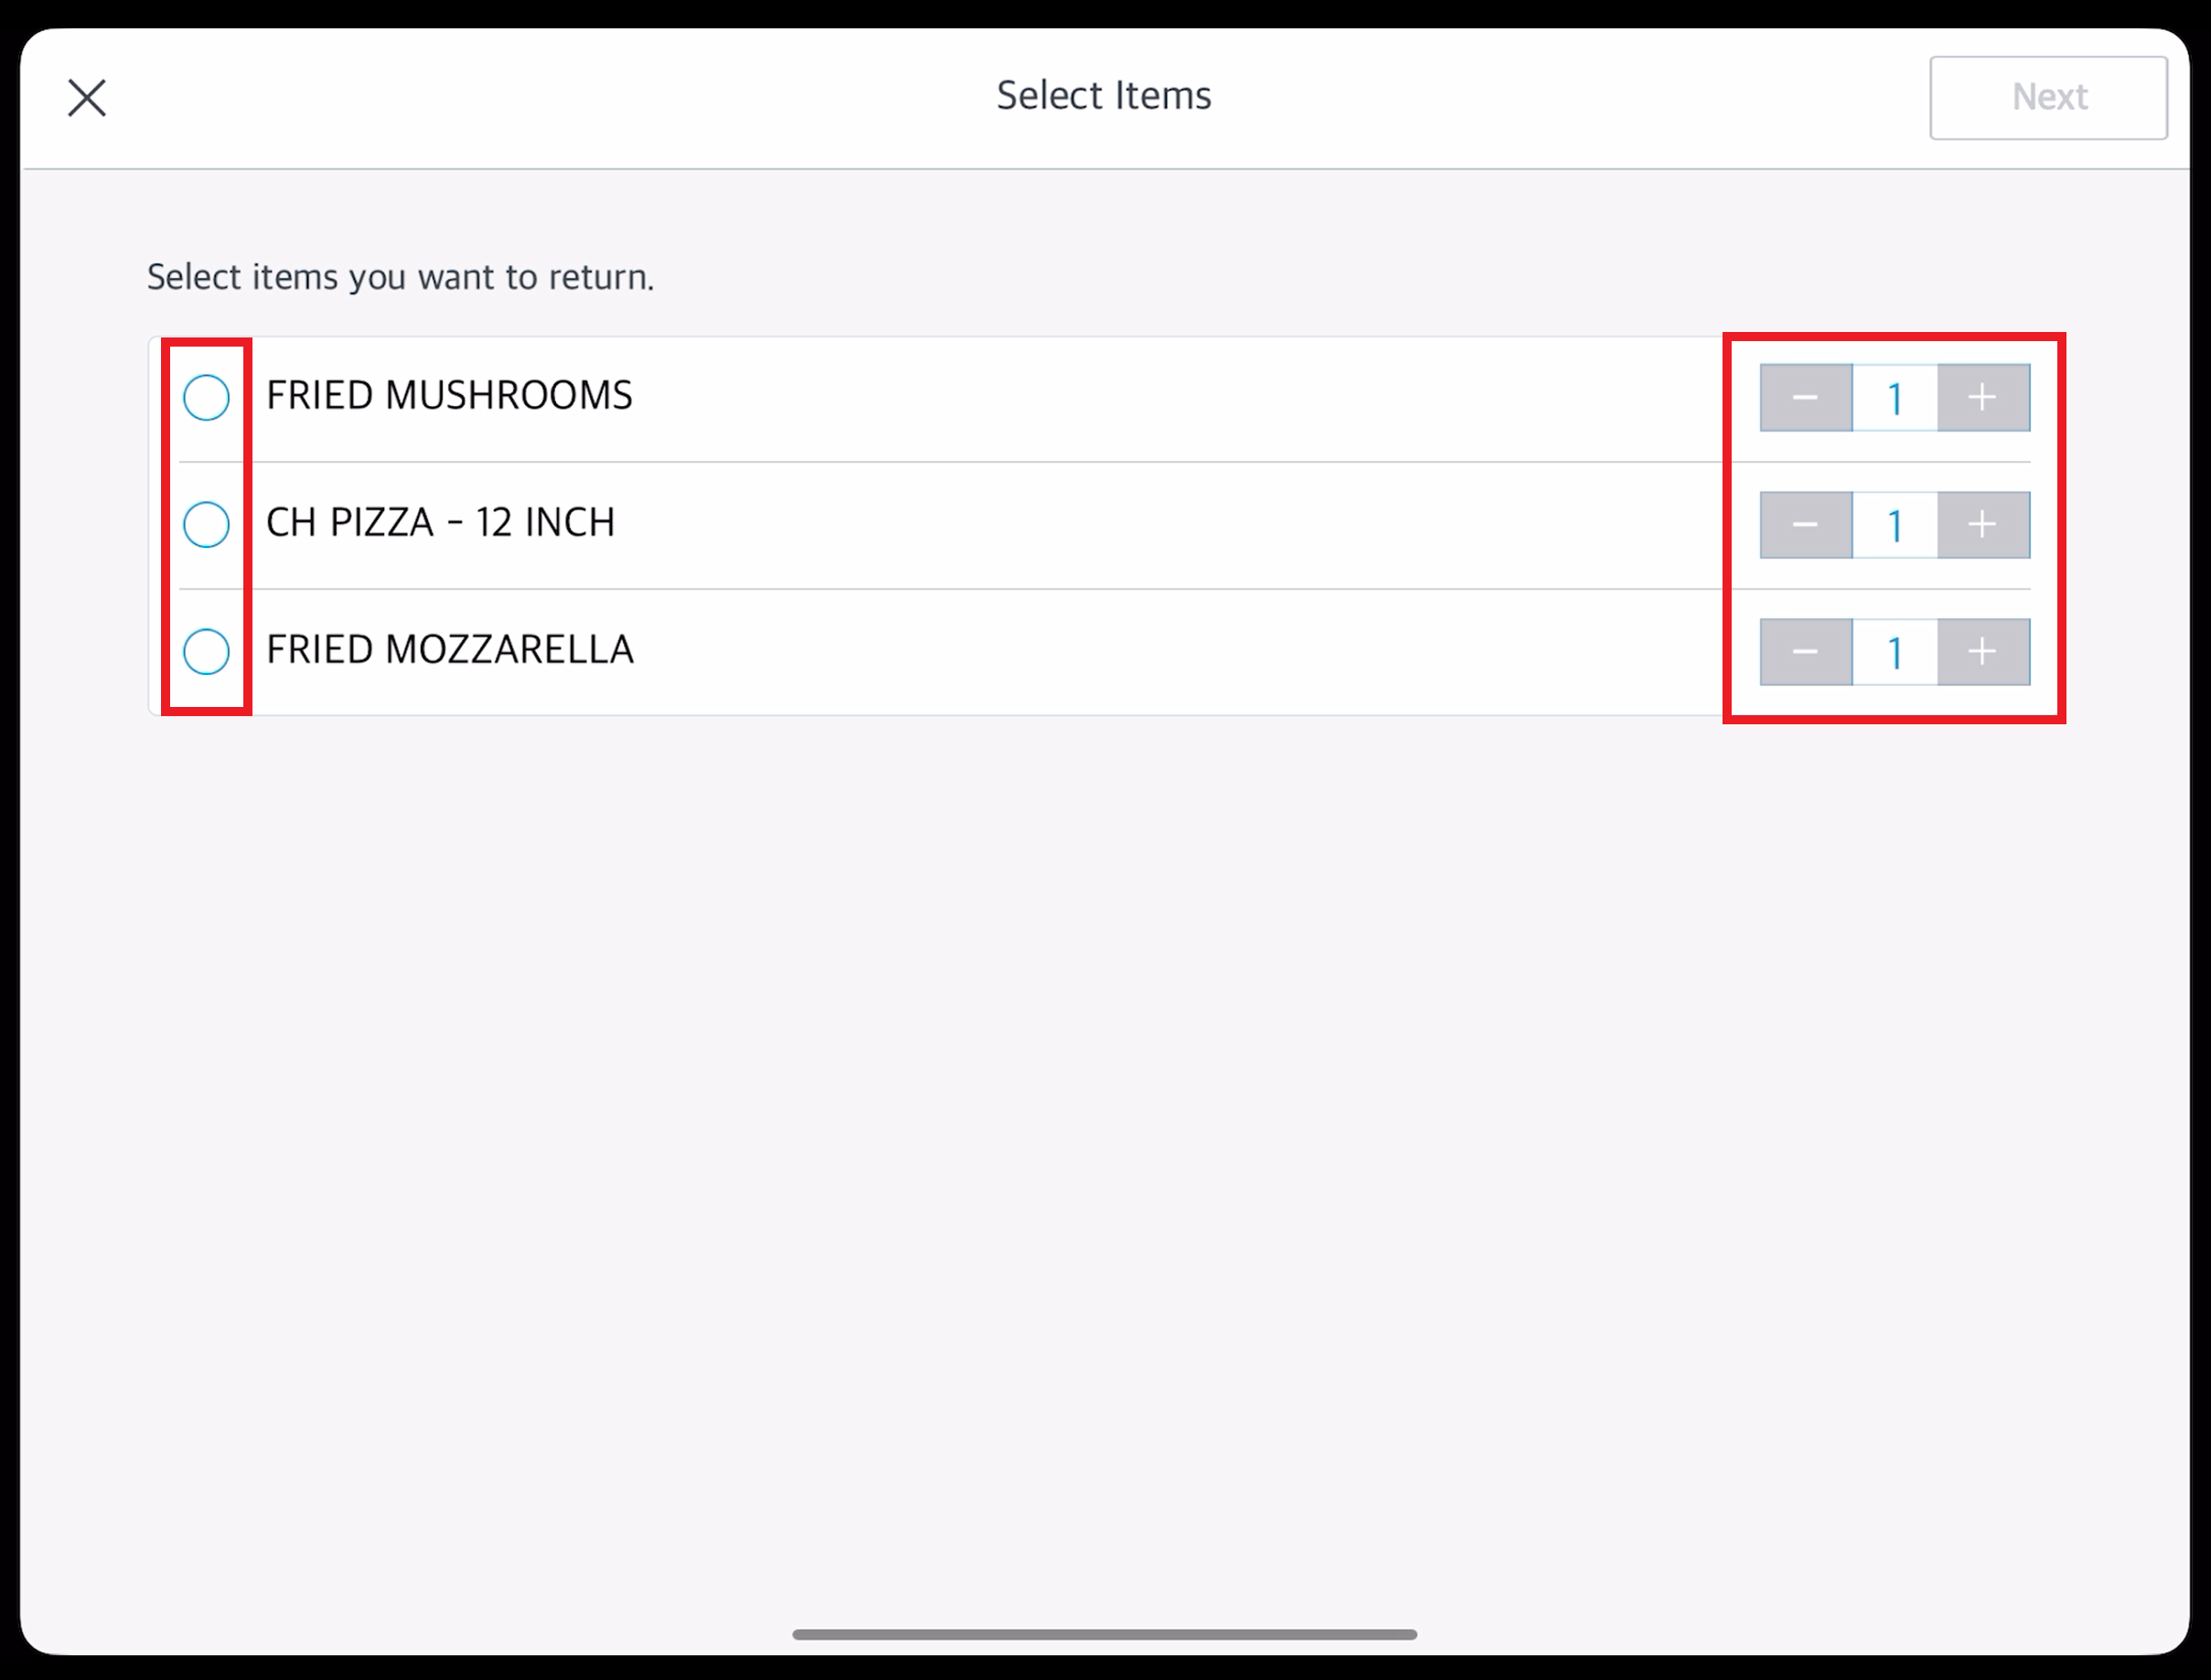
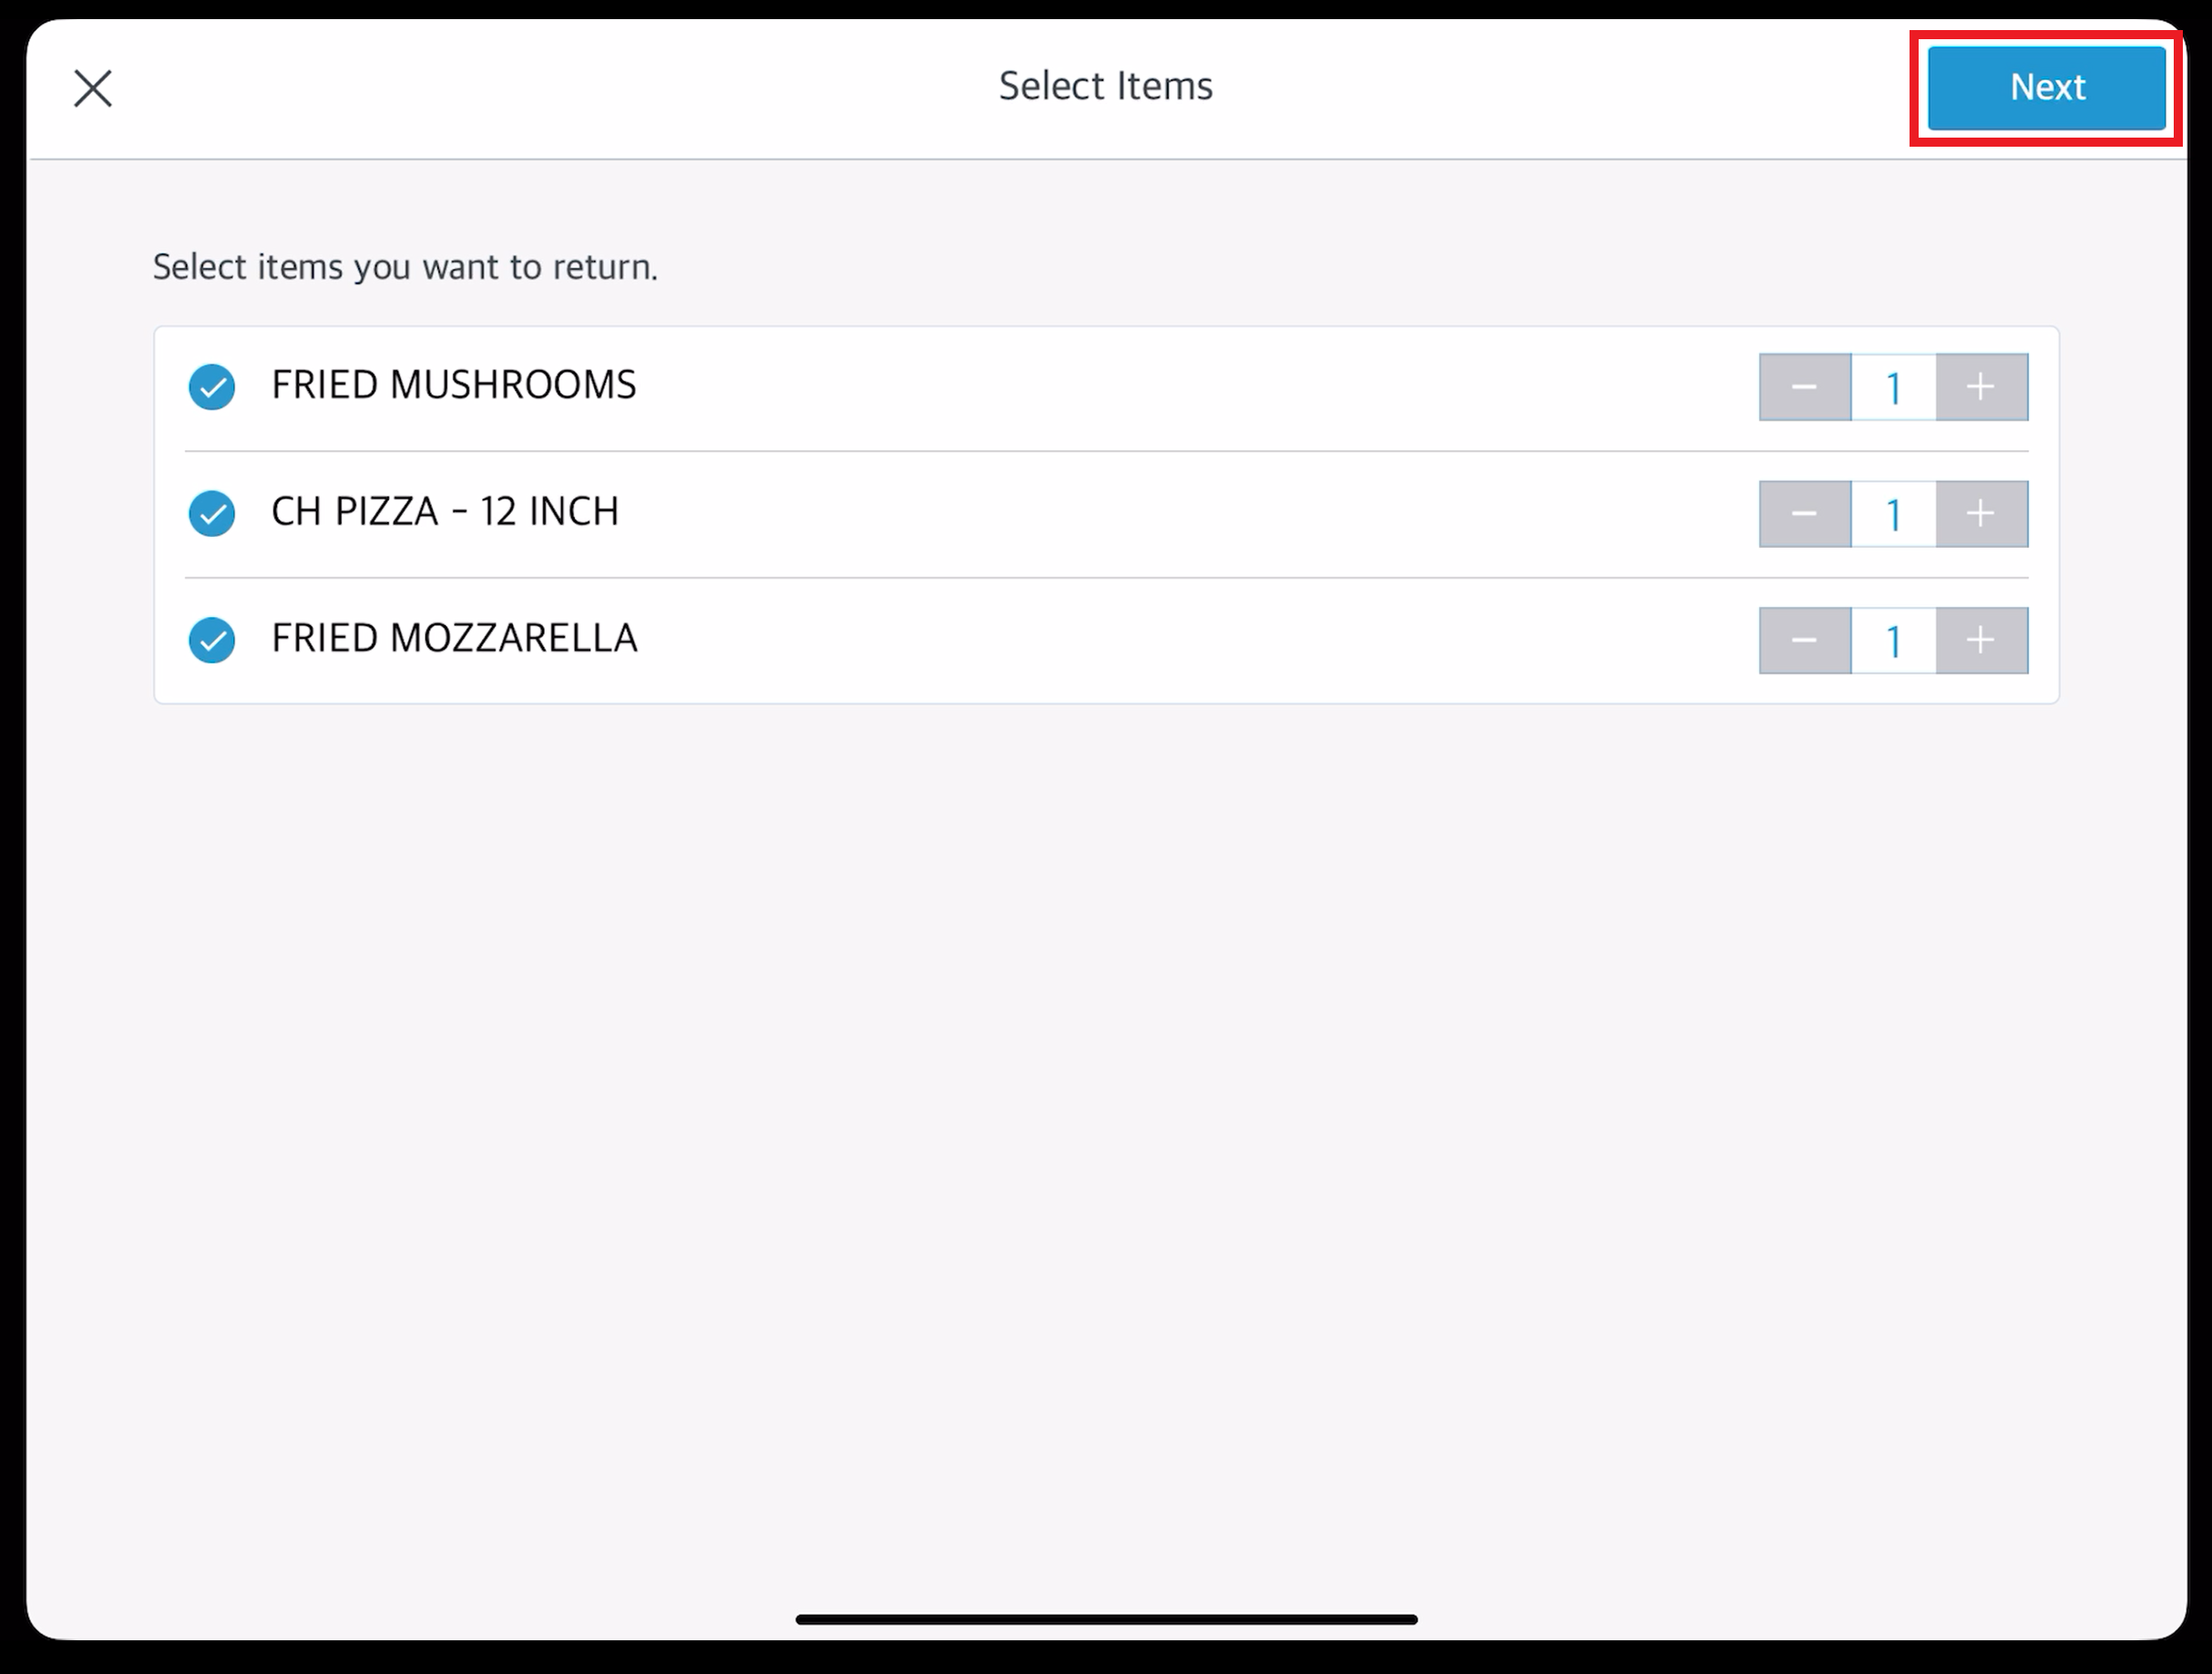
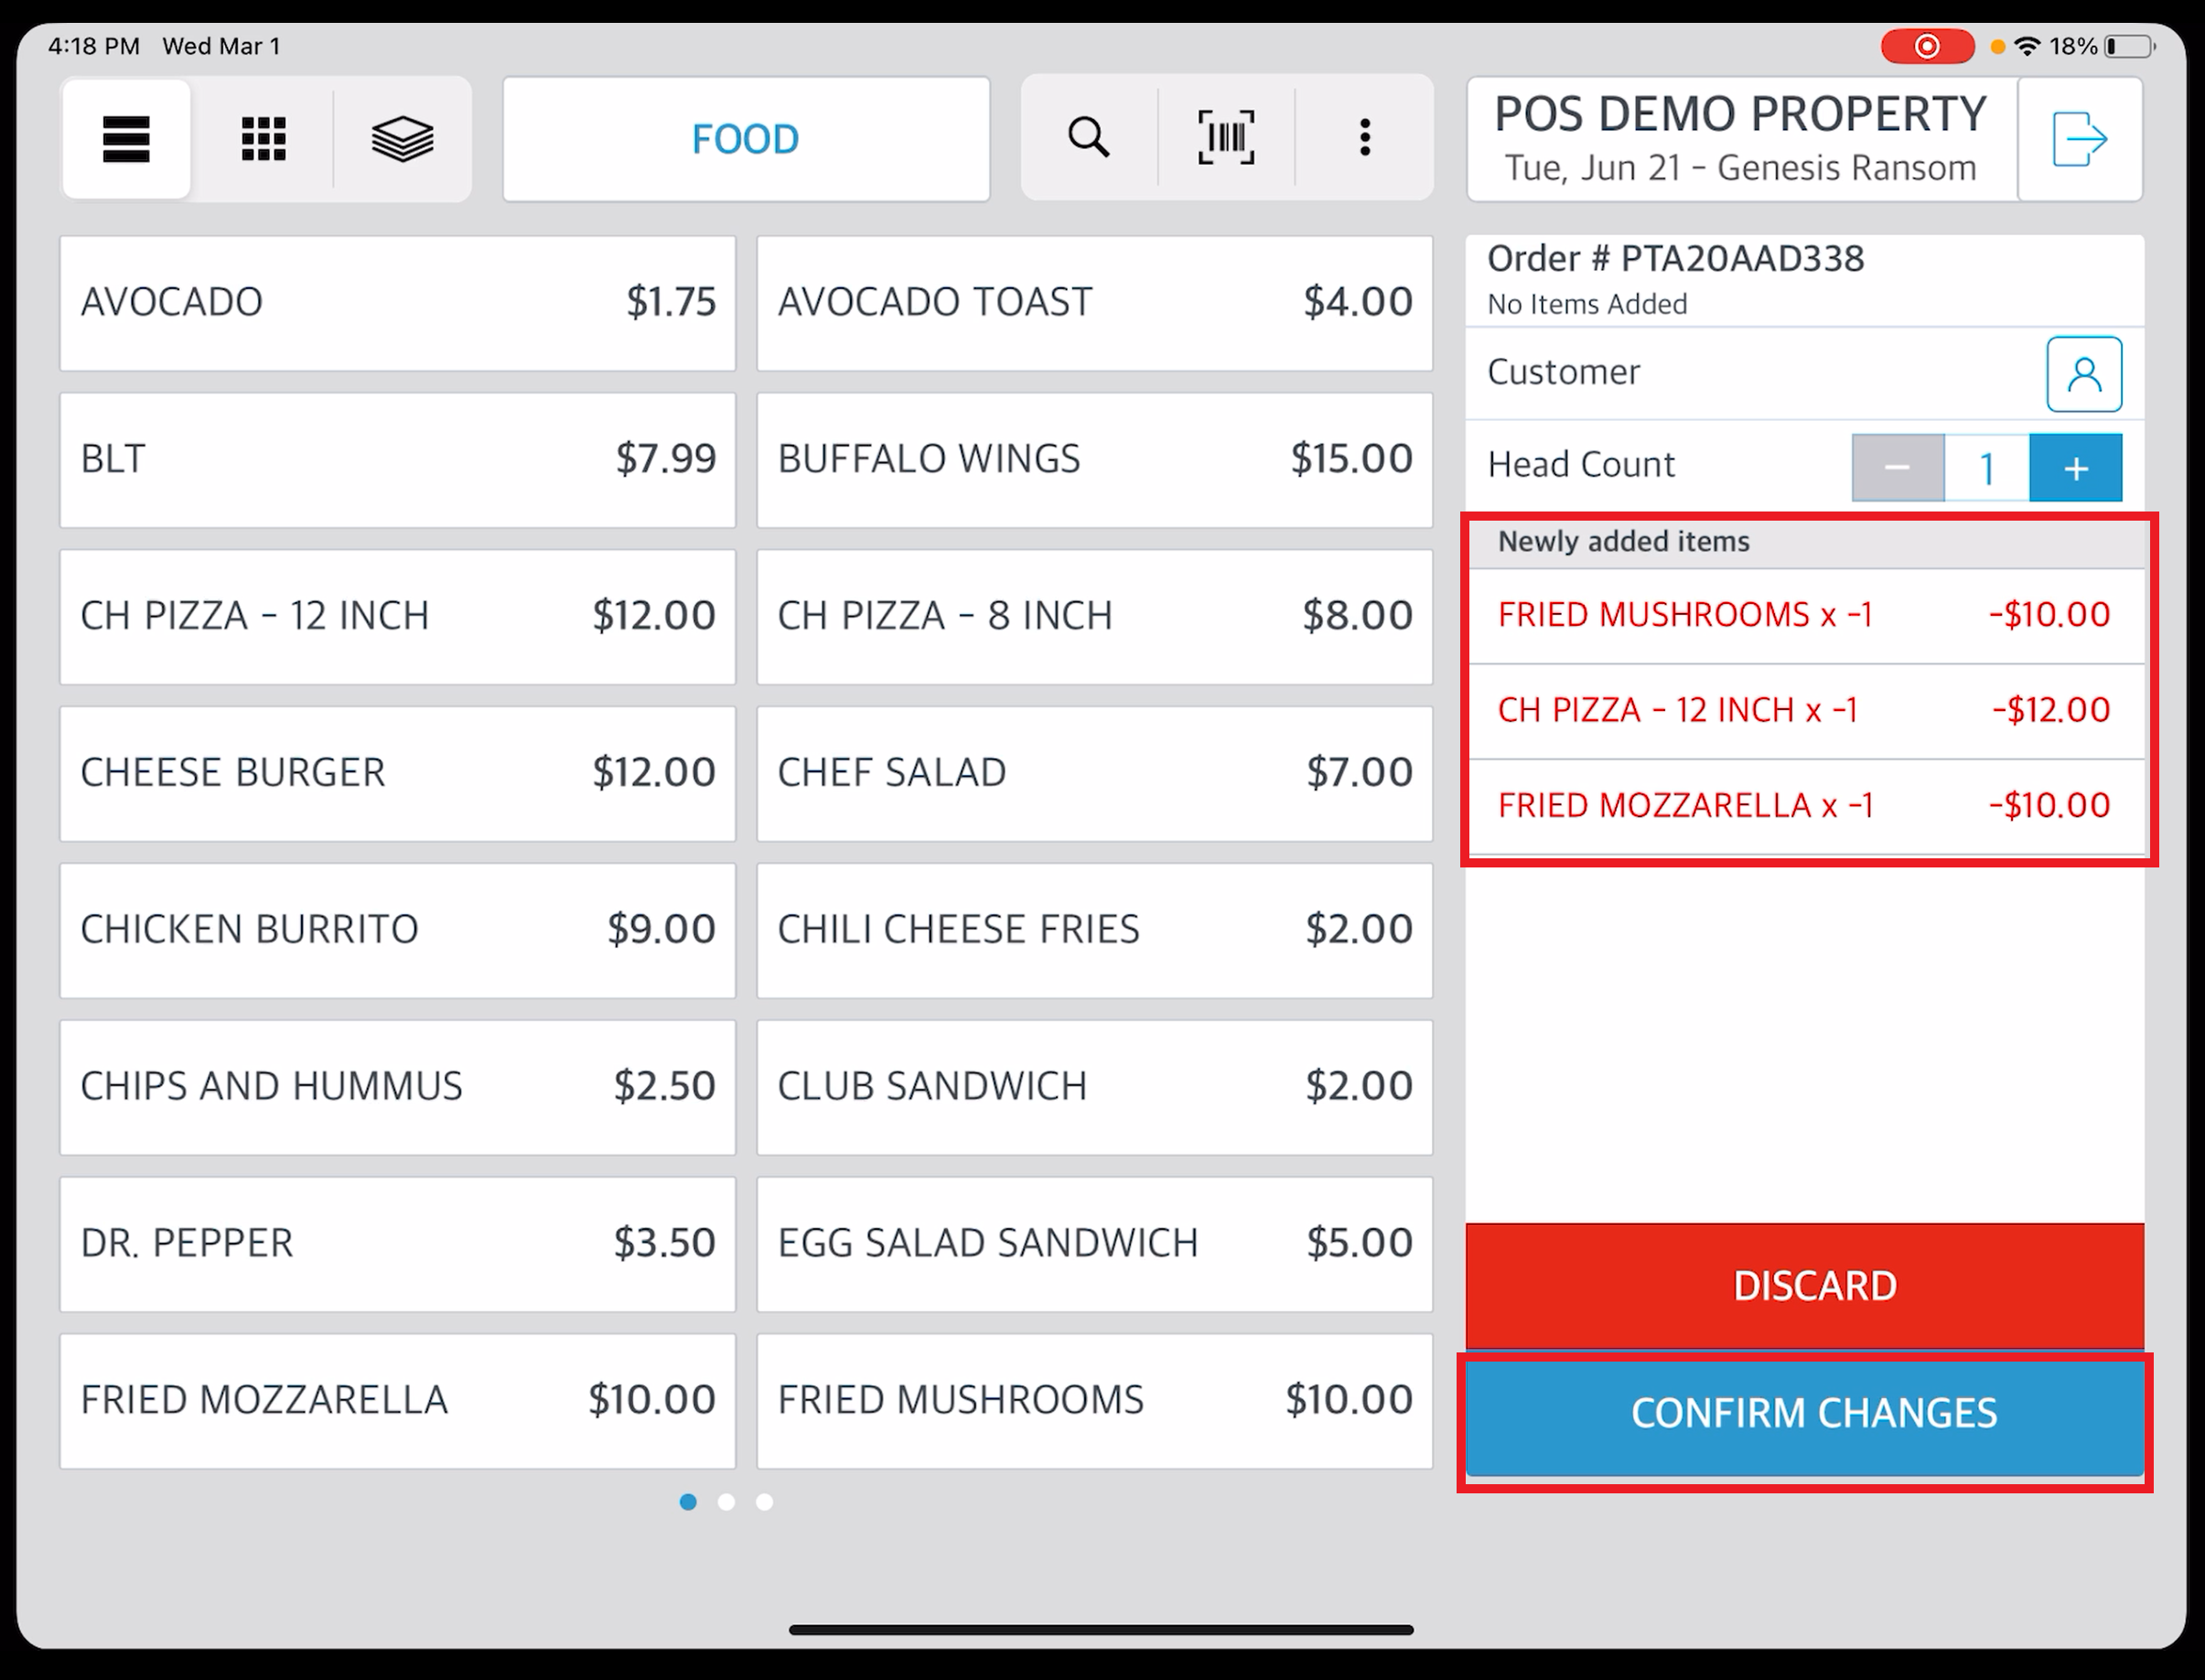
The Select Items popup activates, containing a list of all items included in the order. Select the radio button of each item to be returned. If applicable, select the quantity of each item to be returned. In the example shown there’s only one of each item, but if there were two orders of FRIED MUSHROOMS for example, a number “2” would appear at the right for that item. To return only one of the two orders of FRIED MUSHROOMS, select the FRIED MUSHROOMS radio button and select the minus sign for FRIED MUSHROOMS once to reduce the quantity to “1”. The second image at right shows an example where all items in the order are being returned.
|
|
|
The popup closes and the Order page is refreshed with the return items. Select CONFIRM CHANGES to continue. |
|
|
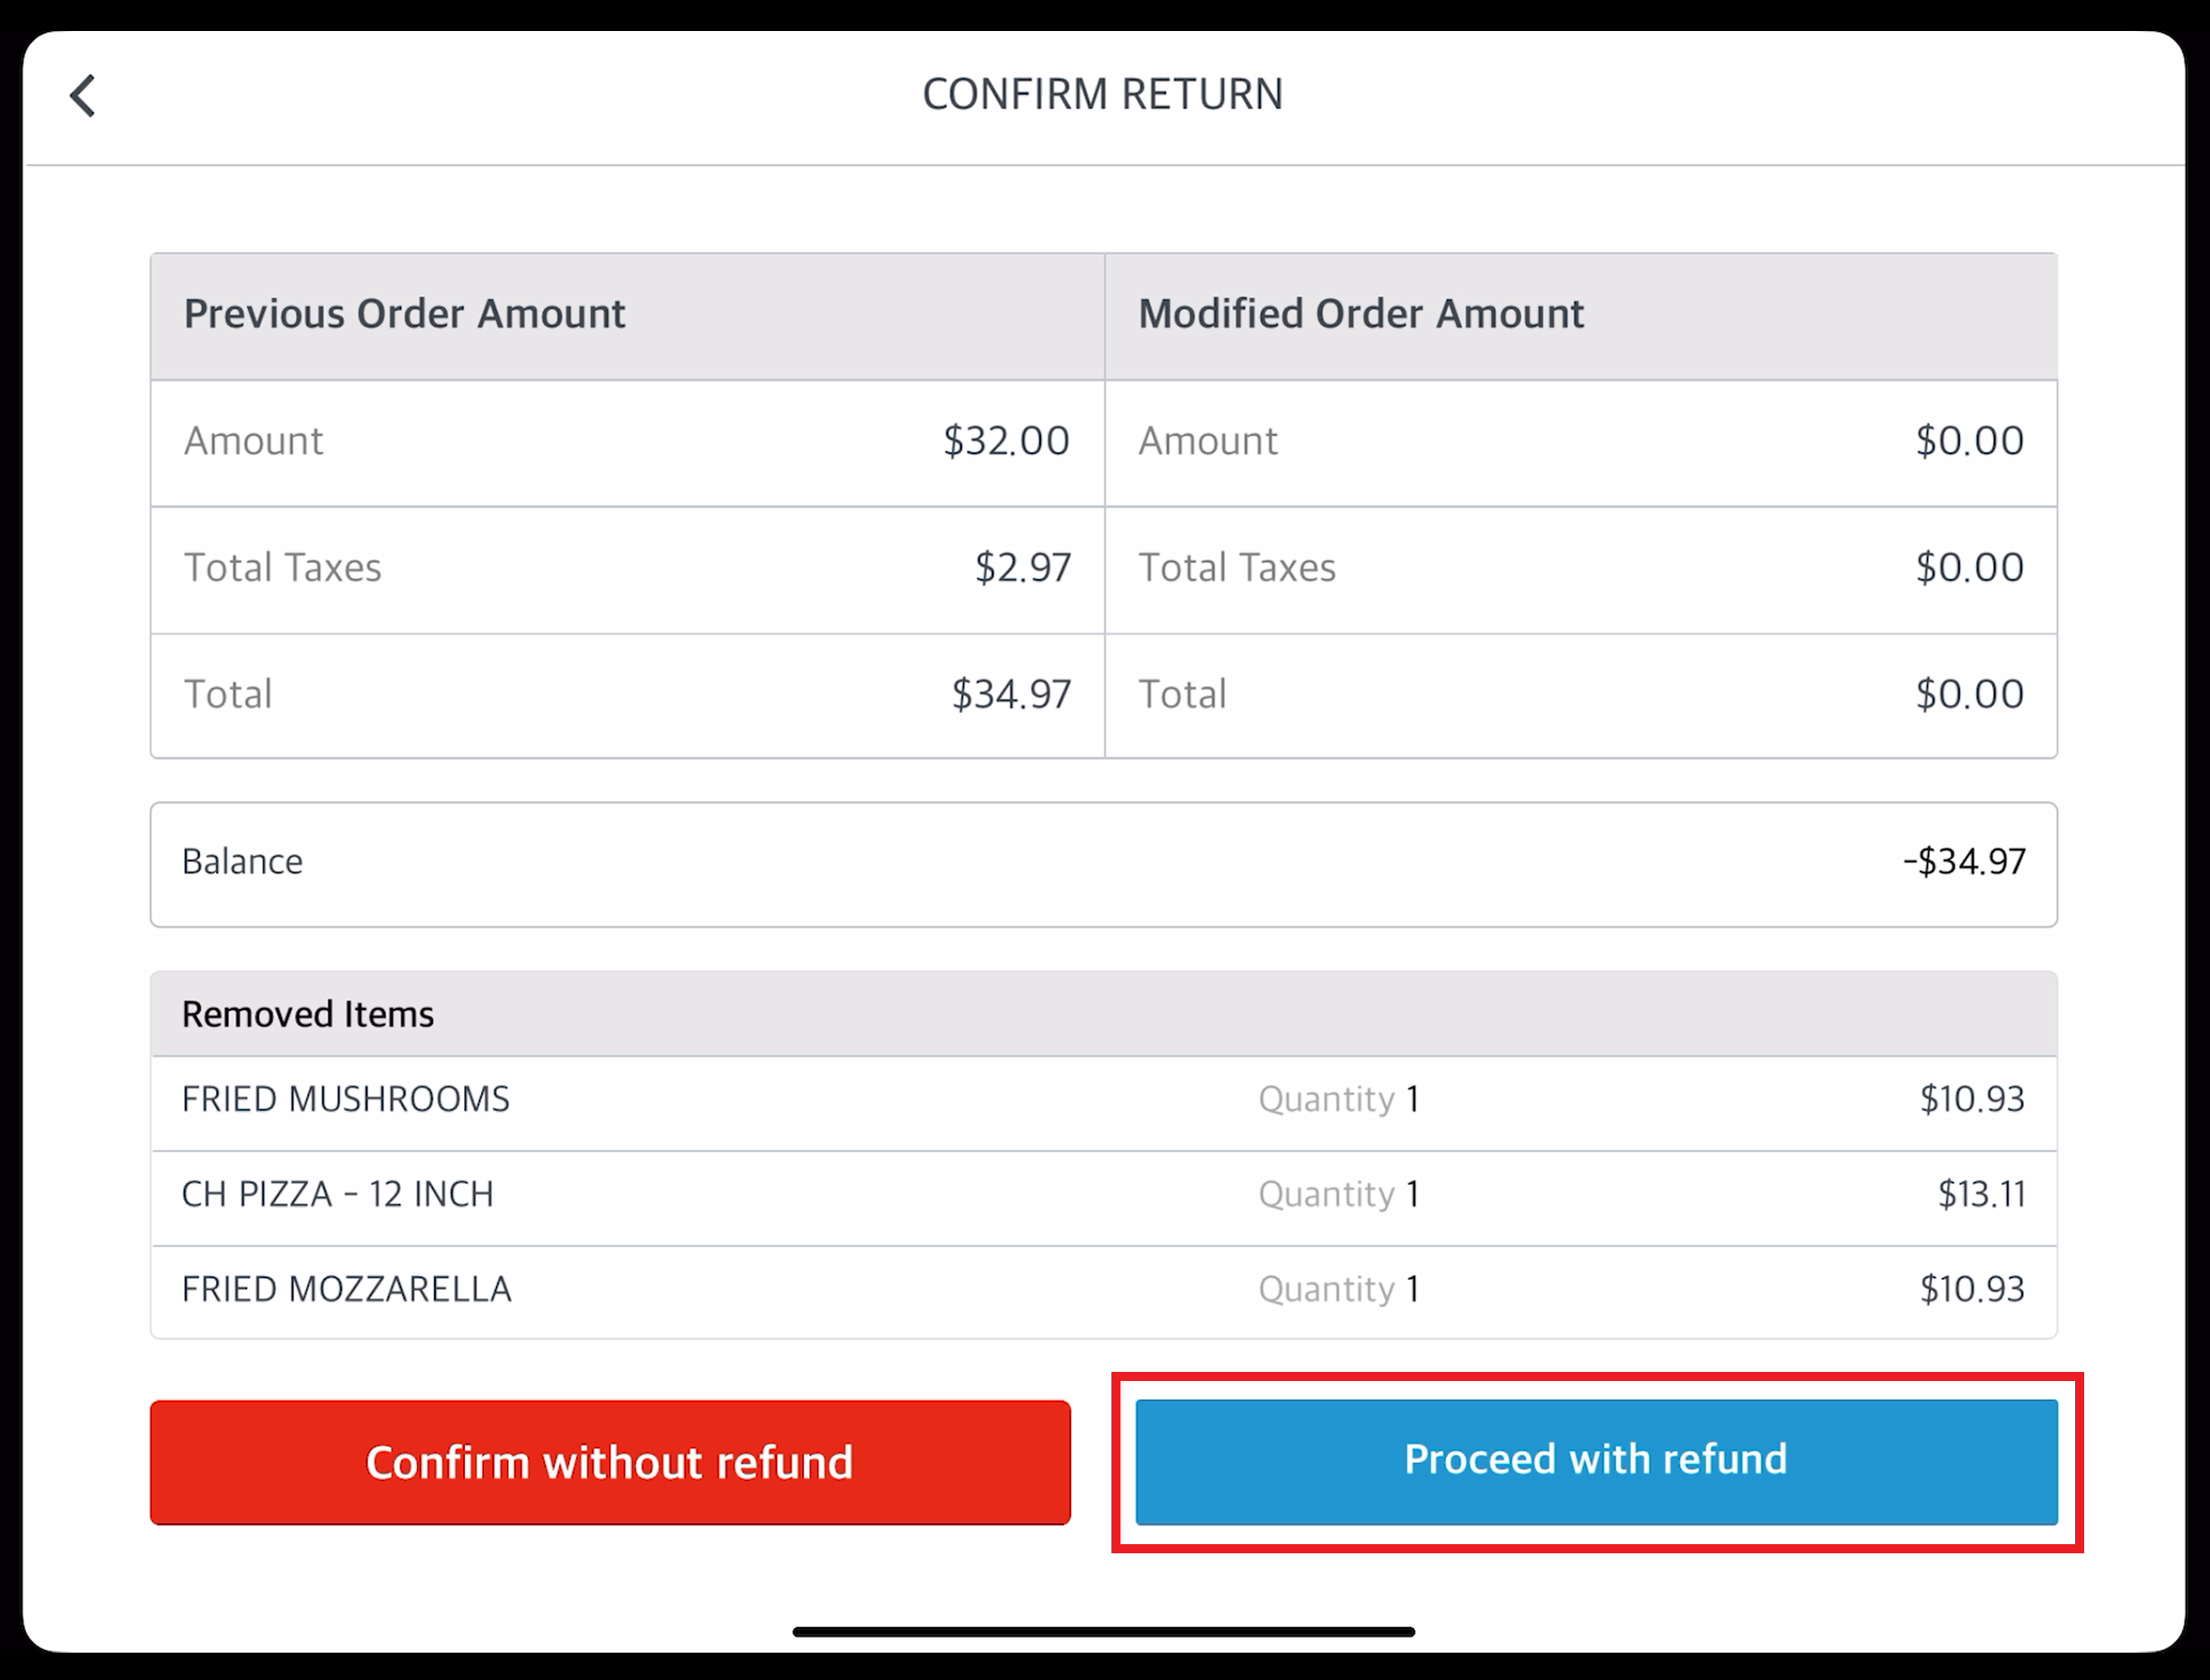
The CONFIRM RETURN popup activates, displaying details of return selections. Select Confirm without refund to process the return without issuing a refund. In that case, the order quantities are updated and a return confirmation message displays, but no changes are made to the charges on the order. Select Proceed with refund to continue with a return that includes a refund, as in this example.
|
|
|
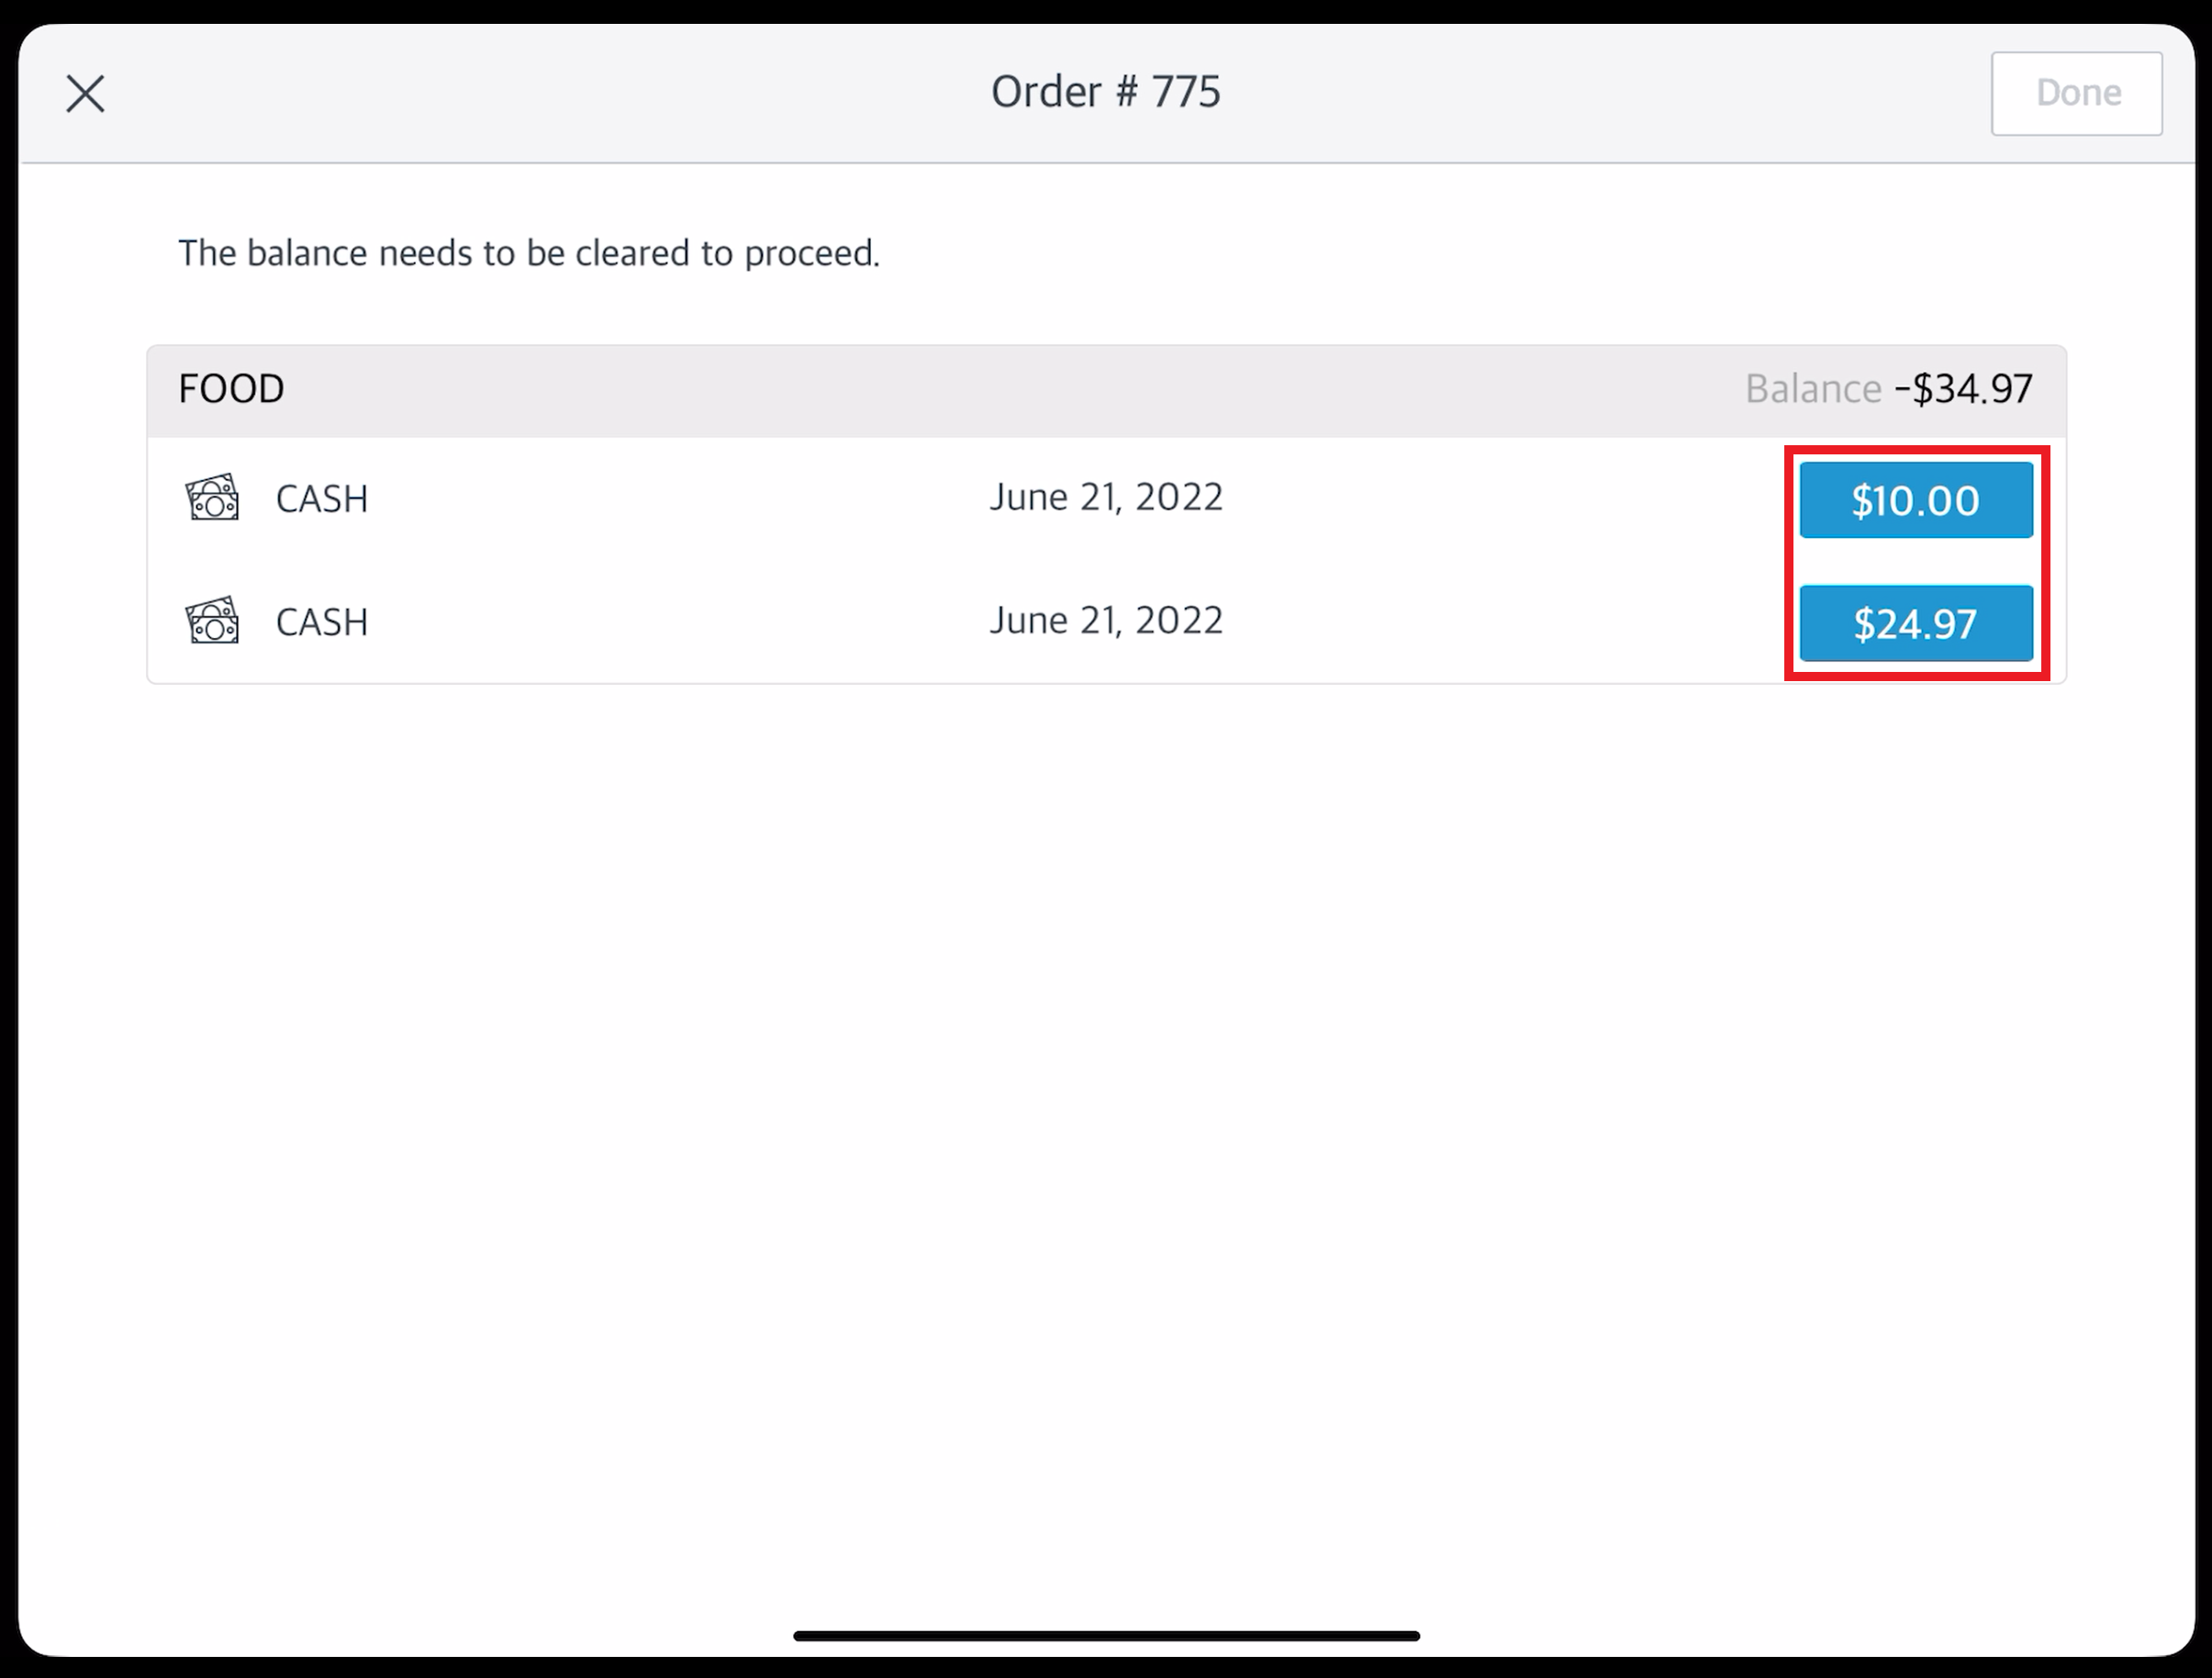
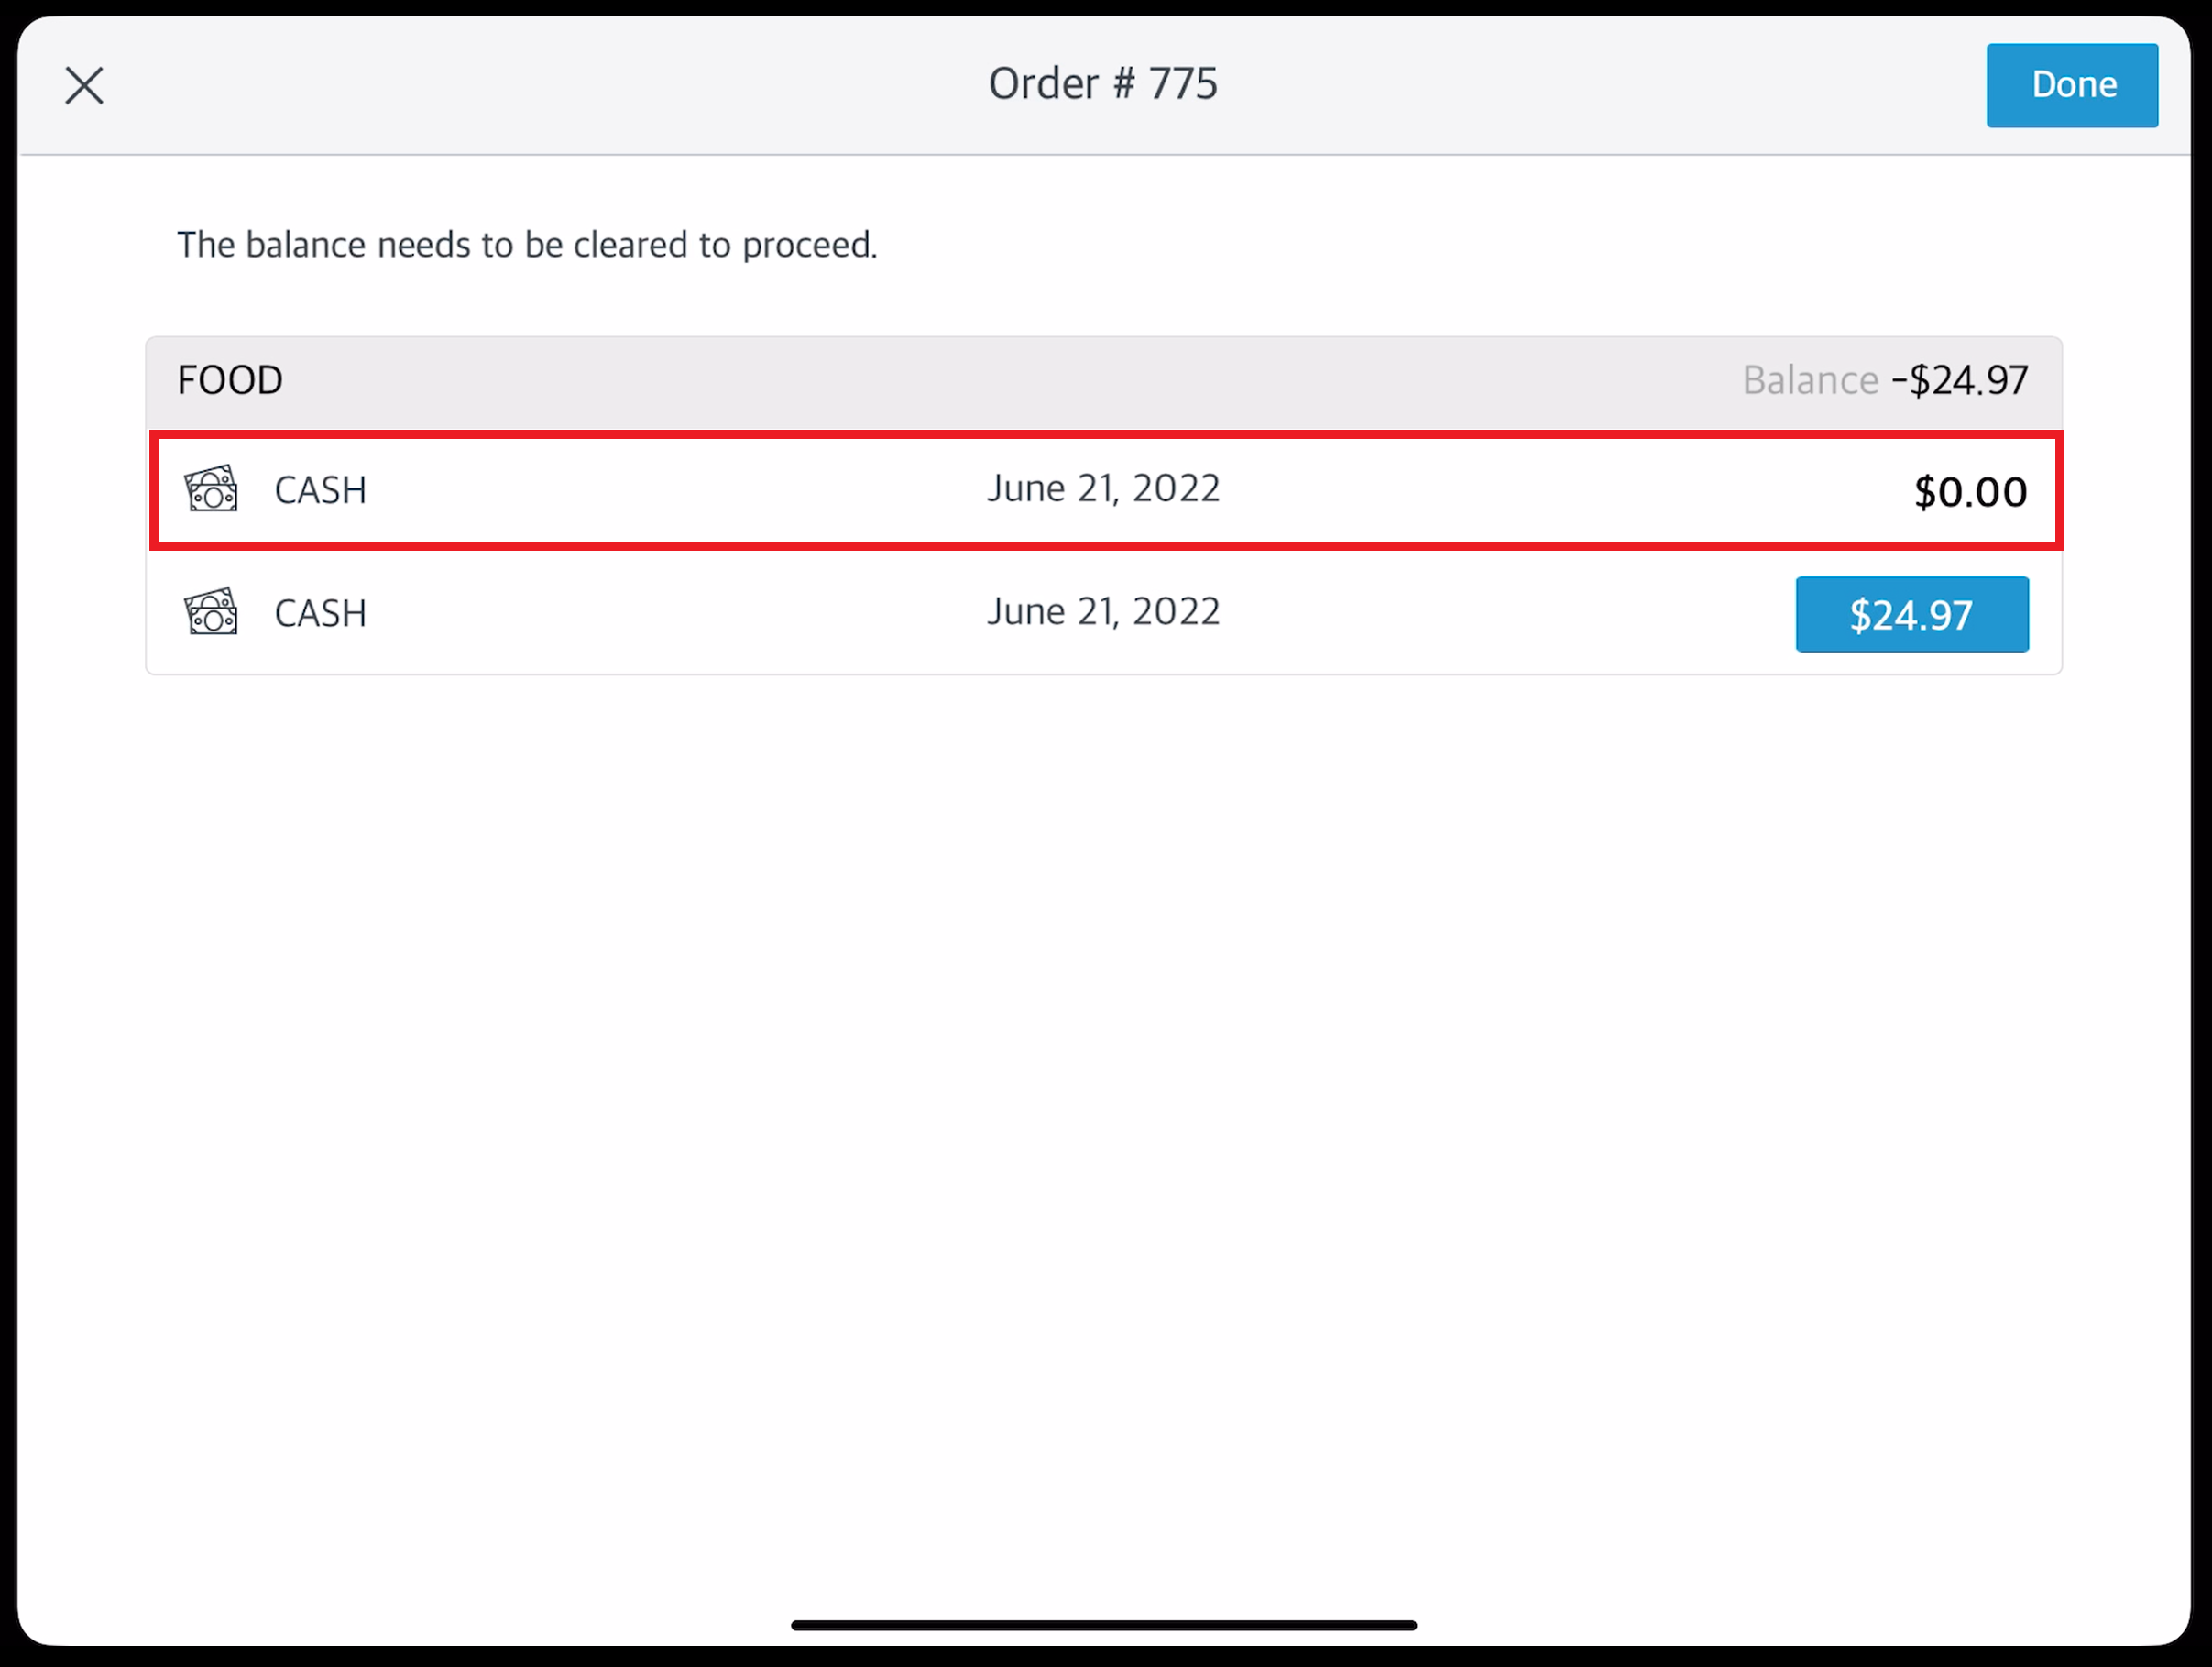
A clear balances popup loads. Each line item here is cleared separately. Select the first item to be cleared. Note that the number of line items shown here may not match the number of return line items shown in the order, depending on payments previously applied to the order or item groupings that are specific to the property. |
|
|
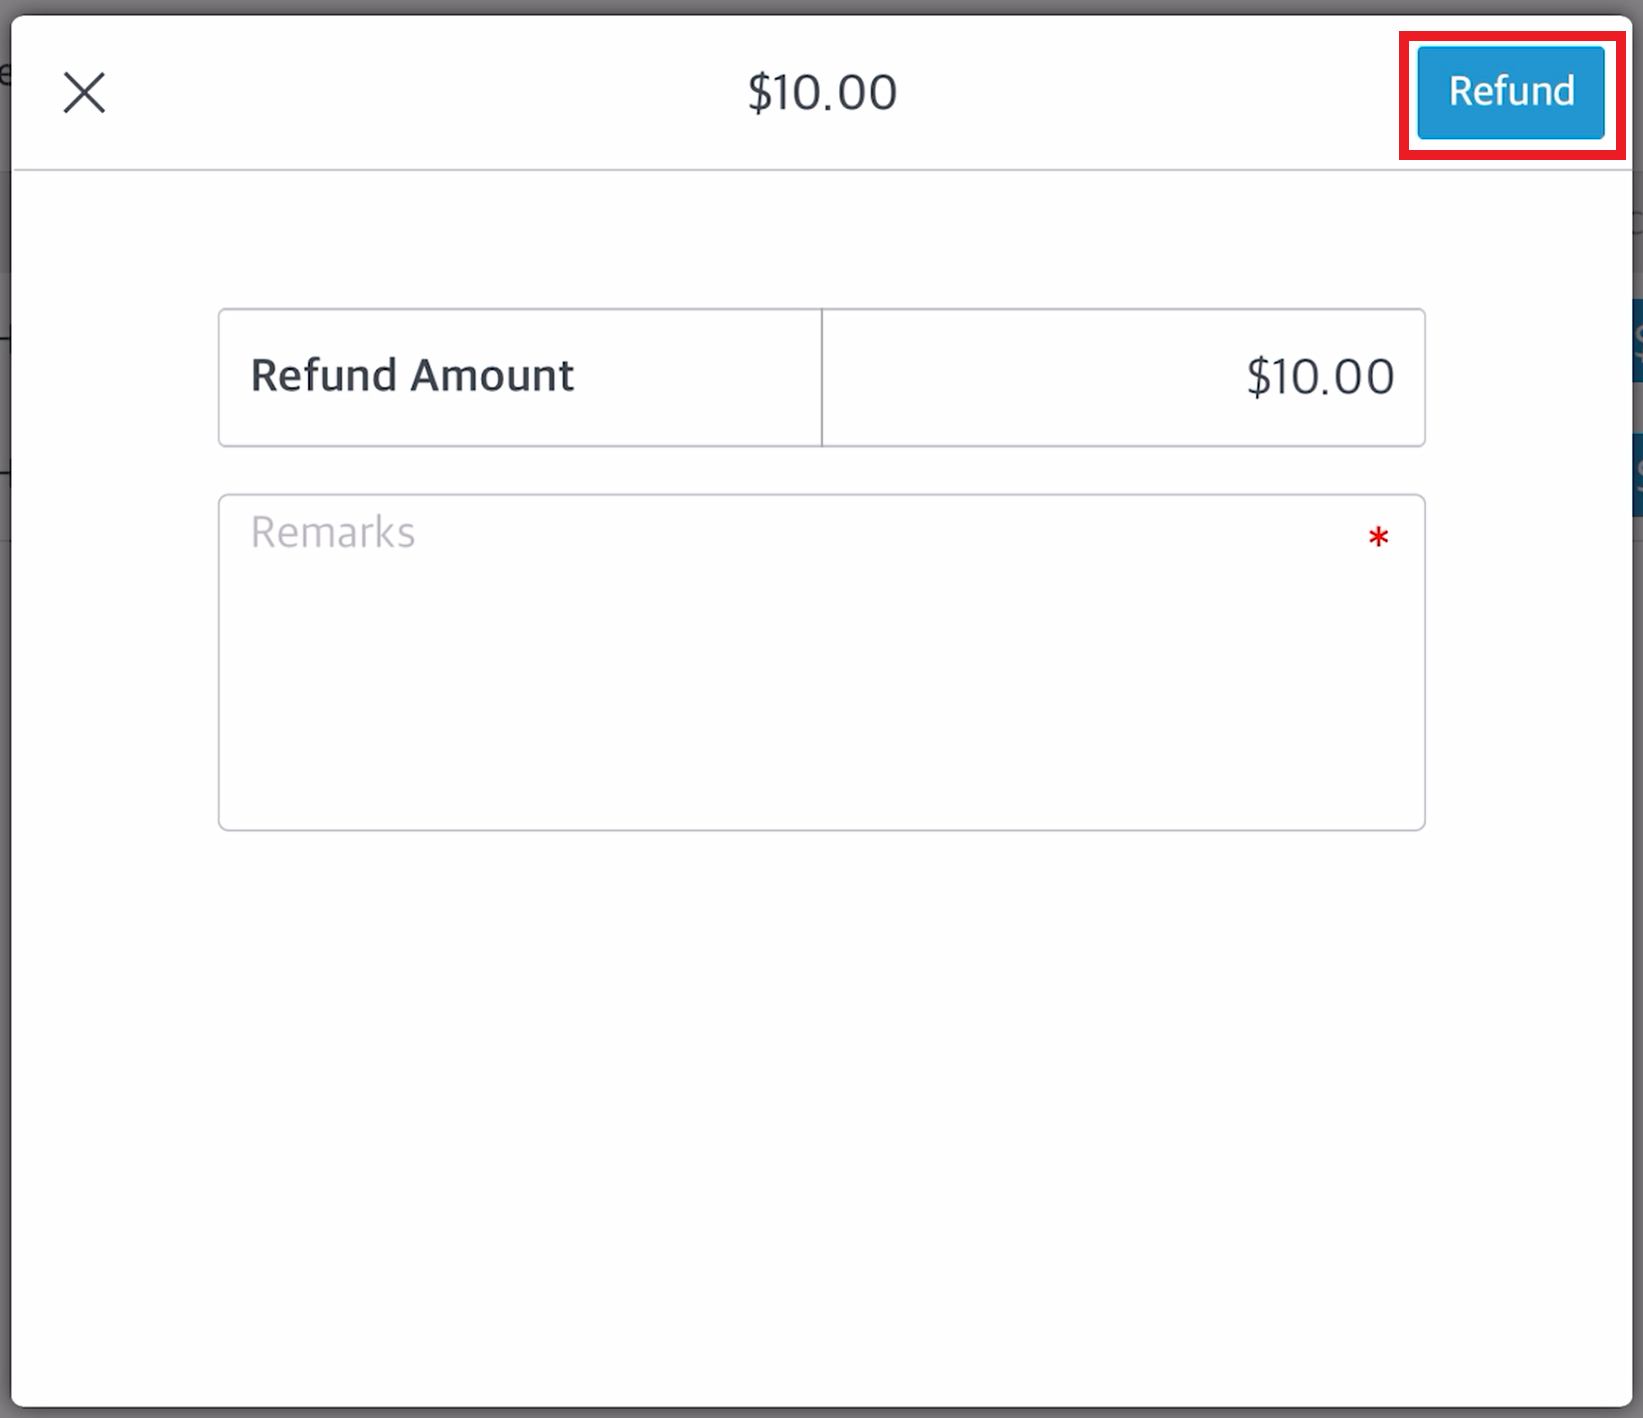
A detail popup for the item loads. Enter the reason for the return in the Remarks field, then select Refund. Note that Refund is selected here regardless of whether or not the return includes a payment refund. |
|
|
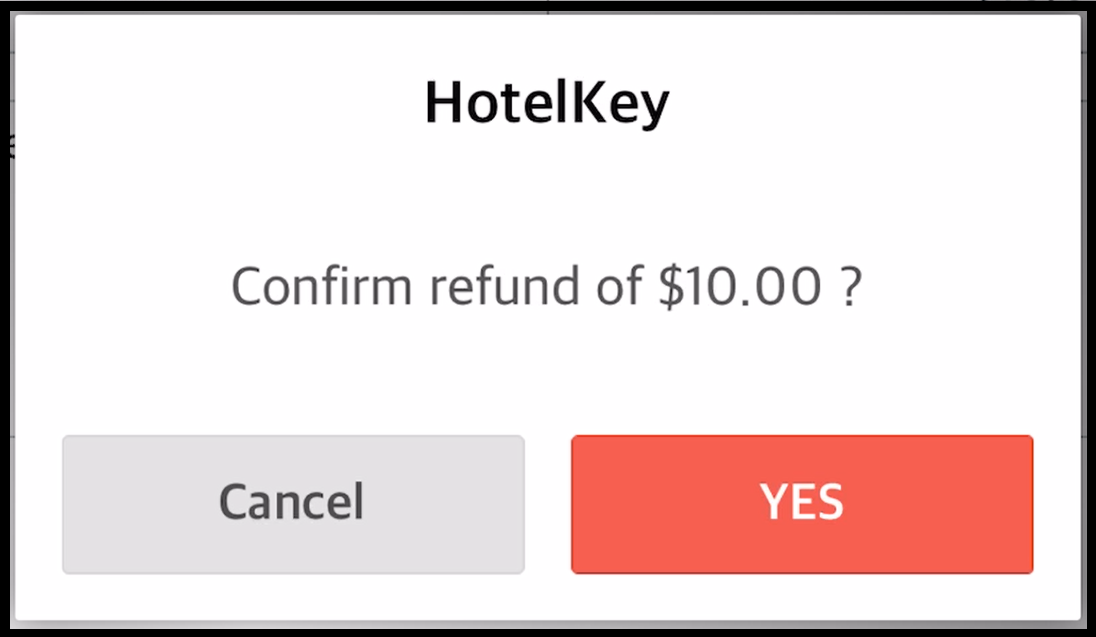
A confirmation popup activates. Select YES to continue. |
|
|
The confirmation popup closes and the first item is cleared from the order. Repeat the above steps for each item to be cleared in the clear balances popup. When all balance items are cleared, as shown in the second image at right, select Done to continue. |

|
|
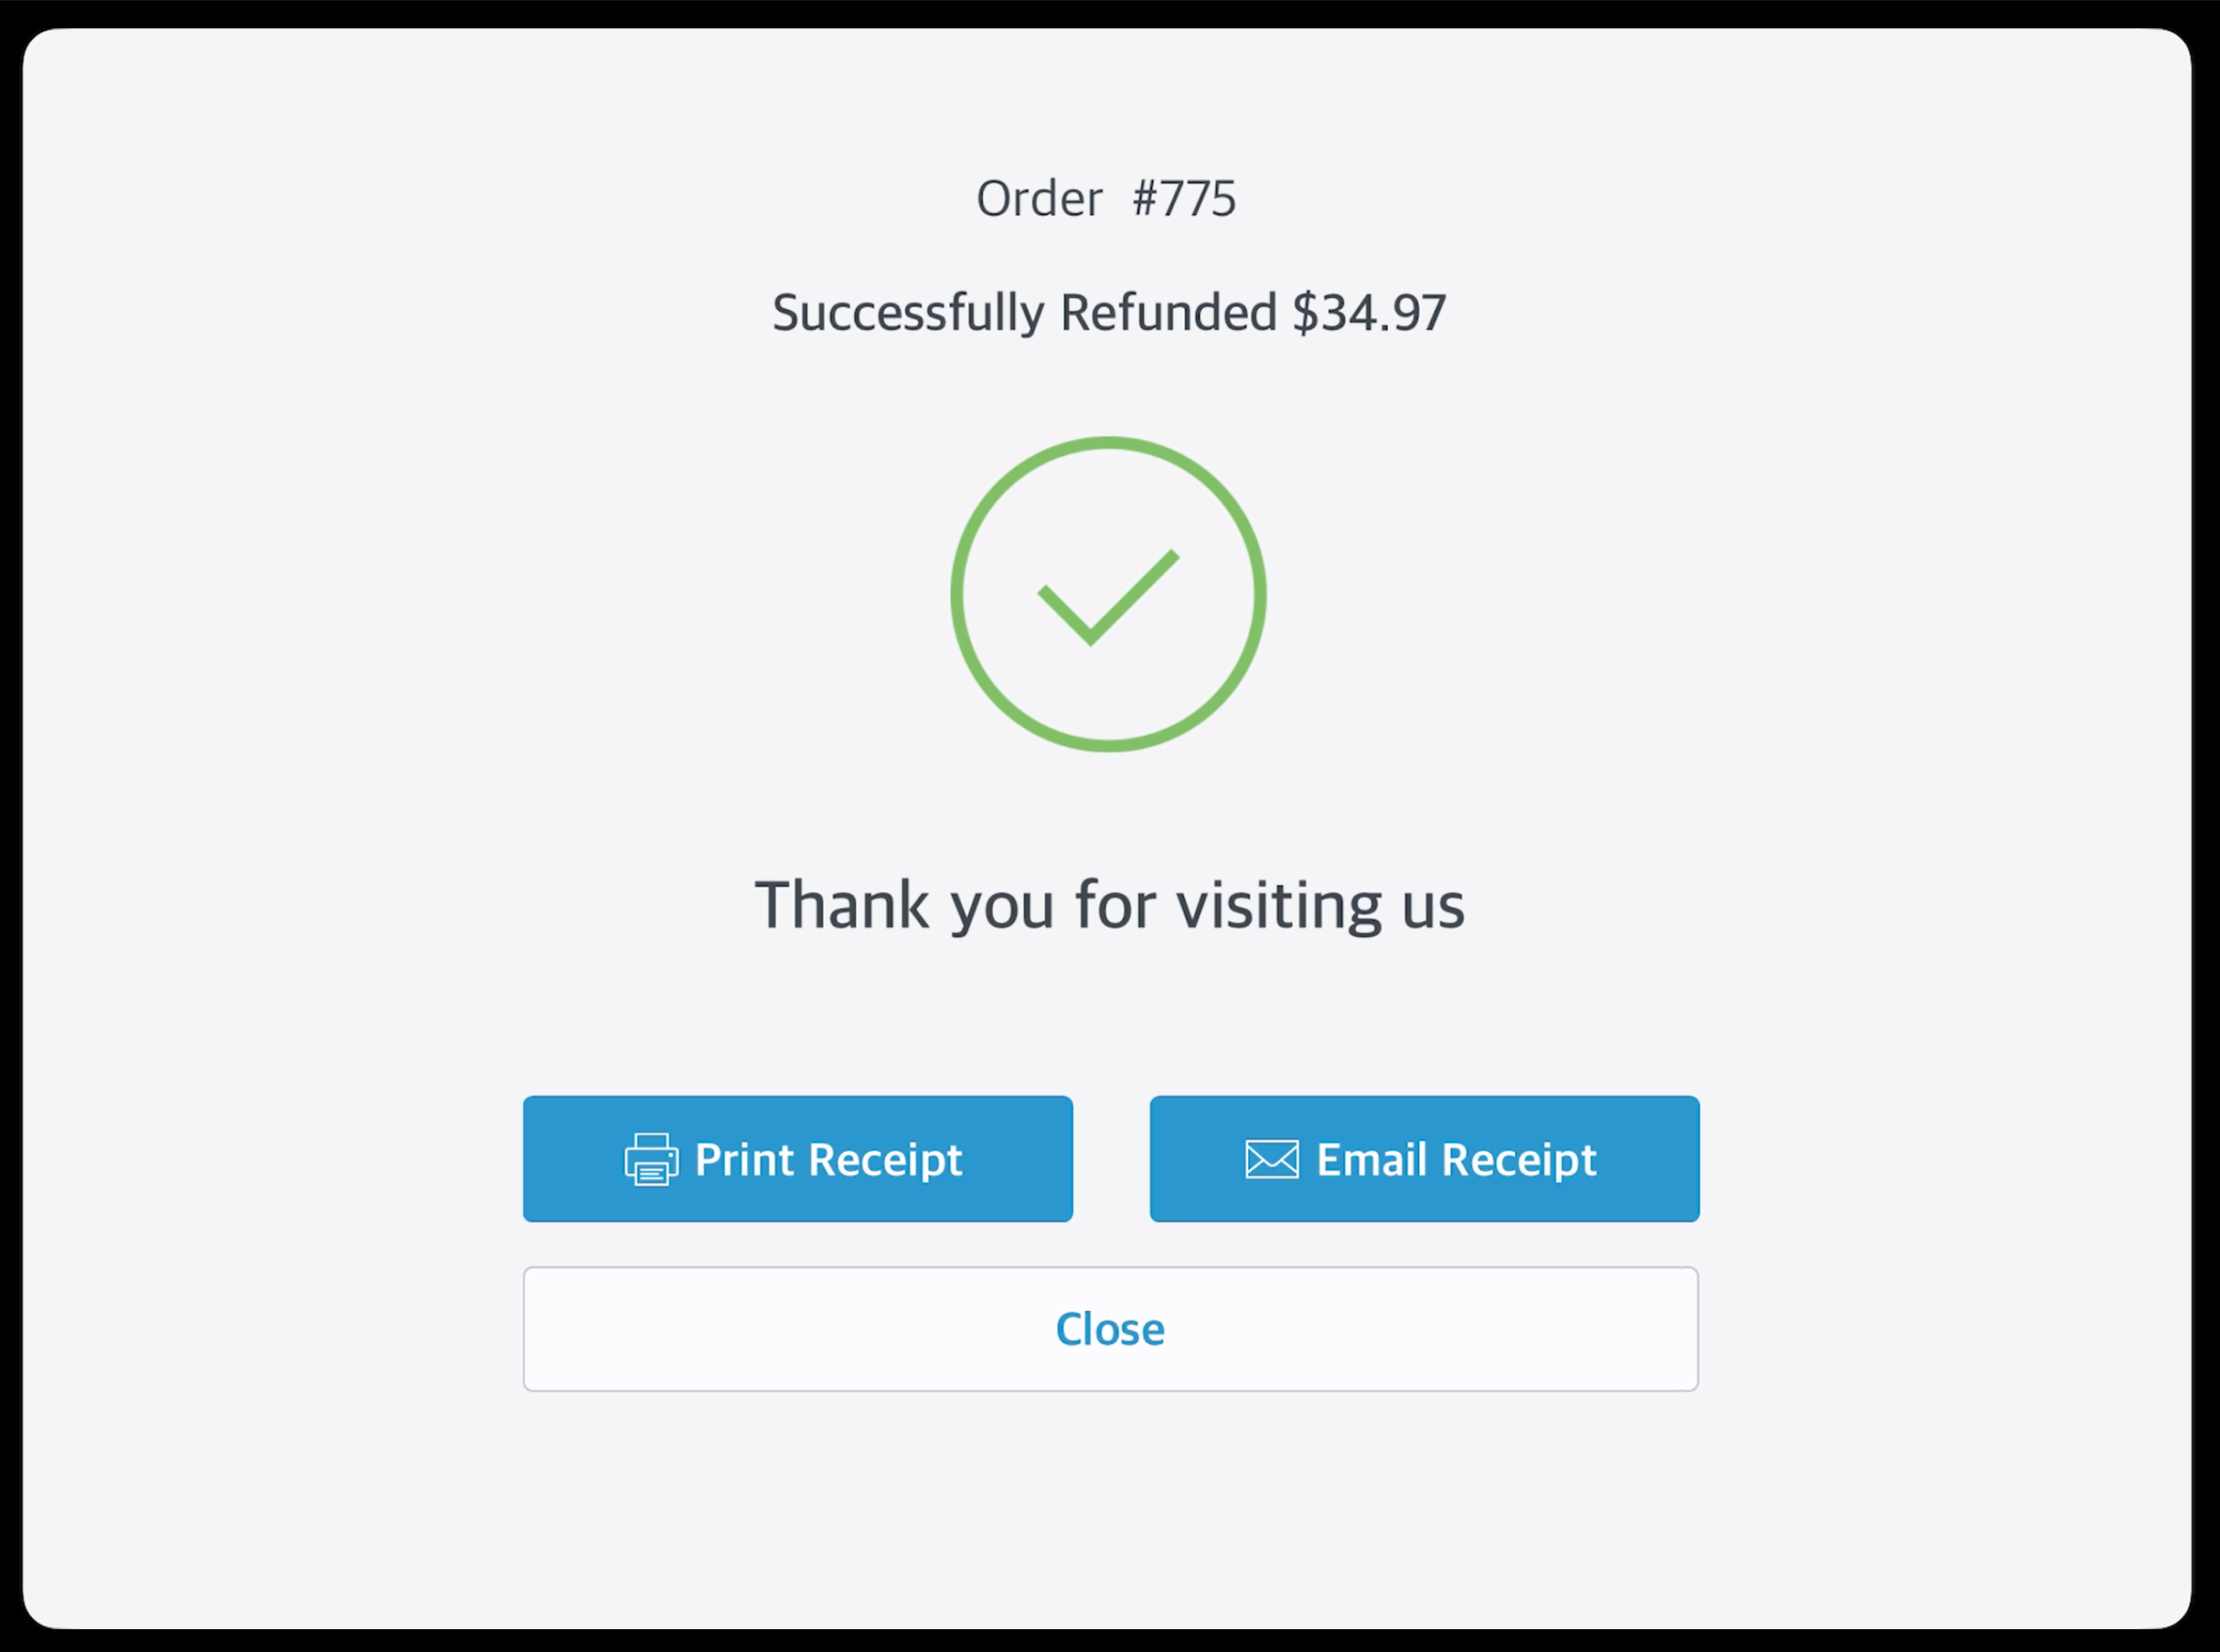
A success panel loads. A receipt can be printed or emailed from here. |
|