
📆 Revision Date:
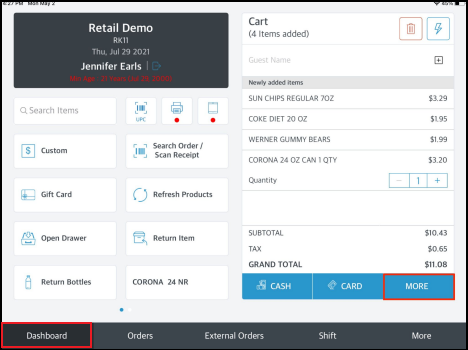
RetailKey allows for guest order bills to be split so that different payment methods can be applied to a single bill or members of a group can each pay their own bill.
|
Select More at the bottom of the Cart on the POS Dashboard. |
|
|
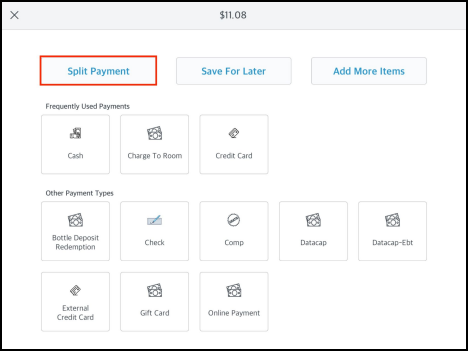
Select Split Payment. |
|
|
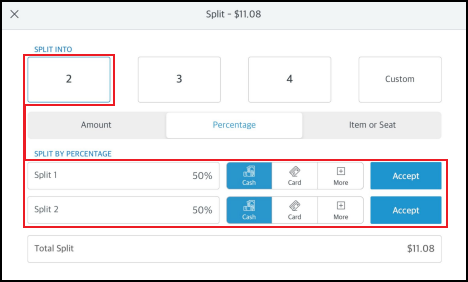
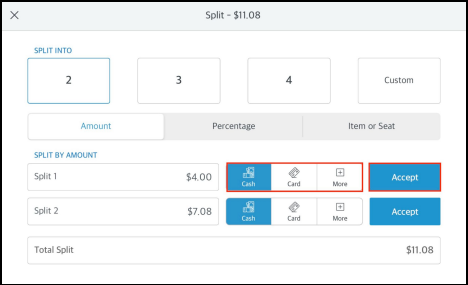
The Split popup loads. Select the number of sub-checks the bill is to be split up into; if the number is greater than 4 select Custom and follow the prompts to enter the desired number. When a split number is selected a matching quantity of split rows populates in the popup for entry of payment details. In the example shown, 2 is the selected split so two rows populate. Between the SPLIT INTO tiles and the SPLIT BY rows, select the type of split to be applied: Amount - a specific dollar amount is entered for each split, total of amounts entered must match the Total Split value shown at the bottom of the popup Percentage - (default, this is the example shown at right) a percent of the bill is assigned to each split, total of percentages entered must match 100% Item or Seat - (this is for a restaurant setup) individual bill line items are assigned to each split, every item in the bill must be assigned to a split Amount and Percentage splits are entered directly in the popup page as shown for the percentage example. If the split type is Amount, the split detail fields reformat to accept dollar amounts instead of percentages. |
|
|
If Item or Seat is selected as the split type, when a split is selected for entry of details the Select Items popup activates. Select the item(s) to apply to the selected split. When all items for the selected split are added, select Save to save changes and close the popup.
|

|
|
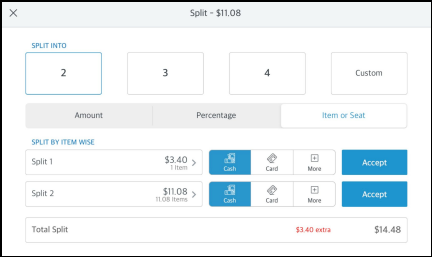
The selected split row is updated in the Split popup to contain the cost of the selected items. In the example shown there is only one other split, so the remaining items are automatically assigned to it. If there are more than two splits, repeat the process as described to assign additional items to the other splits. |
|
|
After split assignment is complete, payments for each split payment can be processed individually by selecting a payment type for the split and then selecting the associated Accept link. |
|
|
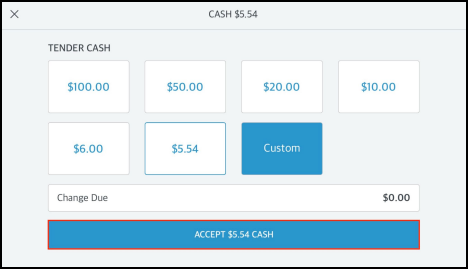
A payment processing popup activates for selection / entry of payment details. In the example shown, a cash payment is being processed for the first split. Select / enter applicable options, then select the ACCEPT link to process the payment. |
|
|
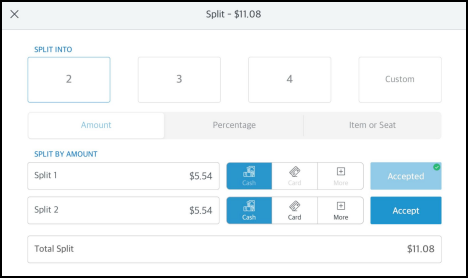
The payment is processed and the popup closes. Notice that the Accepted link for the split that was processed is now dimmed and marked with a green dot to indicate its payment was accepted.
|
|
|
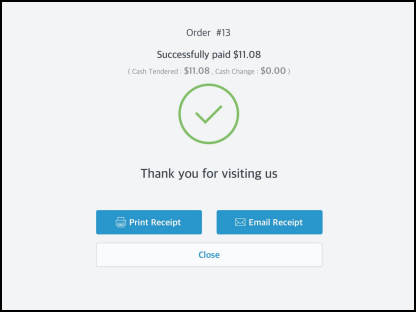
When each split’s payment is applied, a confirmation popup with payment details for that split loads. The split receipt can be printed or emailed from here. Repeat the above steps to process payments for all splits. |
|