Transfer a Product
📆 Revision Date:
The RetailKey system allows for transfers of products from the current property’s stores or from a different, associated property’s stores.
Transfer processing allows for different team members to enter the request, review and approve the request, and to grant final approval.
On the home page of the HotelKey administration web application (admin.hotelkeyapp.com ), select the Administration v2 link in the RetailKey section. | 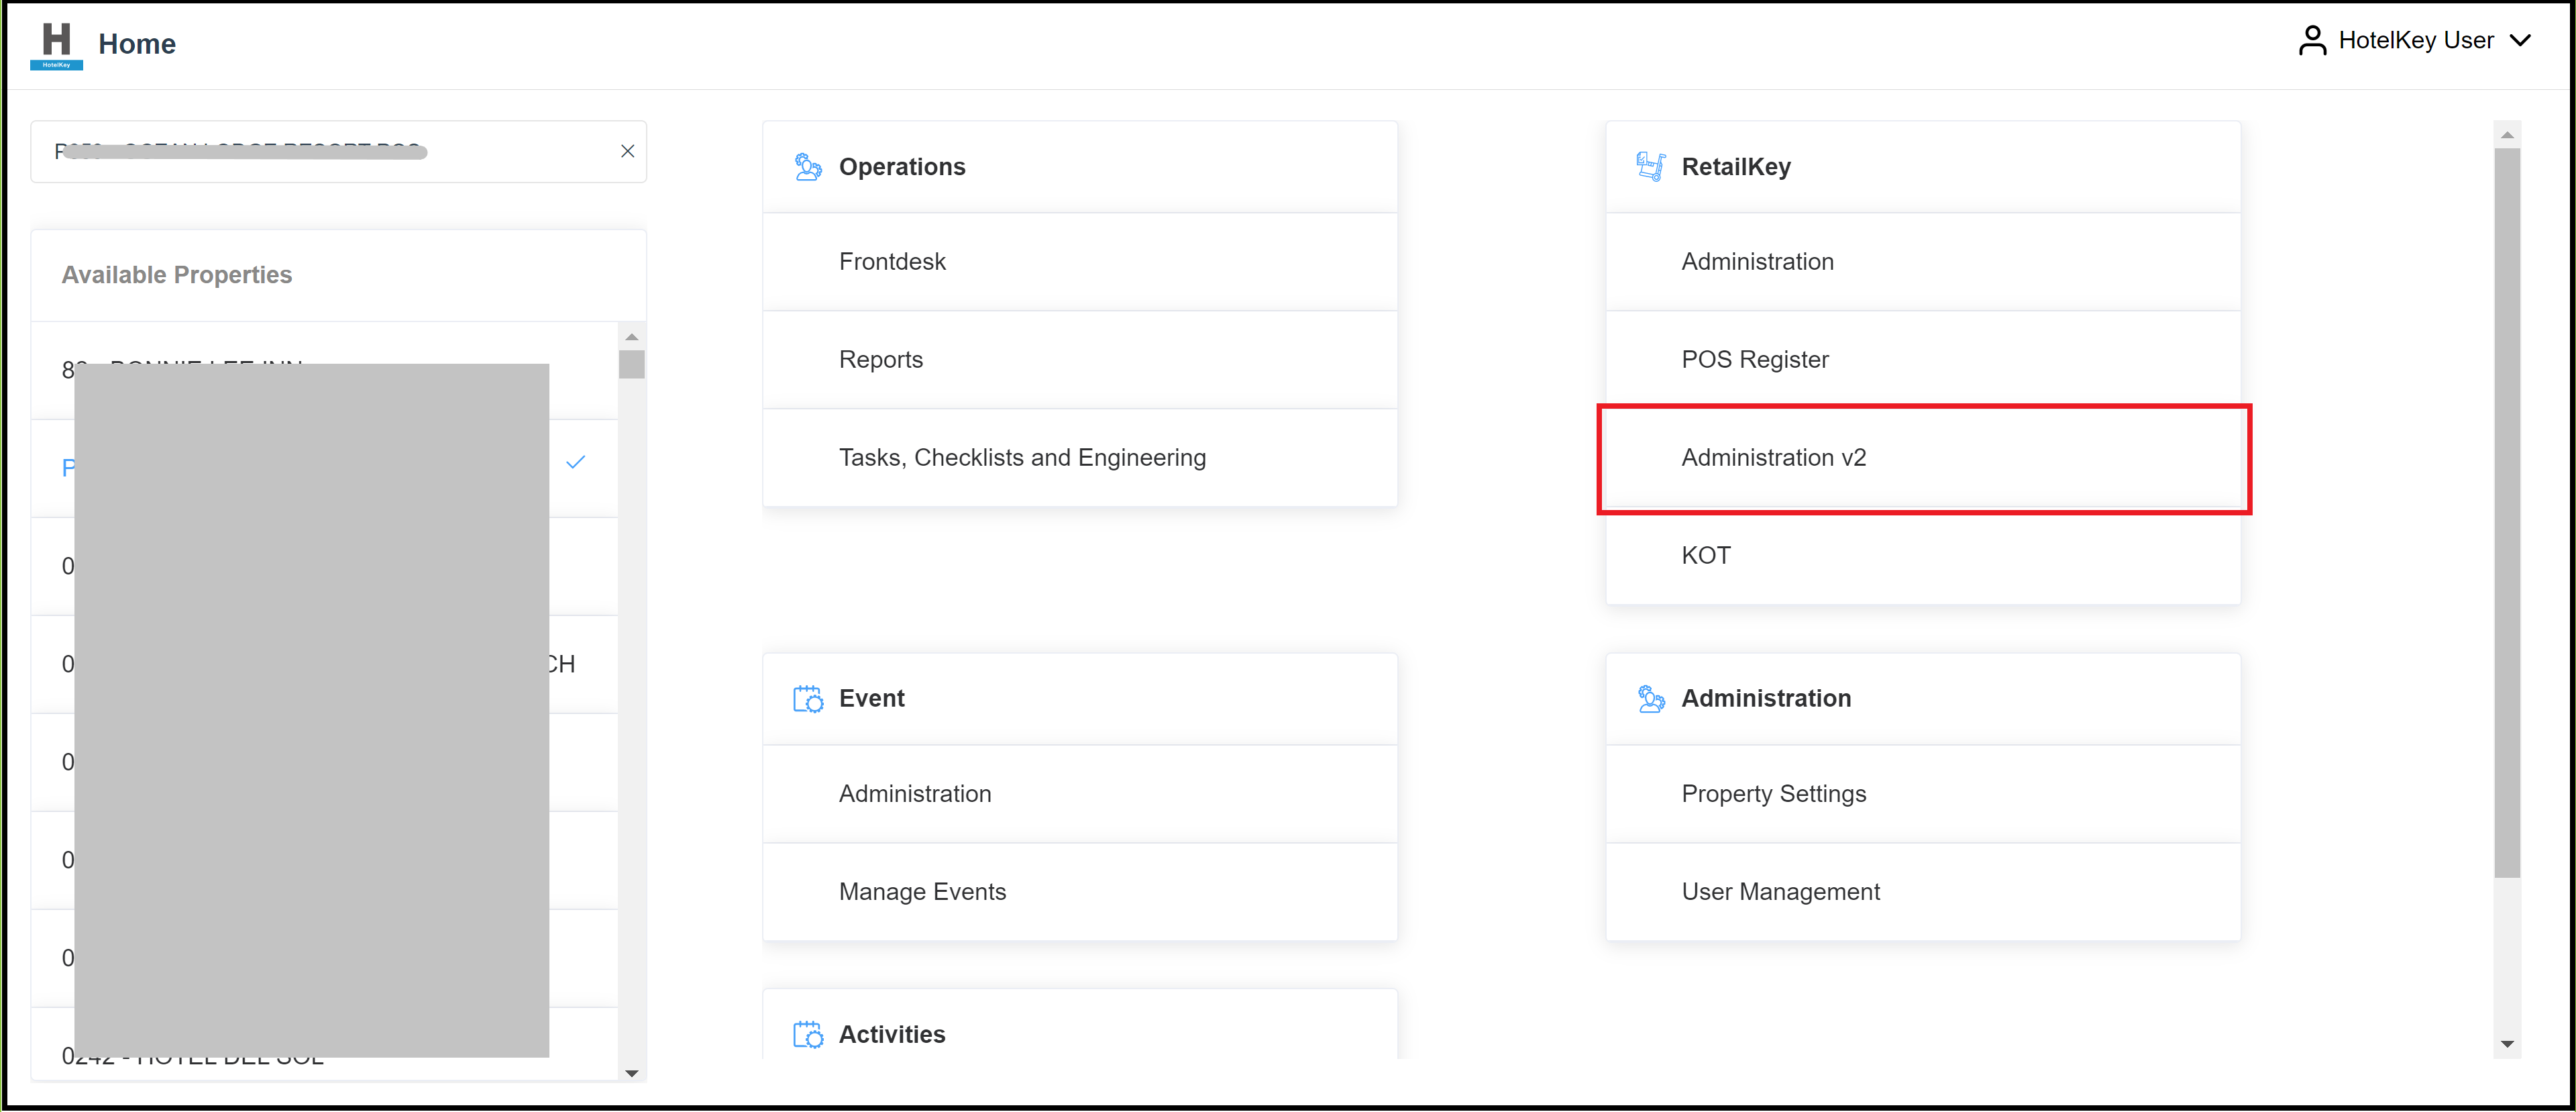 RetailKey Section in HotelKey Admin App
|
The RetailKey Admin page loads. Expand the Stock Management sidebar menu, select Transfer. | 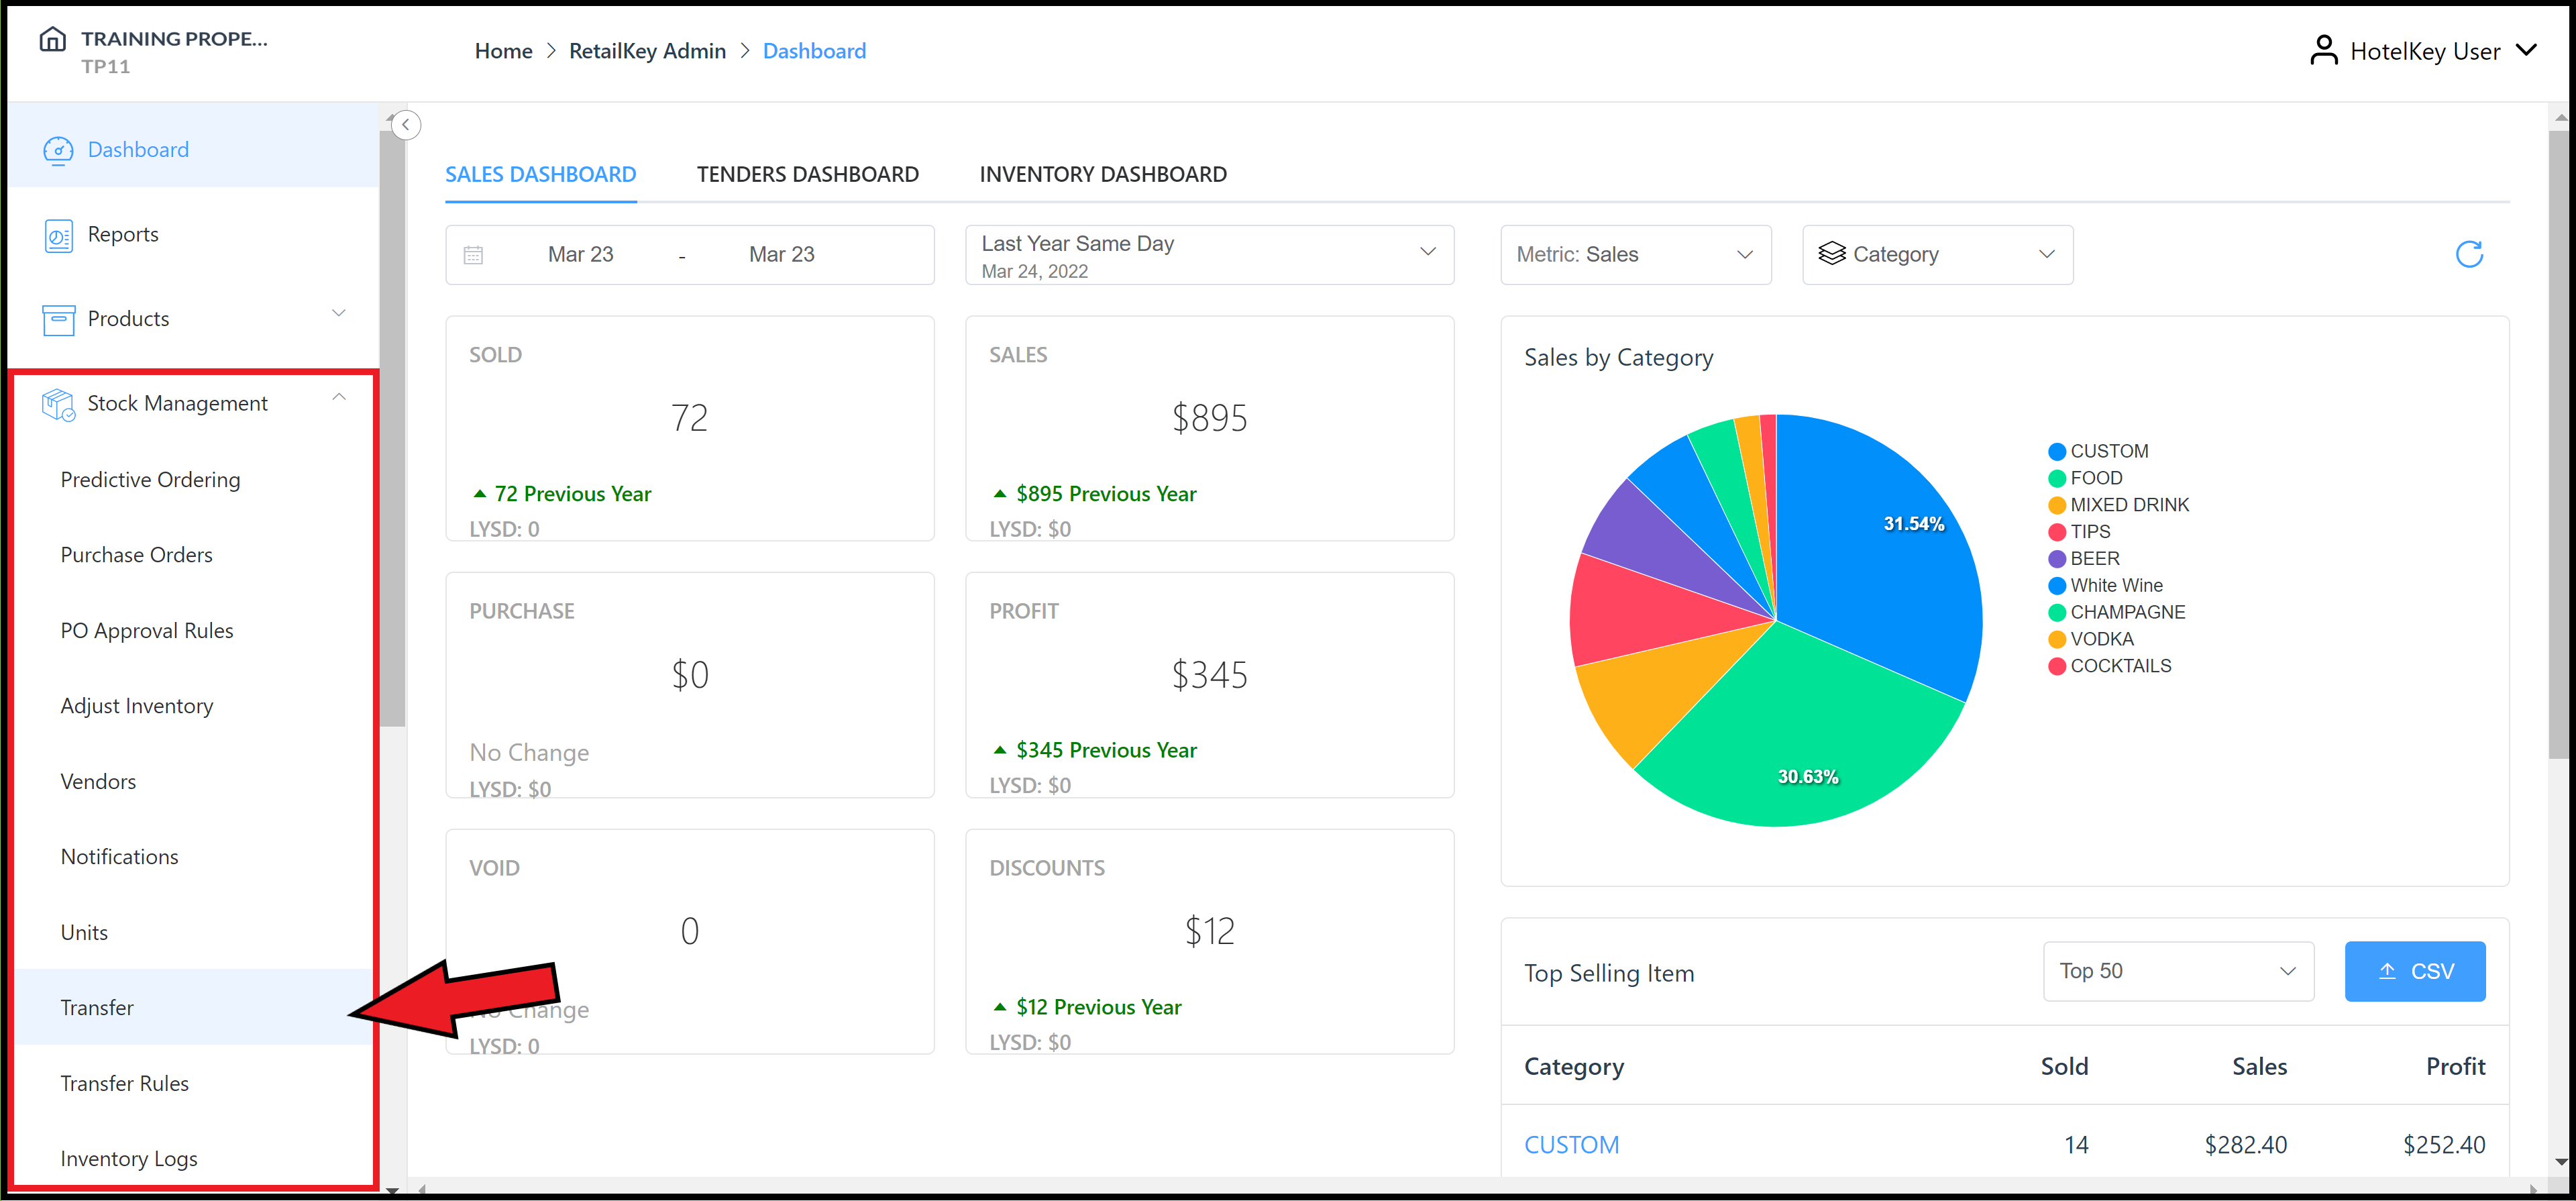 Stock Management Menu Expanded - Transfers Link |
The Product Transfers panel loads, containing a list of existing transfer requests. Select New Request. |  Product Transfers Panel - New Request Link |
The Create a Transfer Request panel loads. In the Transfer To section, select Select Store. | 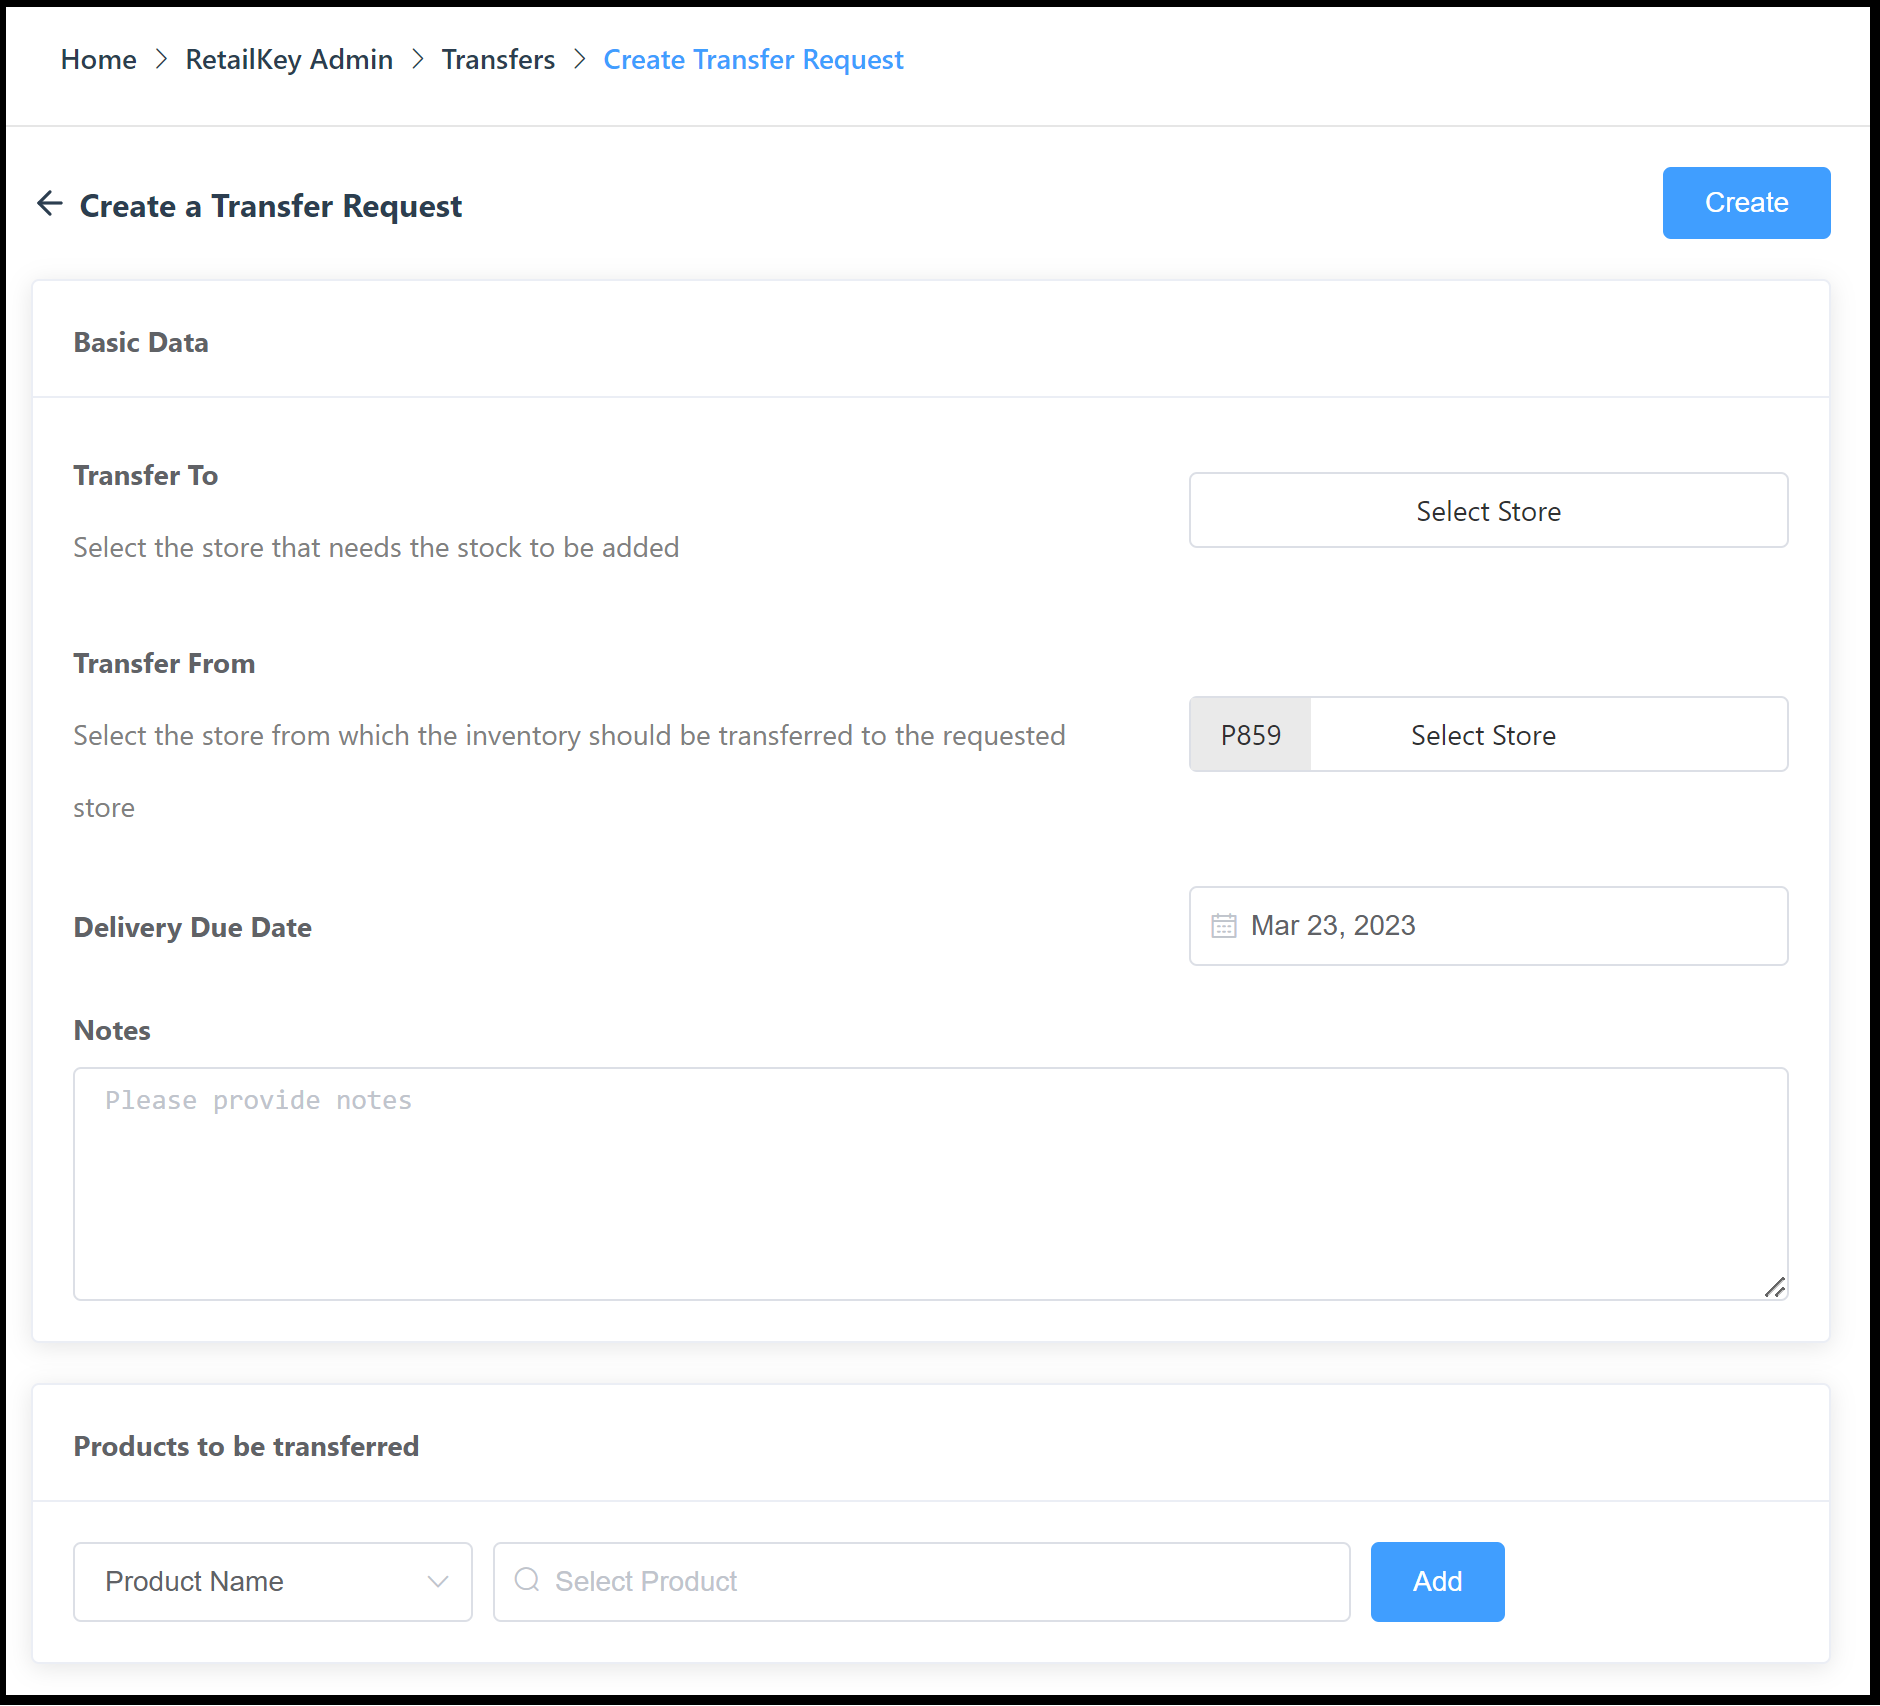 Create a Transfer Request Panel |
The Select Store panel loads with the Select A Store From This Property tab open by default. To transfer from a store on the current property, select the applicable store on this tab. The Confirm link activates, select it to save changes and close the panel. See the next row of this table for Select A Store From Different Property tab instructions. | 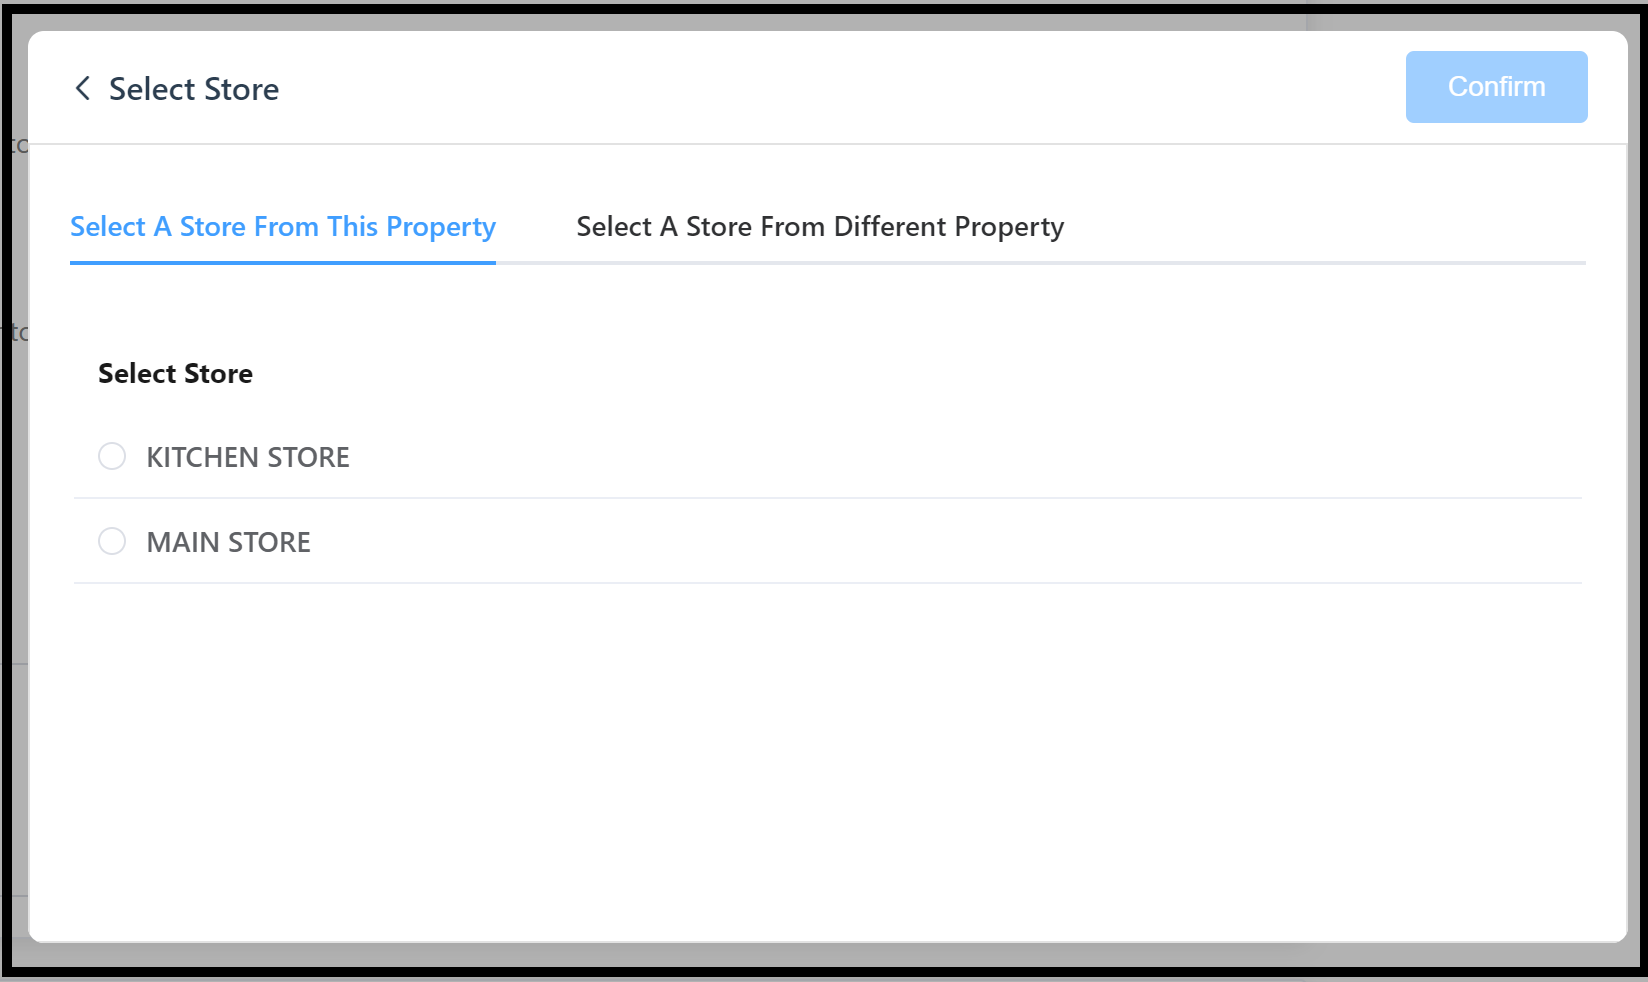 Select A Store From This Property Tab |
To transfer from a store on a different property, select the Select A Store From Different Property tab. The tab contains a list of properties from which products can be transferred. Select the applicable property. A list of stores for the selected property loads. Select the applicable store. The Confirm link activates, select it to save changes and close the panel. | 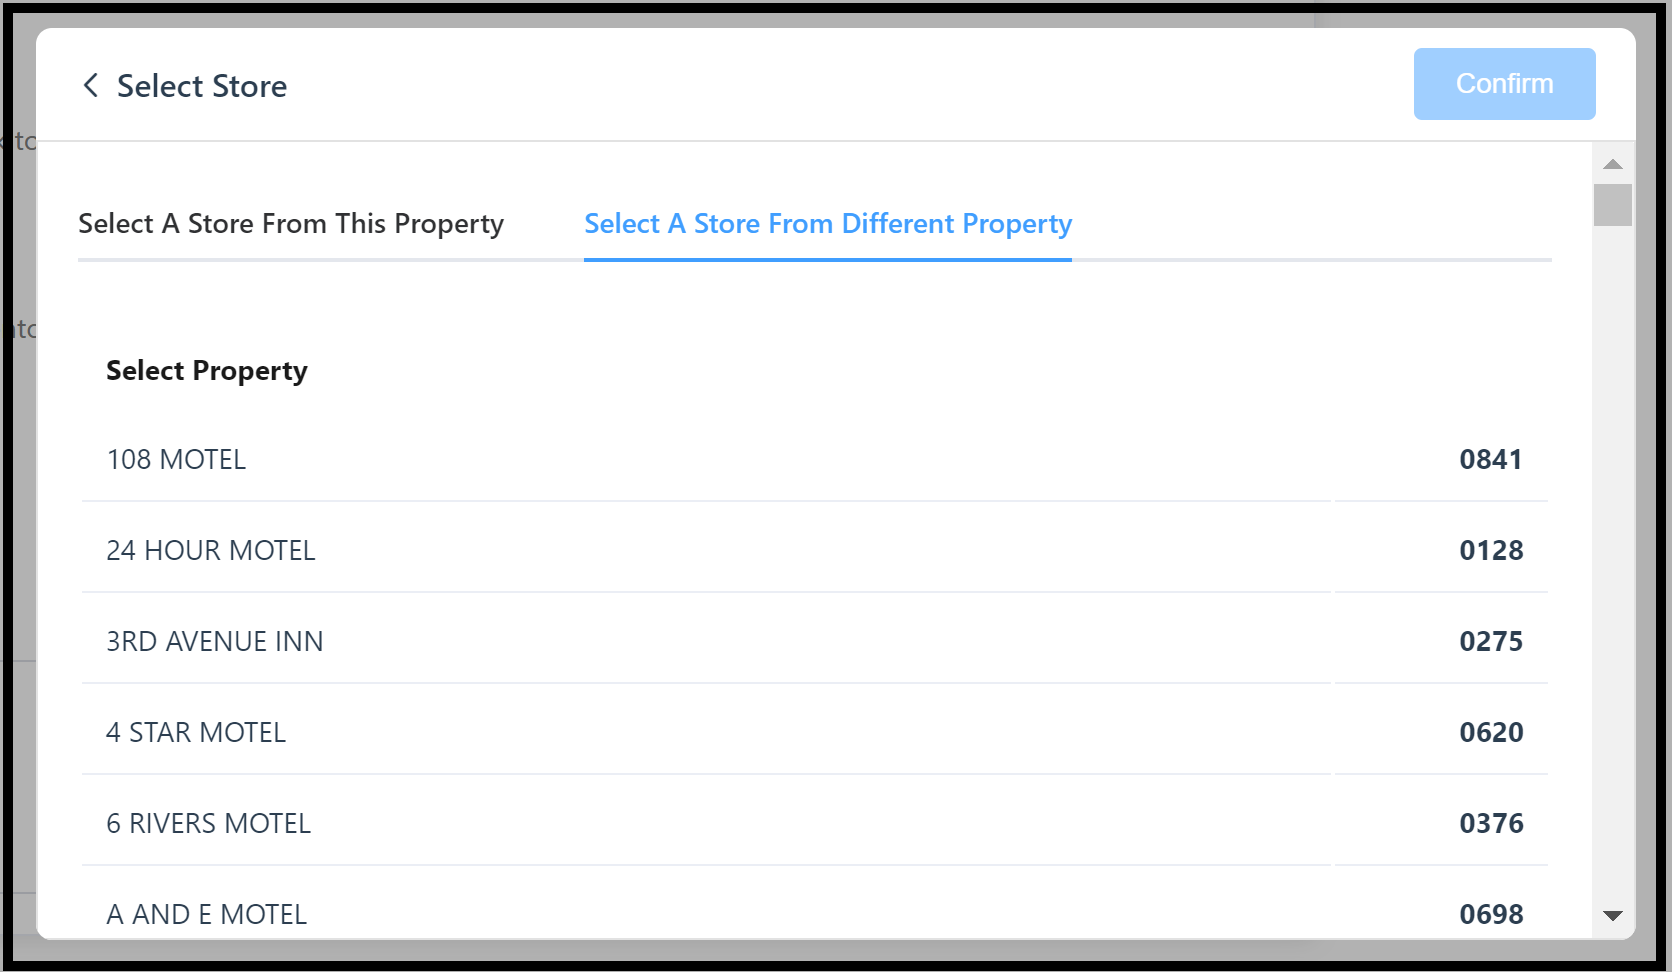 Select A Store From Different Property Tab 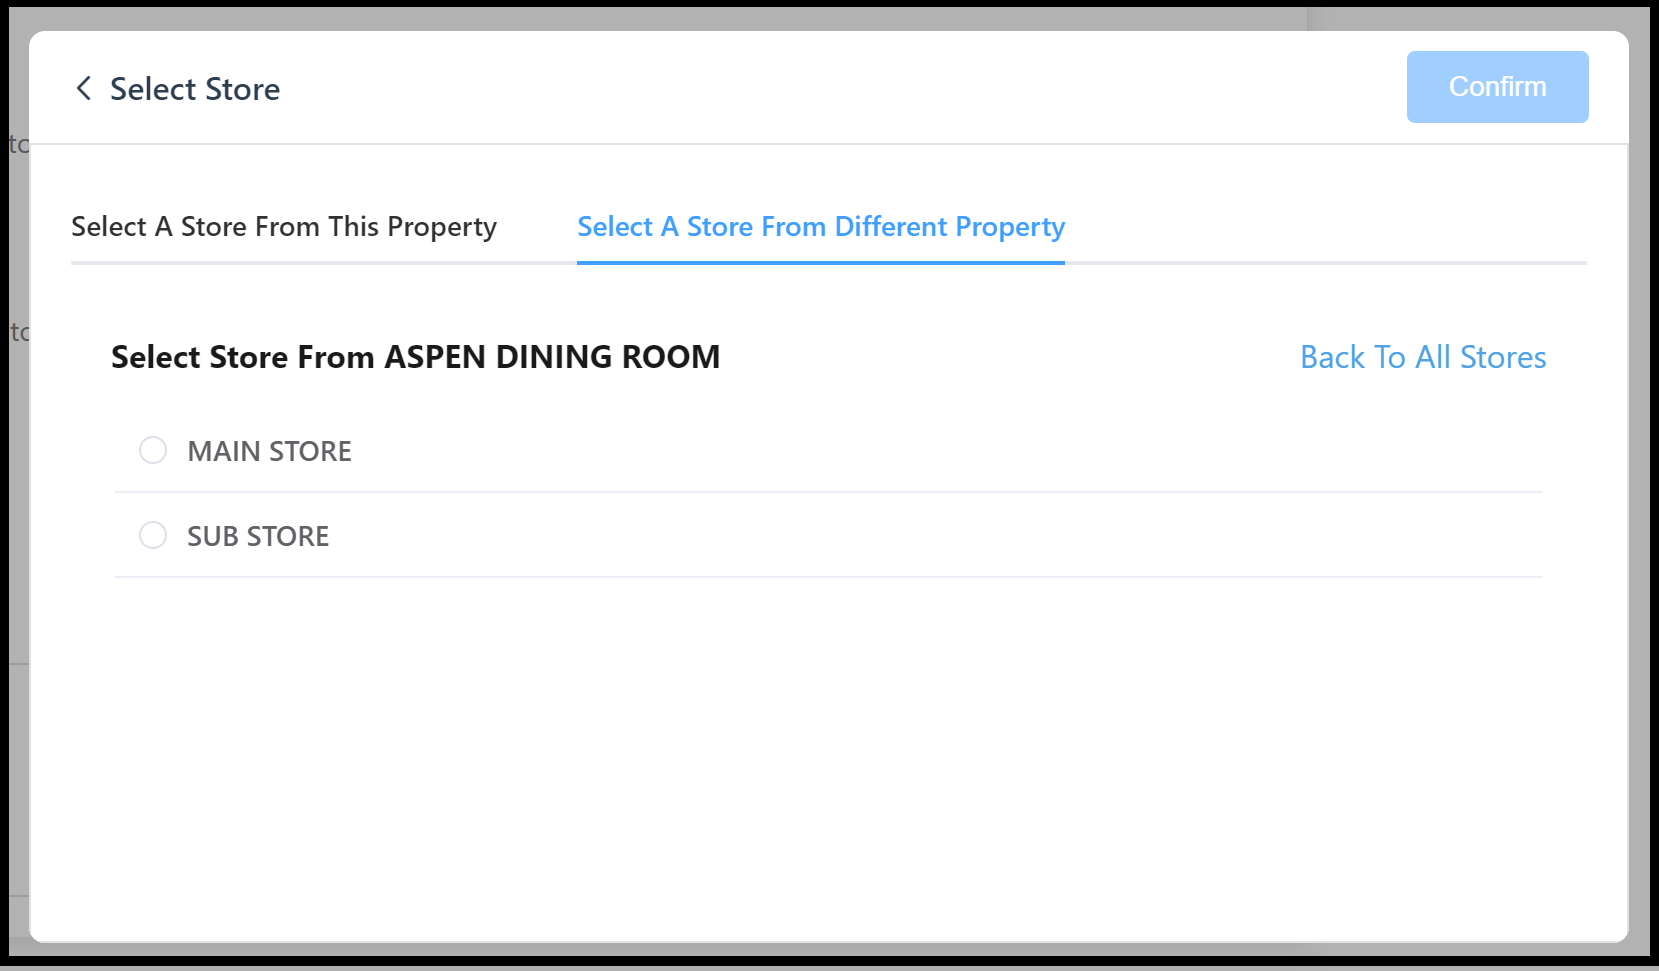 Select Store From Different Property Panel |
Back on the Create a Transfer Request panel, in the Products to be transferred section at the bottom, select and add applicable products to the list. Select Product Name or Product SKU in the first search box, then use the associated search box to enter the first few characters of the Name or SKU, as applicable. Select the desired product from the drop down list and select Add. A detail section expands for entry of the Quantity to be transferred. | 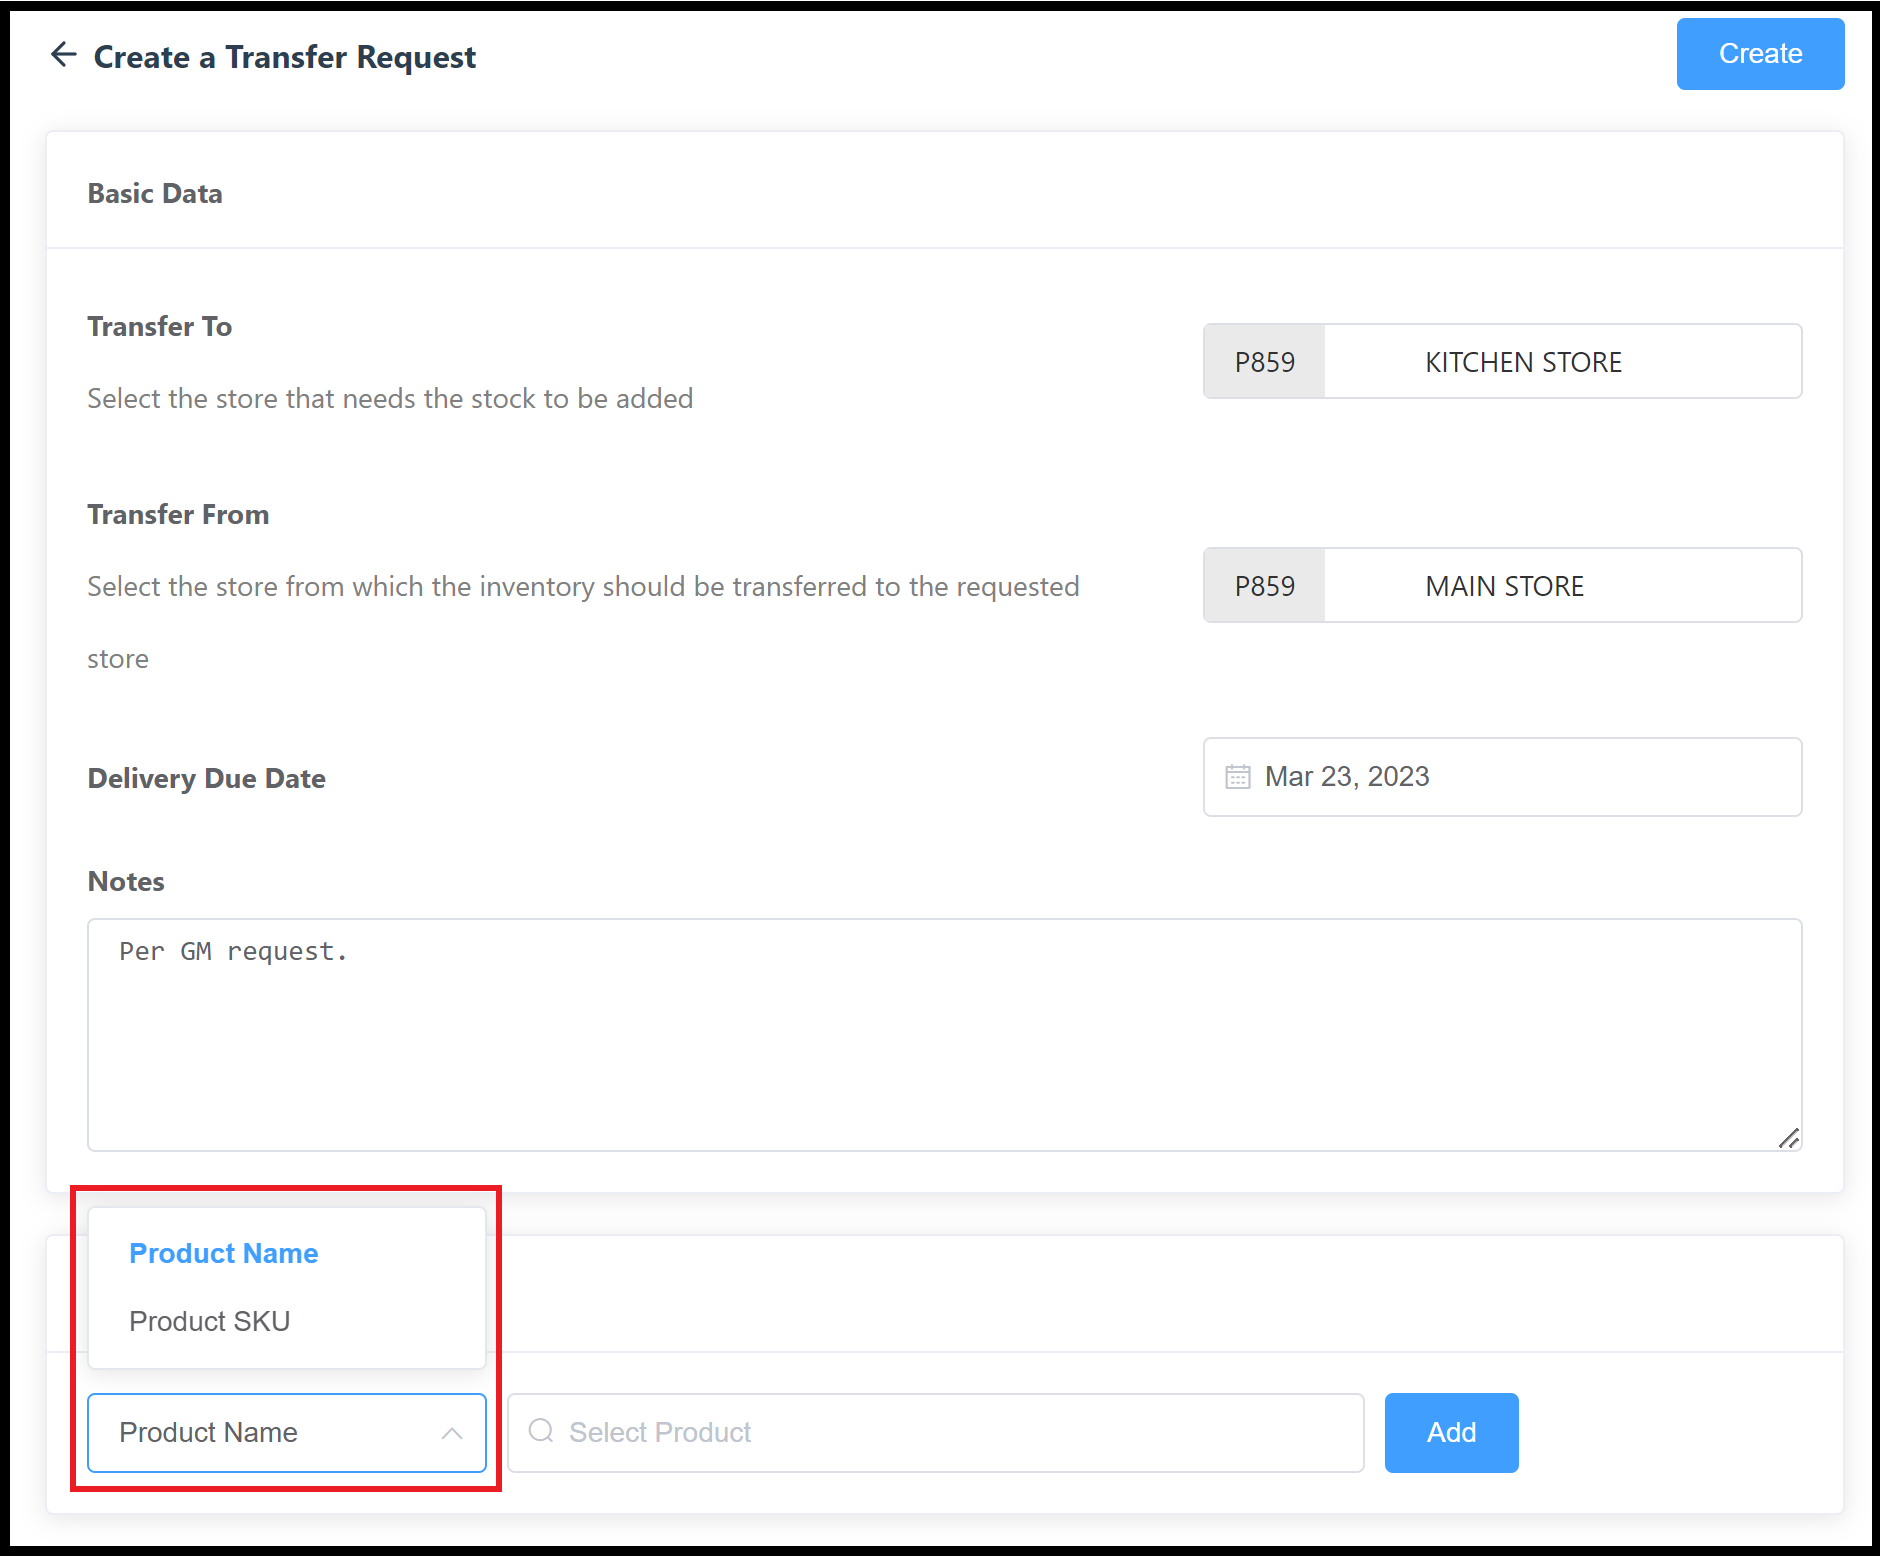 Products to be Transferred Section - Select Product Name or SKU  Matching Products Drop Down List  Product Details - Enter Quantity |
Here is an example of the completed Create a Transfer Request panel. When all products to be transferred are added, select Create at the top of the panel to close it and create the transfer request. | 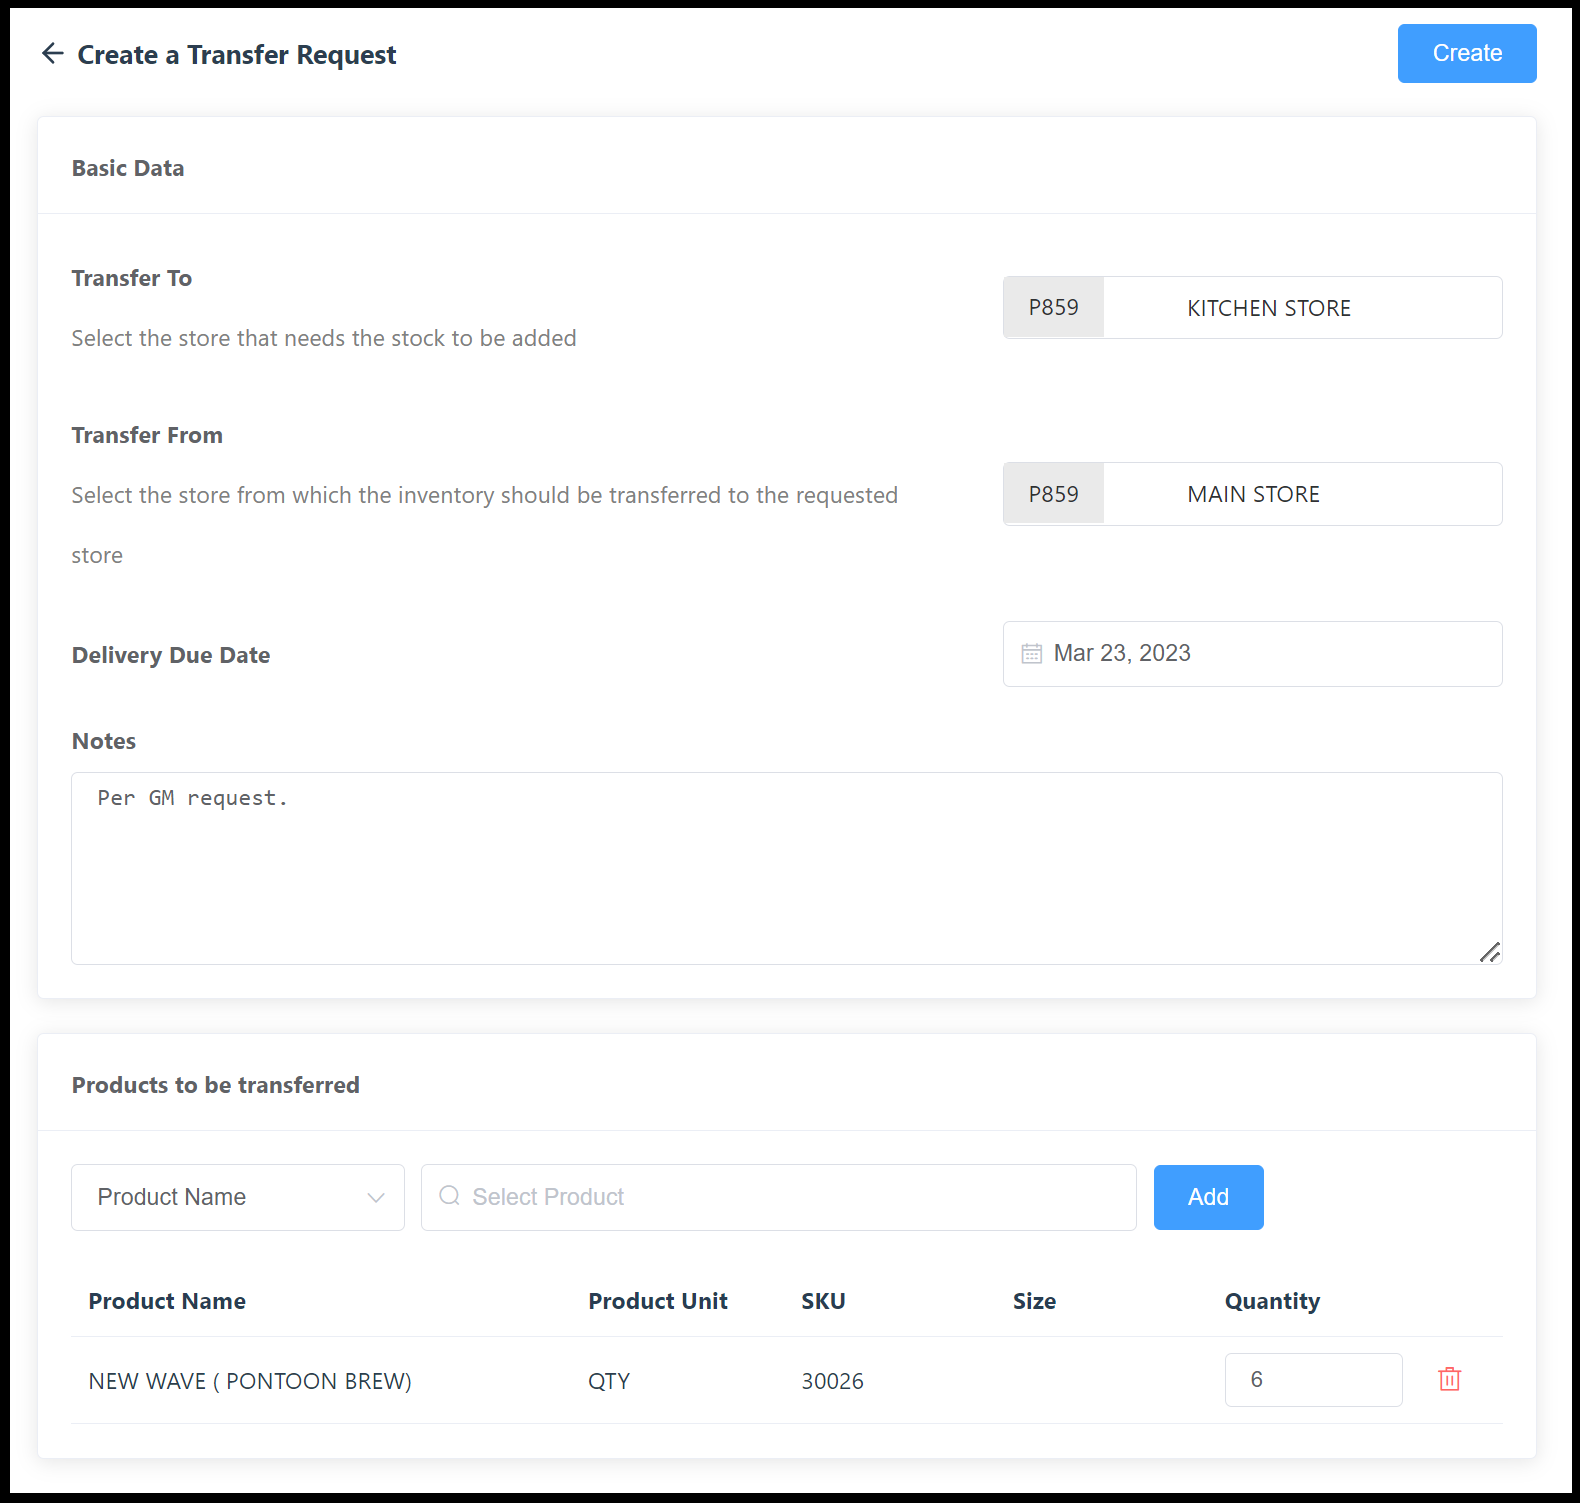 Create a Transfer Request Panel - Completed |
Details of the request are loaded for confirmation. If details are incorrect, use the back arrow at the upper left to return to the previous panel and make corrections. If details are correct, select Confirm. |  Confirm Transfer Request |
The new request is added to the Product Transfers panel with a status of REQUESTED. |  Product Transfers List - Statuses |
To approve the request, navigate to the applicable request on the Product Transfers panel (Administration v2 > Stock Management > Transfer) and select the applicable request. A transfer request details panel loads. Select Edit to make changes before approving. Select Confirm to approve the request. This changes the request status on the Product Transfers list panel to “APPROVED”. Note that where a product is being transferred from the store of a different property, business policies and procedures may require a team member from that property to approve the transfer. | 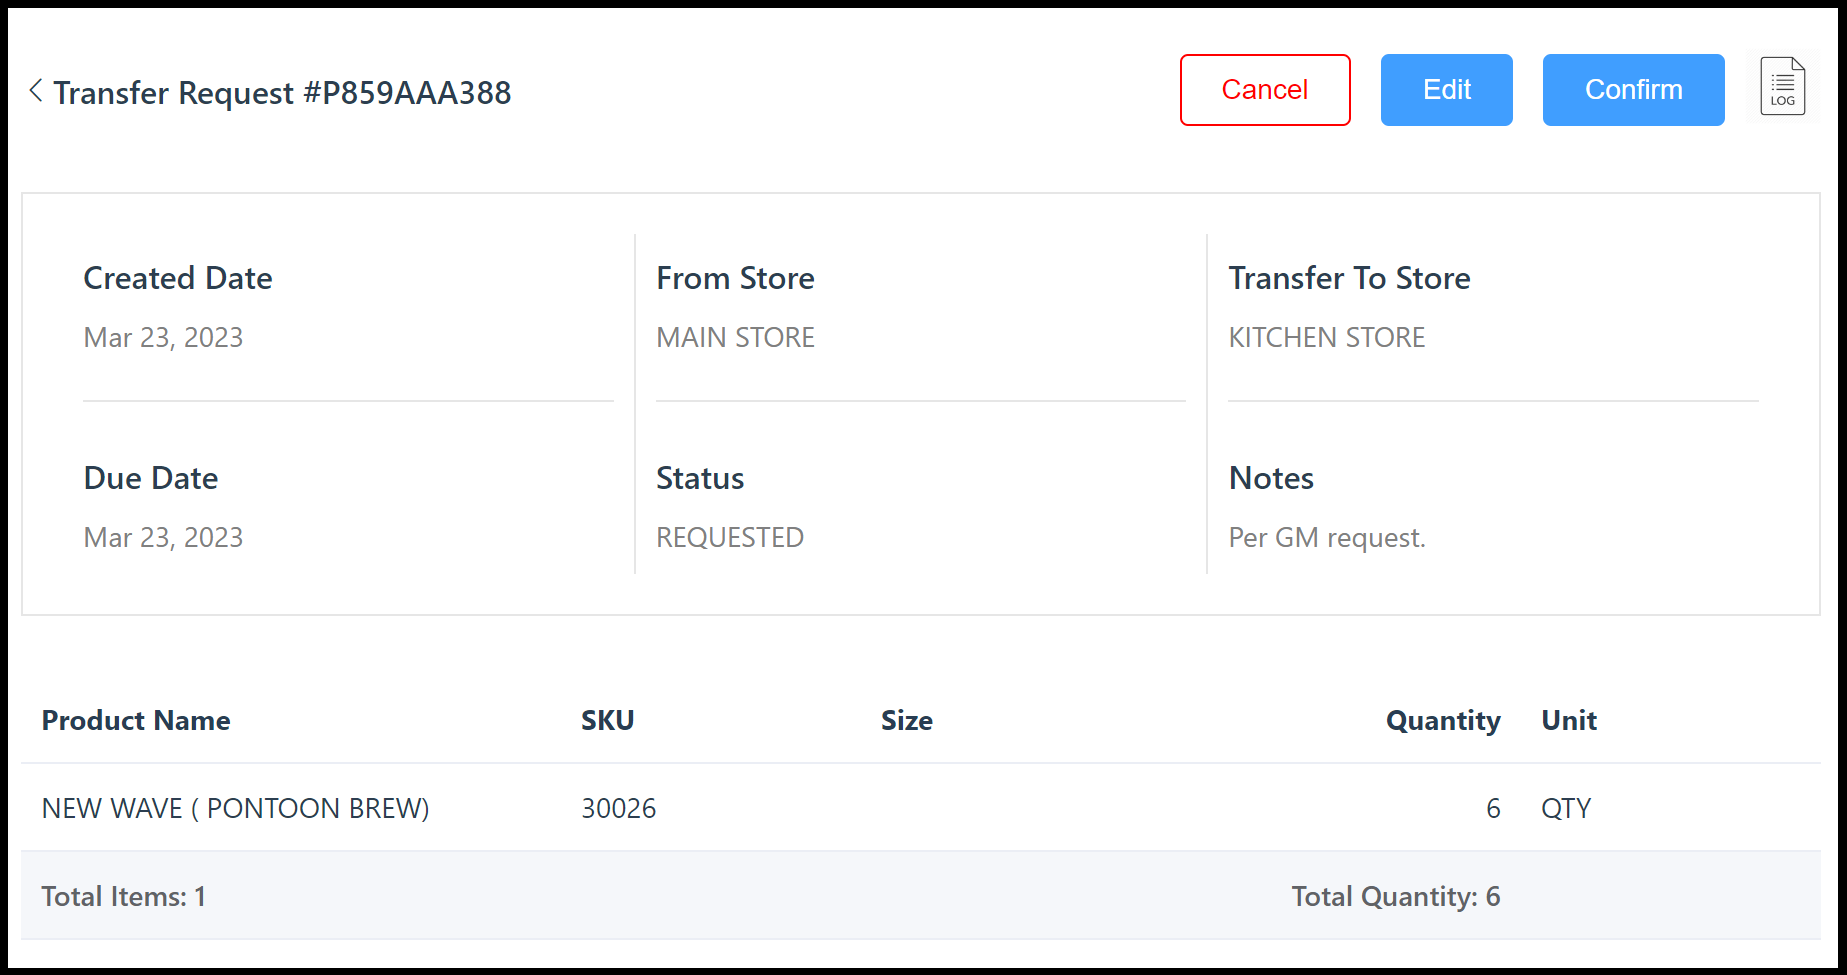 Transfer Request Details |
To complete the request, navigate to the applicable request on the Product Transfers panel (Administration v2 > Stock Management > Transfer) and select the applicable request from the list. A transfer request details panel loads. Select Edit to make changes before completing. Select Confirm to complete the request. A final confirmation panel loads, displaying details of the transfer. Select Confirm to complete the transfer. Details of the completed transfer are shown. Note that completed transfer requests are removed from the Product Transfers list. | 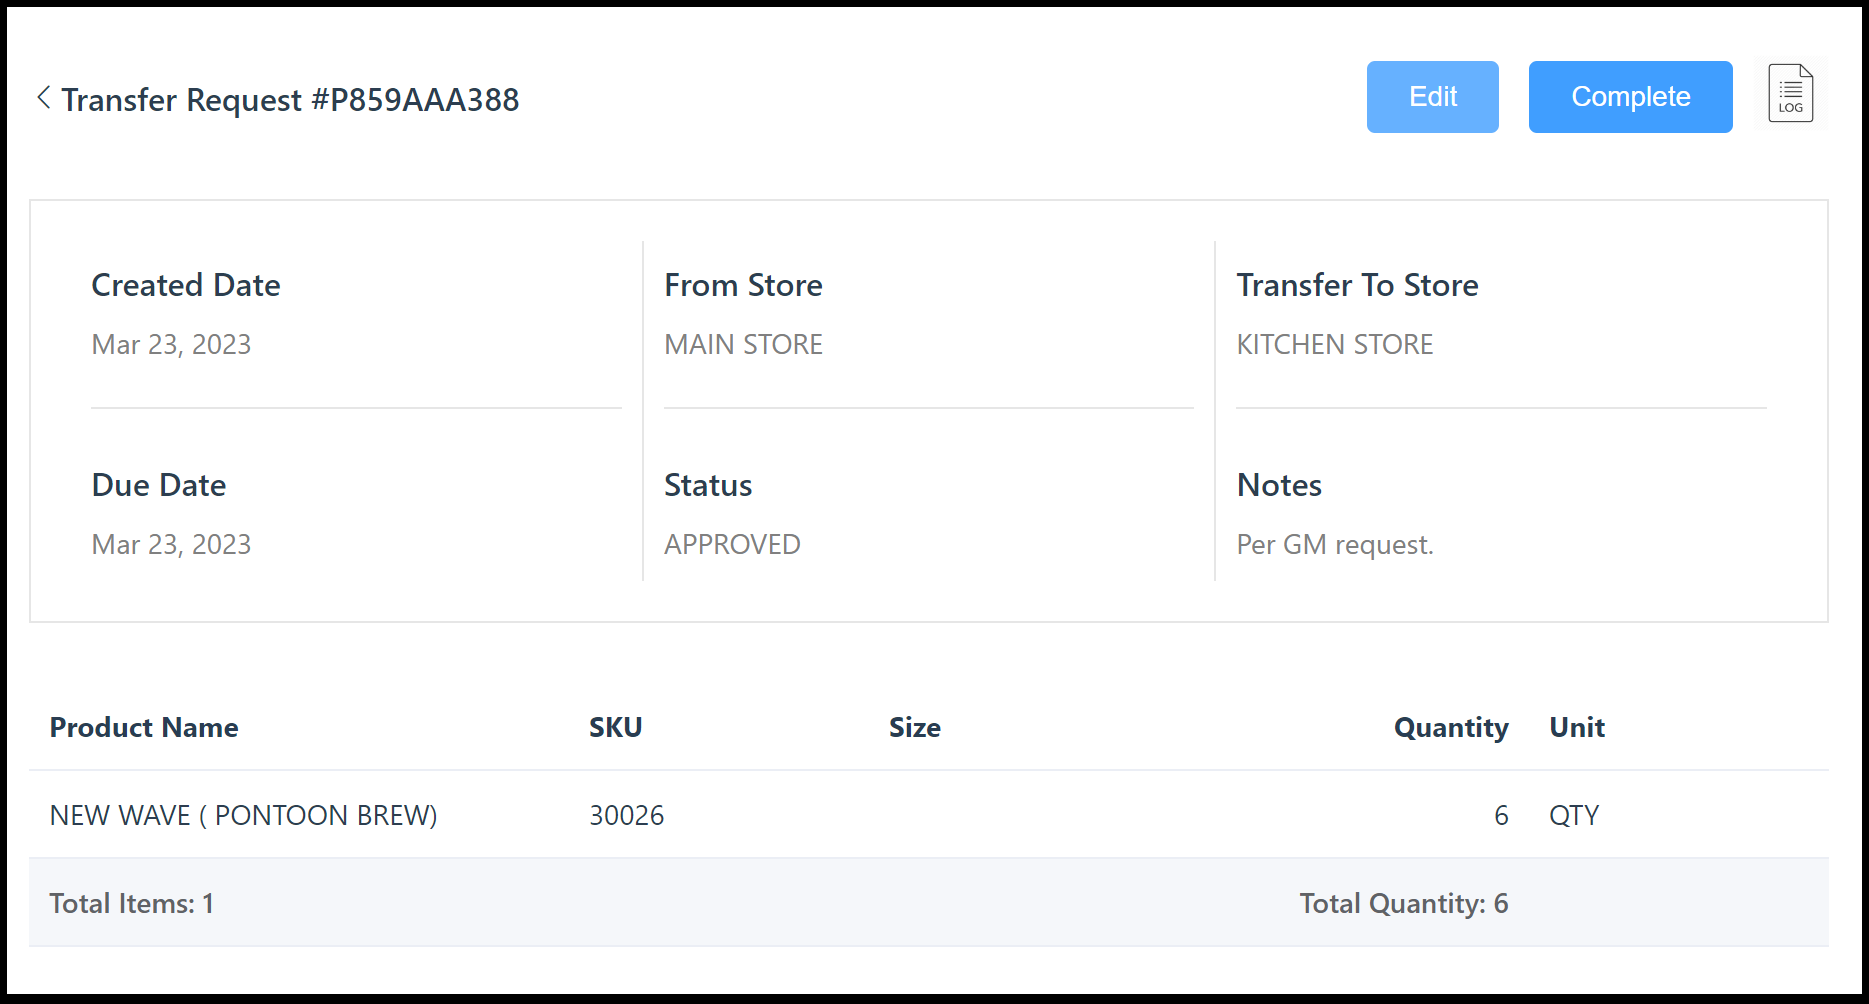 Transfer Request Details - Complete Link  Final Transfer Confirmation Panel 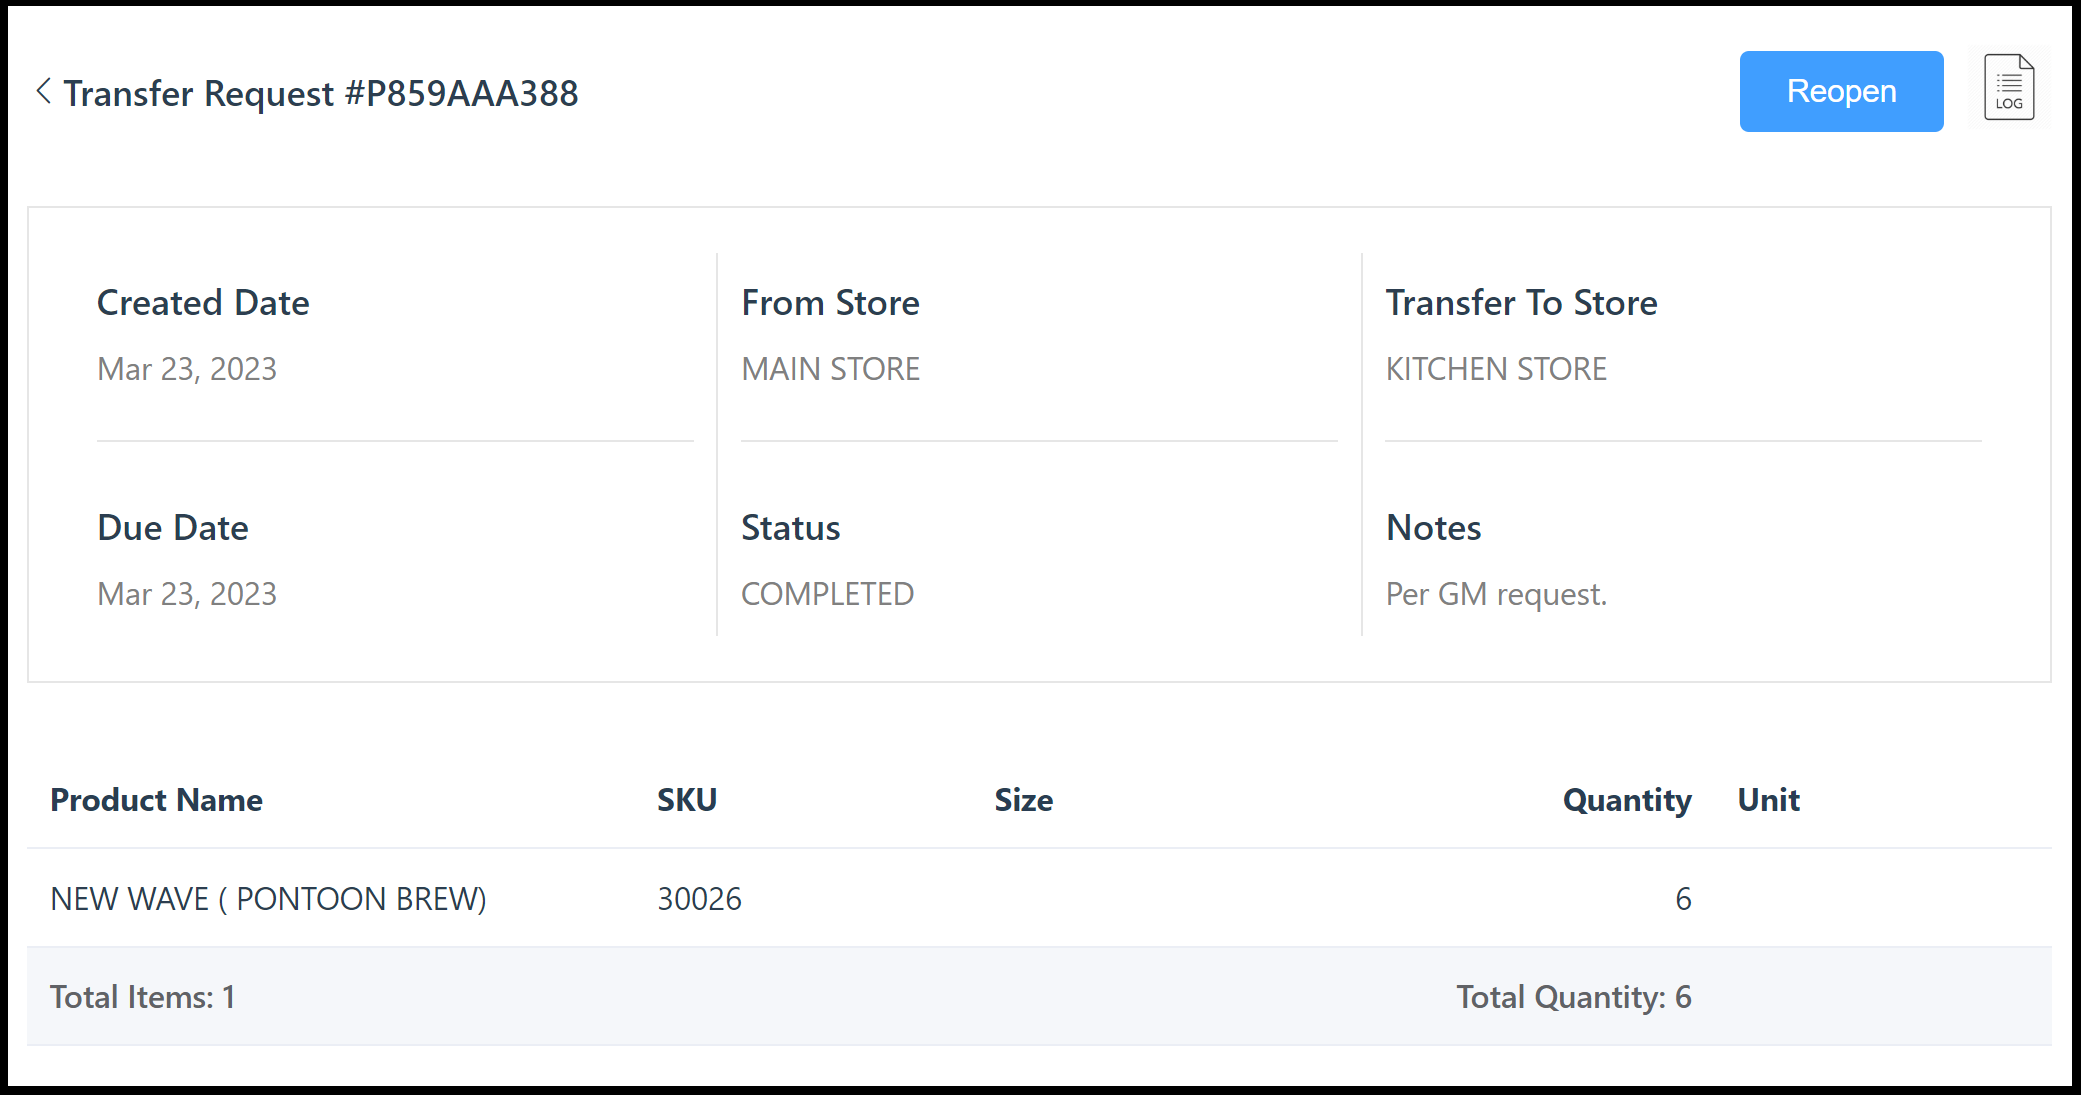 Transfer Request Complete |
