Action Menu: Availabilities Screen

📆 Revision Date:

The Availabilities screen provides a dynamic, visual calendar that helps you efficiently manage event spaces and monitor the status of all events—Confirmed, Tentative, and Prospect—at a glance.

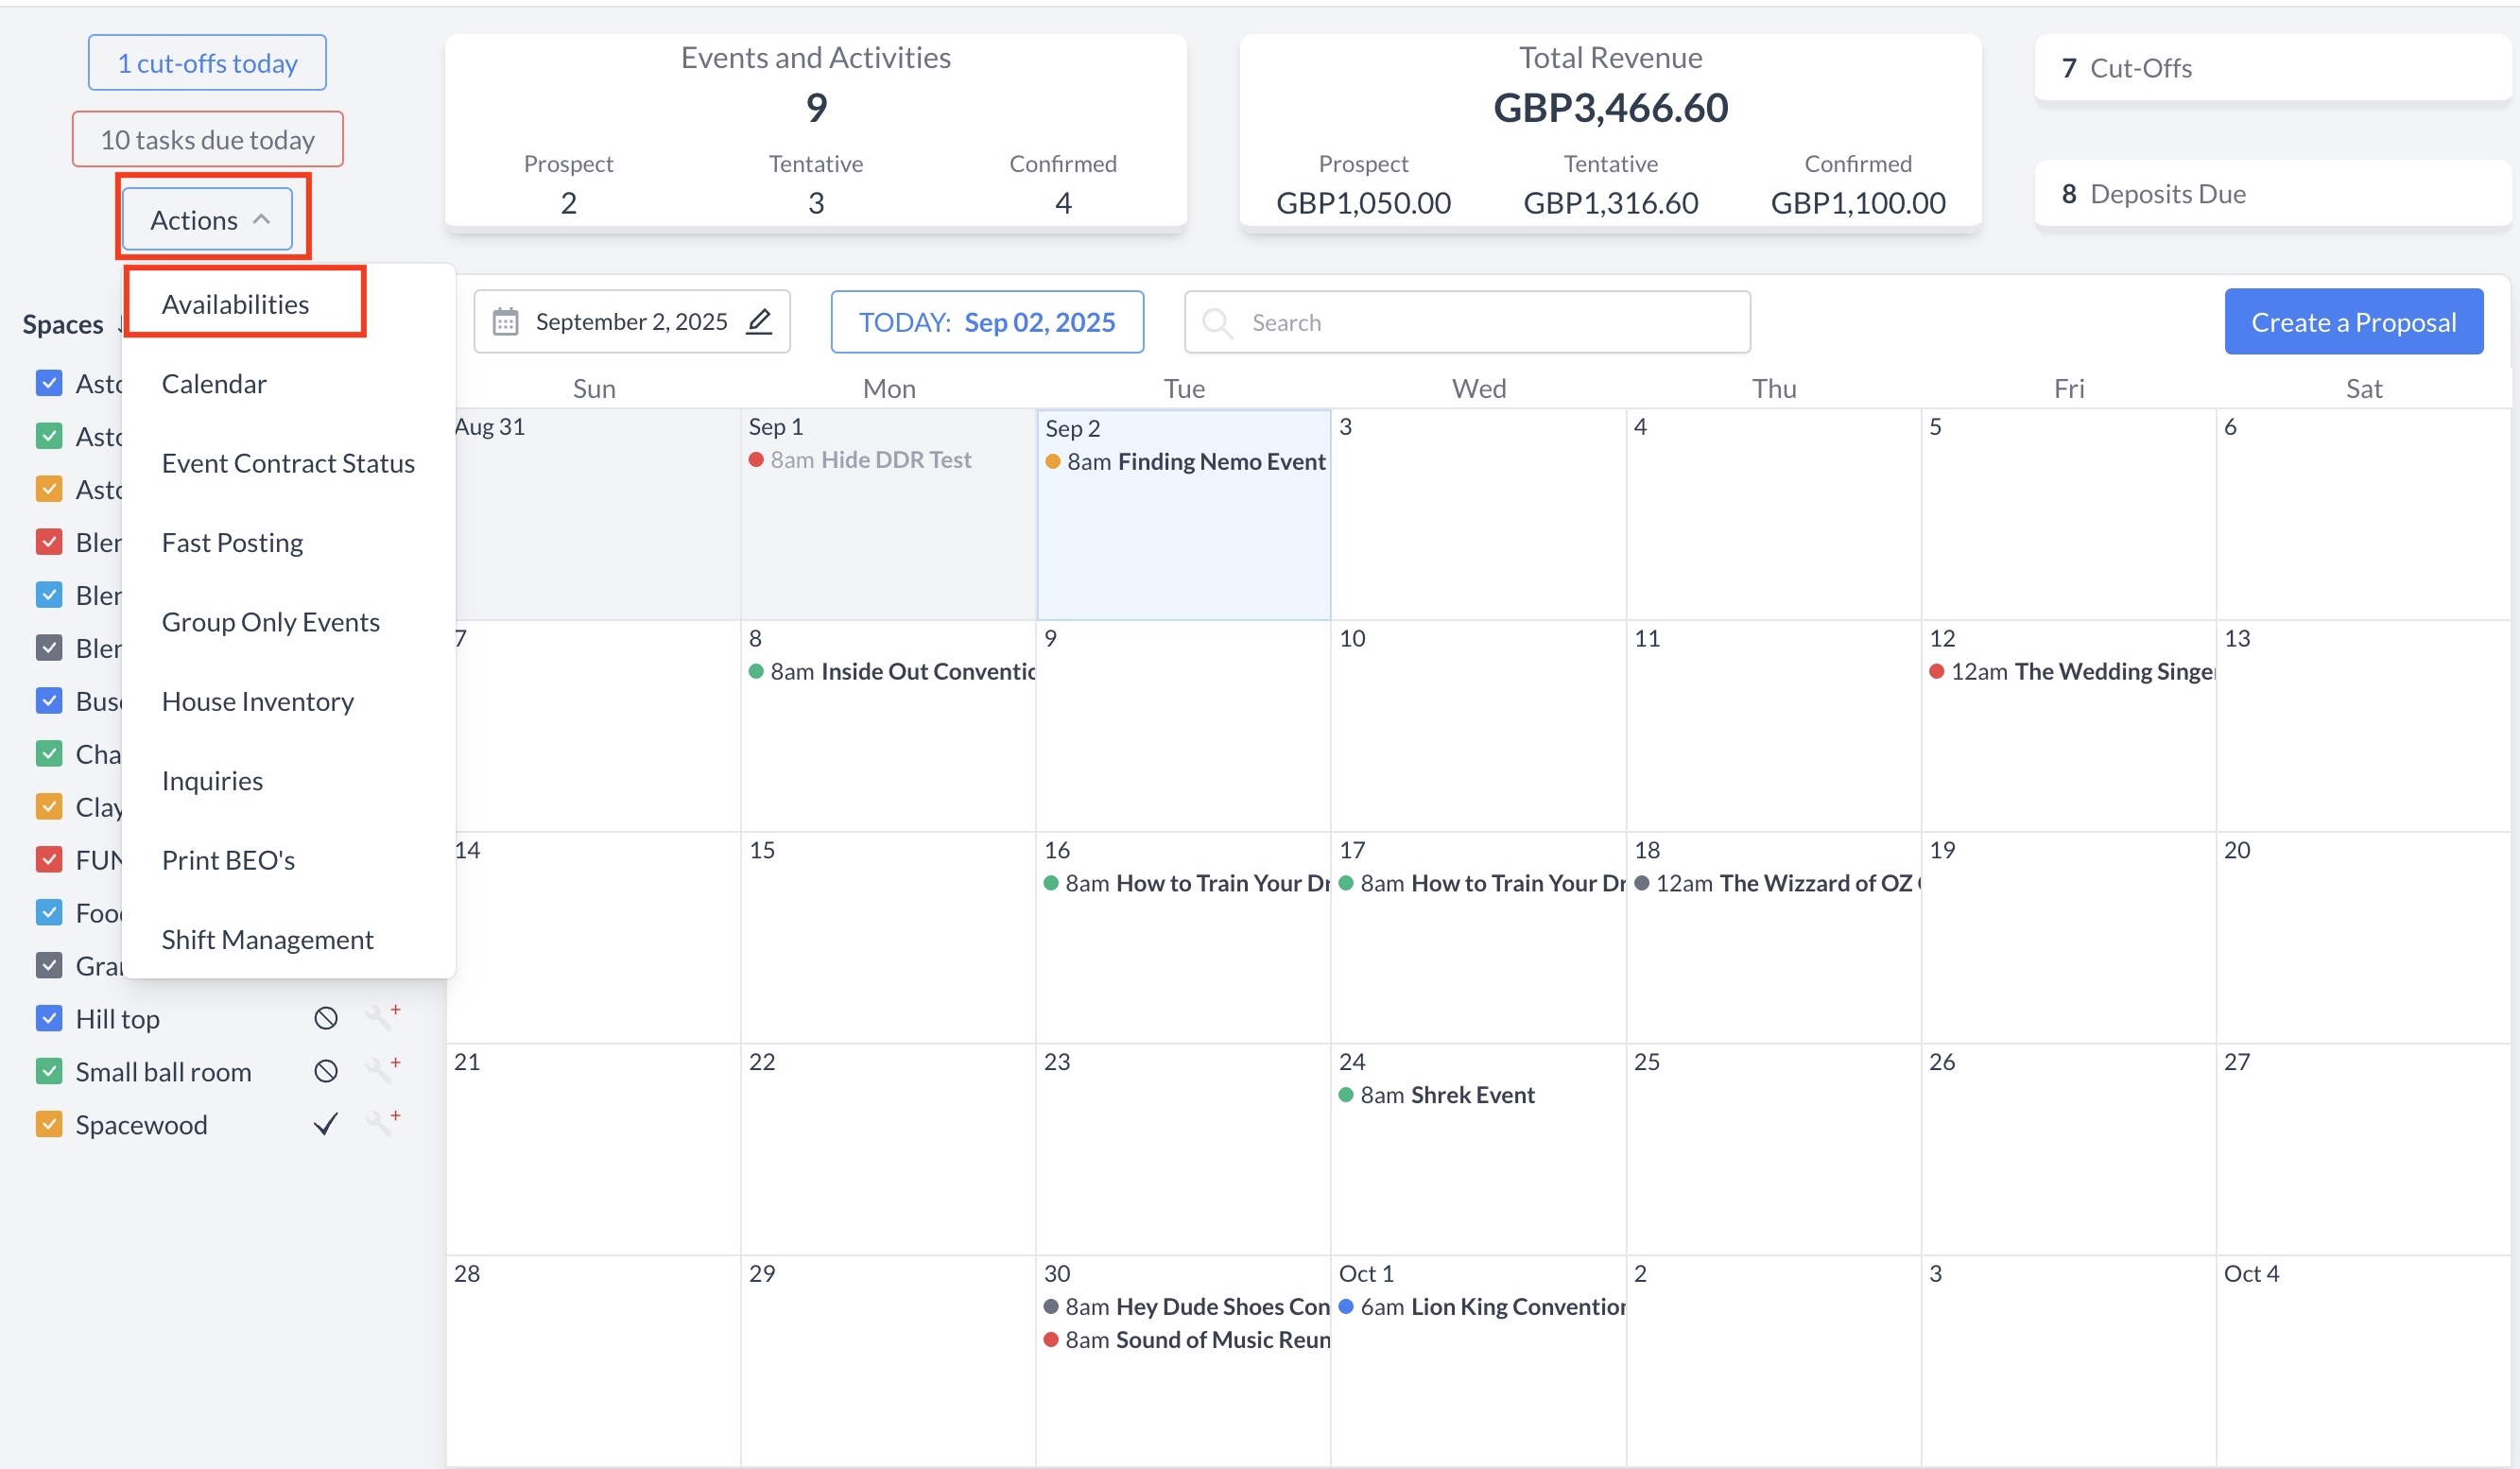
Navigate to Home > Event Management > Actions > Availabilities

Image 9-2-25 at 7.54 PM.jpg
Actions Menu > Availabilities


Default Calendar View

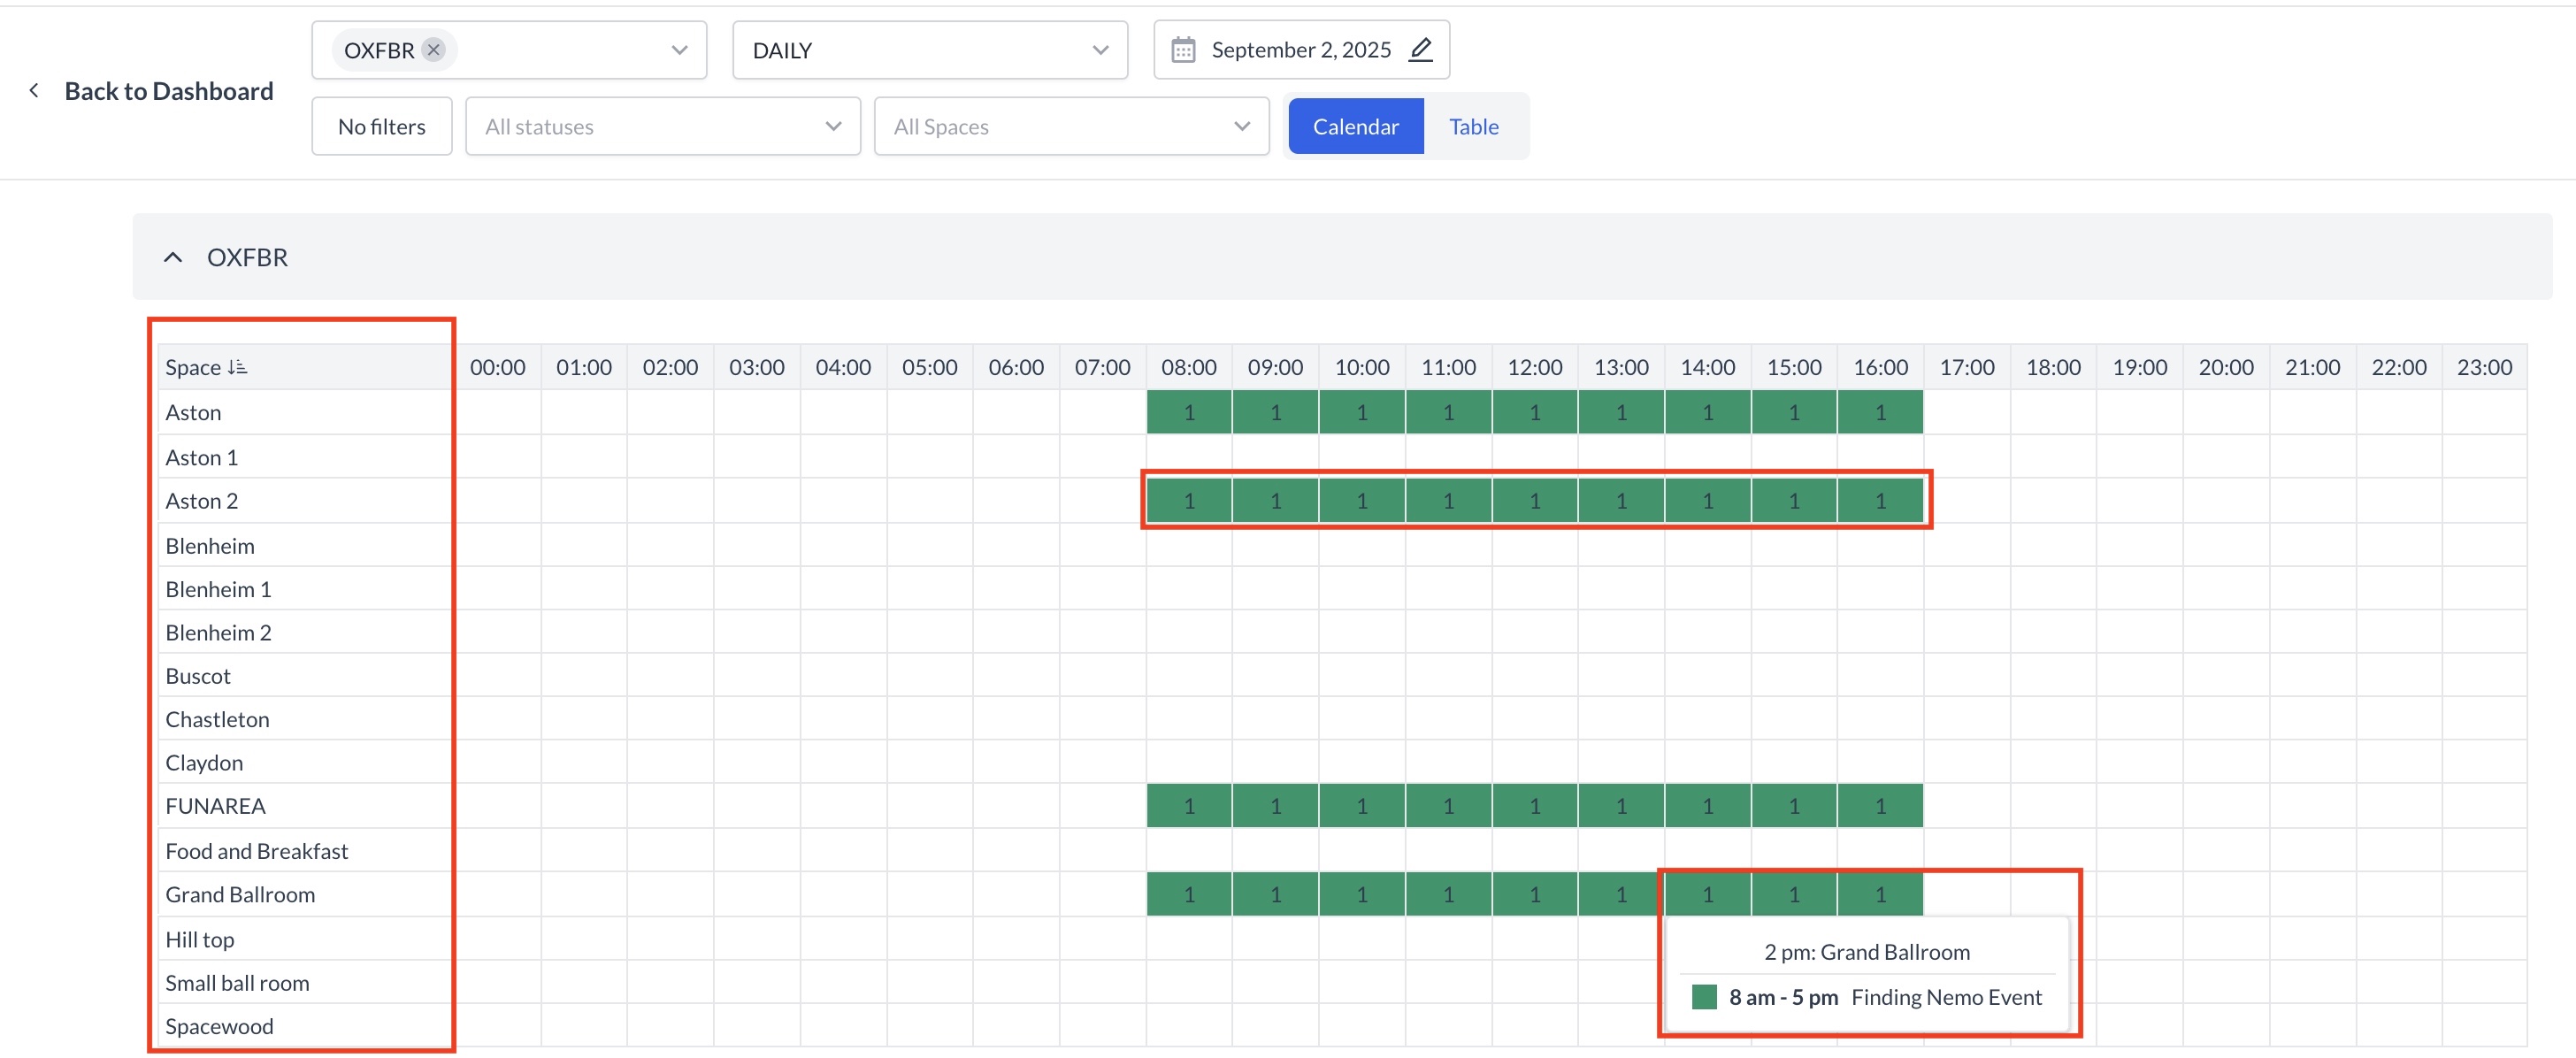
The default view of the Availabilities screen is the daily view for the current business day.

  • On the left side, you'll see a list of all event spaces.

  • If a space has an event with a Prospect, Tentative, or Confirmed status, the corresponding time block on the calendar will be shaded and display a number.

  • This number indicates how many events are reserved in that space during the selected time block.

  • Hover over the number to view a tooltip showing the event name and time.

Image 9-2-25 at 7.58 PM.jpg
Availabilities - Daily View


Changing the Calendar View
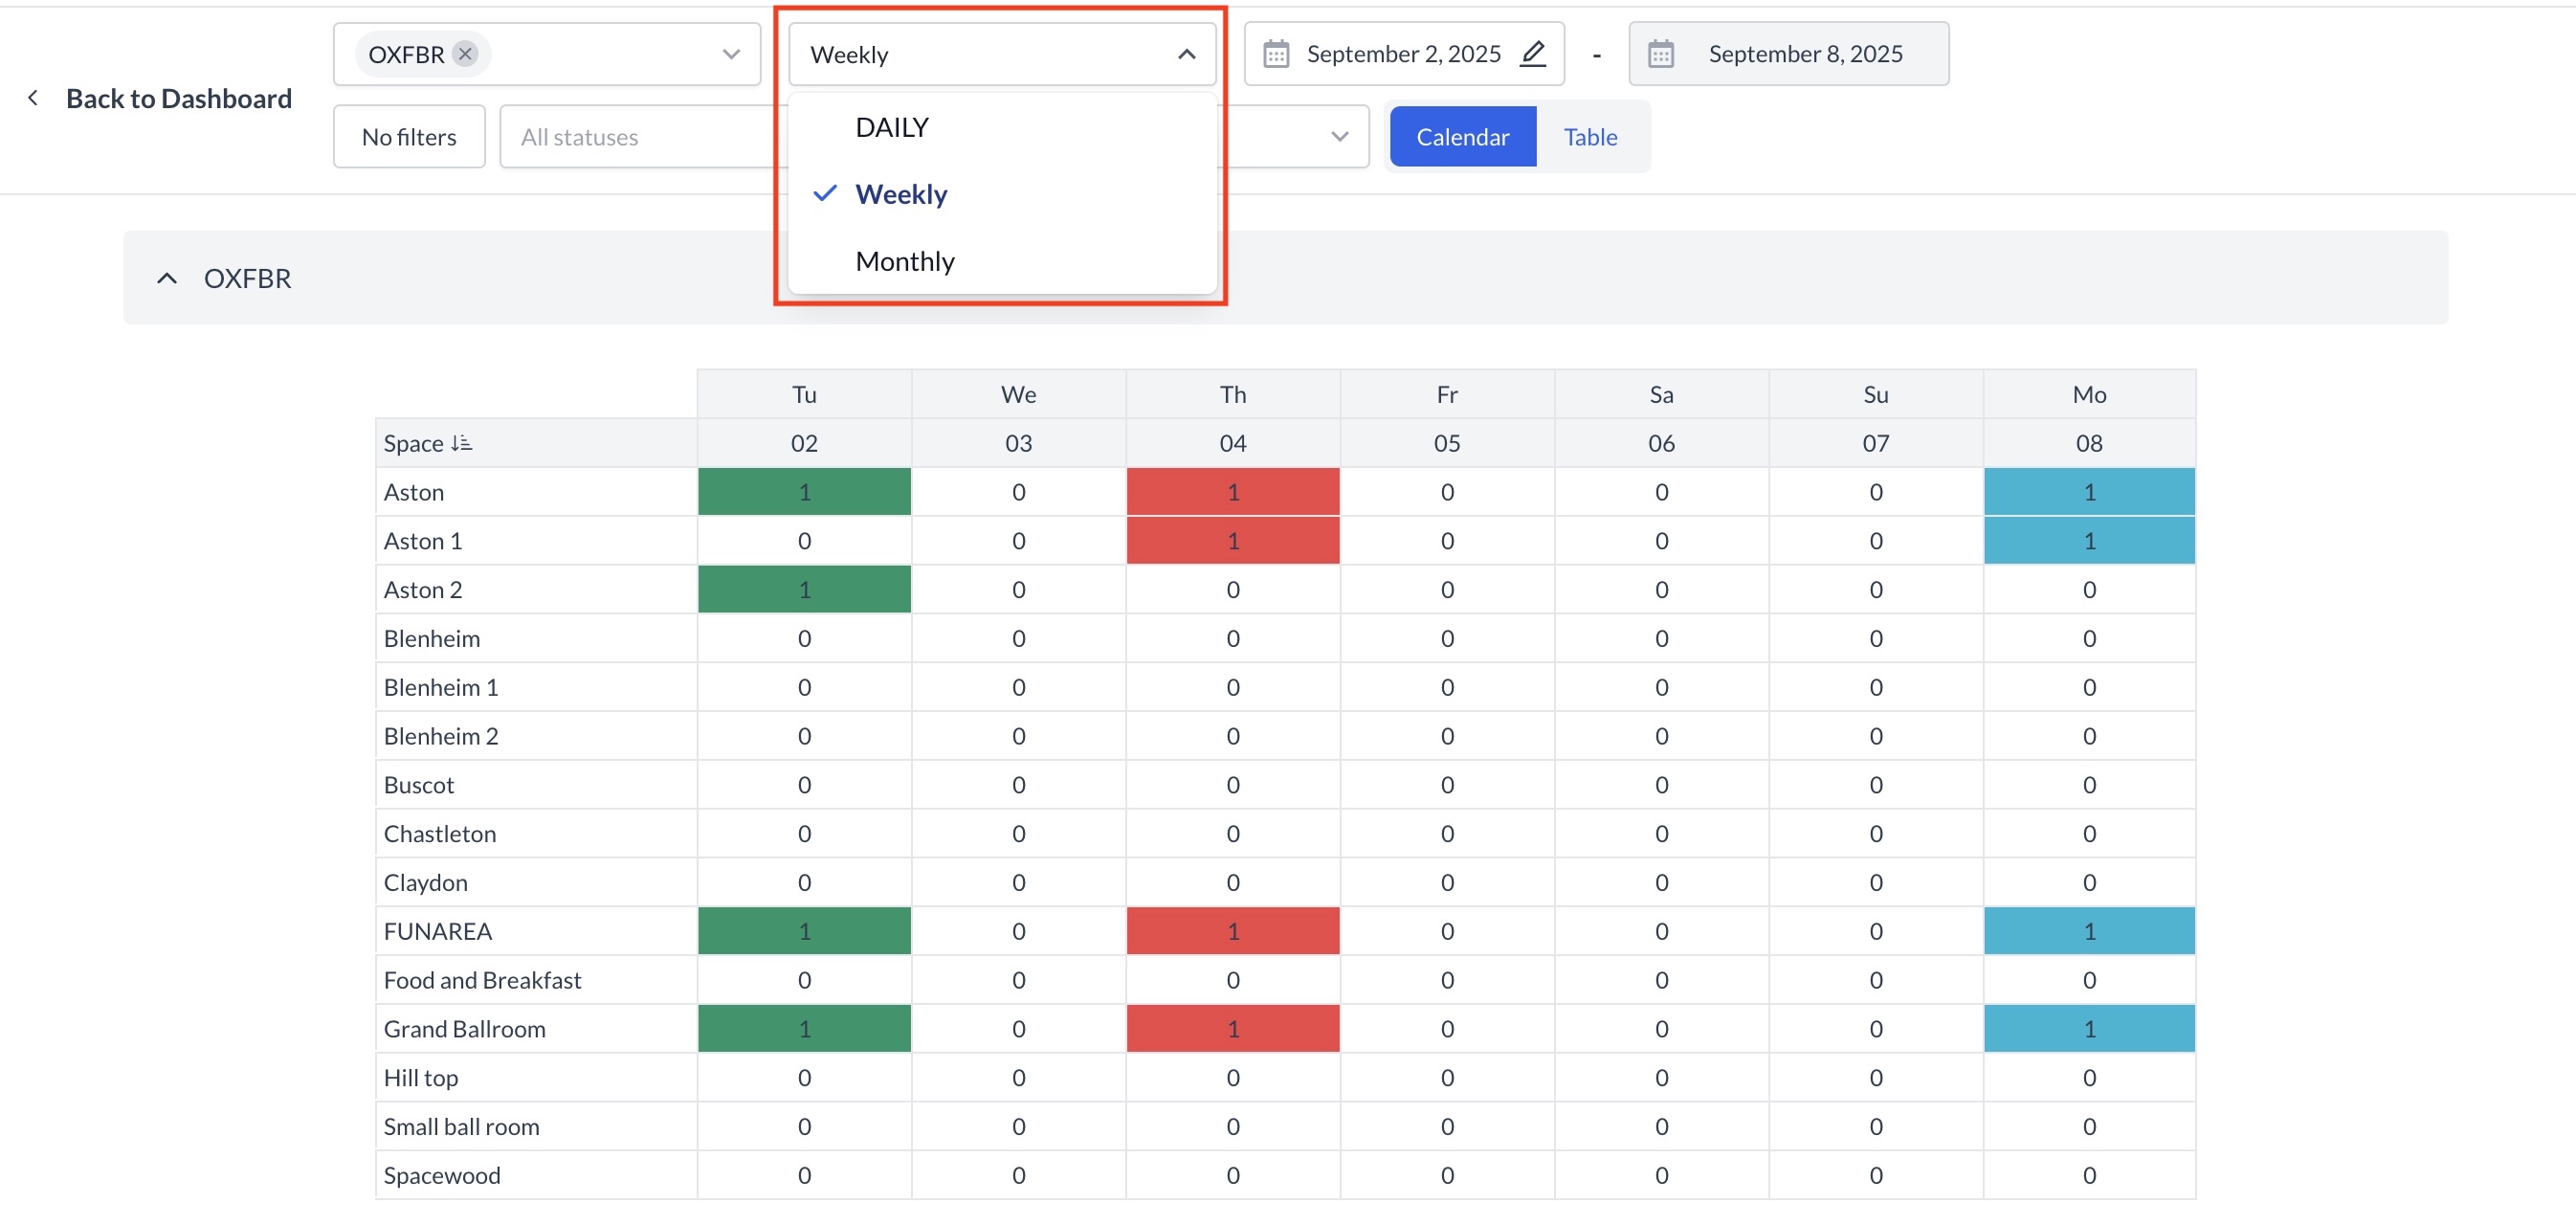
To change the calendar view, click the dropdown menu next to the "Daily" label. From here, you can select one of the following options:

  • Daily View

  • Weekly View

  • Monthly View

This allows you to customize how event space availability is displayed based on your scheduling needs.

Image 9-2-25 at 8.02 PM.jpg
Calendar View Options


Navigating to a Different Date
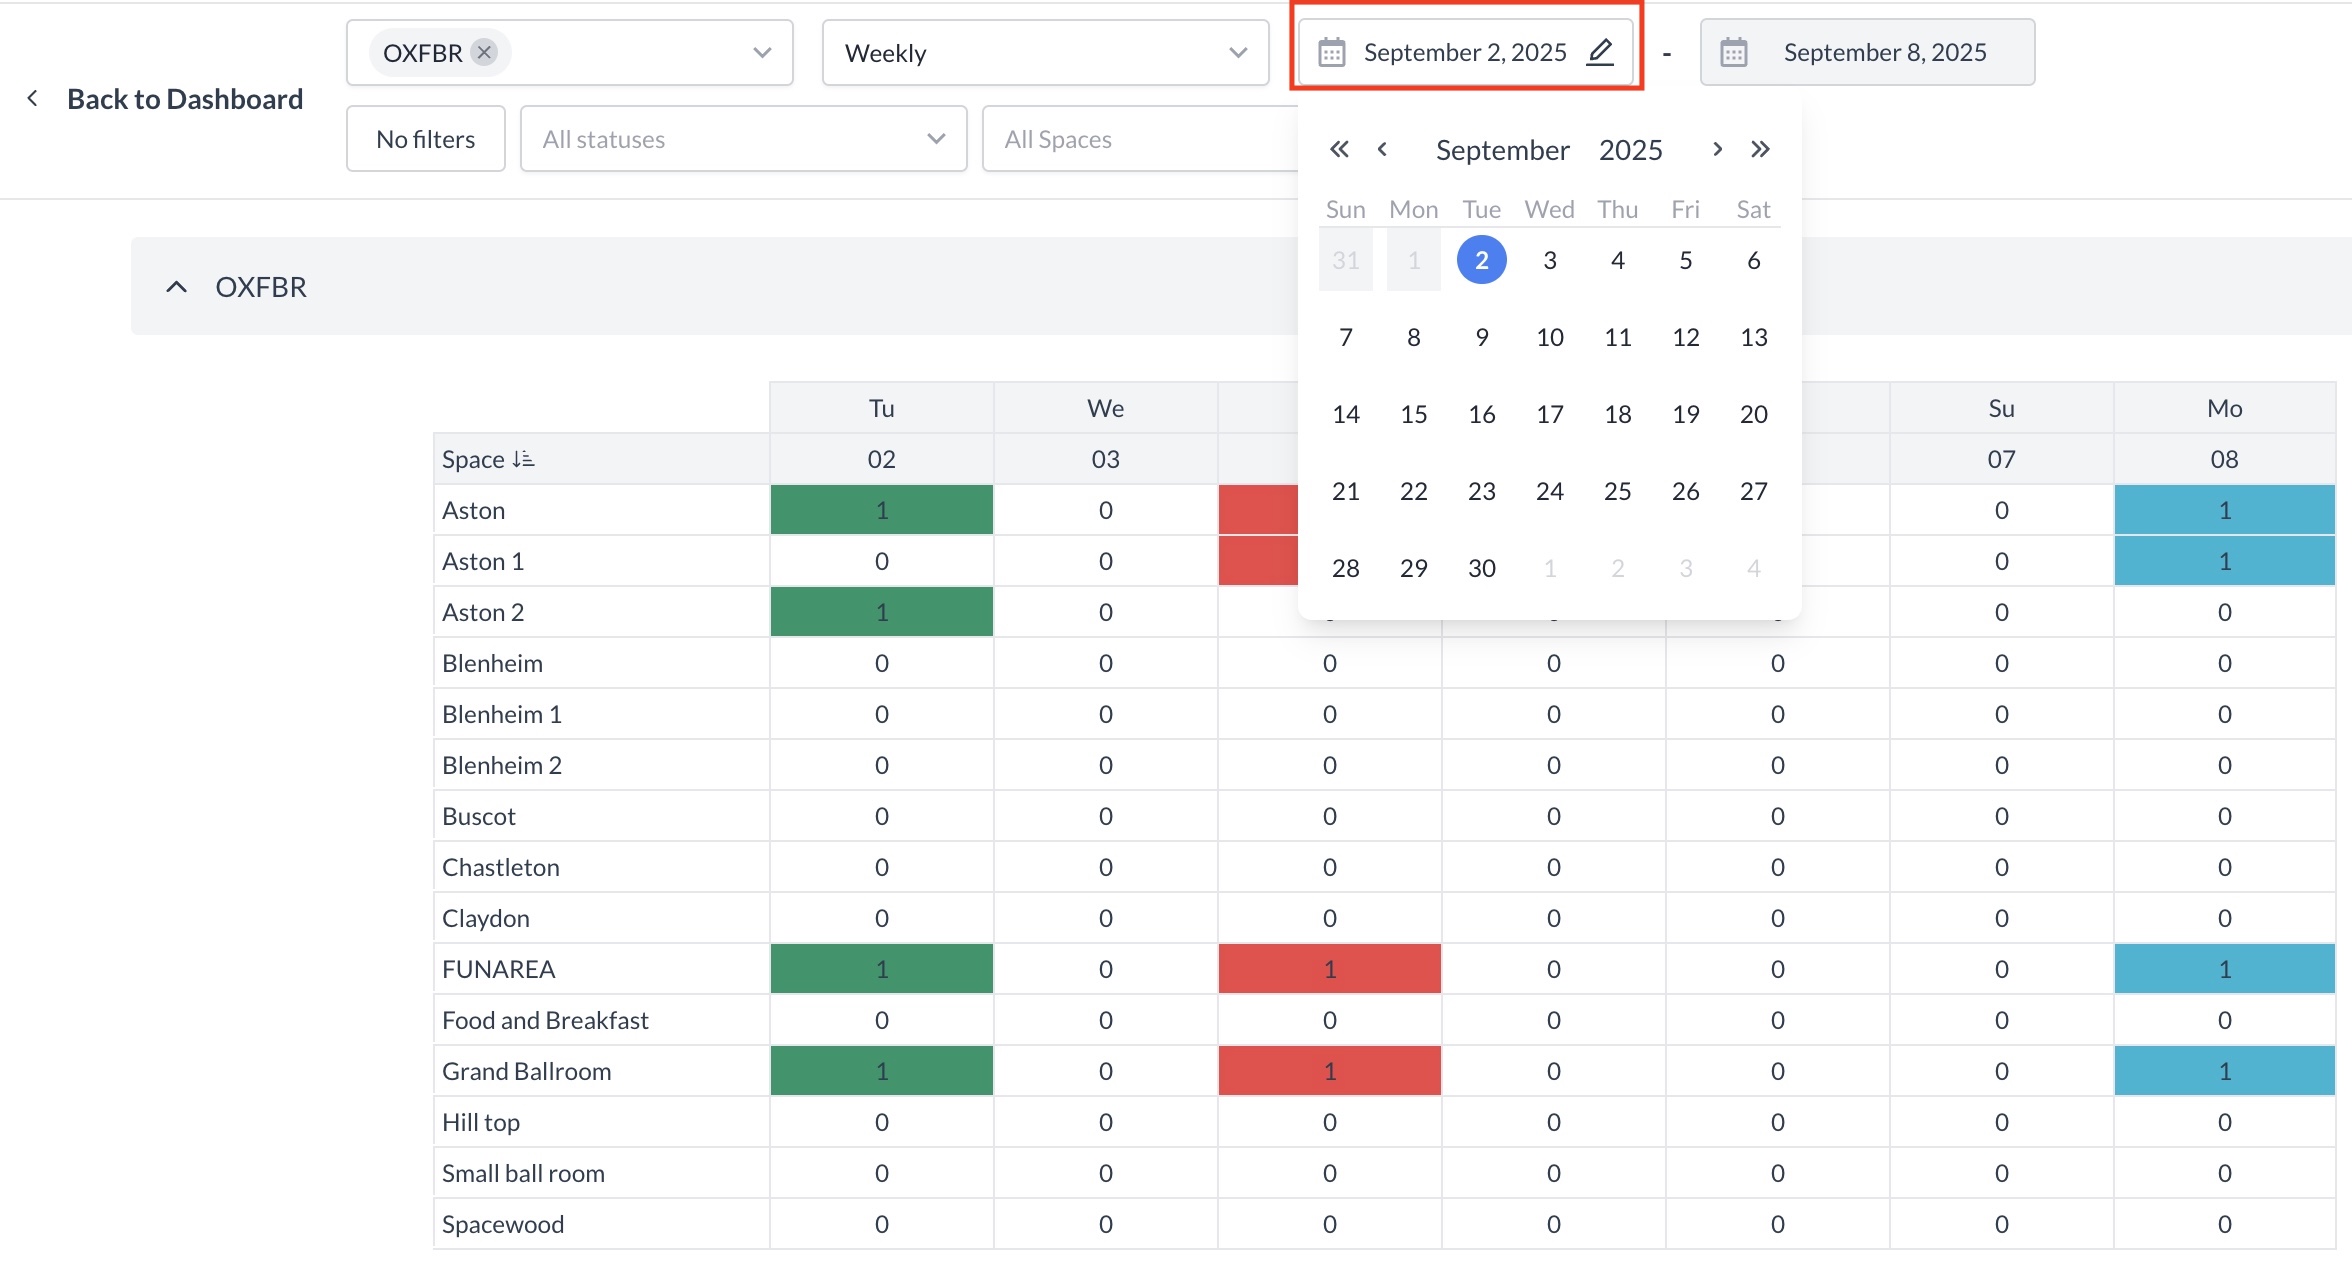
To view availability for a different day, week, or month, use the calendar date picker. Simply click the date field and select your desired date to update the calendar view accordingly.

Image 9-2-25 at 8.05 PM.jpg
Calendar Date Picker


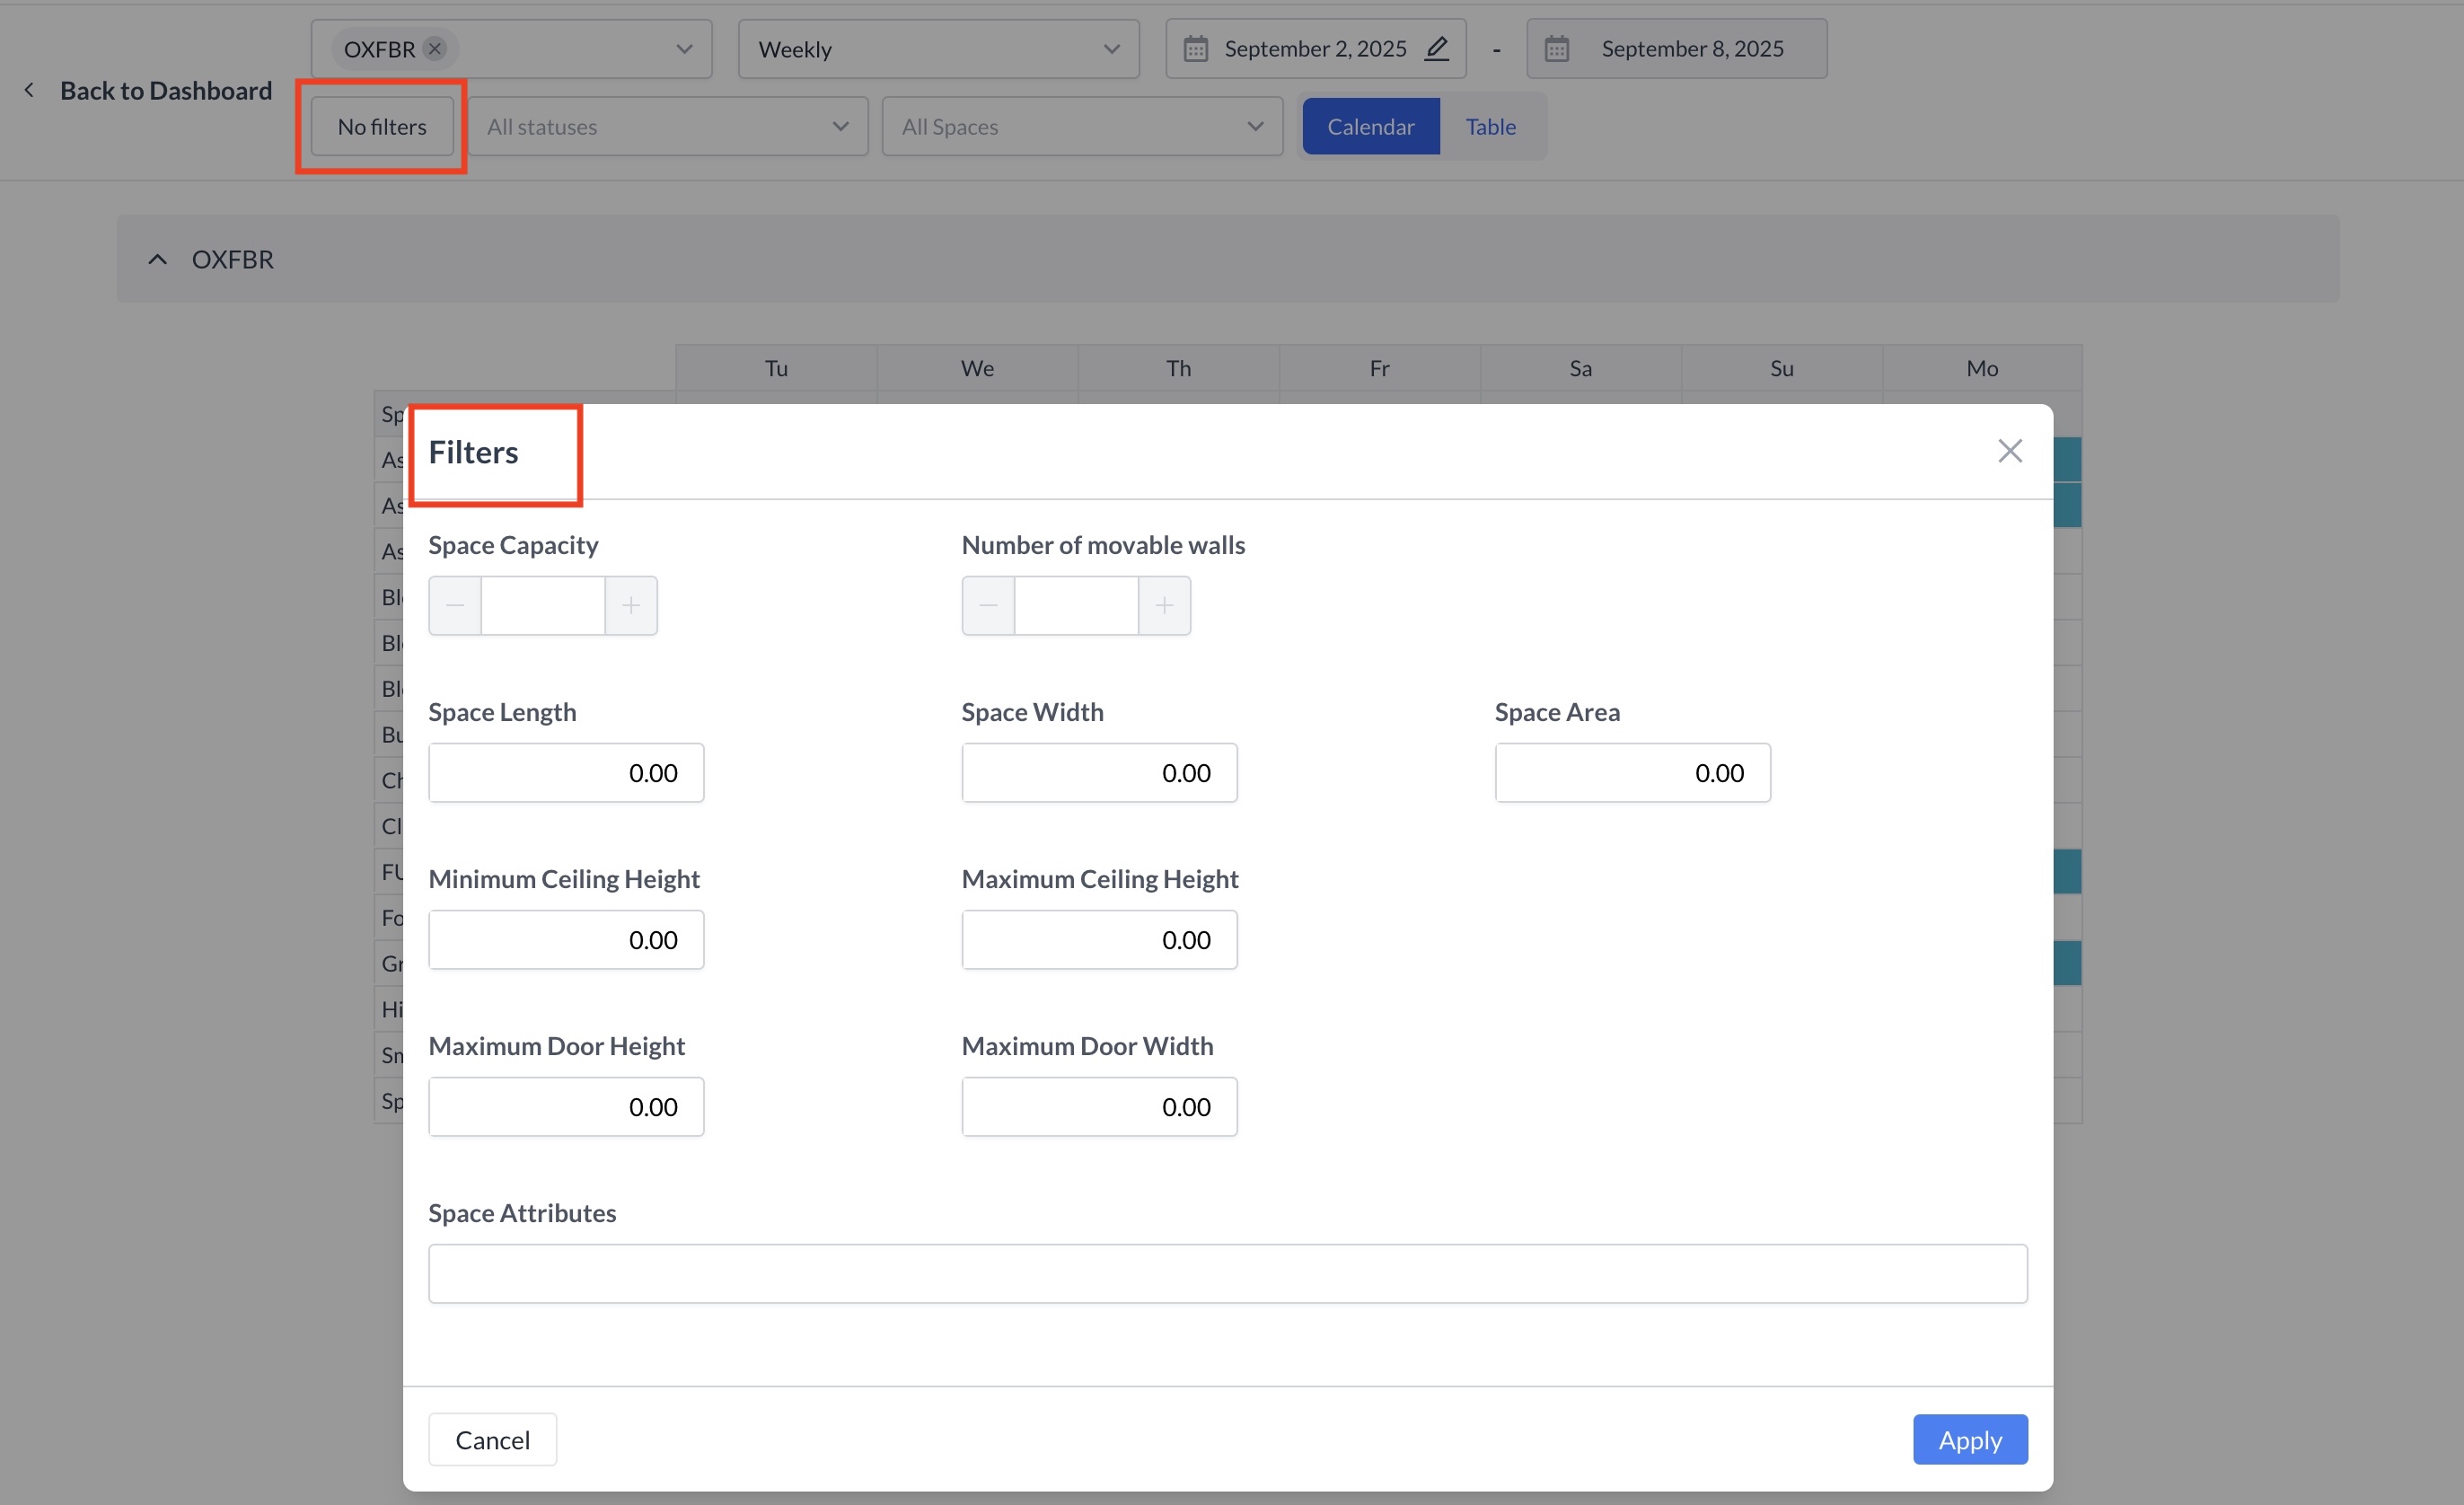
Using Filters to Refine the Space List
Click the Filters button to narrow down the list of spaces based on specific criteria such as capacity, space width, total area, and custom attributes. Click Apply to see the filtered results.

This helps you quickly identify spaces that meet the exact requirements for your event.

Image 9-2-25 at 8.08 PM.jpg
Filters to Refine the Space List


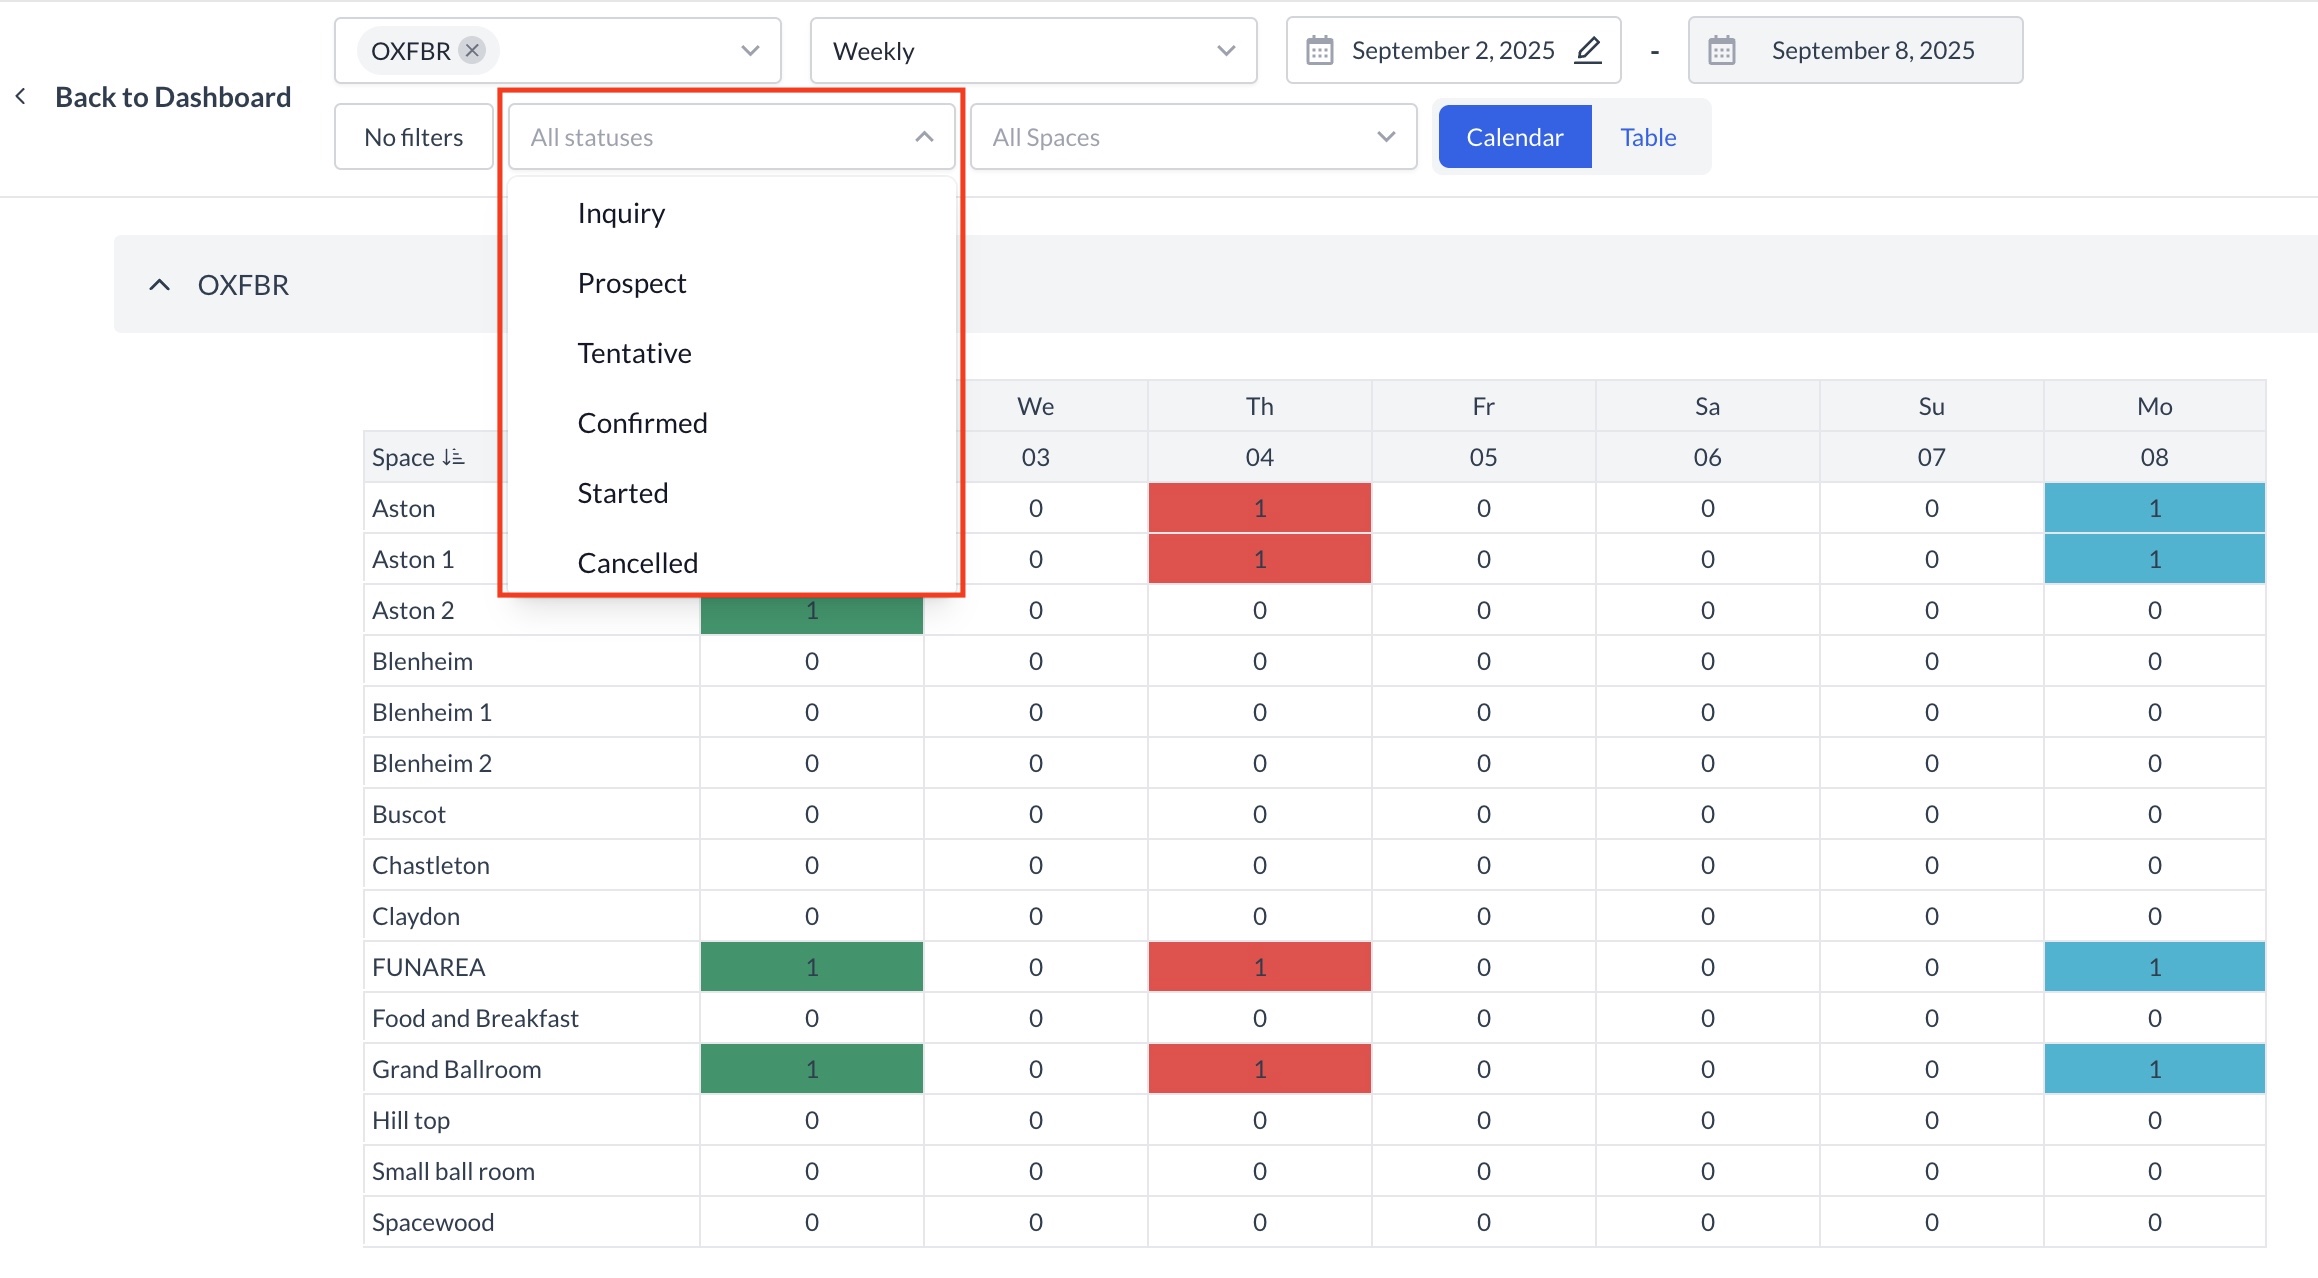
Filtering by Event Status
By default, the view displays “All Statuses.” To filter events by a specific status, click the All Statuses dropdown and select the desired option (e.g., Prospect, Tentative, or Confirmed). The calendar will then display only the events matching the selected status for the chosen time period.

Image 9-2-25 at 8.12 PM.jpg
Filtering by Event Status


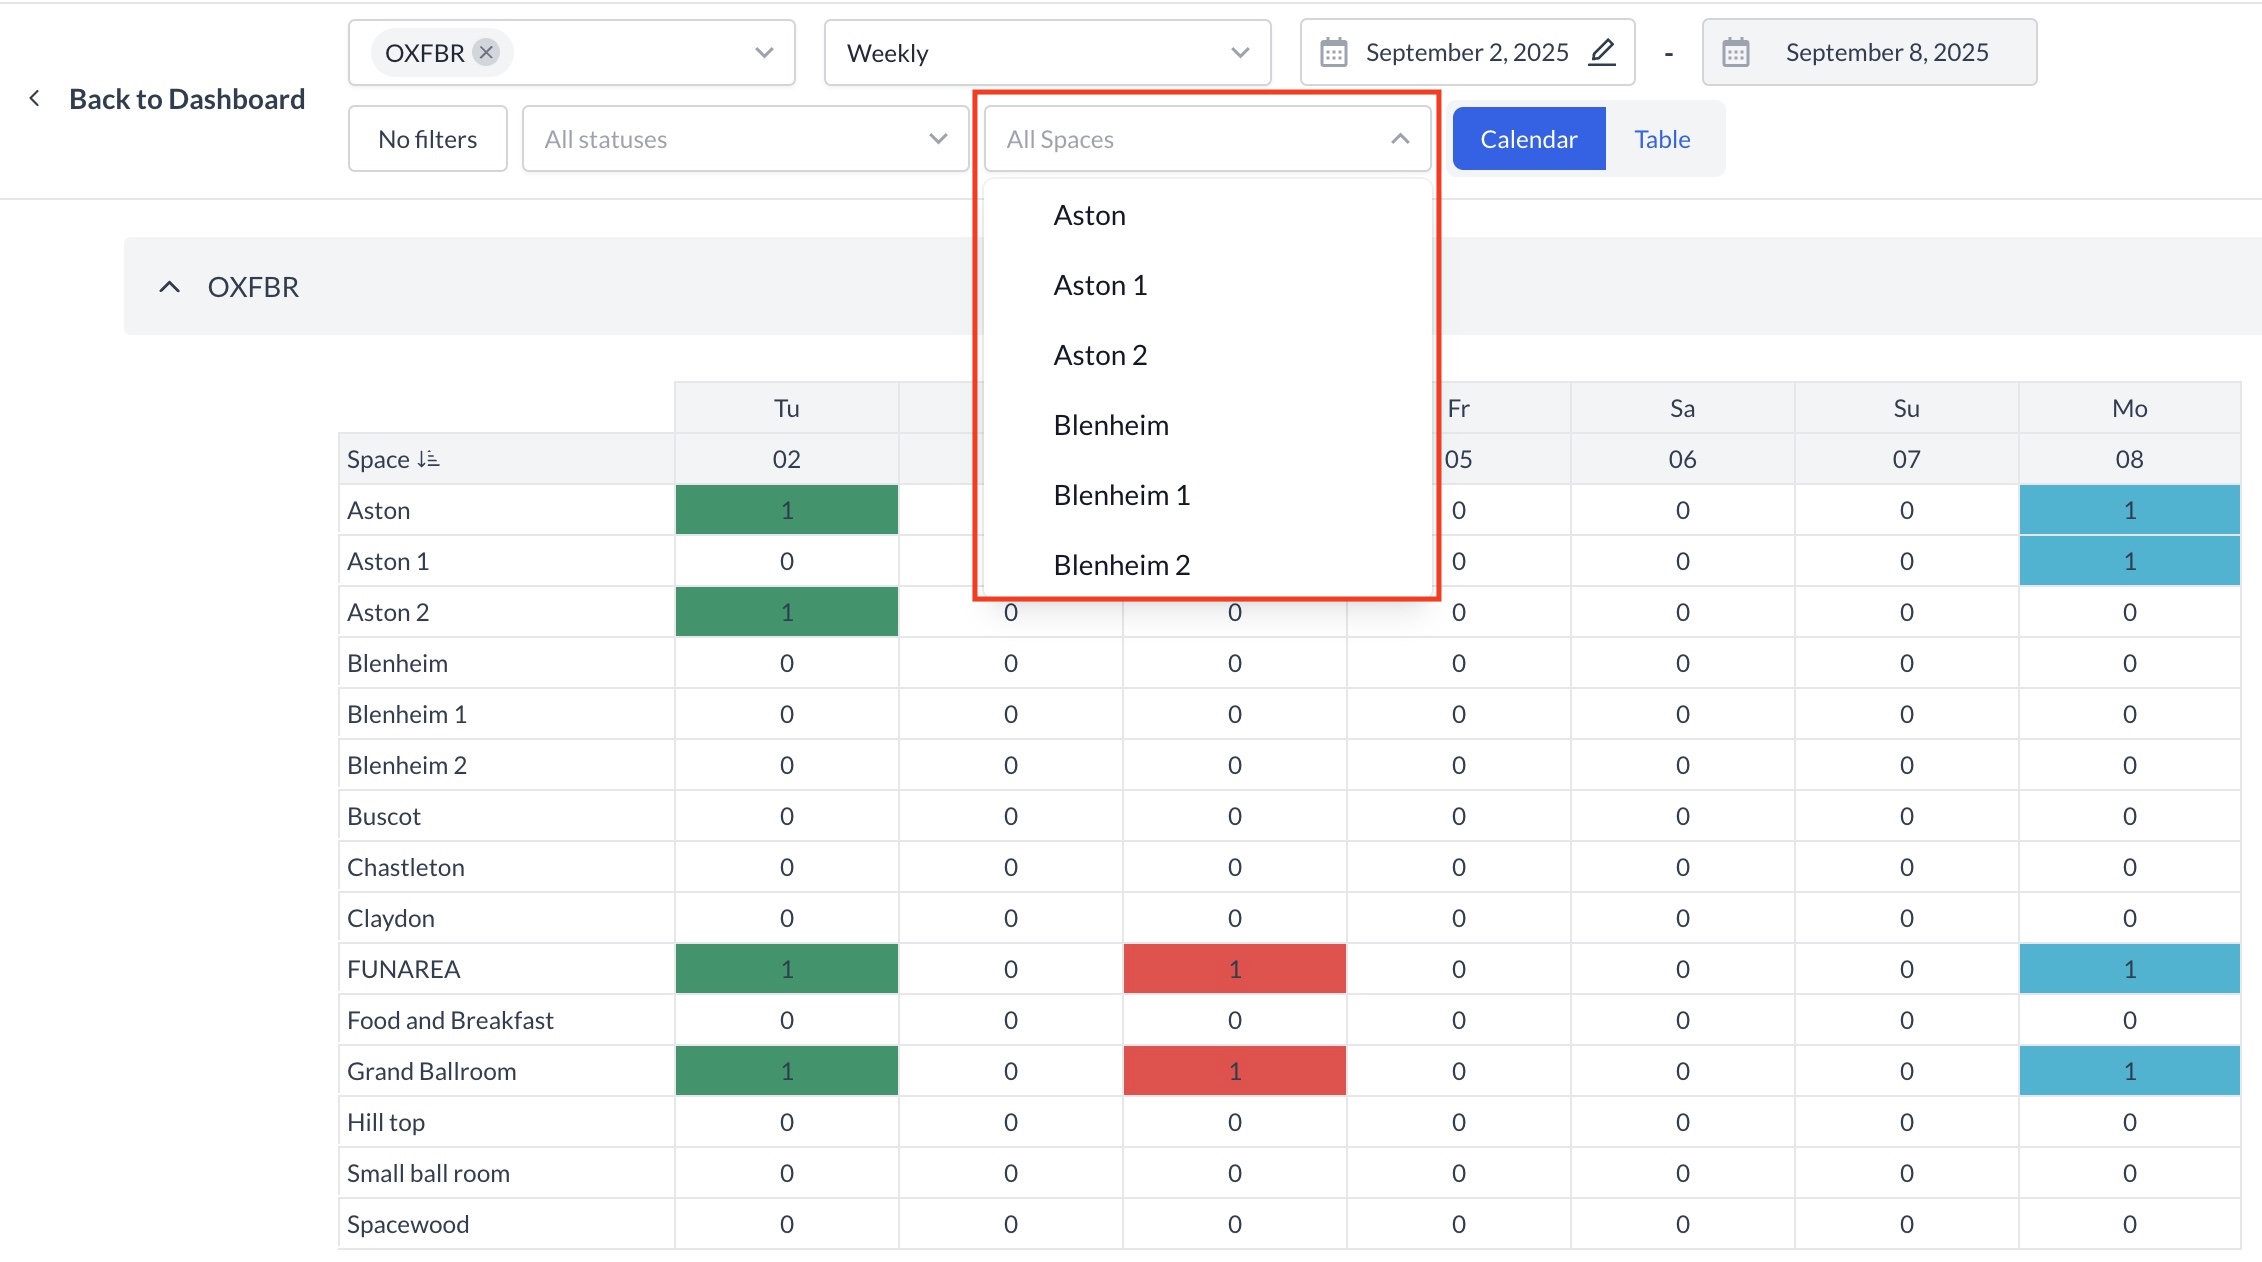
Filtering by Space
By default, the calendar displays all spaces. To view events for a specific space, click the All Spaces dropdown and select the desired space. The calendar will then update to show only the events scheduled in that space for the selected time period.

Image 9-2-25 at 8.15 PM.jpg
Filtering by Space


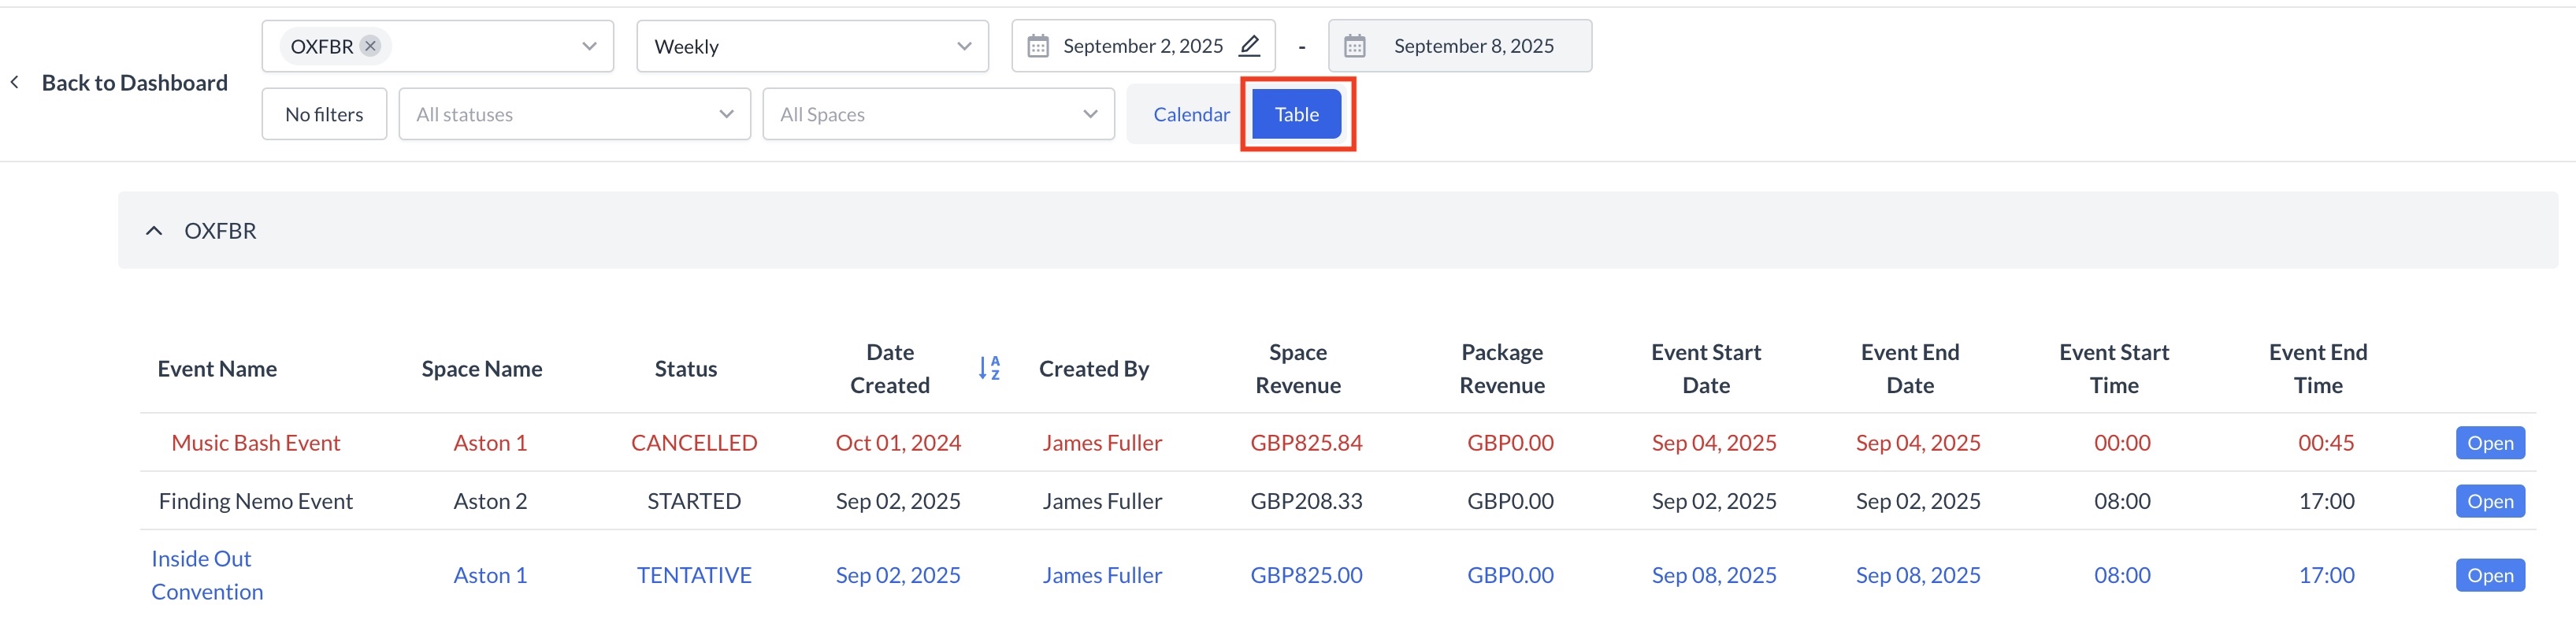
Switching to Table View
Click the Table button to switch from the calendar view to a consolidated table view. This format presents the event data in a report-style layout, making it easier to review and analyze details in a structured format.

Image 9-2-25 at 8.17 PM.jpg
Table View


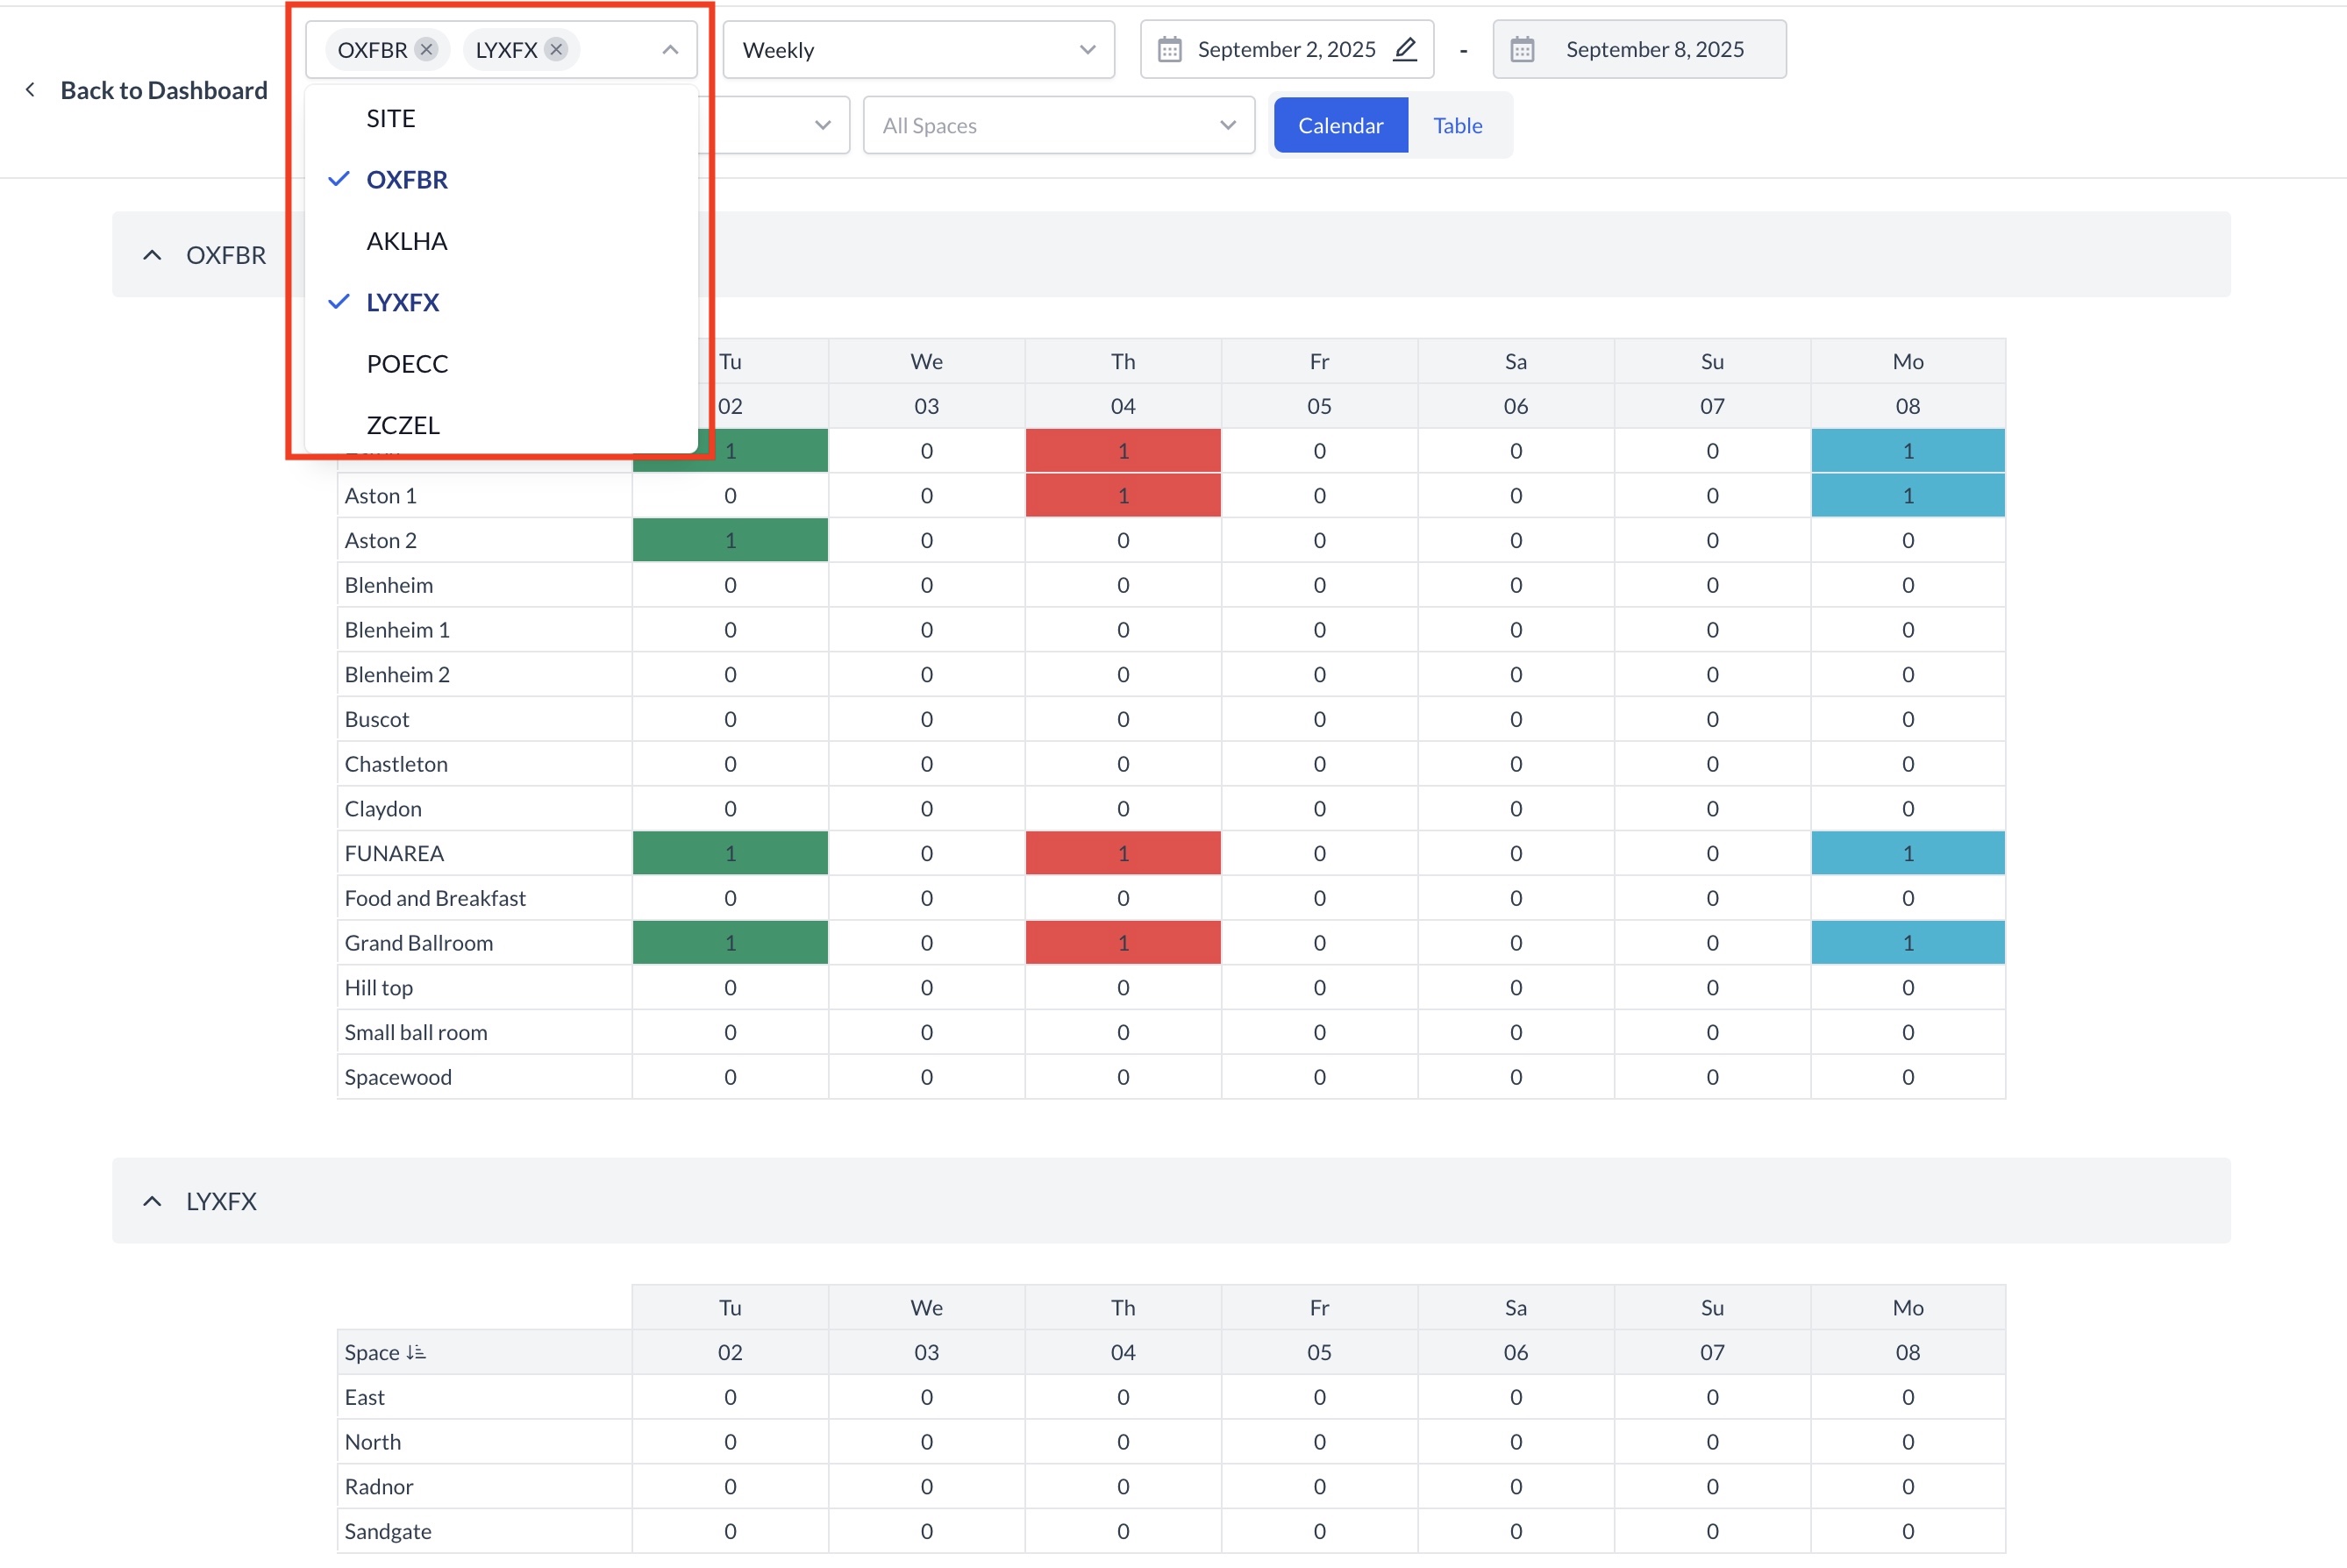
Viewing Multiple Properties
Users with access to multiple properties can use the Property dropdown to select one or more additional properties. This enables you to view space availability across all selected properties in a single, unified view.

Image 9-2-25 at 8.21 PM.jpg
Multiple Properties View