
📆 Revision Date:
Calendar is a scheduling tool that allows you to create and manage appointments within EventKey without having to leave an access your mailbox calendar.
-
Schedule meetings, events, and reminders
-
Set up recurring events (e.g., weekly meetings)
|
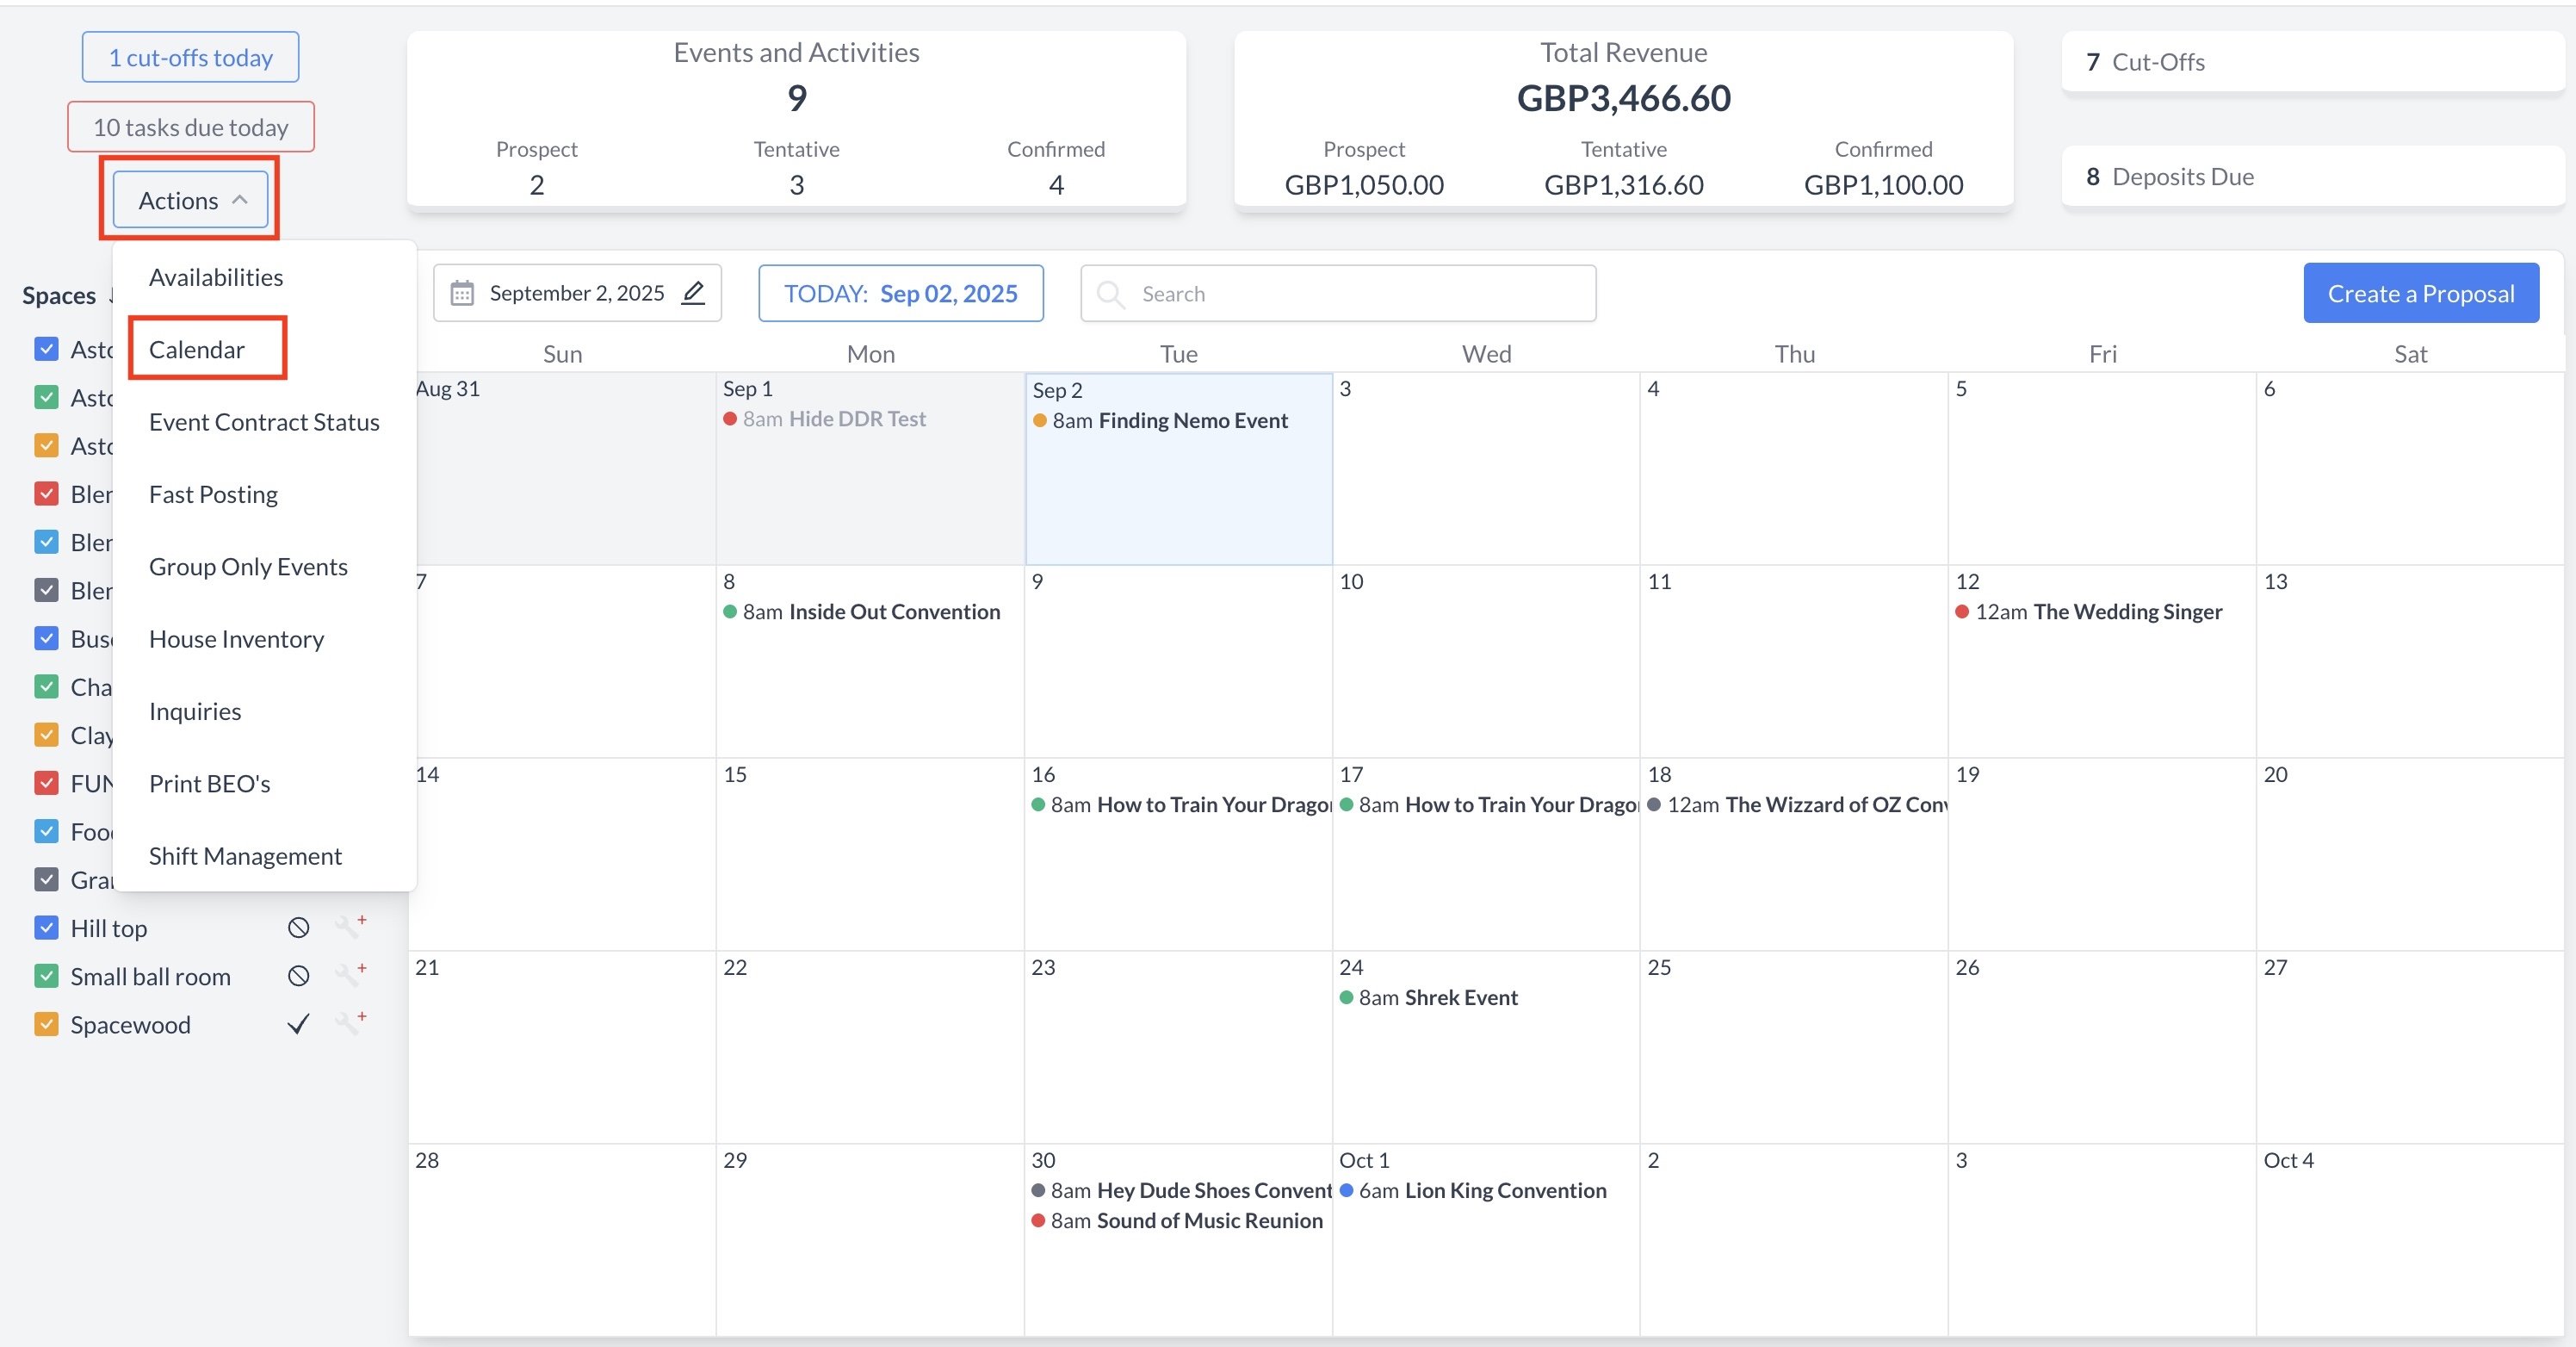
Navigate to Home > Event Management > Actions > Calendar |
|
|
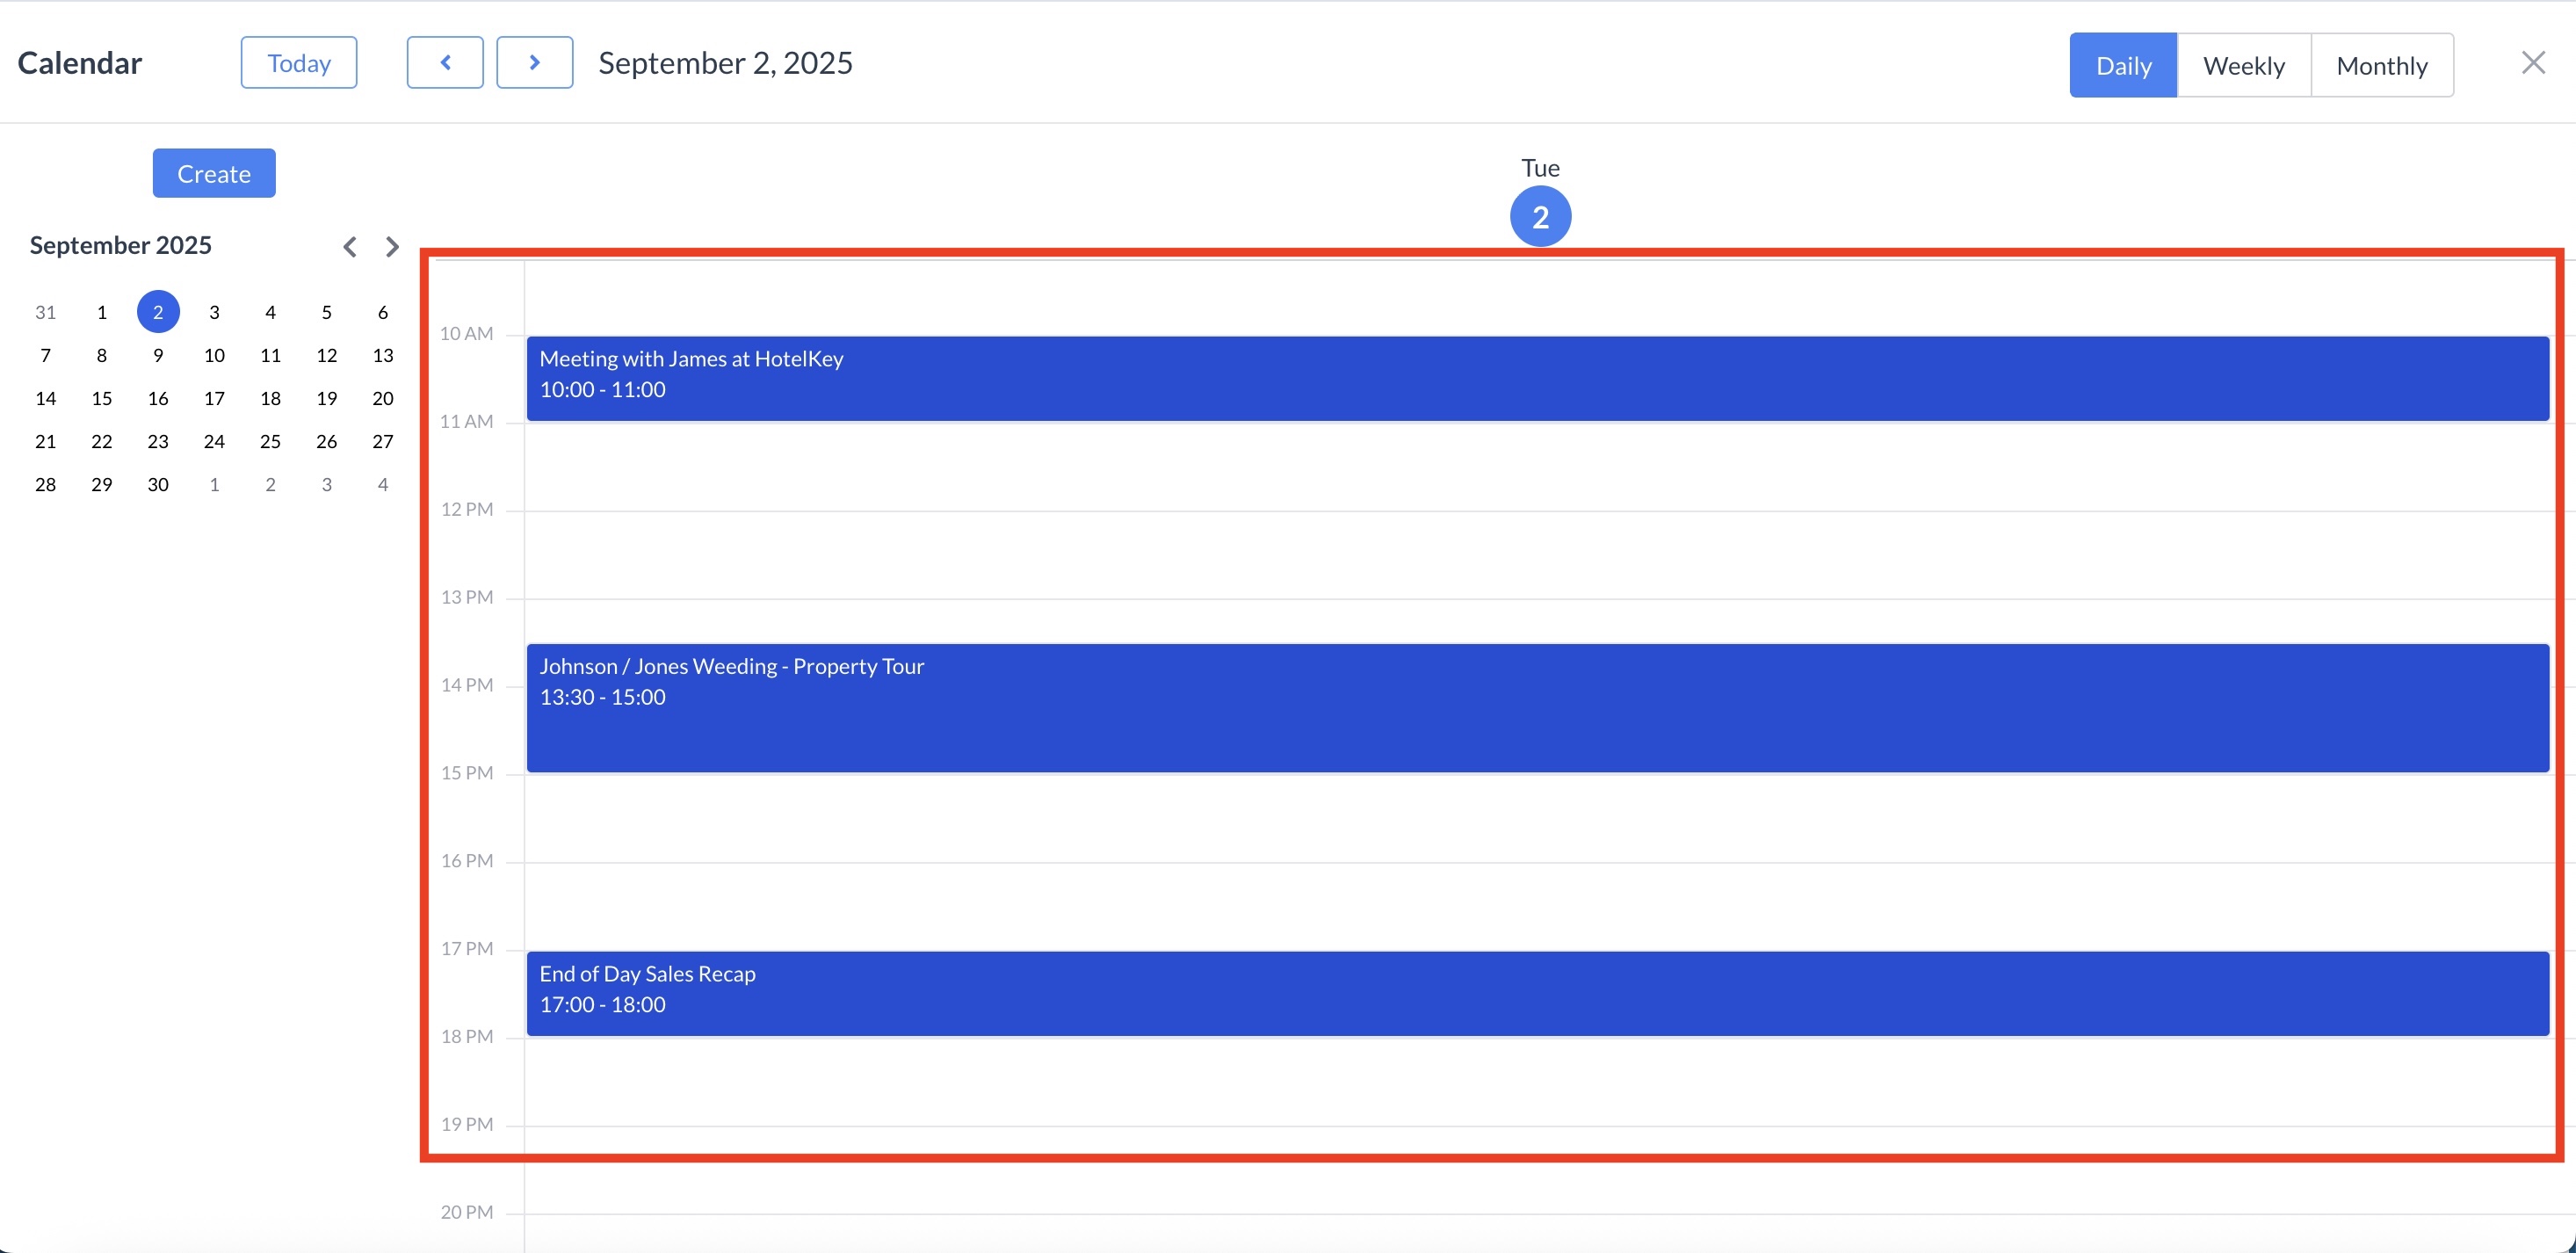
Default Calendar View
|
|
|
Viewing Scheduled Meetings
|
|
|
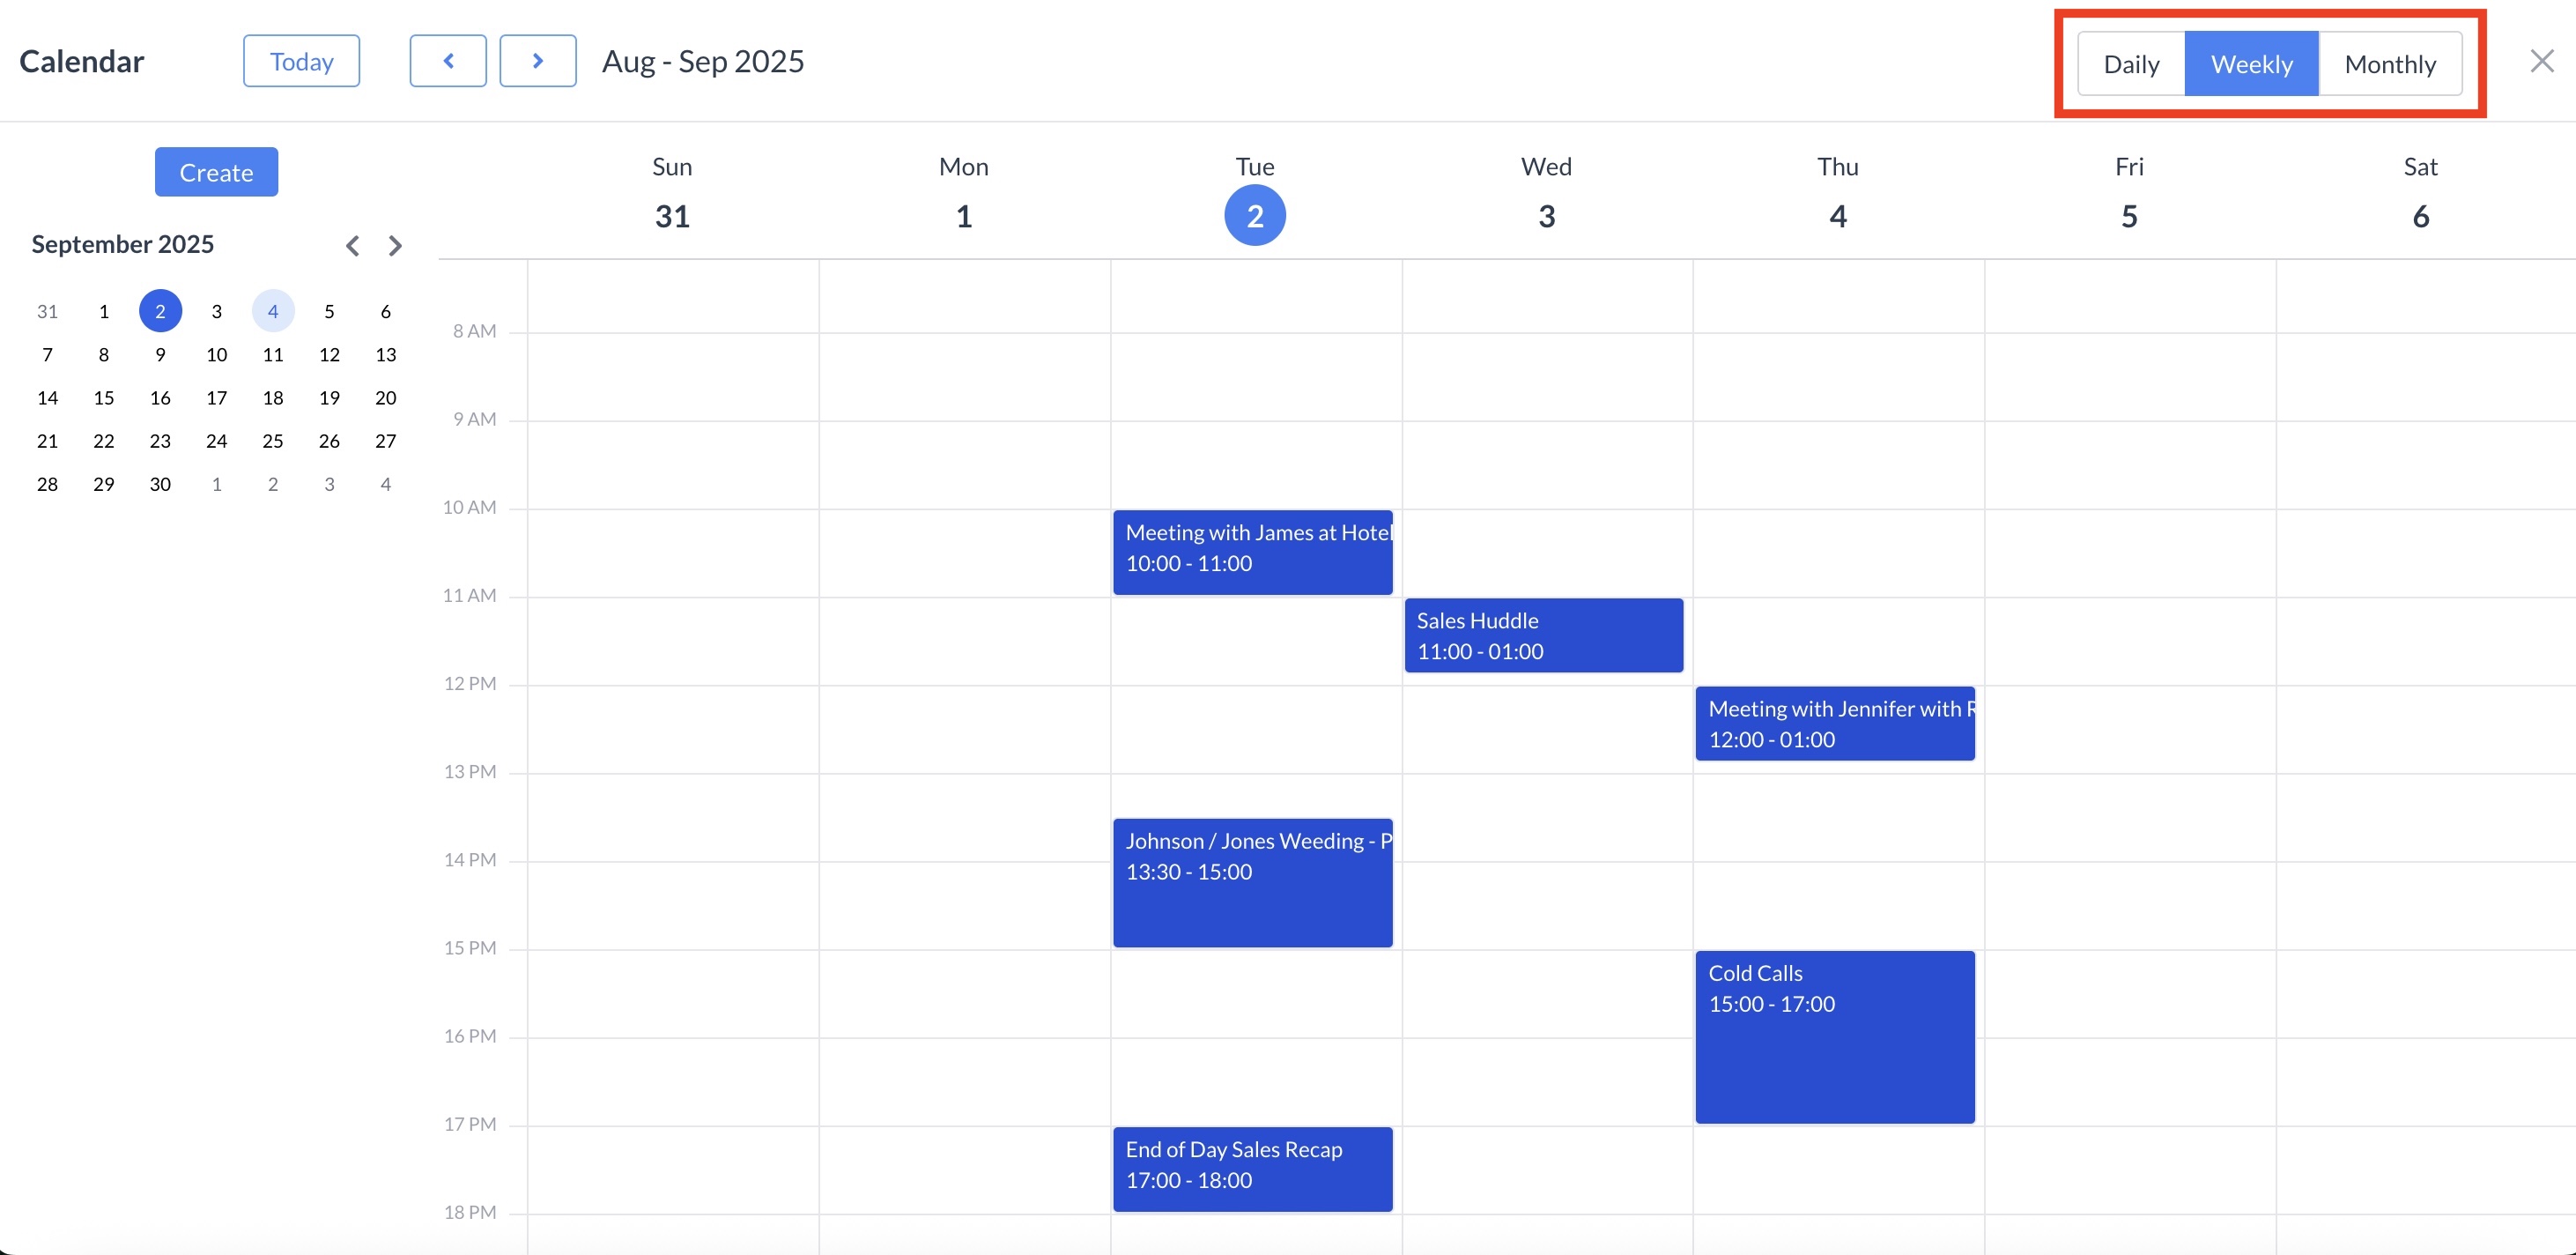
Changing the Calendar View
|
|
|
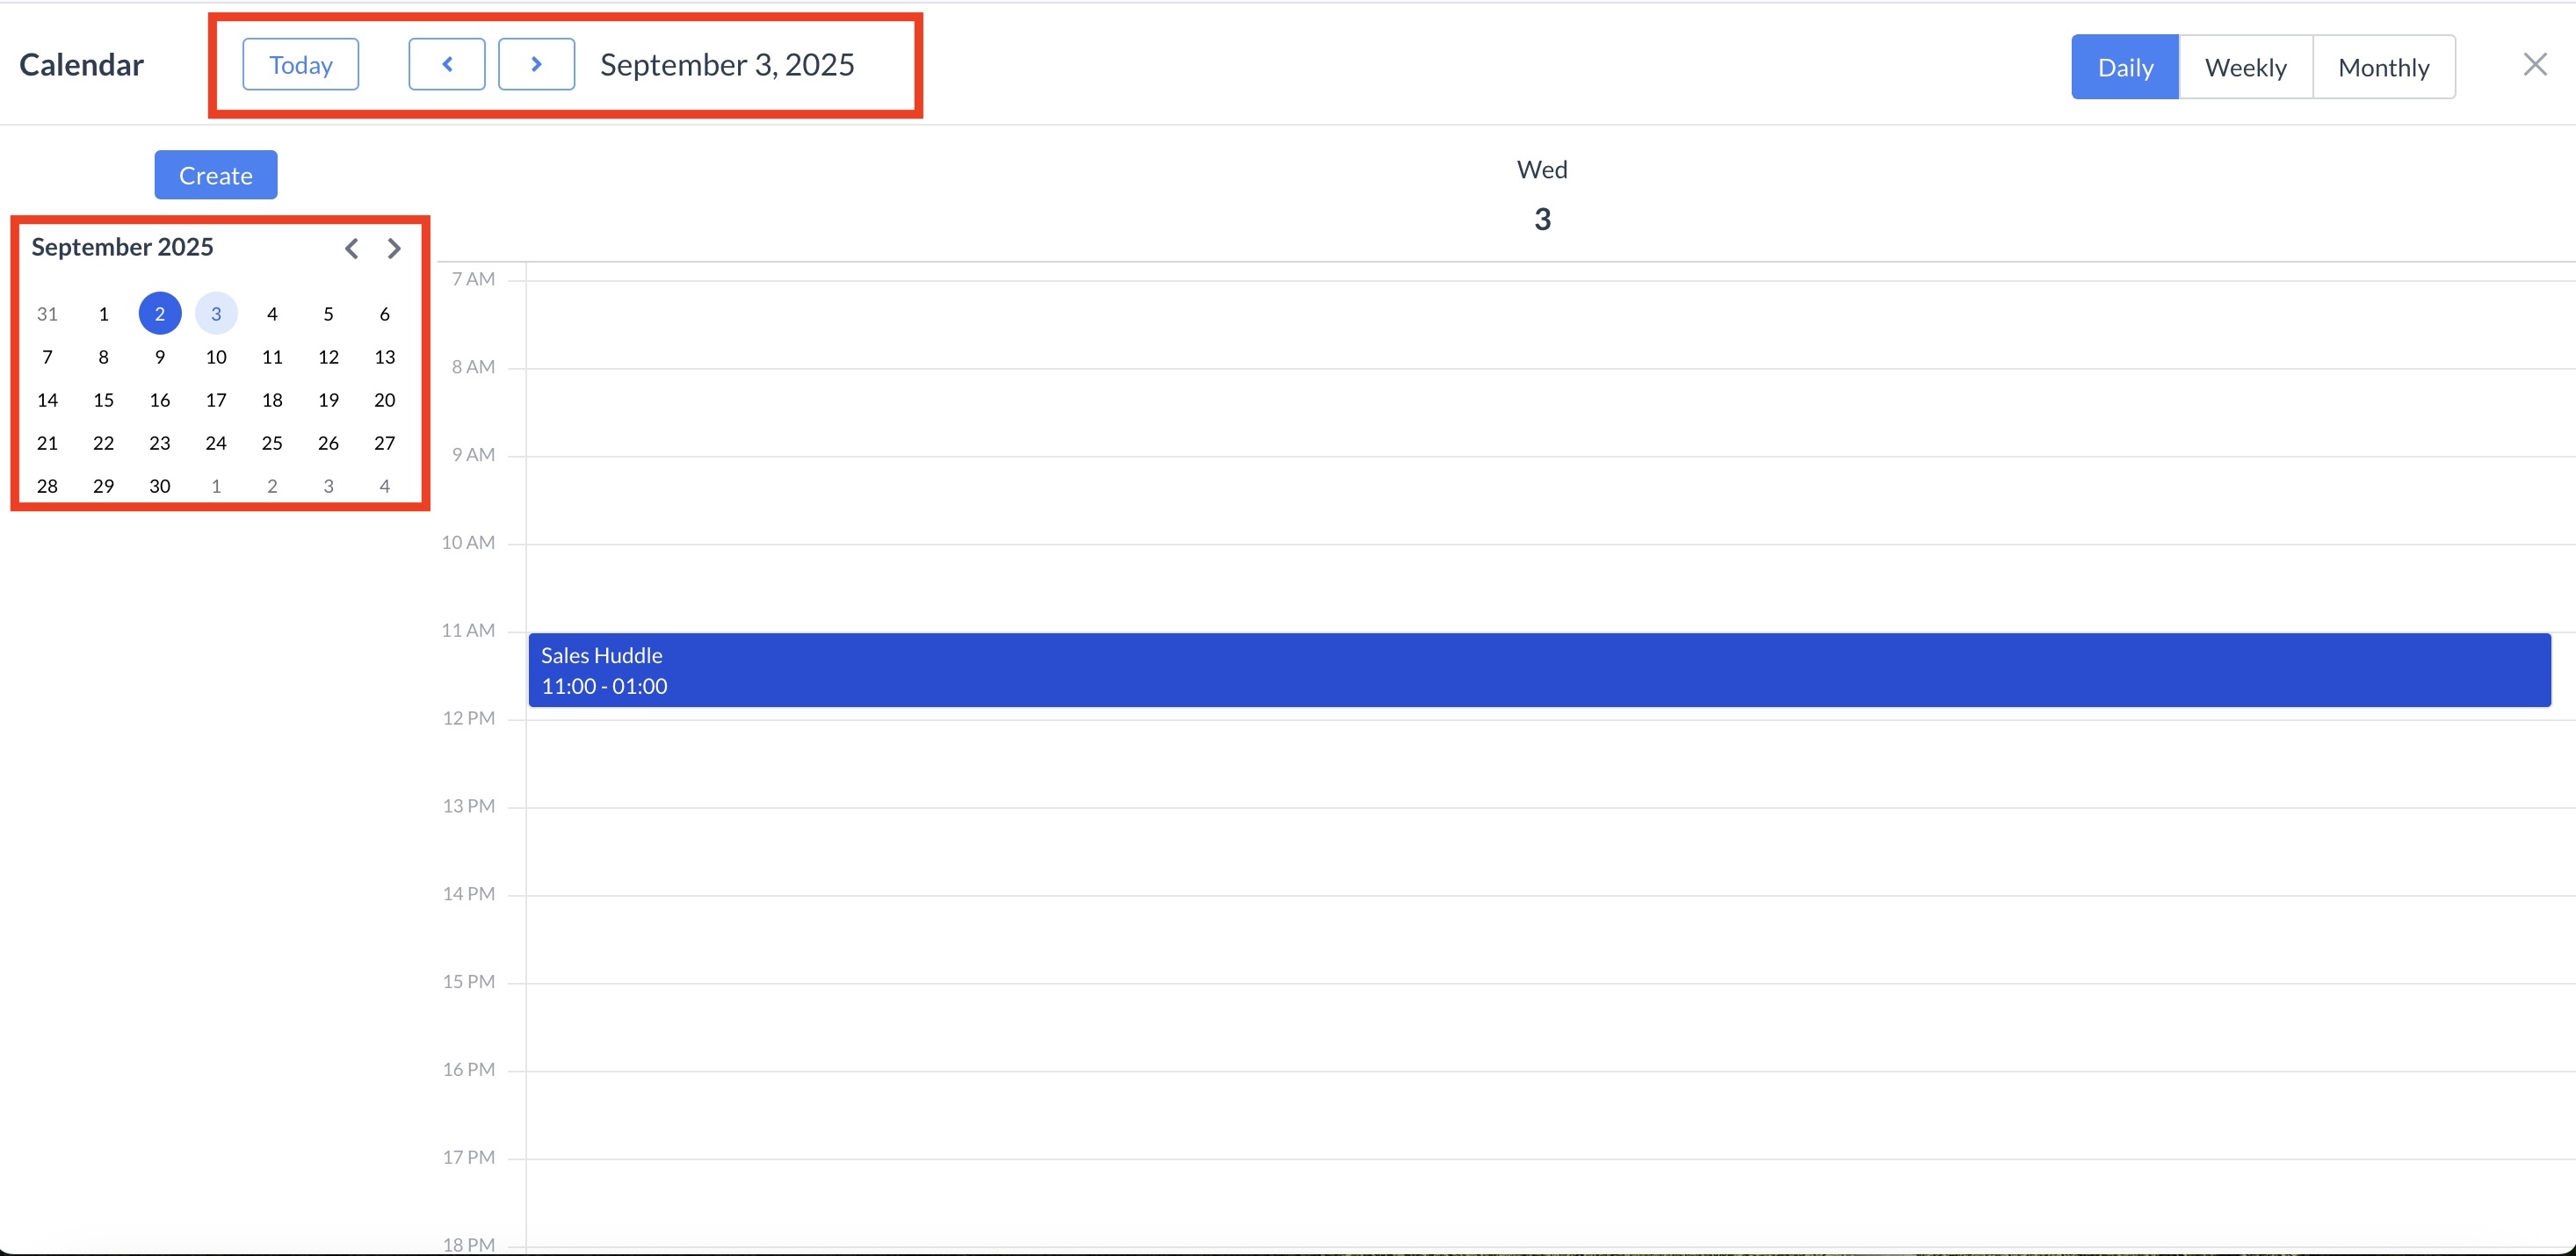
Navigating the Calendar by Date
|
|
|
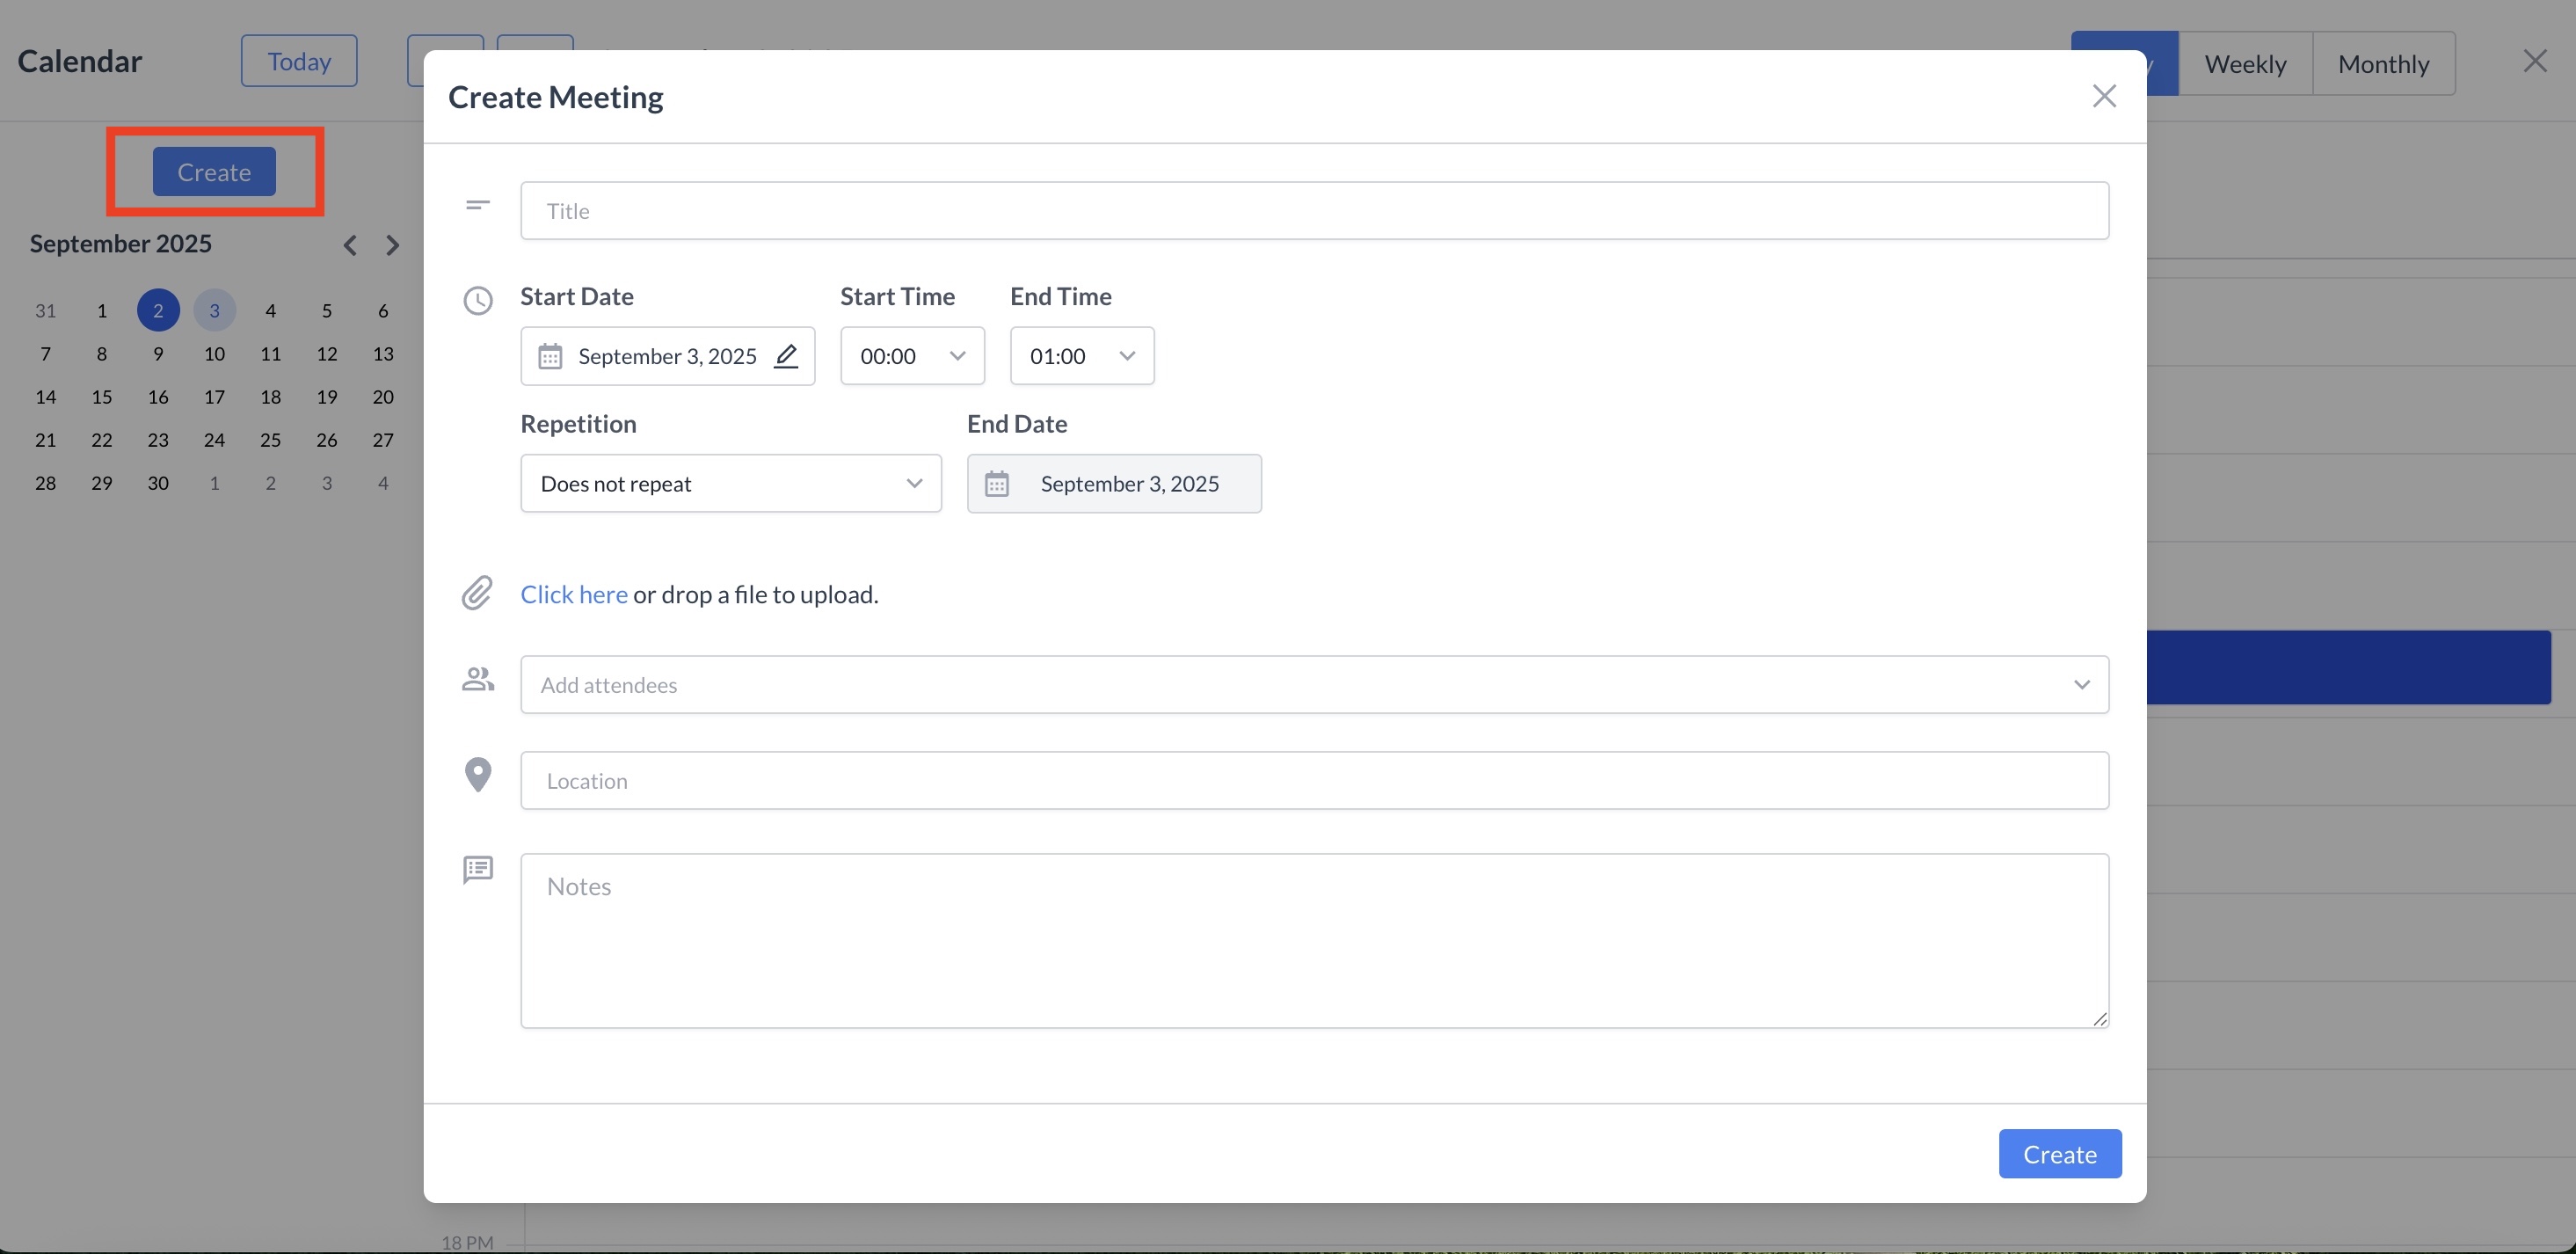
Creating a New Appointment To schedule a new appointment, click the blue "Create" button. This will open the Create Meeting window. Fill in the following details:
Once all required information is entered, click Create to add the meeting to your calendar. |
|
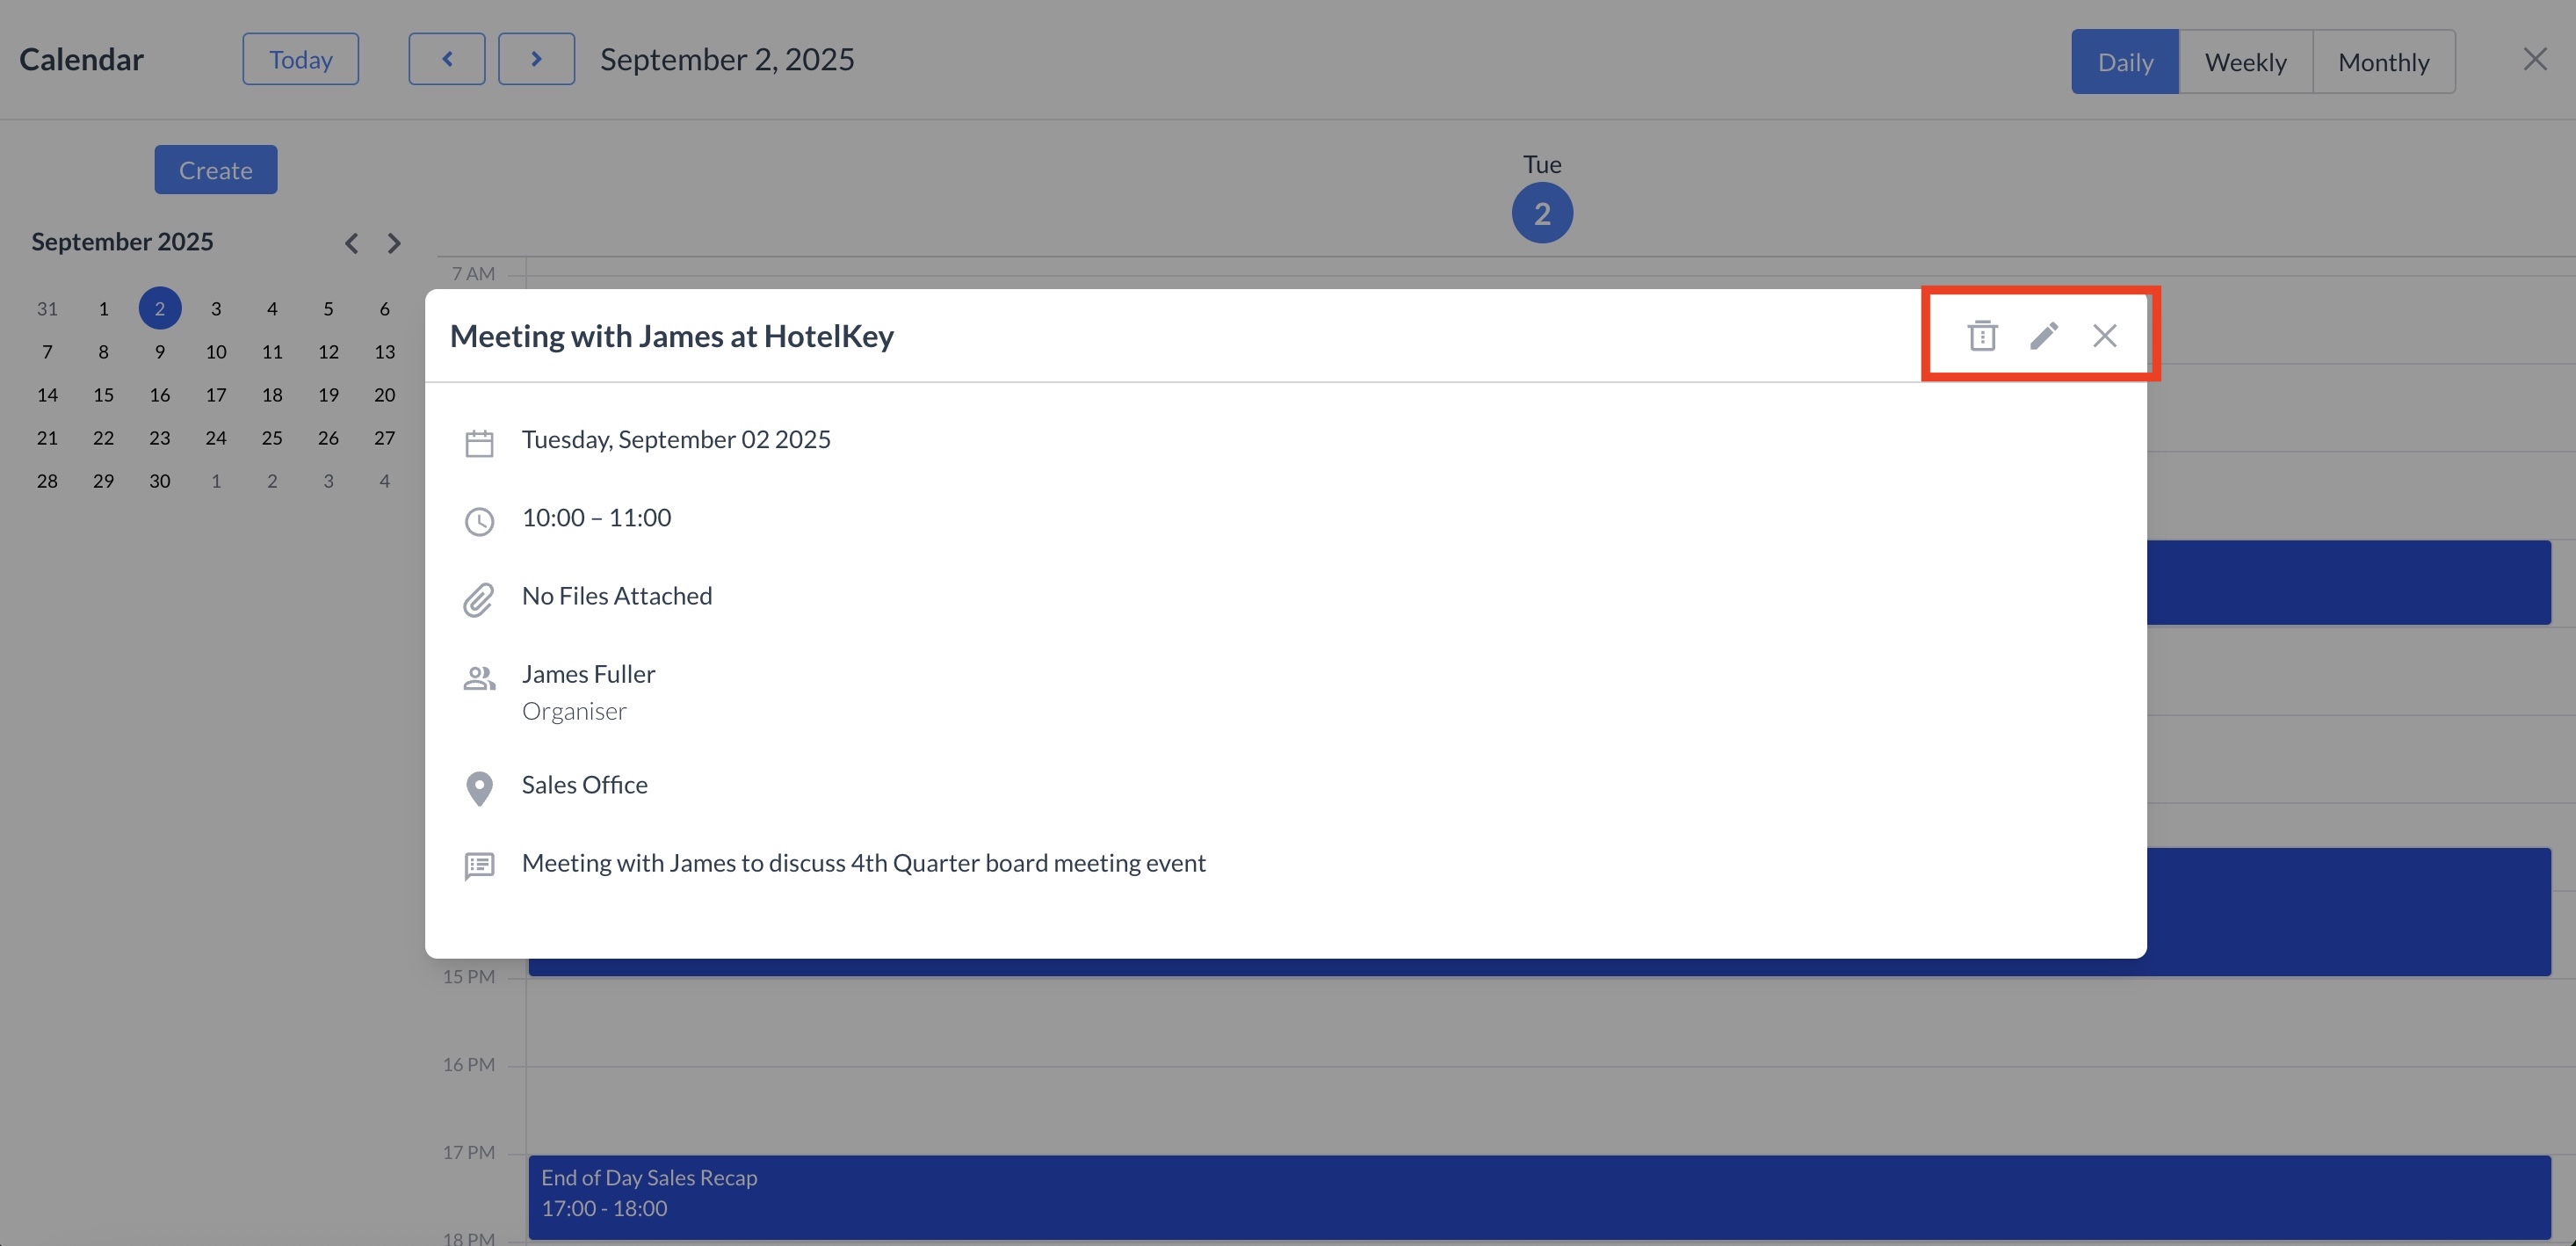
Editing or Deleting an Appointment
To modify or remove an existing appointment:
|
|
|
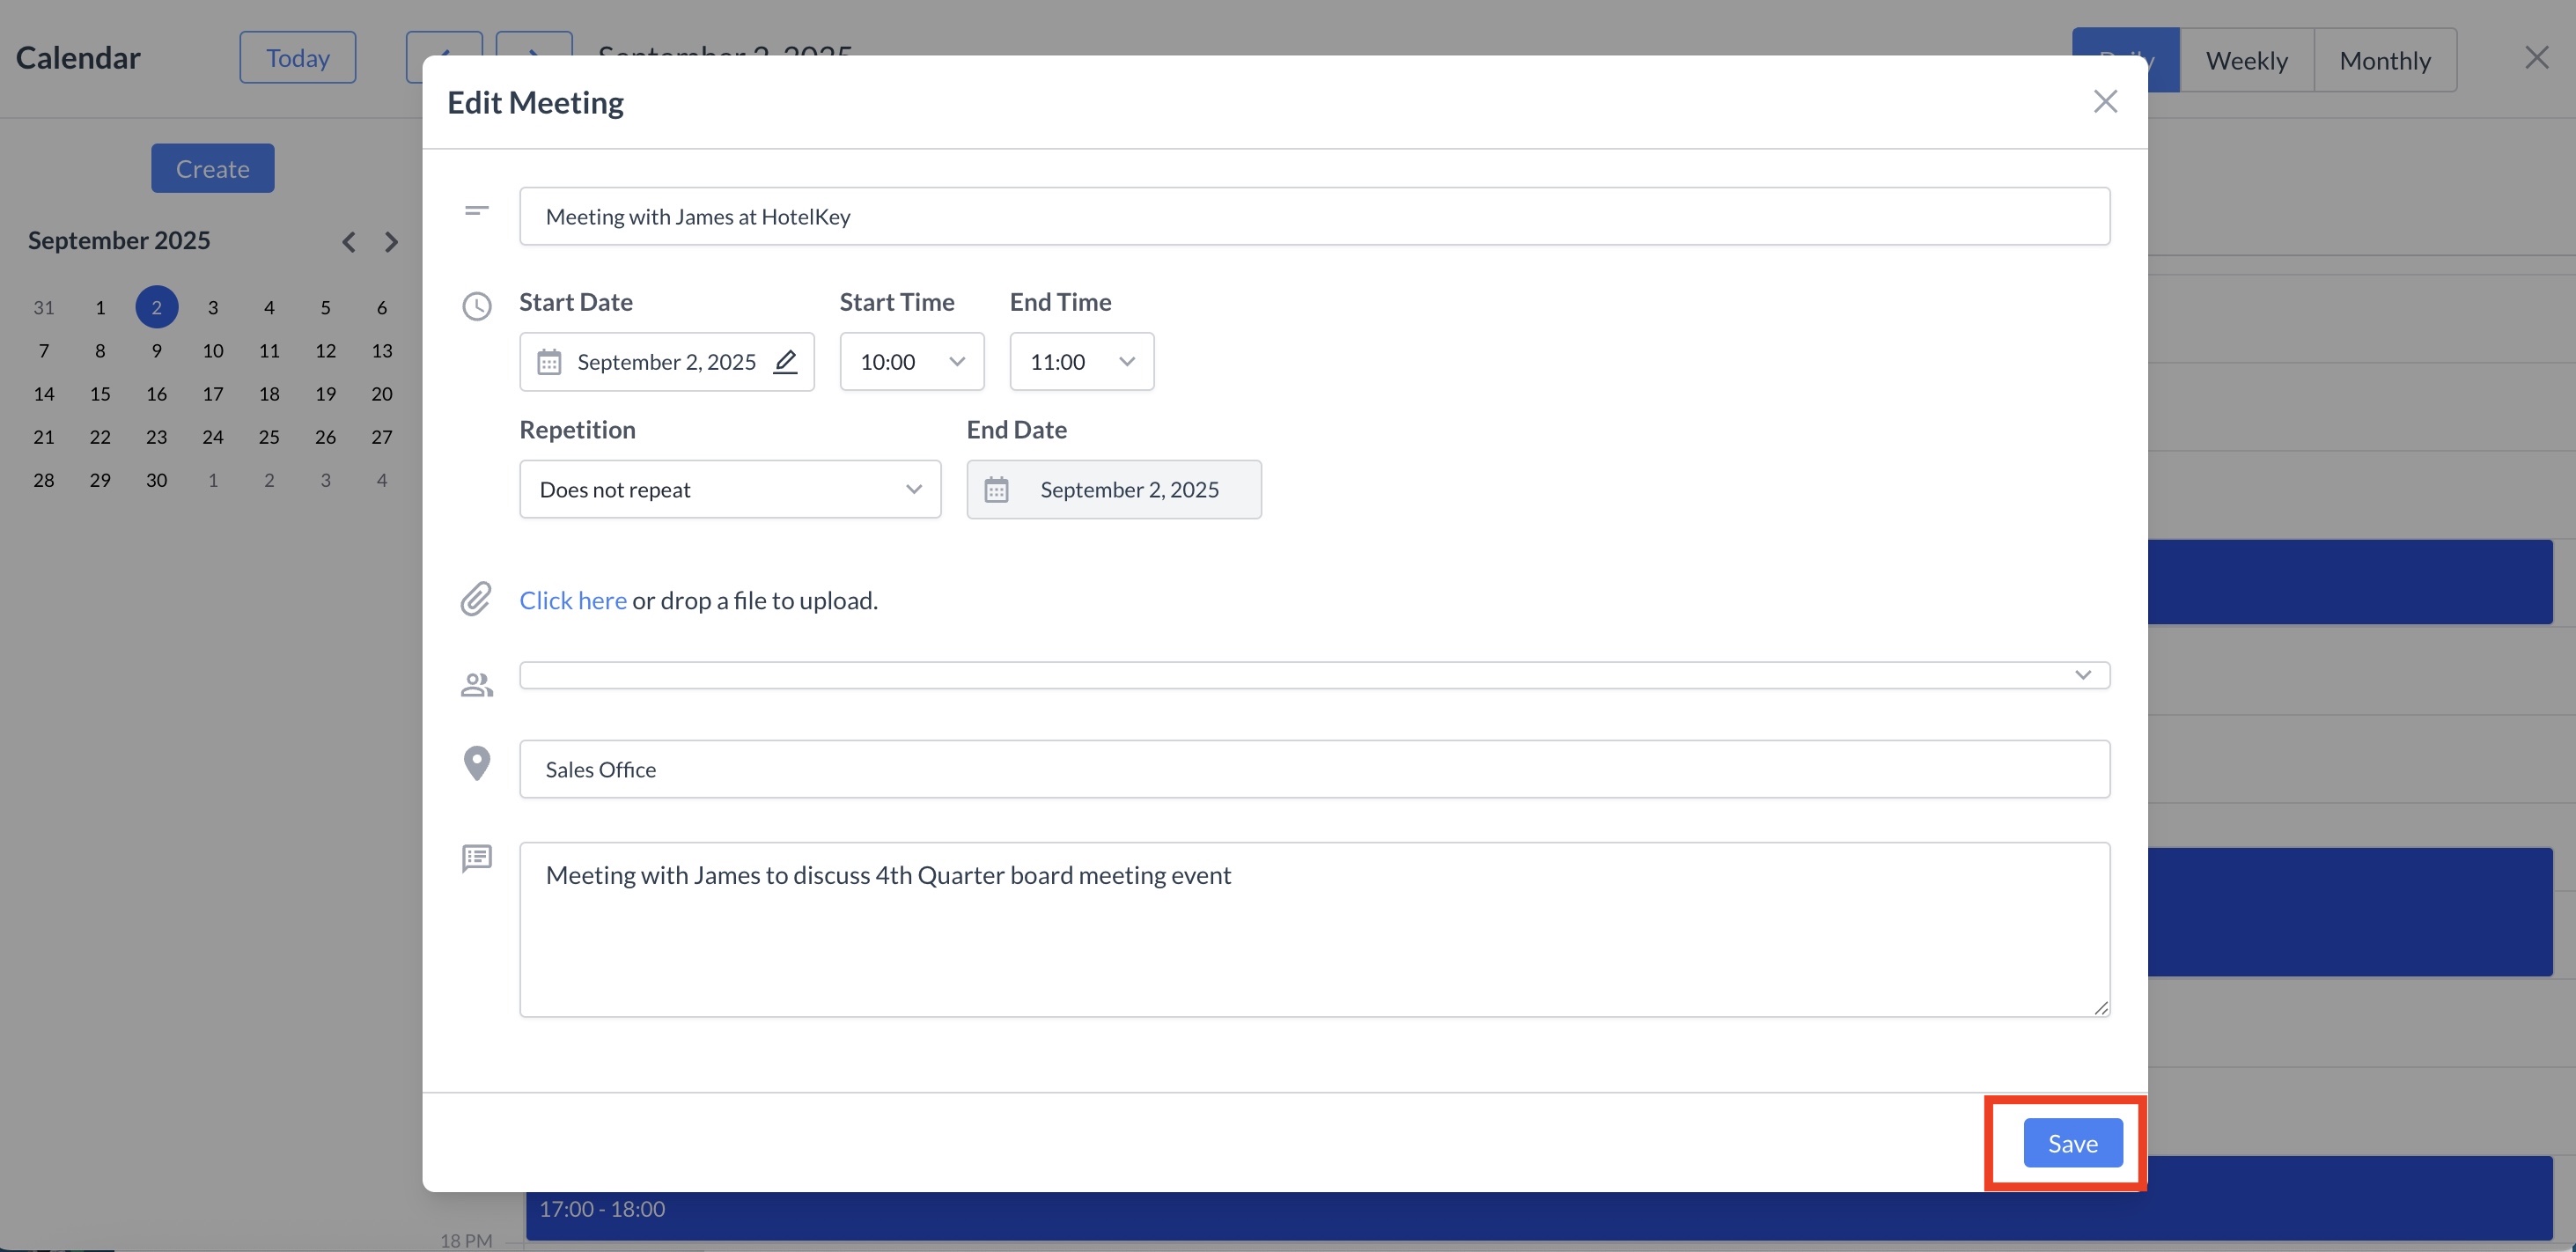
Editing an Appointment
|
|
|
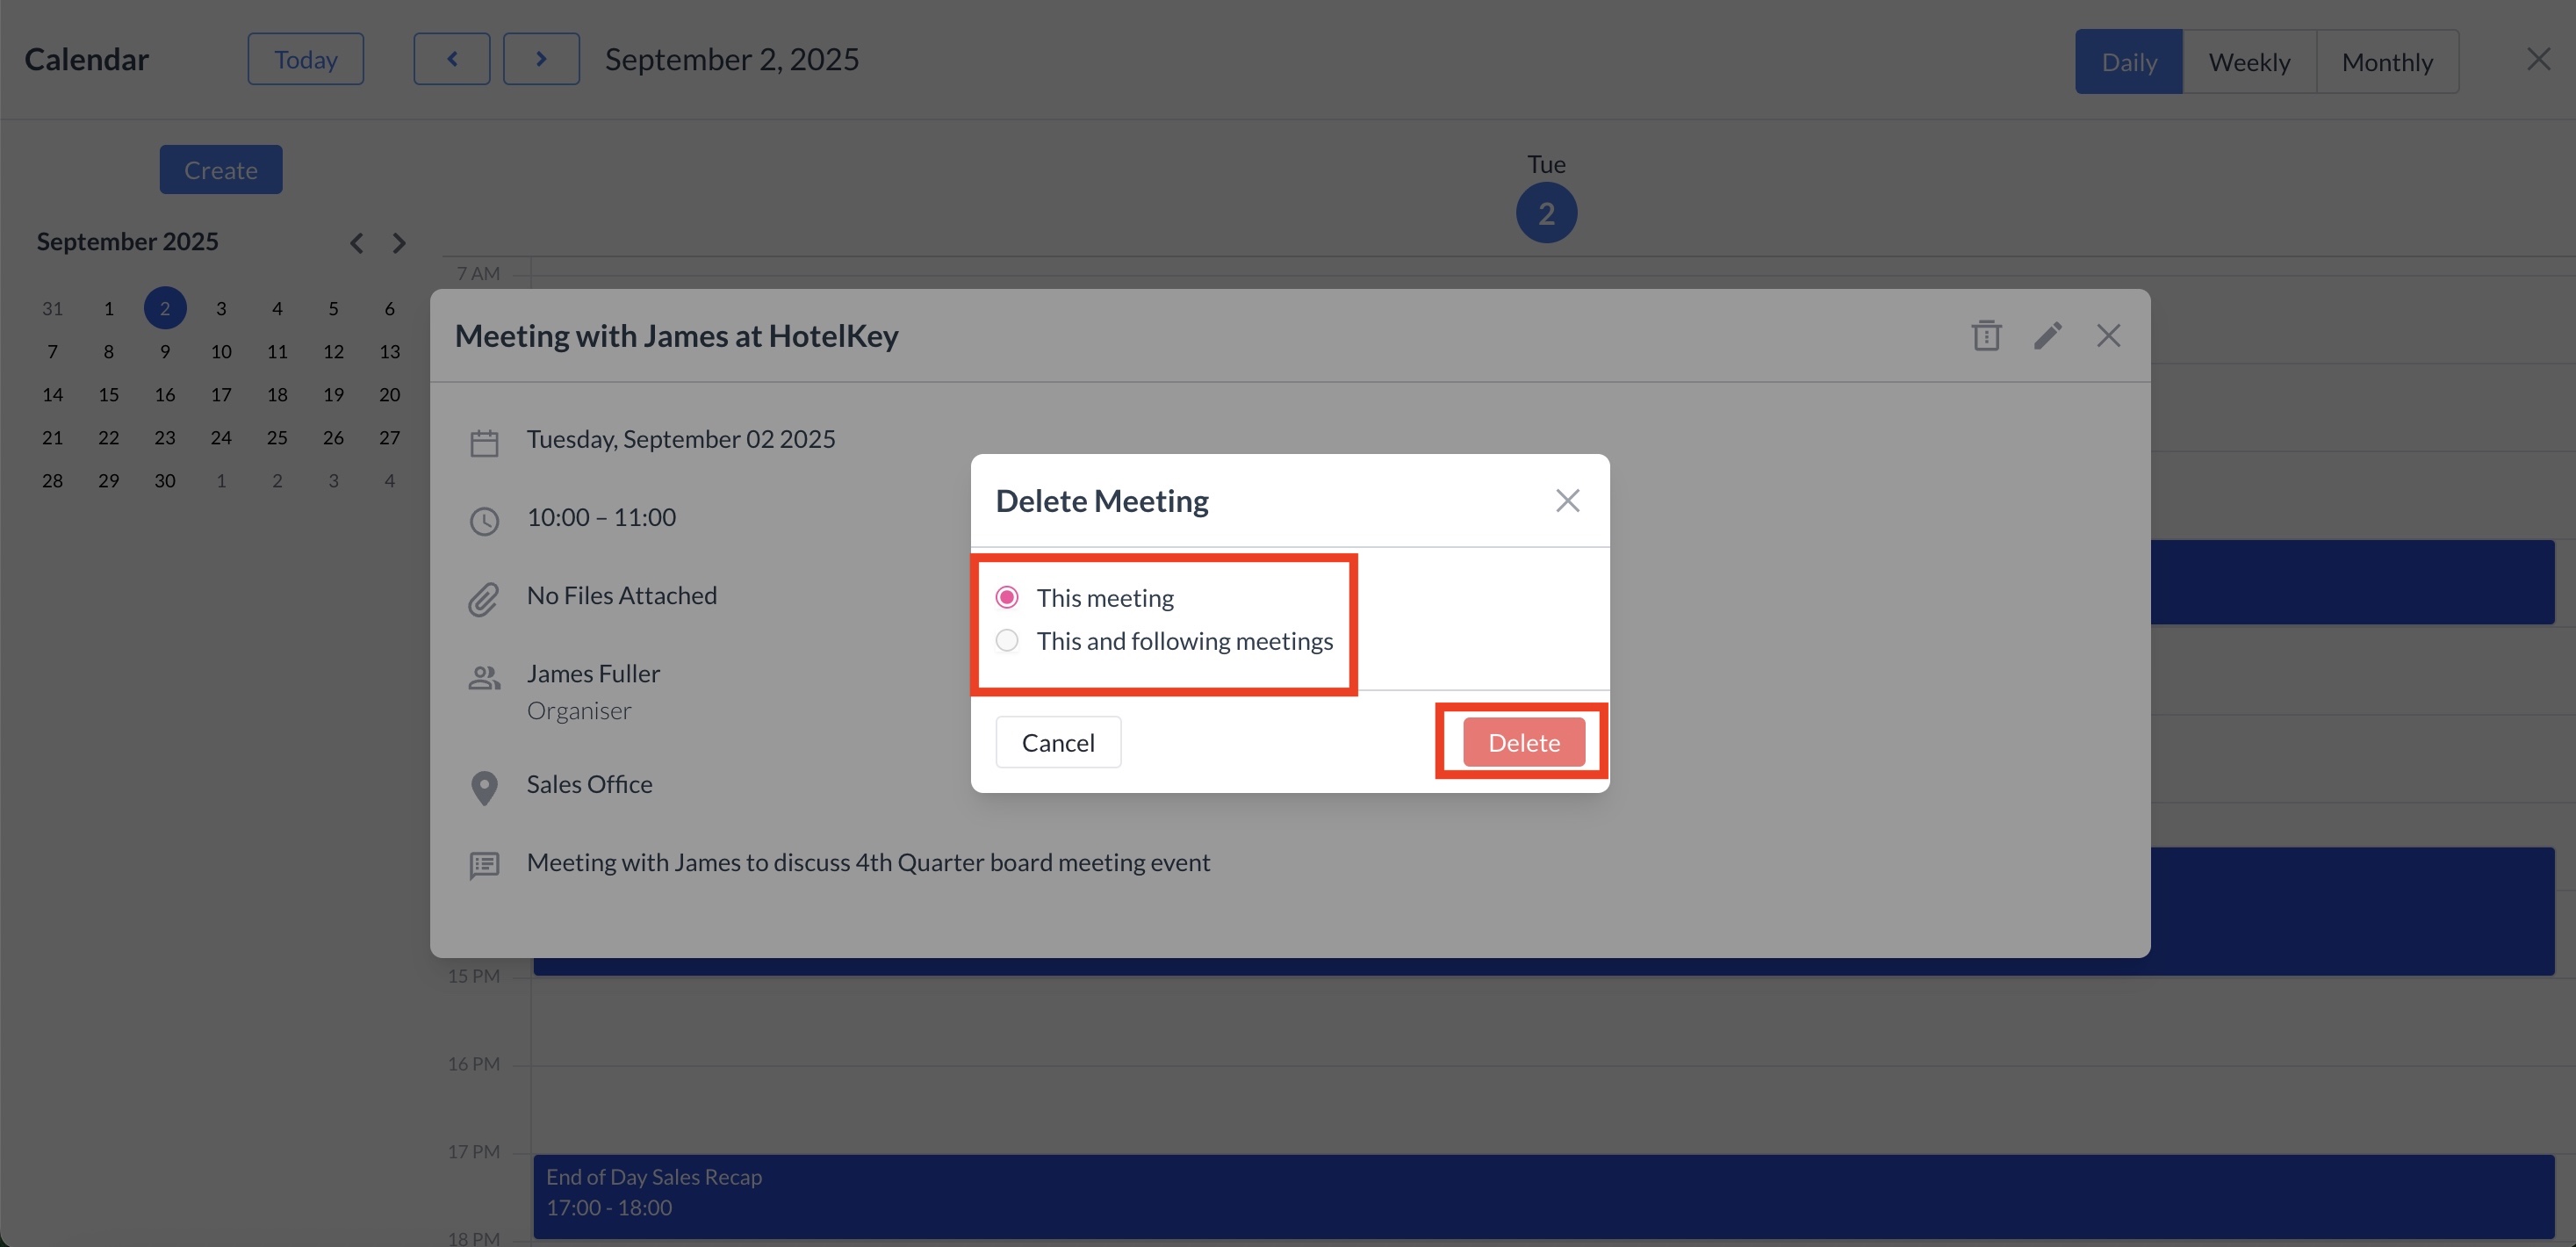
Deleting an Appointment When you delete an appointment, you will be presented with two options:
Select the appropriate option, then click the red "Delete" button to confirm. Your appointment will be successfully deleted. |
|