Action Menu: Converting an Inquiry to a Prospect Event

📆 Revision Date:

Once an inquiry (lead) is marked as won, you can convert it into a prospect event. A prospect event represents the next stage in the sales funnel, where the status shows the progression from initial inquiry to qualified lead, and ultimately to a customer.

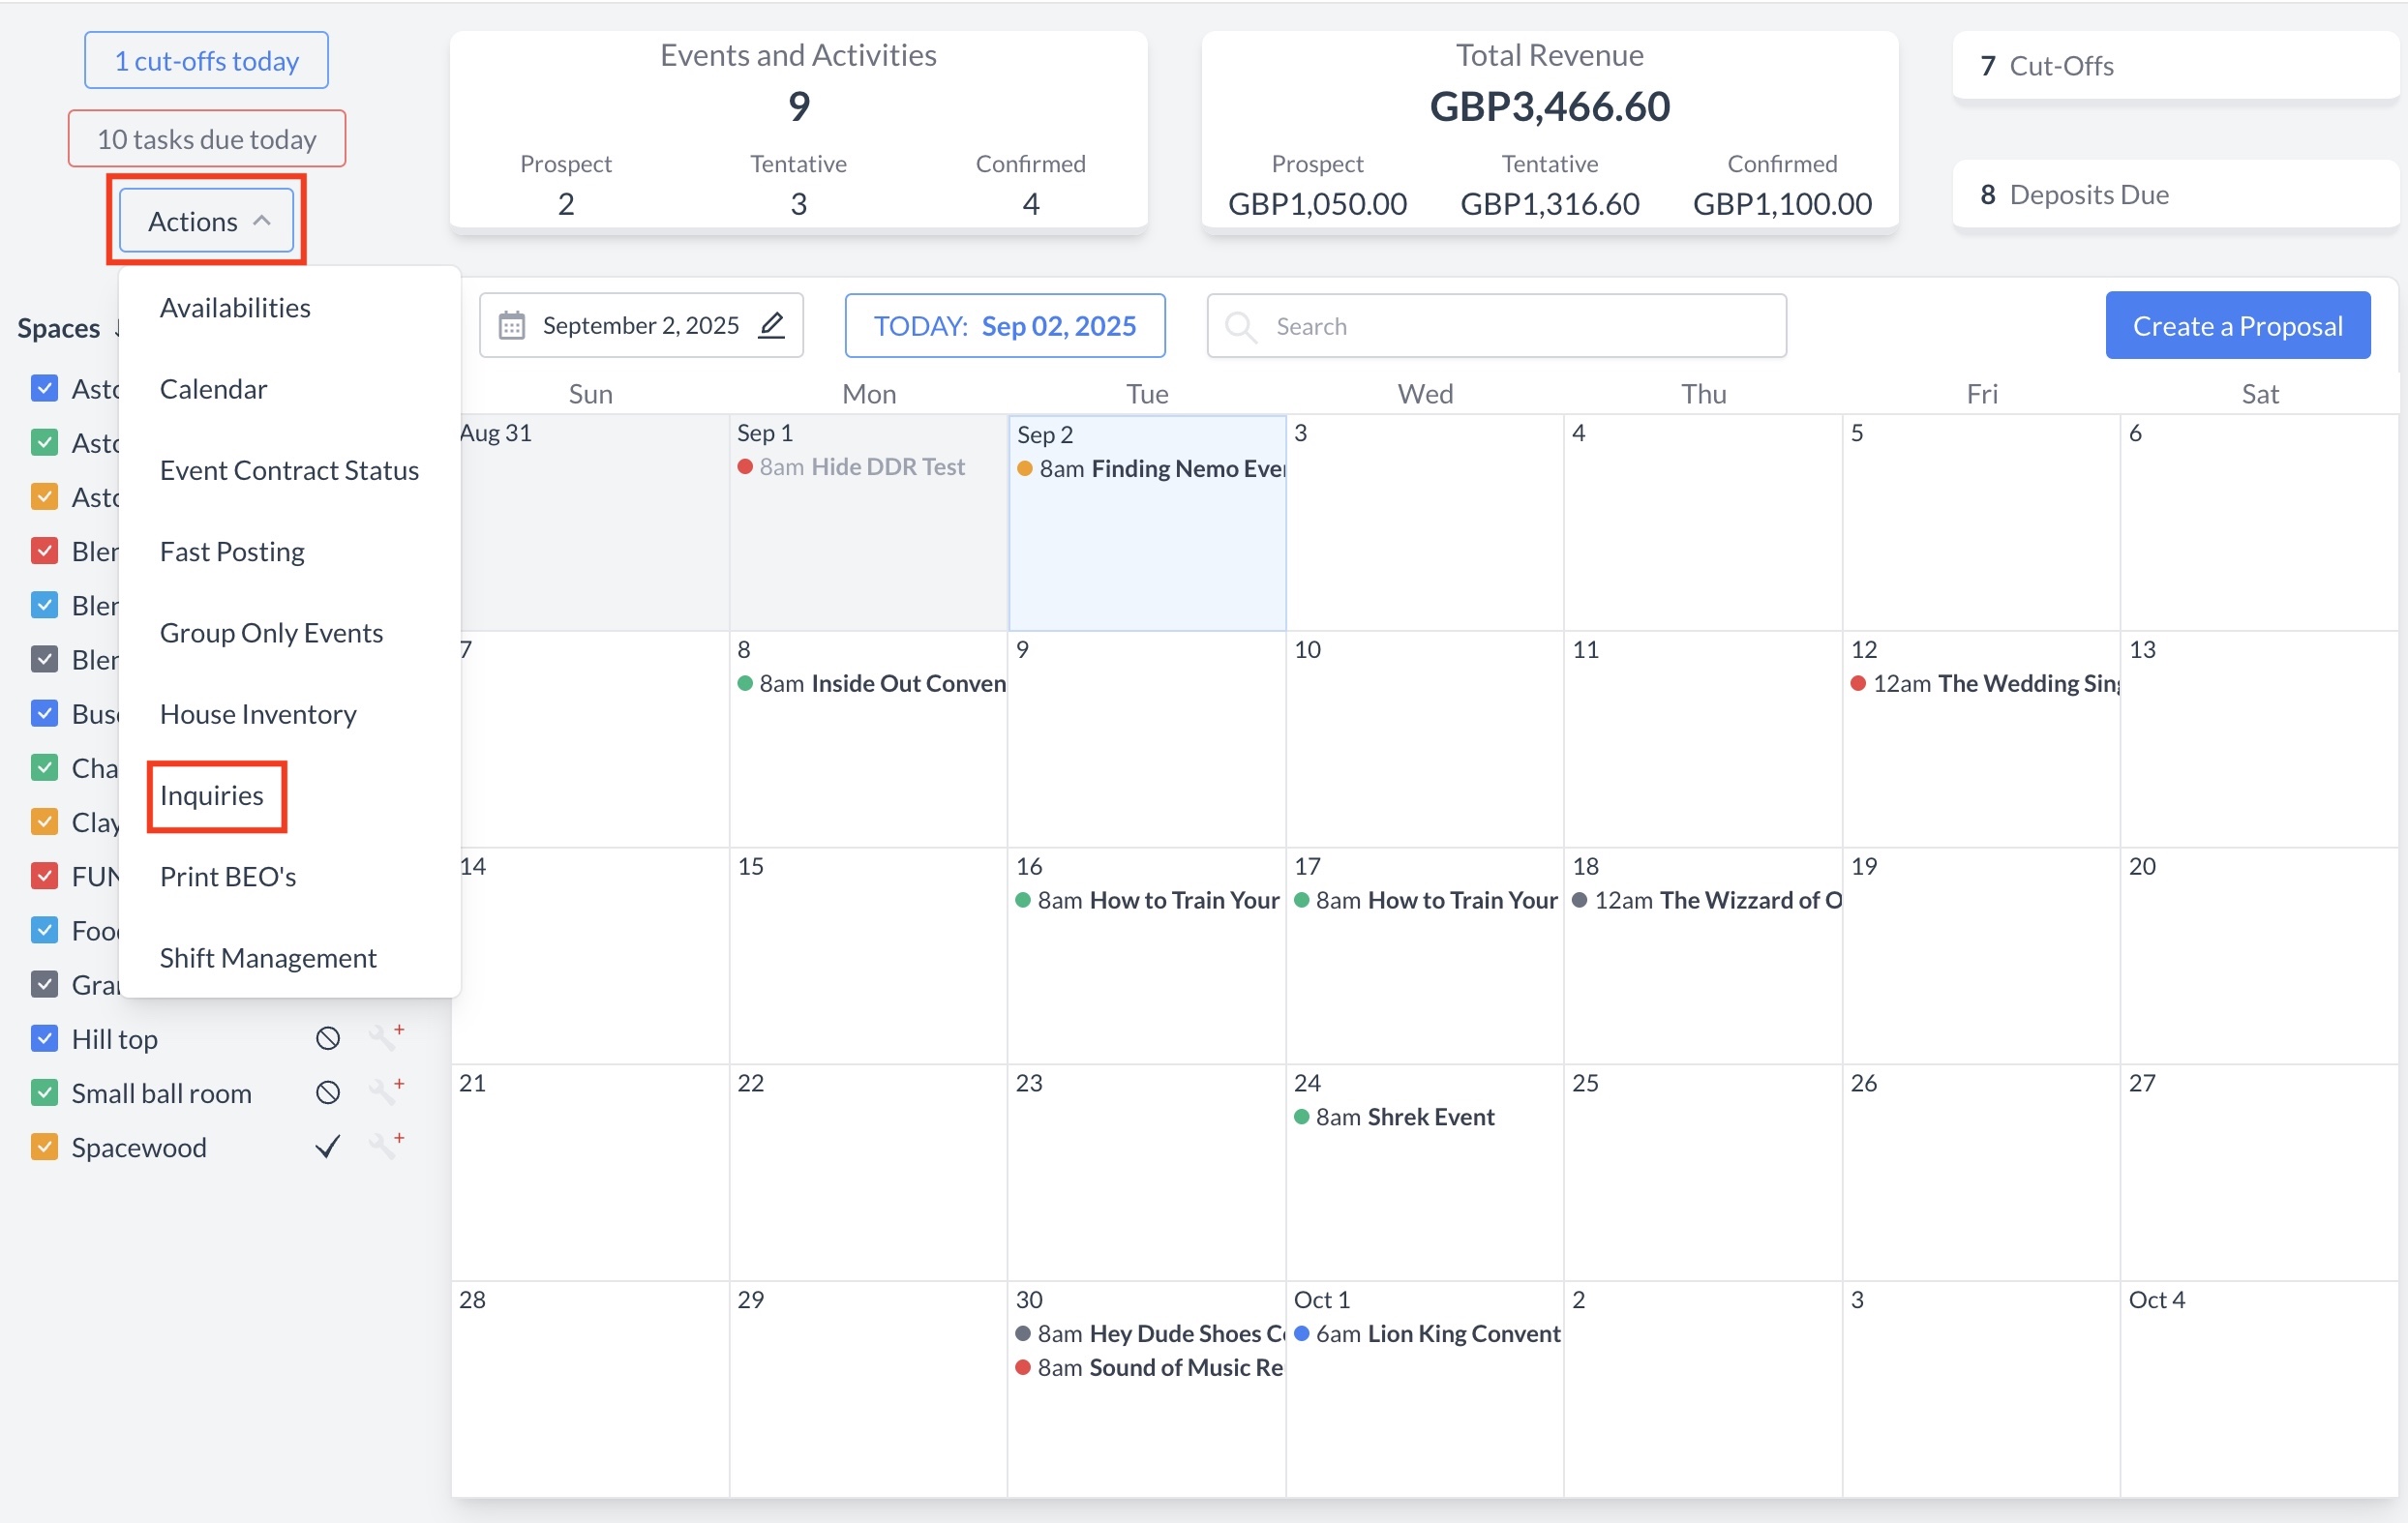
Nvigate to Home > Event Management > Actions > Inquiries

Image 9-3-25 at 2.06 PM.jpg
Action Menu > Inquiries

Locating an Inquiry

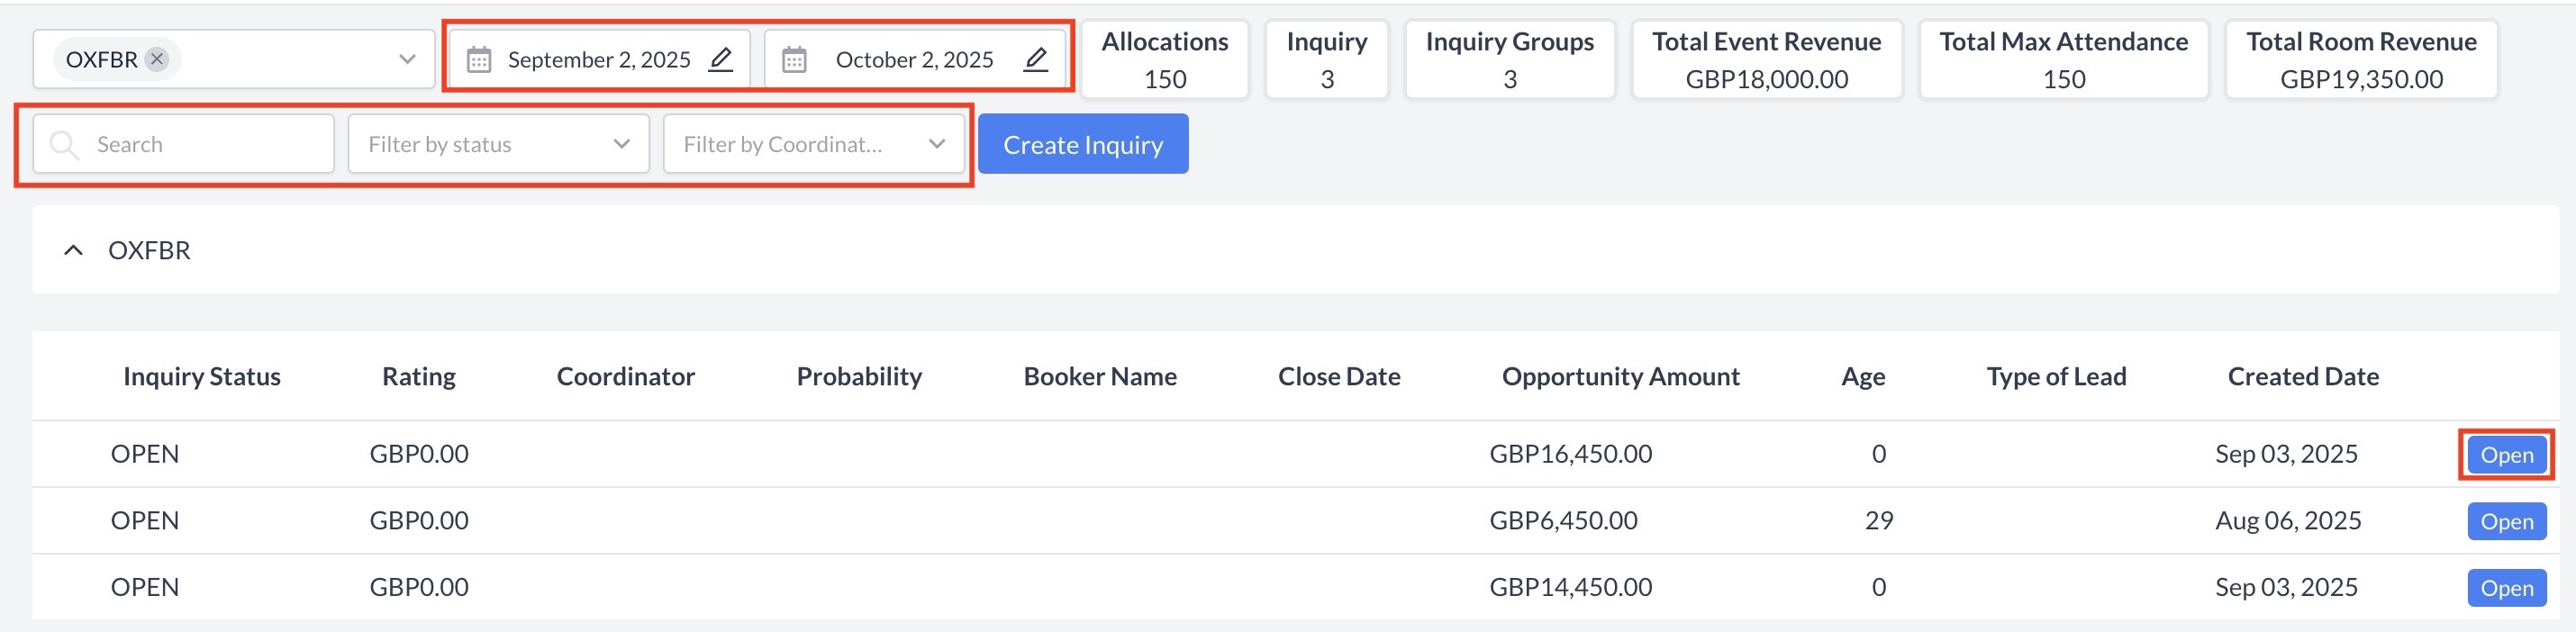
To begin managing an inquiry, you’ll first need to locate it from the Inquiry Home Screen. Use the following search and filter options to find the specific inquiry you’re looking for:

  • Start Date:
    Enter the start date of the inquiry. You can also leave this field set to the current business day.

  • End Date:
    Enter the end date of the inquiry or extend the date range further into the future to include long-term inquiries.

  • Search Box:
    Type the name of the event into the search box to find matching results.

  • Filter by Status:
    Use this dropdown to filter inquiries by their current status, such as Open, In Progress, Dormant, or Turned Down.

  • Filter by Coordinator:
    Use this option to filter inquiries by the assigned event coordinator.

Once you've located the desired inquiry, click the blue “Open” button to view and manage its details.

Image 9-3-25 at 6.48 PM.jpg
Locating an Inquiry


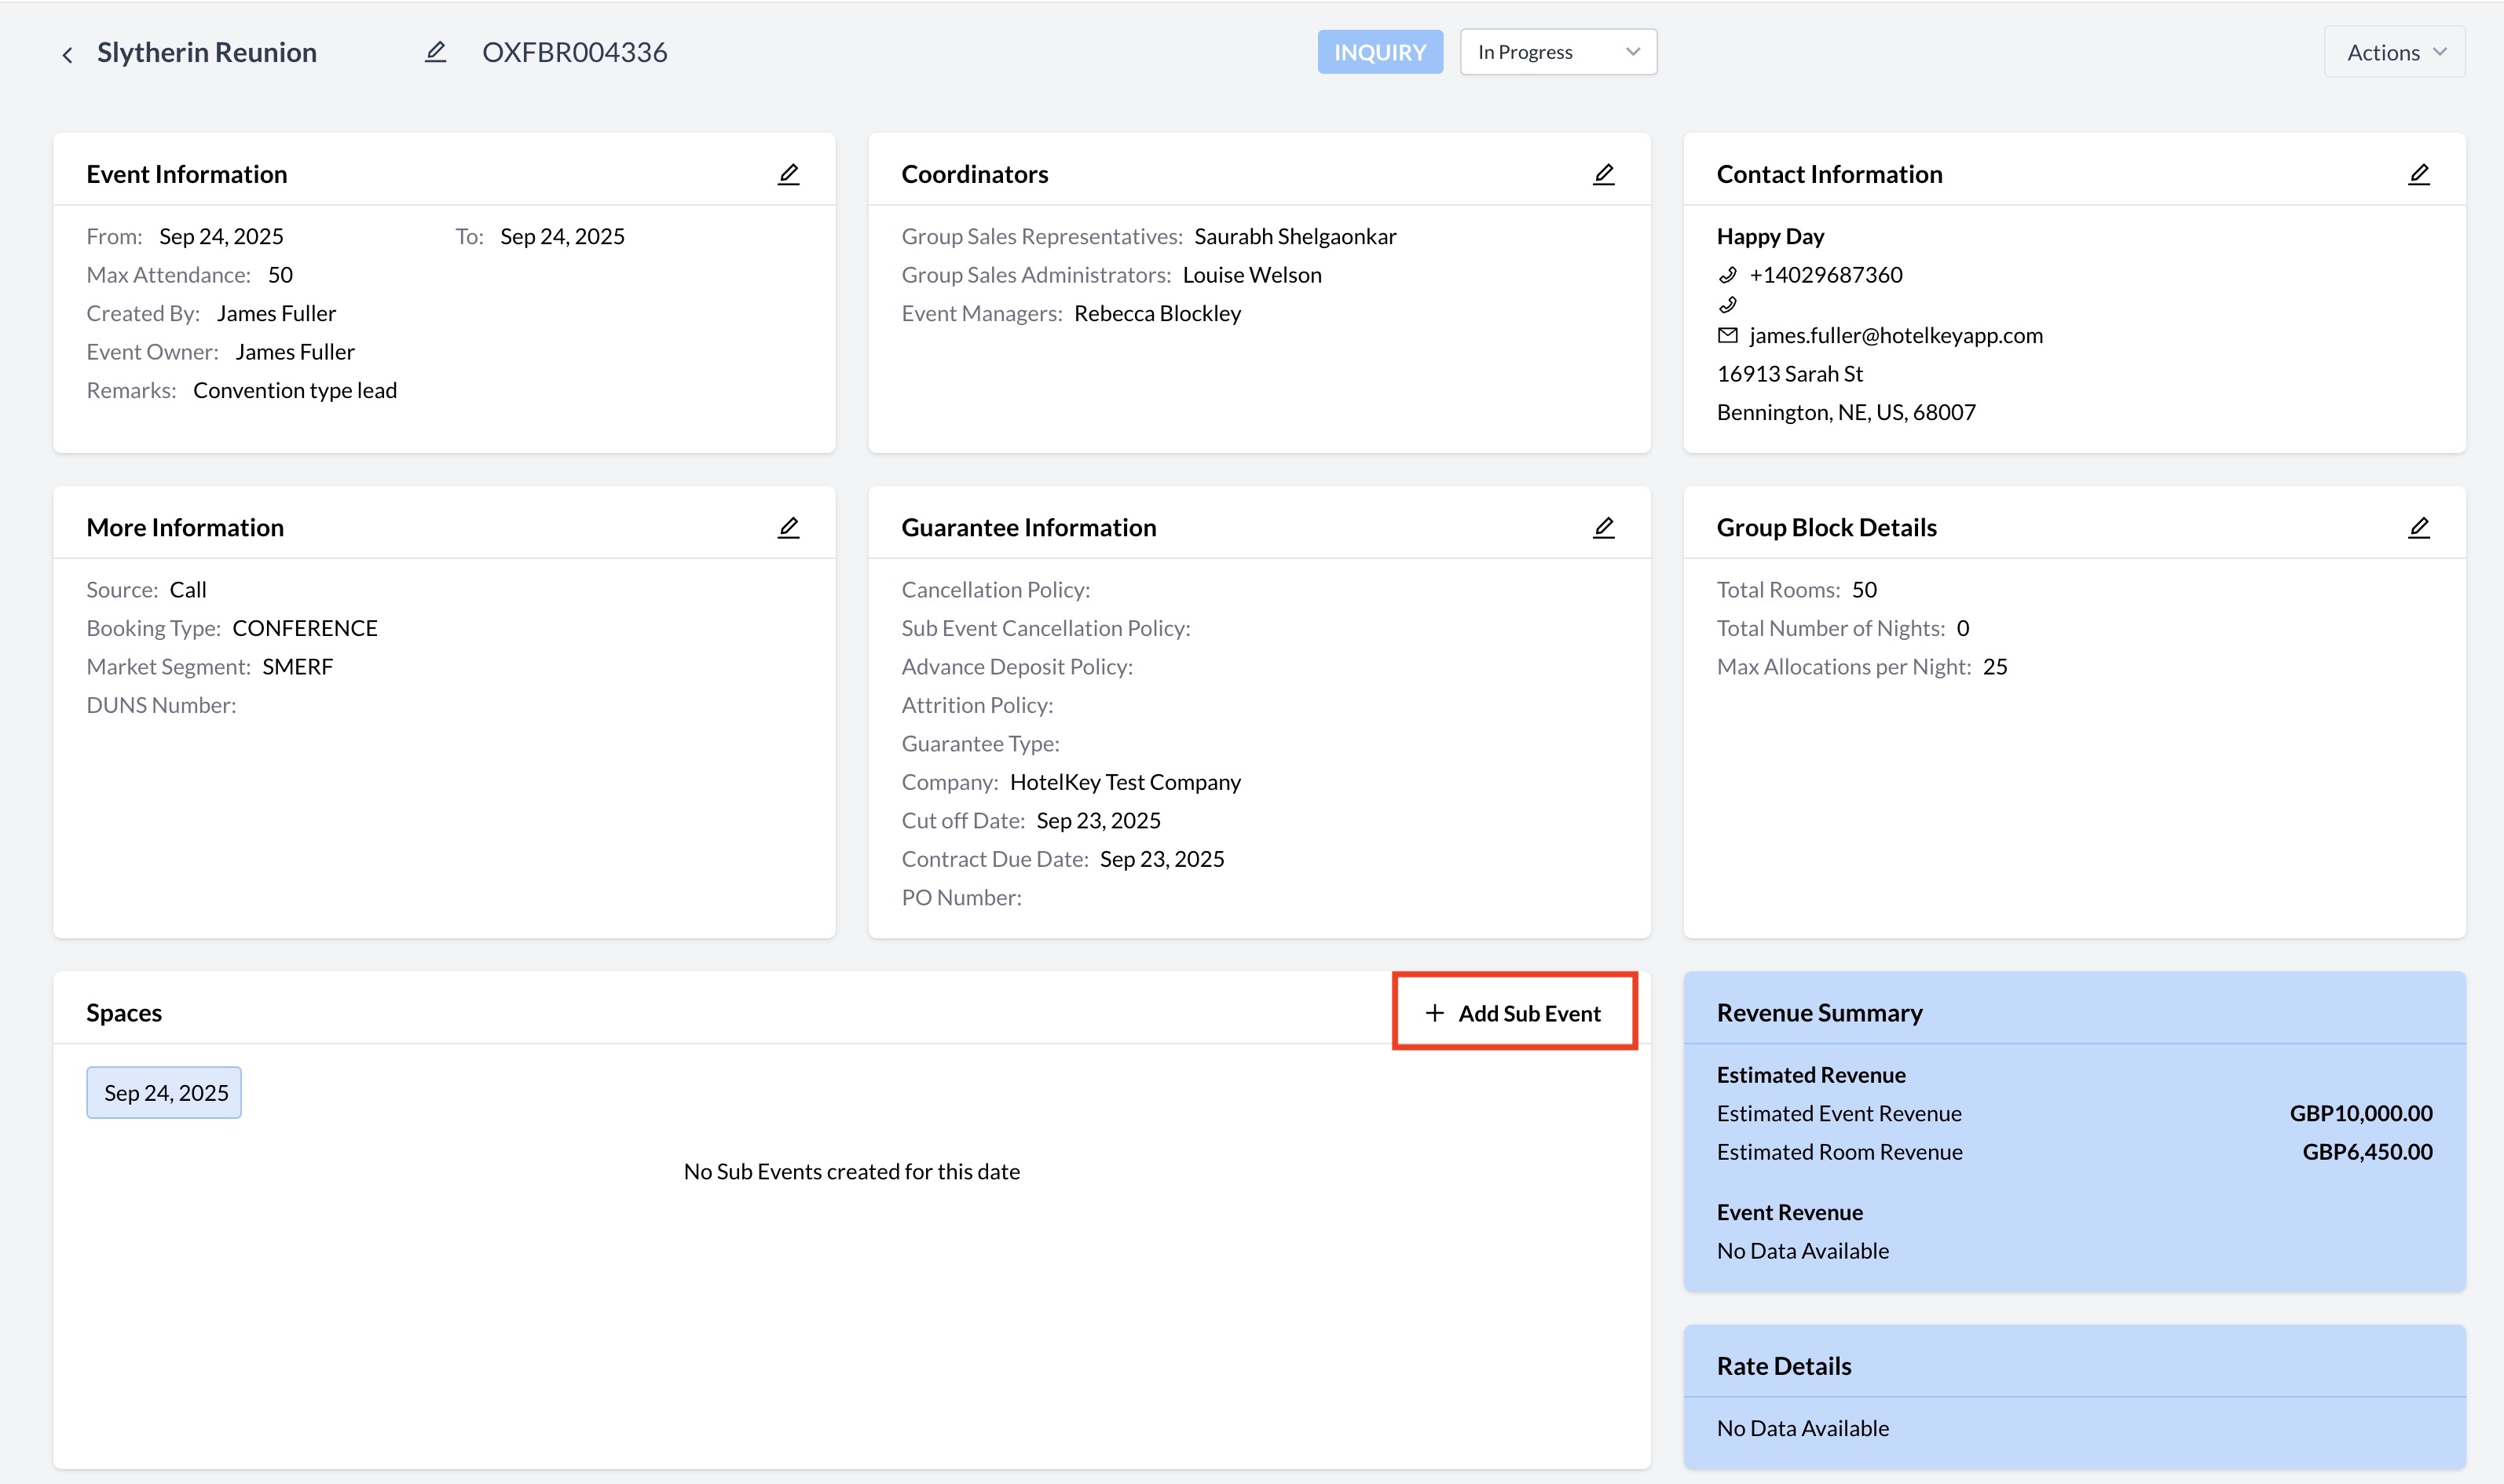
Before converting an inquiry into a prospect event, you must first create a sub-event. The sub-event defines the potential meeting space, rental rate, and estimated number of attendees. To create it, click the Add Sub Event button under the Spaces section.

Image 9-3-25 at 7.31 PM.jpg
Create Sub Event


Creating a Sub-Event

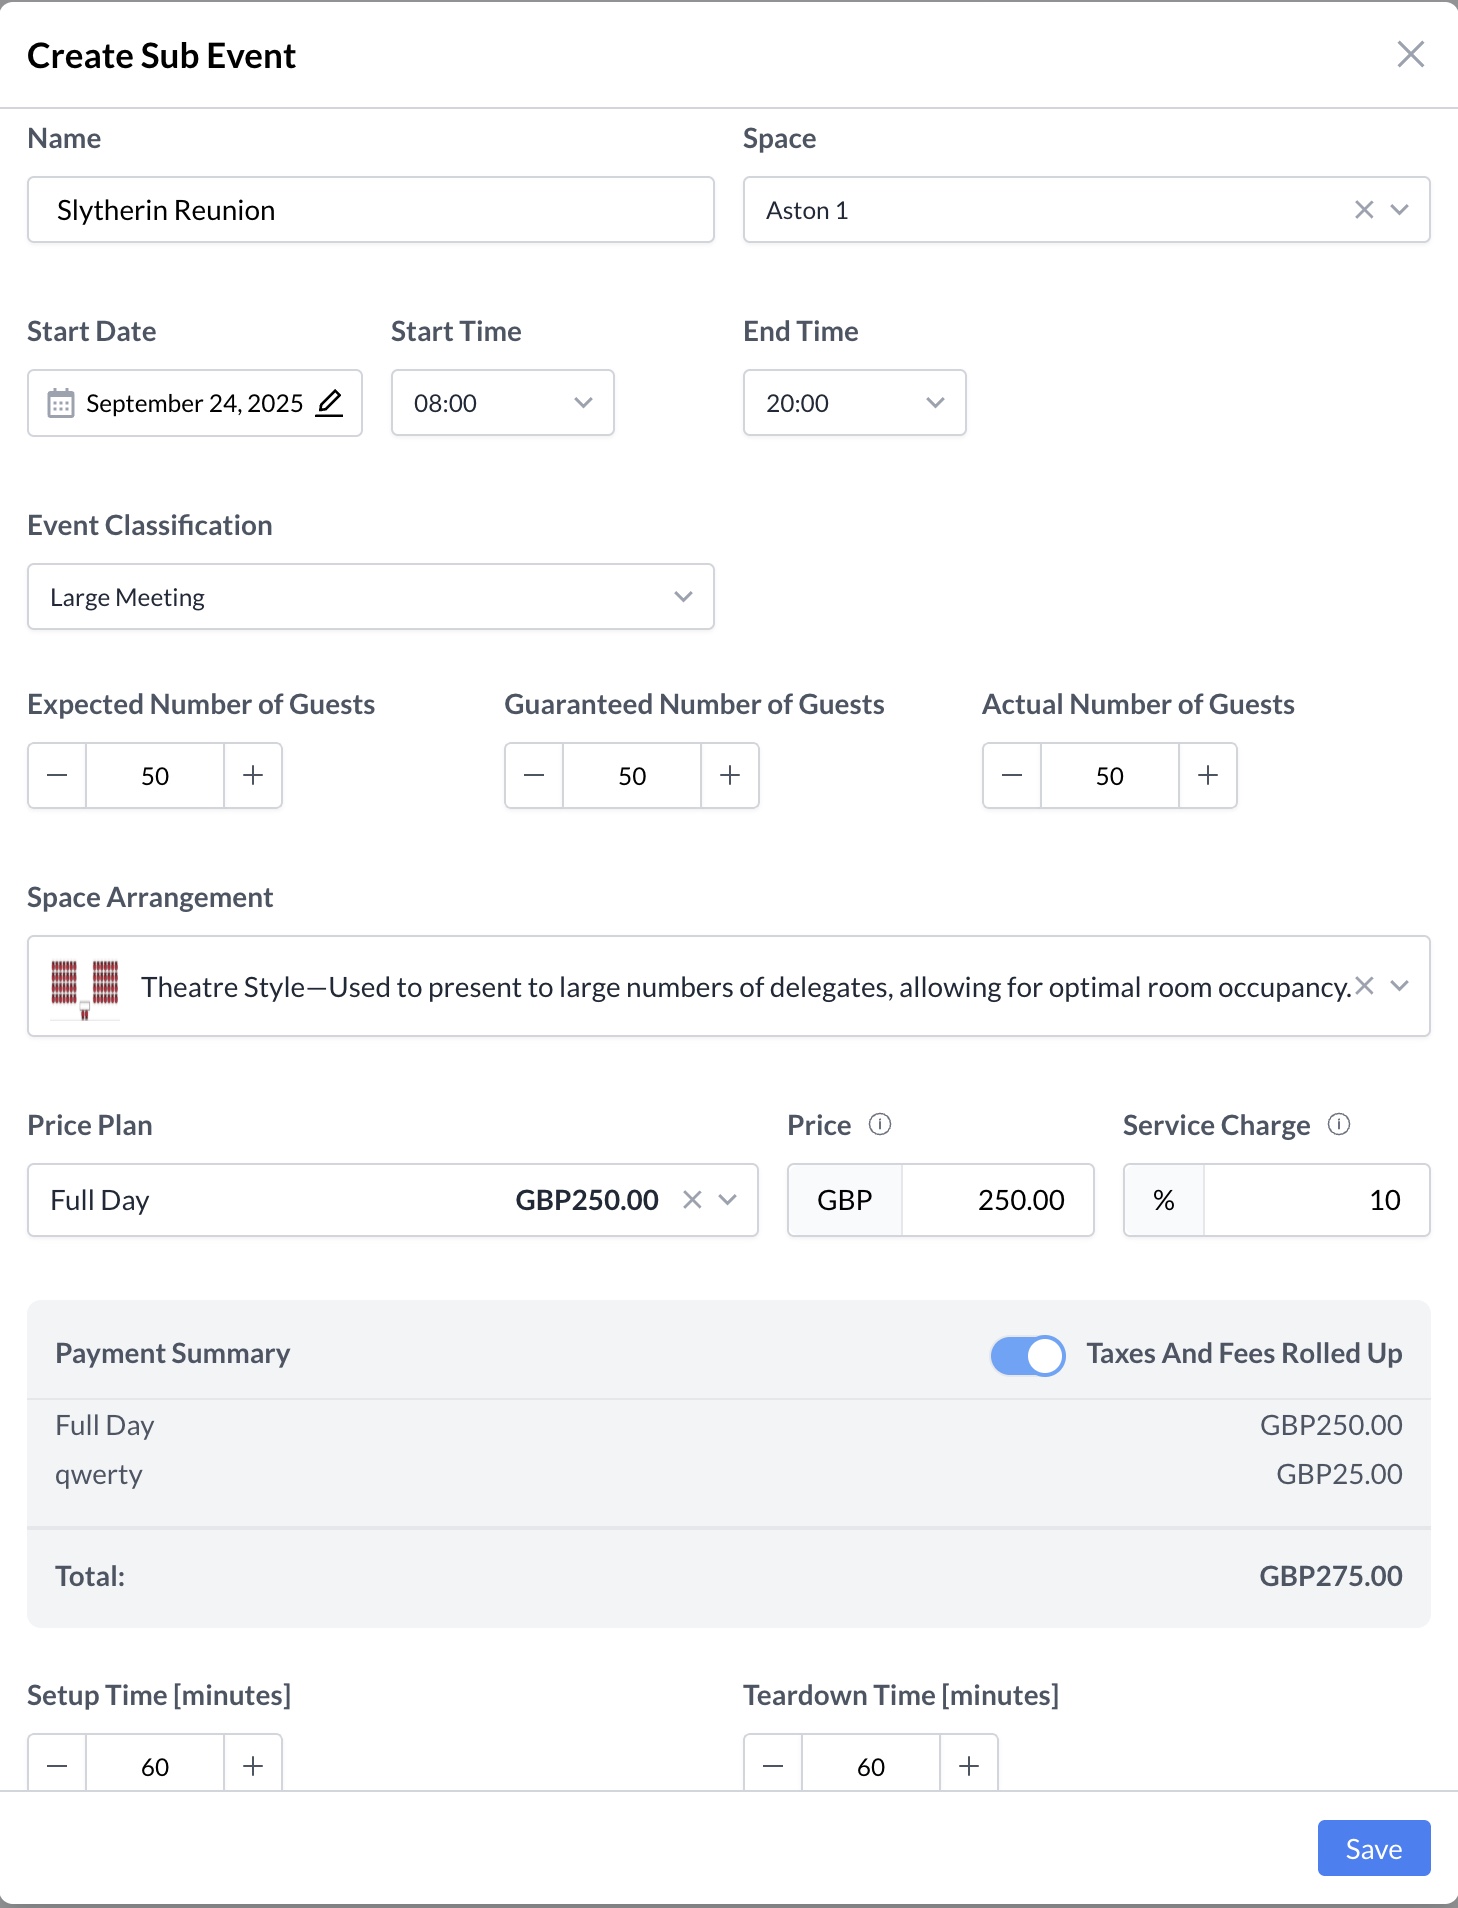
When creating a sub-event, enter the following details:

  • Name – Enter the name of the event occupying the room.
    Note: This may differ from the overall event name, especially if there are multiple breakout sessions.

  • Space – Select the assigned meeting room.

  • Start Date – Enter the first date of the meeting.

  • Start Time – Enter the time the meeting begins.

  • End Time – Enter the time the meeting ends.

  • Event Classification – From the dropdown menu, select the type of meeting.
    This field is used for reporting and may not apply to all properties.

  • Expected Number of Guests – Enter the number of guests anticipated by the event organizer.

  • Guaranteed Number of Guests – Enter the number of guests the organizer guarantees.

  • Actual Number of Guests – Enter the actual number of attendees.
    Initially, this may be an estimate. Update it after the event if needed.

  • Space Arrangement – Select the room setup requested by the event organizer.

  • Price Plan – Select the applicable price plan.

  • Price – The system will auto-fill the price based on the selected plan.
    If you have permission, you may override the rate.

Once all details are entered, click the Save button to create the sub-event.

Image 9-3-25 at 7.37 PM.jpeg
Sub Event Screen


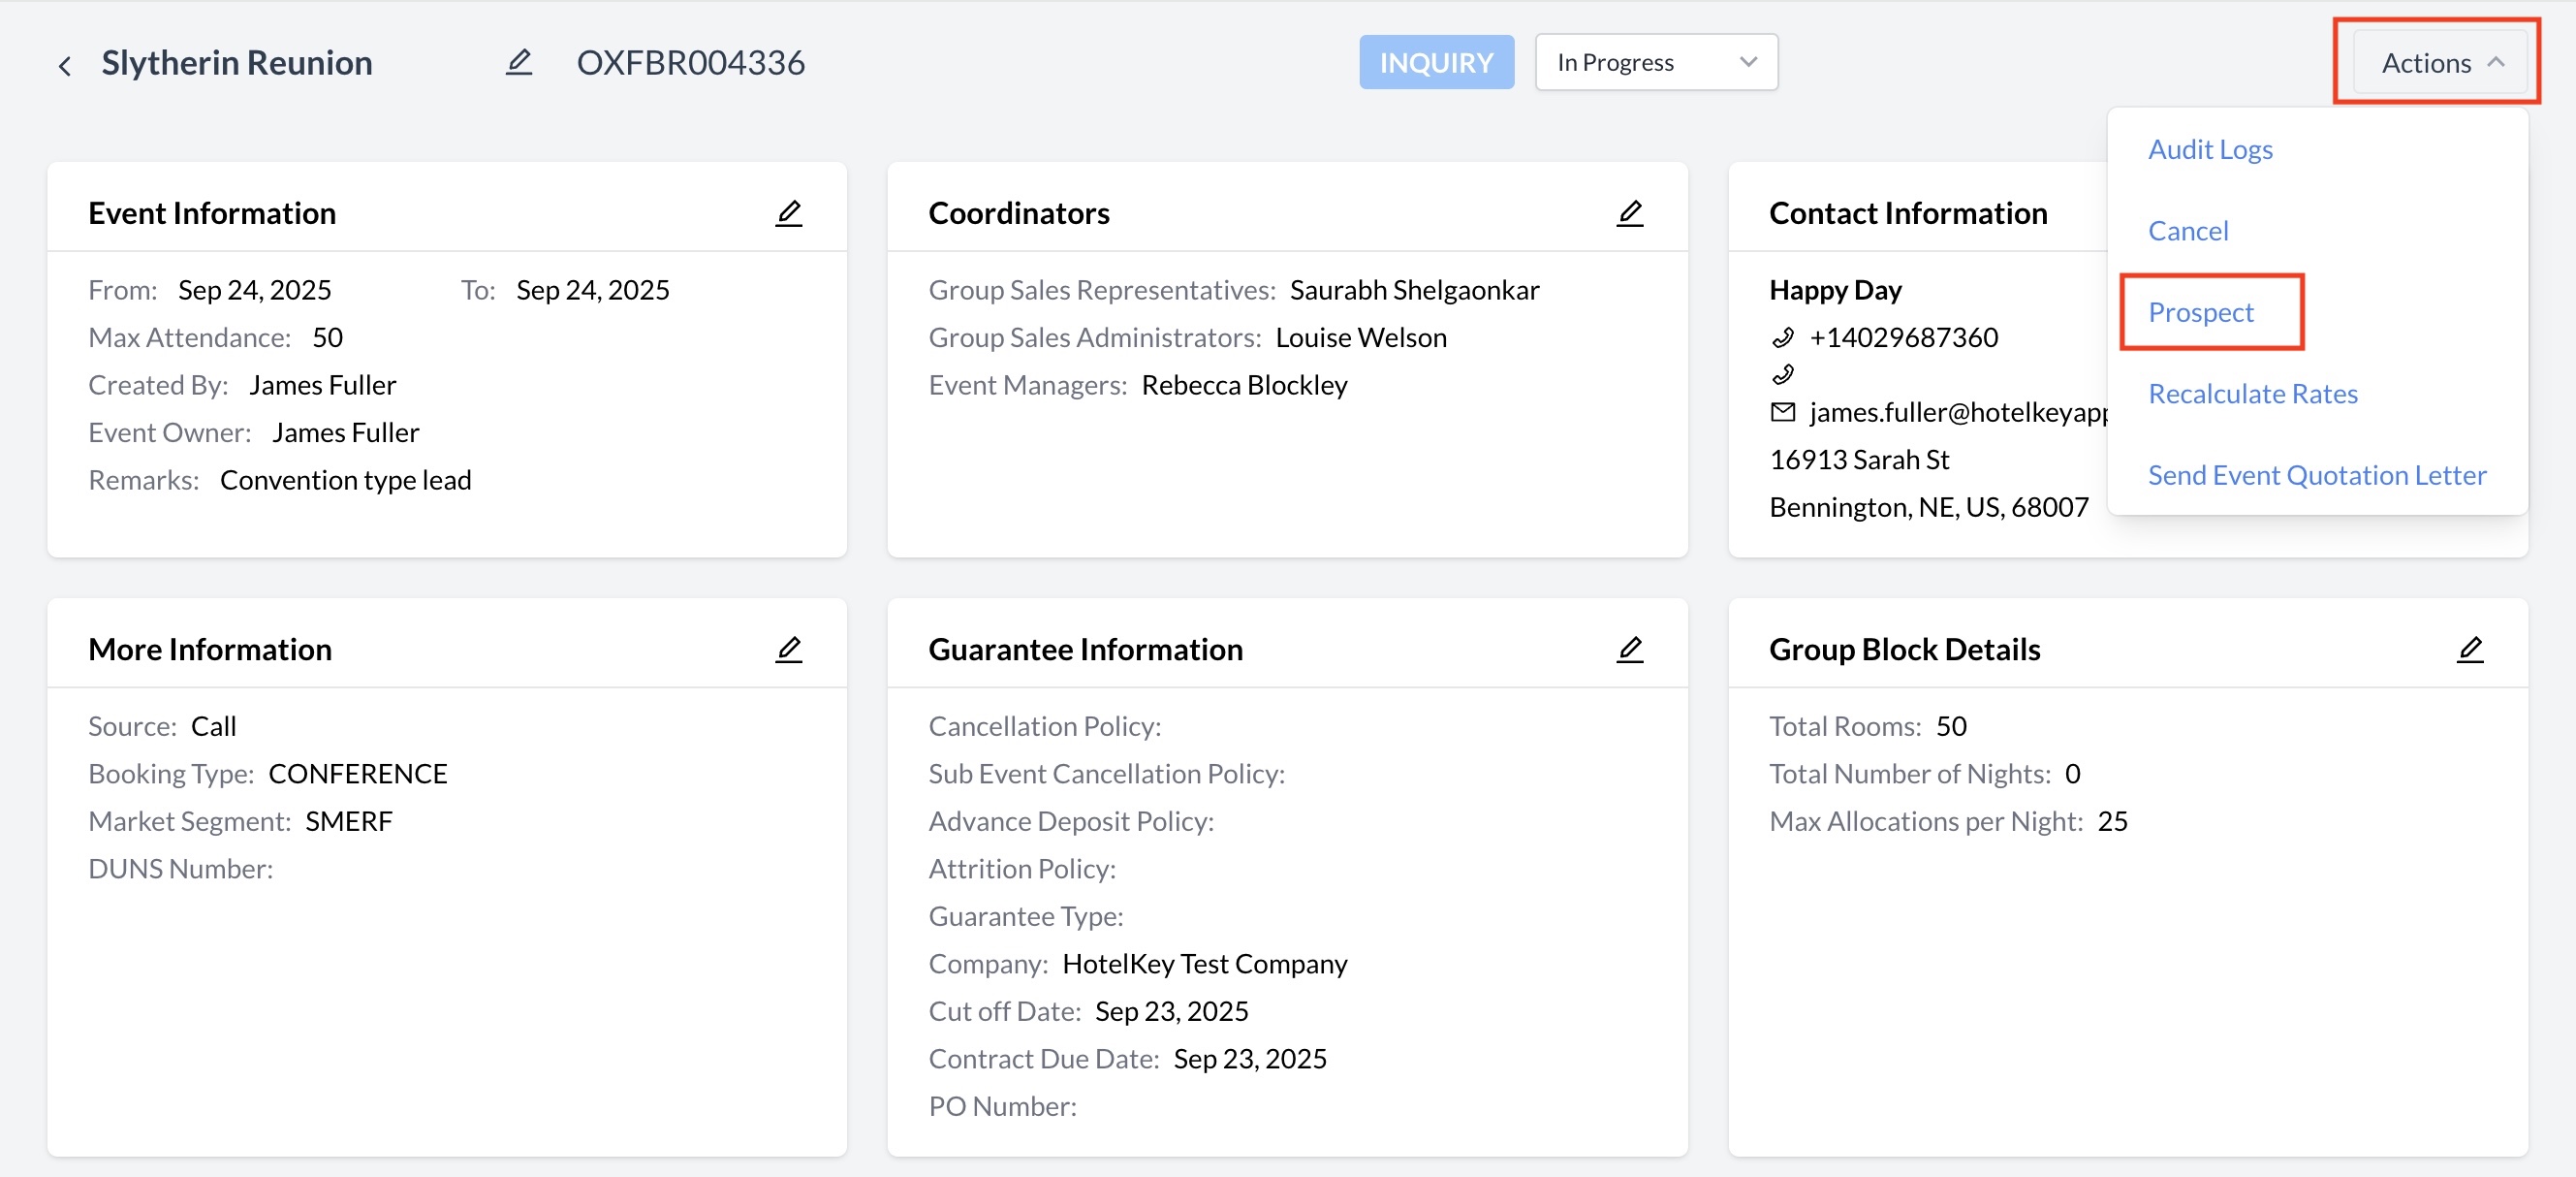
In the upper-right corner, open the Actions menu, then choose Prospect from the dropdown list.

Image 9-3-25 at 7.43 PM.jpg
Actions Menu Dropdown List


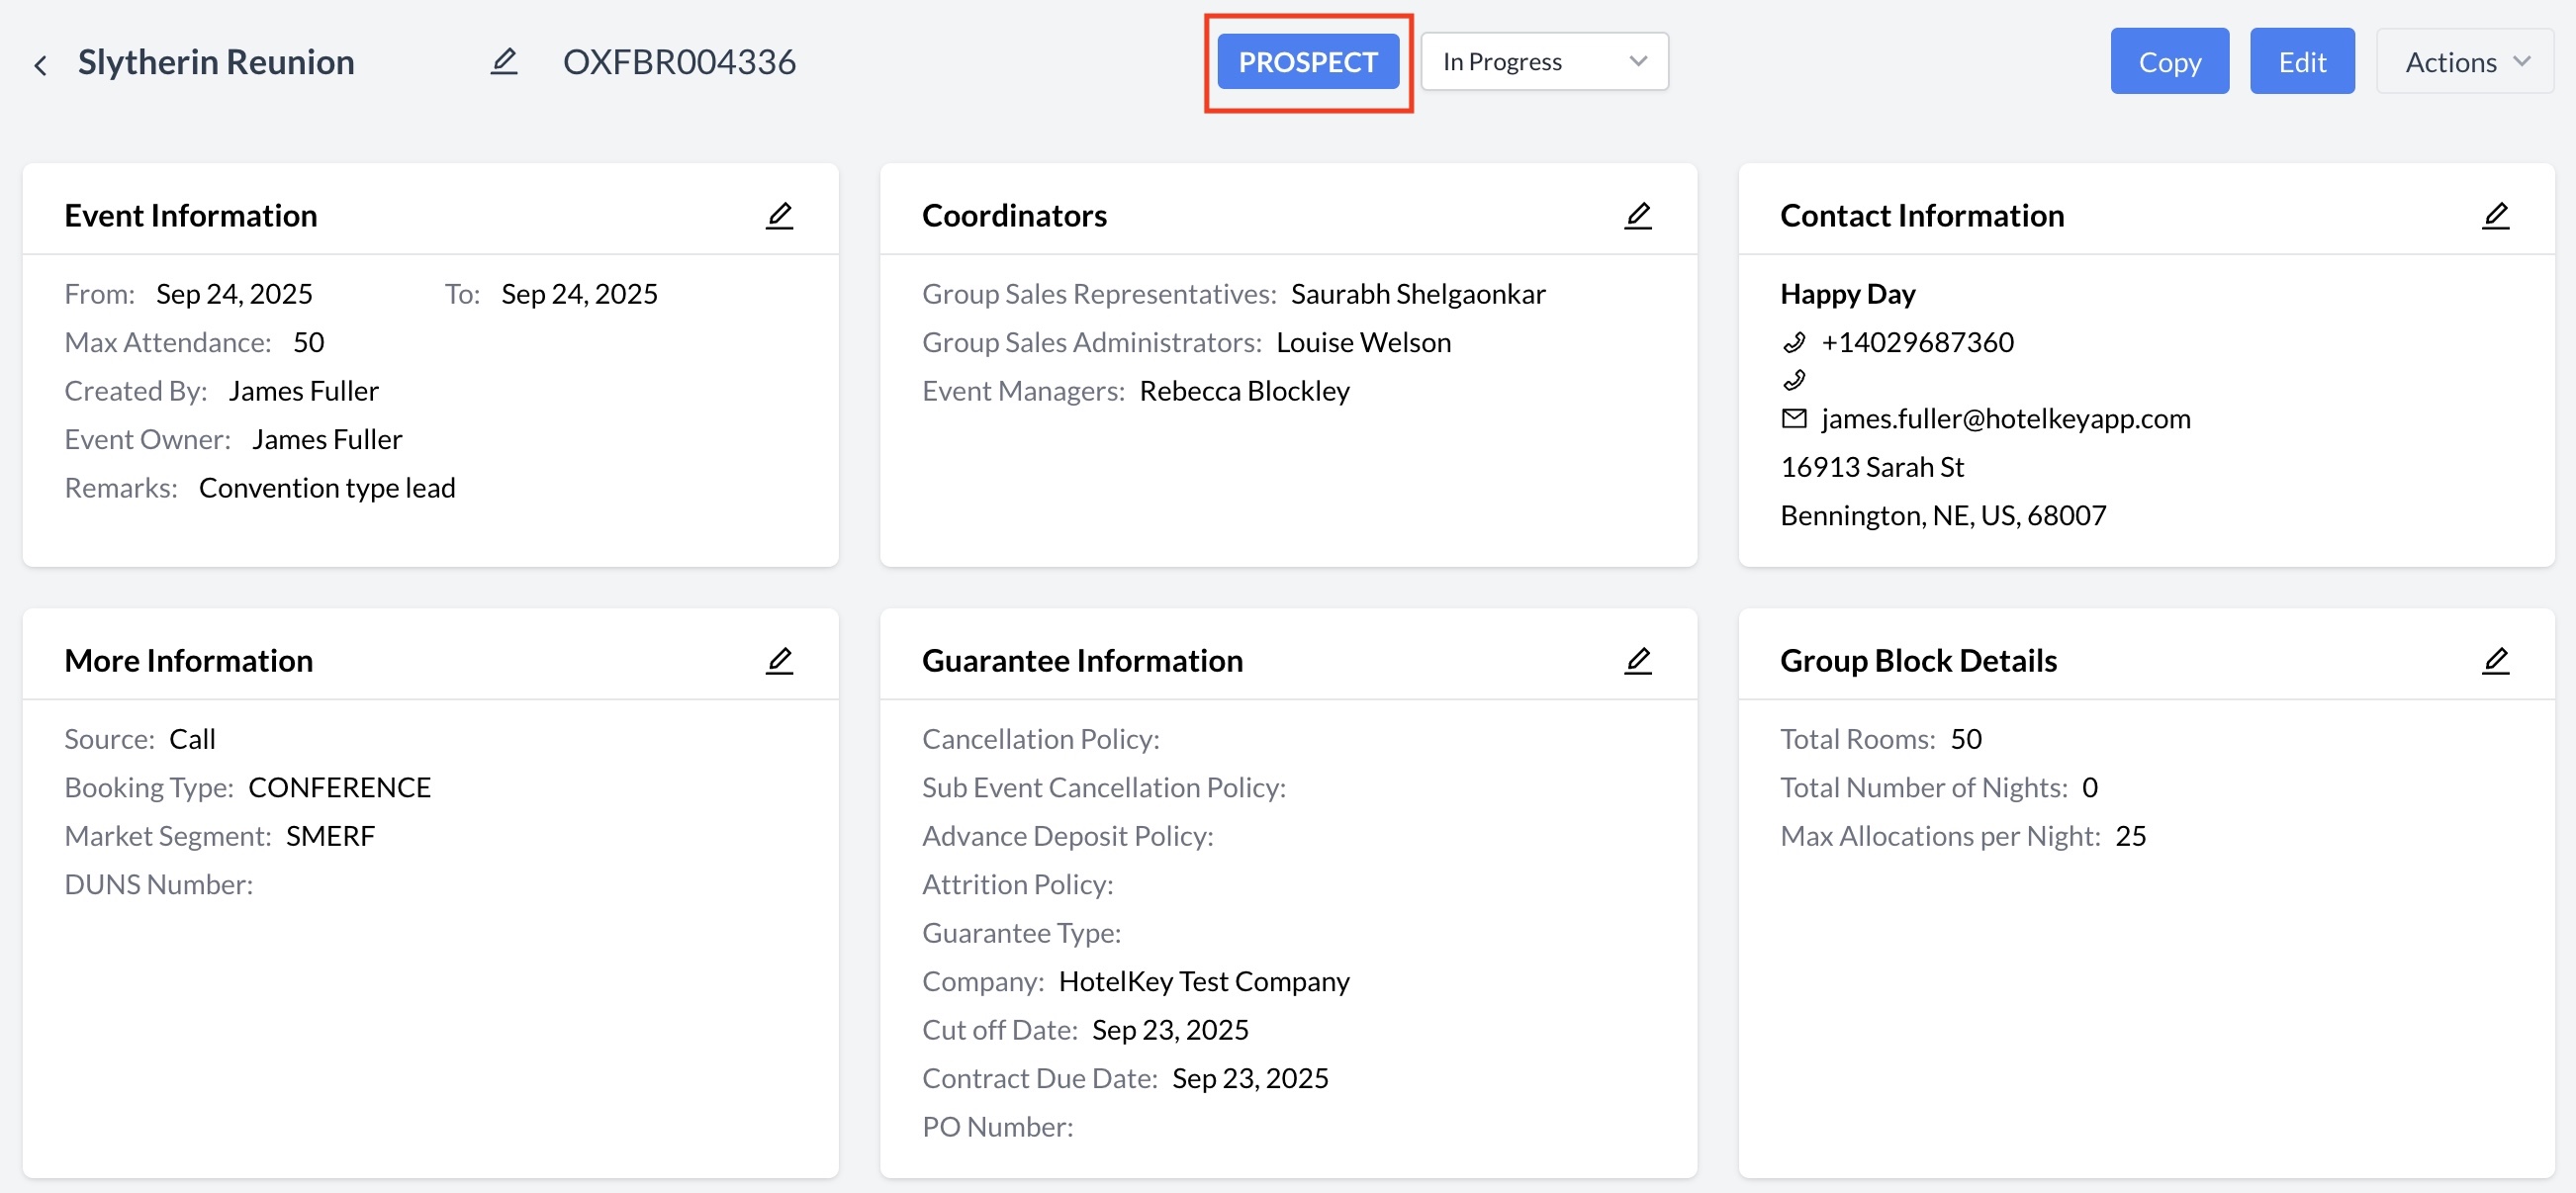
The event is now in Prospect status. You can confirm this by checking the top center of the screen, where the inquiry status now displays as Prospect.

Image 9-3-25 at 7.46 PM.jpg