
📆 Revision Date:
Introduction to Inquiries (Leads)
An Inquiry—also known as a lead—is an initial request from a potential client expressing interest in hosting an event at your venue. It typically includes basic event details such as dates, attendee numbers, and space or room needs.
This article provides step-by-step guidance on how to manage inquiries after they’ve been created, helping you track potential business and move leads through the sales process efficiently.
|
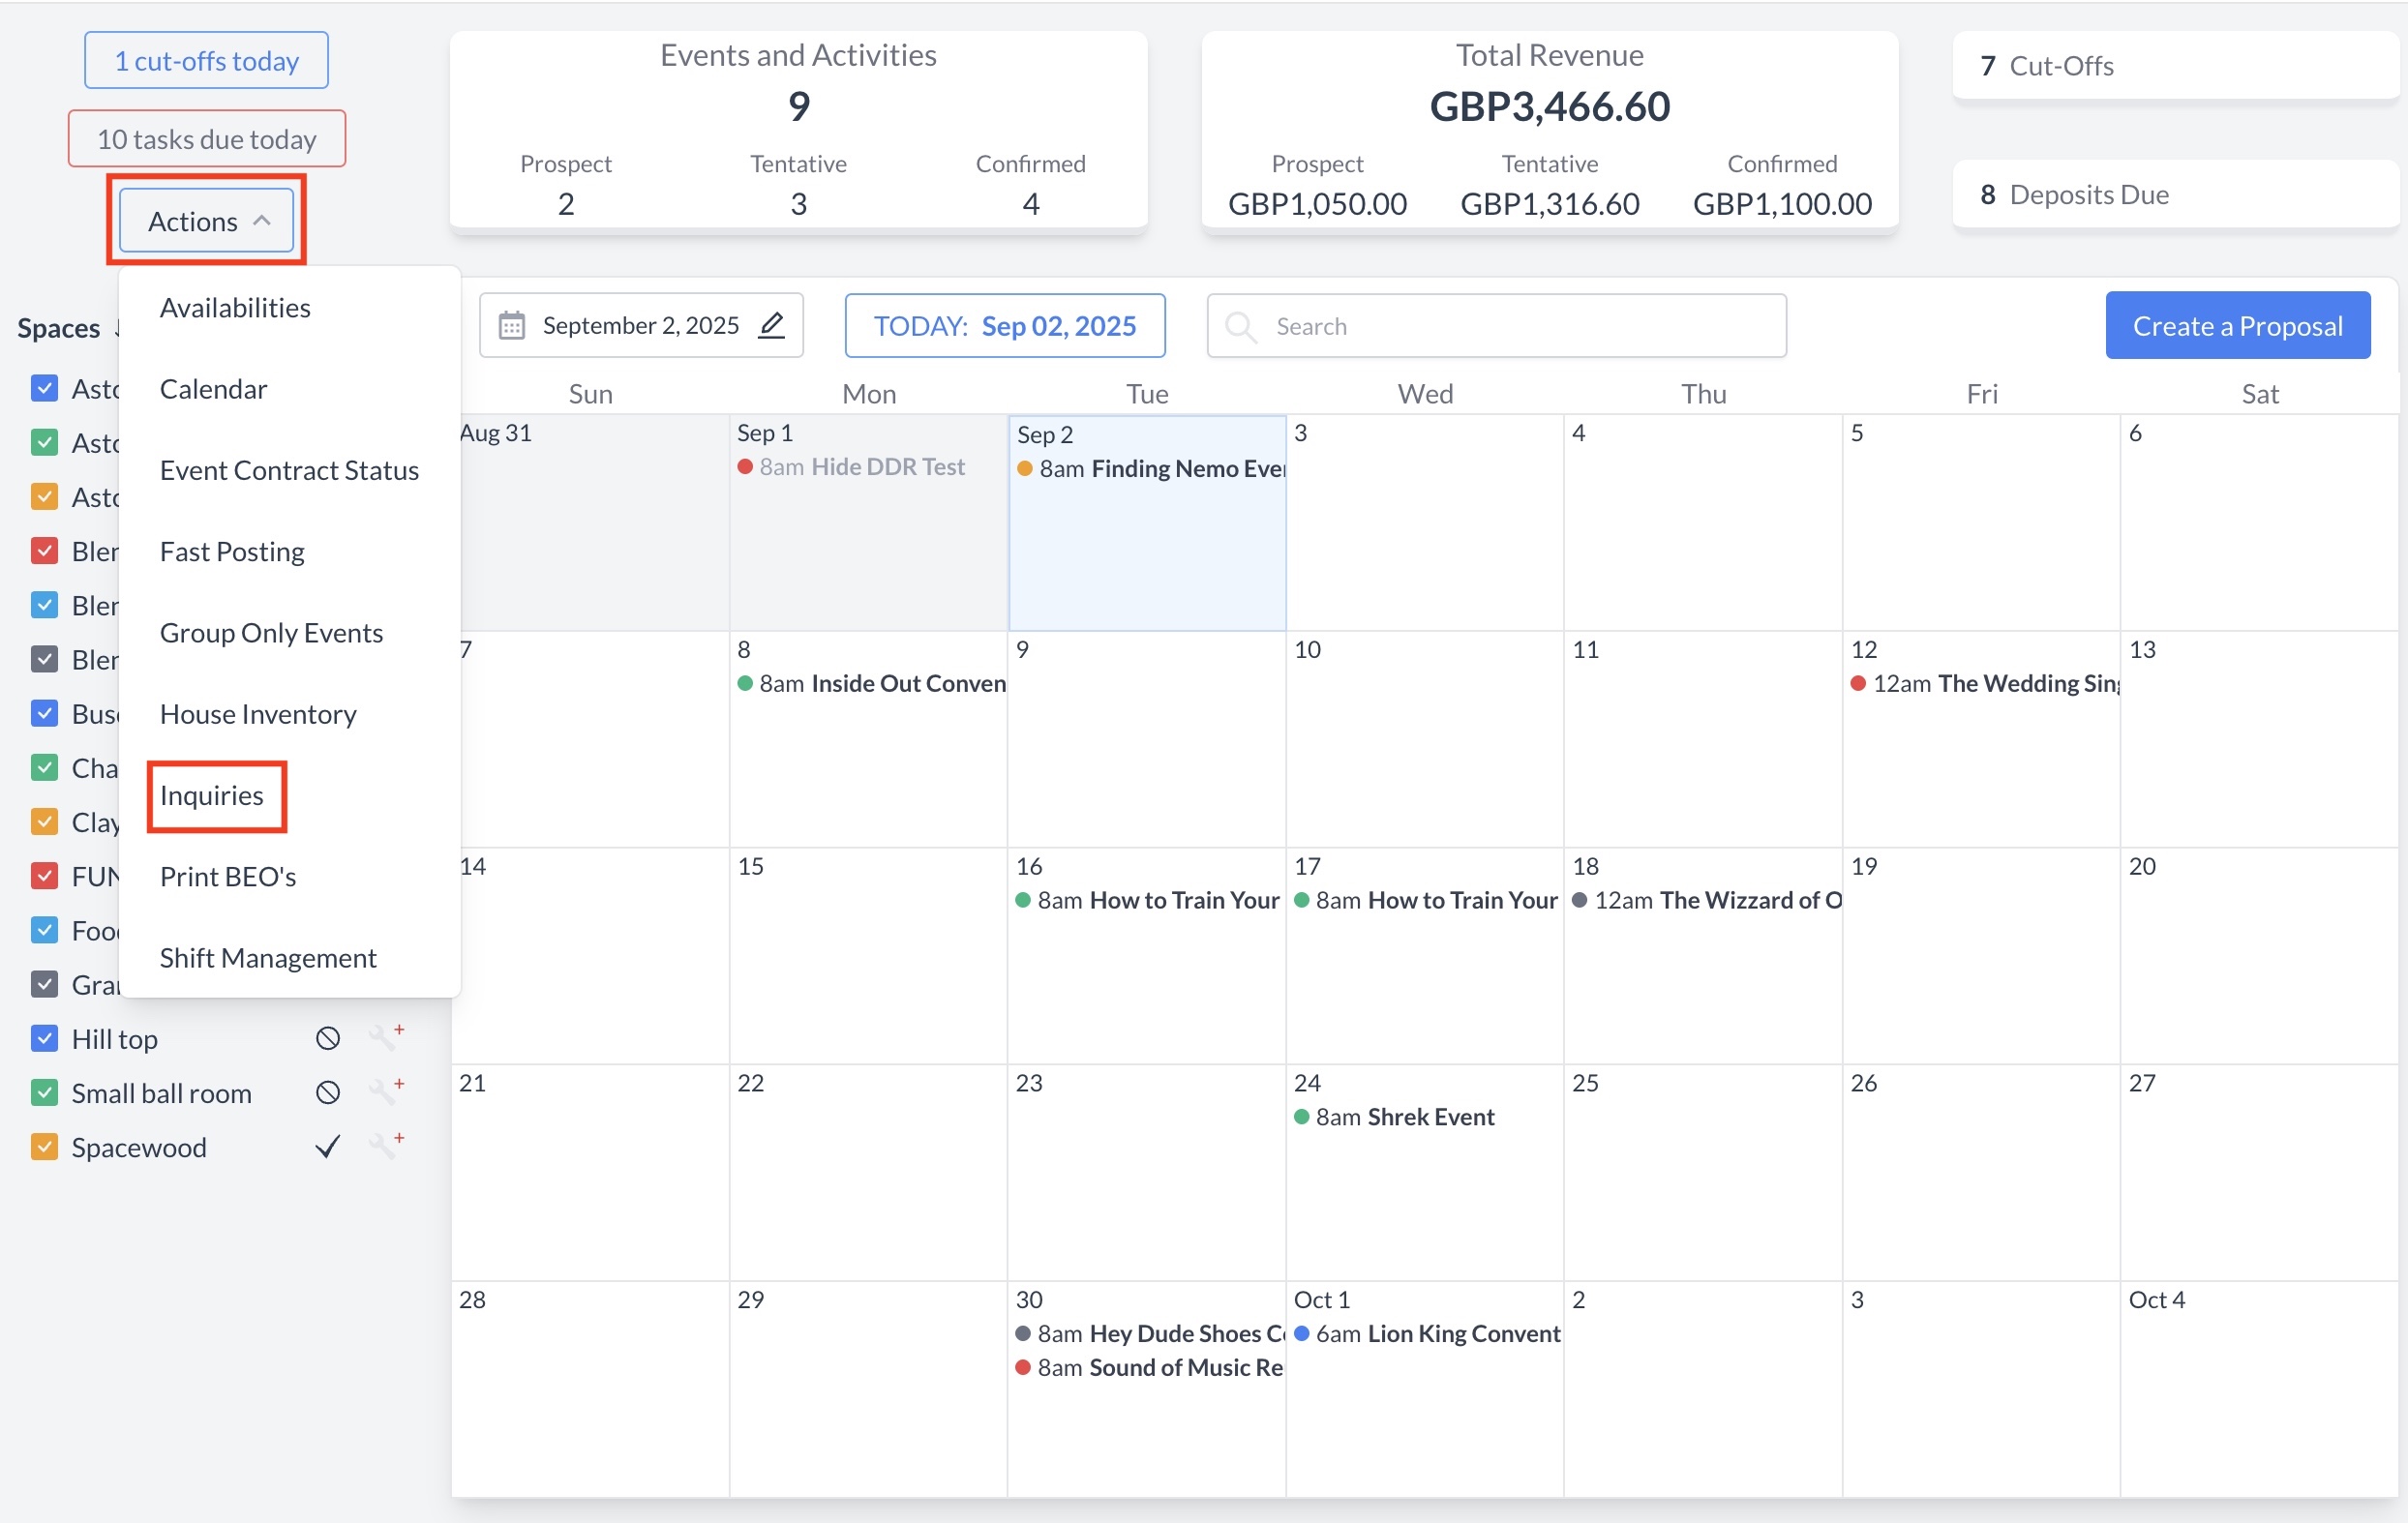
Navigate to Home > Event Management > Actions > Inquiries |
|
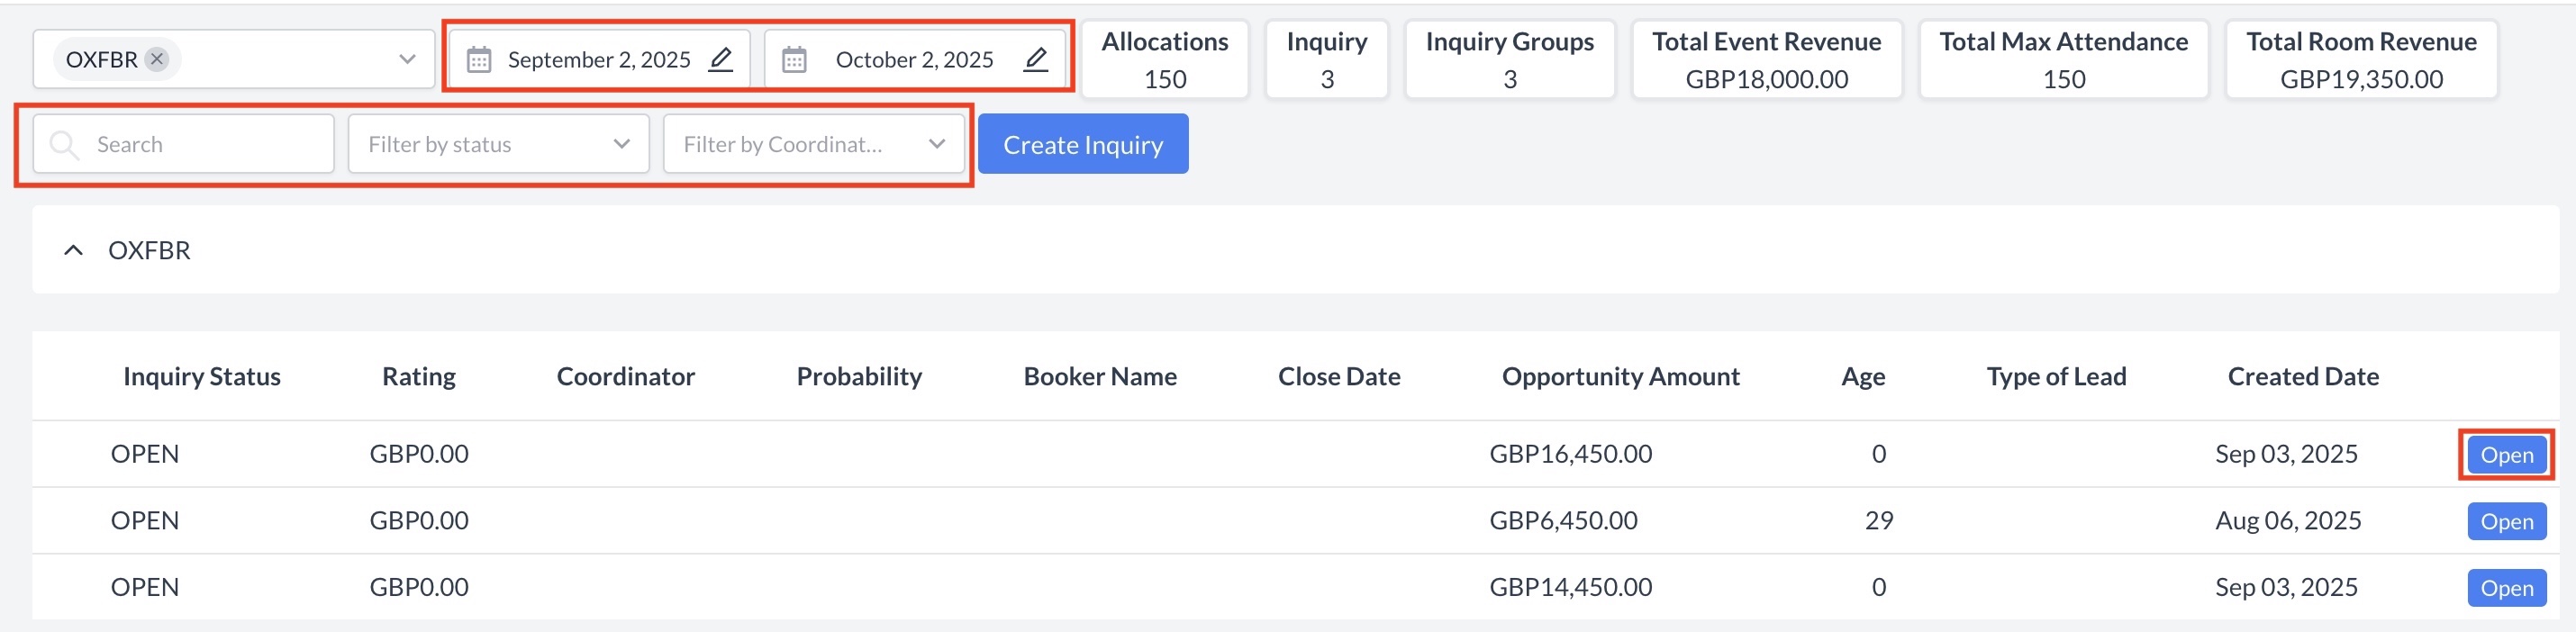
Locating an Inquiry
To begin managing an inquiry, you’ll first need to locate it from the Inquiry Home Screen. Use the following search and filter options to find the specific inquiry you’re looking for:
Once you've located the desired inquiry, click the blue “Open” button to view and manage its details. |
|
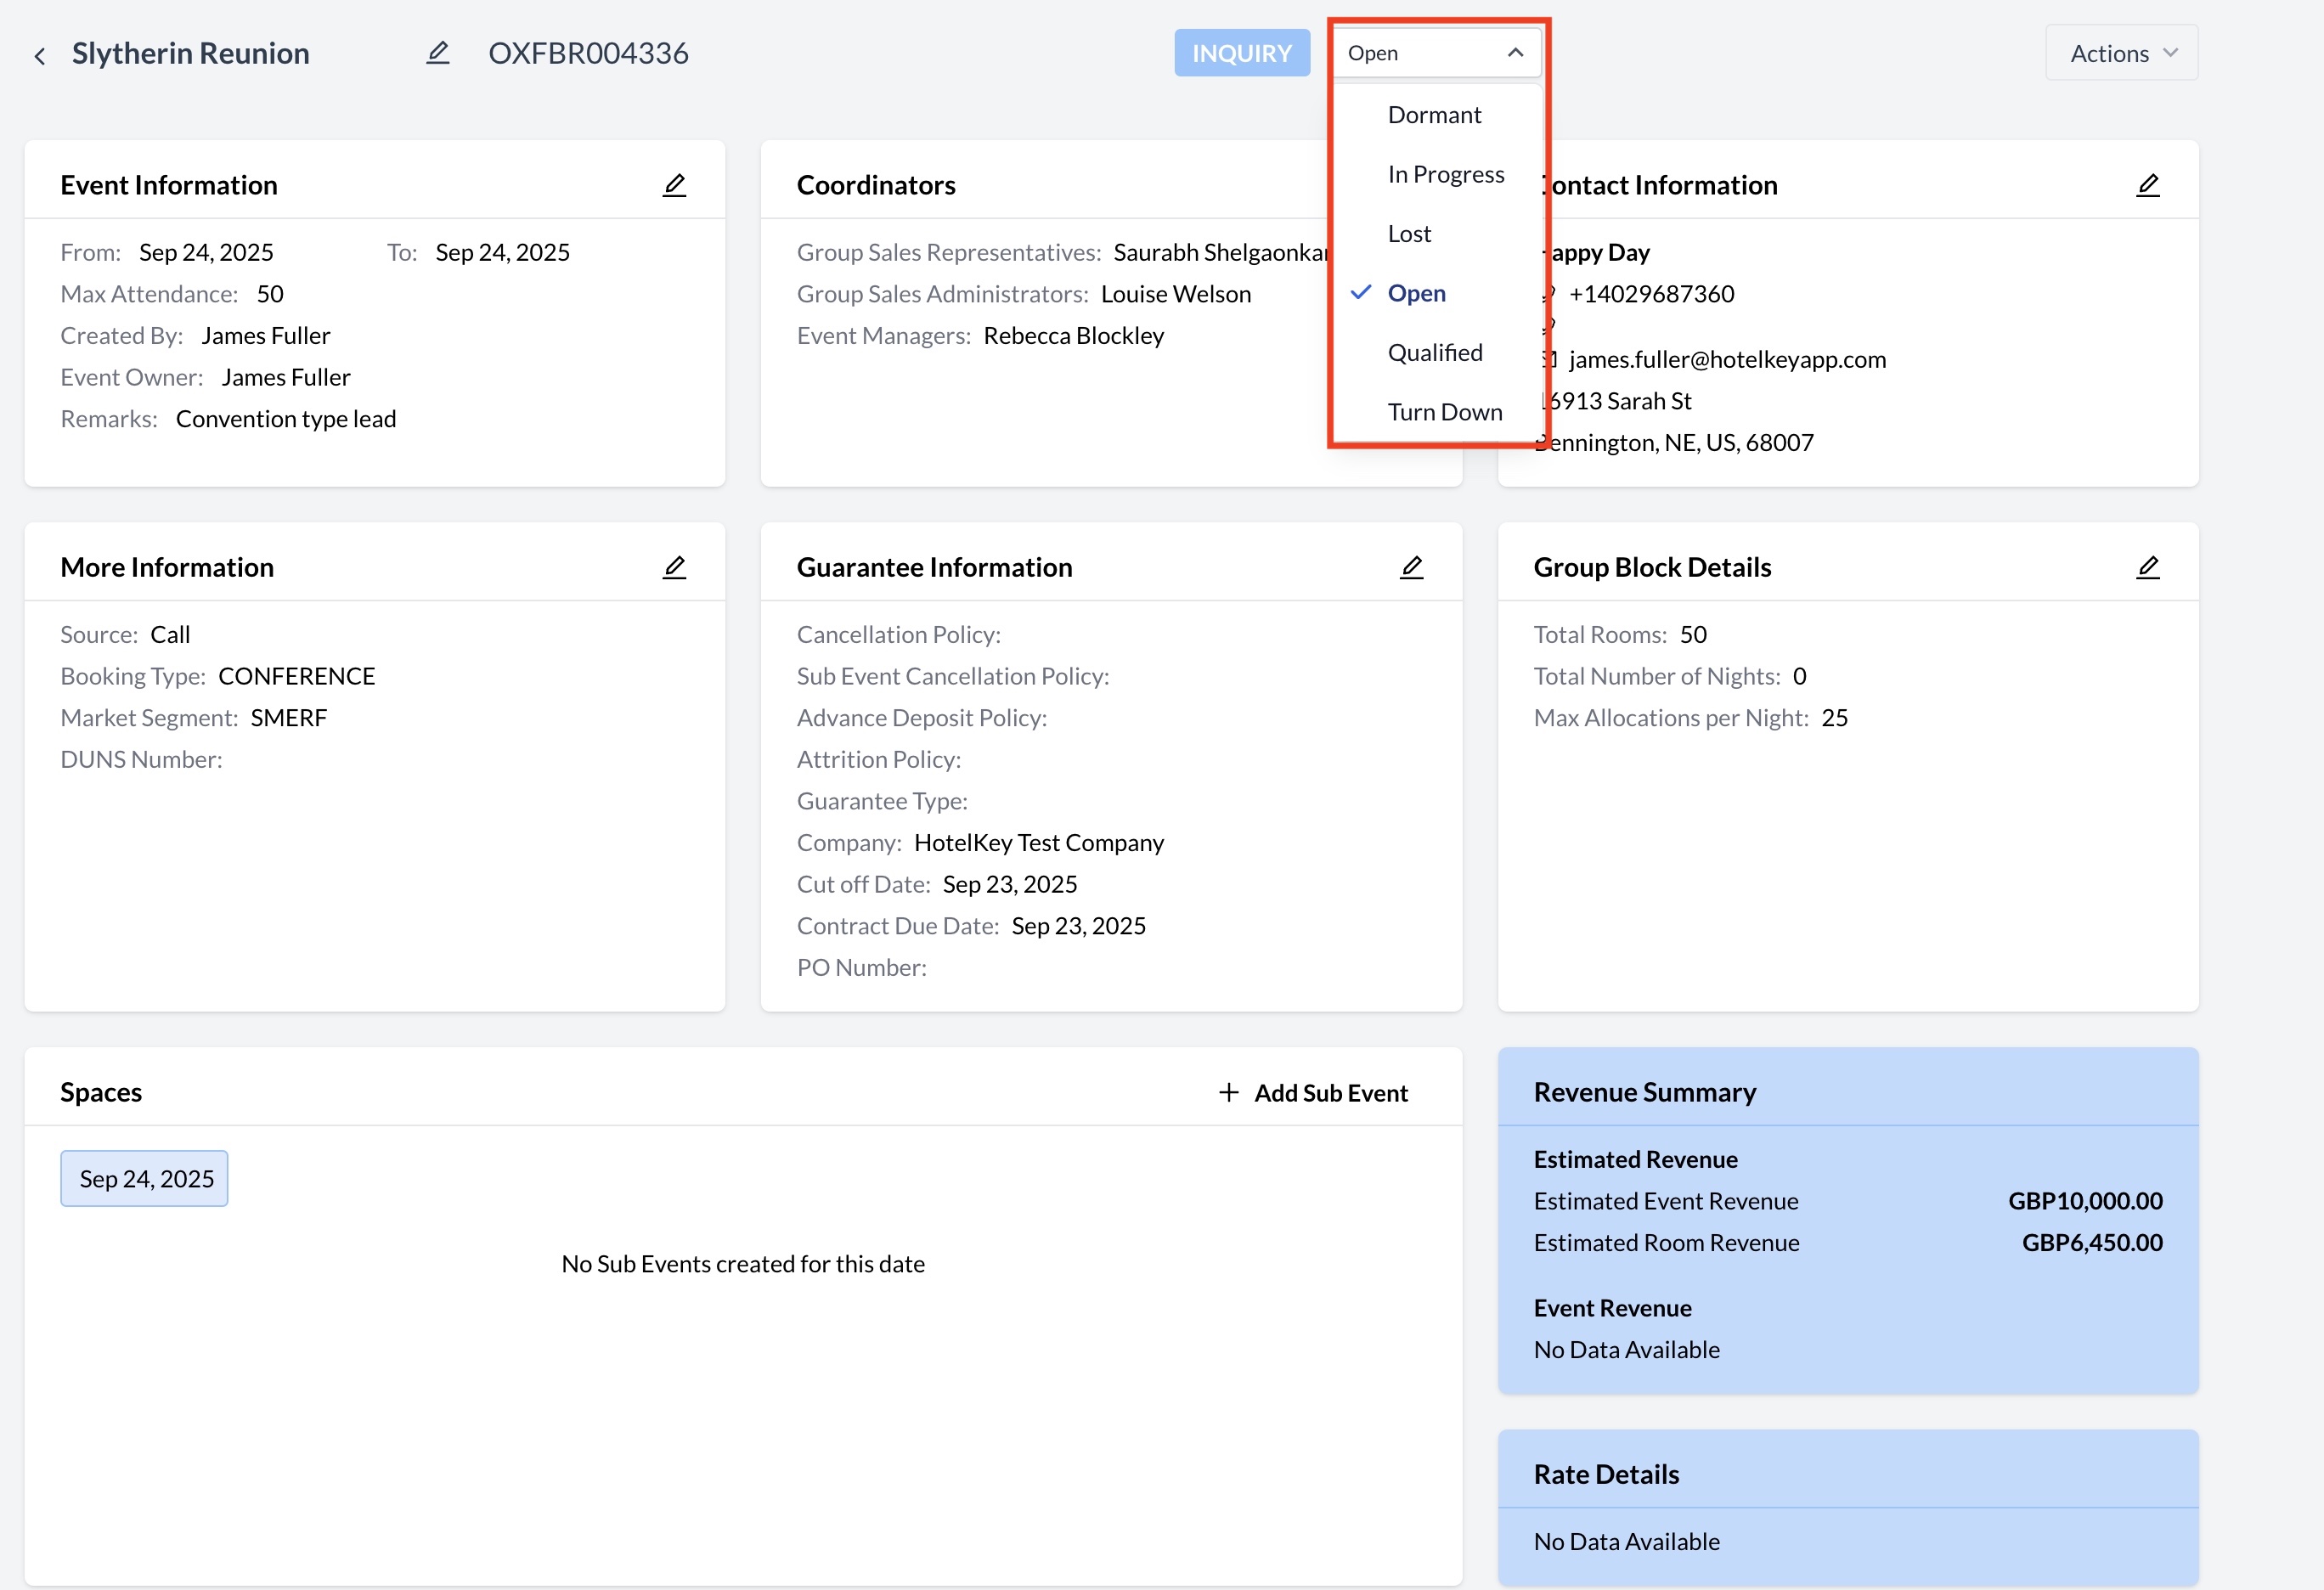
Updating the Inquiry Status
To change the status of an inquiry:
|
|
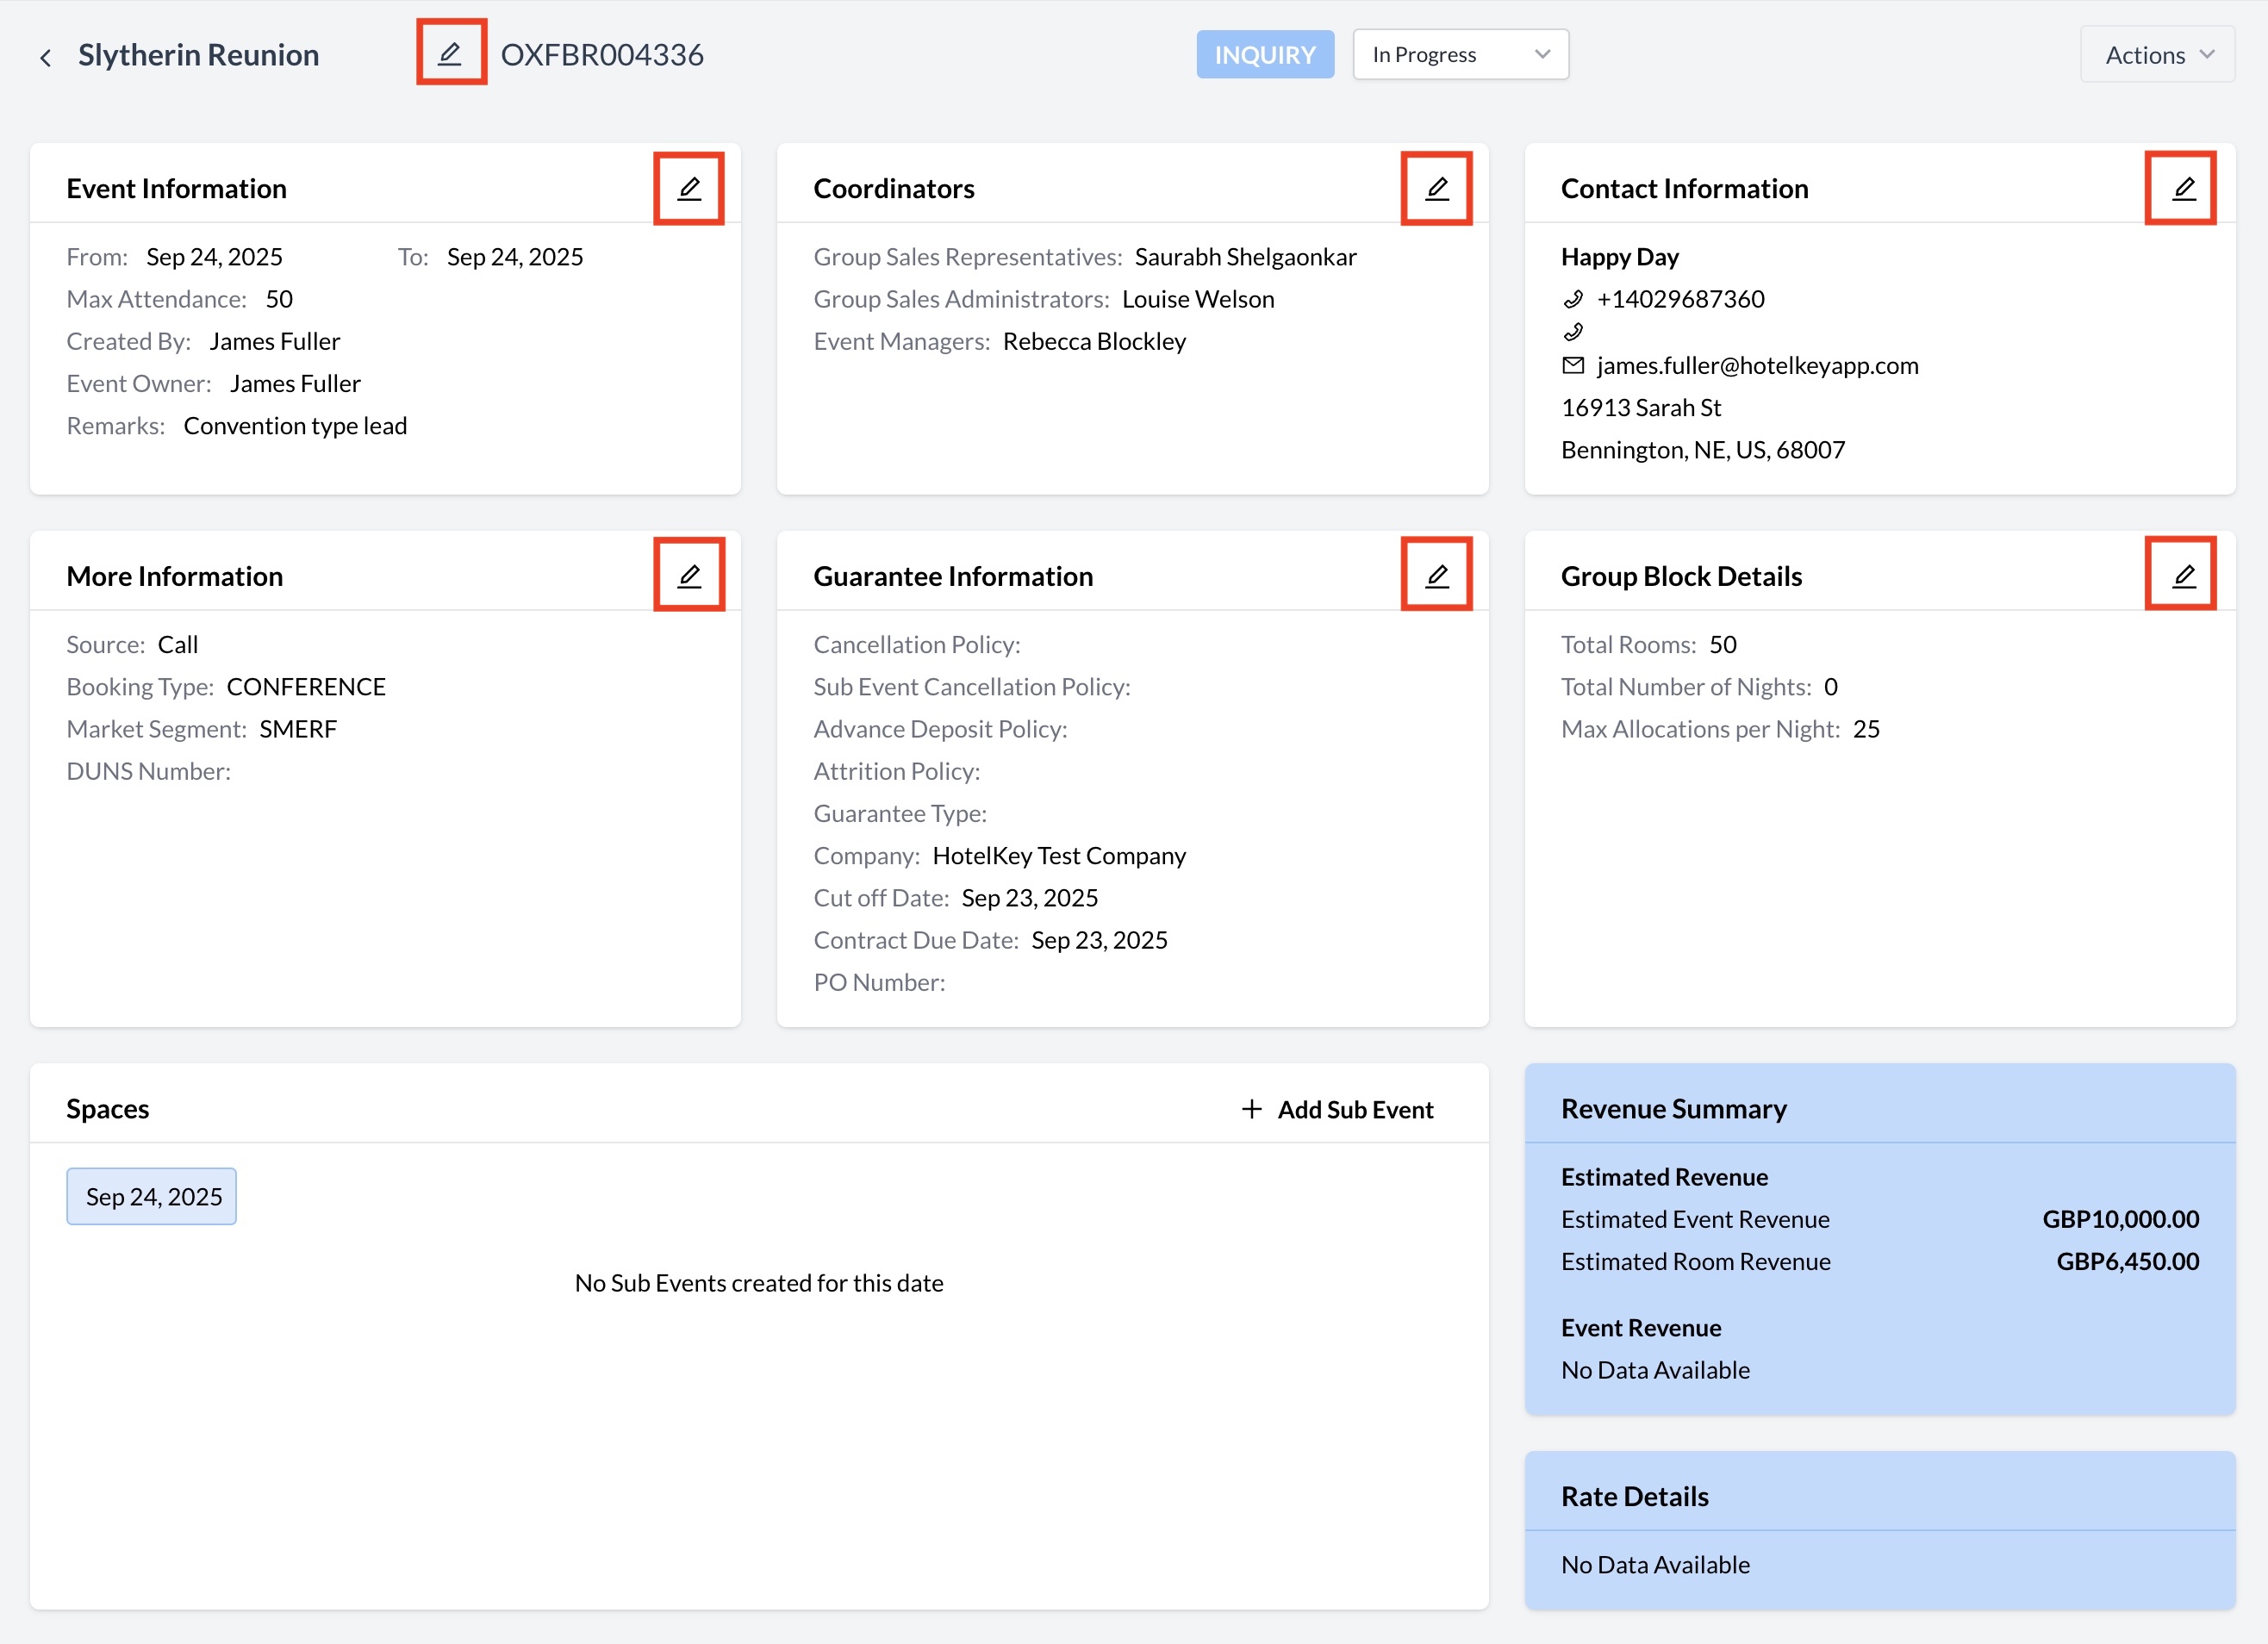
Editing Inquiry Details
|
|
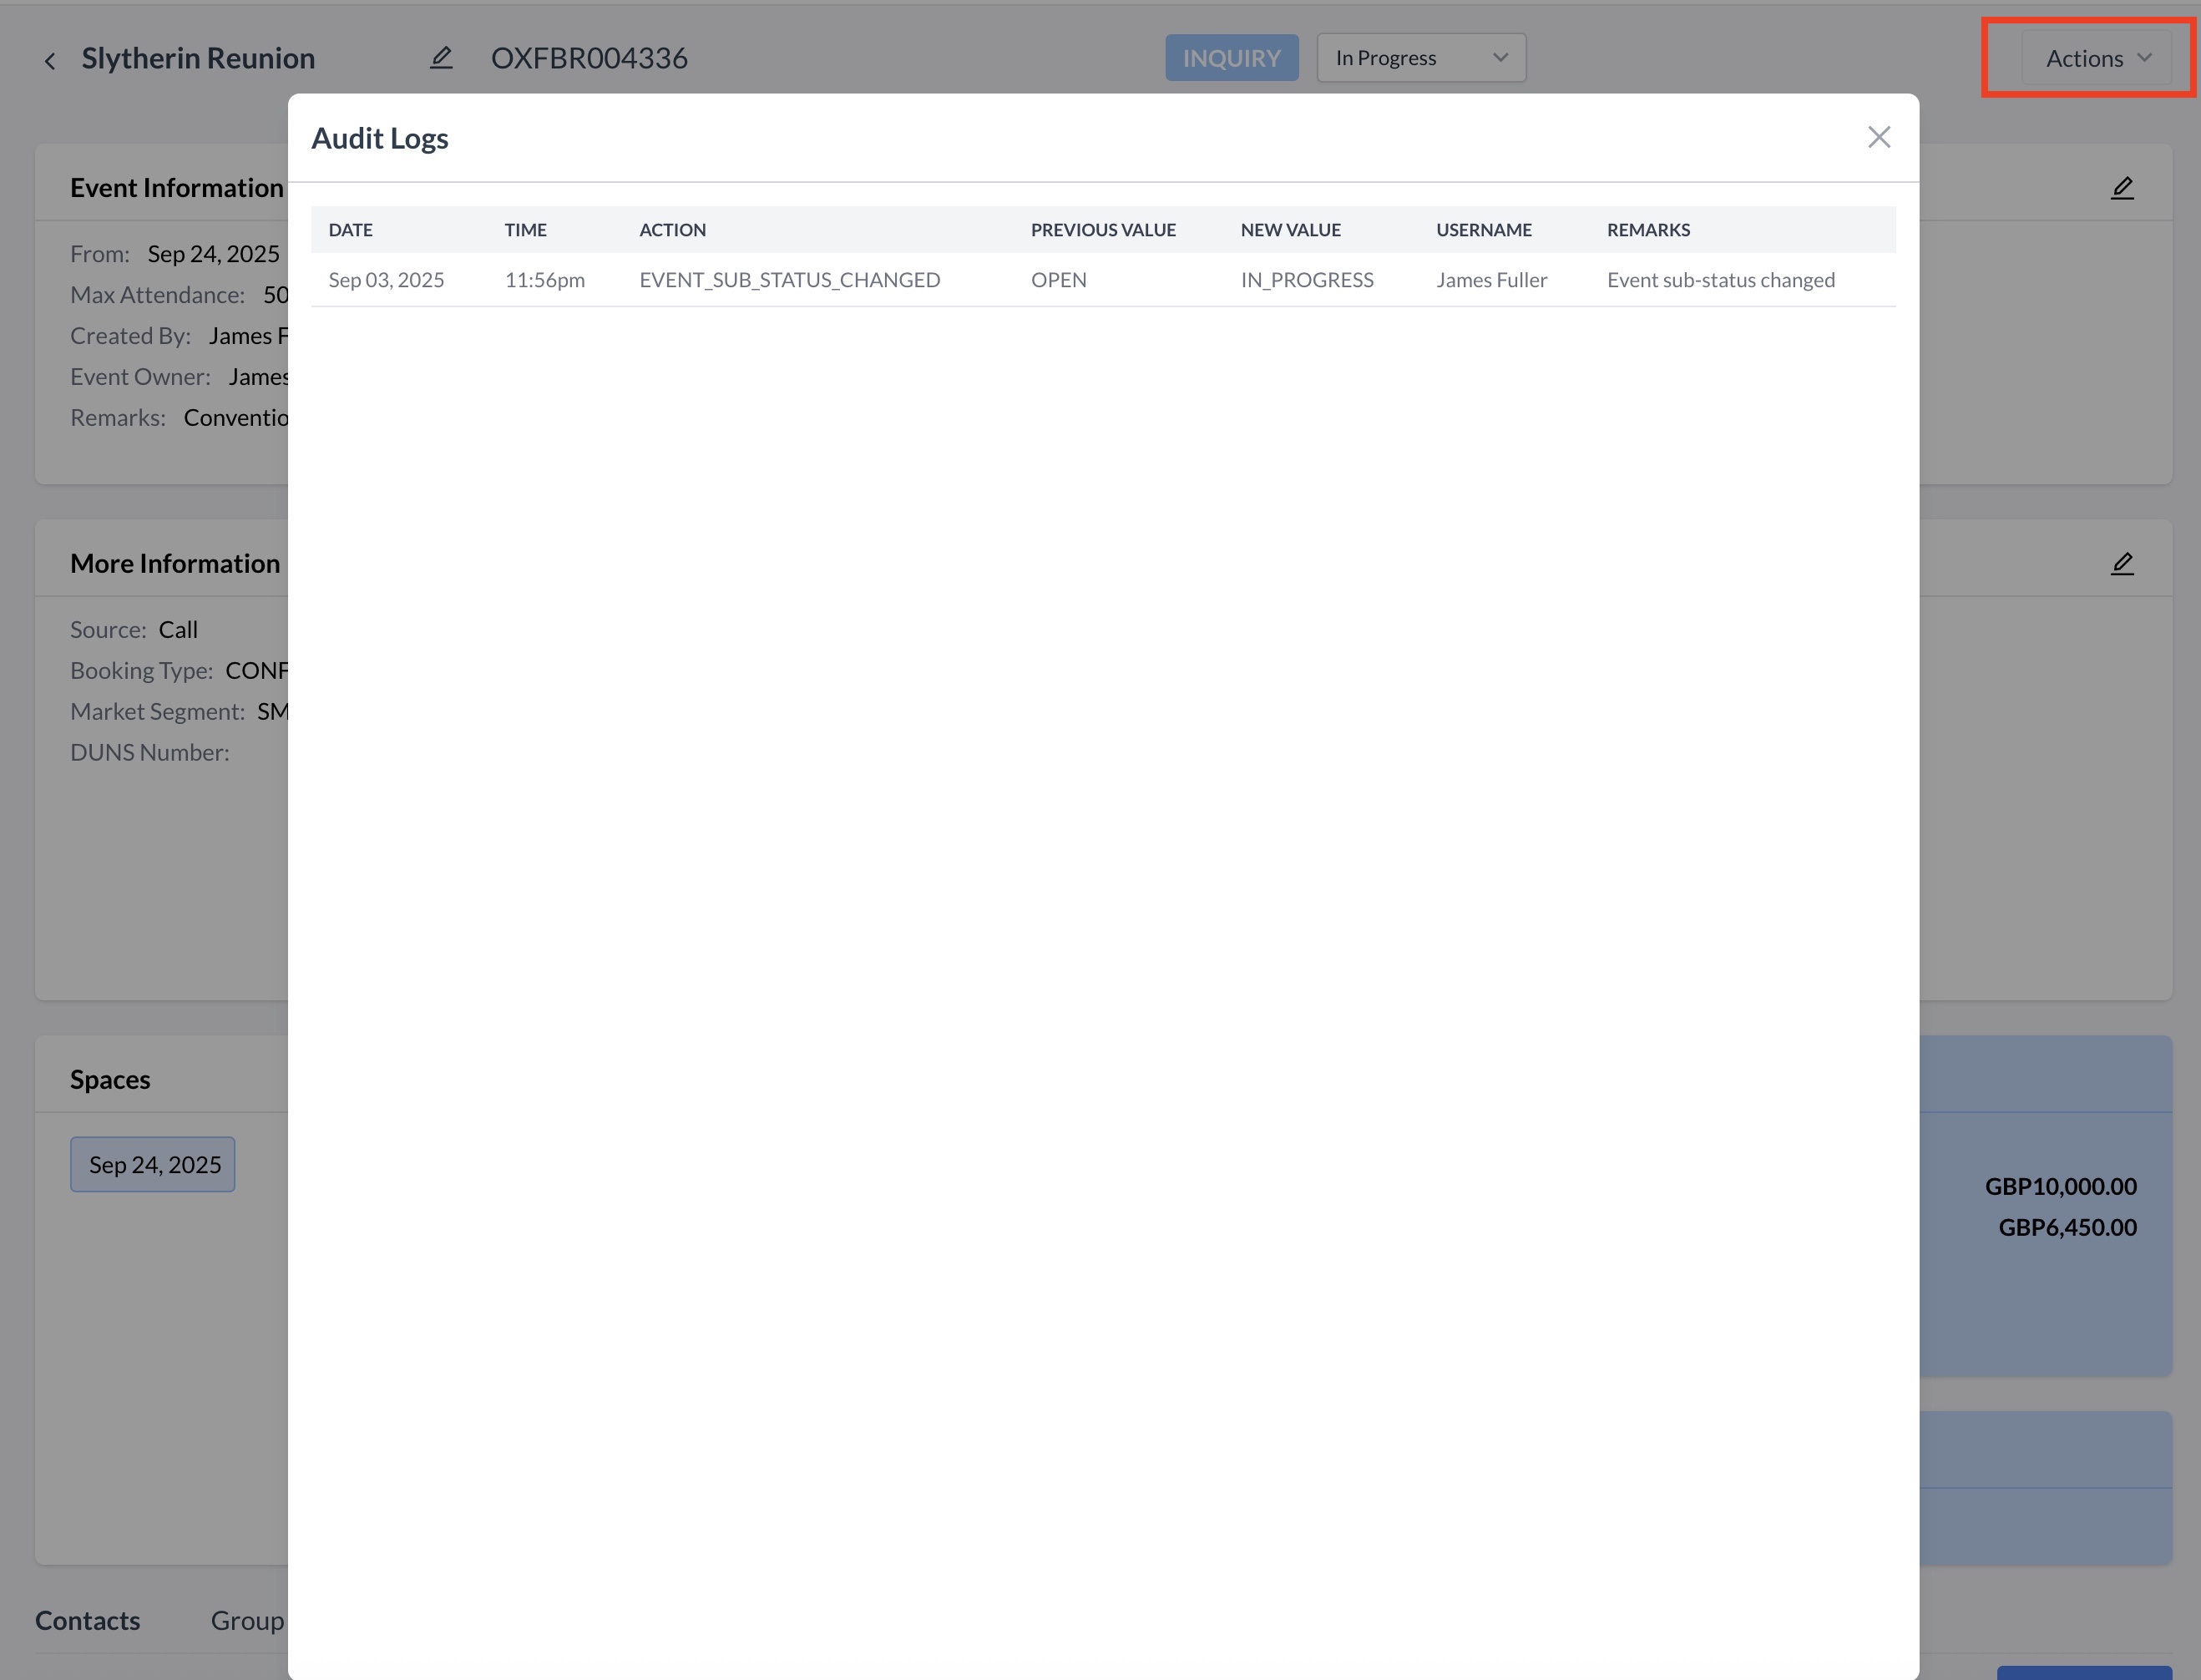
Viewing Inquiry Change History (Audit Log)
To review any changes made to the inquiry:
|
|