📆 Revision Date:
Cancellation Policy
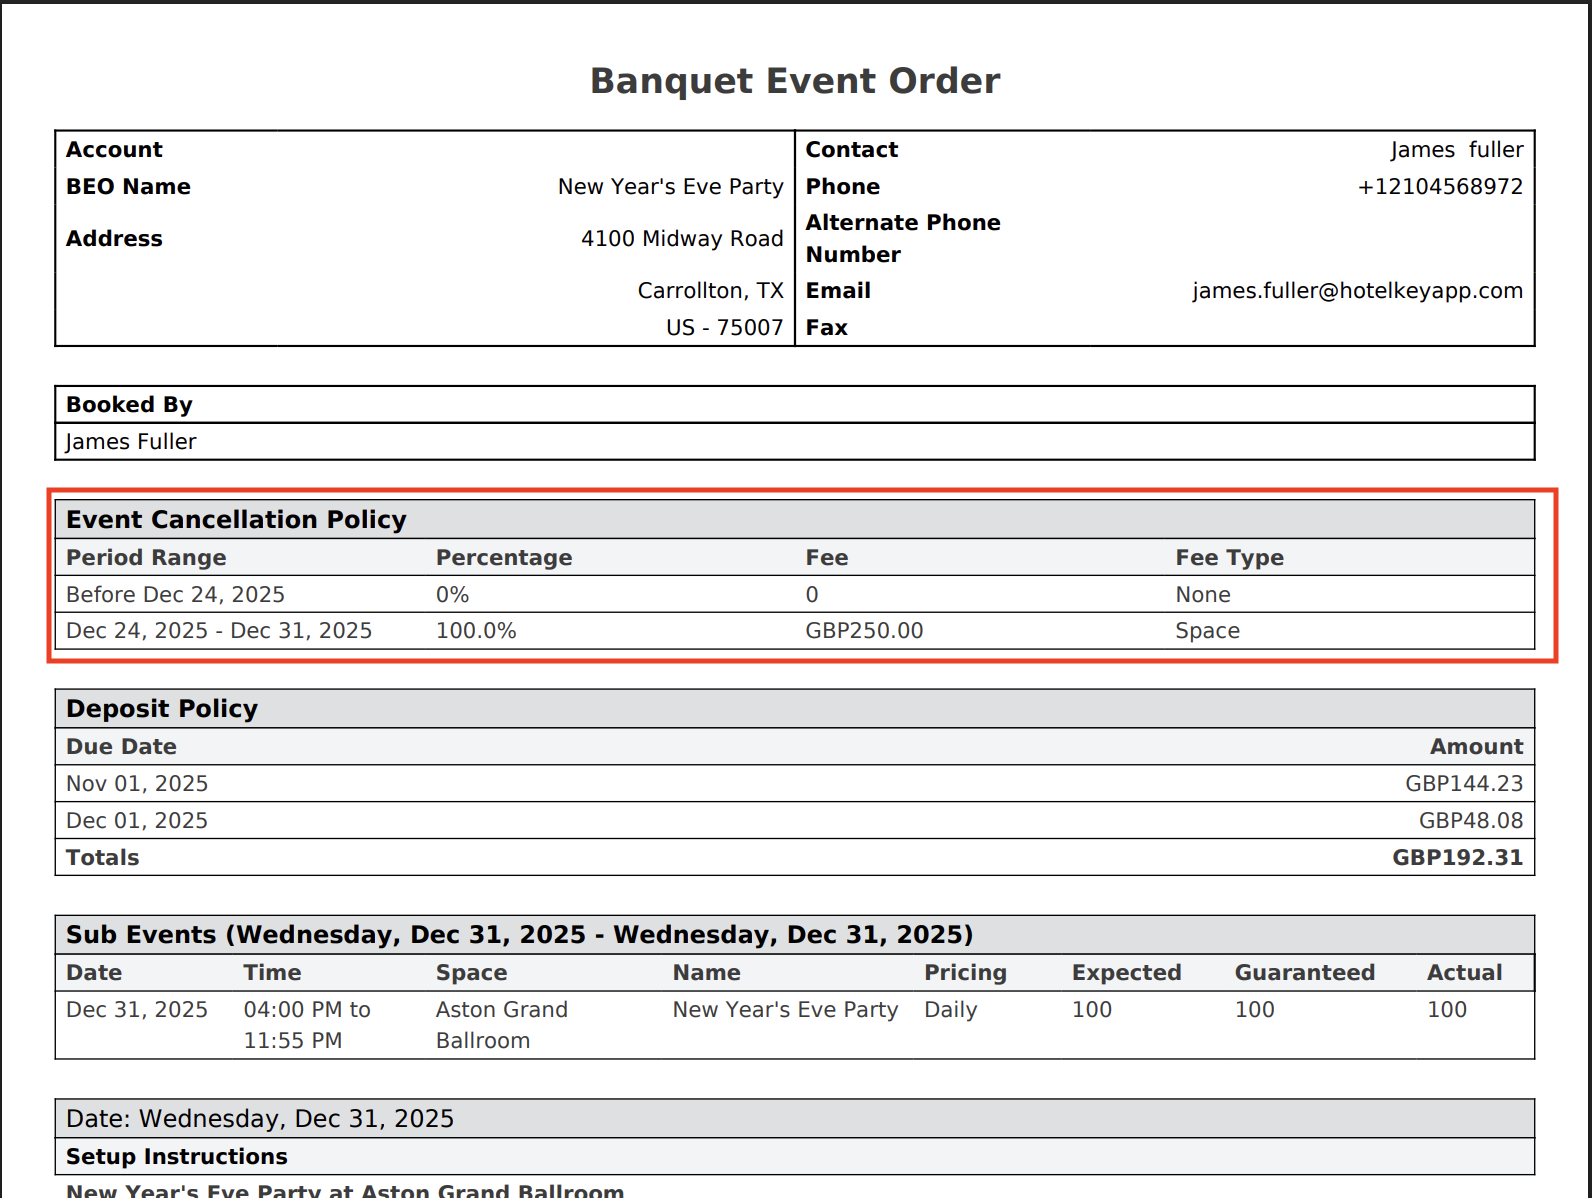
A Cancellation Policy for an event in EventKey defines the terms and financial obligations that apply if a client cancels a confirmed event. This policy helps protect the venue from lost revenue due to late cancellations and provides clear expectations for the client.
In EventKey, the cancellation policy is linked to the event record, and may automatically trigger cancellation charges or update event status if the policy terms are met. It ensures consistency in how cancellations are handled operationally and financially.
🛑 Prerequisites
Before creating a Space, the following items must be set up to ensure proper configuration and functionality:
1. Charge Type
Why it’s needed:
The Charge Type determines where the revenue from the event cancellation is recorded for reporting purposes.
Action required:
Create the required Charge Type before setting up the Cancellation Policy.
|
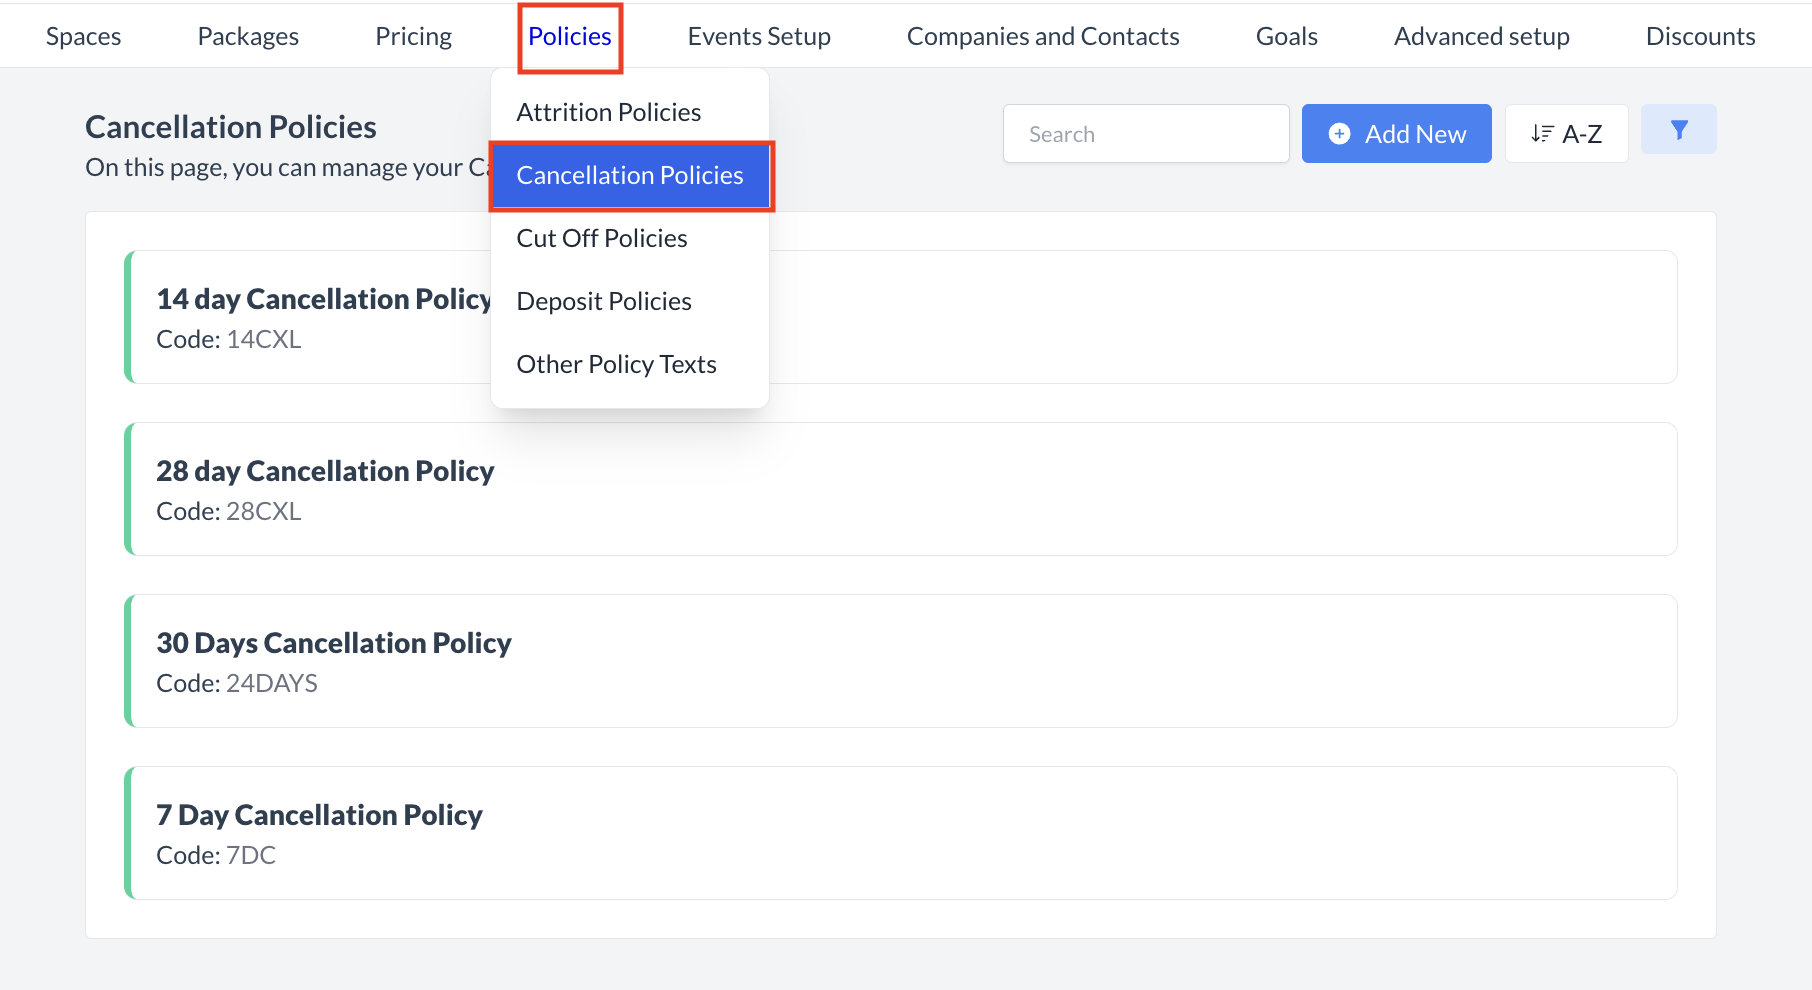
Navigate to Home > Event Administration > Policies > Cancellation Policies |
|
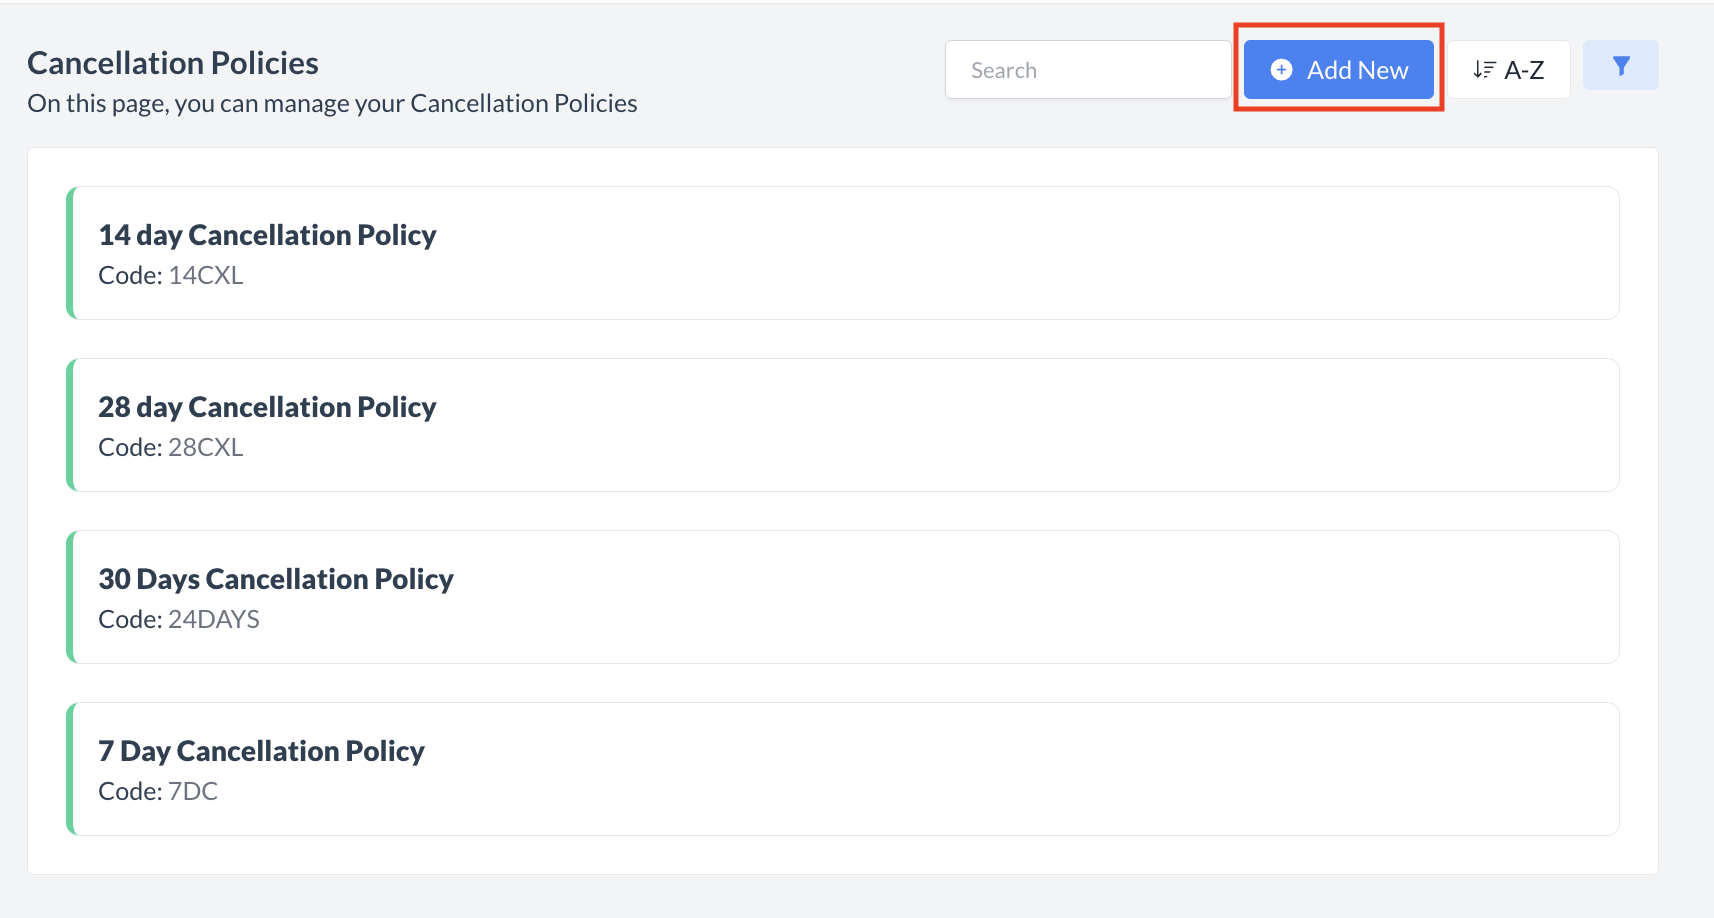
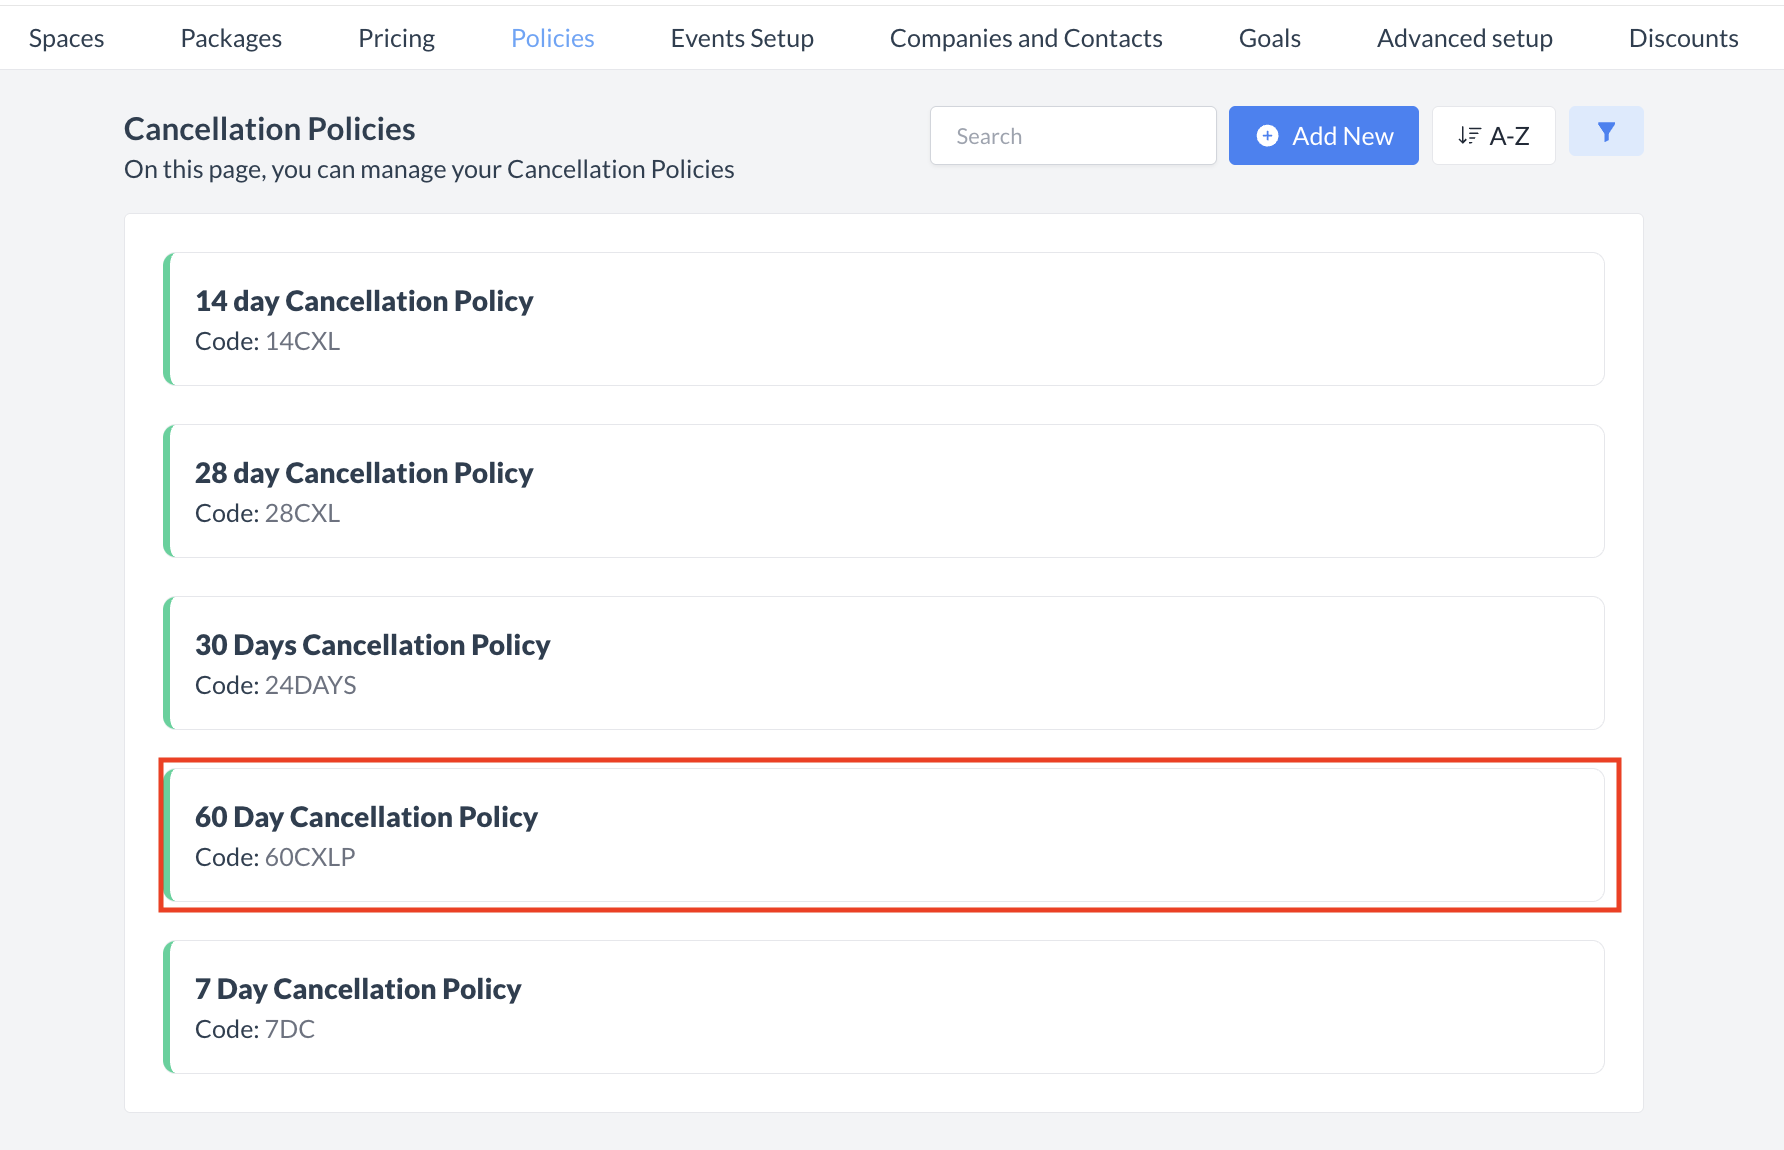
Accessing and Creating Cancellation Policies
The Cancellation Policies screen displays a list of all existing cancellation policies available for use with an event. To create a new policy:
|
|
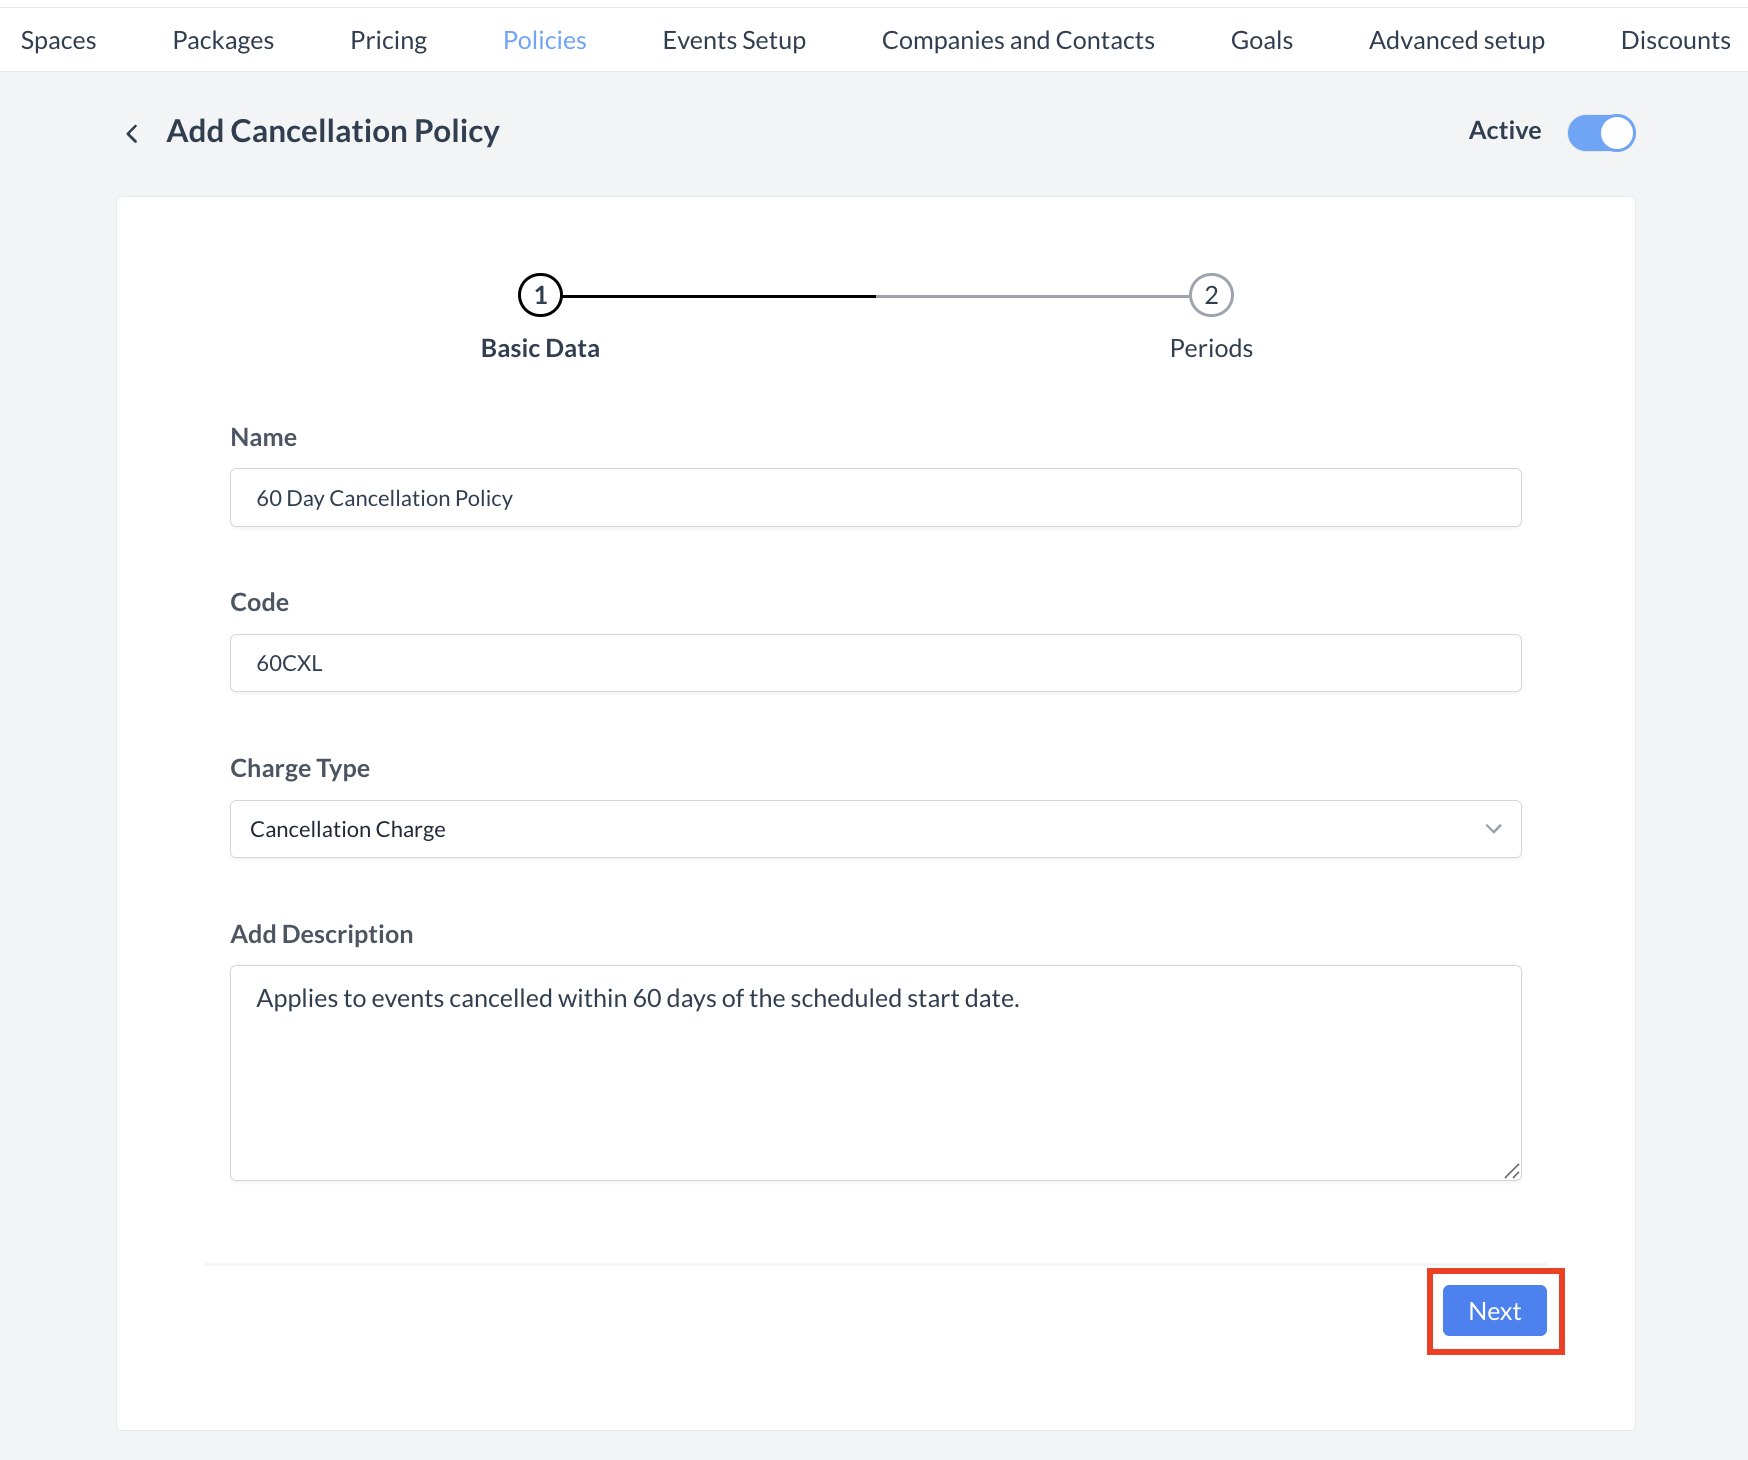
Step 1: Enter Basic Information for the Cancellation Policy
When the Add Cancellation Policy screen appears, you’ll begin by completing the Basic Data section:
Once all required fields are completed, click the blue Next button to proceed to the next step. |
|
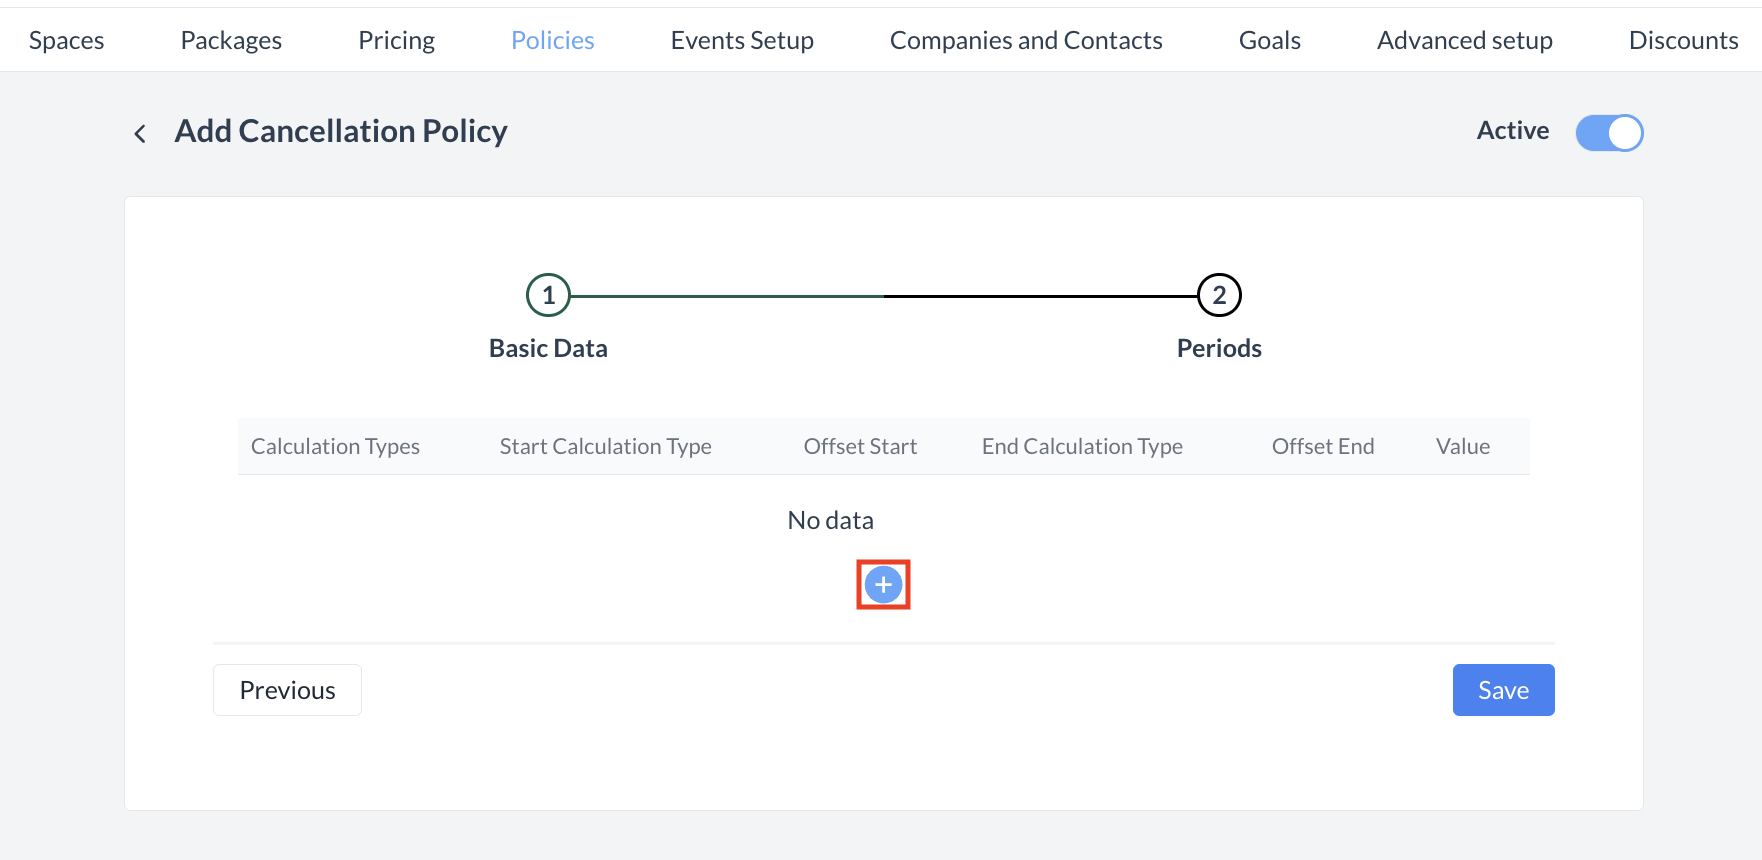
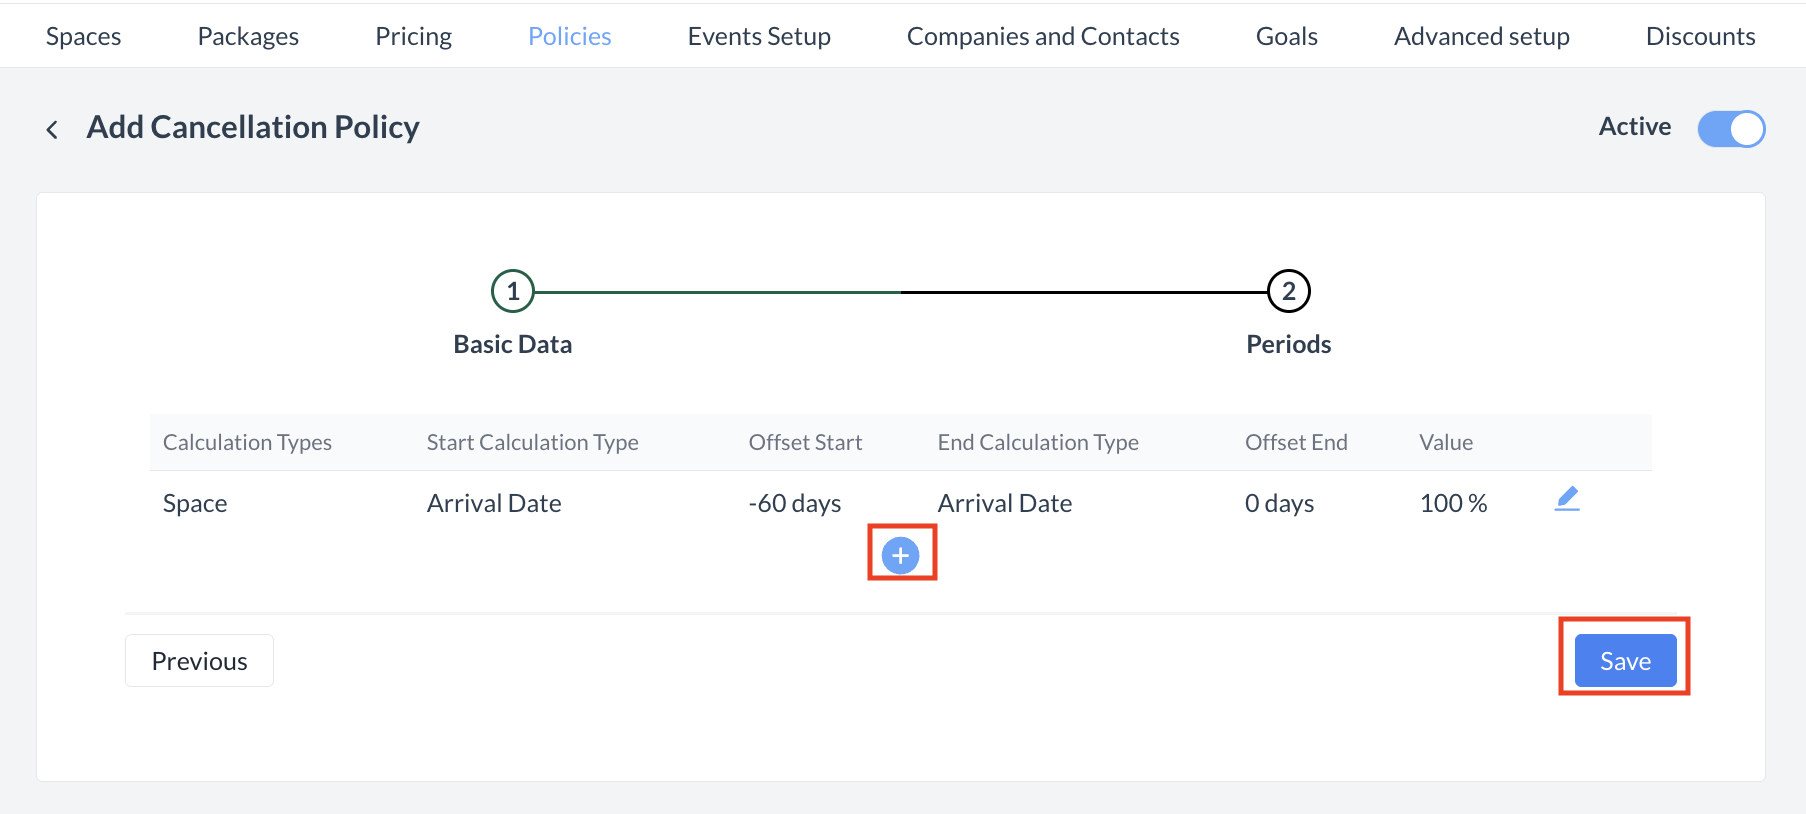
Step 2: Define Cancellation Periods
In Step 2: Periods, you will define the timeframe during which the cancellation penalty will apply.
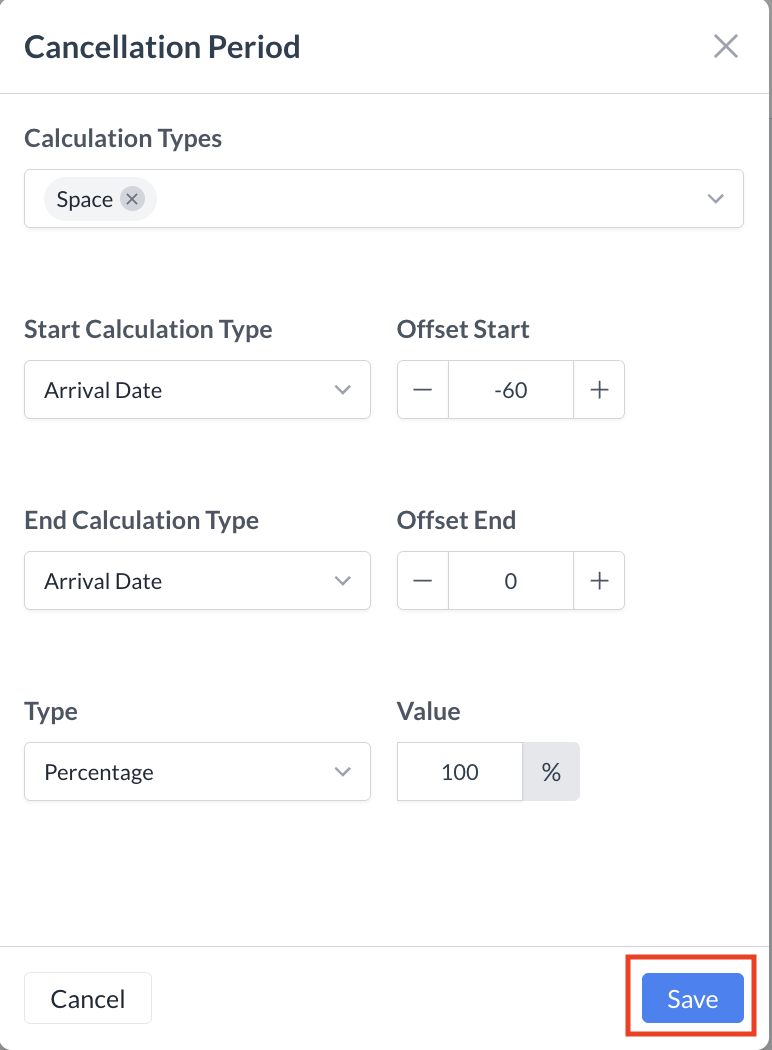
➤ Calculation Type
Select the area the cancellation penalty should apply to. You may select one or multiple options:
➤ Start Calculation Type
Choose the date reference point for the start of the penalty window:
Then, enter the Offset Start — the number of days from the selected calculation type. 🔔 Important: For example, if your event is on December 31, 2025, and you want the cancellation penalty to apply 60 days before event start, you should enter the value as -60. ➤ End Calculation Type
Choose the date reference point for the end of the penalty window:
Then, enter the Offset End — the number of days from the selected calculation type. 🔔 Important: For example, if your event is on December 31, 2025, and you want the cancellation penalty to apply 0 days before event start, you should enter the value as 0. Example:
This configuration means the penalty will apply to cancellations made between 0 and 60 days prior to the event start date. ➤ Penalty Type
Select how the penalty should be calculated:
Enter the appropriate value based on your selection.
|
|
Adding Additional Cancellation Periods or Saving the Policy
After saving your cancellation period, you will return to the Step 2: Periods screen.
|
|
Confirmation
After saving, you will be returned to the Cancellation Policies listing screen.
|
|
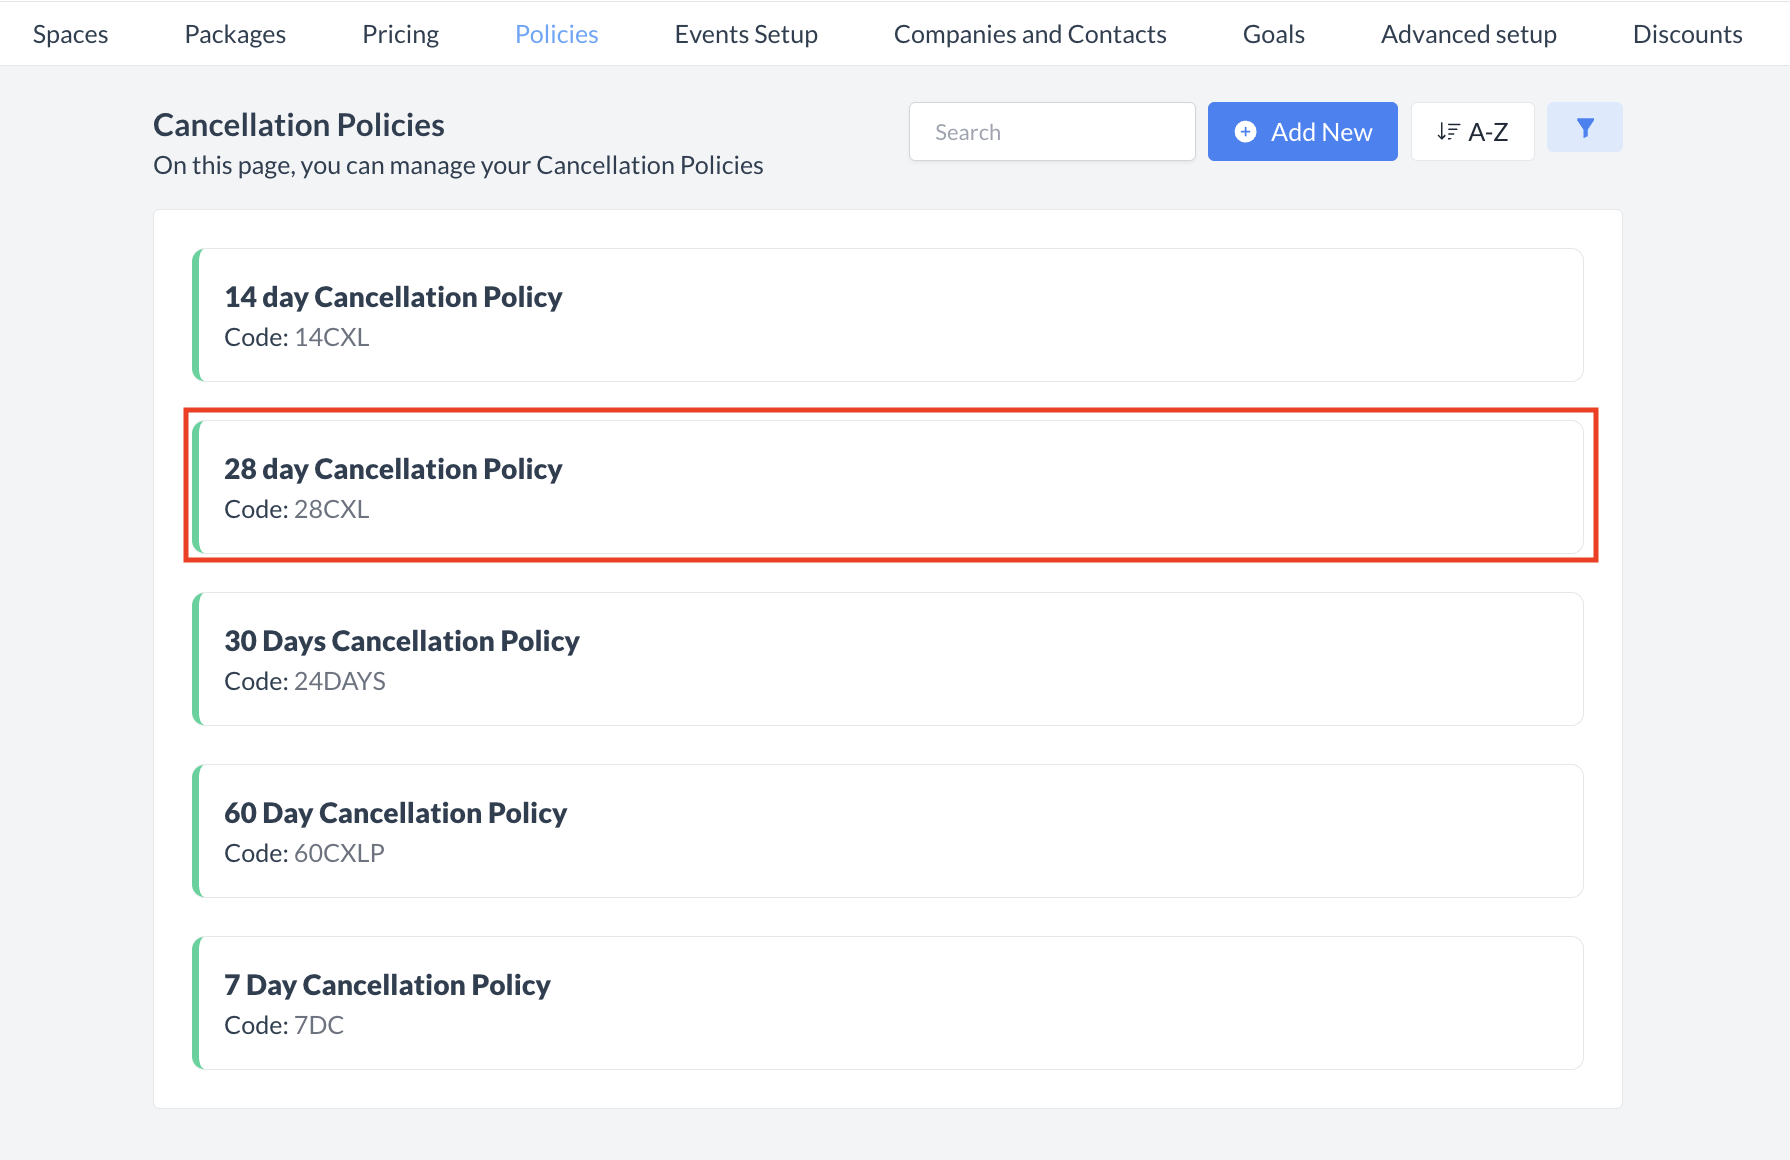
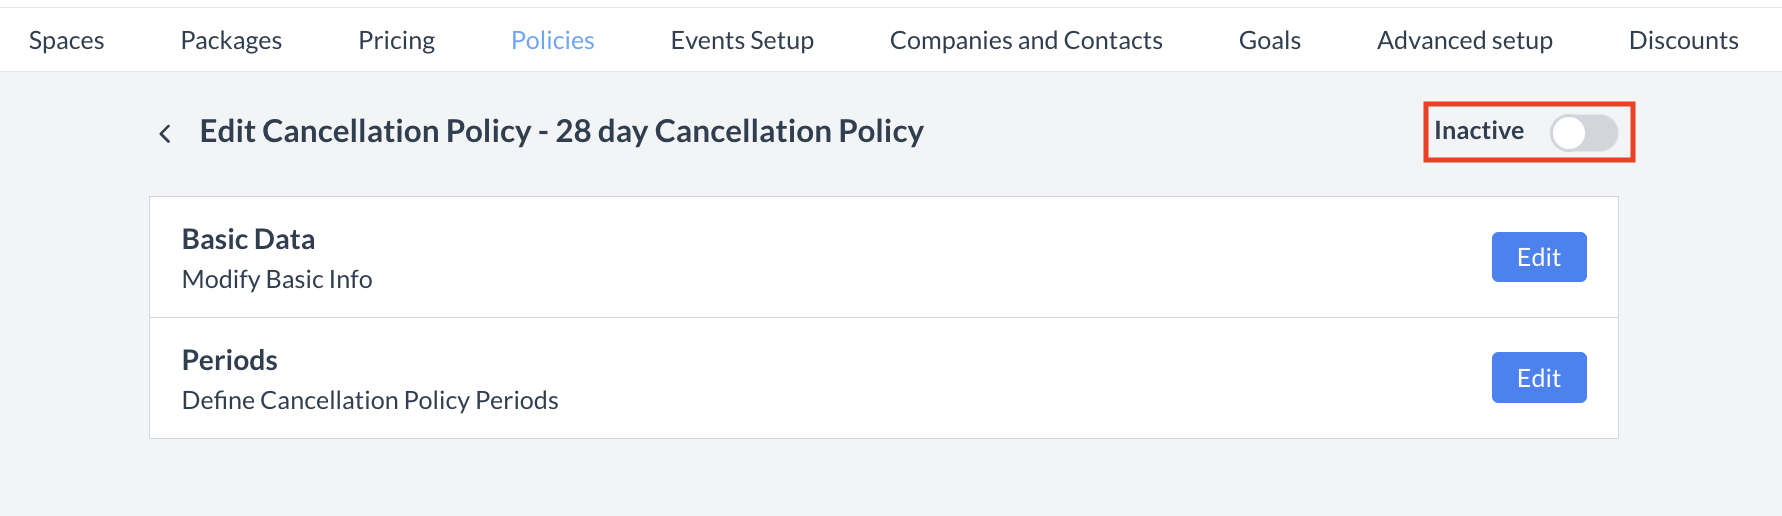
🔄 Inactivating a Cancellation Policy
To deactivate a cancellation policy:
Once inactivated, the policy will no longer appear in the Cancellation Policies listing and will not be available for selection on new events. |
.png?cb=ed3606df53b5ef27e0141c45fd64764e)
|
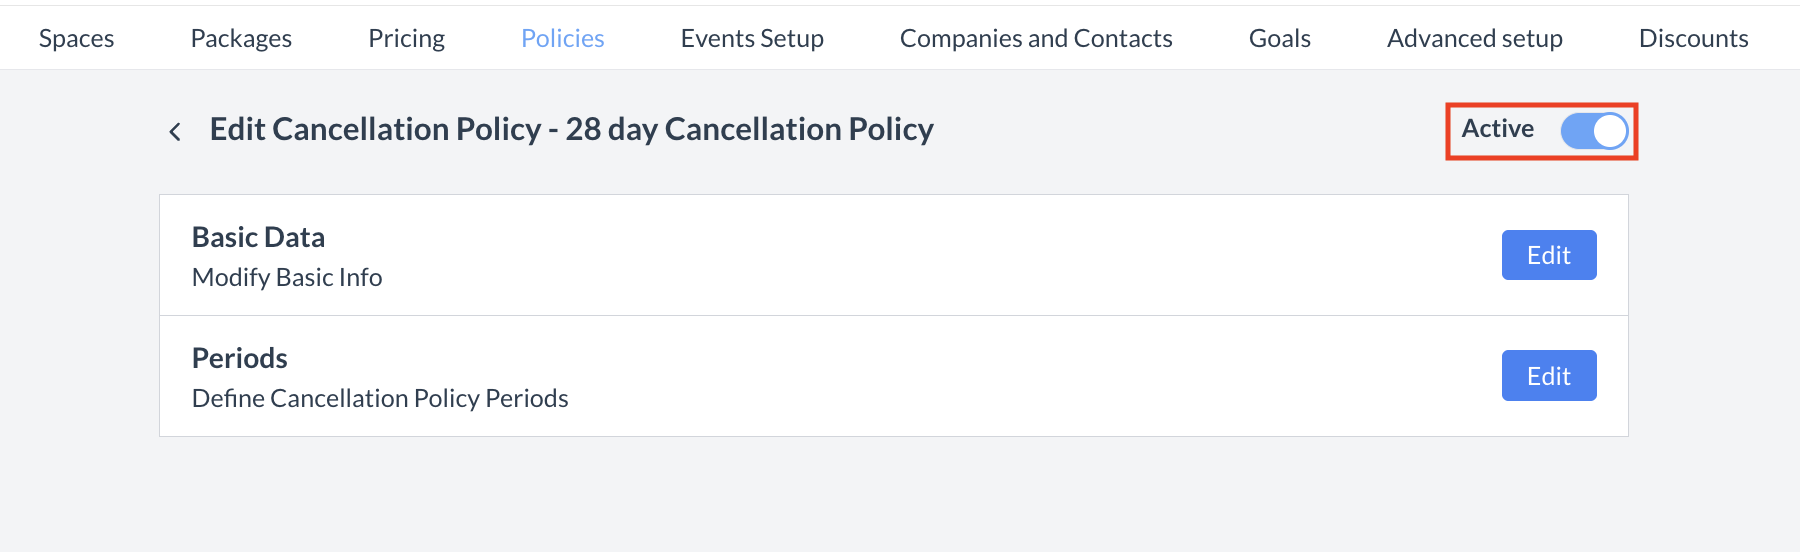
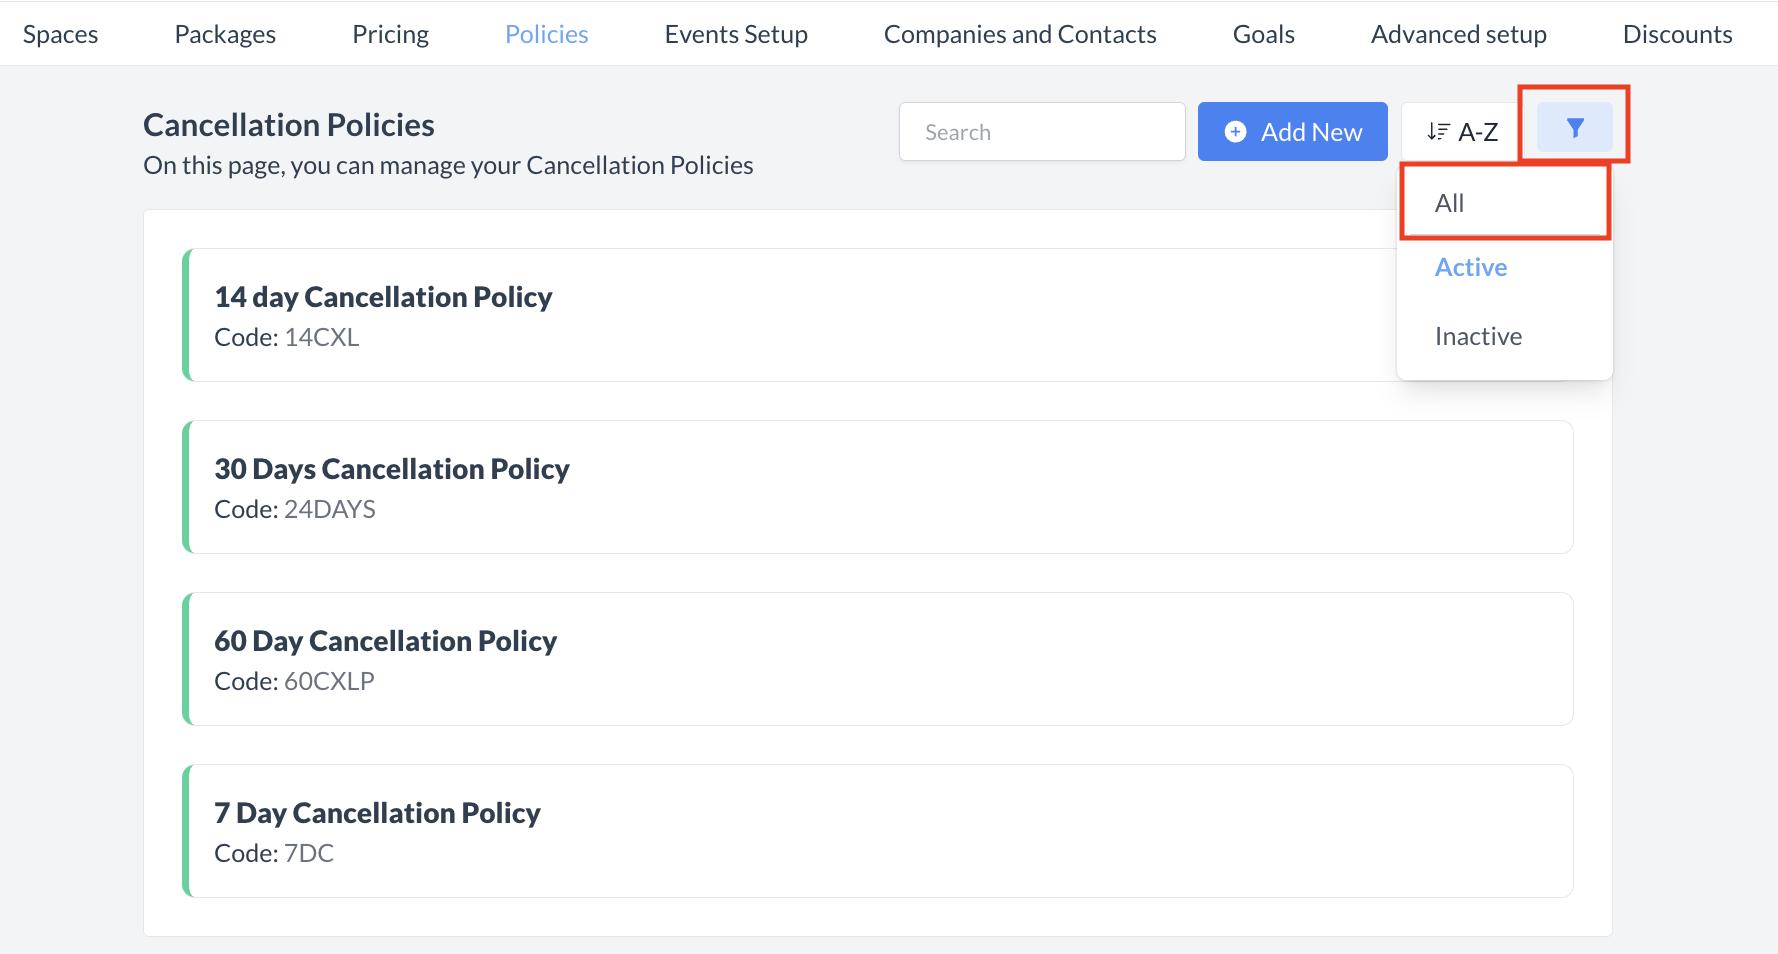
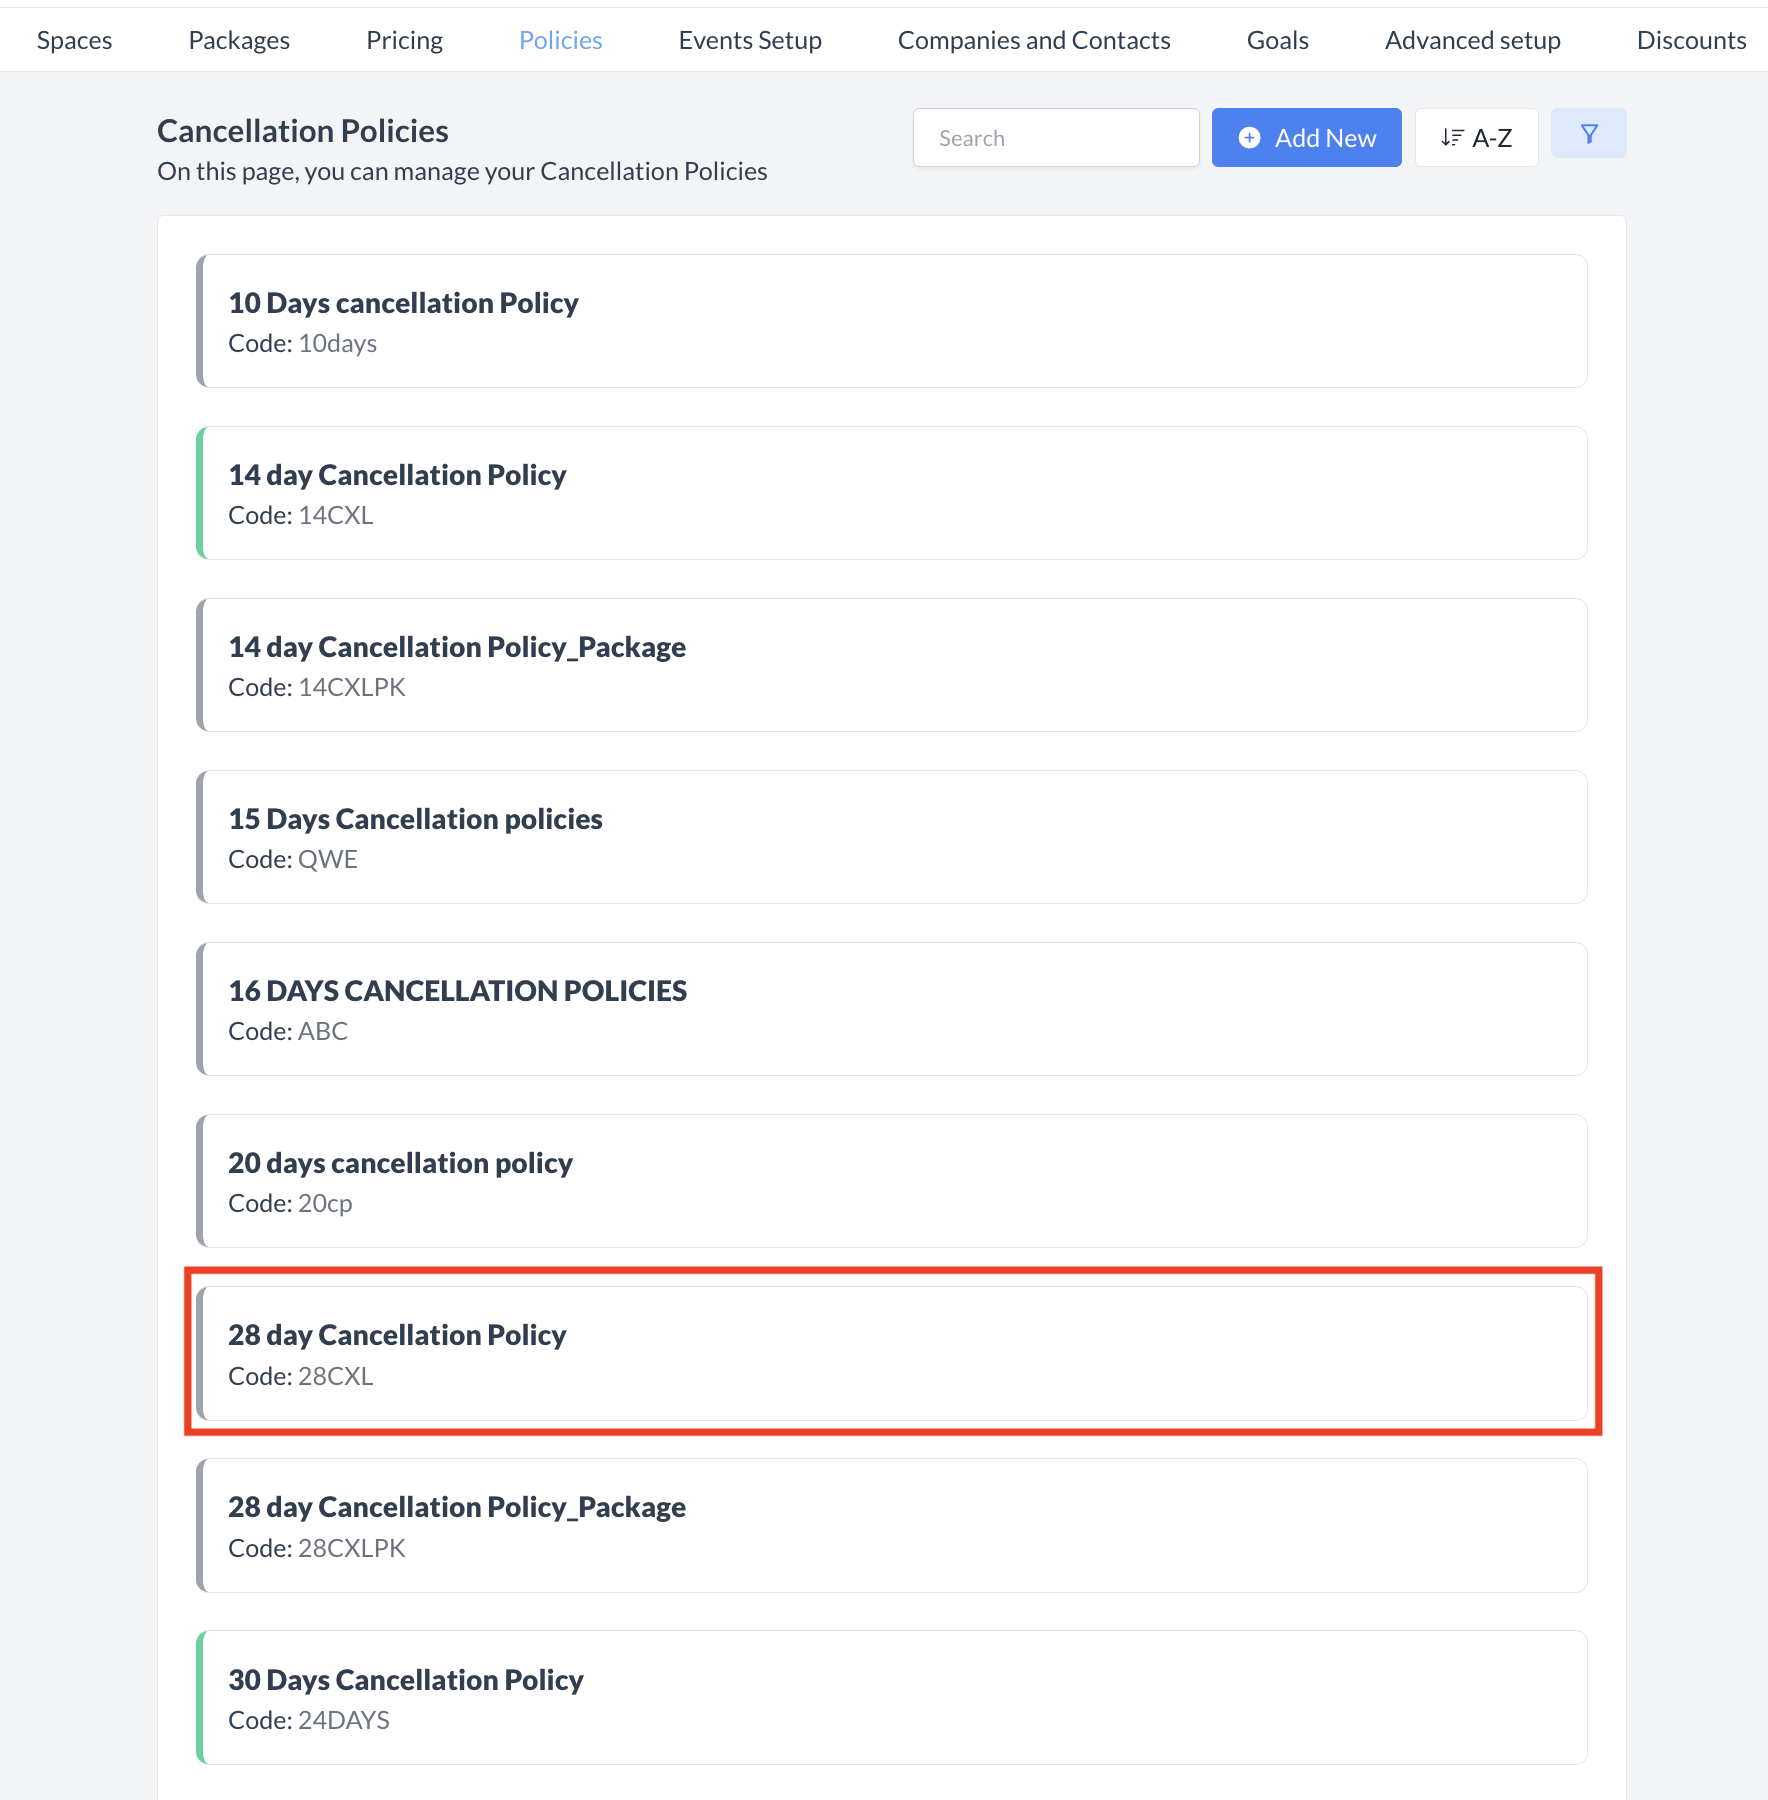
🔁 Reactivating an Inactive Cancellation Policy
To reactivate a cancellation policy:
The policy is now reactivated and will appear in the main Cancellation Policies listing screen, making it available for use again. |
.png?cb=06412ac7187d5e97a2ce1ffea519cbad)
|
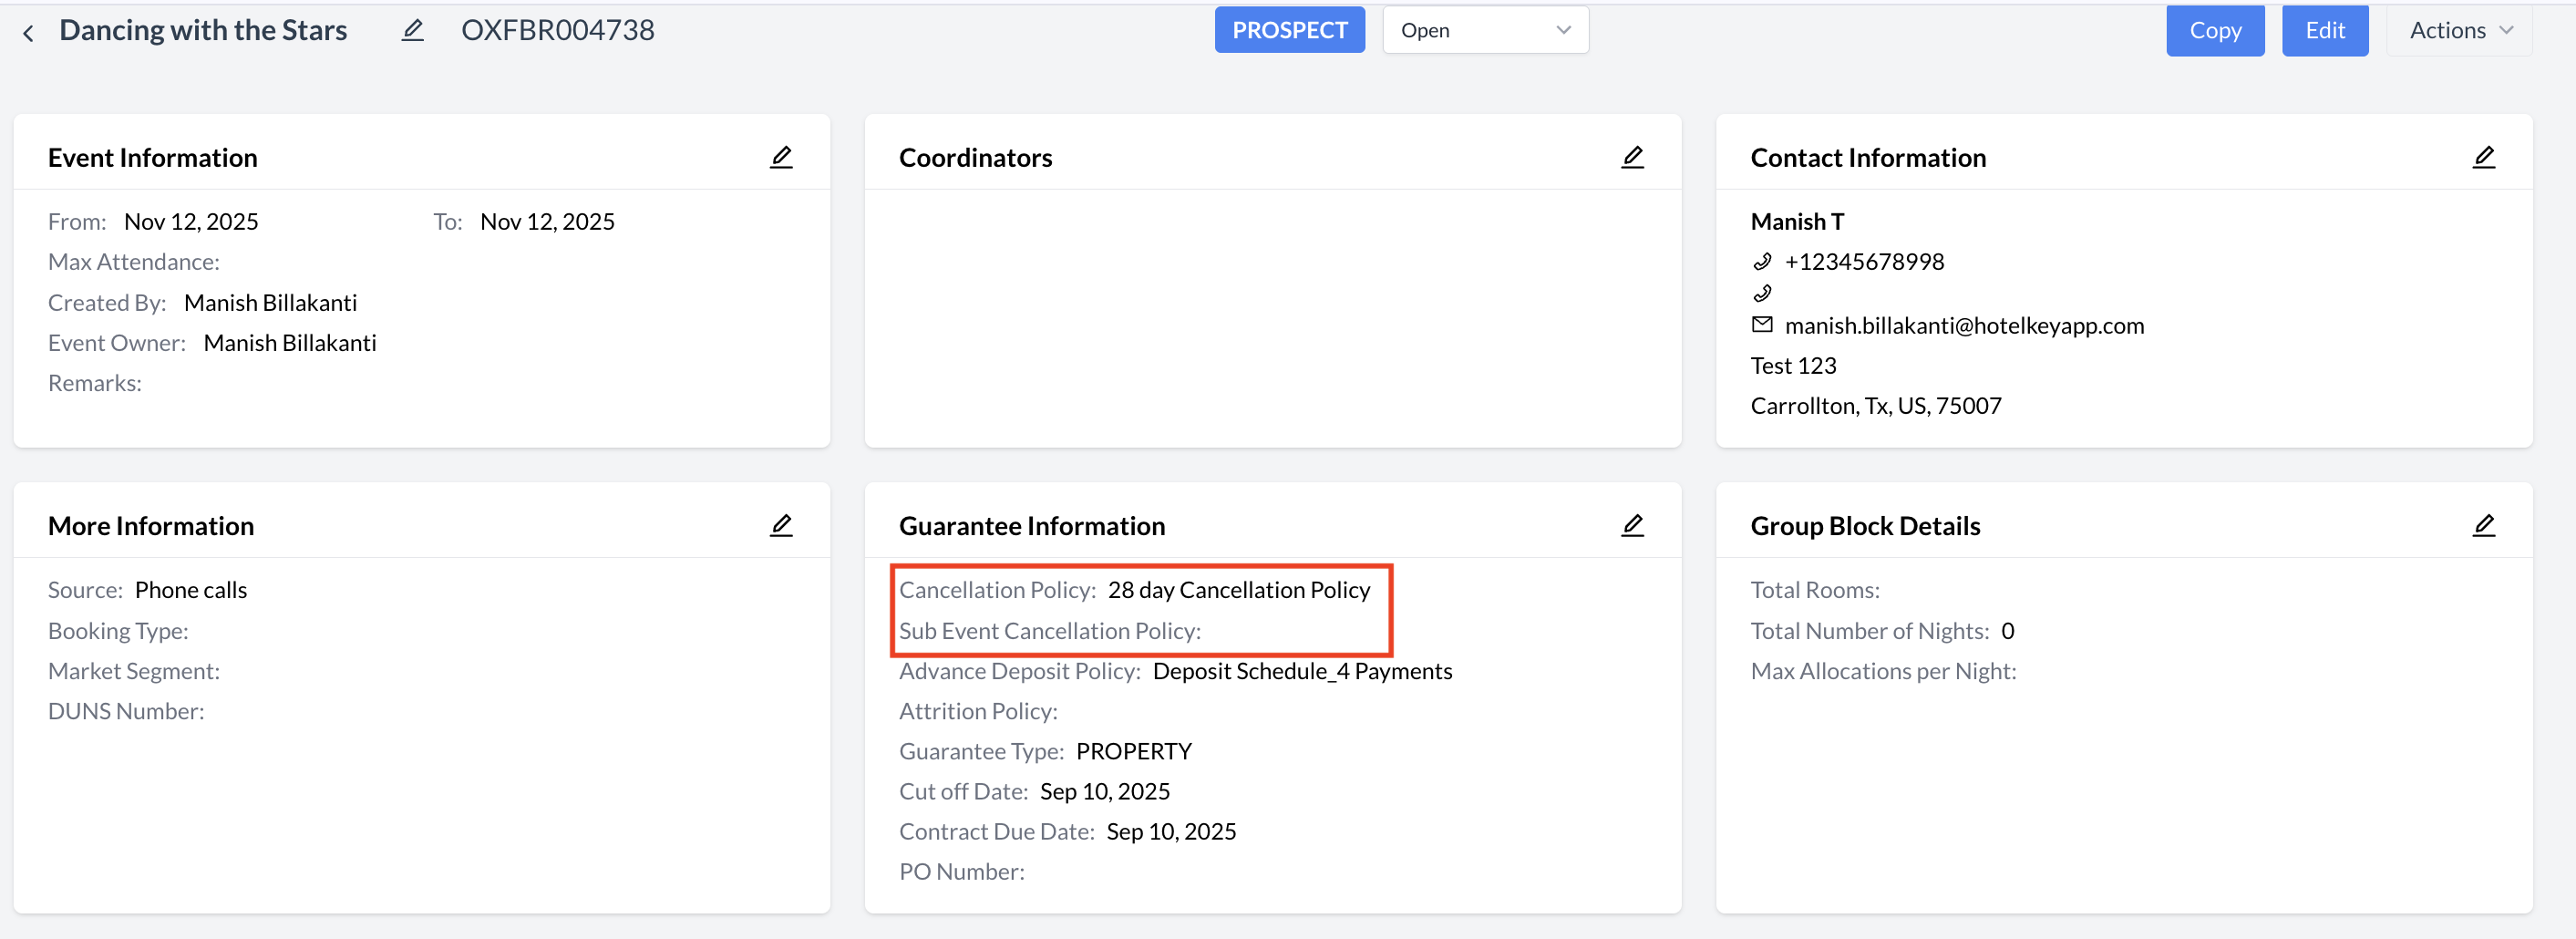
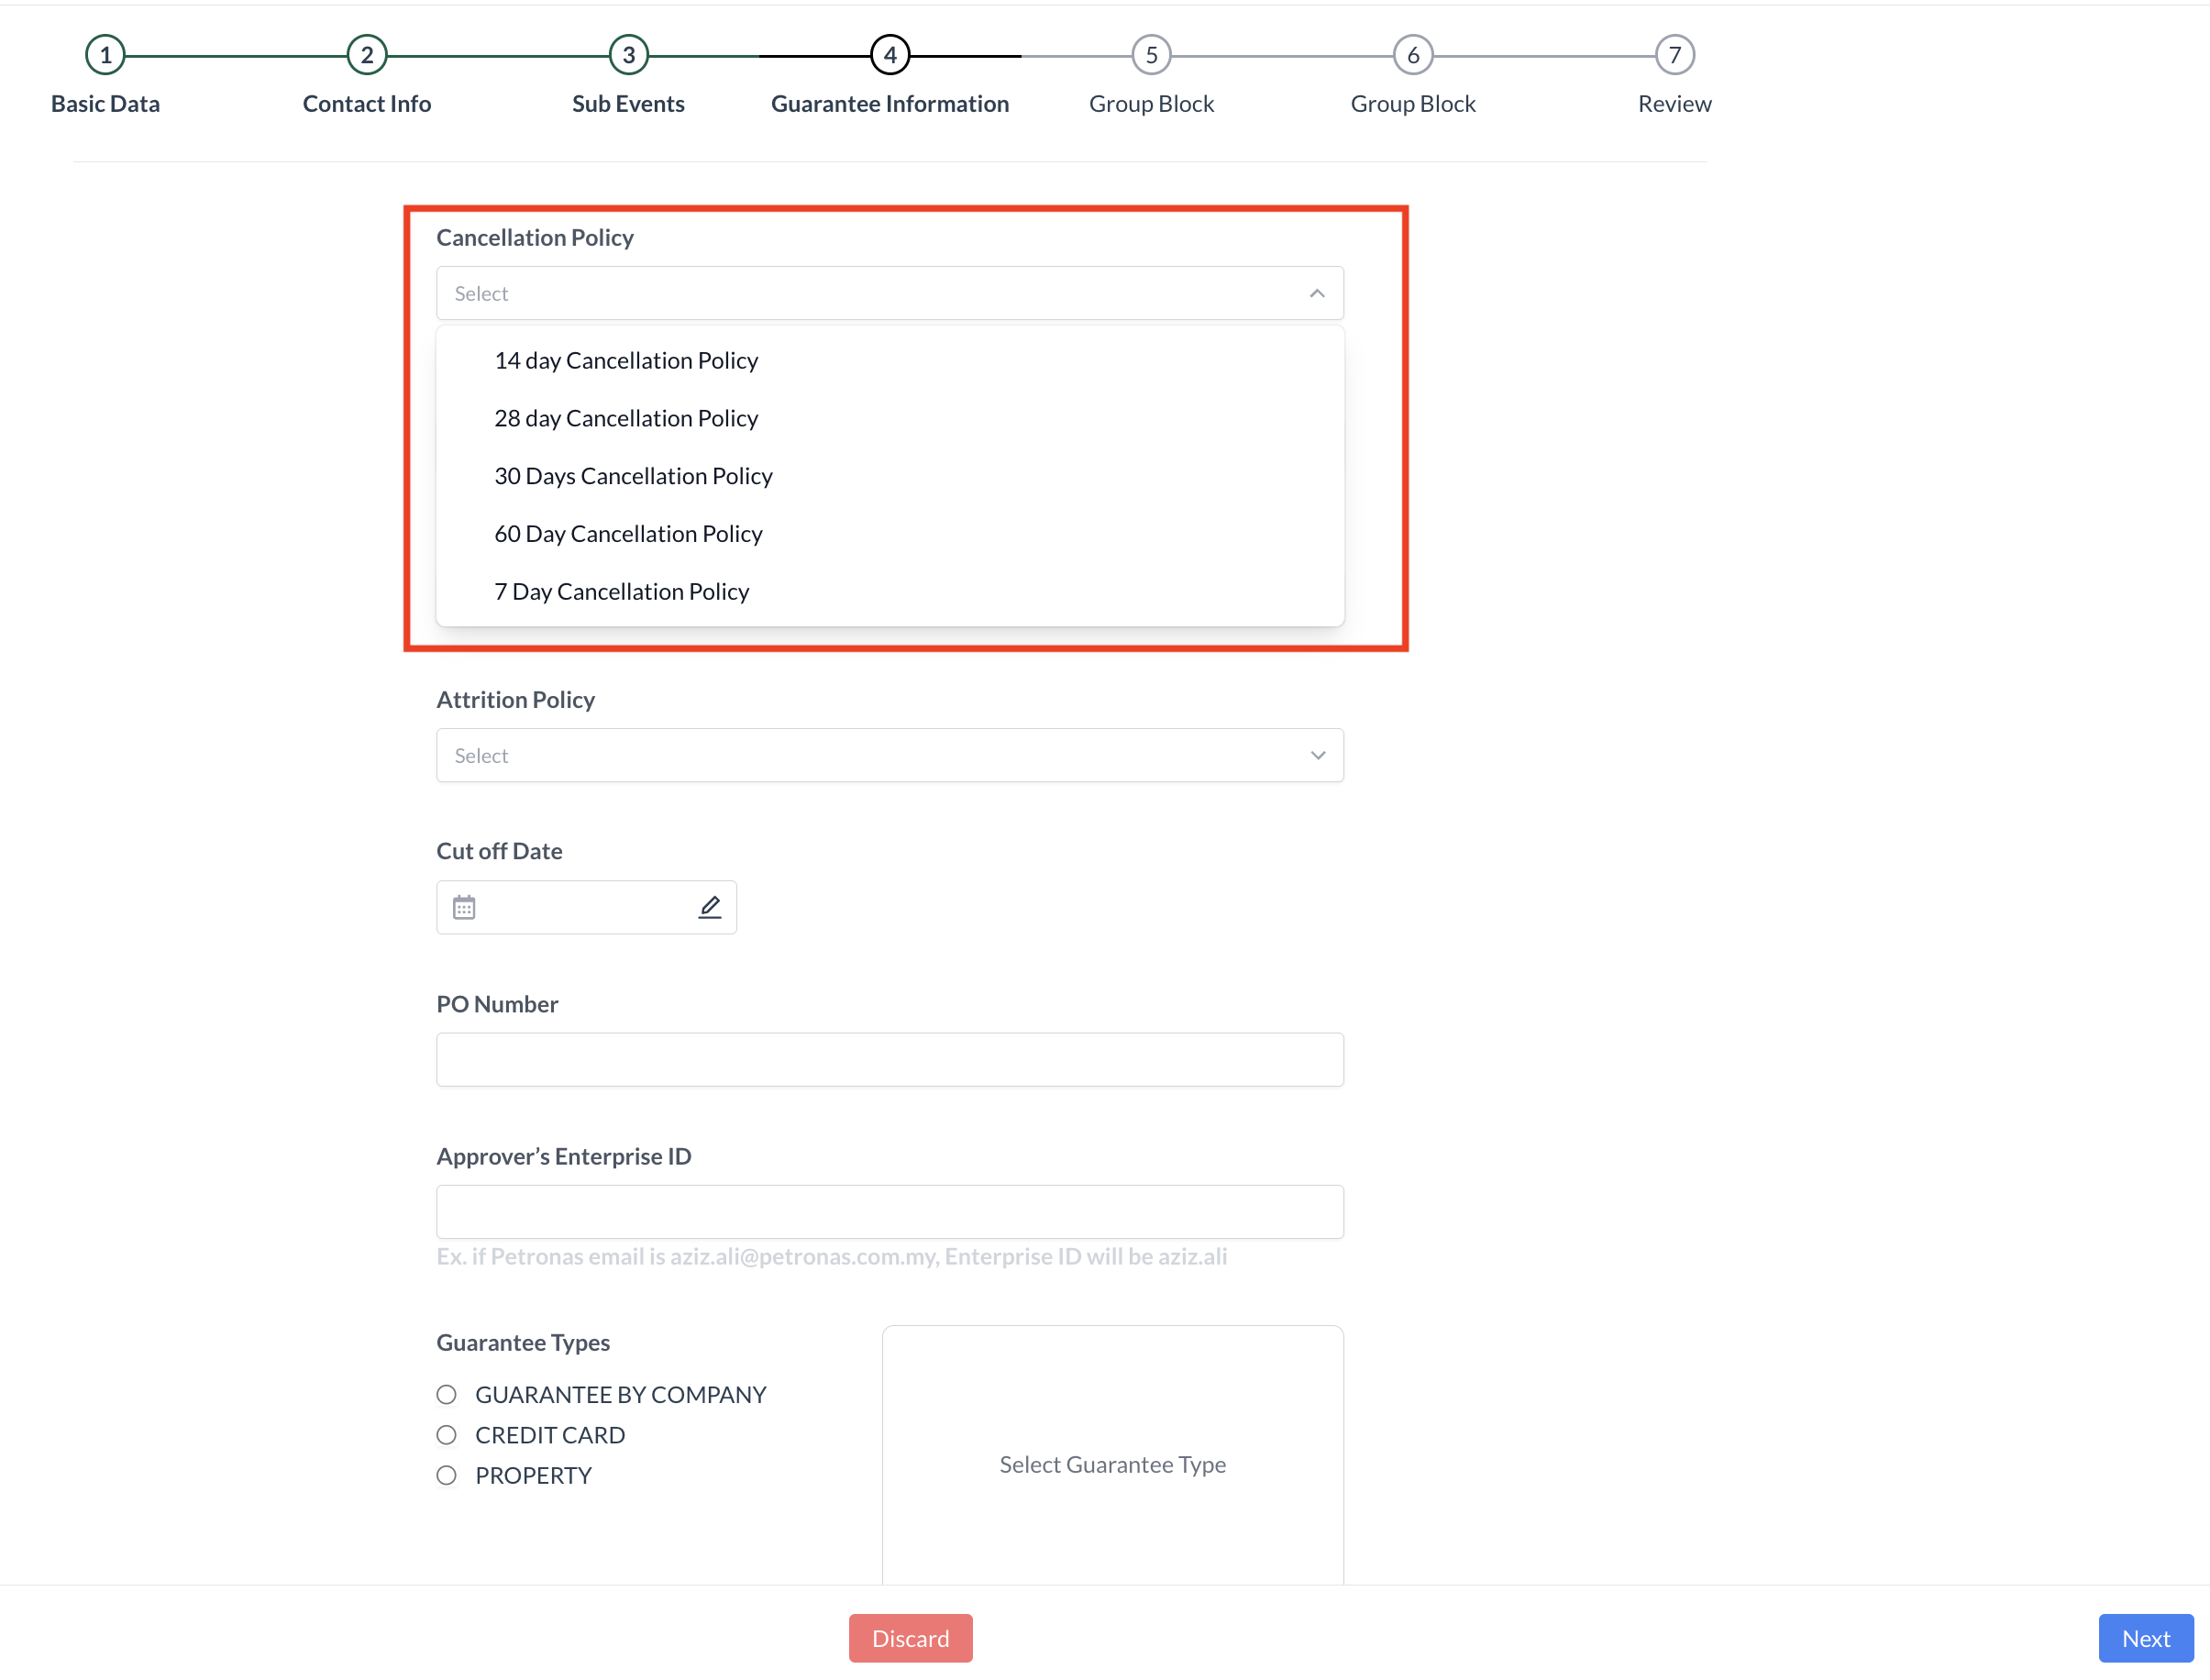
⏭️ What’s Next
After creating a new Cancellation Policy, you may need to apply it to existing event records. To update an event, navigate to the event record and click the Edit (pencil) icon located under the Guarantee Information section. In the Cancellation Policy dropdown menu, select the newly created policy, then click Save to confirm your changes. The event record will now display and use the updated cancellation policy.
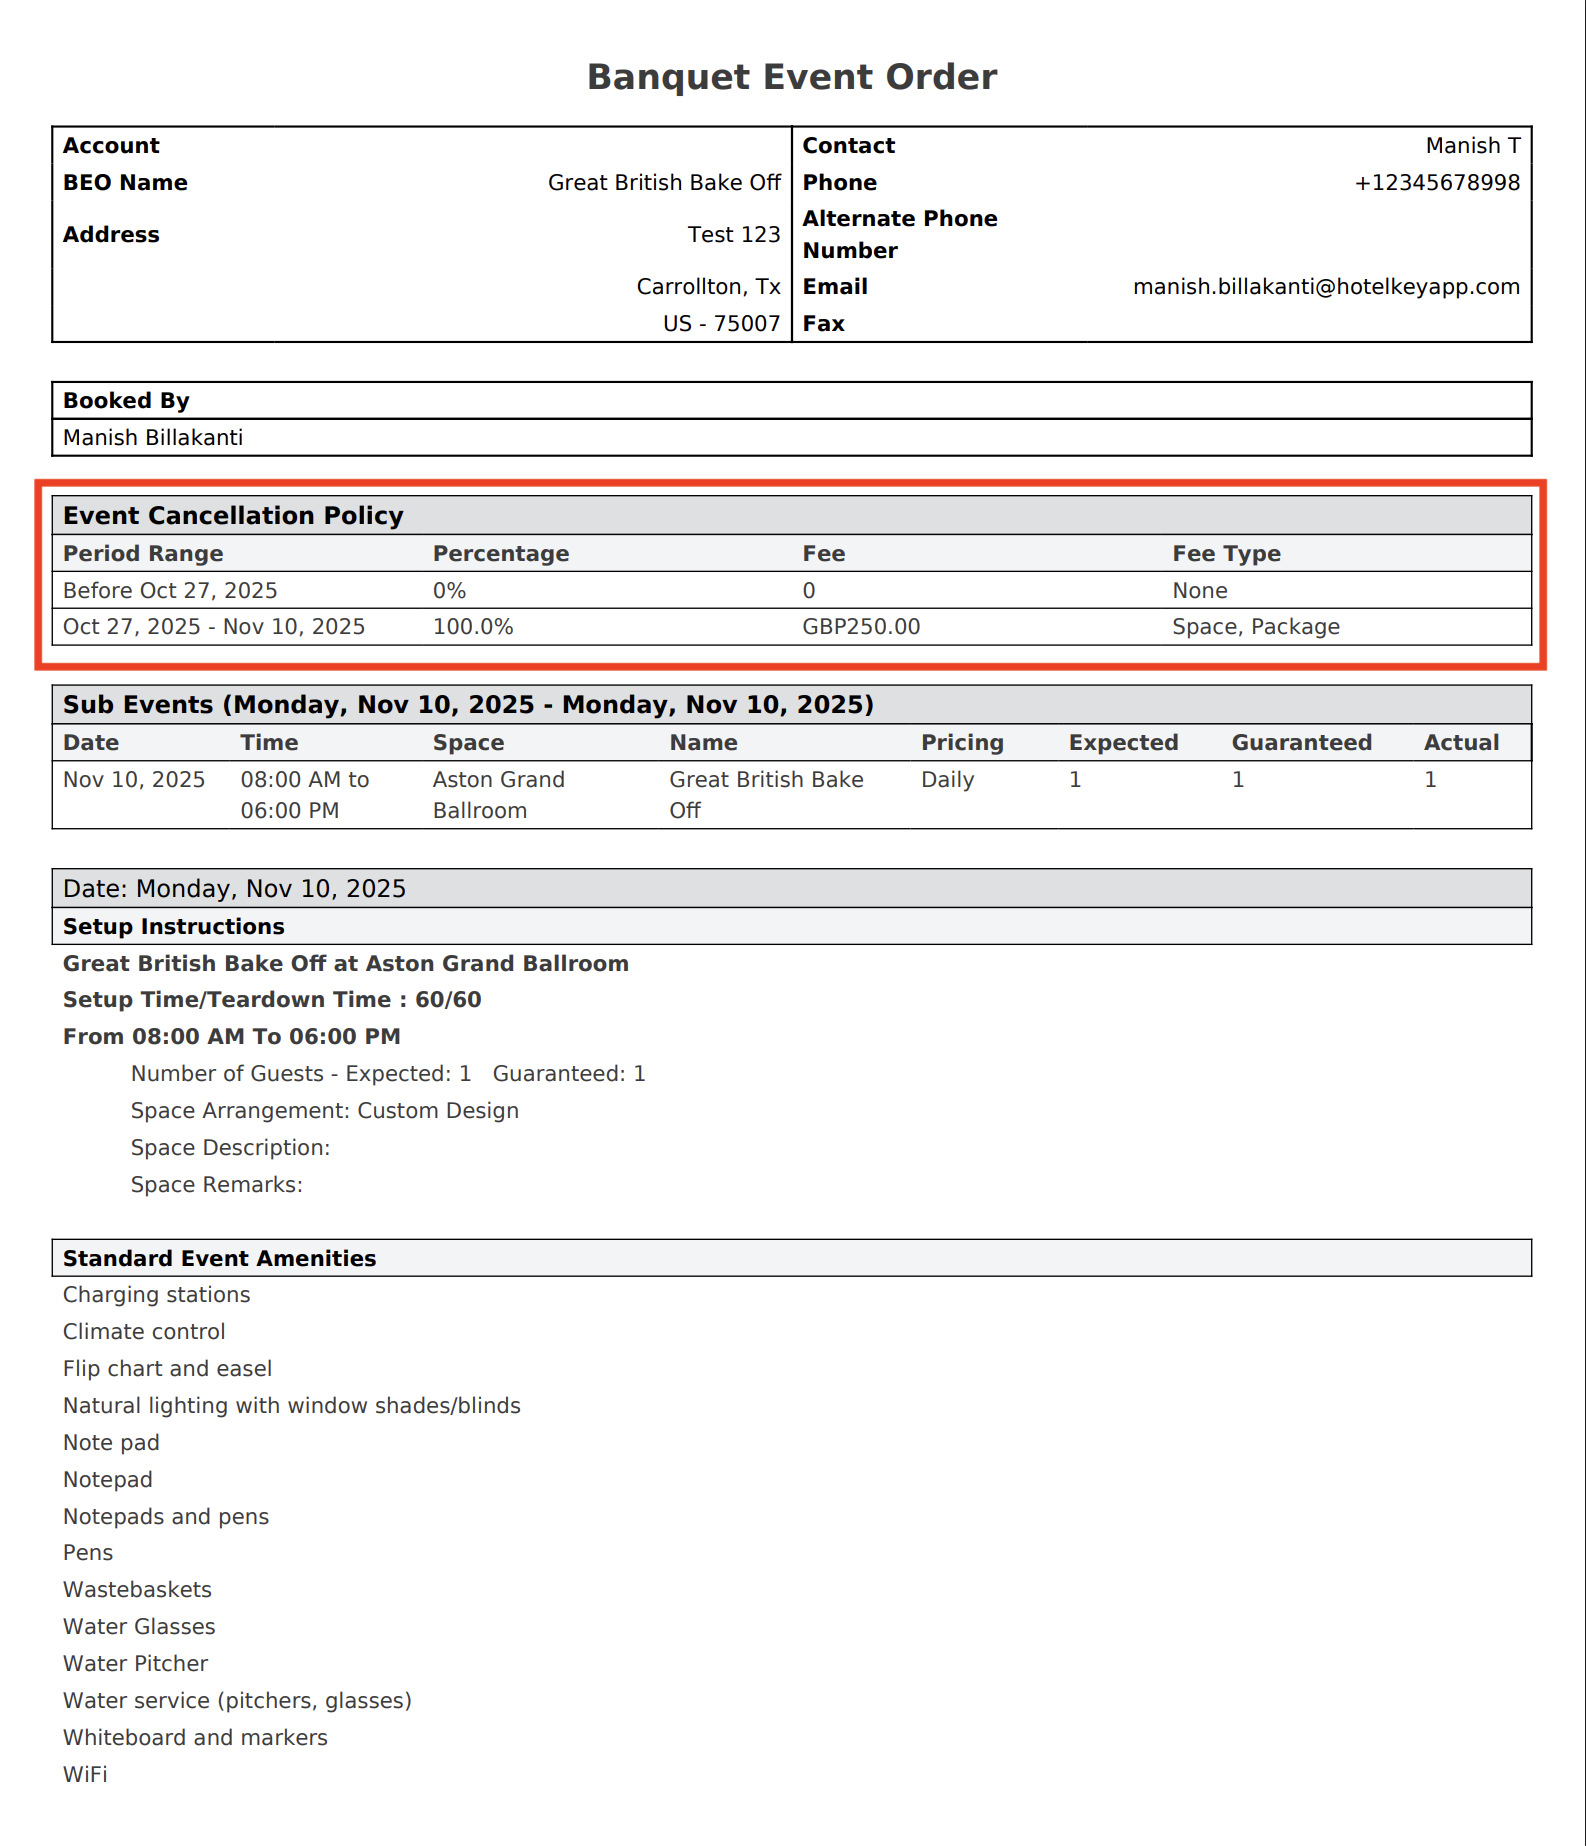
🖥️ Where “Cancellation Policies” Appears in the User Interface (UI)
There are several locations within EventKey cancellation policies will appear both in the UI & Reports. Below are a few more common examples: