Create a Product (Basic or Variant)
📆 Revision Date:
Products are classified as Basic or Variant when they are added to the system, depending on whether or not they are regrouped for sale to guests. Consider receiving a case of 144 bottles of water for sale to guests.
If each bottle is to be sold individually, the product is created as a Basic product; similarly, if the entire case of bottles is to be offered for sale as a single unit, it is created as a Basic product
If the bottles are to be broken up into a variety of quantity groups for sale (e.g., guests can buy bottles in a six pack or in a twelve pack), the product is created as a Variant product
Before deciding how to classify a product (Basic or Variant), think about the impacts to future ordering, inventory, sales and reporting tasks. Classifying a product as Variant provides much more detailed reporting on that product, but it also adds complexity and increases the future workload in managing that product.
Note that HotelKey provides a rich variety of data entry fields for product tracking and reporting, but many are optional. The instructions below cover how to create a product using the minimum required fields.
On the home page of the HotelKey administration web application (admin.hotelkeyapp.com), select the Administration v2 link in the RetailKey section. | 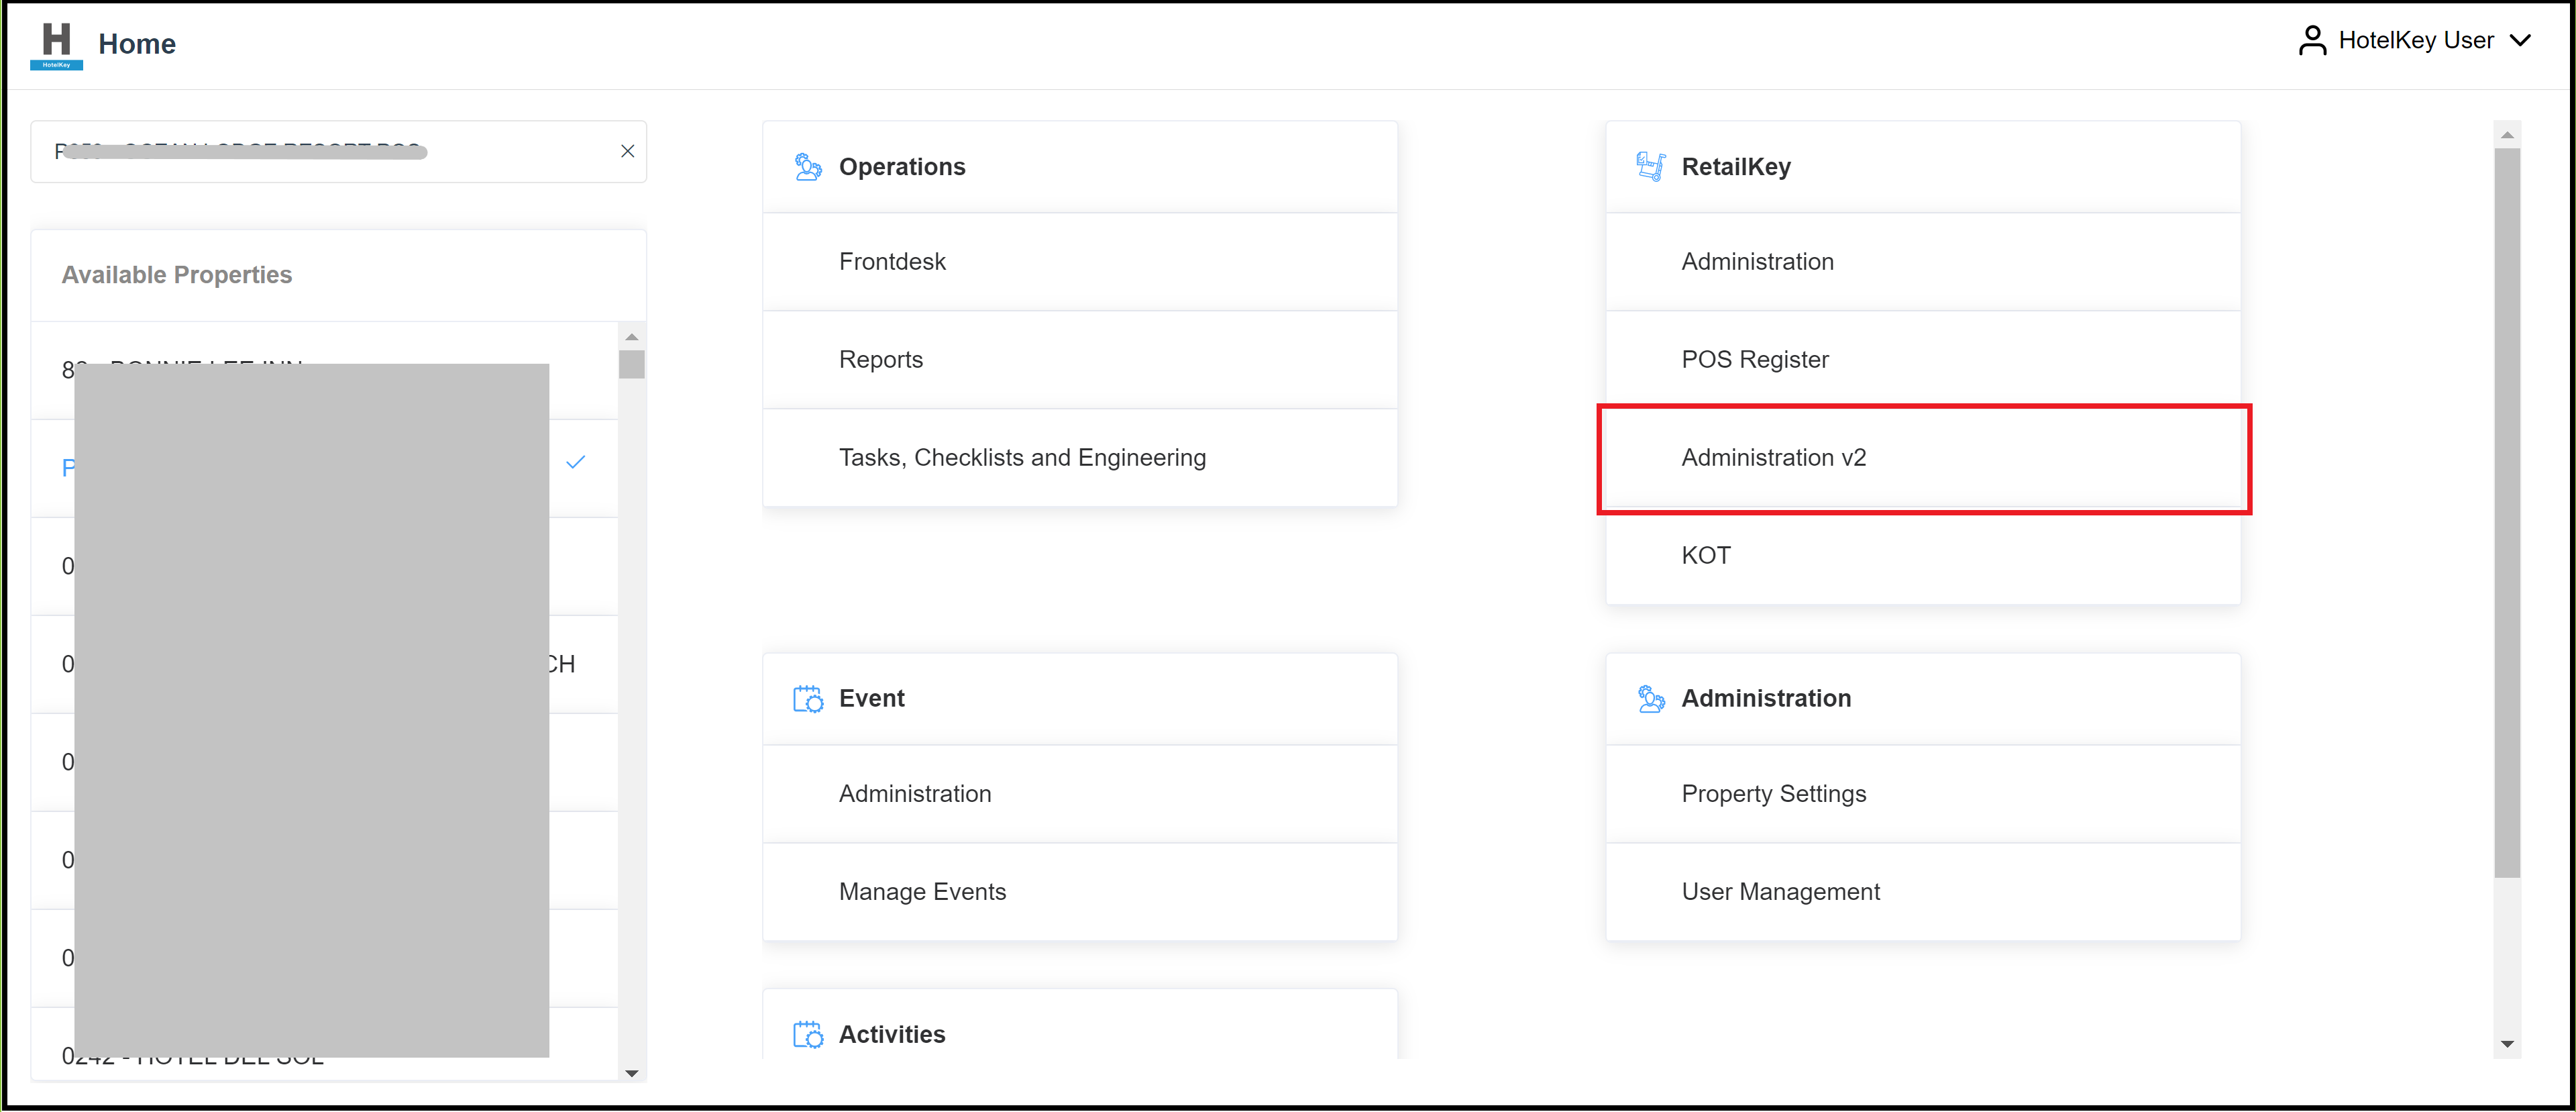 RetailKey Section in HotelKey Admin App |
The RetailKey Admin page loads. Expand the Products sidebar menu, select Products List to load the Products panel, as shown. Select New. |  Products Sidebar Menu Expanded - Products List Link Selected |
The Basic Data panel loads. Enter the product Name and select a SKU option (Auto Generate is the default). For UPC, select Generate UPC or Enter UPC. If Enter UPC is selected, a form populates for lookup of the code, as shown. If no matching code is found, select the plus sign to add a new code. A popup opens; enter the code and select Save. To add a photo, simply click on the plus sign, this will open up your files, select the photo in which you would like to display (hit save if you doing outside of the product creation flow) To delete a photo, hover over the photo, click the eye icon, and then the trash can and select save Note that it’s possible to add more UPC codes for the product: select the plus sign icon at the bottom of the code entry popup to populate an additional code data entry field. Repeat to add as many codes as are needed, then select Save. | 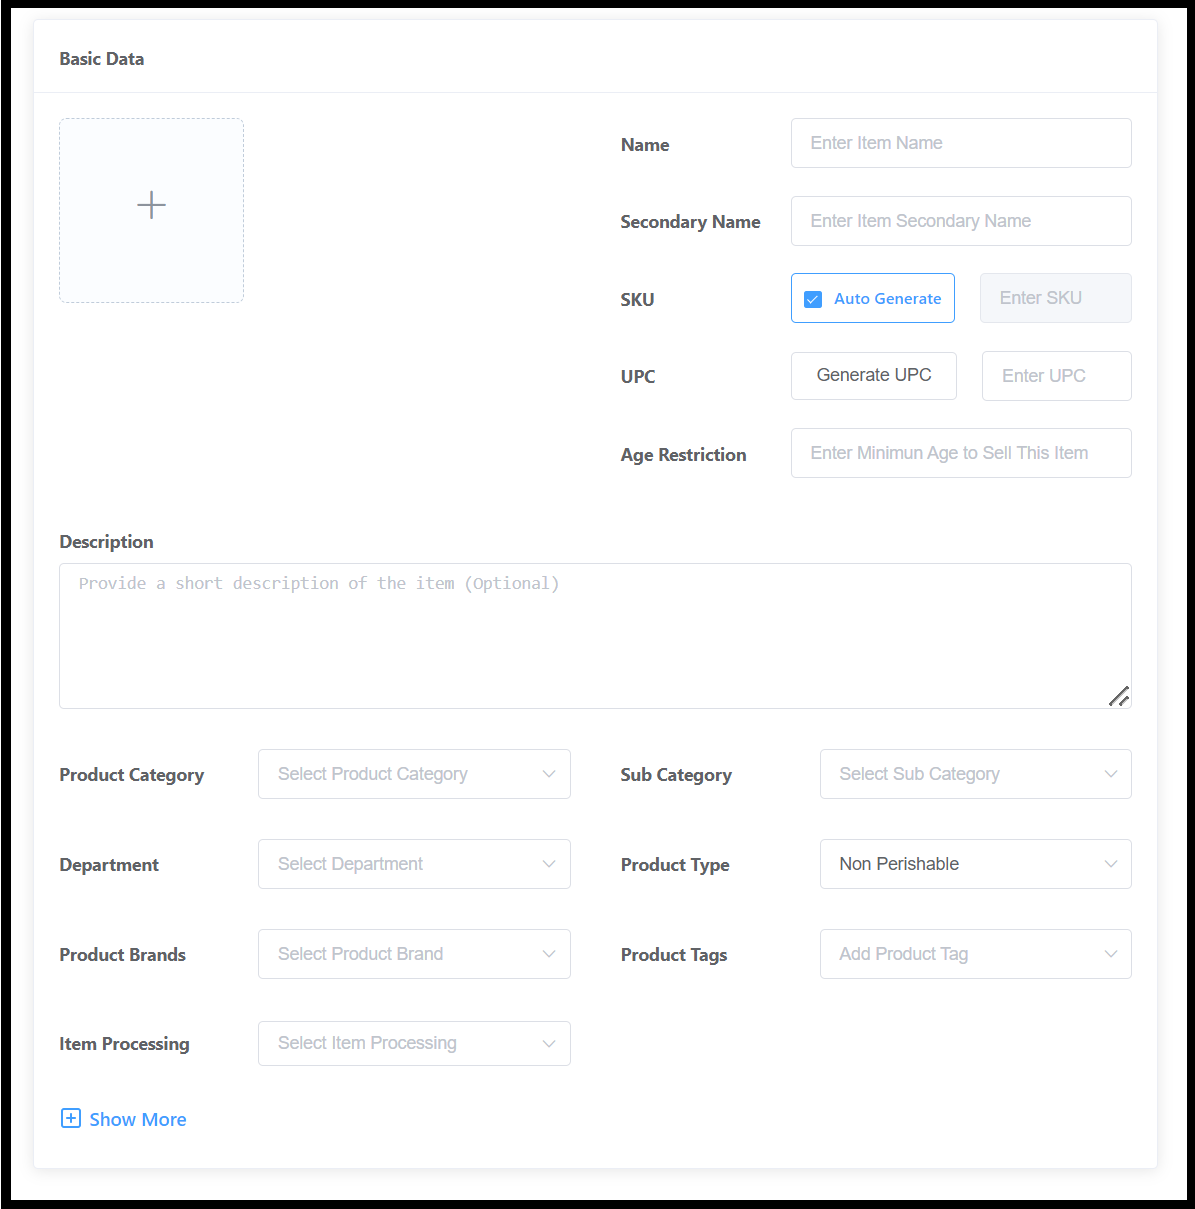 Basic Data Panel, Blank 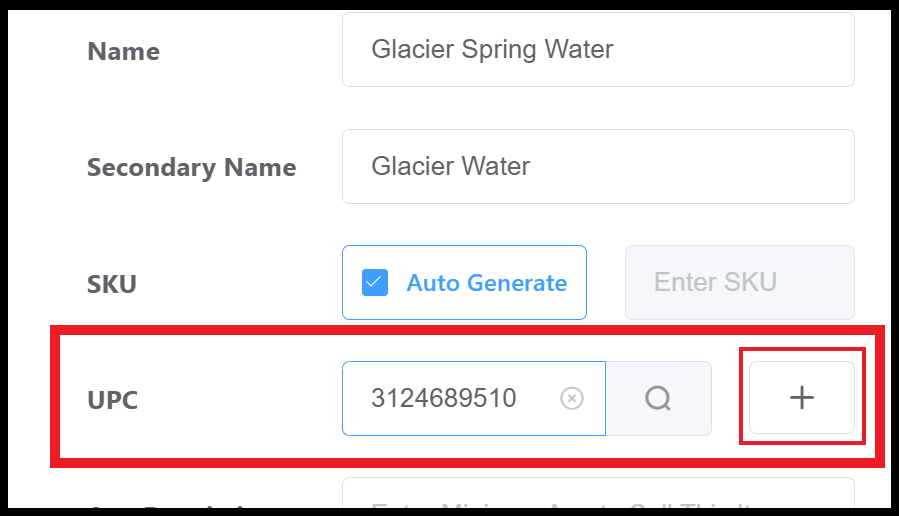 UPC Lookup Field and Plus Sign  UPC Code Entry Popup |
Enter a Description of the product. Select a Product Category, Department and Product Type. An example of the filled Basic Data panel is shown at right. Fields containing gray data entry tips (instead of data) are not required. Note that the UPC field now shows a numeric indicator of how many UPC codes have been added for this product. Select Show More for additional options | 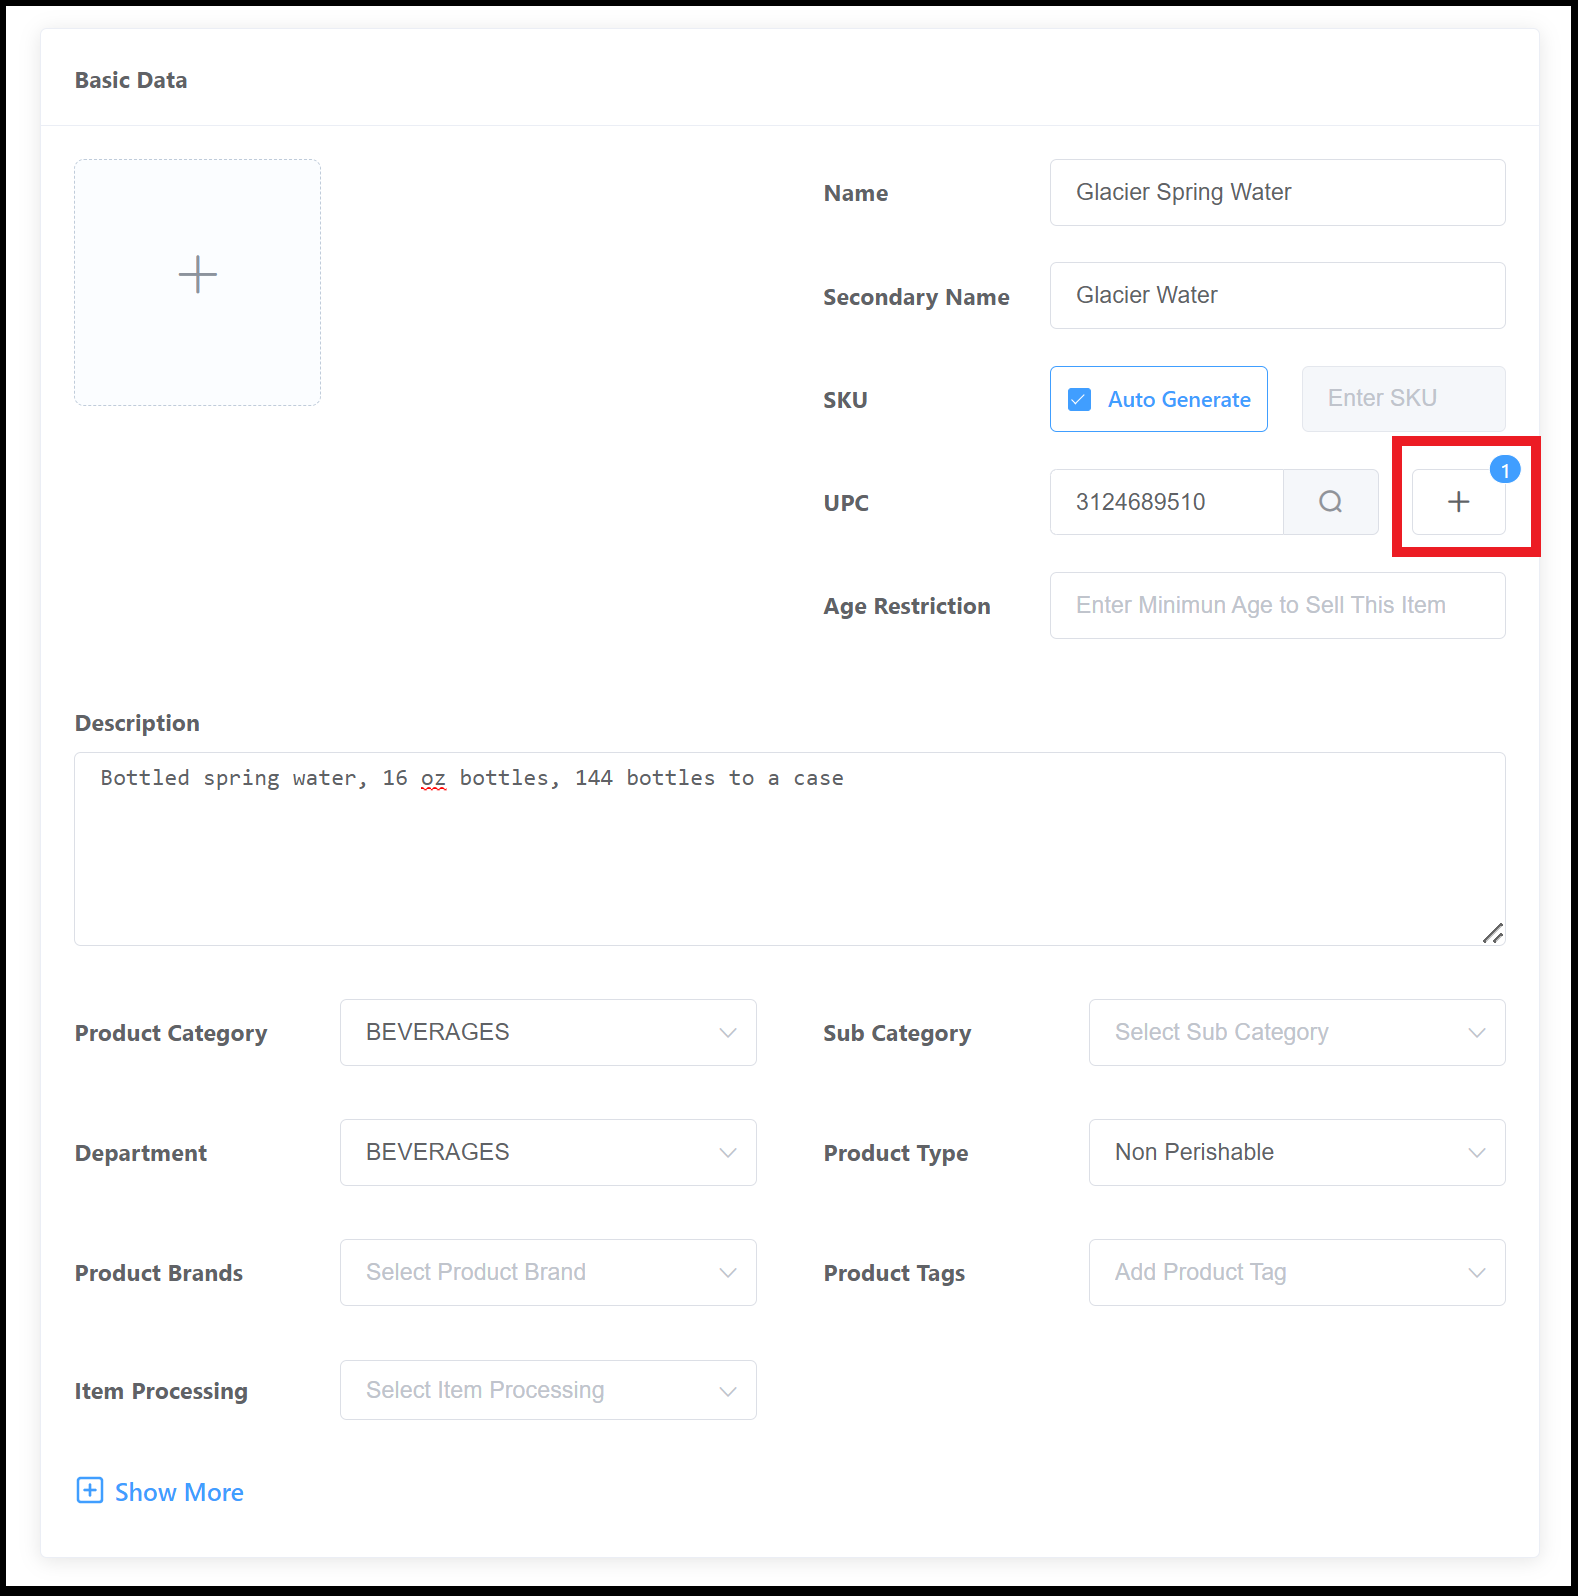 Basic Data Panel, Filled 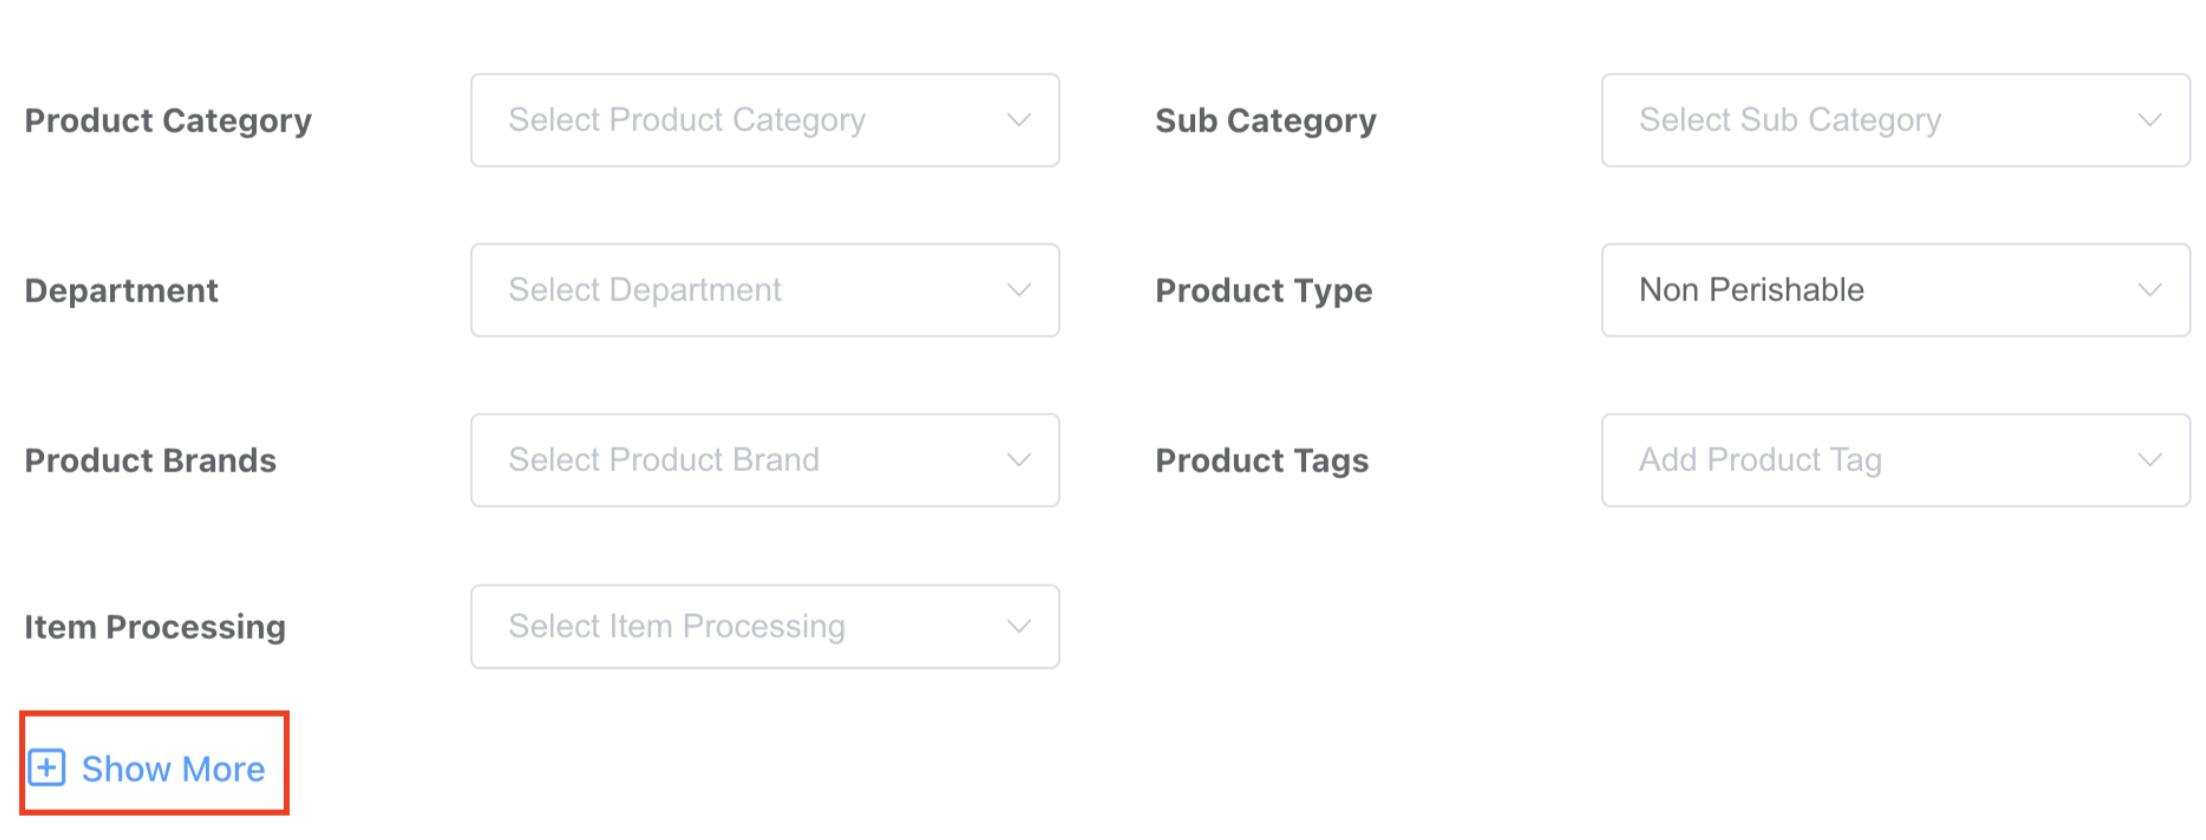 Show More Options |
Show More page loads - giving option to add Size, Case Size and Pack Size Take Budweiser beer, for instance, which is delivered in a 24-case configuration, consisting of two sets of 12 bottles each. The preference is not to market the product in 12-packs but rather to offer each bottle as a standalone item. For the size 1, case size designate it as 24, and set the pack size to 1. However, if you are selling a 12-pack, then the pack size should be specified as 12. |   |
Scroll down to the Selected Product Type section. Basic Product is selected by default. | 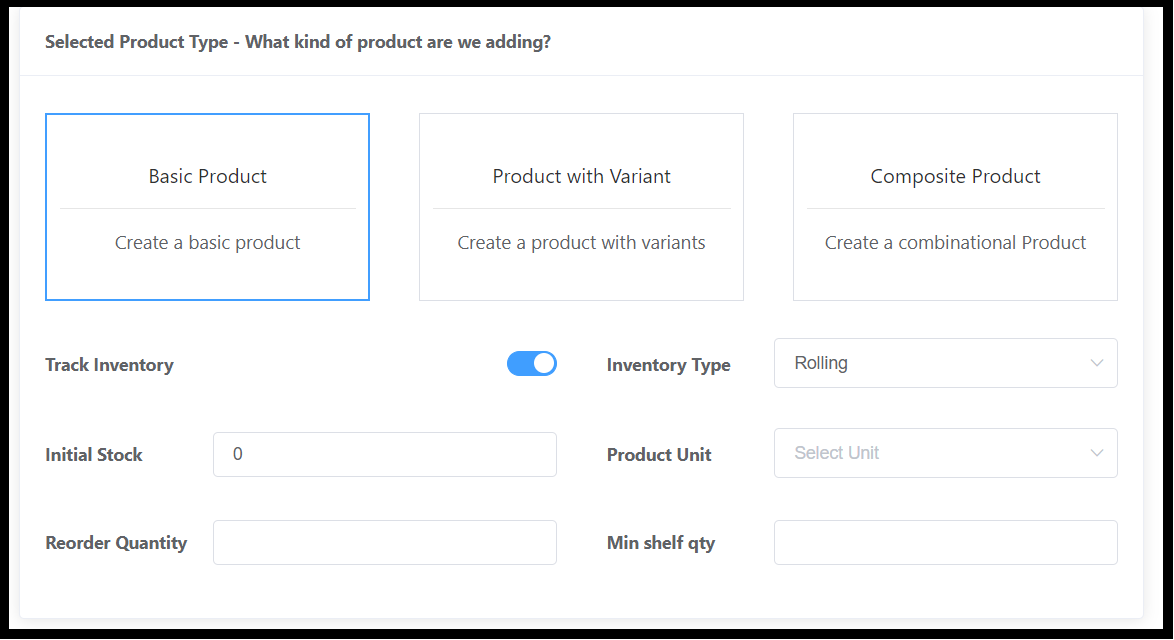 Selected Product Type Section |
Basic Product
In this example, a single bottle of Glacier Spring Water is being created as a Basic Product. The water arrives in a case of shrink-wrapped 24 packs, but those packs will be broken up and the water will be sold by the individual bottle.
Leave the default selections of Basic Product , Inventory Type “Rolling” and Track Inventory in place. Enter the Initial Stock for the product. | 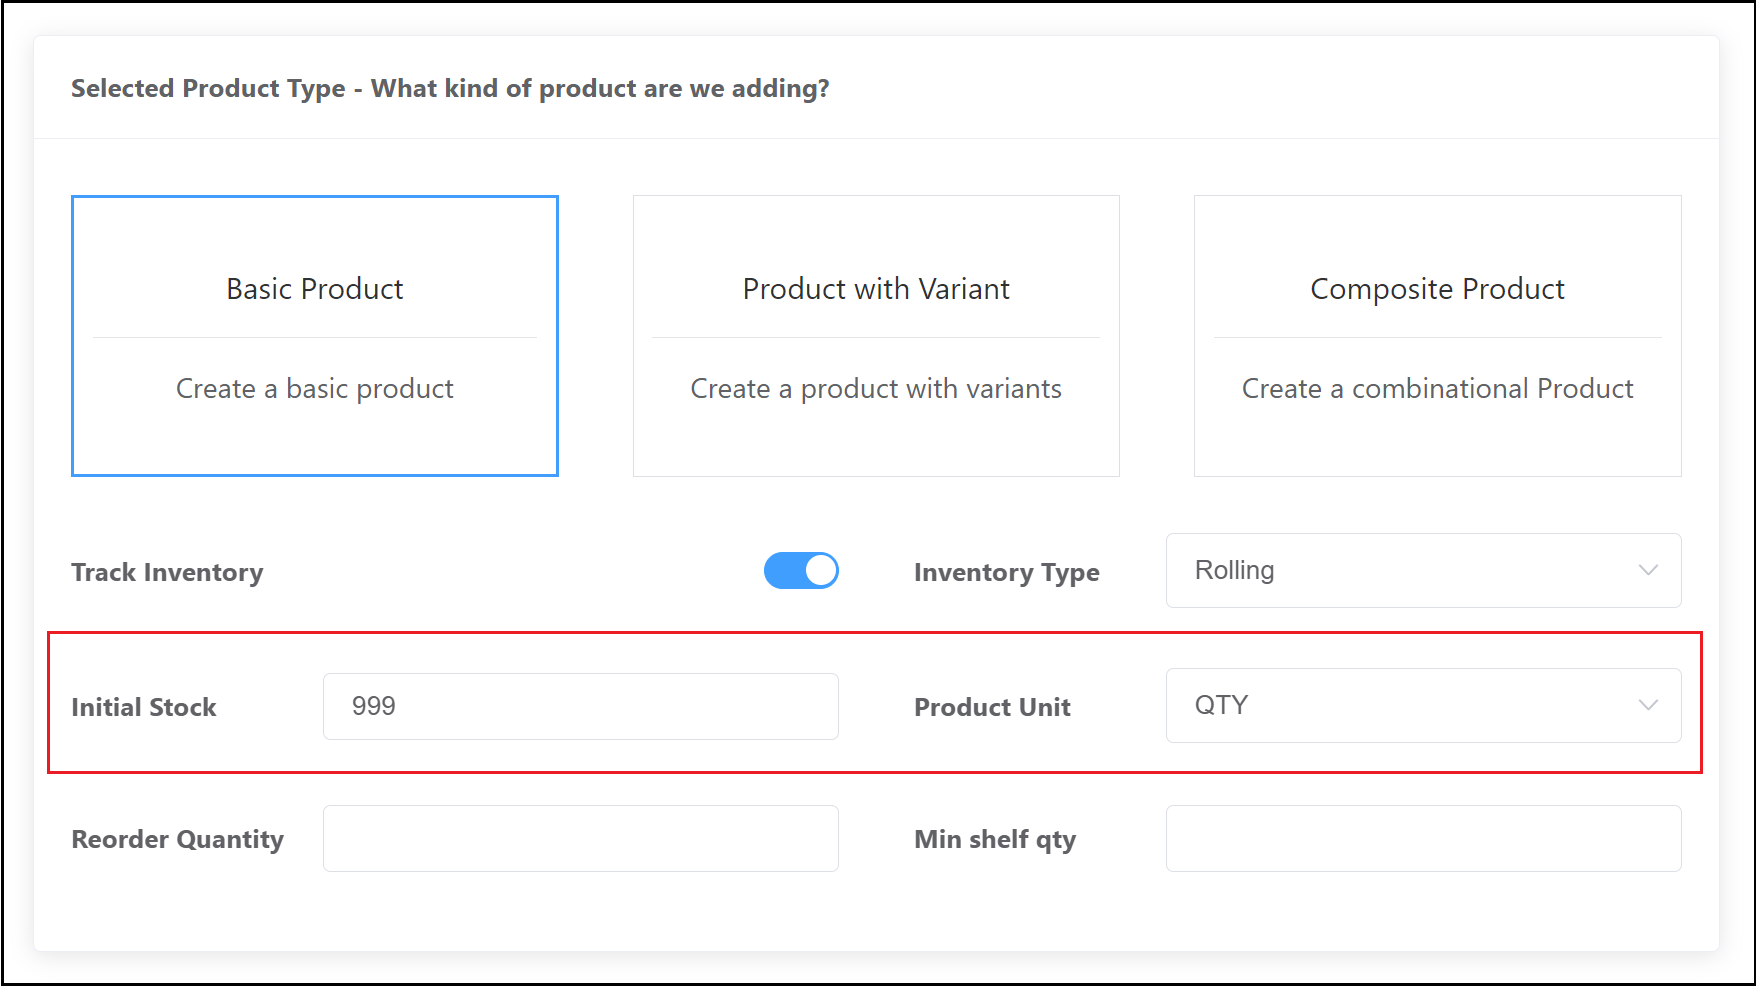 Basic Product - Initial Stock and Unit Details |
Scroll down to the Supplier Details section. Select a Preferred Vendor. As shown, vendor details populate in a form at the bottom of the section. Enter the Vendor SKU and select the vendor Unit type (e.g. “QTY” for standalone, self contained items like bottles of water or a t-shirt, OZ, mL or similar for items like liquor added to bar drinks by the shot from a larger bottle). Optionally, select Add to add another vendor. Note - the Preferred Vendor still needs to be selected in the highlighted section shown in the image to the right | 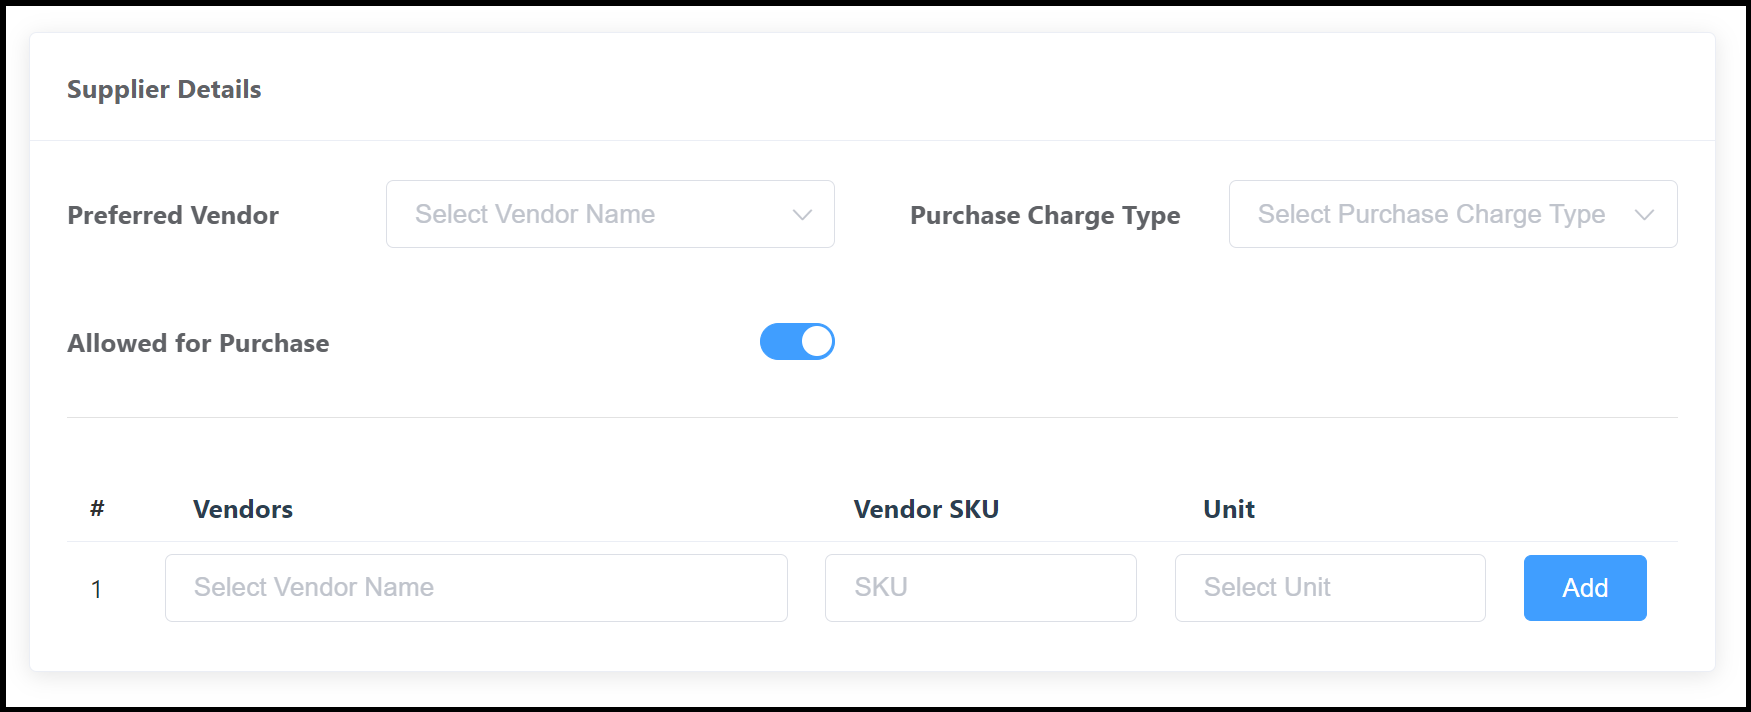 Supplier Details Section 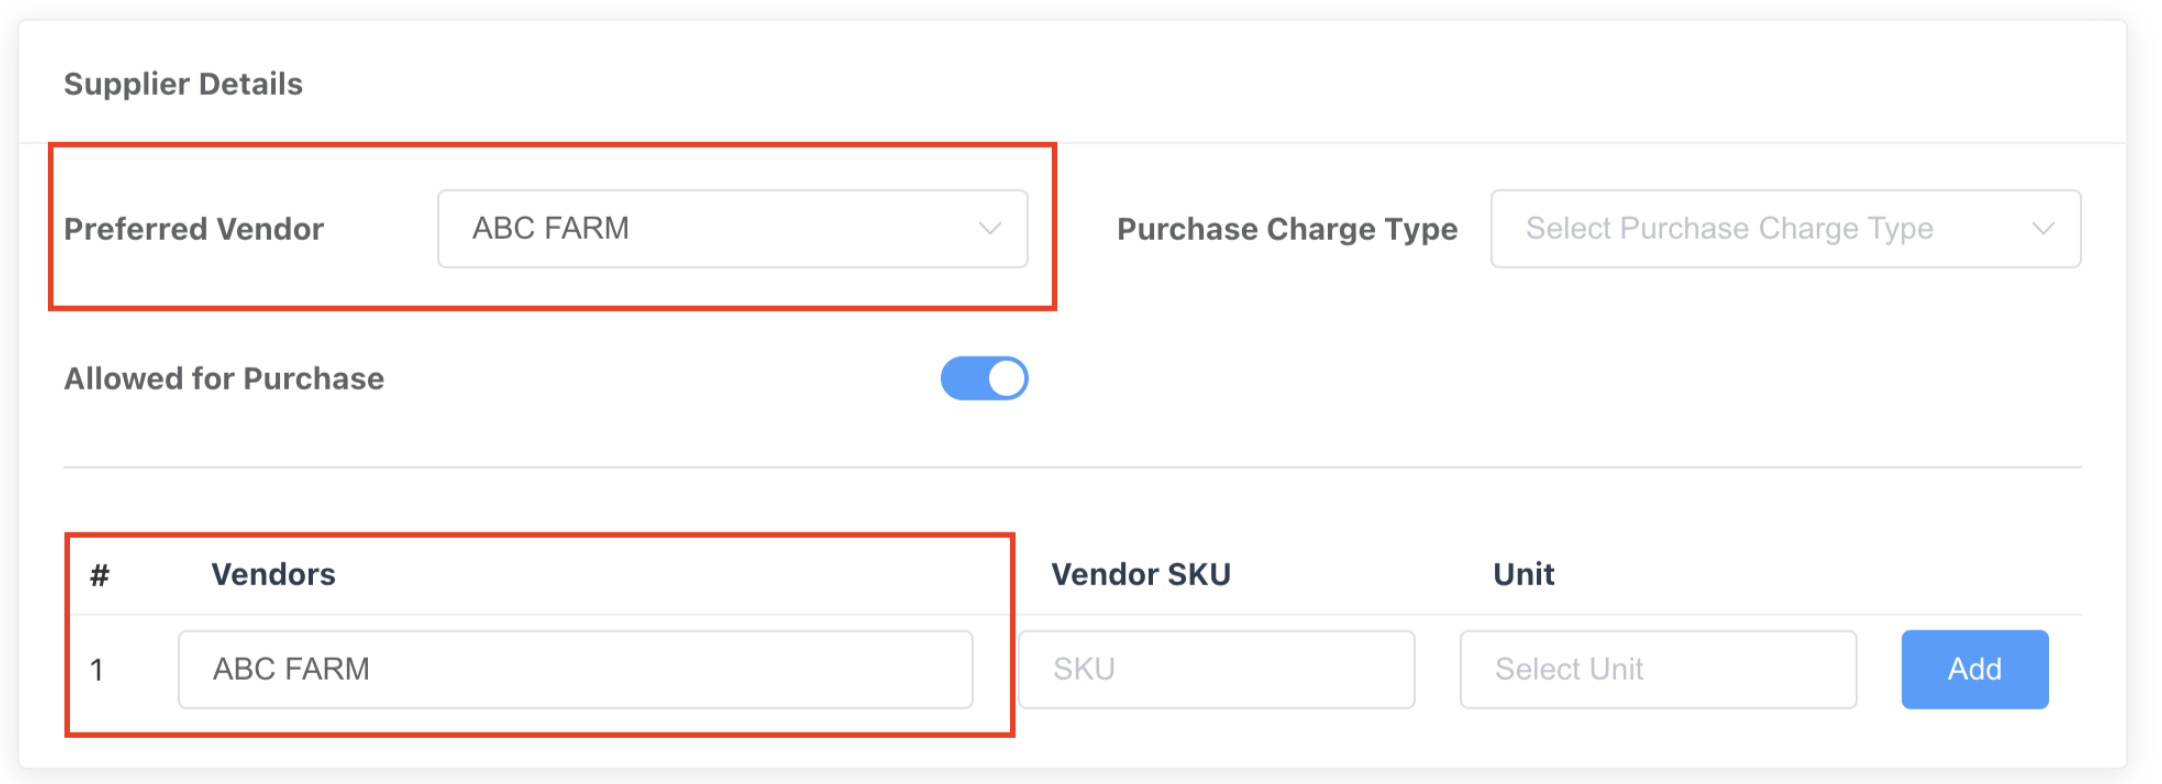 |
The Suggested Products section is optional and can be skipped. |  Suggested Products Section |
Scroll down to the Sales and Pricing section. Select the Sales Charge Type and Wholesale Price. To have the system automatically calculate the Retail Price based on markup, select Percent or Amount for Margin (aka “markup”) - must be one or the other, then enter the applicable number. For example:
To have the system automatically calculate the Margin, enter the Retail Price. Note that when Enable Rate Inclusive of taxes is selected, the system adjusts the calculation so that the retail price includes tax, and the Retail Price field is updated to show this. The product must be linked to a menu before it can be sold. Select a menu, then select Link to Menu. As shown, details of the selected menu populate at the bottom of the section. Repeat this step to add the product to additional menus. | 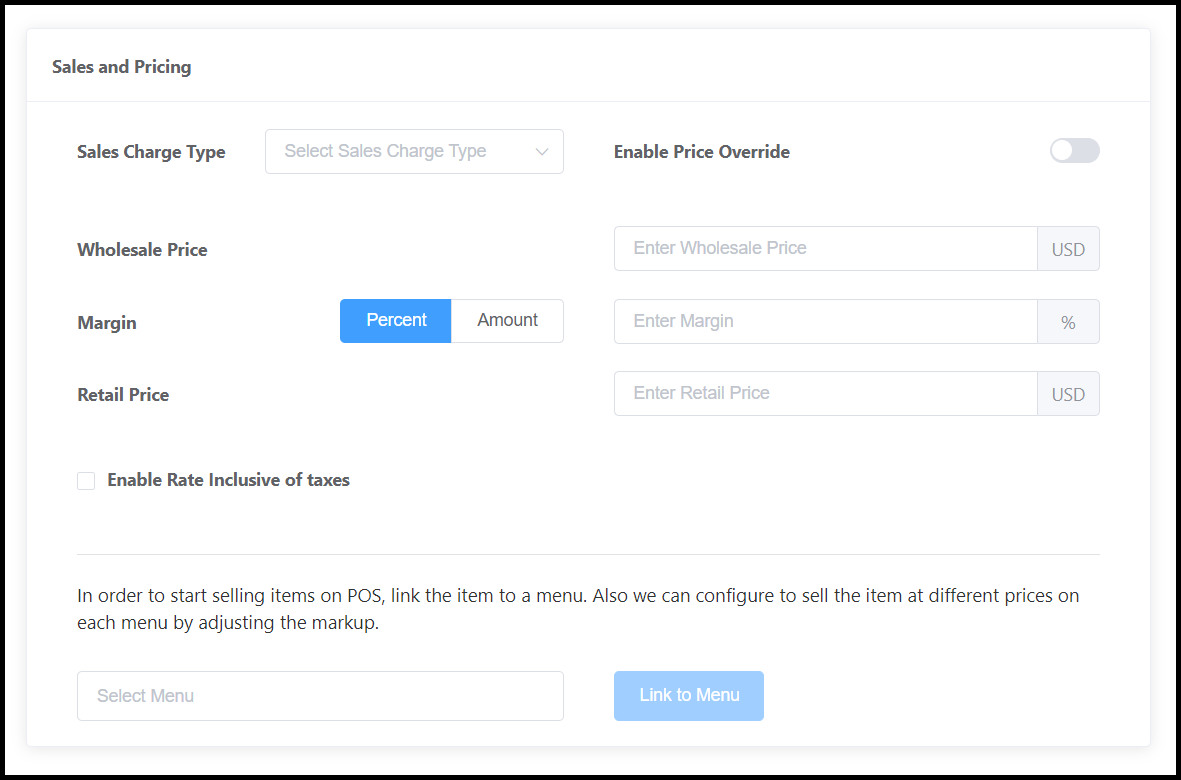 Sales and Pricing Section 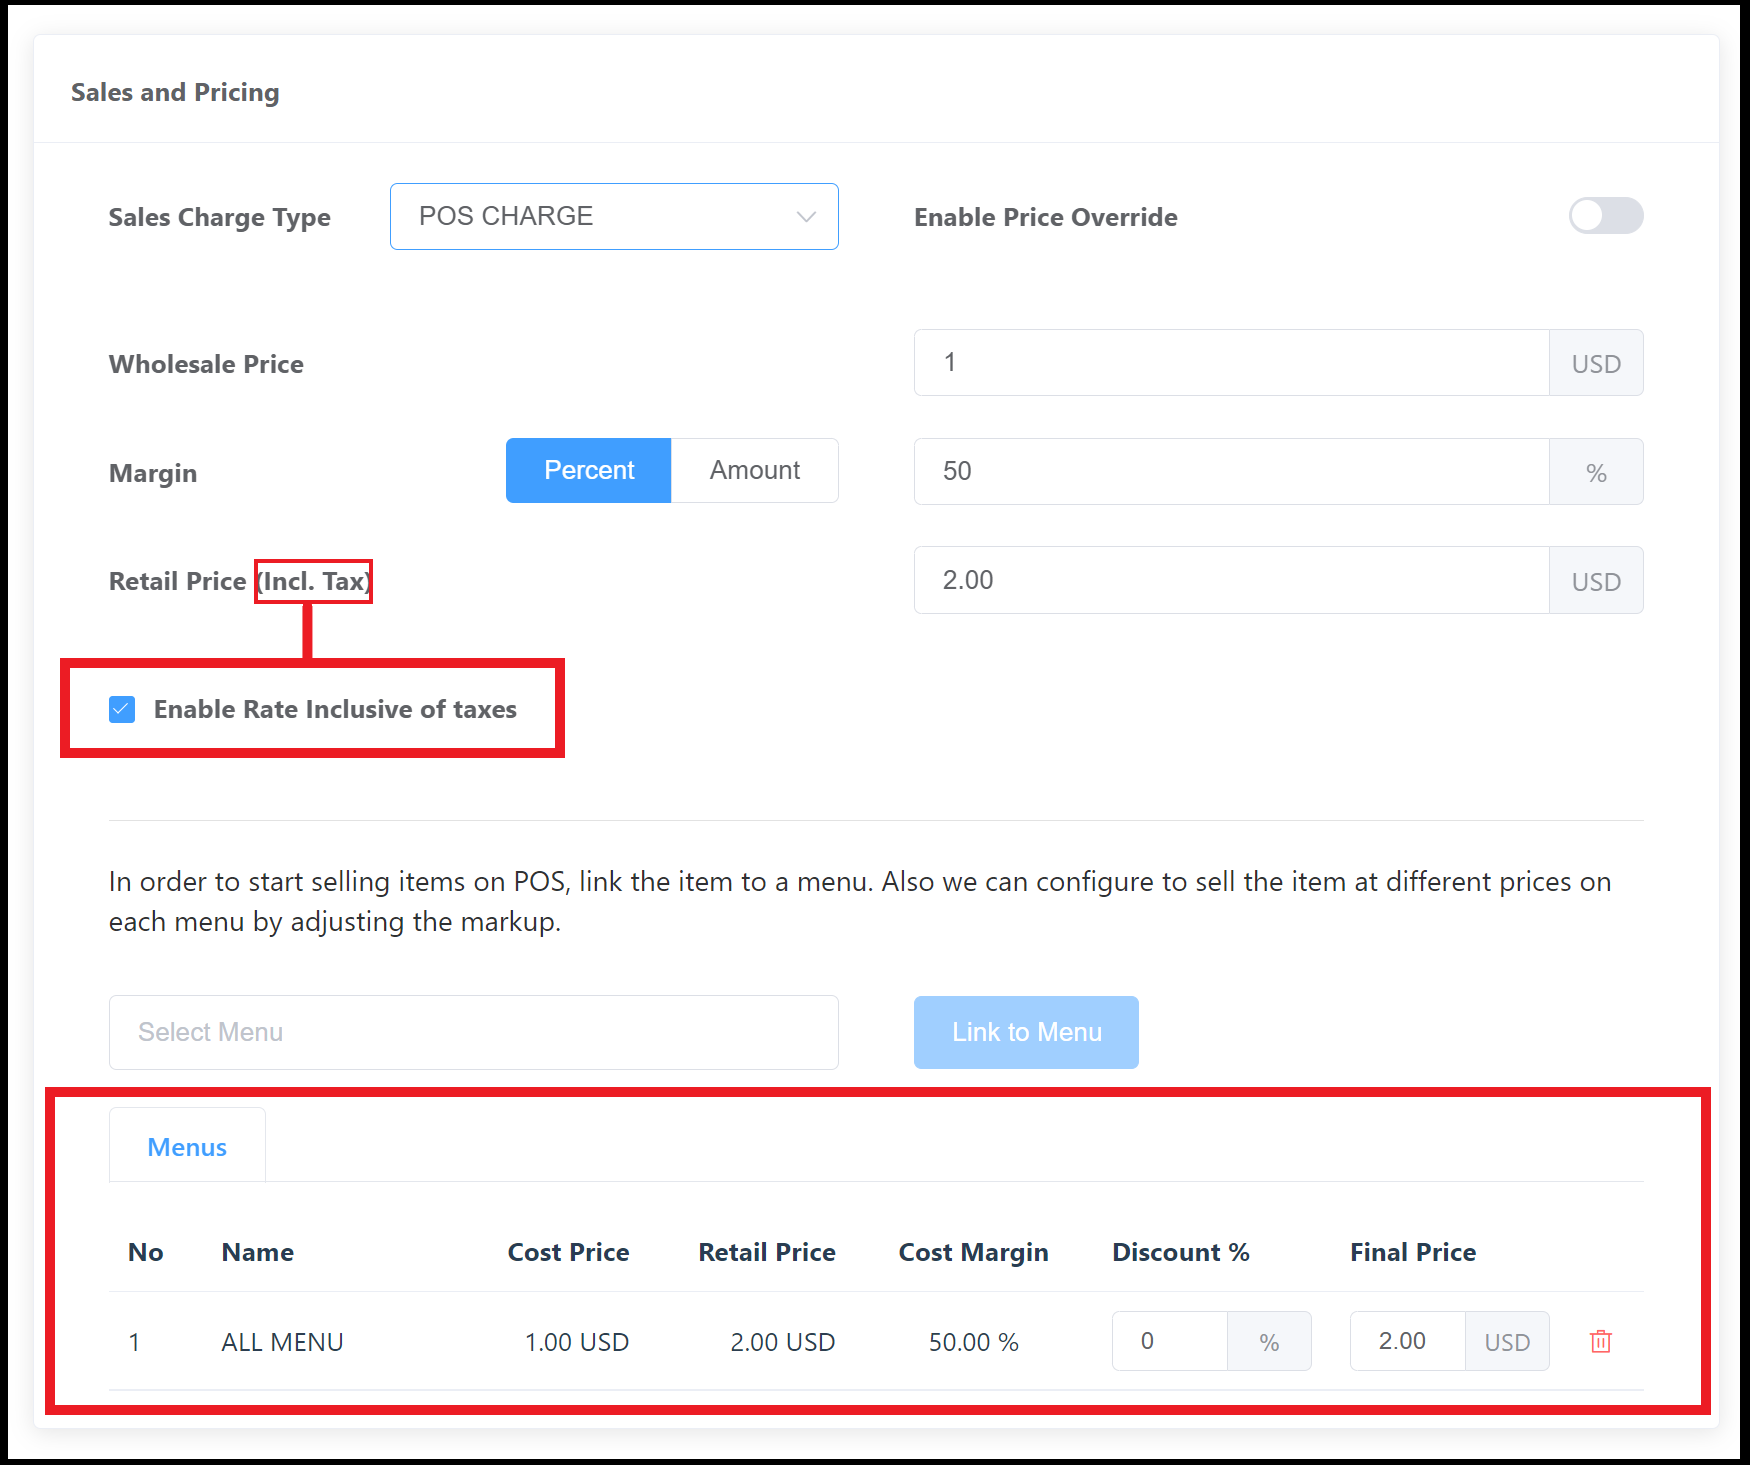 Sales and Pricing Section, Filled |
In the next section, Enable for selling, enable item for sales at POS is selected by default. | 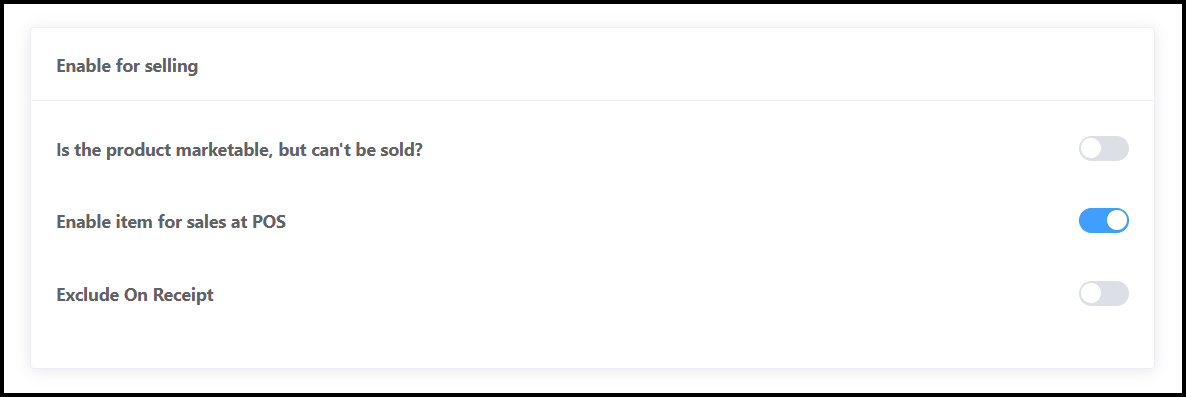 Enable For Selling Section |
Scroll back up to the top of the Add New Product panel and select Save to add the product. |  Select Save to Add Product |
The panel closes and a success message briefly displays. | 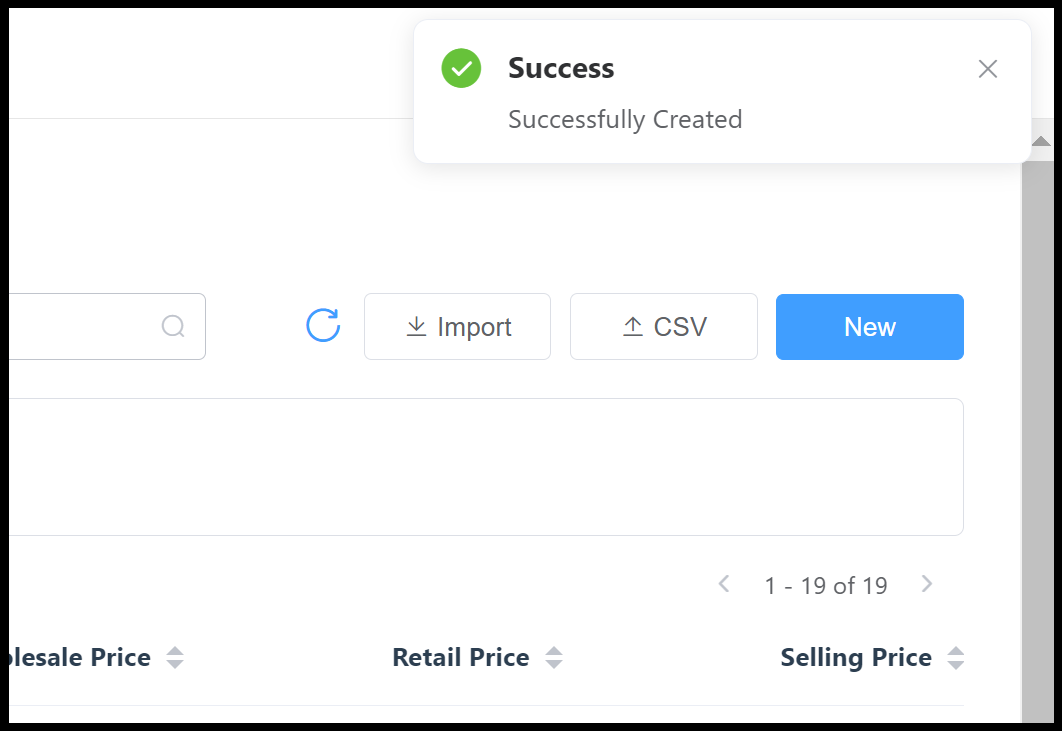 Product Created Success Message |
Variant Product
In this example, six and twelve packs of Glacier Spring Water are being created as a Variant product. The water arrives in a case of shrink-wrapped 24 packs, but those packs will be broken up and the water will be sold in six and 12 packs that are offered to guests at a discount compared to buying individual bottles. The Variant product to be created would be named “Glacier Water Multipacks”, its first Variant would be a six pack, and its second variant would be a 12 pack.
The water arrives from the wholesaler in 50 cases containing 144 bottles each, shrink wrapped into six 24 packs (6 x 24 = 144). Some math is required to regroup the products into the desired pack sizes. In this example, the cases are being broken up as follows:
25 cases to be broken up into 24 6 packs each, 600 6 packs total from these 25 cases
25 cases to be broken up into 12 12 packs each, 300 12 packs total from these 25 cases
So the initial quantity of Glacier Water Multipacks is 900 packs total: 600 six packs and 300 12 packs. Make a note of these calculations, they are needed for input below.
Select Product with Variant. An Attributes section populates. This is where the different variations, or “Variants”, of the product are added. In this example, a Pack of 6 and Pack of 12 Variant will be added. | 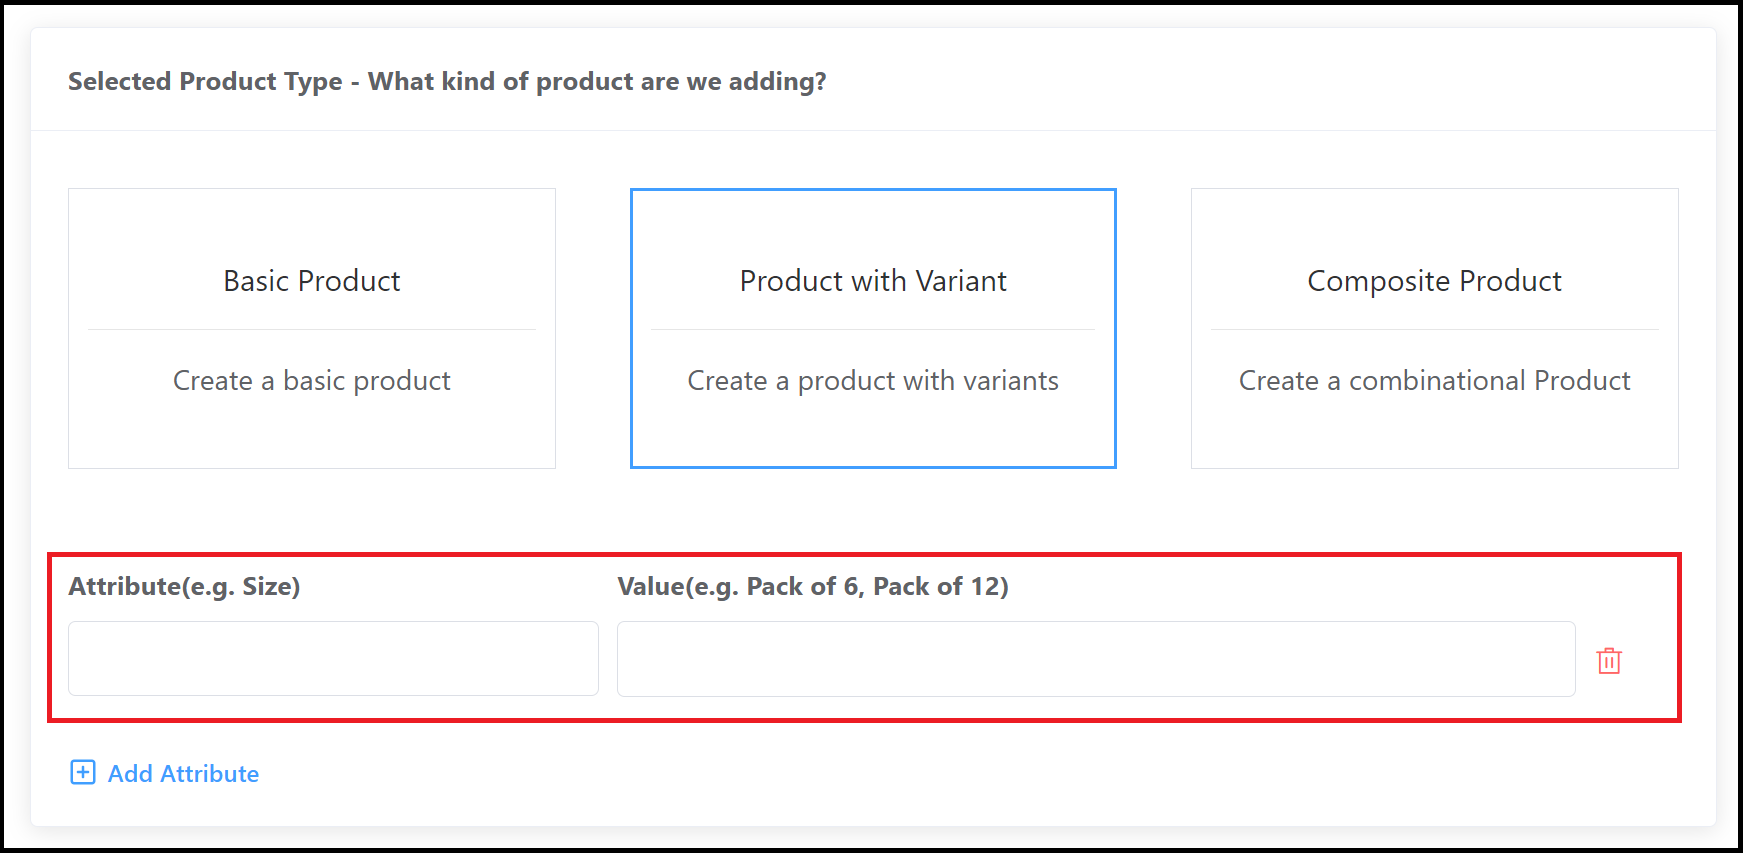 Product with Variant Selected - Attributes Field |
Enter Pack Size for the first Variant; the system saves it as a colored tag in the Value field. In this example Pack of 6 has been entered. An item detail section populates. Enter the Cost Price (price paid to vendor/supplier) and Retail Price; the system calculates the Margin. Select Default if this is to be the default selection for this product (Glacier Water Multipacks). | 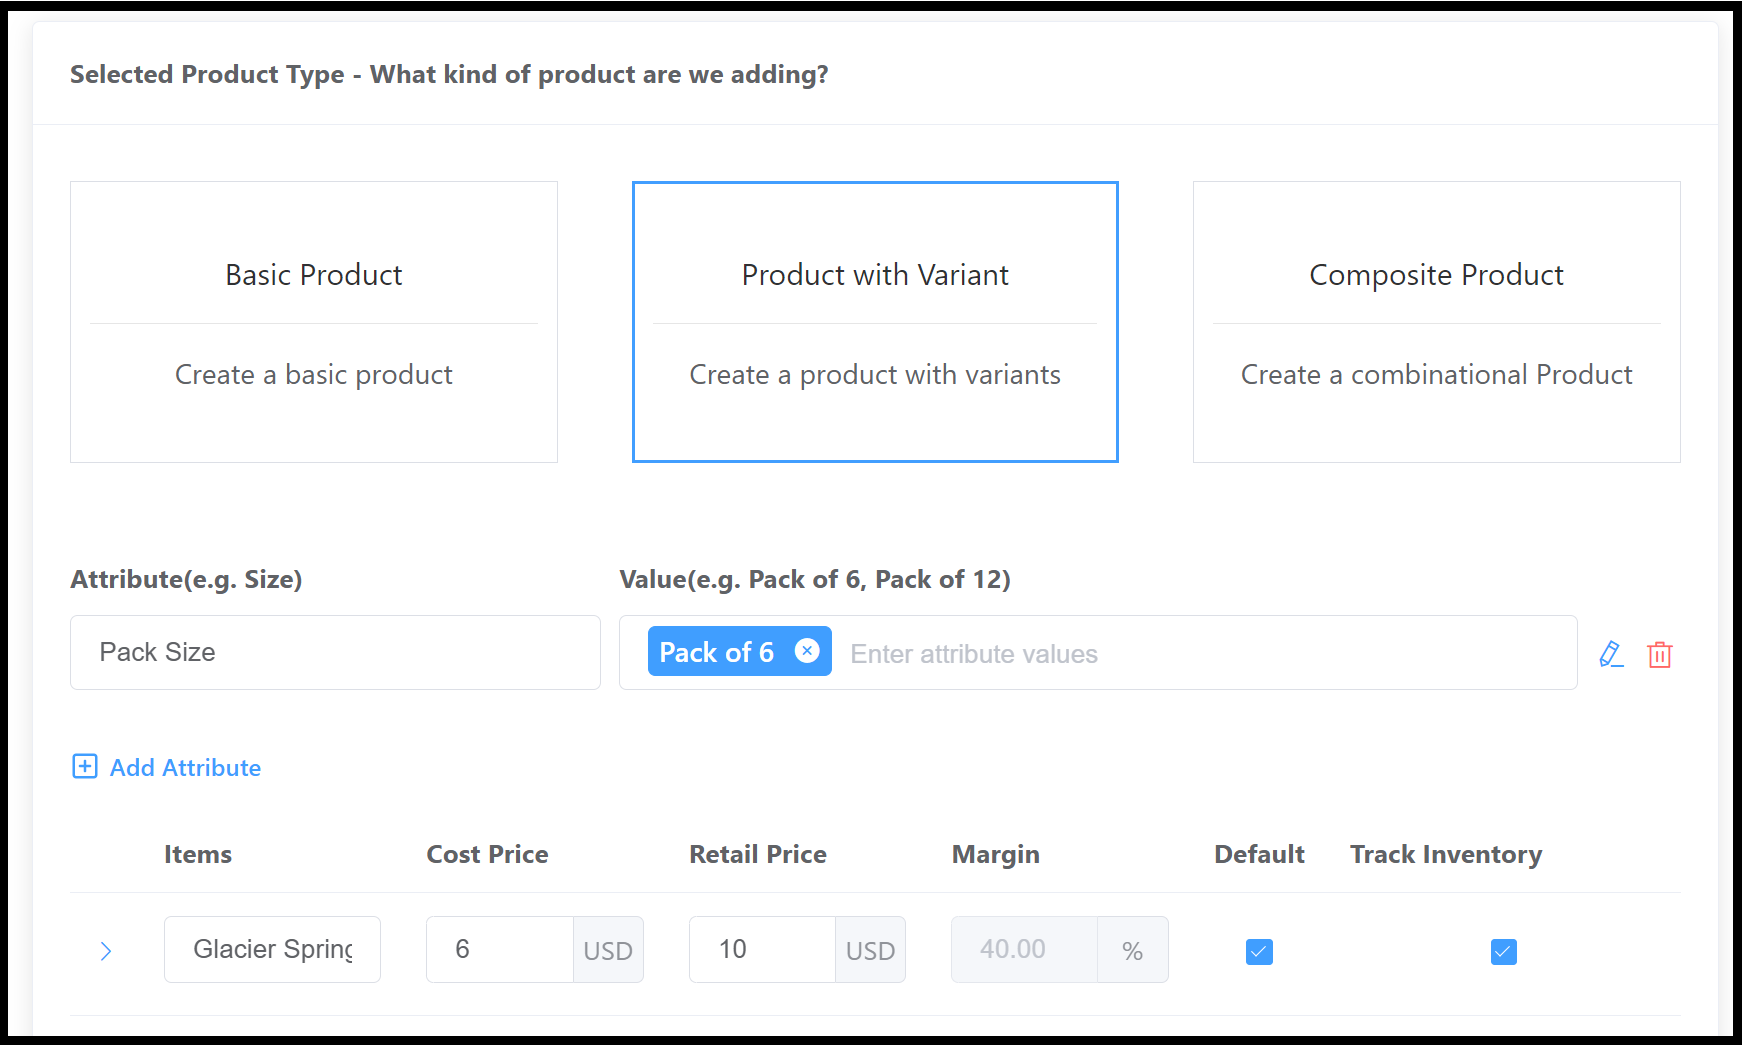 Product with Variant - Pack of 6 Attribute Added 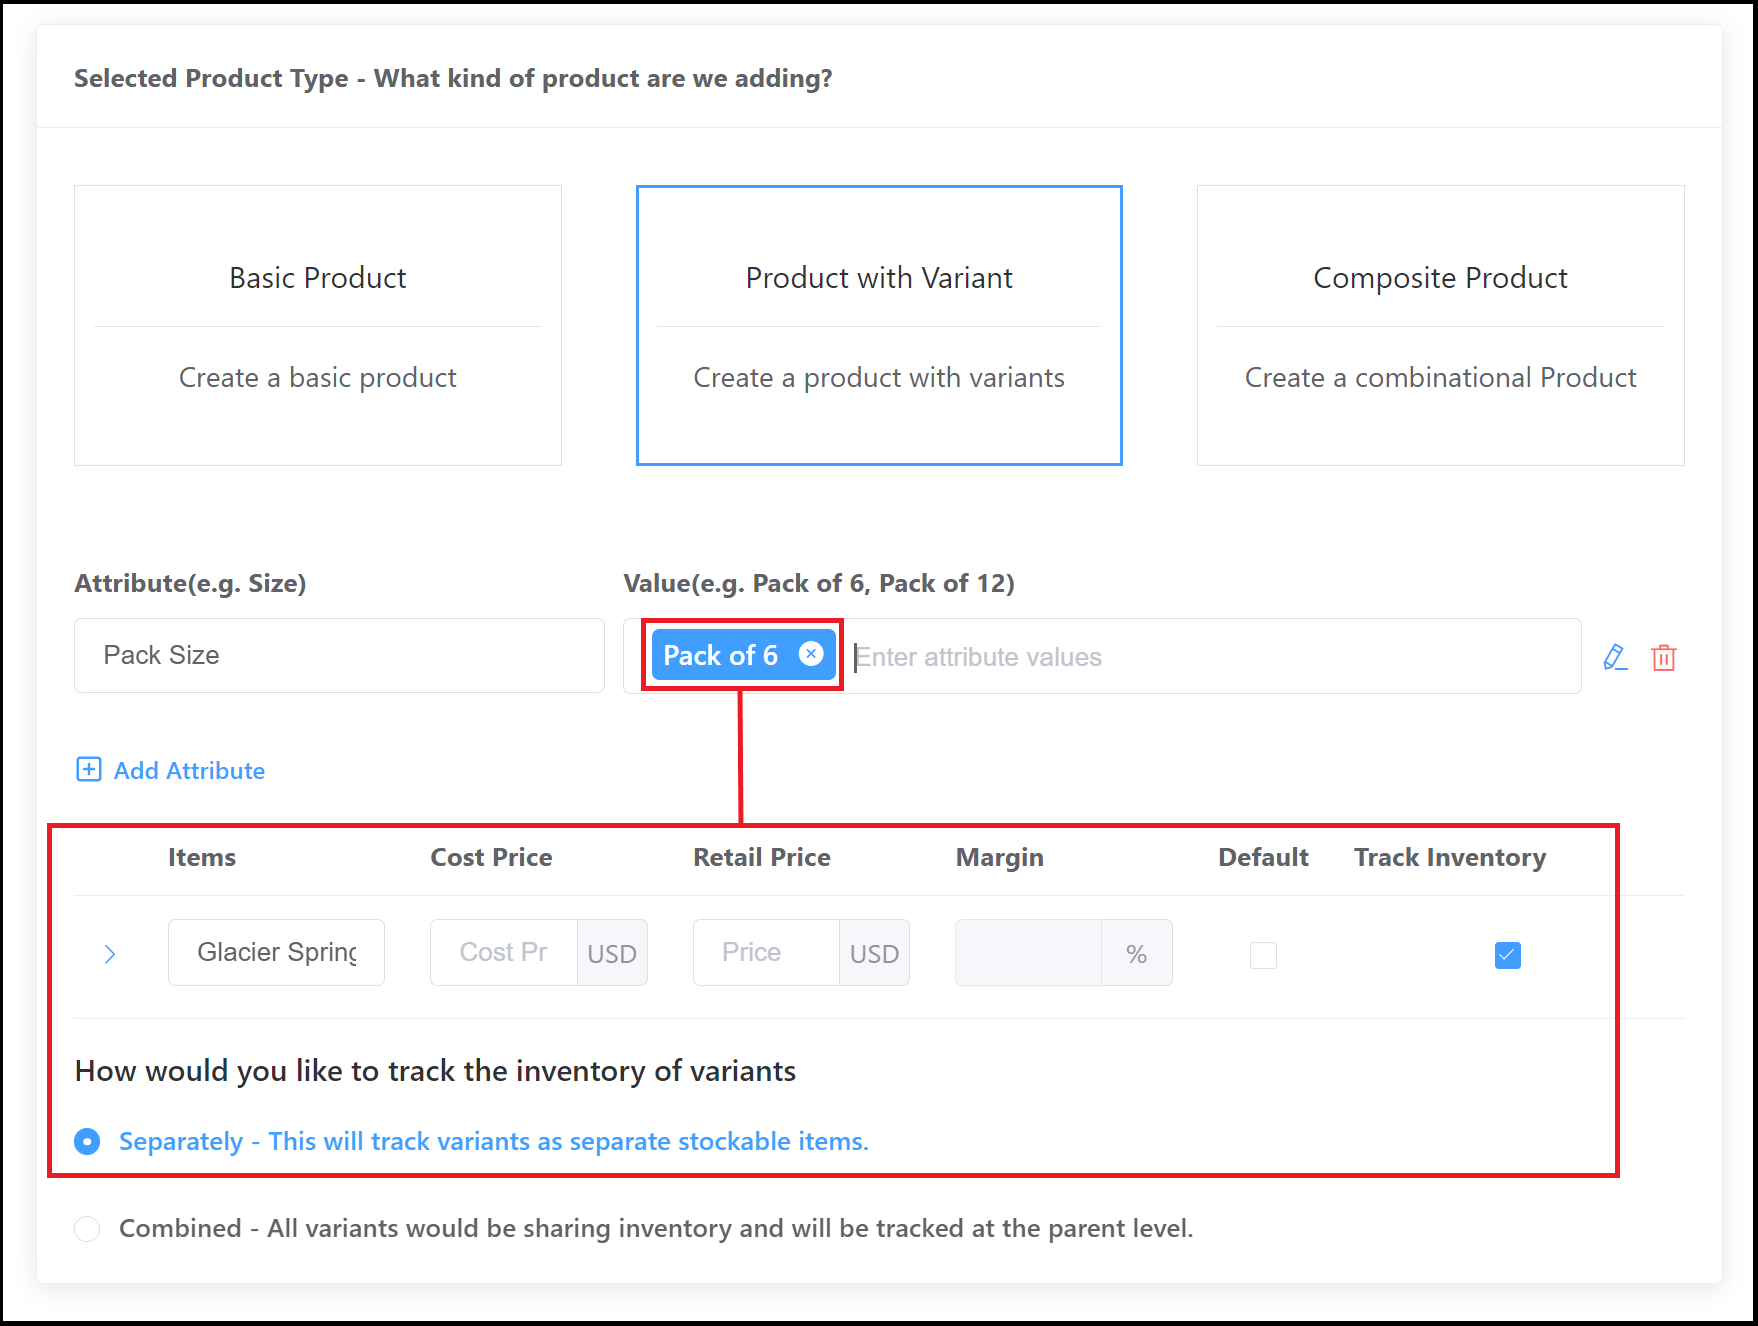 Item Detail Section |
Select the expand arrow at the far left of the product line item to expand product details. Enter product details as follows: Initial Quantity - enter the initial quantity of this Variant; in this example the initial quantity is 24 six packs Product Unit type - select “QTY” for standalone, self contained items like bottles of water or a t-shirt, “Oz”, “mL” or similar for items like liquor added to bar drinks by the shot from a larger bottle; in this example “QTY” is the correct selection Reorder Quantity - enter the number of six packs on hand at which more should be ordered (e.g., if more should be ordered when the property is down to four 6 packs, enter “4” here) Min shelf qty - enter the minimum number of six packs to be kept on the shelf for sale; if stock on hand dips below this number, 6 packs should not be offered for sale at all Stock Multiplier - enter the number of individual items included in this variant; in this case it’s 6, because this Variant is the six pack UPC - enter the custom UPC code for this Variant; in the example the code entered is the standard Glacier Water UPC with “X6” added to the end Size - enter the number of items in the product; in this example it’s “6” individual water bottles Optionally add Product Tags for future lookup. Note that only one of the variants can be the Default selection. Once a Default selection is made that product must be de-selected as the default before a different variant can be selected in its place. Toggle Allowed for Purchase ON, as shown. An example of the filled Sales and Pricing section for the 6 pack is shown at right. | 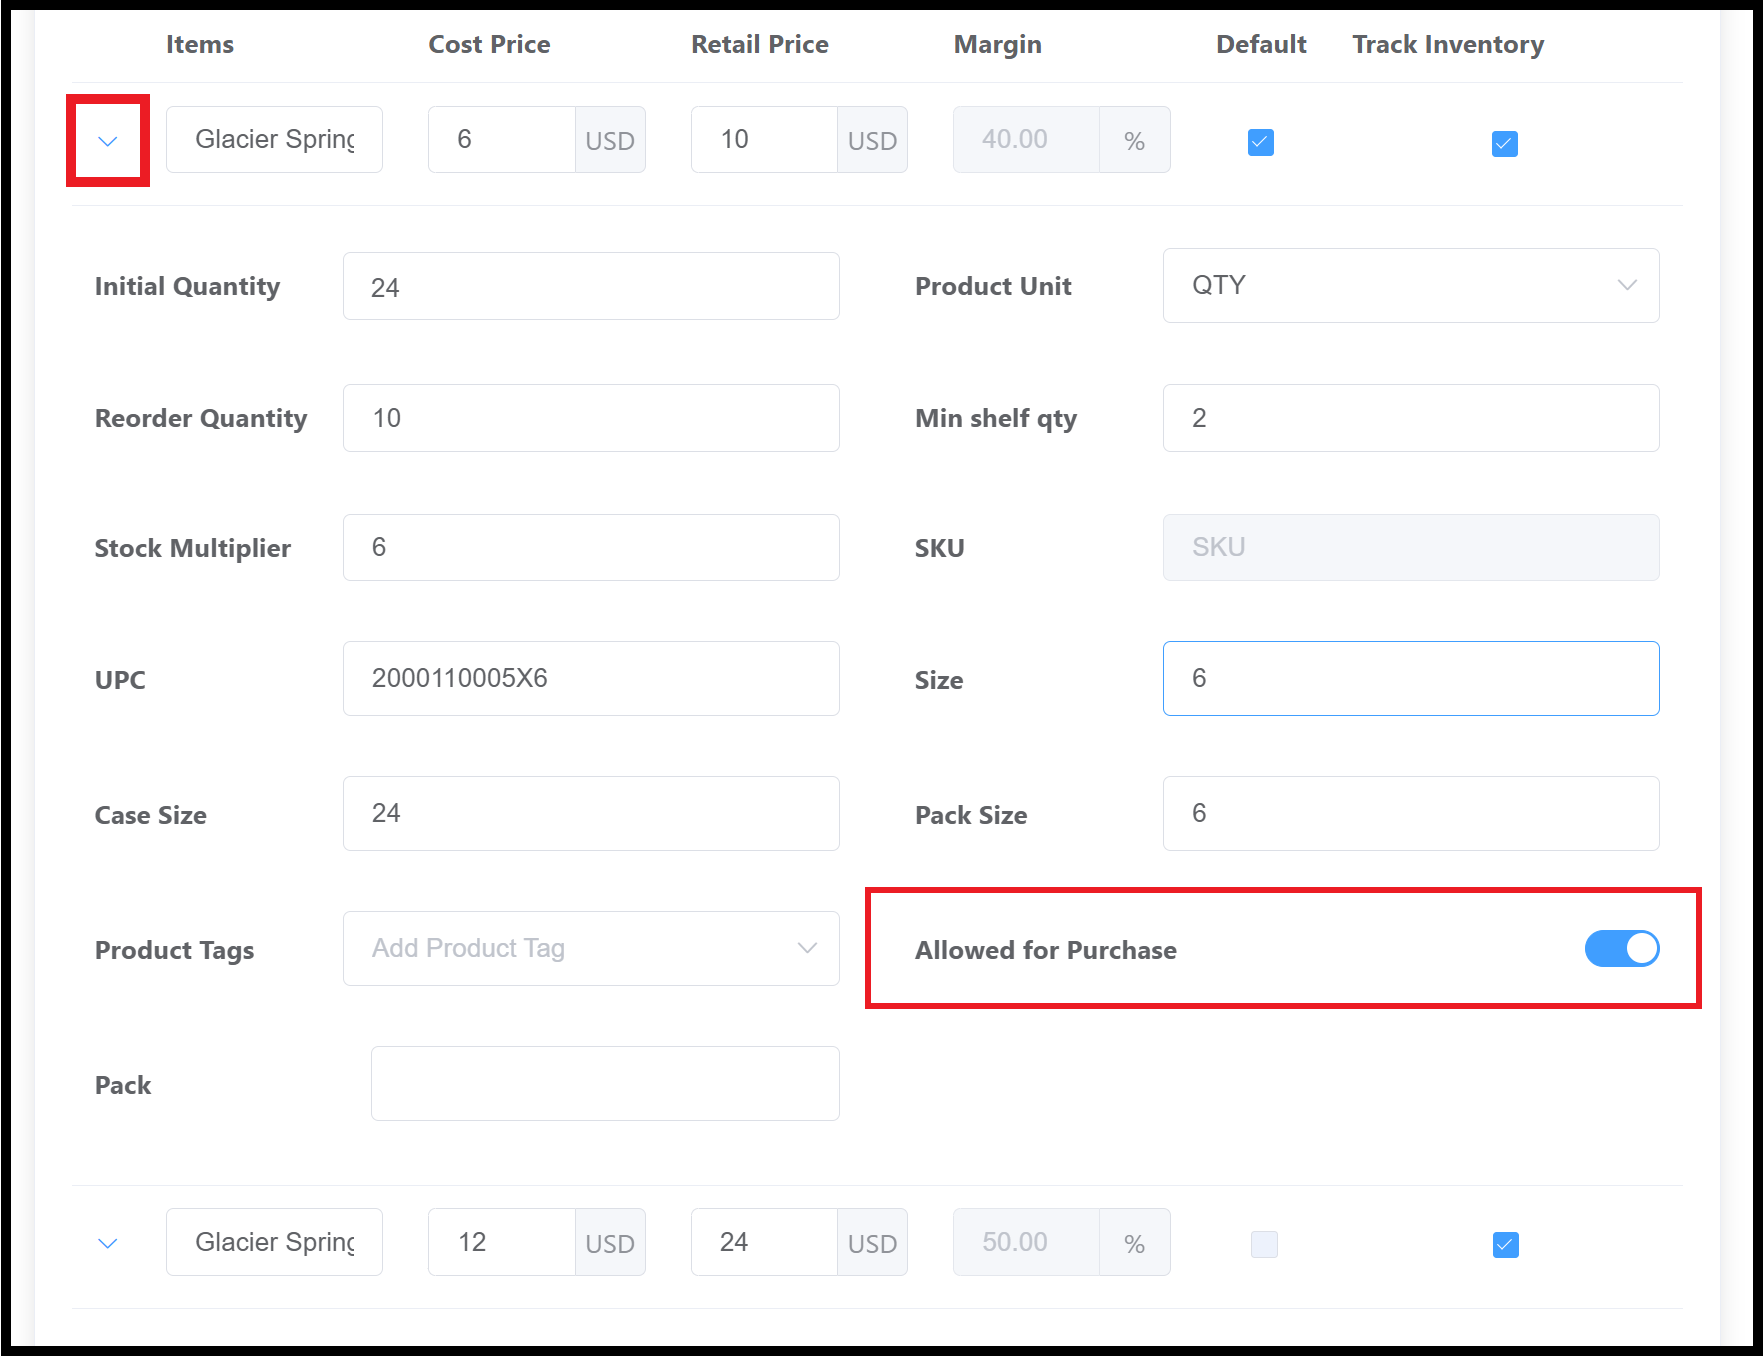 6 Pack Product Details Expanded |
Screenshots at right show the addition of the 12 pack Variant. | 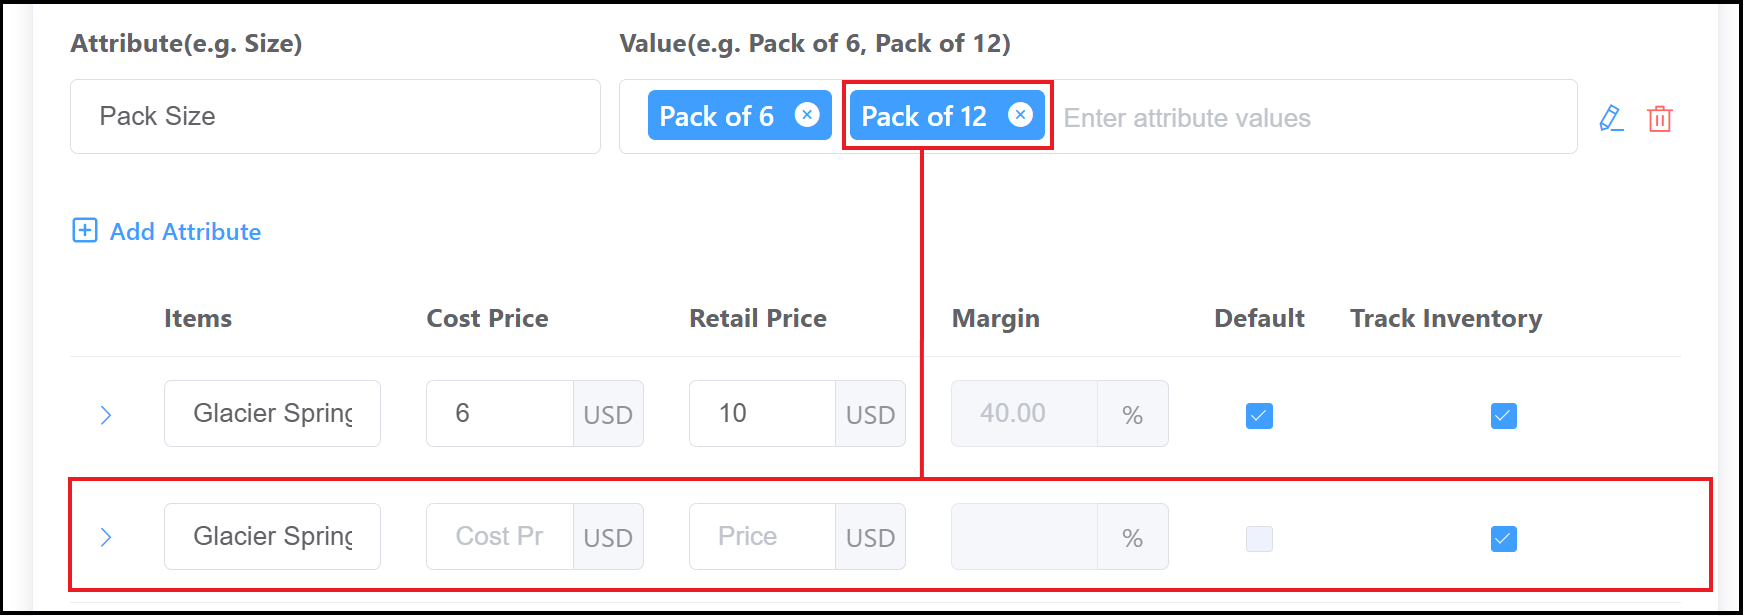 Pack of 12 Variant Entered 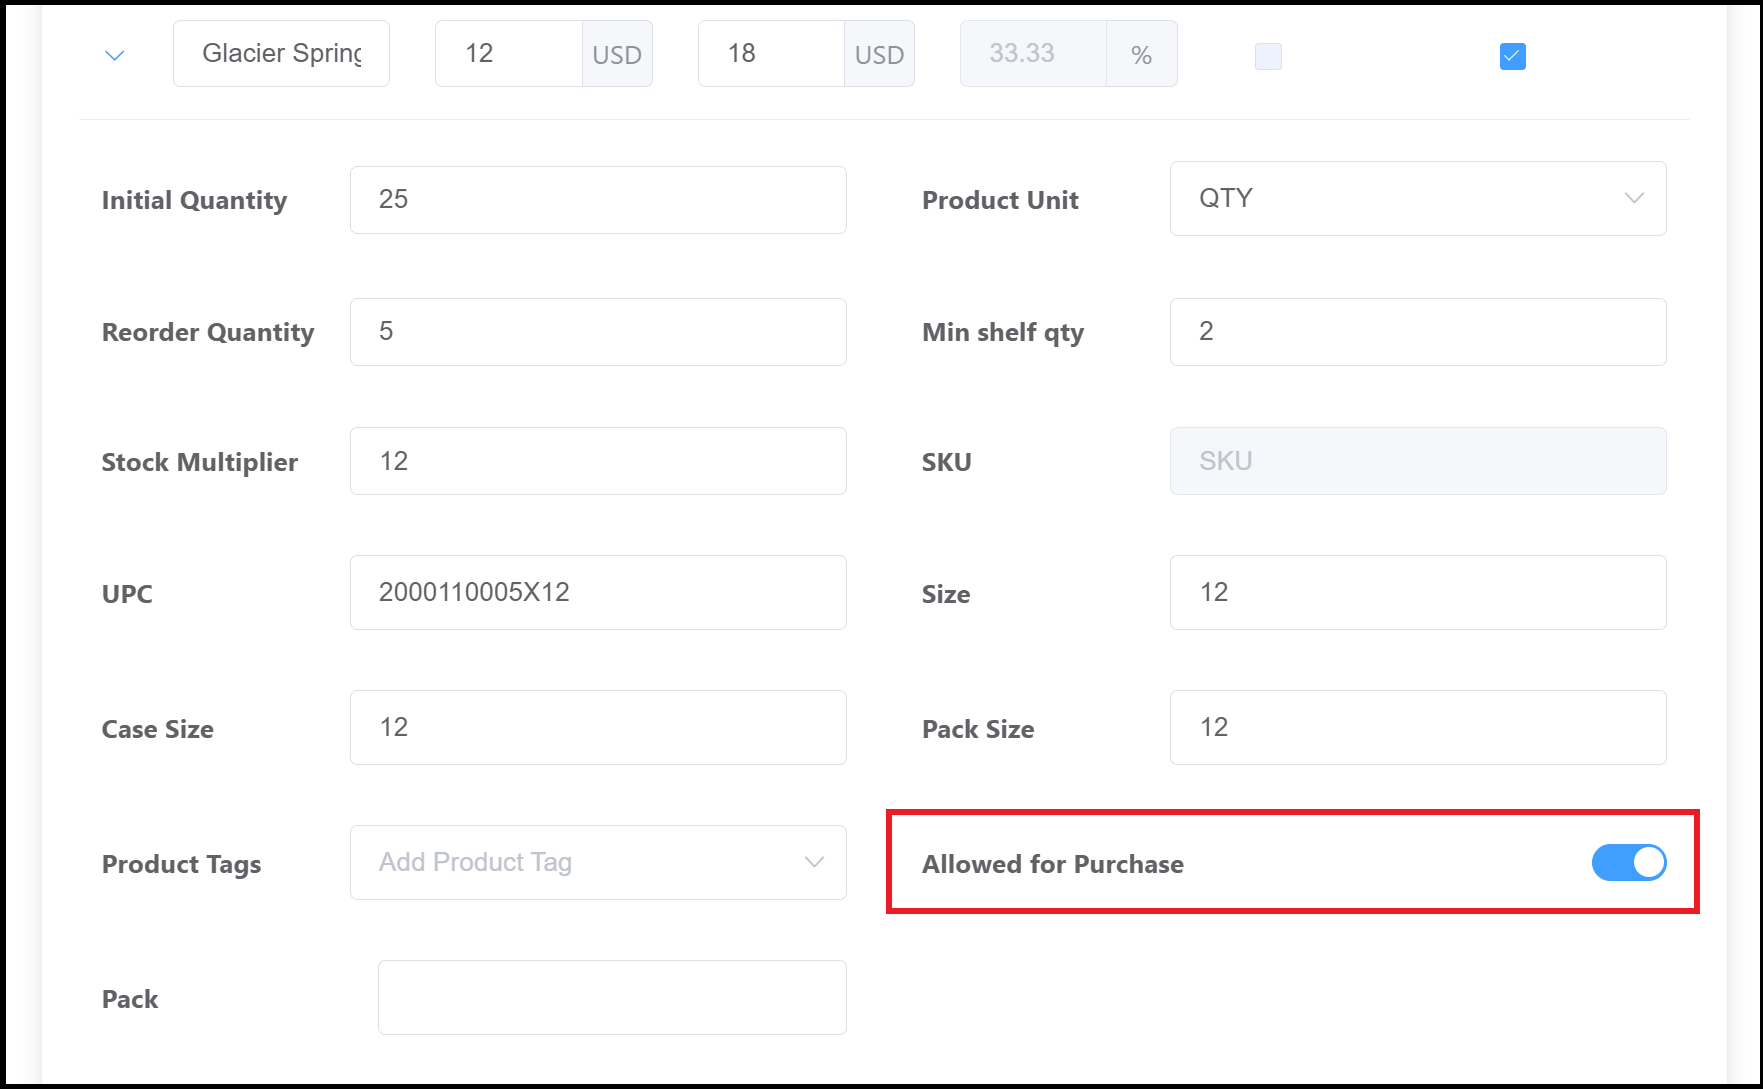 12 Pack Product Details Expanded |
Scroll down to the Supplier Details section. Select a Preferred Vendor. As shown, vendor details populate in a list at the bottom of the section. Enter the Vendor SKU and select the vendor Unit type (e.g. “QTY” for standalone, self contained items like bottles of water or a t-shirt, OZ, mL or similar for items like liquor added to bar drinks by the shot from a larger bottle). Optionally, select Add to add another vendor. | 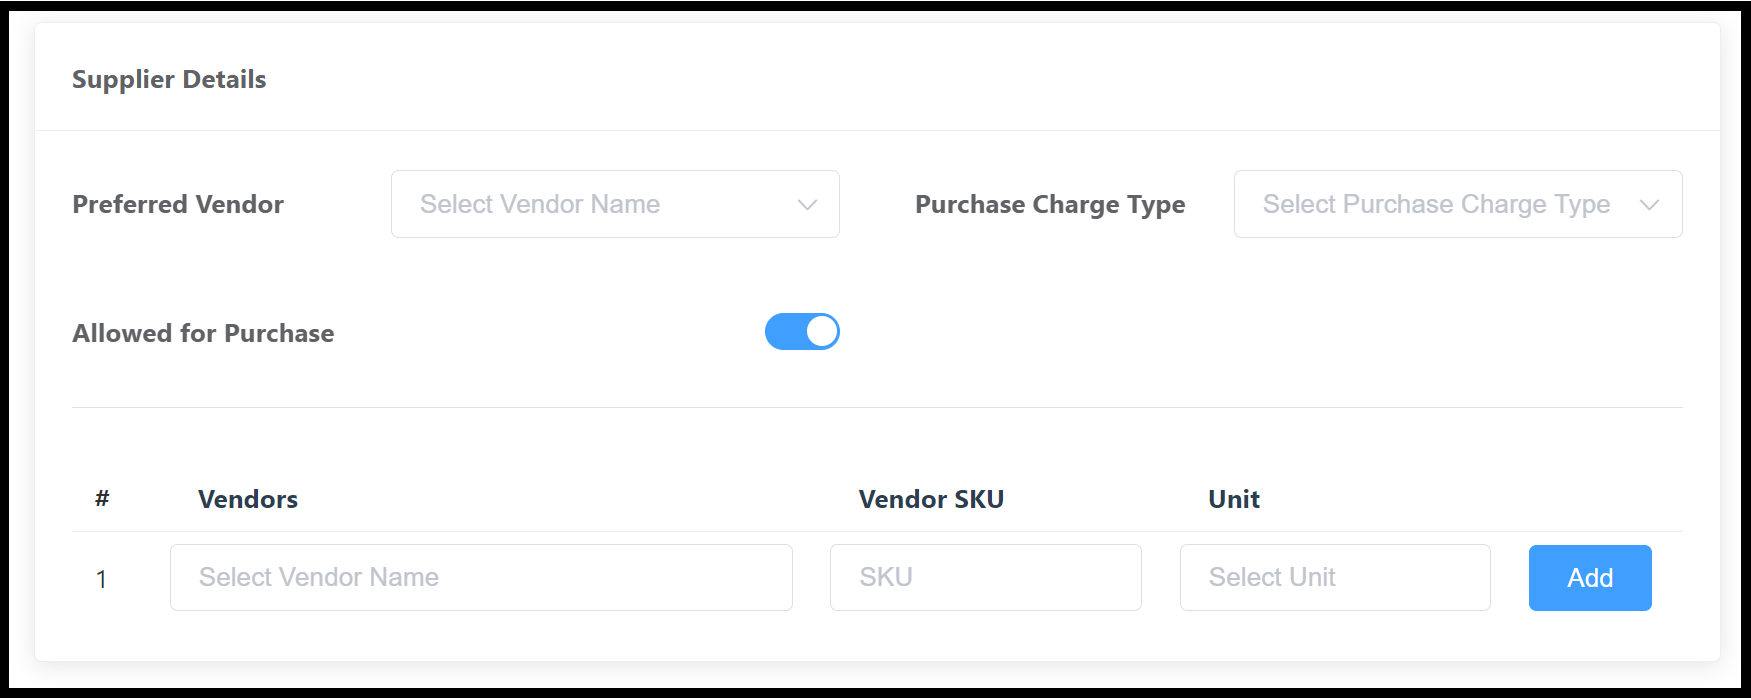 Supplier Details Section 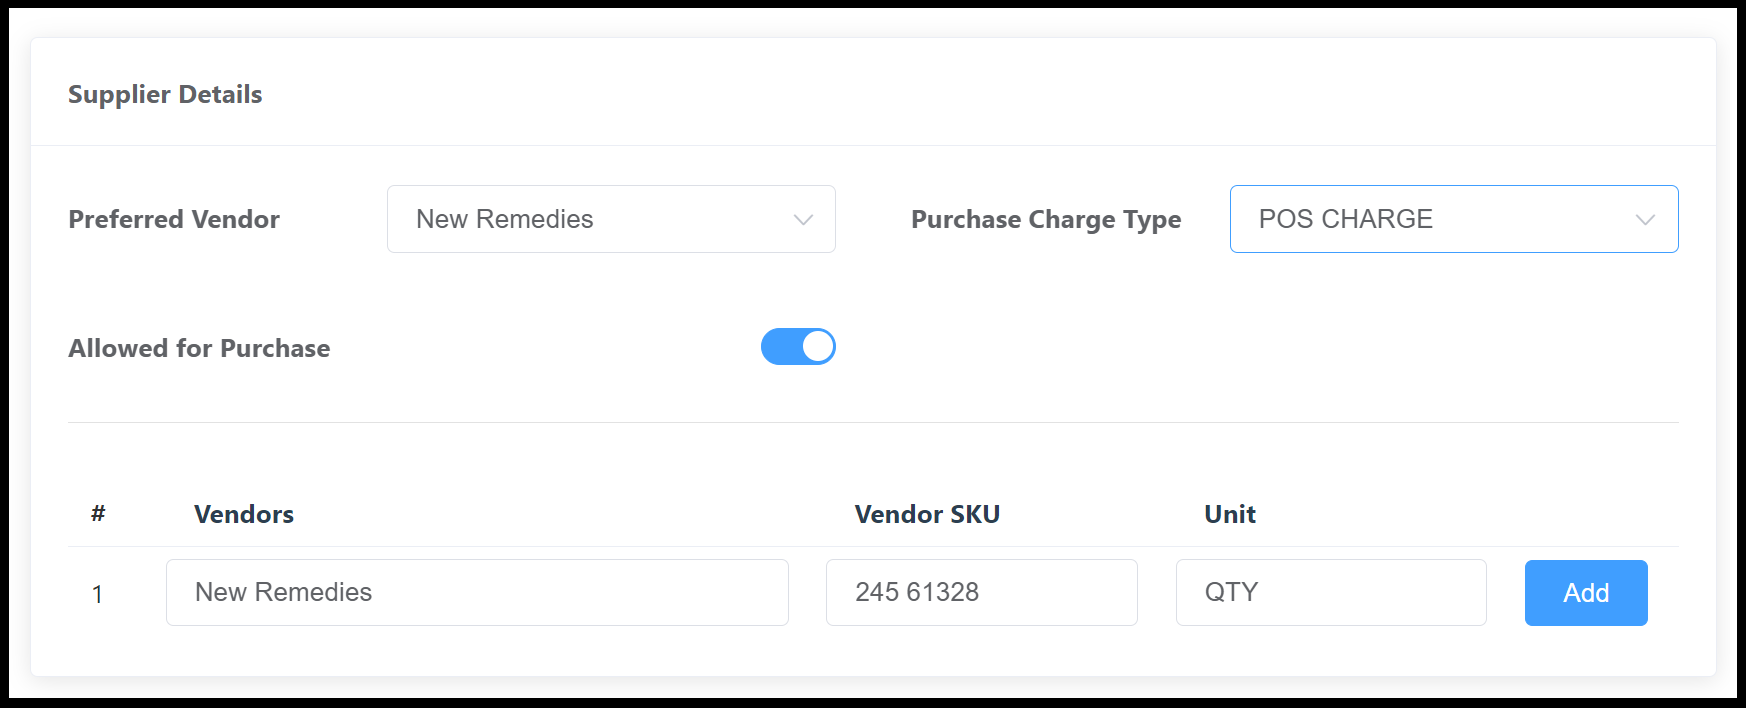 Supplier Details Section - Vendor Added 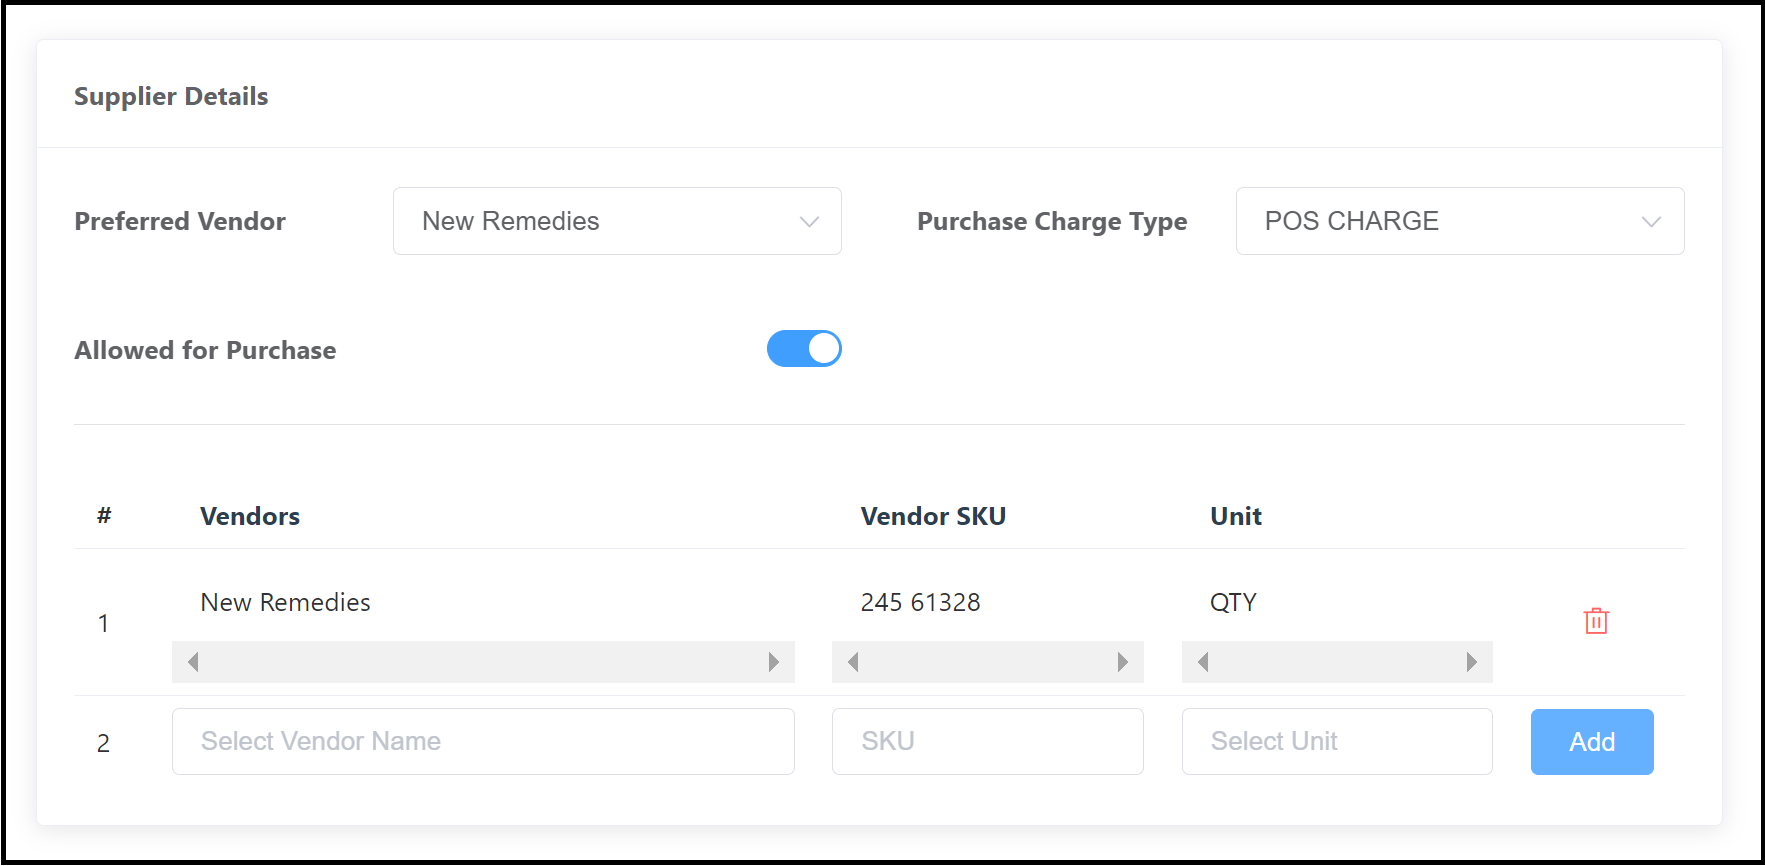 Supplier Details Section - Vendor List |
Scroll down to the Sales and Pricing section. Select the Sales Charge Type and Wholesale Price. To have the system automatically calculate the Retail Price based on markup, select Percent or Amount for Margin (aka “markup”), then enter the applicable number. For example:
To have the system automatically calculate the Margin, enter the Retail Price. Note that when Enable Rate Inclusive of taxes is selected, the system adjusts the calculation so that the retail price includes tax, and the Retail Price field is updated to show this. The product must be linked to a menu before it can be sold. Select a menu, then select Link to Menu. As shown, details of the selected menu populate at the bottom of the section. Repeat this step to add the product to additional menus. An example of the filled Sales and Pricing section for the 12 pack is shown at right. | 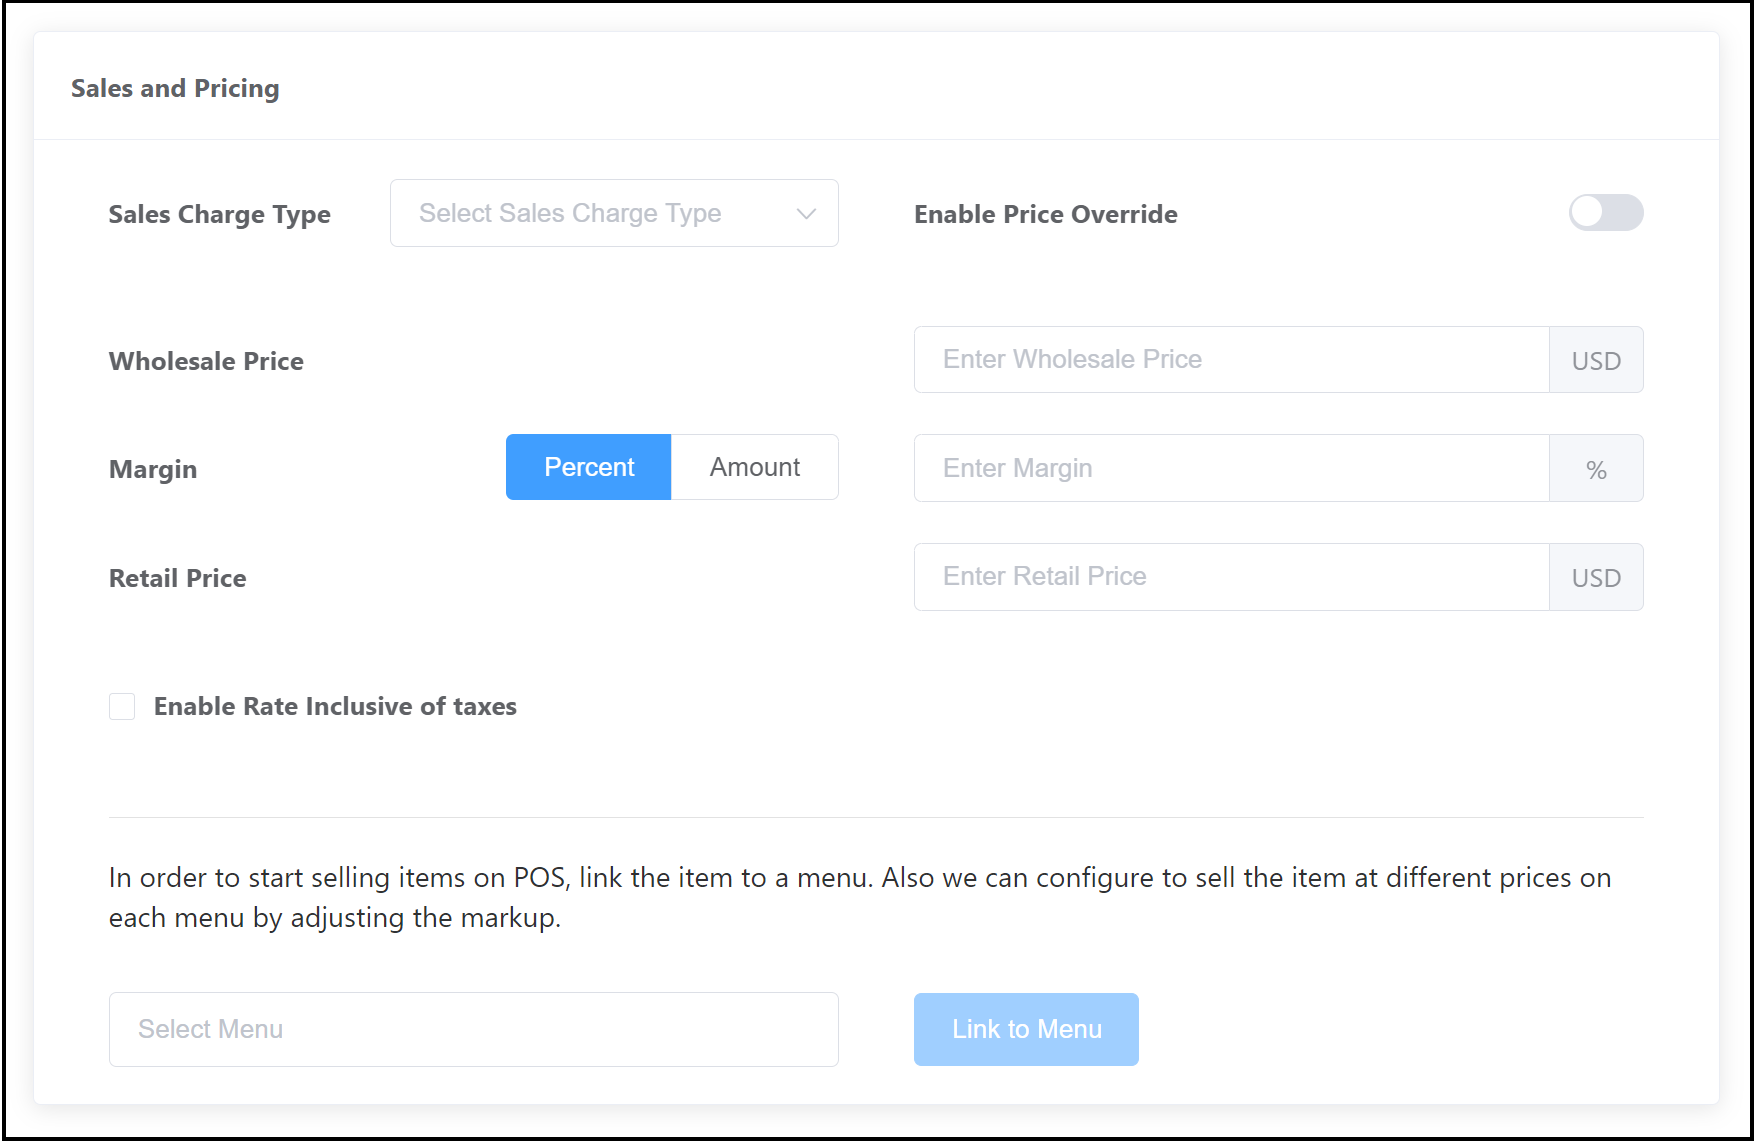 Sales and Pricing Section for Variant - Blank 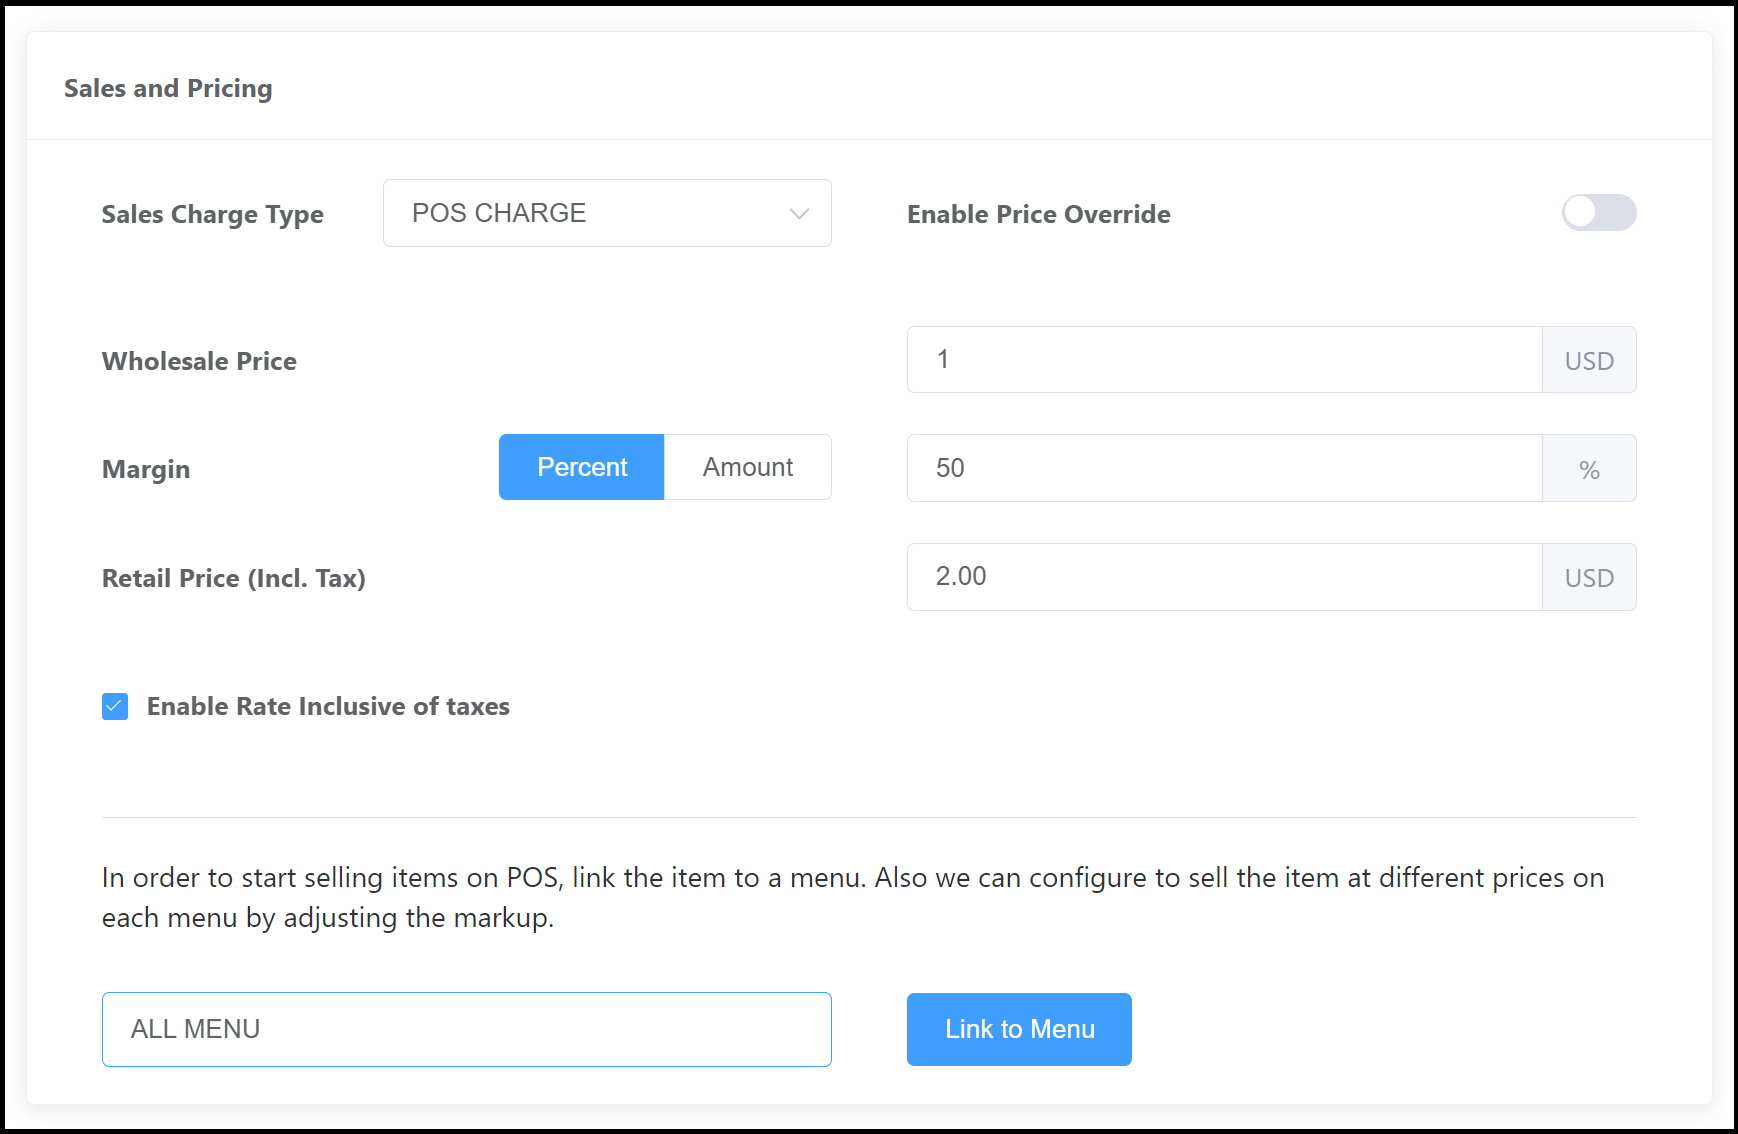 Sales and Pricing Section for Variant - Filled |
A Confirm Stock Details Popup popup activates, showing key details of the new variant products to be added. A Confirm Stock Details popup loads. Review and verify the stock on hand details shown. In this example, 600 6 packs and 300 12 packs are being added, for a total of Stock of 900 packs. Close the popup using the “X” icon at the upper left to return to product details and make changes. Select Confirm to create the products and close the popup. | 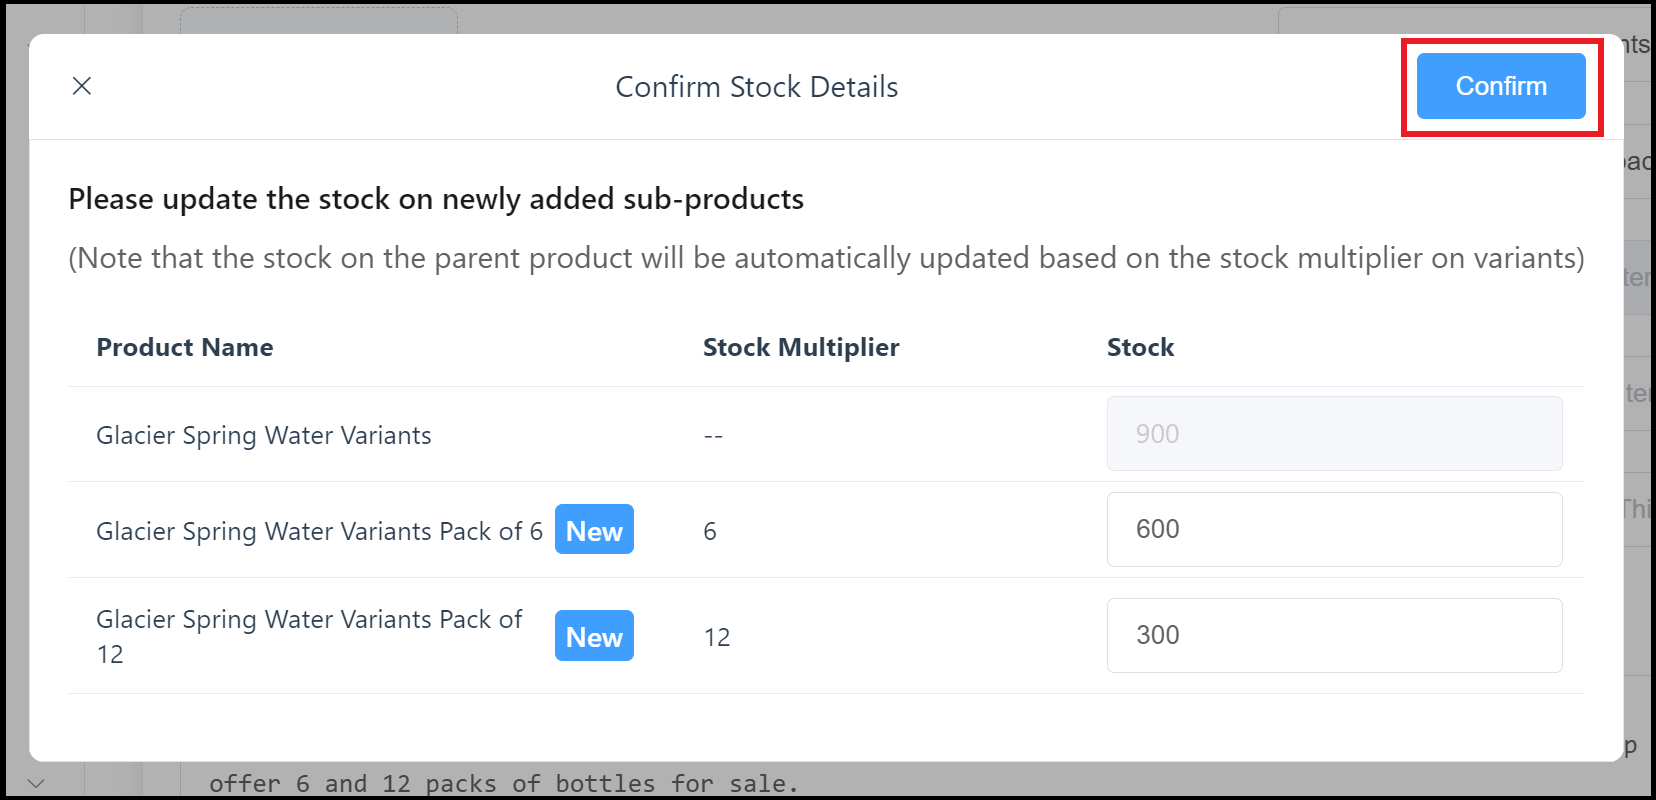 Confirm Stock Details Popup |
The panel closes and a success message briefly displays. |  Product Created Success Message |
