Create Event Proposal Meeting Room Only
📆 Revision Date:
What is a Proposal?
A Proposal, also referred to as a event, represents any group function hosted by the hotel—such as a meeting, wedding, or conference. Events are the core component used to book and manage meeting spaces, food and beverage services, and other key details that contribute to a successful guest experience. Each event is classified by type, linked to a booking, and managed throughout its entire lifecycle within the system—from initial proposal to final execution—providing a centralized workflow for sales, catering, and operations teams.
Navigate to Home > Event Management > Dashboard. Click the blue Create a Proposal button to start a new proposal (event). | 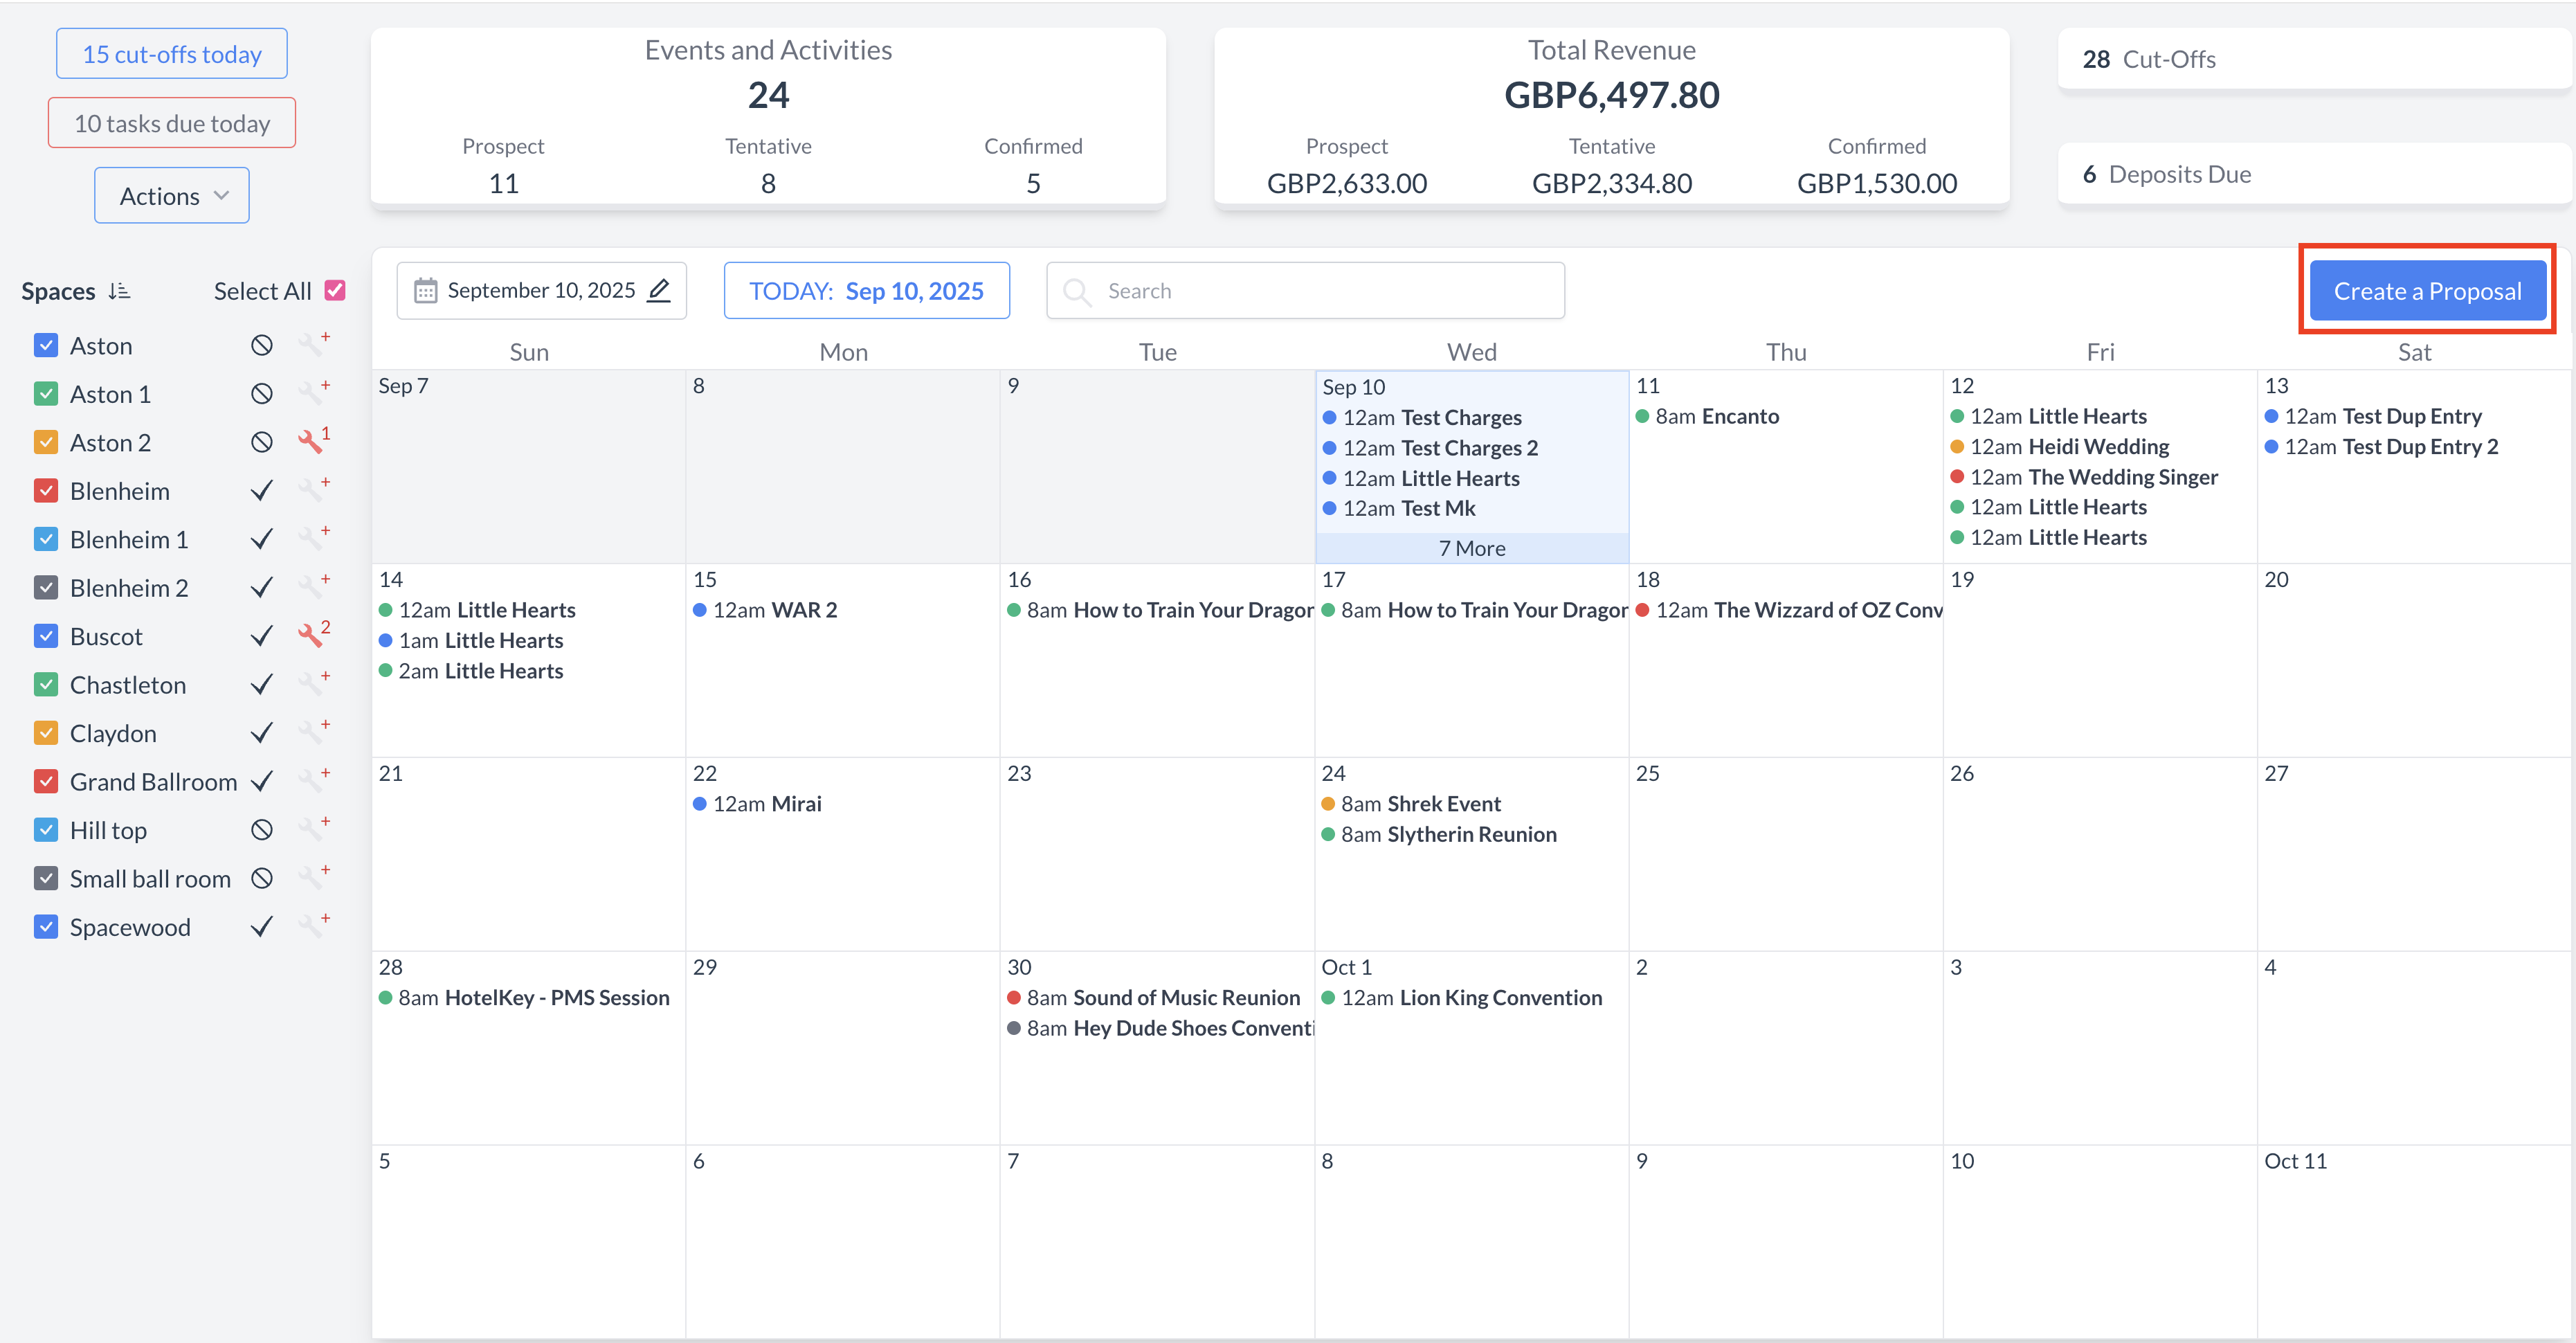 Create a Proposal Button |
Select Proposal Type and Status:
Once both fields are completed, click the blue "Next" button to continue. Selecting the correct proposal type and status ensures the appropriate template and configuration settings are automatically applied during the event creation and conversion process. | 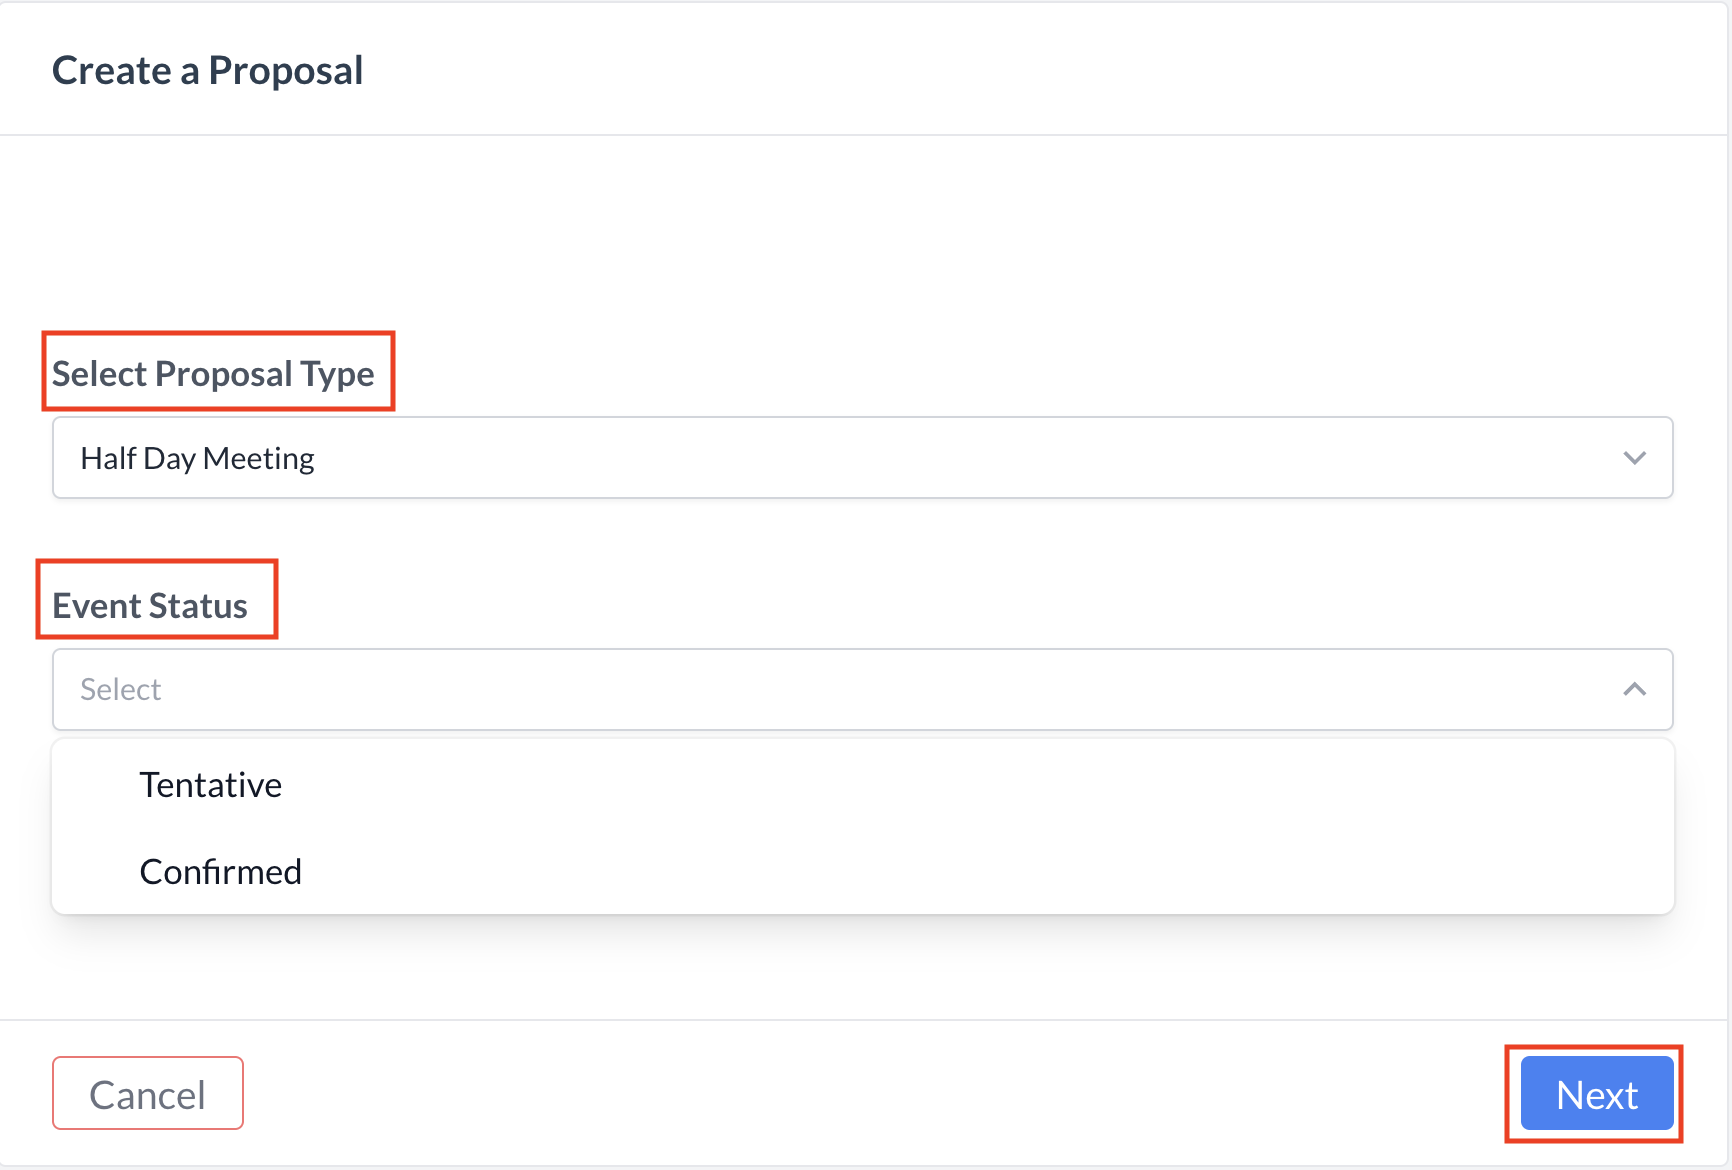 Create a Proposal Screen |
Step 1a: Basic Data - Enter Event Information Begin by completing the Event Information tab with the following details:
| 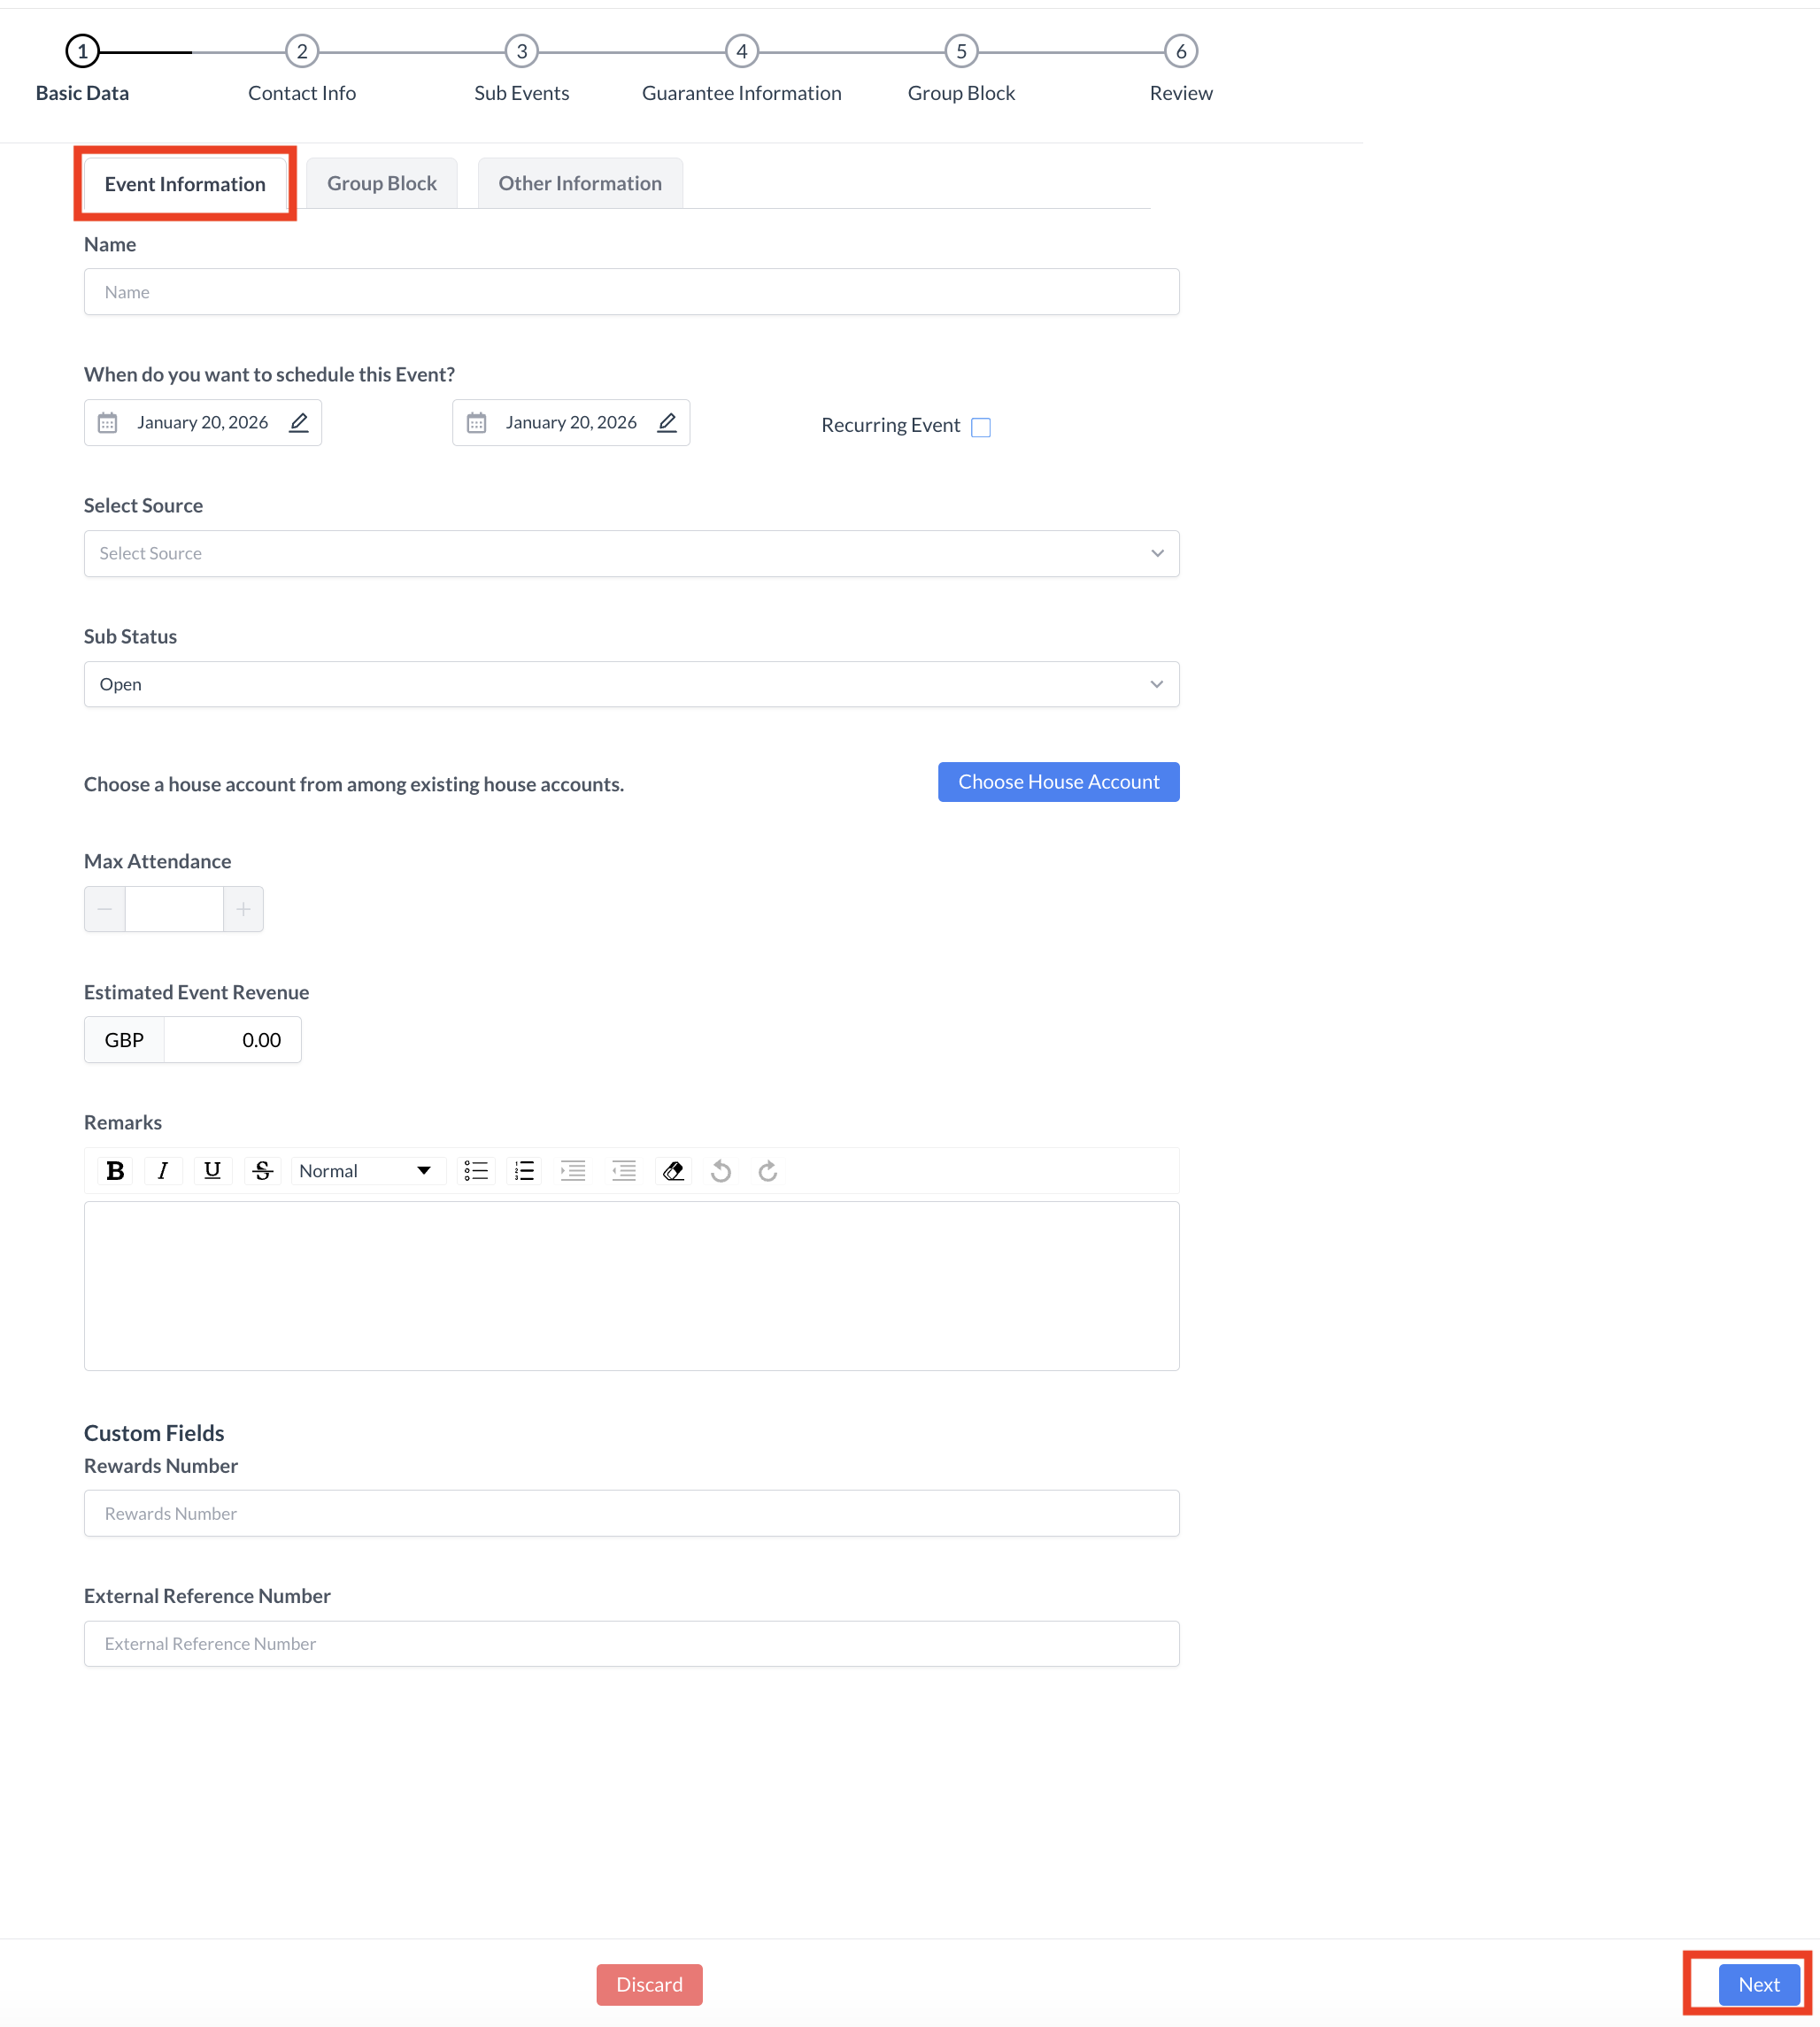 Basic Data_Event Information Screen |
Step 1b: Basic Data Complete Other Information On the Other Information tab, enter the following details to help categorize and assign responsibility for the event:
| 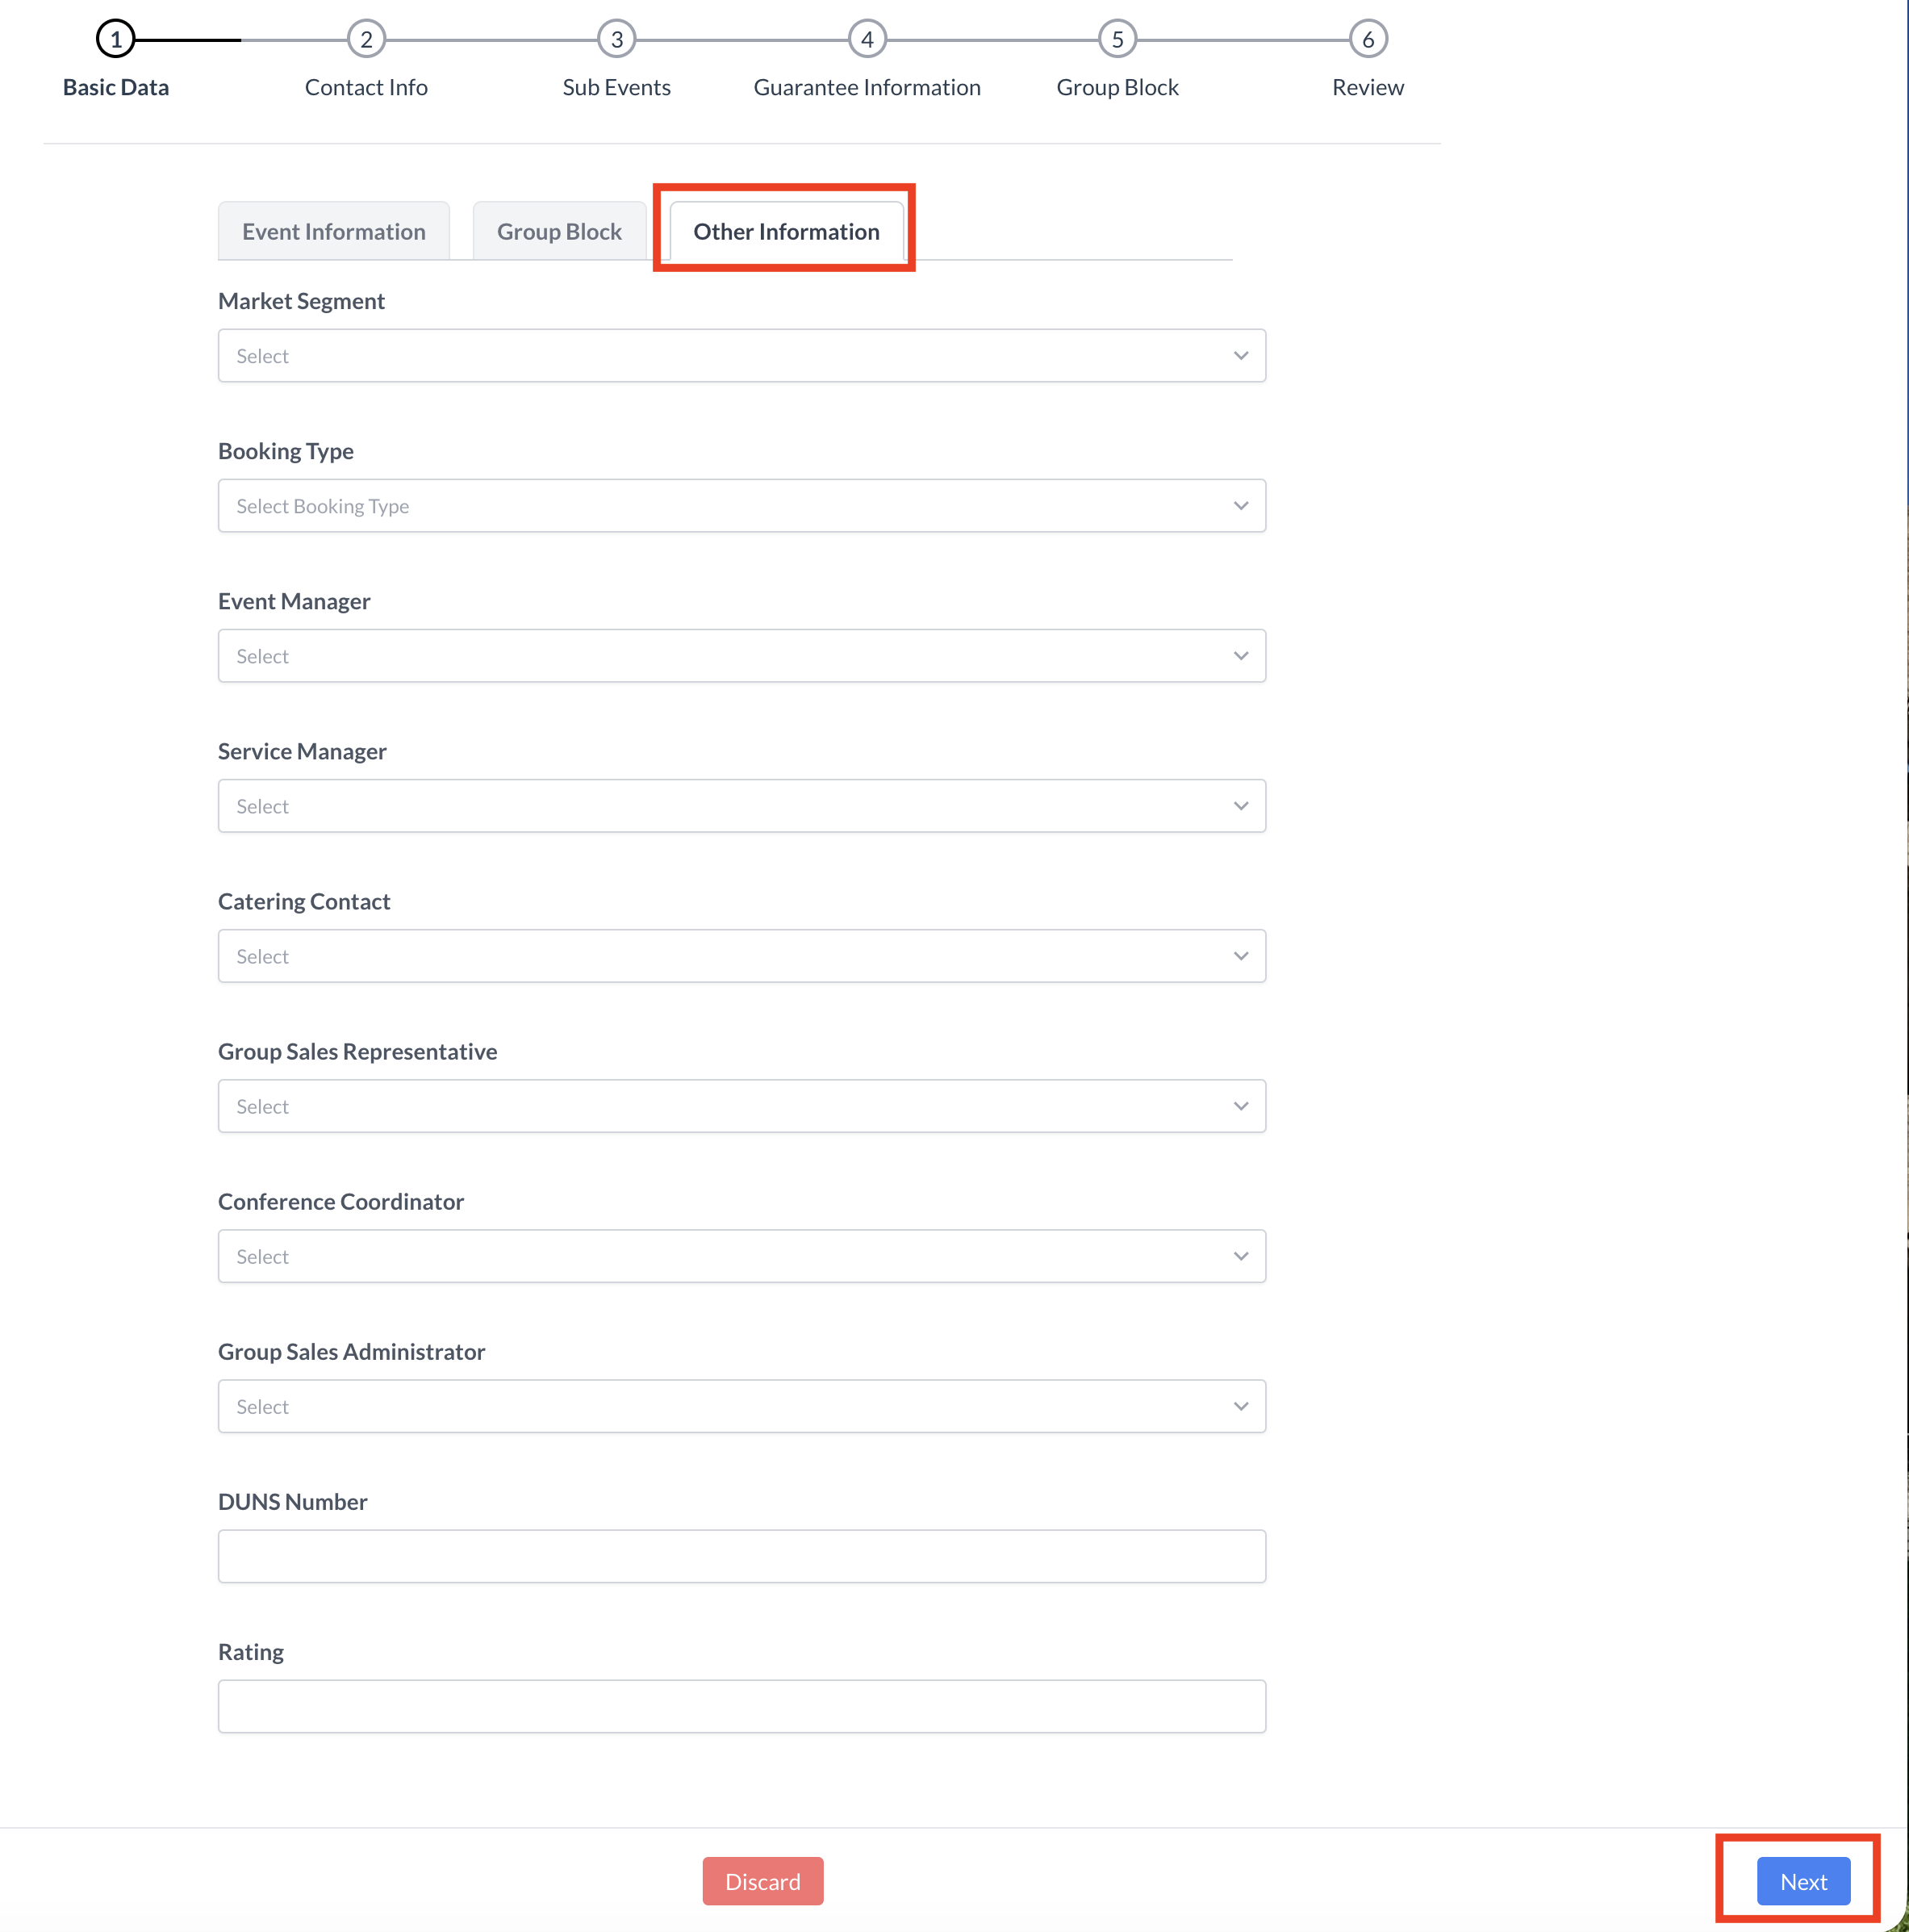 Basic Data - Other Information Screen |
Step 2a: Enter Contact Information On the Contact Info screen, enter the booker's details, including:
| 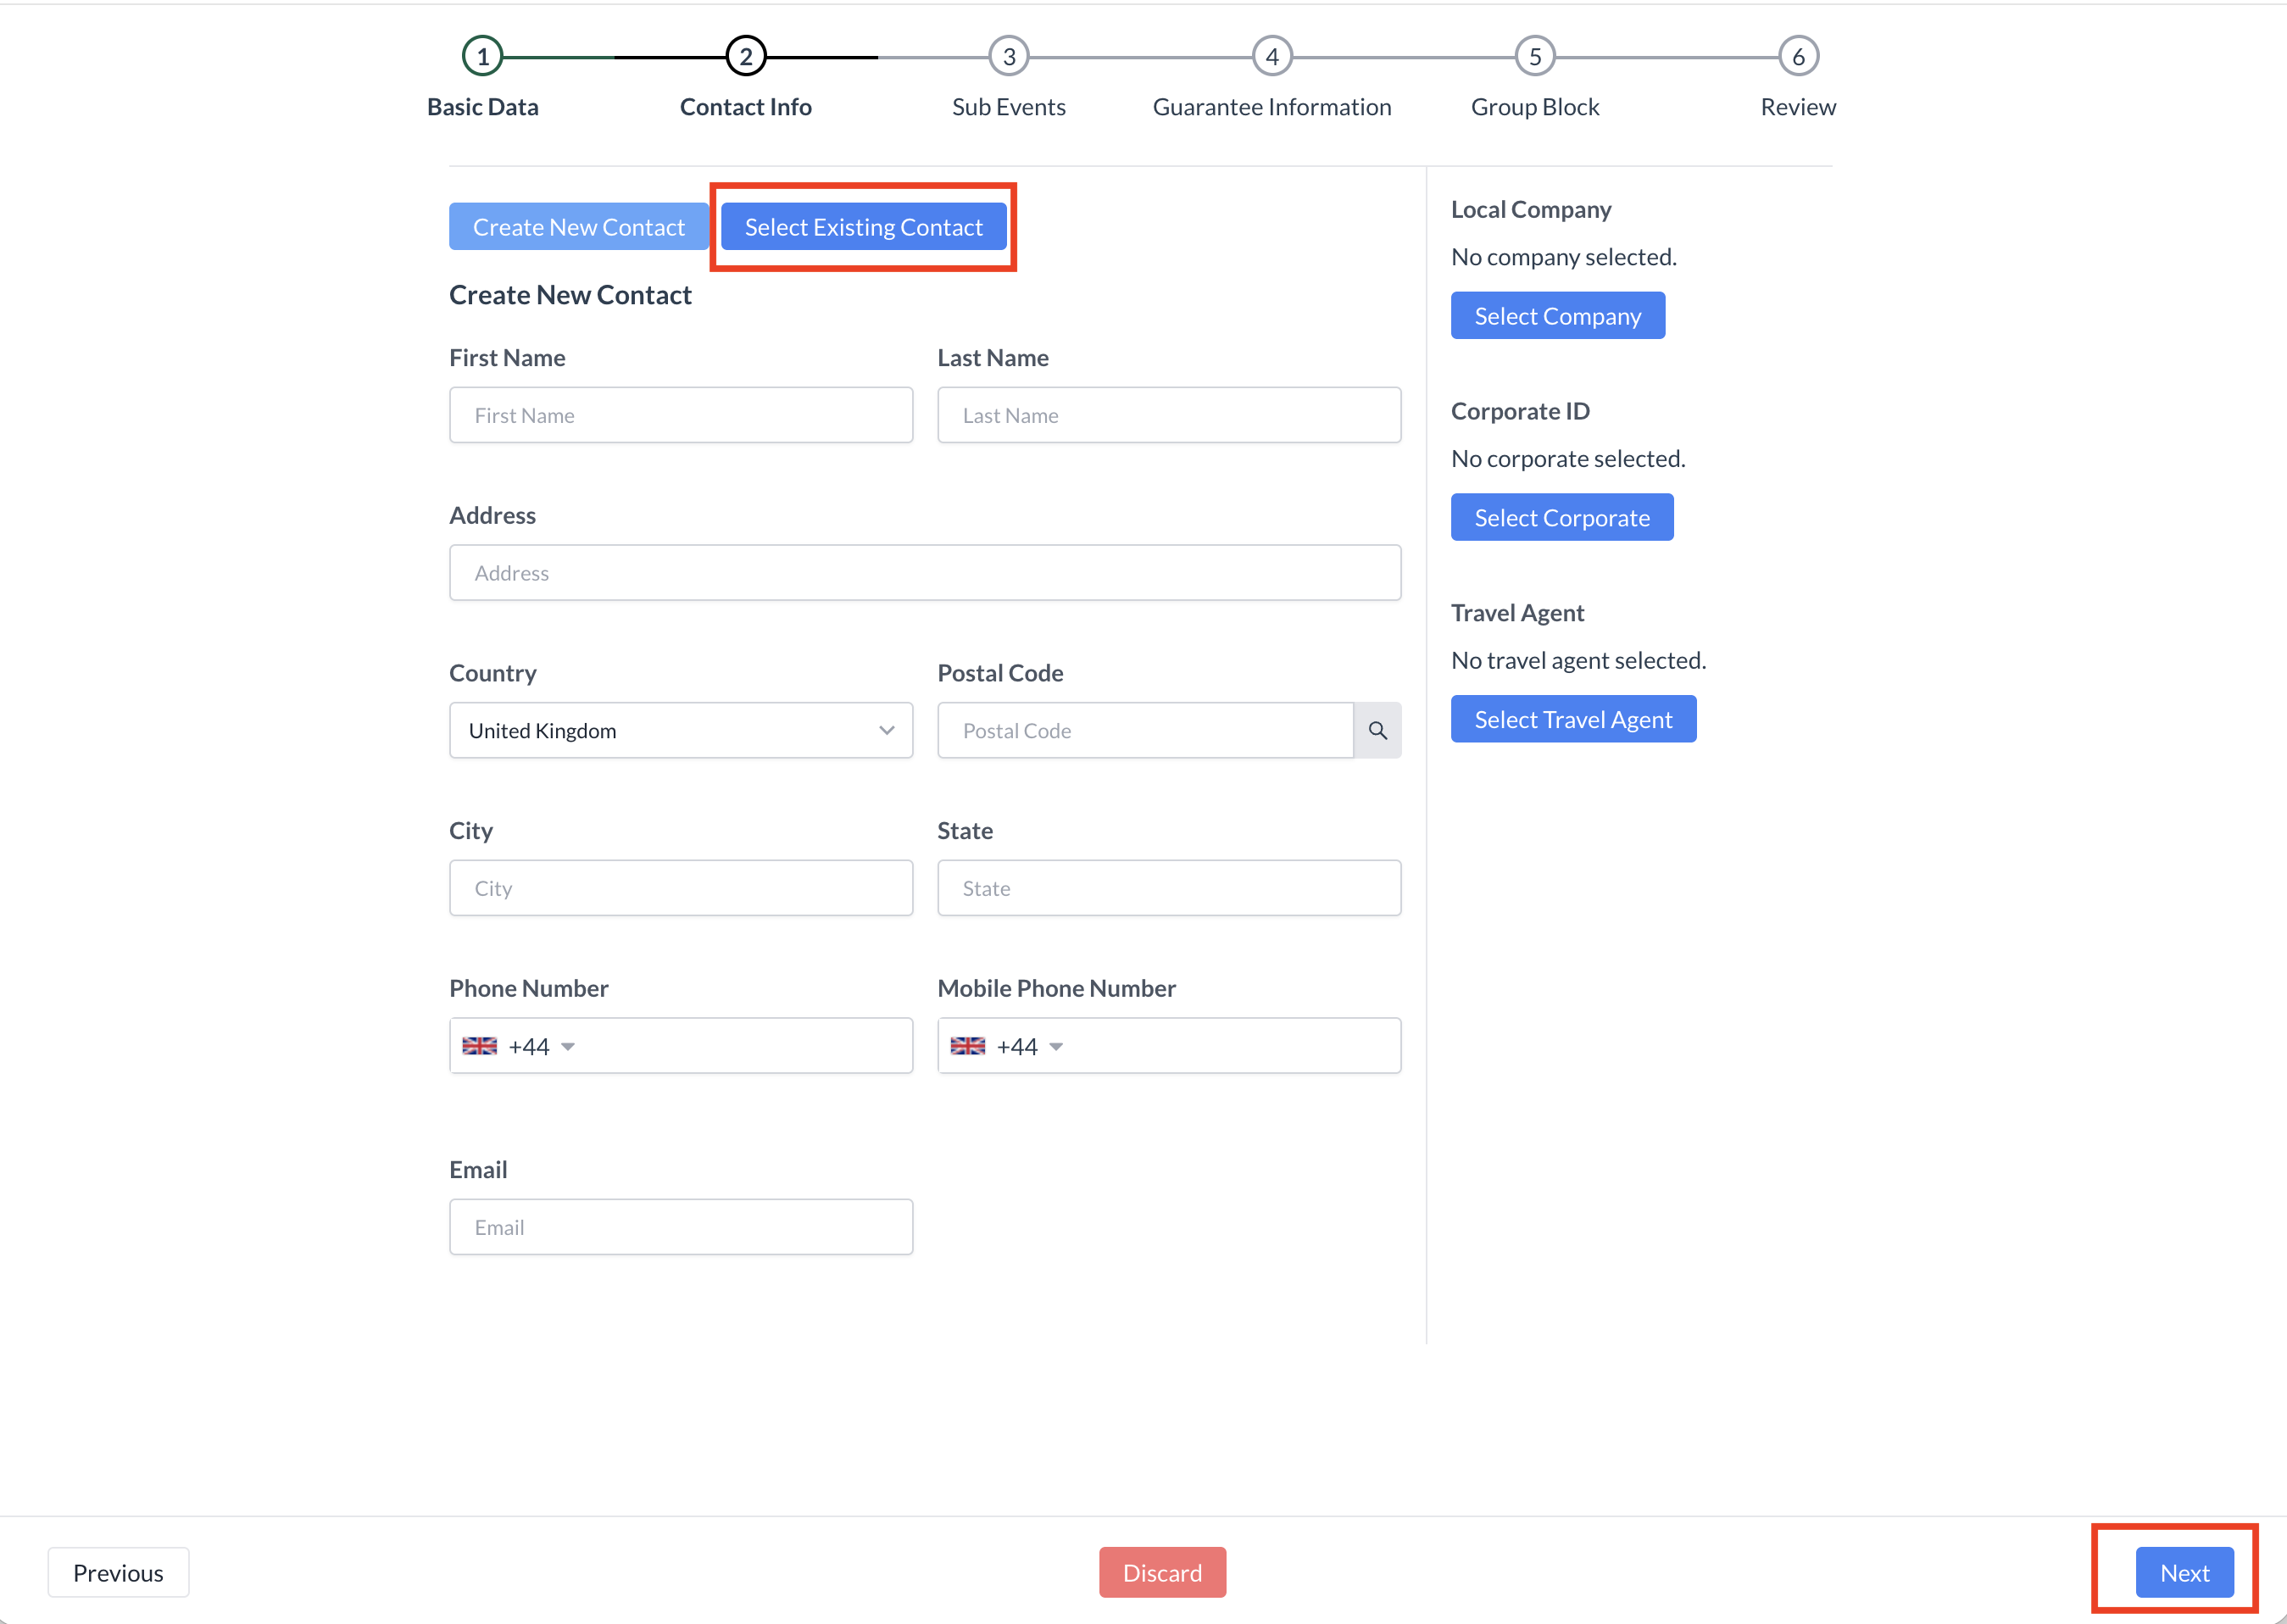 Contact Info - New or Existing Guest
|
Step 2b: Add a Company Profile (If Applicable) If the booker is associated with a company, follow these steps to attach a company profile:
| 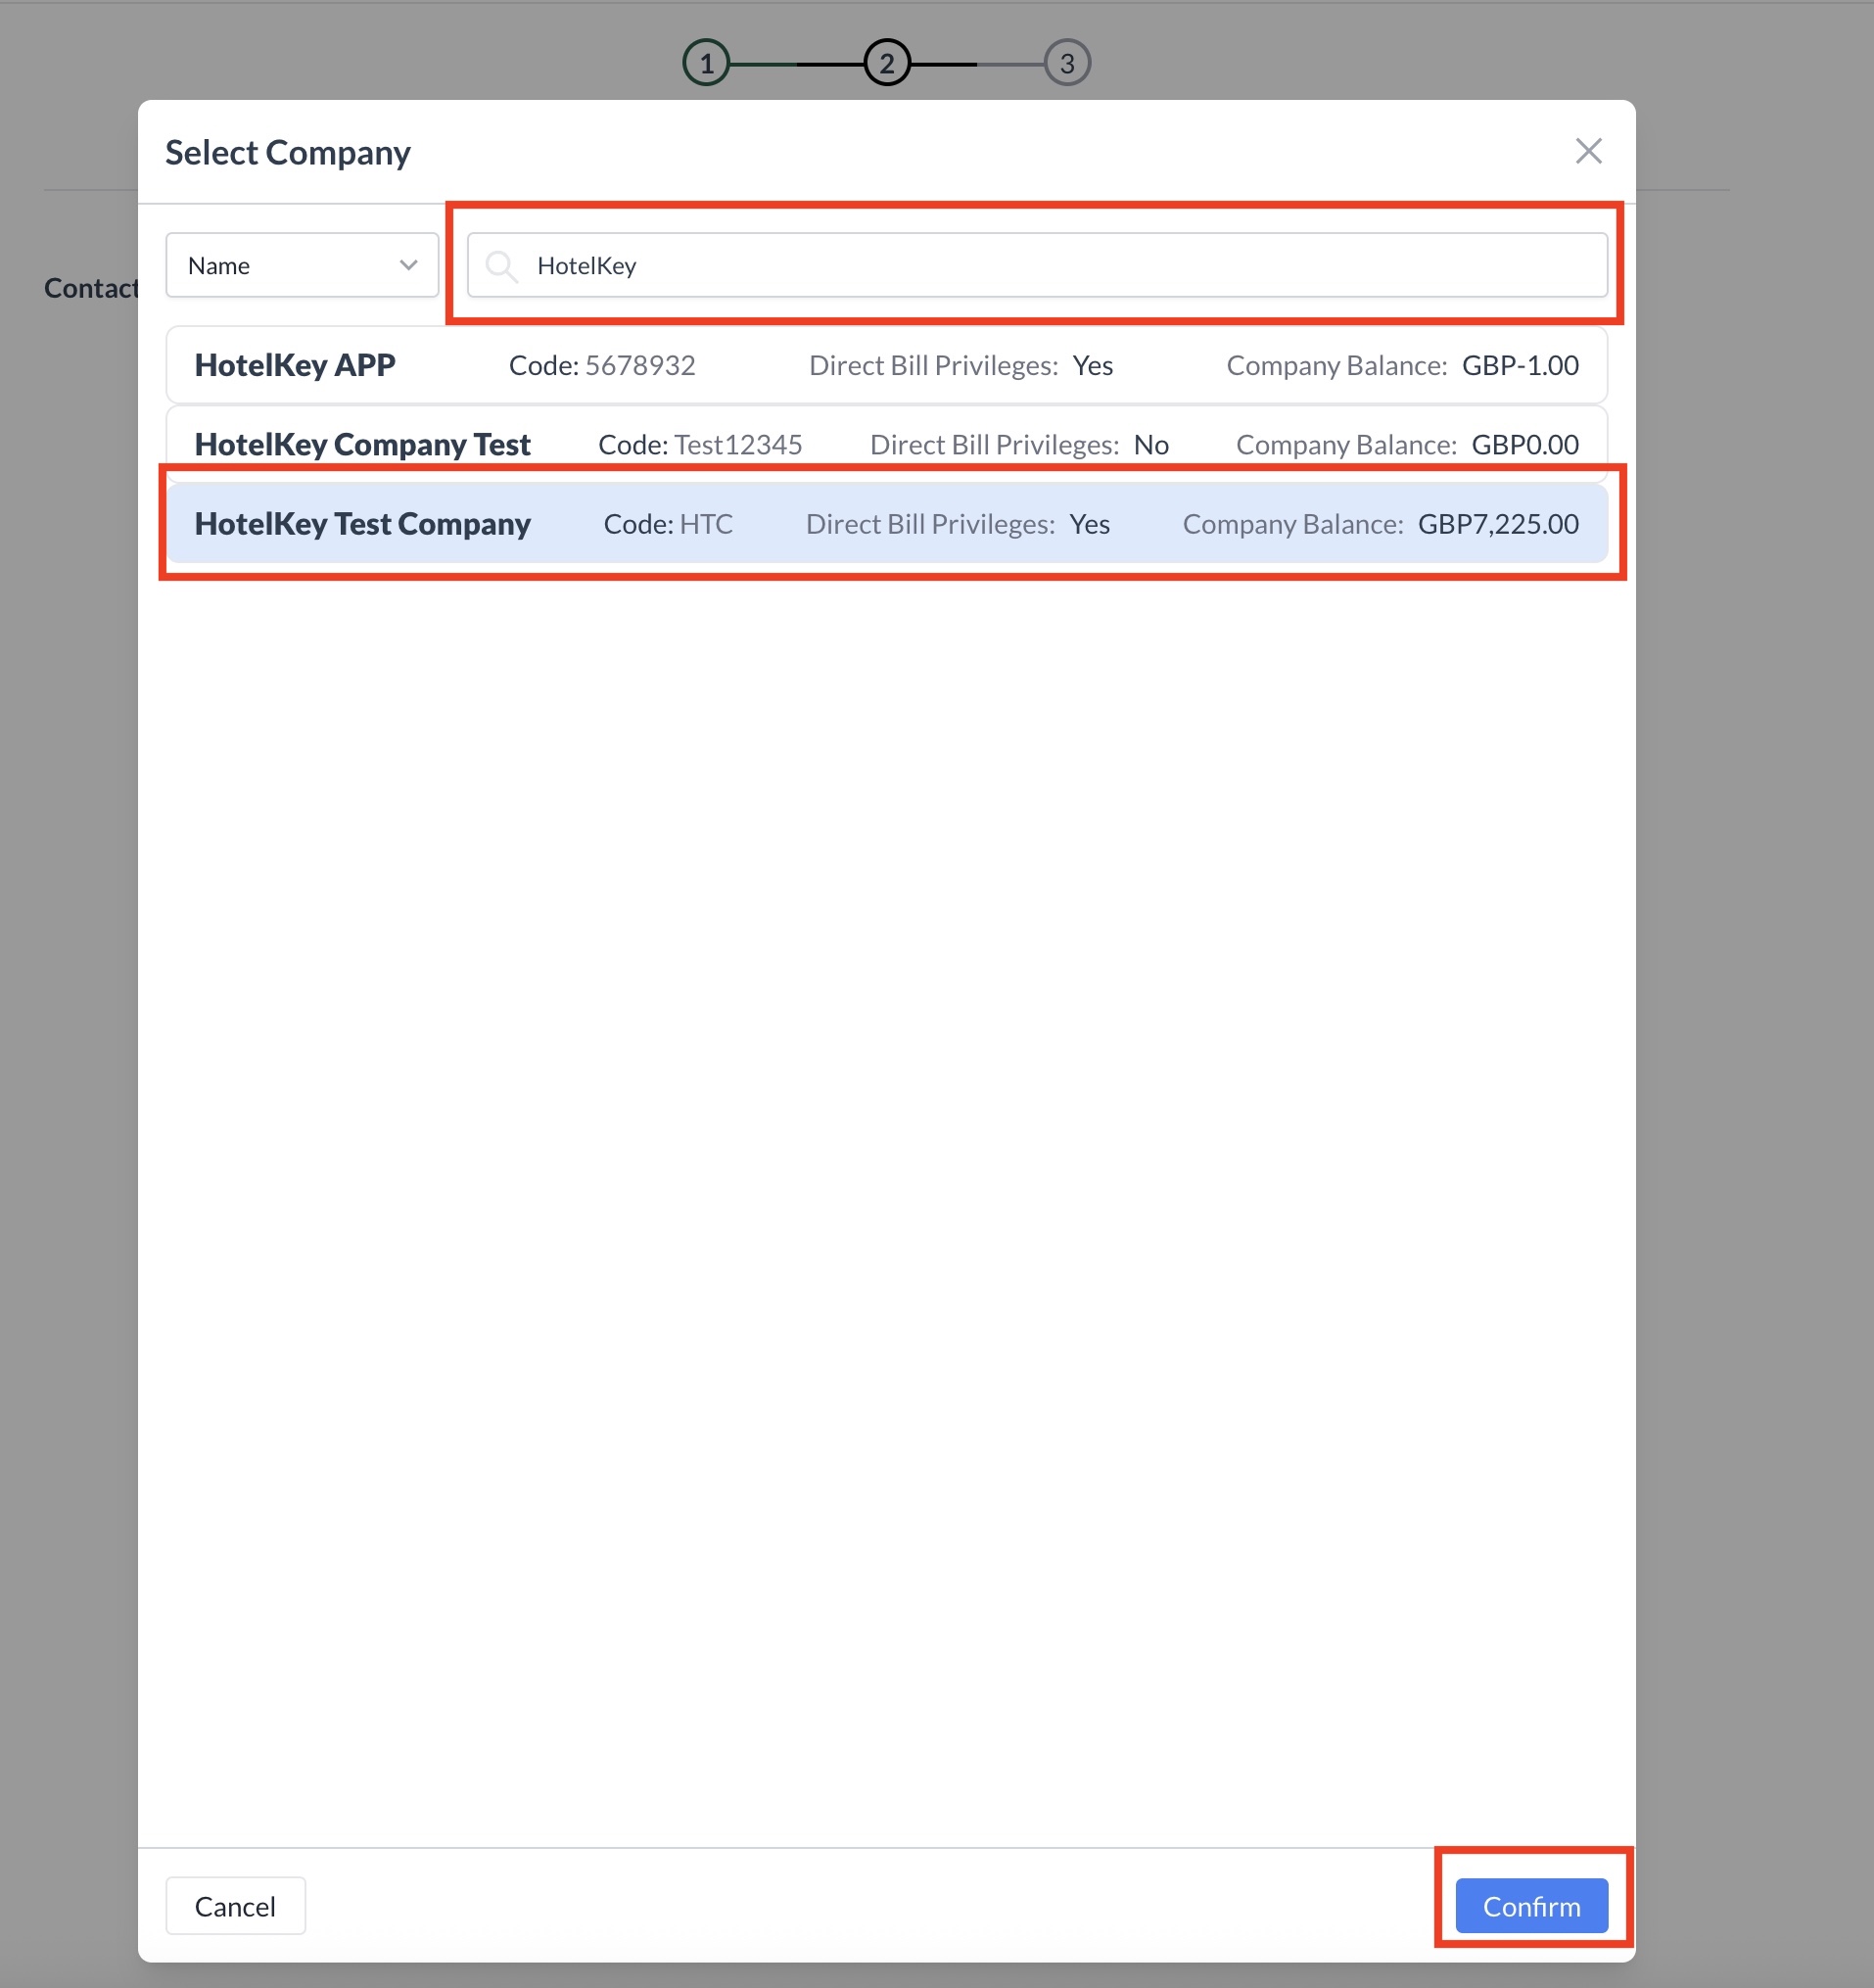 Contact Info - Attaching a Company Profile |
Step 2c: Add a Travel Agent (If Applicable) If the booker is associated with a travel agency, follow these steps to attach the correct IATA profile:
| 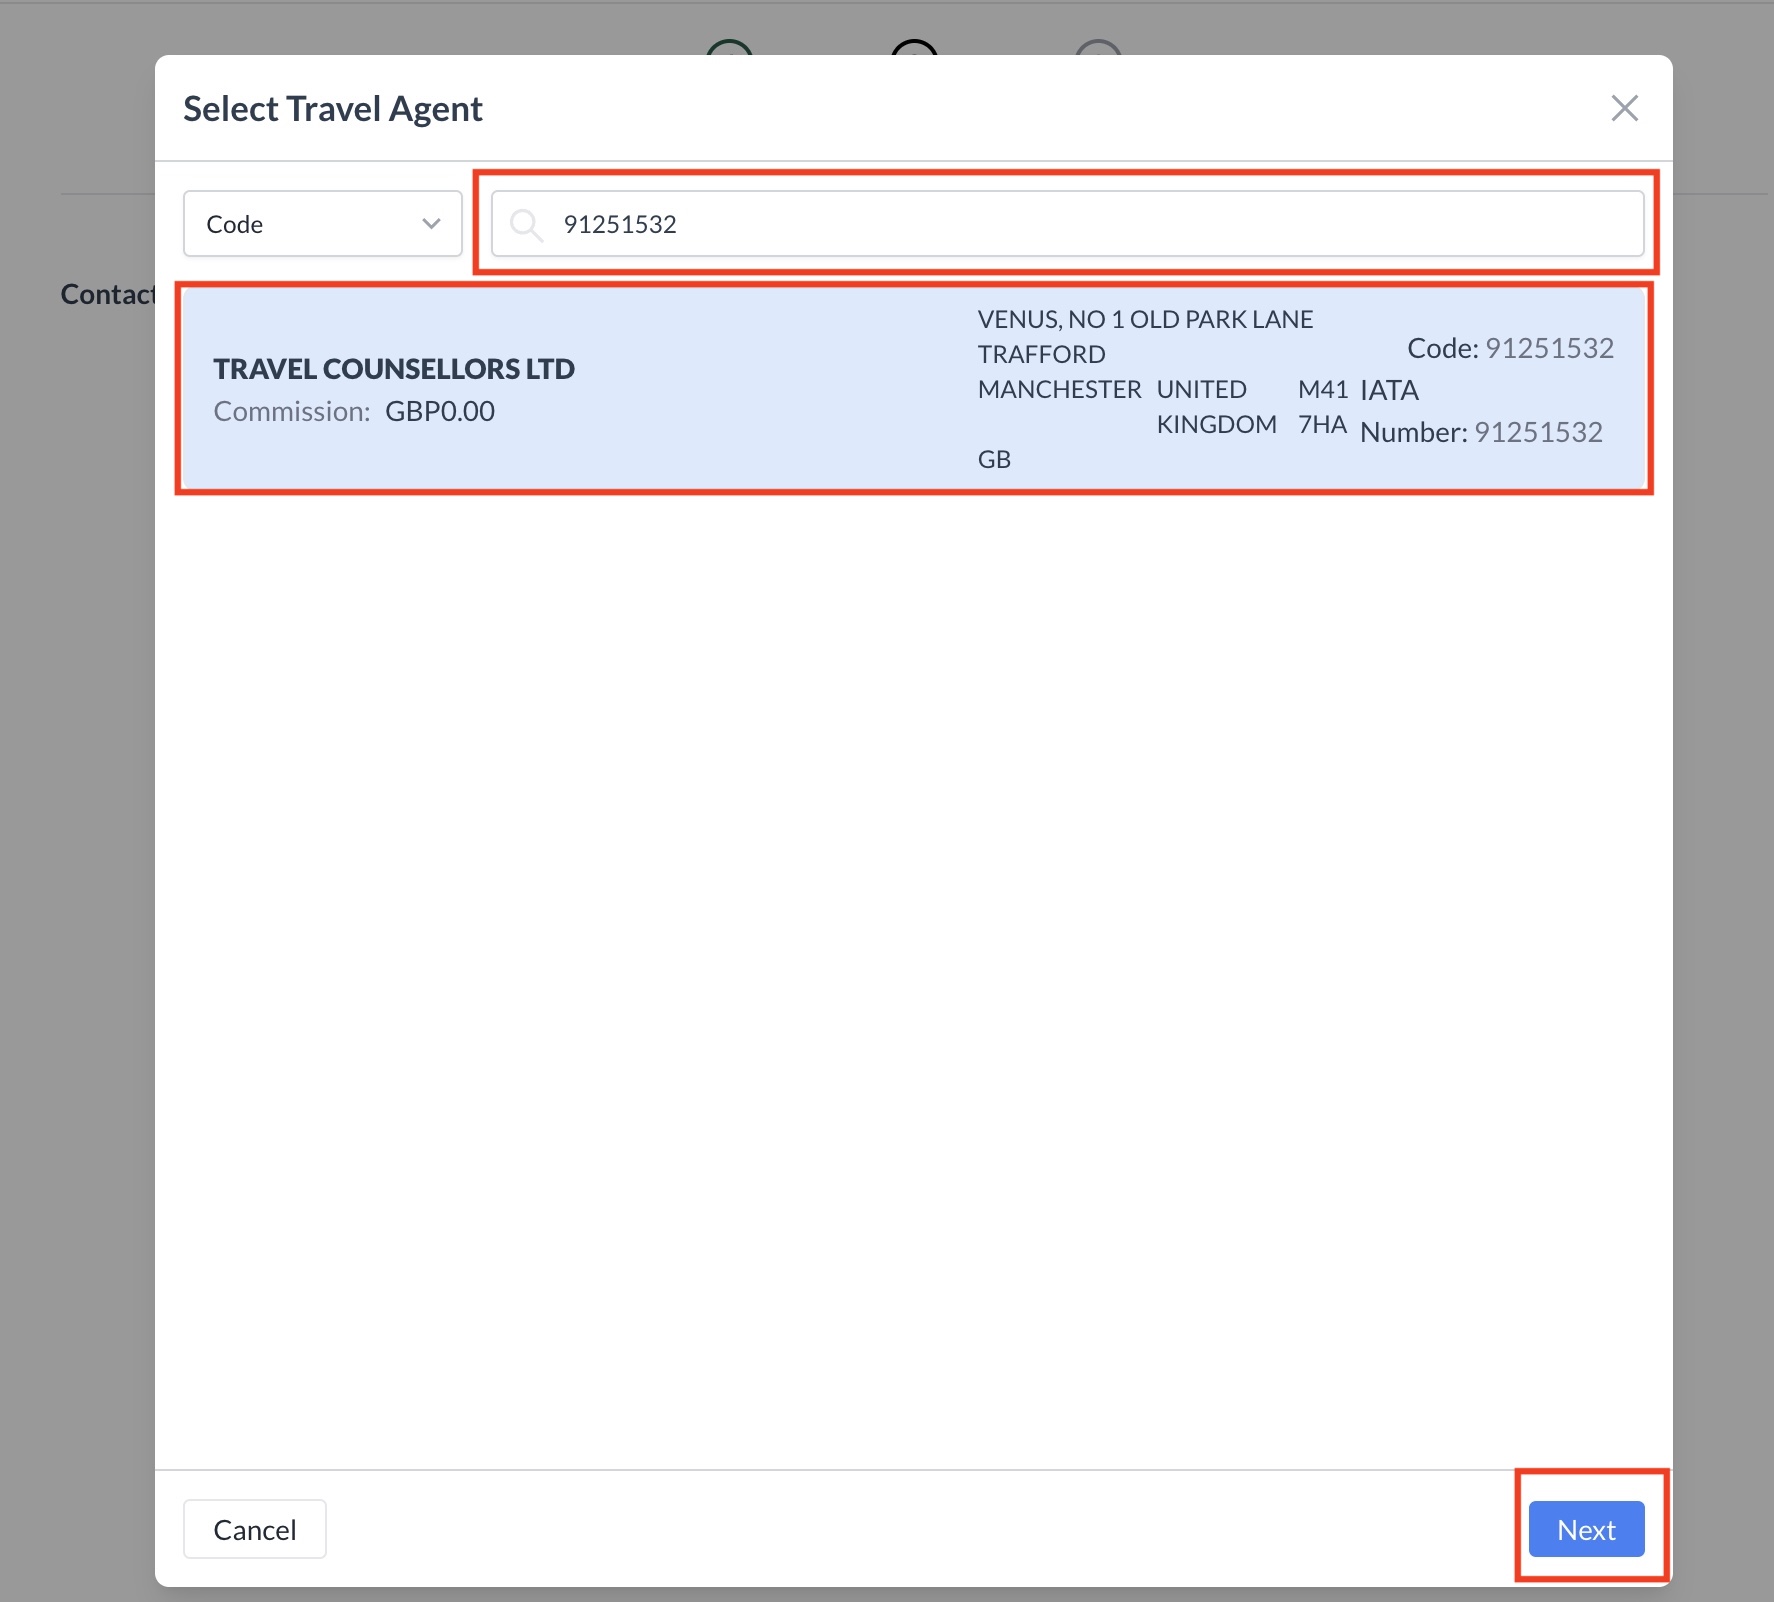 Contact Info - Attaching a Travel Agent Profile
|
Proceed to the Next Step Once the booker’s contact information is complete and any associated Company and/or IATA profiles have been successfully attached:
| 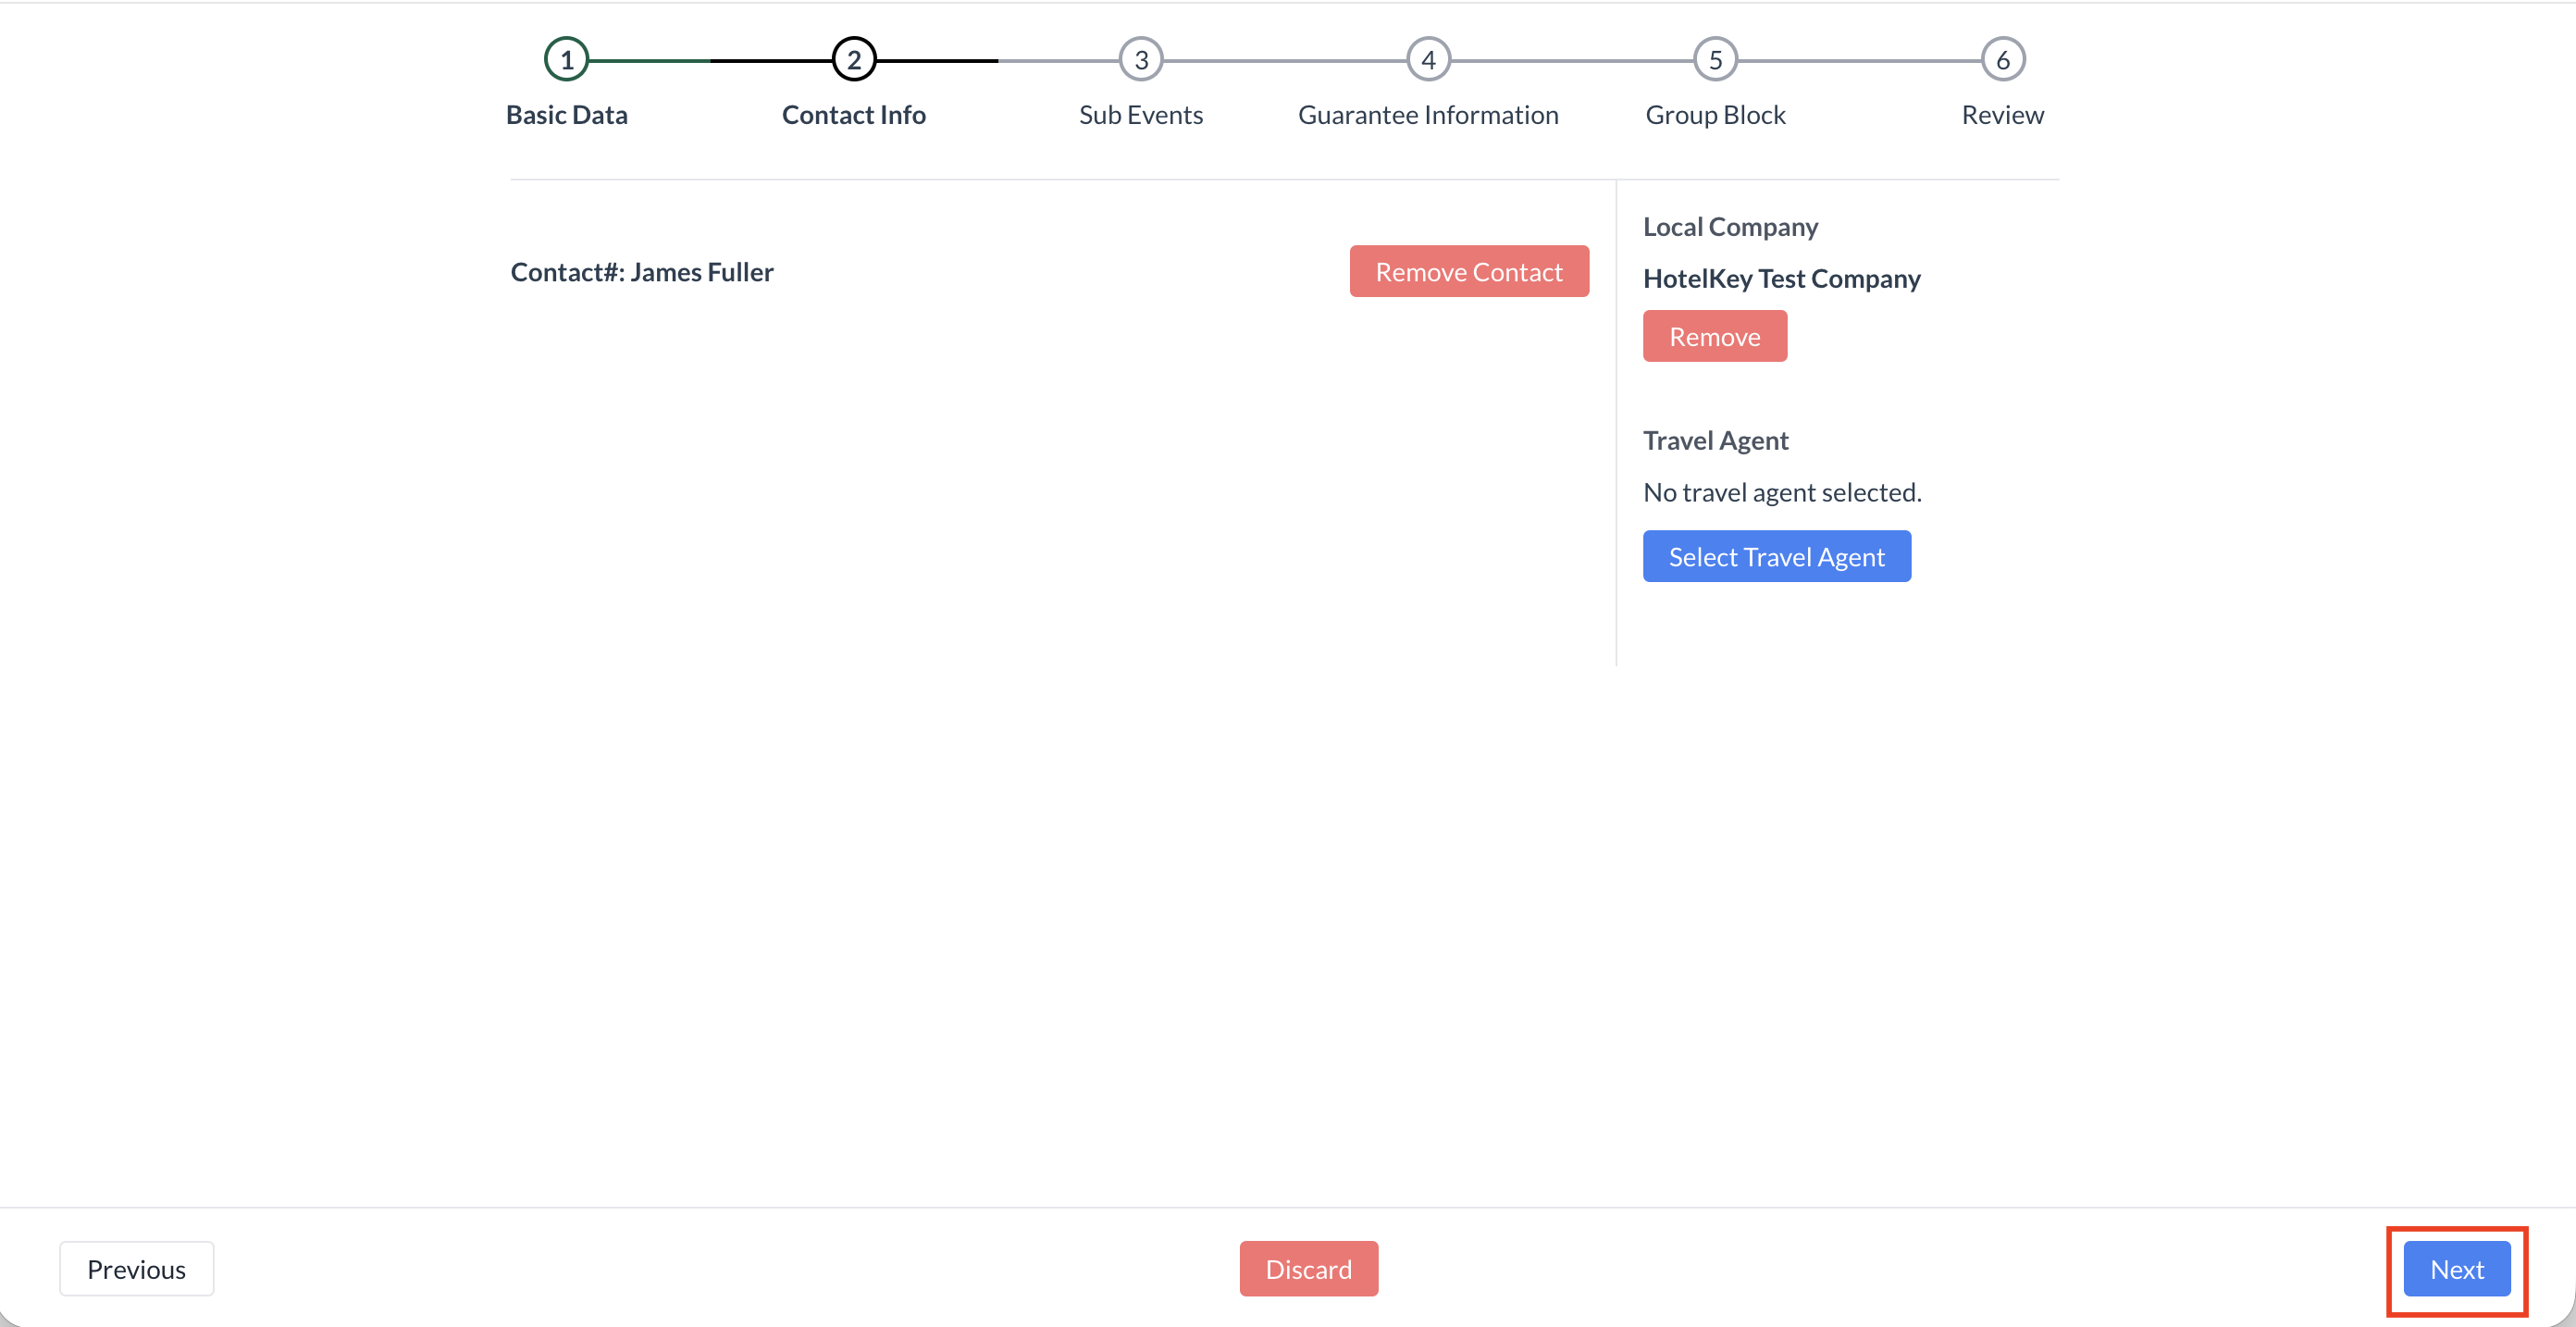 |
Step 3a: Sub Events - Select a Space On the Sub Event screen, select the room or area where the event will be held. | 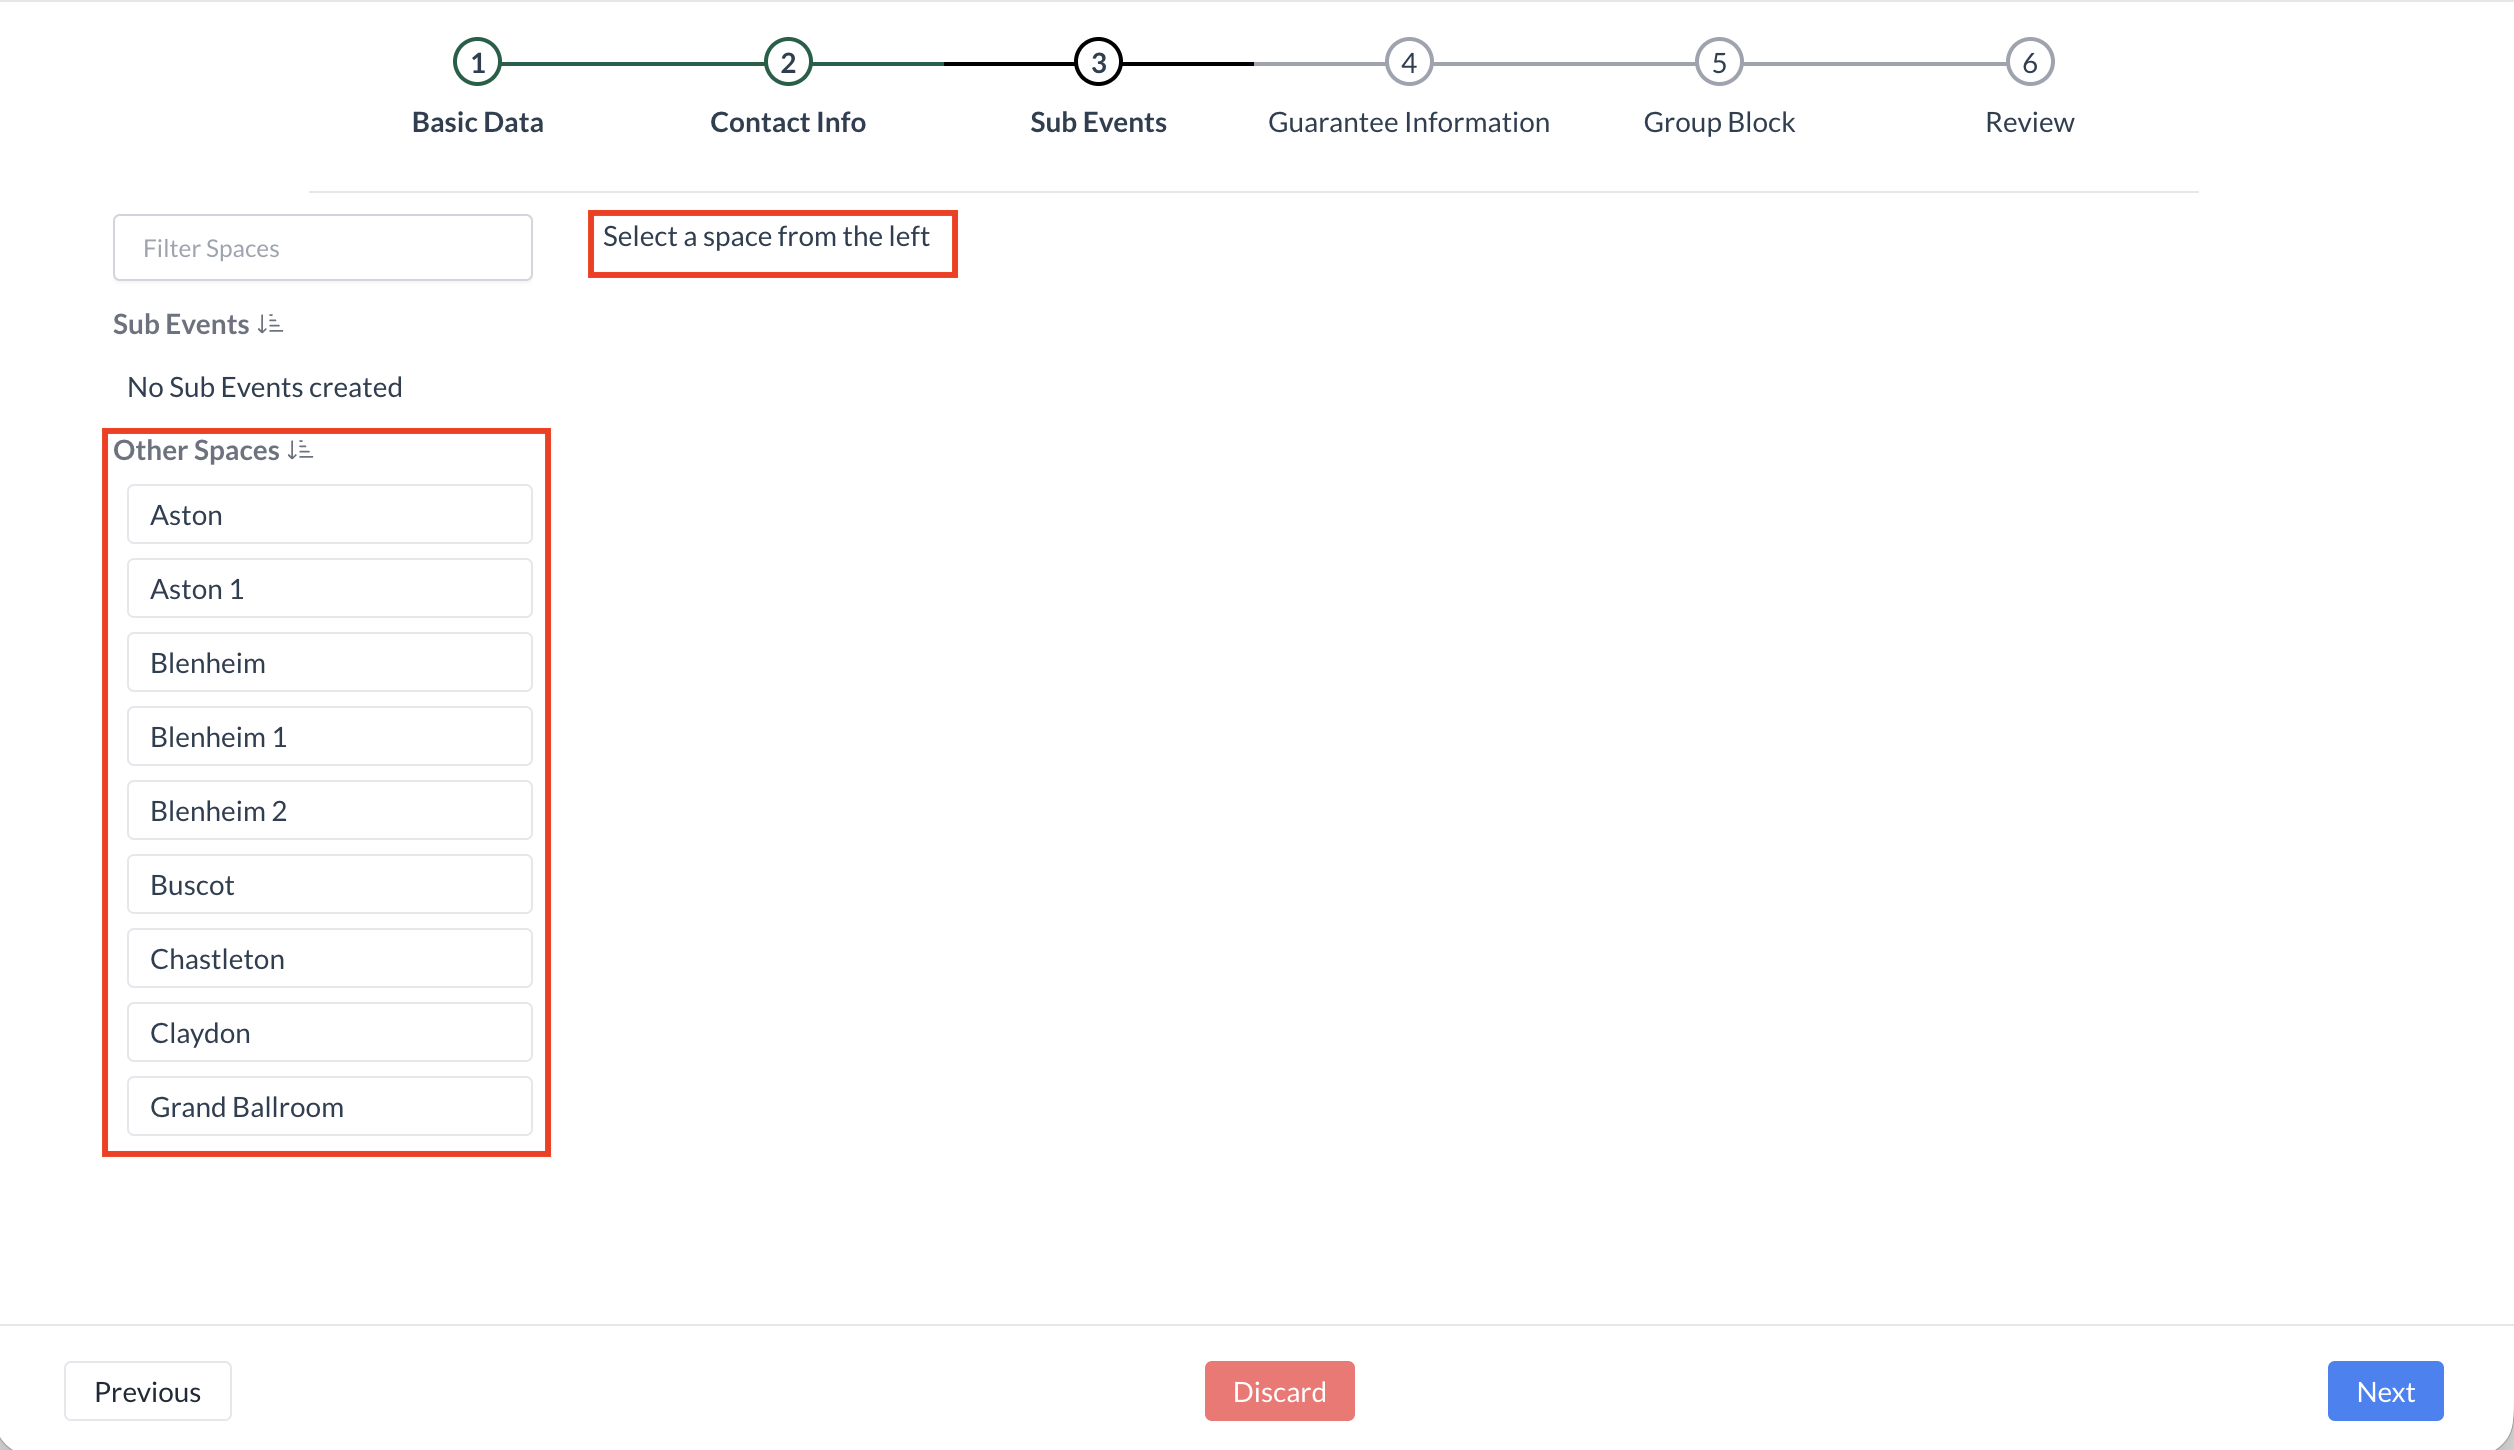 Sub Events - Select a Space Screen |
Step 3b: Sub Events – Enter Event Date, Start Time, and End Time On the Sub Events screen, the first day of the main event will default as the sub-event date. Next, enter or select the following using the dropdown menus:
To view which event has the space booked, click the "Show Occupancy" button. | 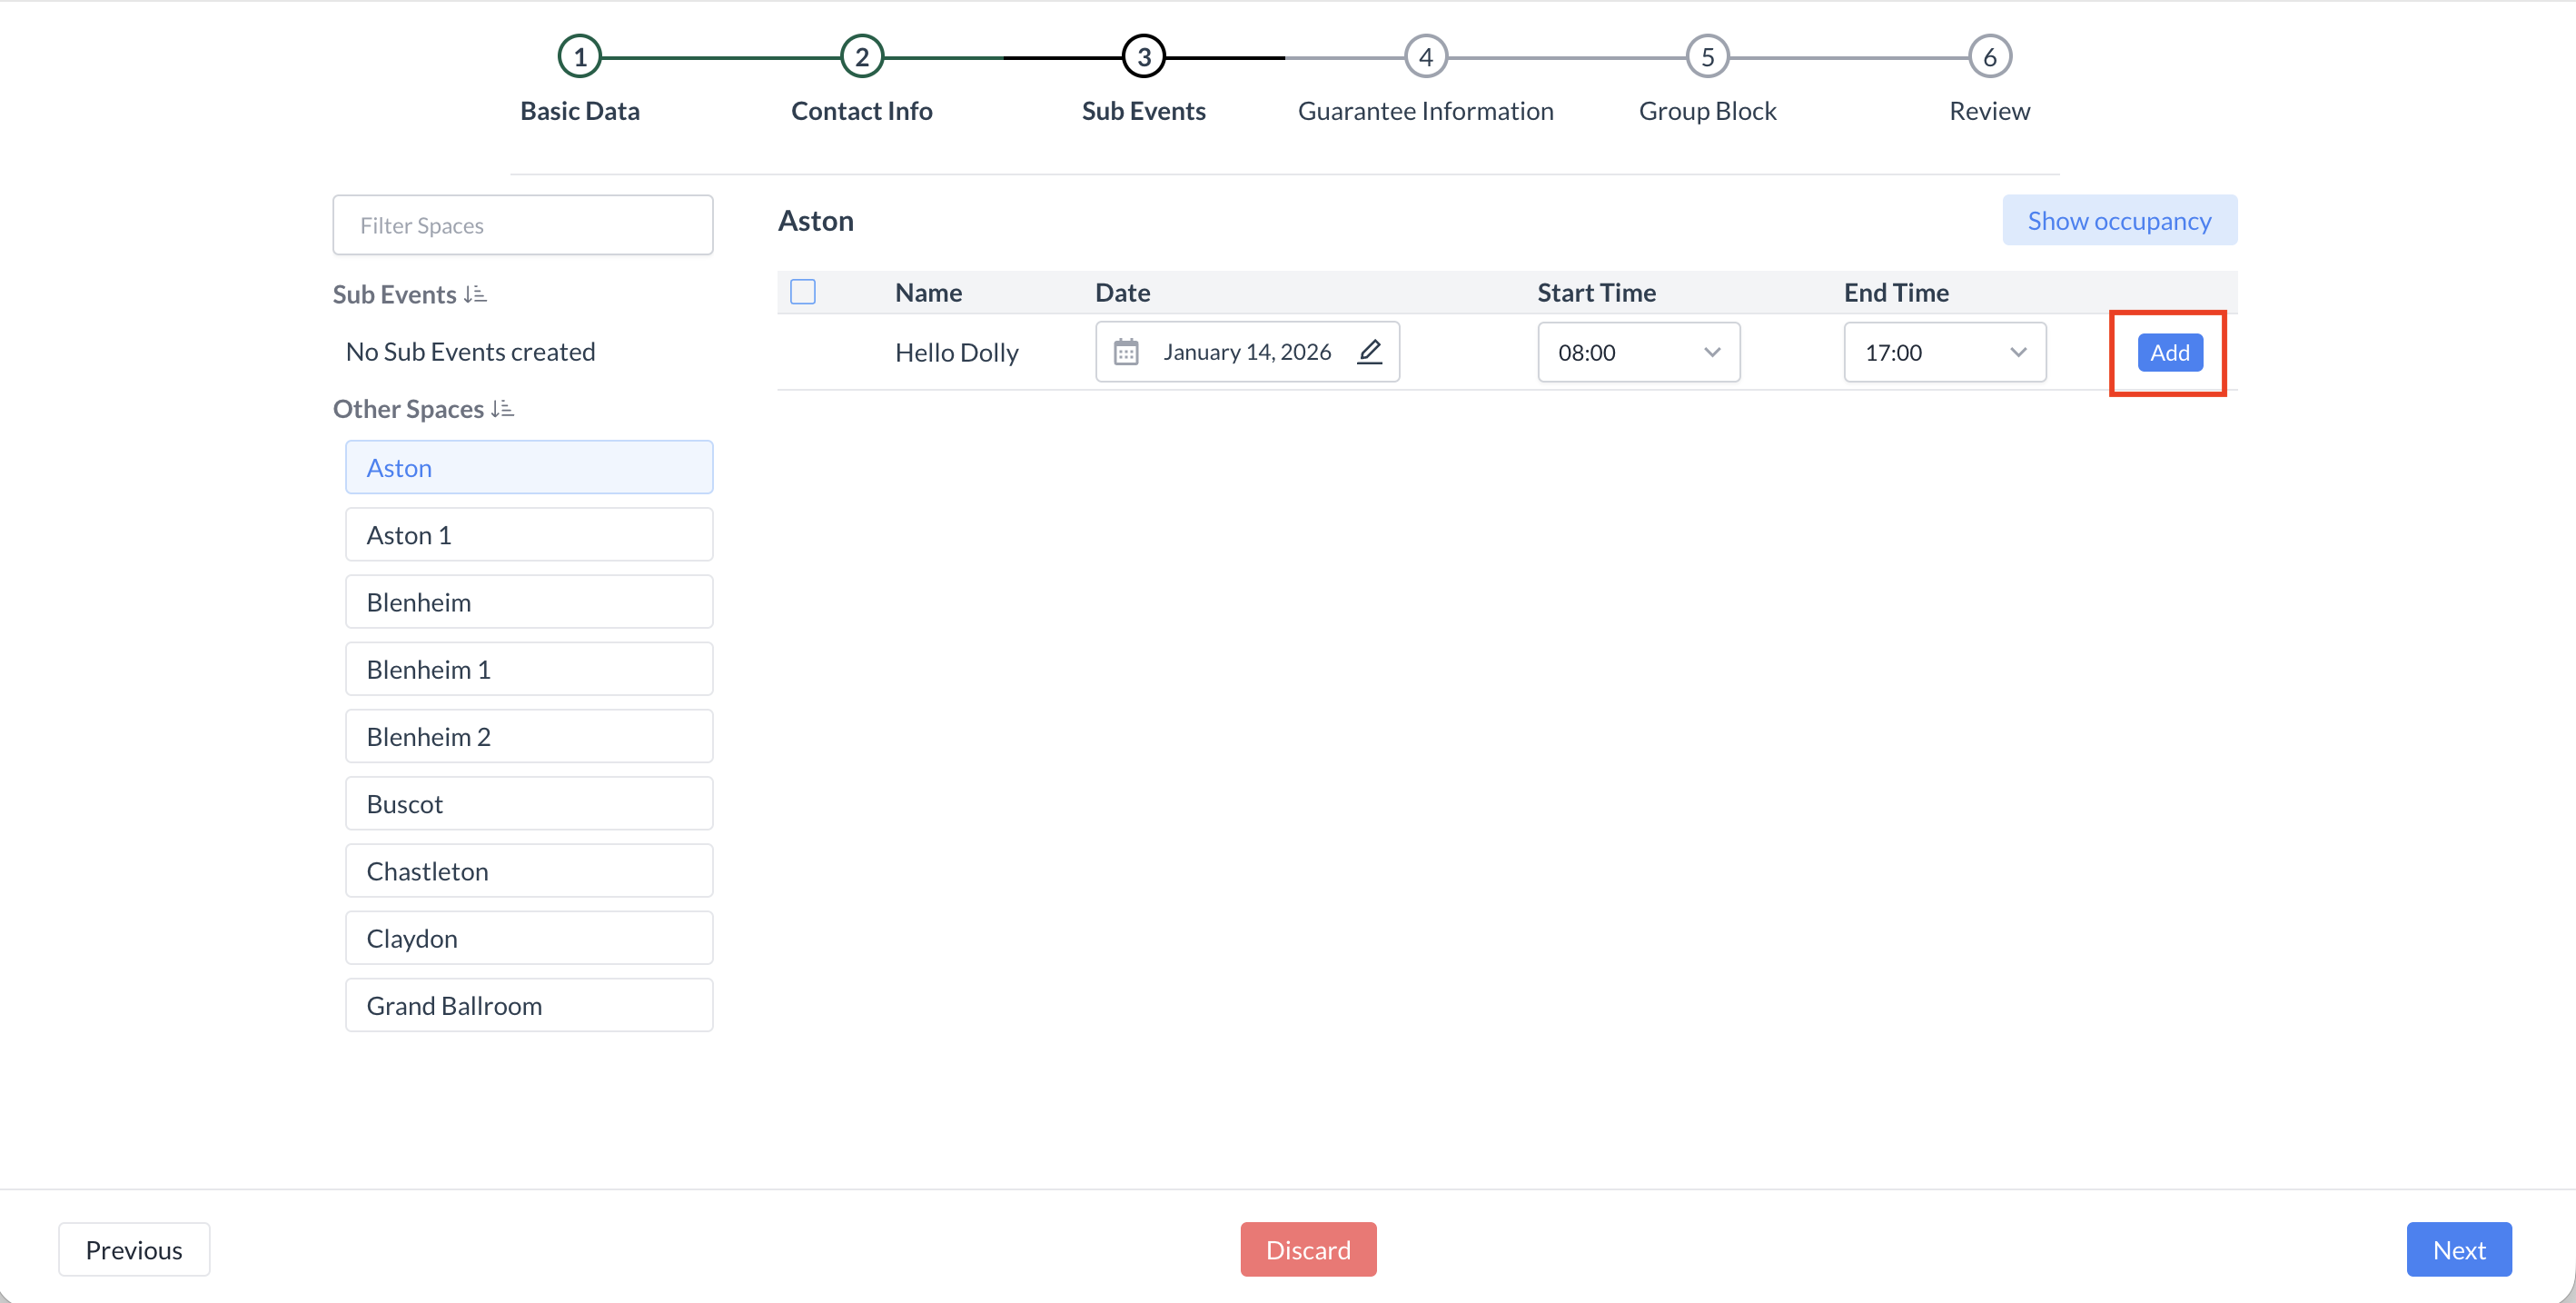 Blue “Add” Button Confirming Space Availability 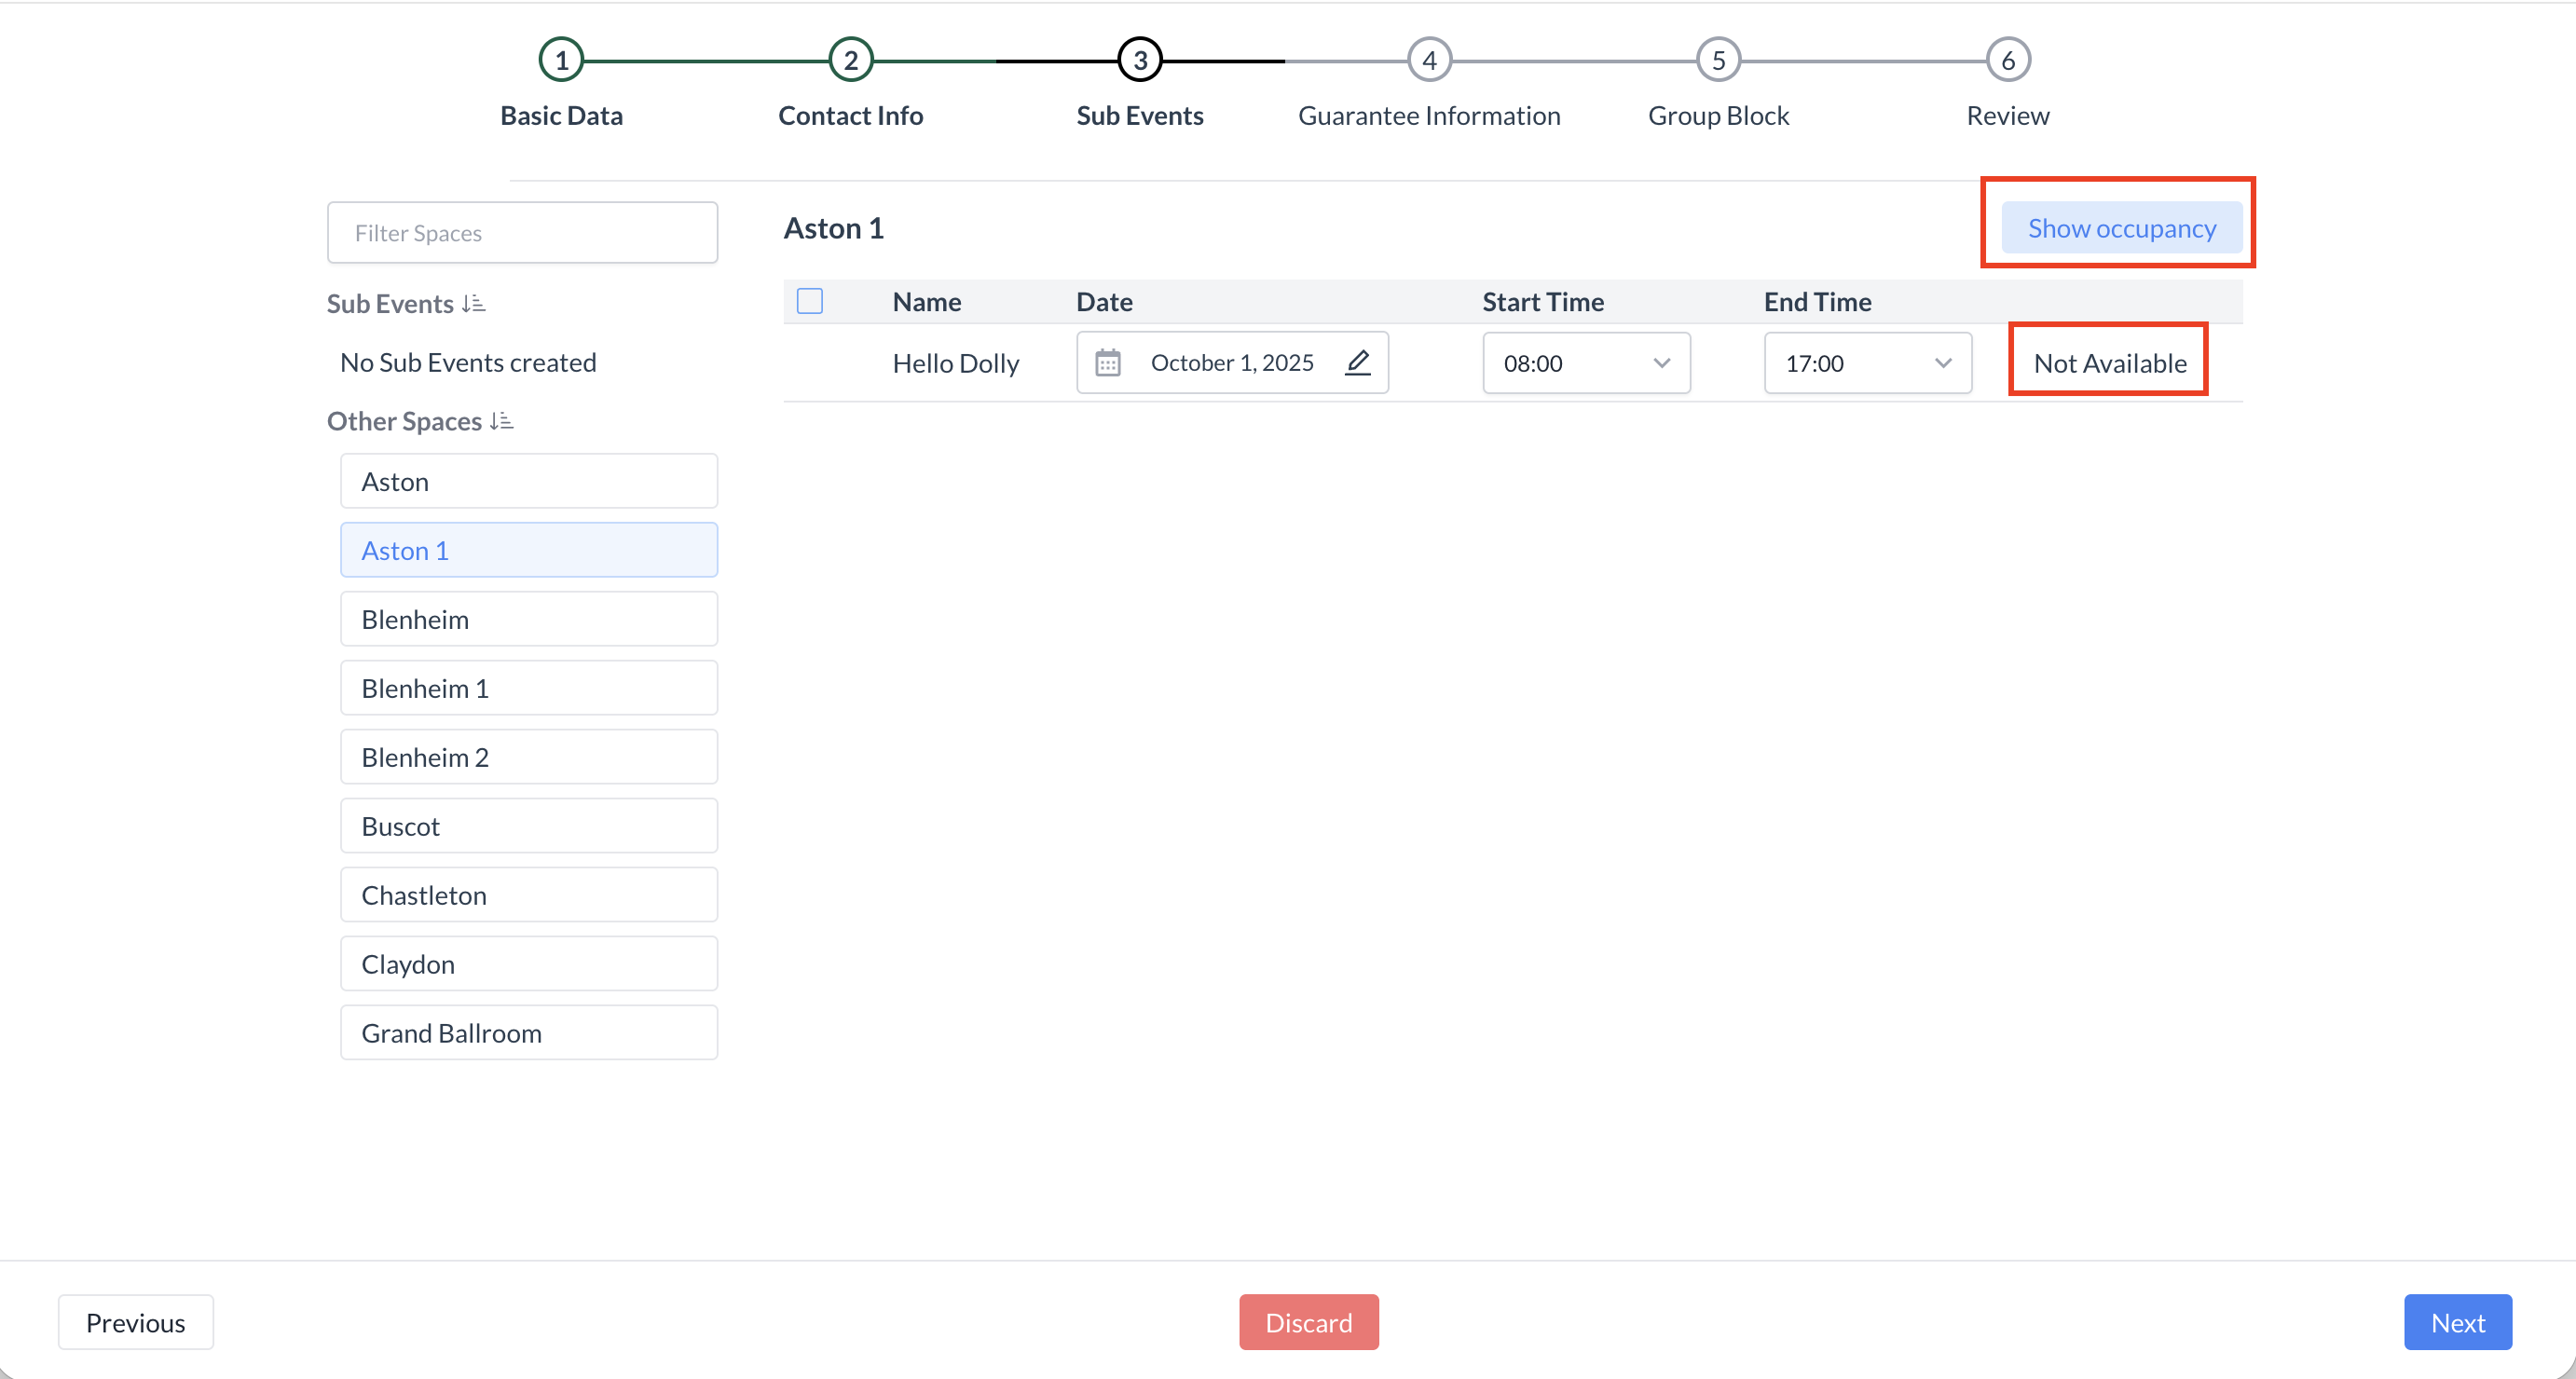 Not Available - Indicating Space is Unavailable .png?inst-v=0dc4bd8e-9fb1-48be-91f4-7fb2bee009b5) Current Space Occupancy |
Step 3c: Sub Events – Create the Sub Event n this step, you will define the key details of the sub event. These details help ensure proper space usage, guest expectations, and operational readiness. 1. Enter Sub Event NameType the name of the sub event.
2. Confirm Date and TimeThe date and time will auto-populate based on your selections in Step 3b. 3. Enter Guest Counts
4. Select Room Setup (Arrangement)Use the dropdown to choose the required room setup (e.g., Theater, Classroom, Banquet). 5. Select Price PlanFrom the dropdown, choose the appropriate space rental price plan.
6. Enter Setup and Teardown TimeSpecify how much time is needed before and after the event for room setup and cleanup. 7. Add Attachments (Optional)Attach any relevant documents such as floor plans, AV instructions, or client notes. 8. Enter Event Description and Remarks
| 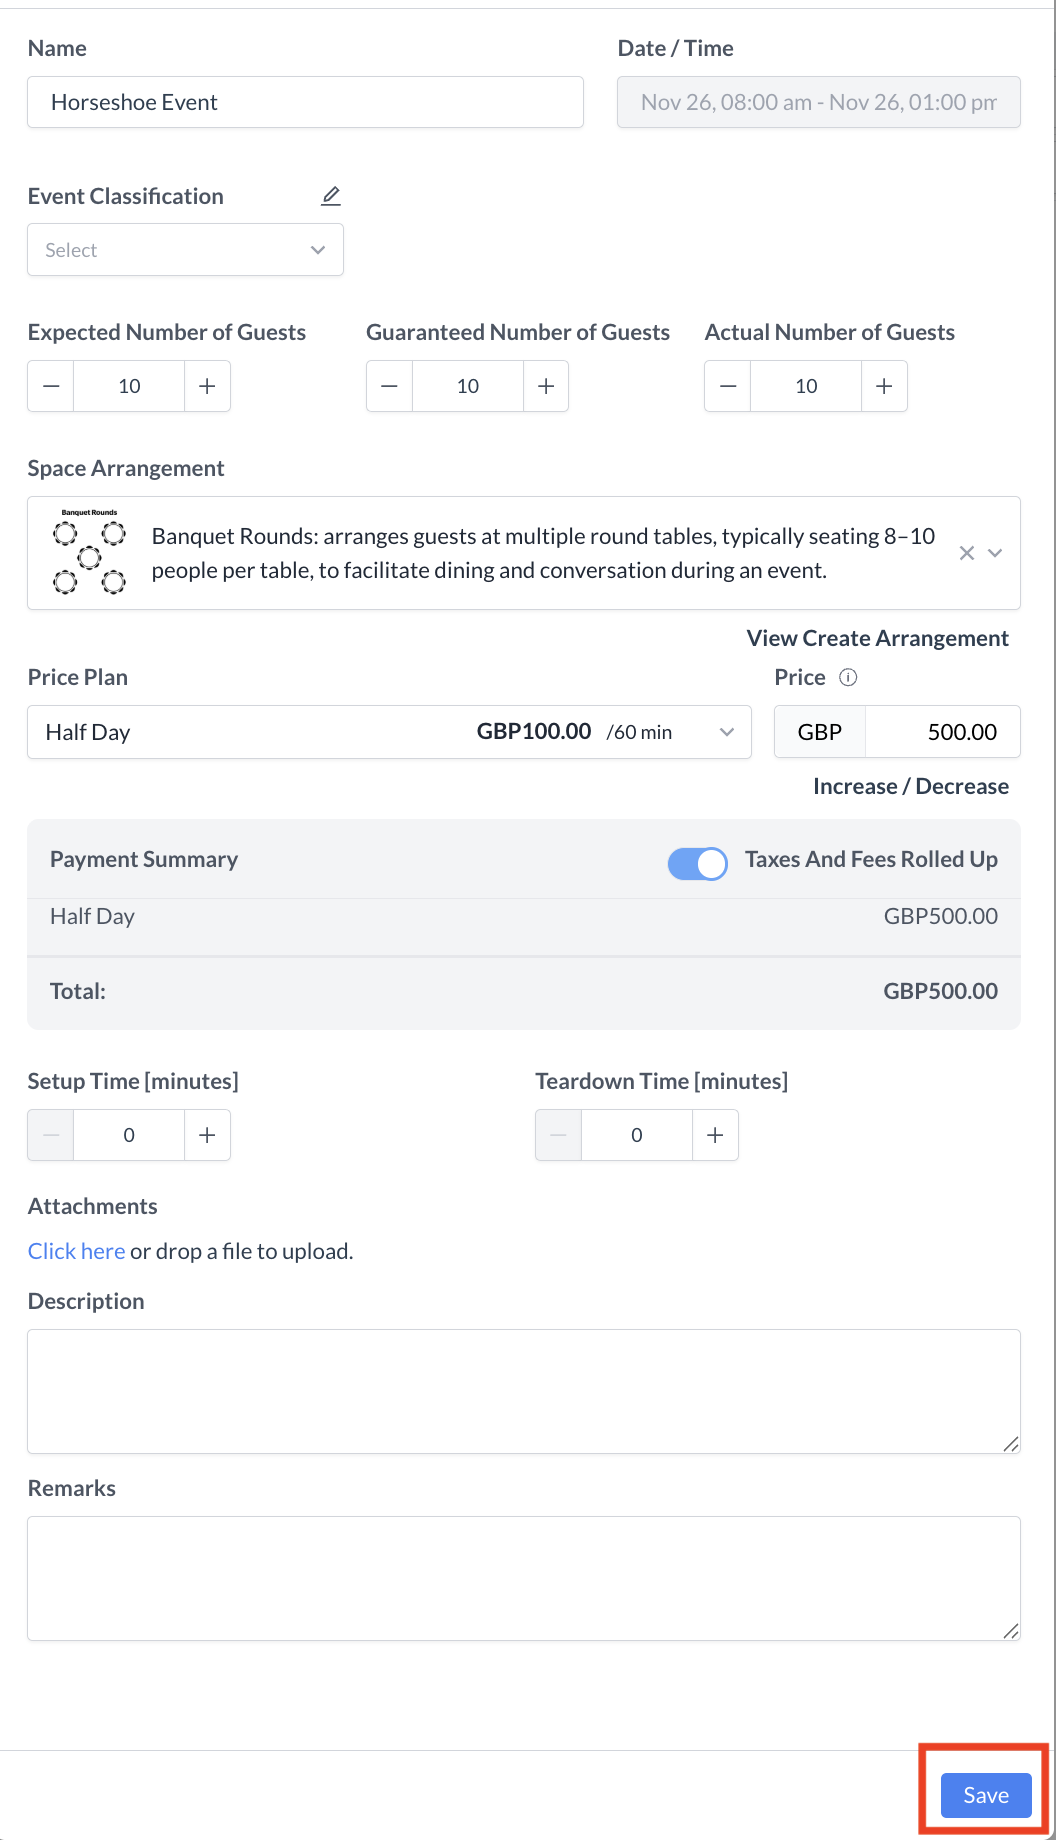 Create Sub Event Screen |
Step 4: Sub Events – Add Packages To enhance your event with additional services:
| 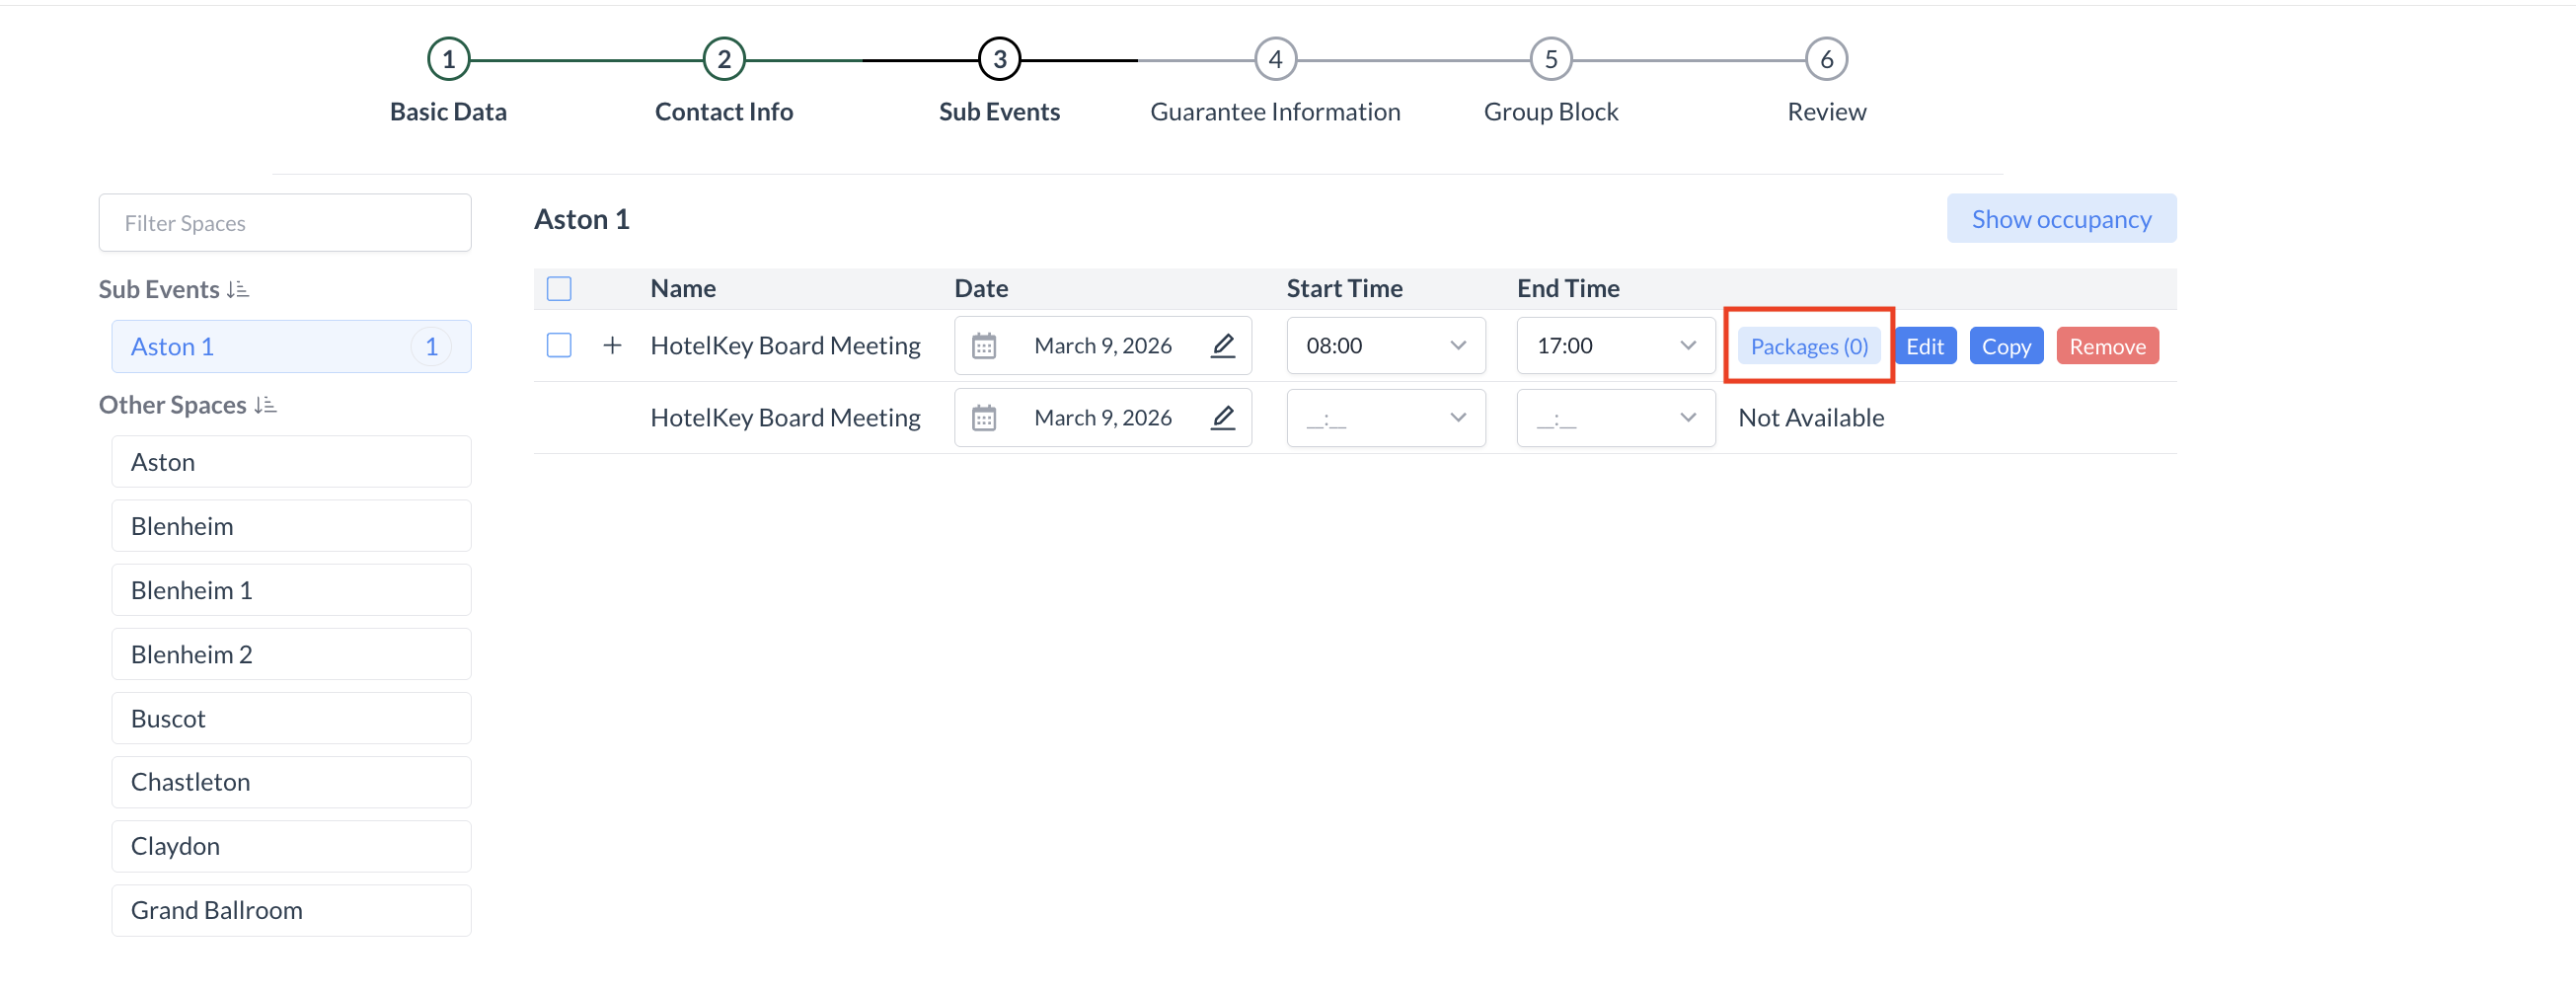 Sub Event Screen |
Step 4a: The Package screen displays all packages currently associated with the event. To add a new package:
| 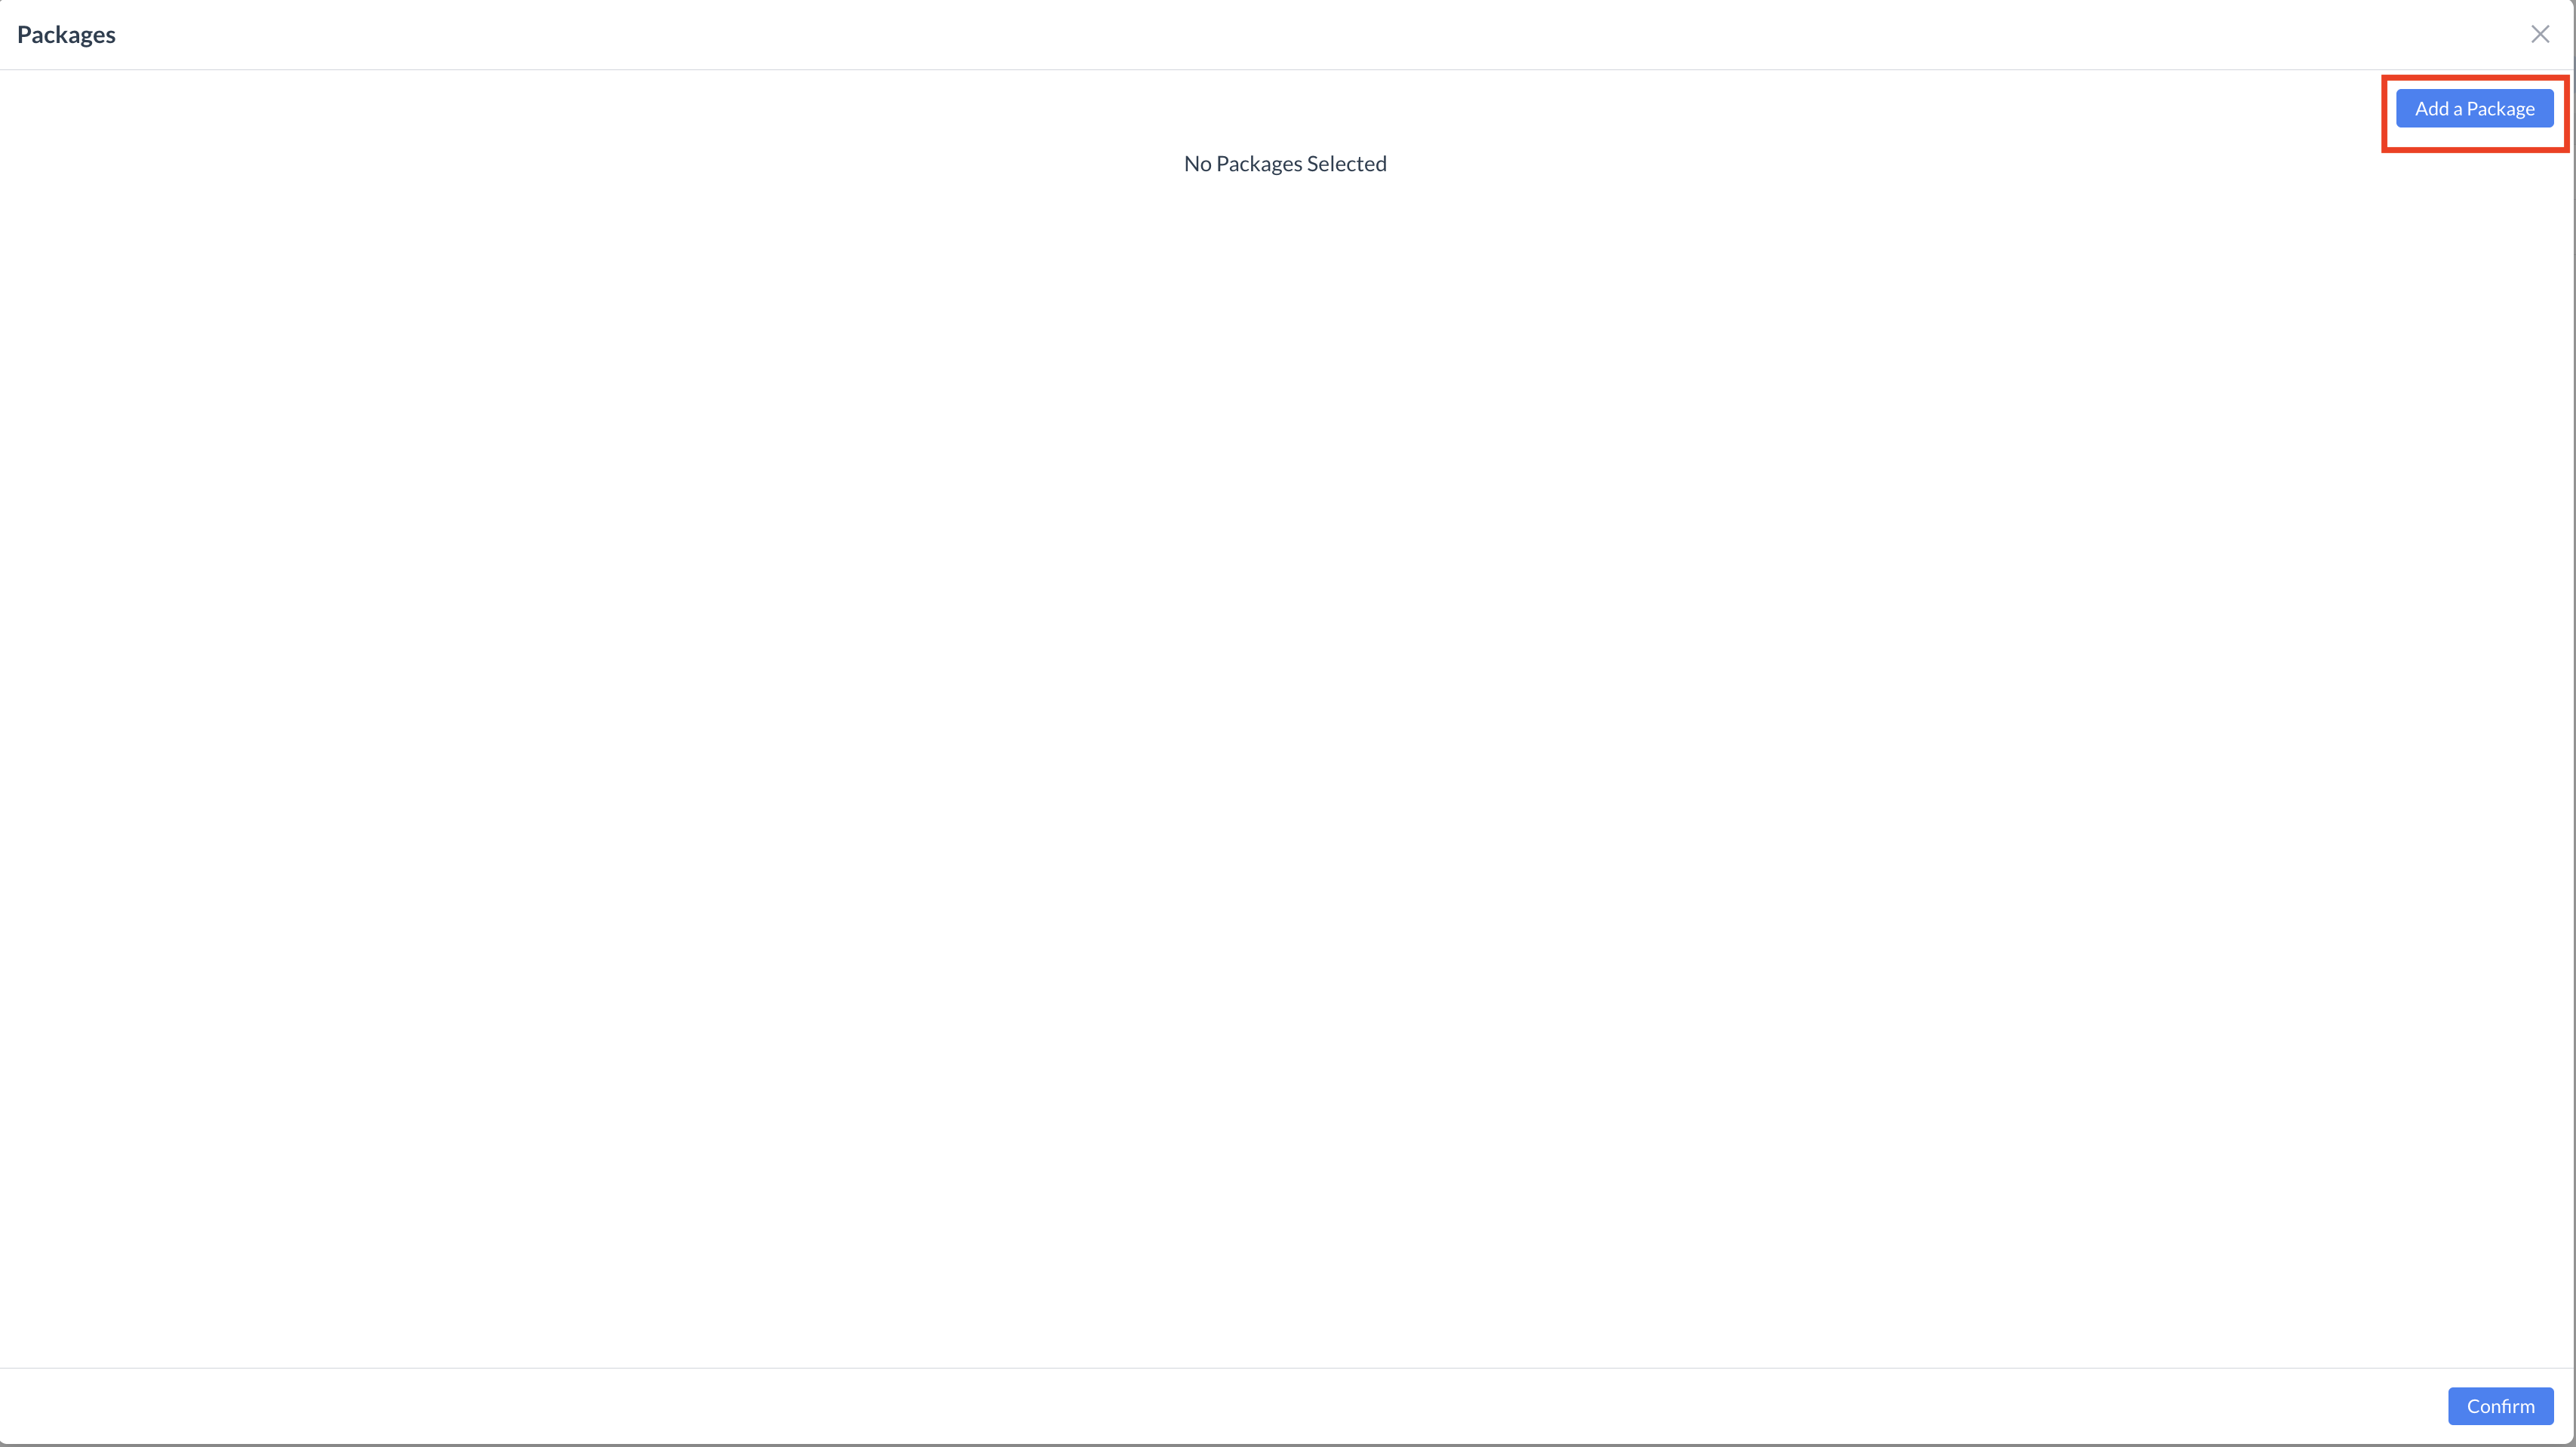 Package Screen 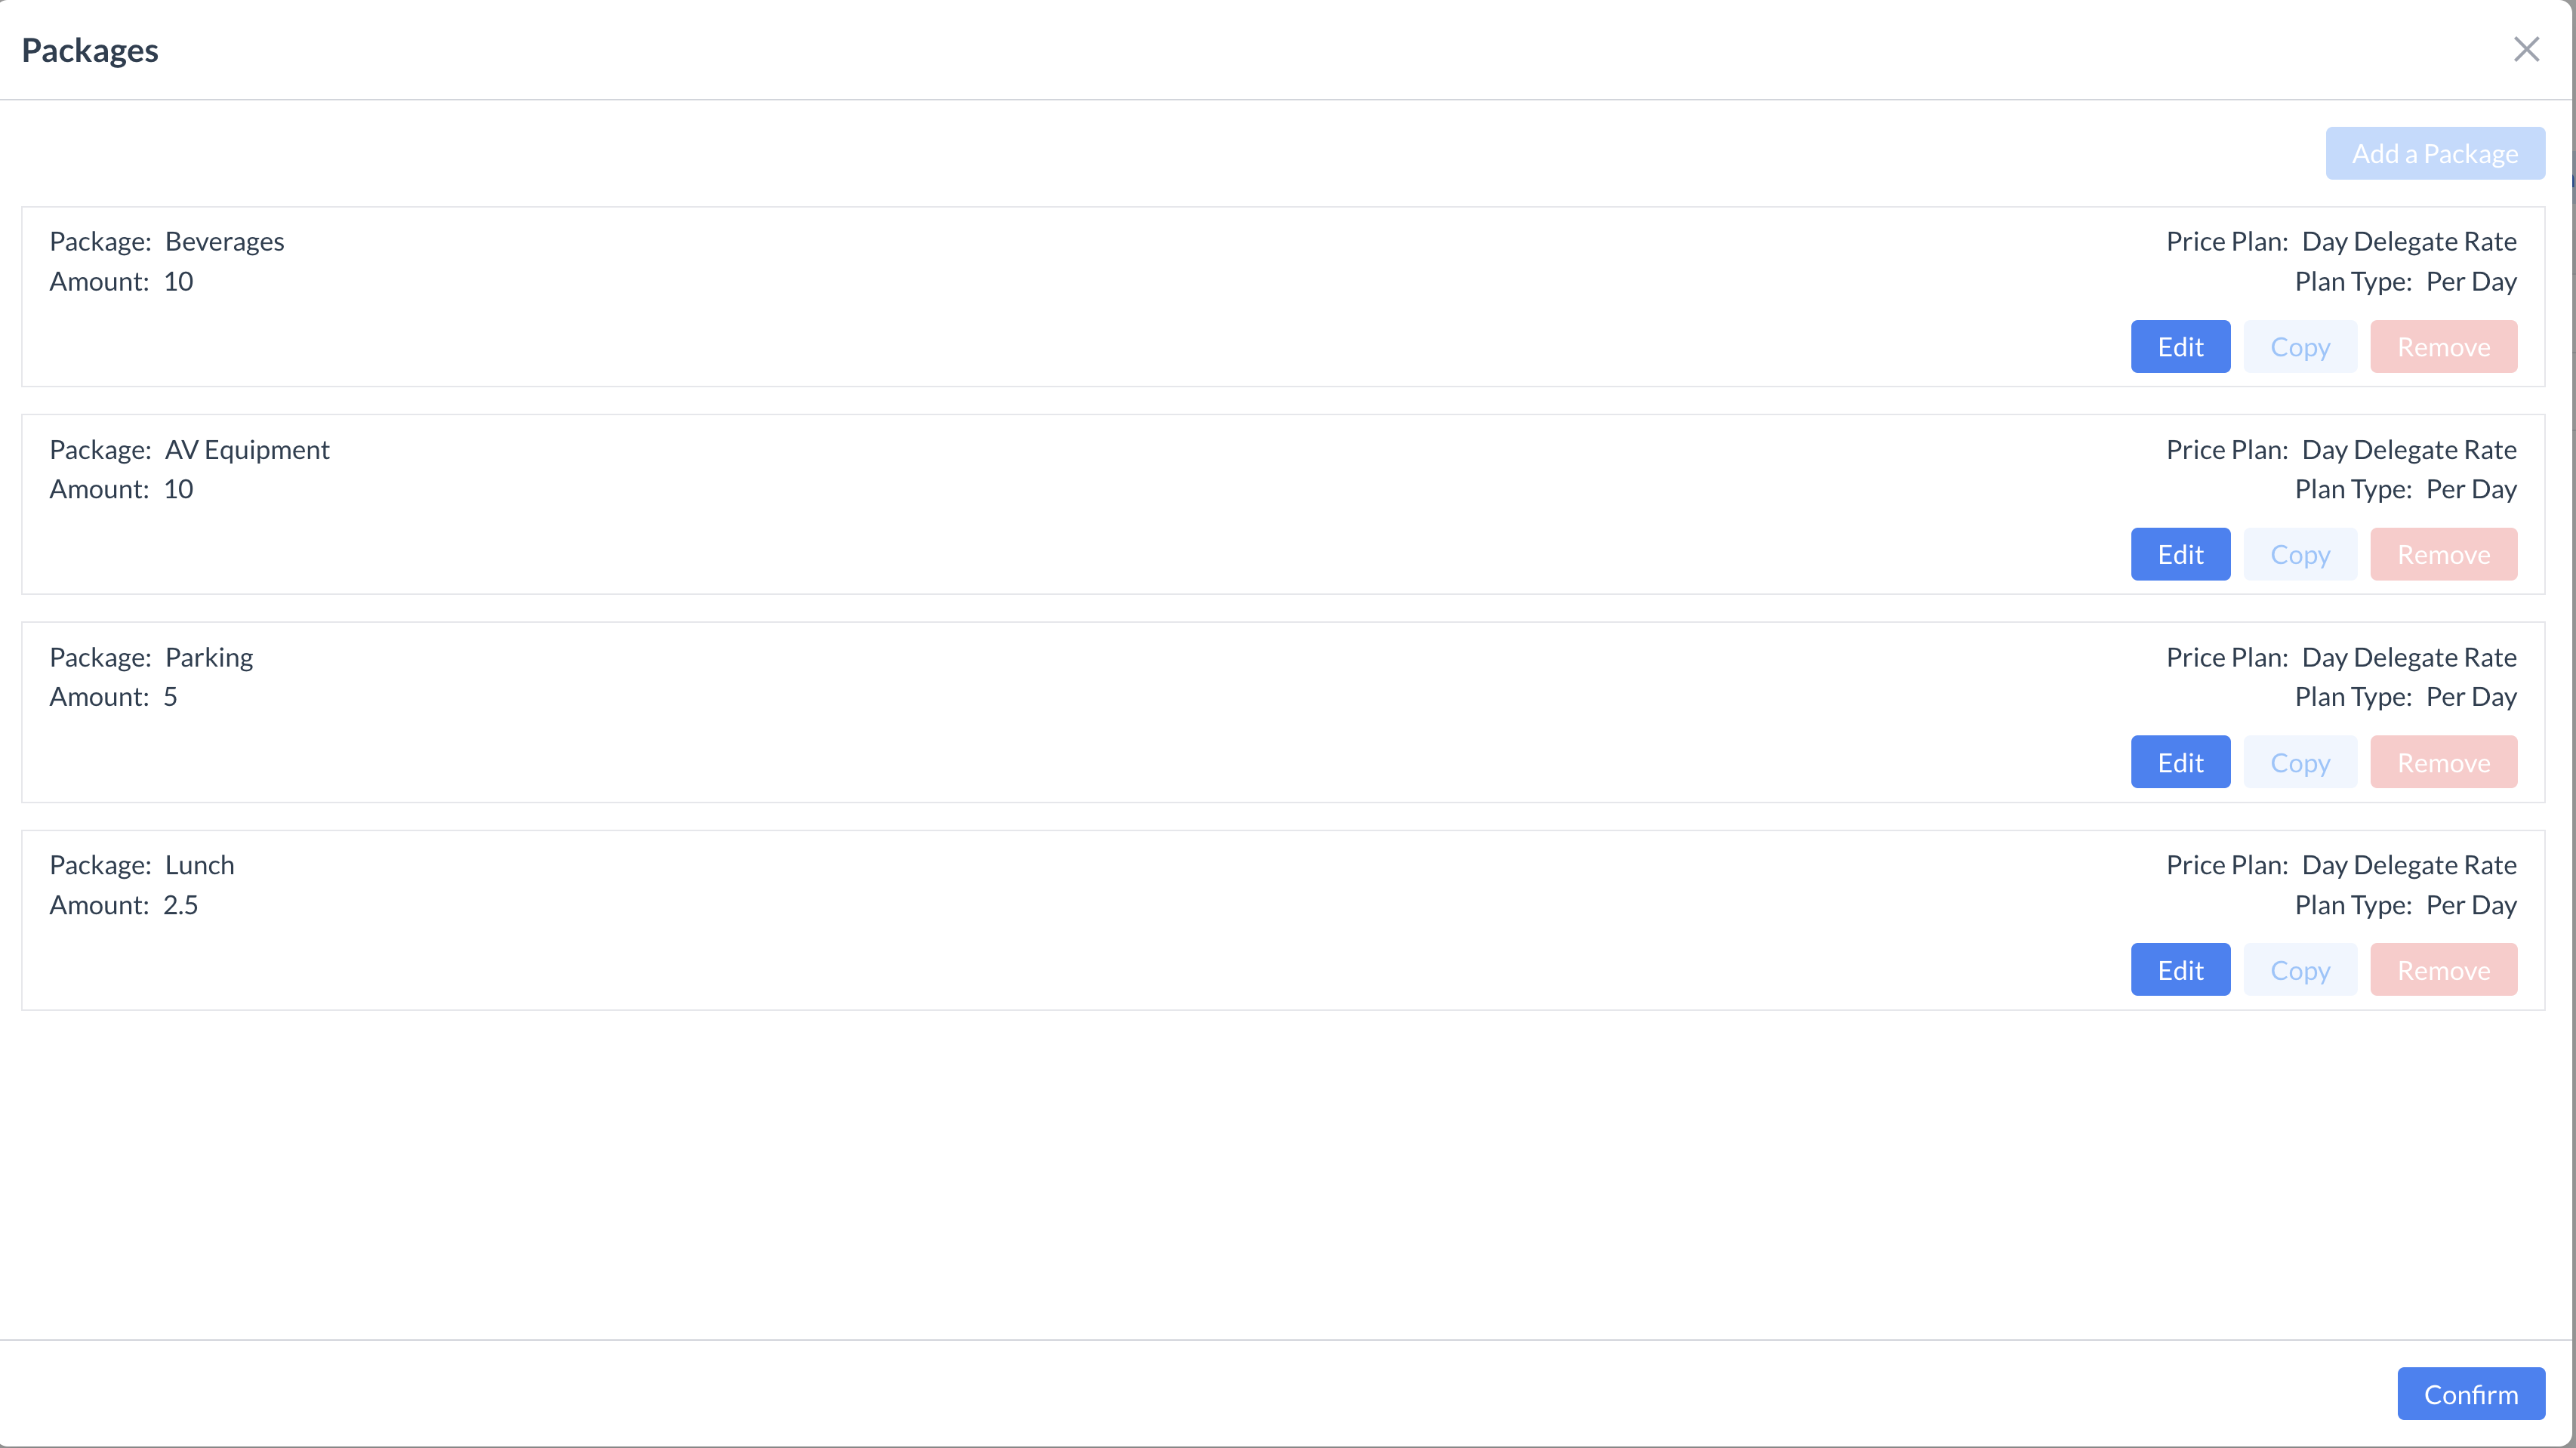 Package Screen - DDR Example |
Step 4b: Adding a Package to an Event Use the Package section to add service components (e.g., food, beverage, AV) to your event. Follow the steps below to configure a package correctly. 1. Select a Package CategoryUse the Package Category dropdown to filter and display packages based on category (e.g., Catering, AV, Beverage). This helps narrow down your selection. 2. Choose a PackageUse the Package dropdown to select the specific package you want to apply to the event. 3. Assign a Package Classification (Optional)Package Classification is used for internal reporting and categorization. This is optional but can be useful for tracking usage and performance. 4. Enter Guest CountsEnter the number of guests for whom the package applies. These counts often populate from the sub-event configuration but can be adjusted as needed—especially for food and beverage packages.
These counts will appear on the Banquet Event Order (BEO) for your catering team. 5. Set Package Timing
⚠️ Note: You can customize setup or delivery times for items by clicking the Add Serving Time link. A new Serving Time Name will appear—enter the desired label, then select the start and end times. All defined serving times will be clearly displayed on the BEO, enhancing operational clarity and supporting smooth event execution. 6. Enter Expected Consumption %Specify the anticipated consumption percentage for the package (e.g., if not all guests are expected to consume a product). This helps with inventory and planning accuracy. 7. Optional: Hide Pricing on the BEOIf you do not want the package’s unit price to appear on the BEO, enable the “Hide Unit Price on BEO” toggle. 8. Select a Price PlanChoose the appropriate price plan for the package based on your event’s rate structure. 9. Add RemarksUse the Remarks field to enter helpful notes such as:
These notes are visible on the BEO. 10. Configure Package ItemsUnder Package Items, you will see the menu and associated products included in the selected package.
| 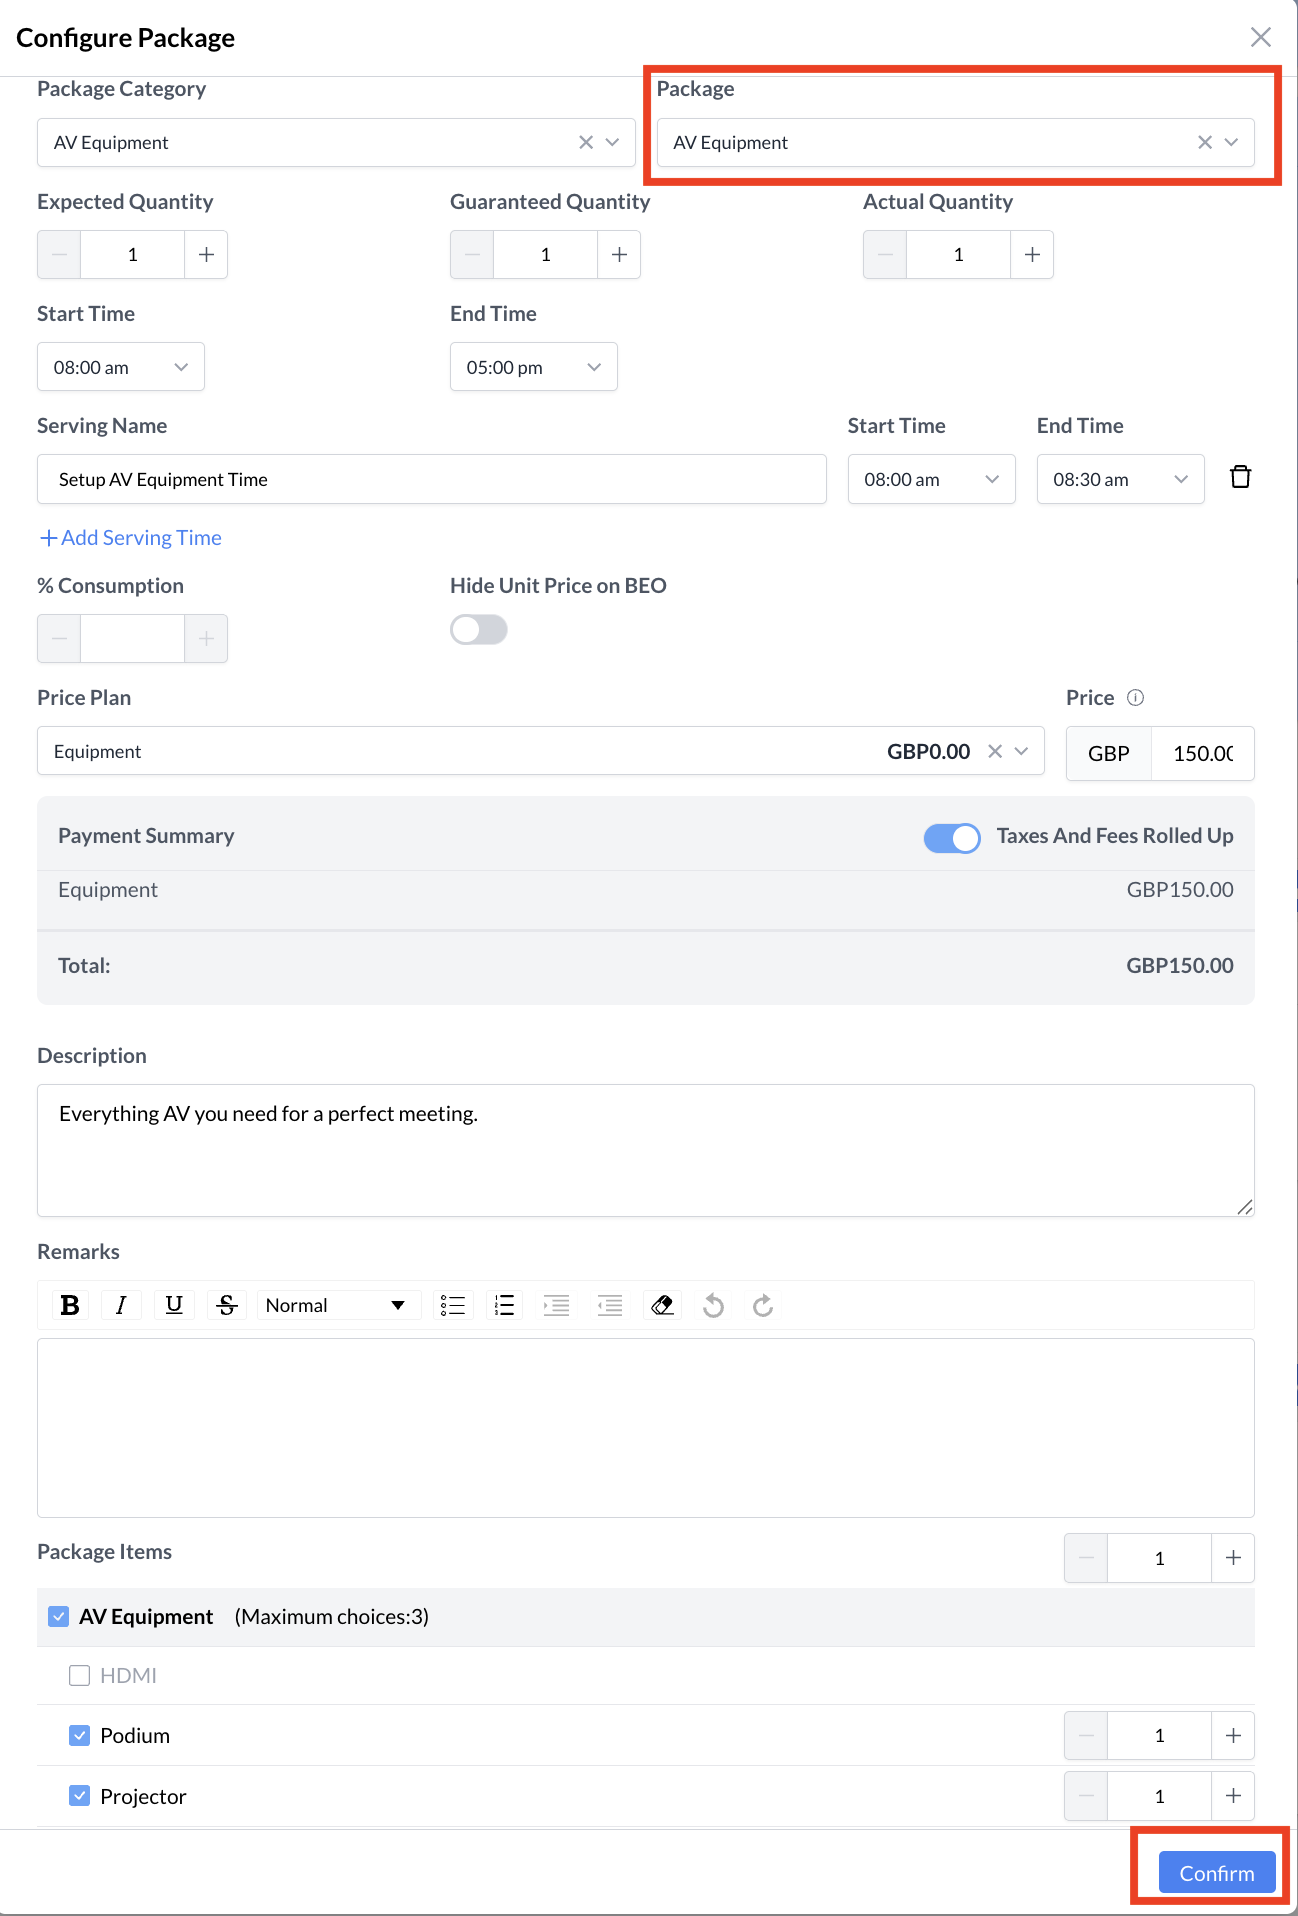 Package Configuration Screen |
Step 4C: Adding a Package to an Event After adding a package, you will return to the Package screen, where the newly added package will now be listed. To add more packages:
When you have finished adding all required packages, click the blue “Confirm” button to proceed to the next step. | 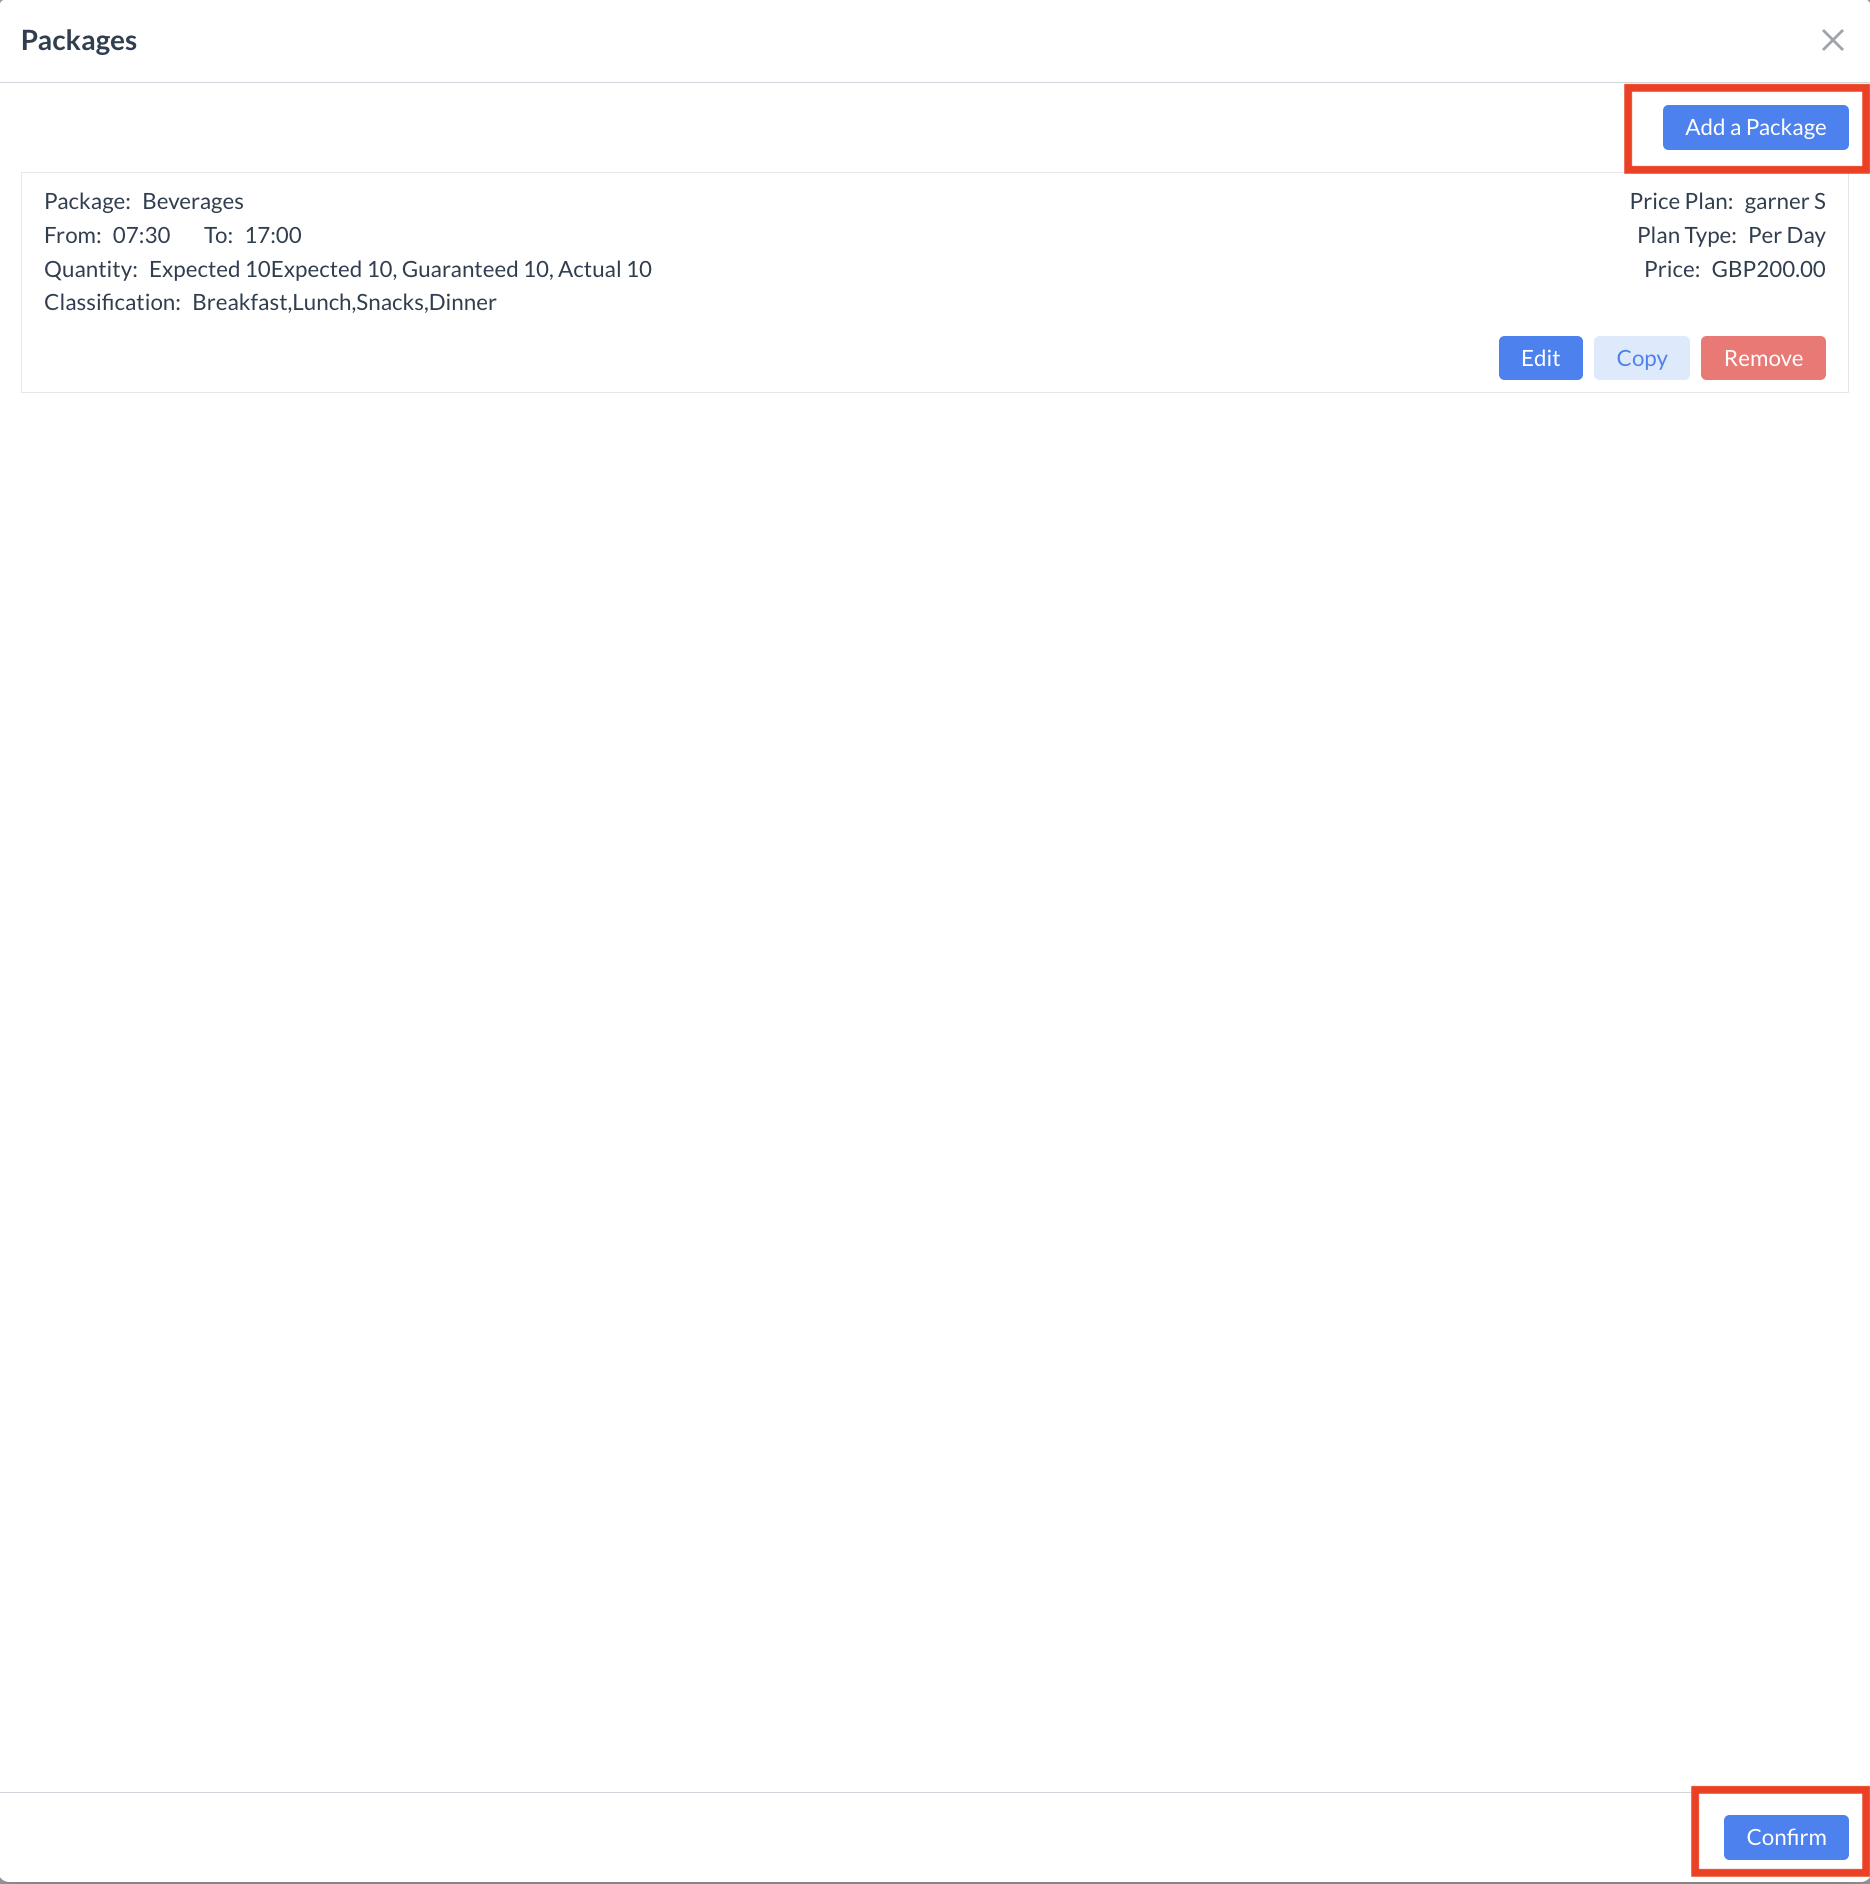 Package Screen |
Step 5: Adding Additional Event Days If your event spans multiple days, you’ll need to create Sub Events and add Packages for each additional day. There are two ways to do this: Option 1: Manually Add a New Event Day
Use this method when the new day has different details (e.g., different room, times, or packages). Option 2: Copy a Previous Event DayIf the next event day will have the same setup as a previous day (same room, times, and packages), you can use the Copy function:
After completing either method, you will return to the Sub Event screen. Once all Sub Events have been created and configured, click the blue “Next” button to continue. | 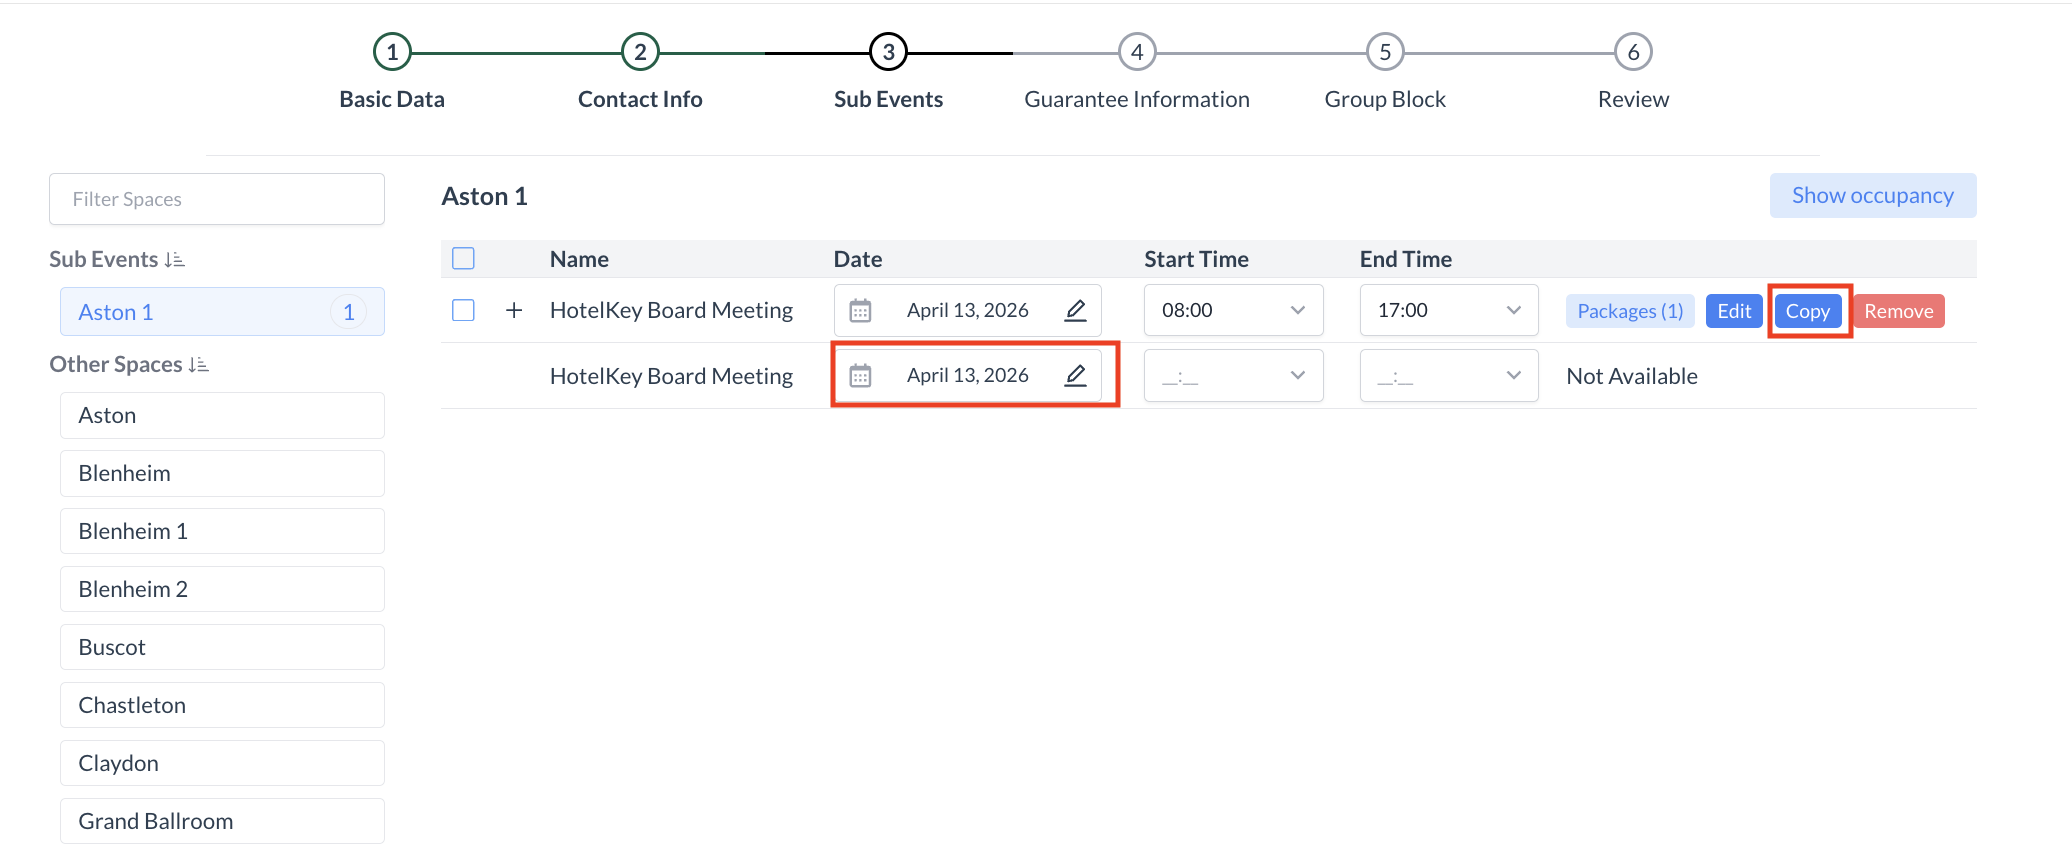 Adding Additional Event Days 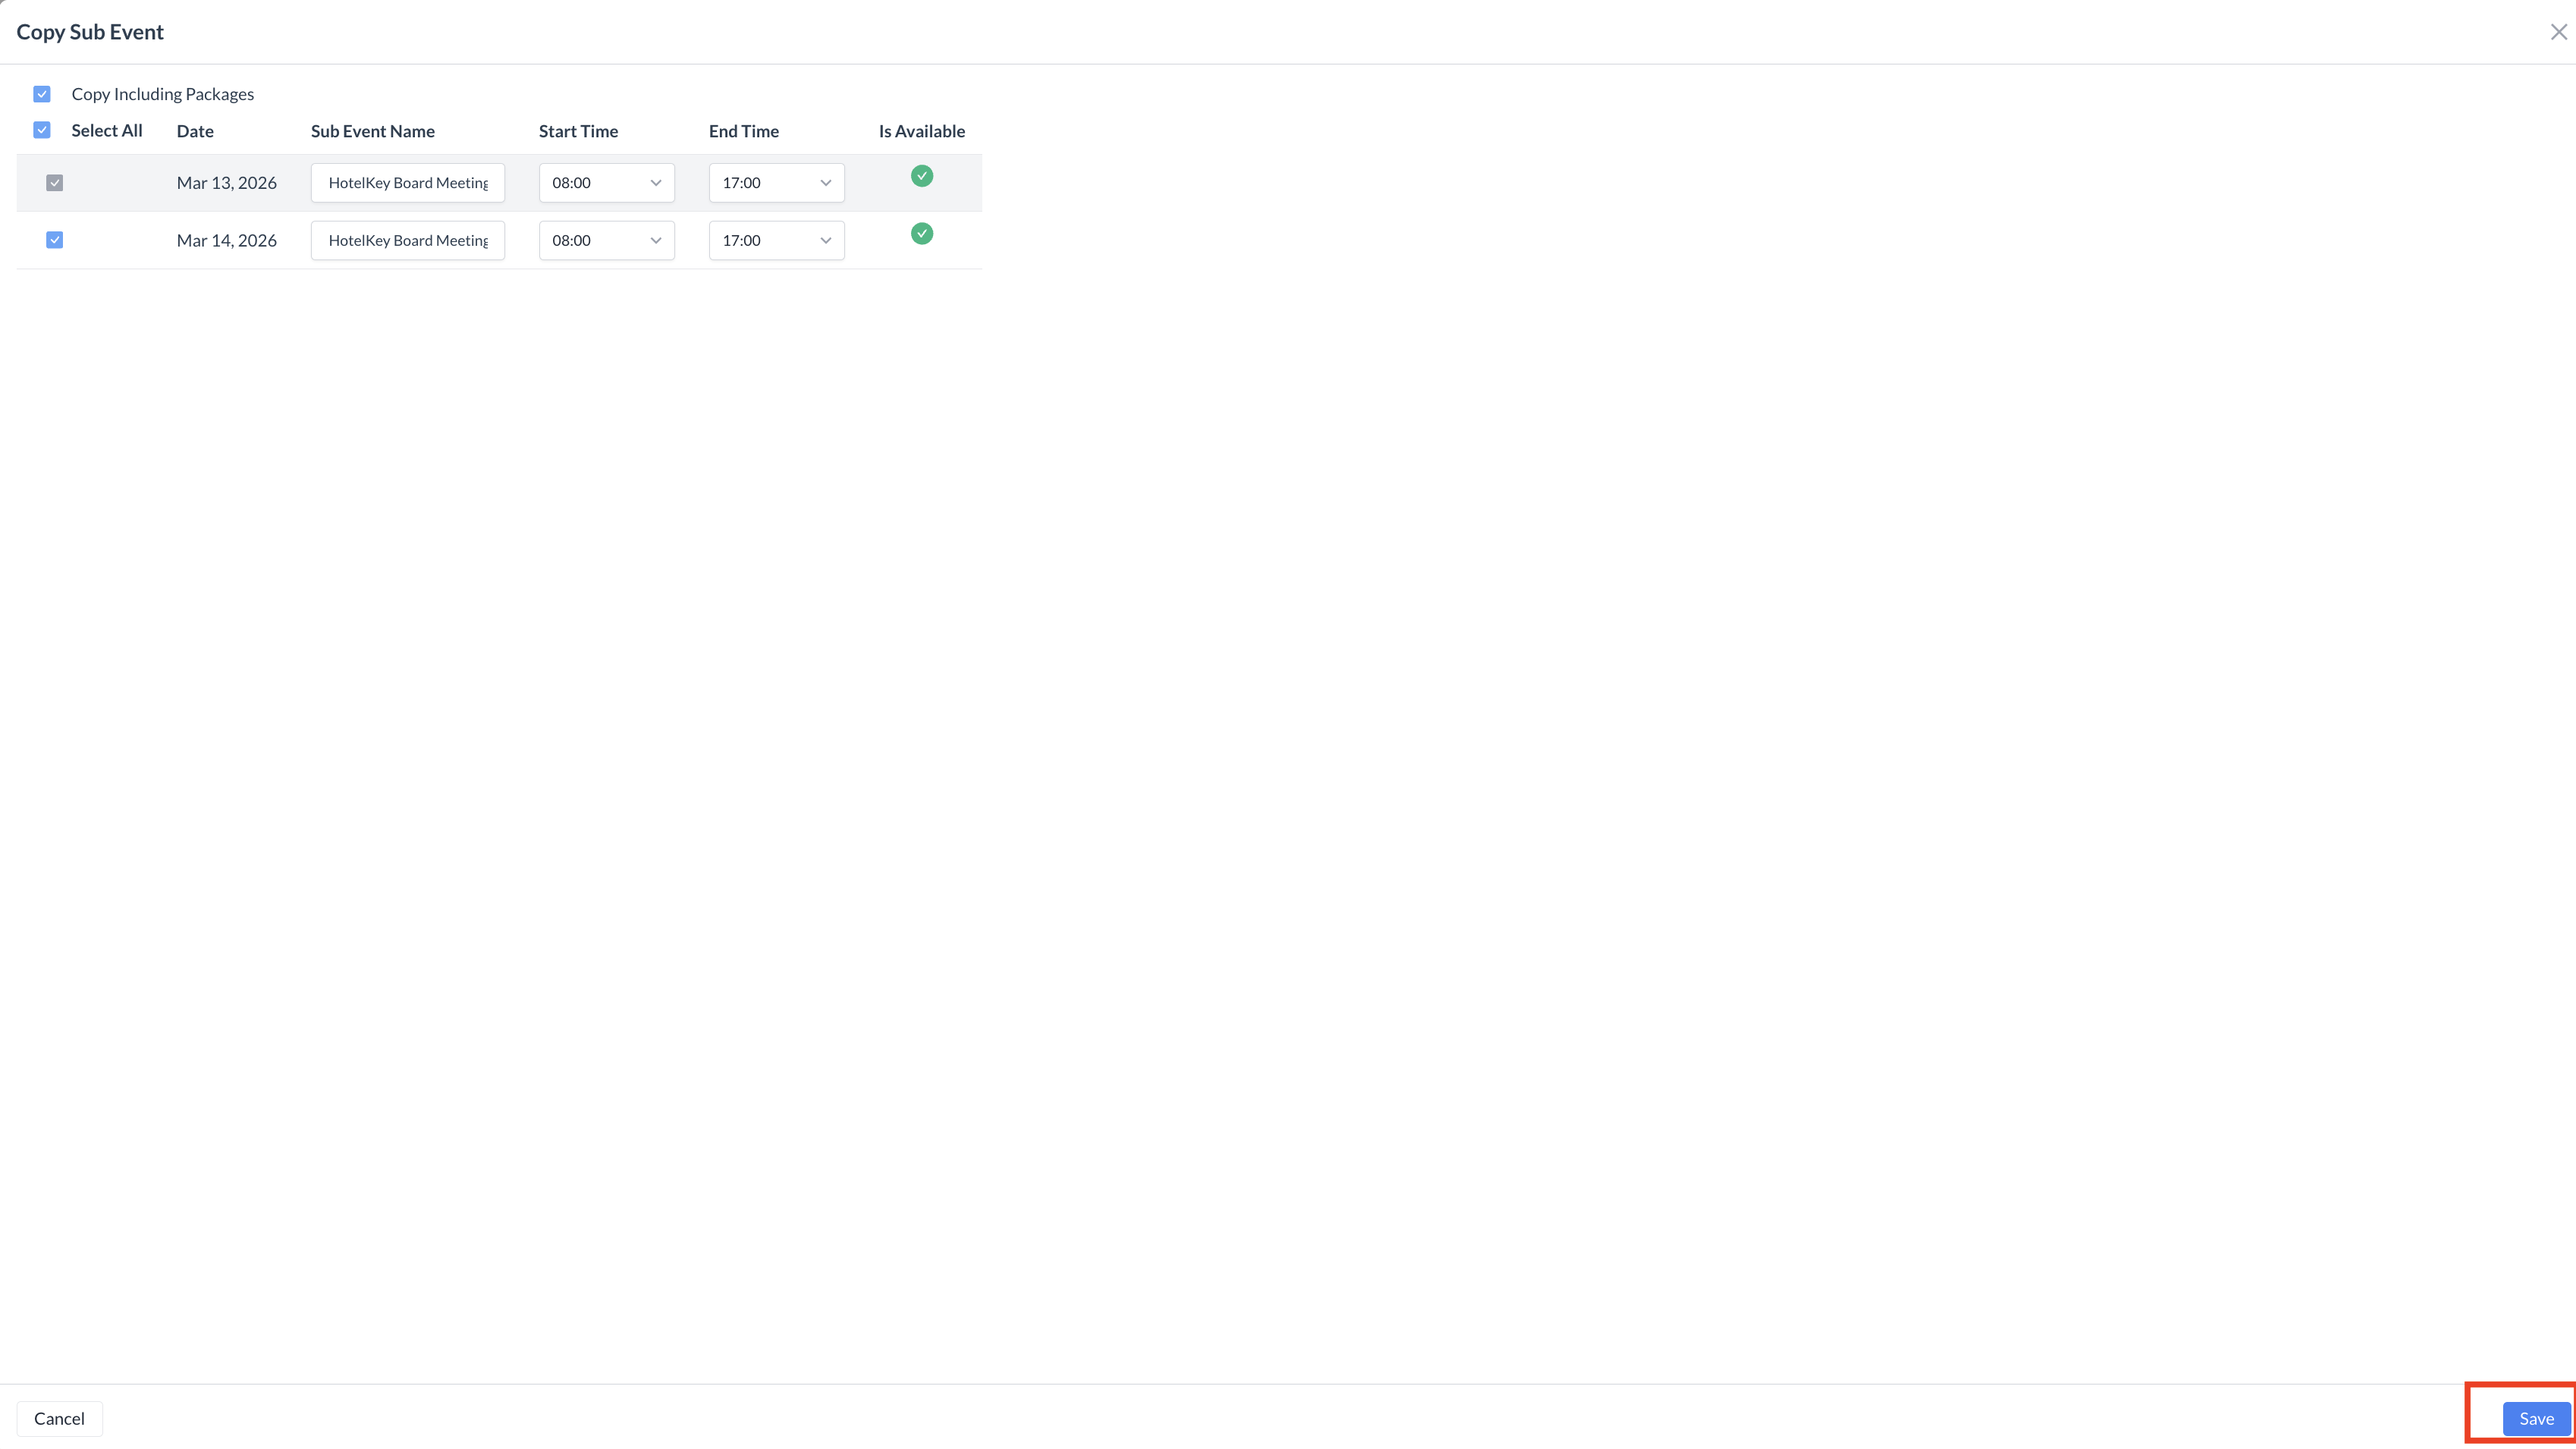 Copy Sub Event Screen 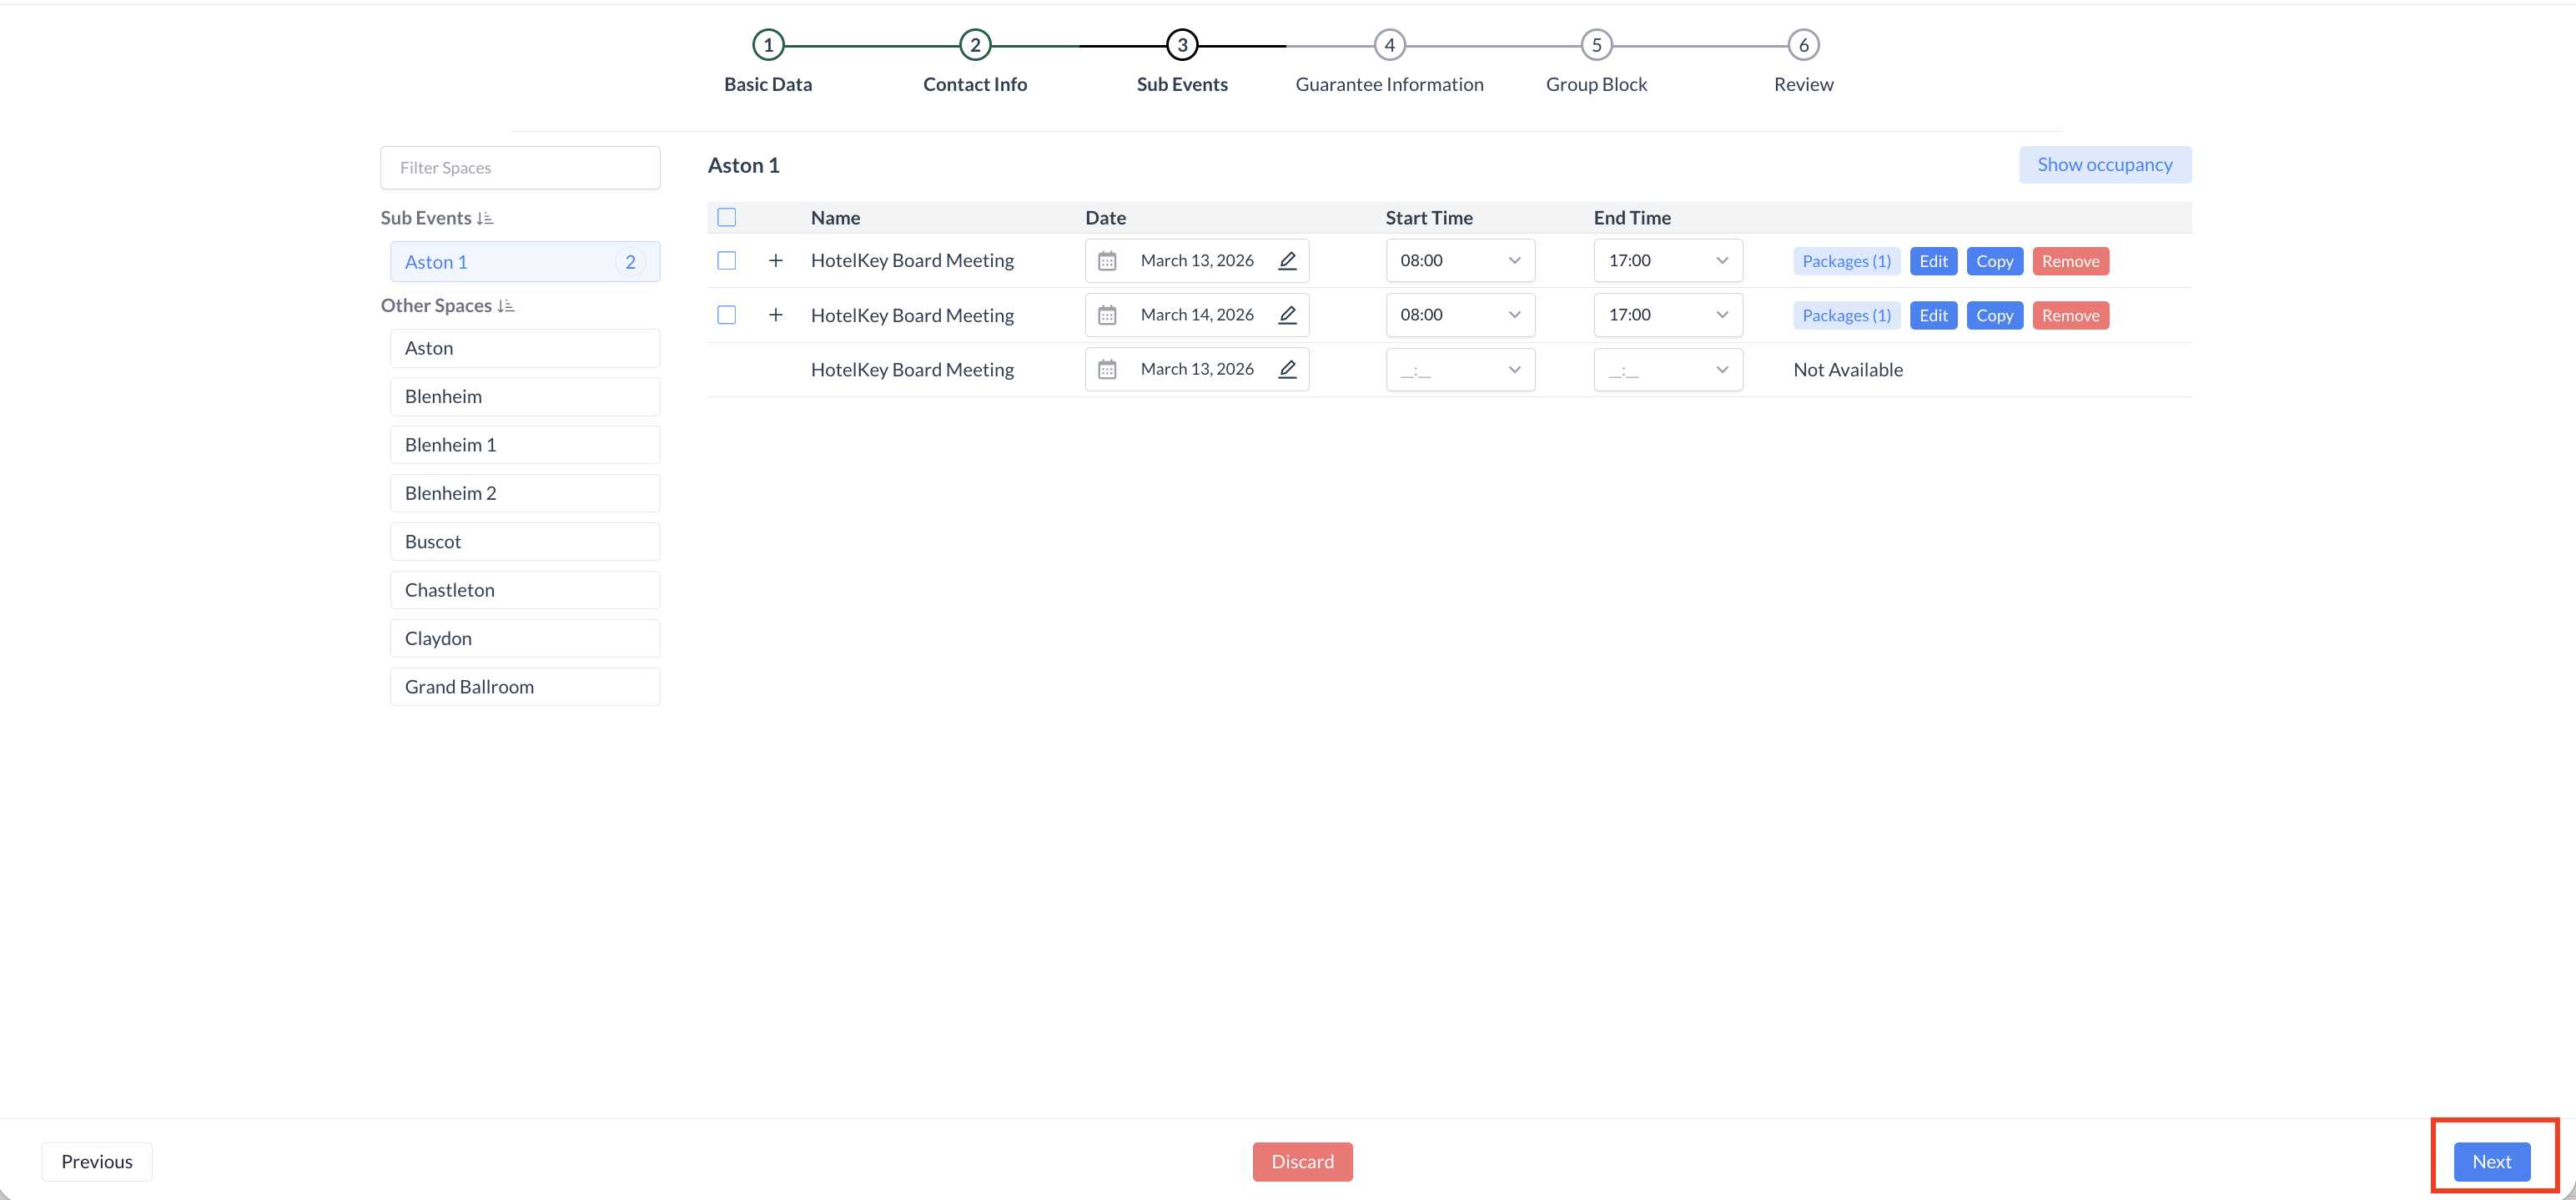 Sub Event Screen |
Step 6: Guarantee & Policy Information In this step, you’ll configure the guarantee details and policy requirements for the event. These settings help define cancellation terms, deposits, and guarantees associated with the event. 1. Select a Cancellation PolicyFrom the Cancellation Policy dropdown, choose the appropriate policy for the overall event (e.g., 28-Day Cancellation). These options are pre-configured by your property.
2. (Optional) Add a Sub Event Cancellation PolicyYou may also assign a cancellation policy at the sub-event level, though this is typically not required. This option is most commonly used for large or complex events that include multiple rooms or meeting spaces, where a penalty might apply for canceling individual components.
3. Select an Advance Deposit PolicyFrom the Advance Deposit Policy dropdown, select the appropriate policy (e.g., Deposit Due 90 Days Before Event Start). 4. (If Applicable) Select an Attrition PolicyIf your event includes a group room block and your property uses attrition policies, select the appropriate Attrition Policy from the dropdown.
5. Set the Event Cut-Off DateUsing the date picker, select the Cut-Off Date for the event. 6. Enter a PO Number (If Provided)If a Purchase Order (PO) Number has been provided for the event, enter it in the PO Number field. 7. Select the Guarantee TypeChoose the Guarantee Type for the event. You can select from:
8. Proceed to the Next StepOnce all guarantee and policy information has been entered, click the blue “Next” button to continue. | 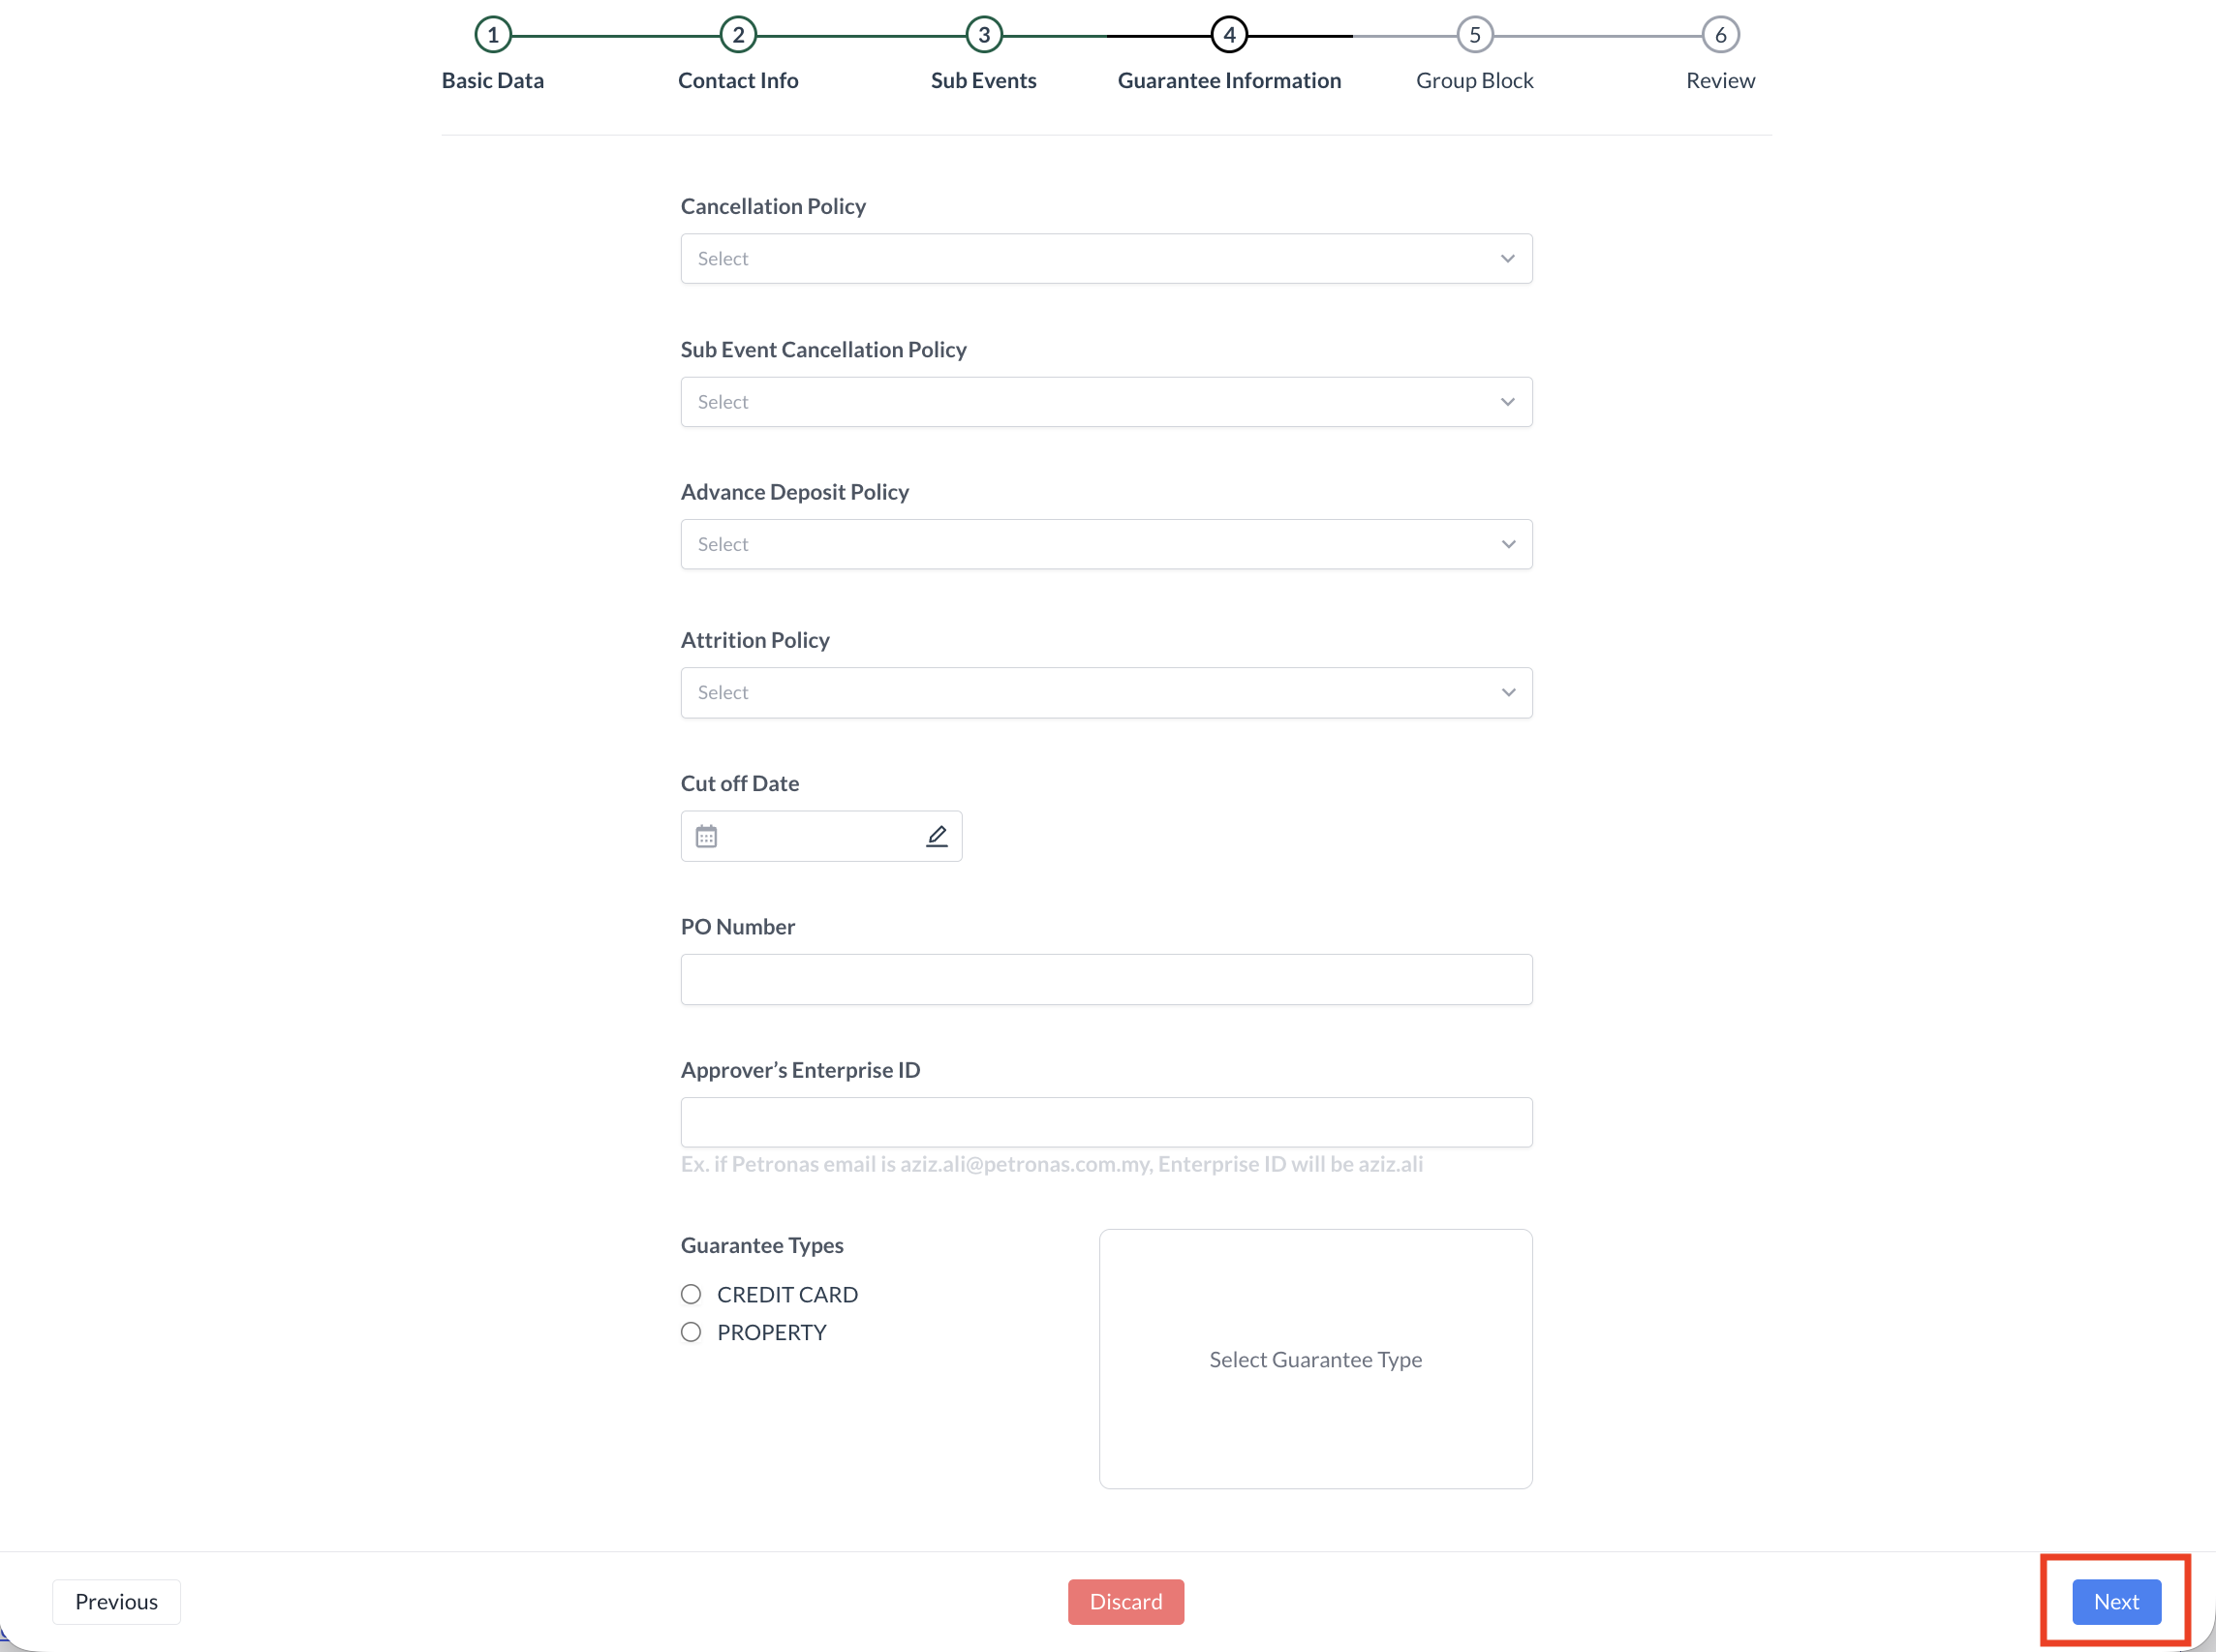 |
Step 7: Skipping Group Block Creation In this training scenario, you will not be creating a new group block. To bypass this step, simply click the blue “Next” button to continue. | 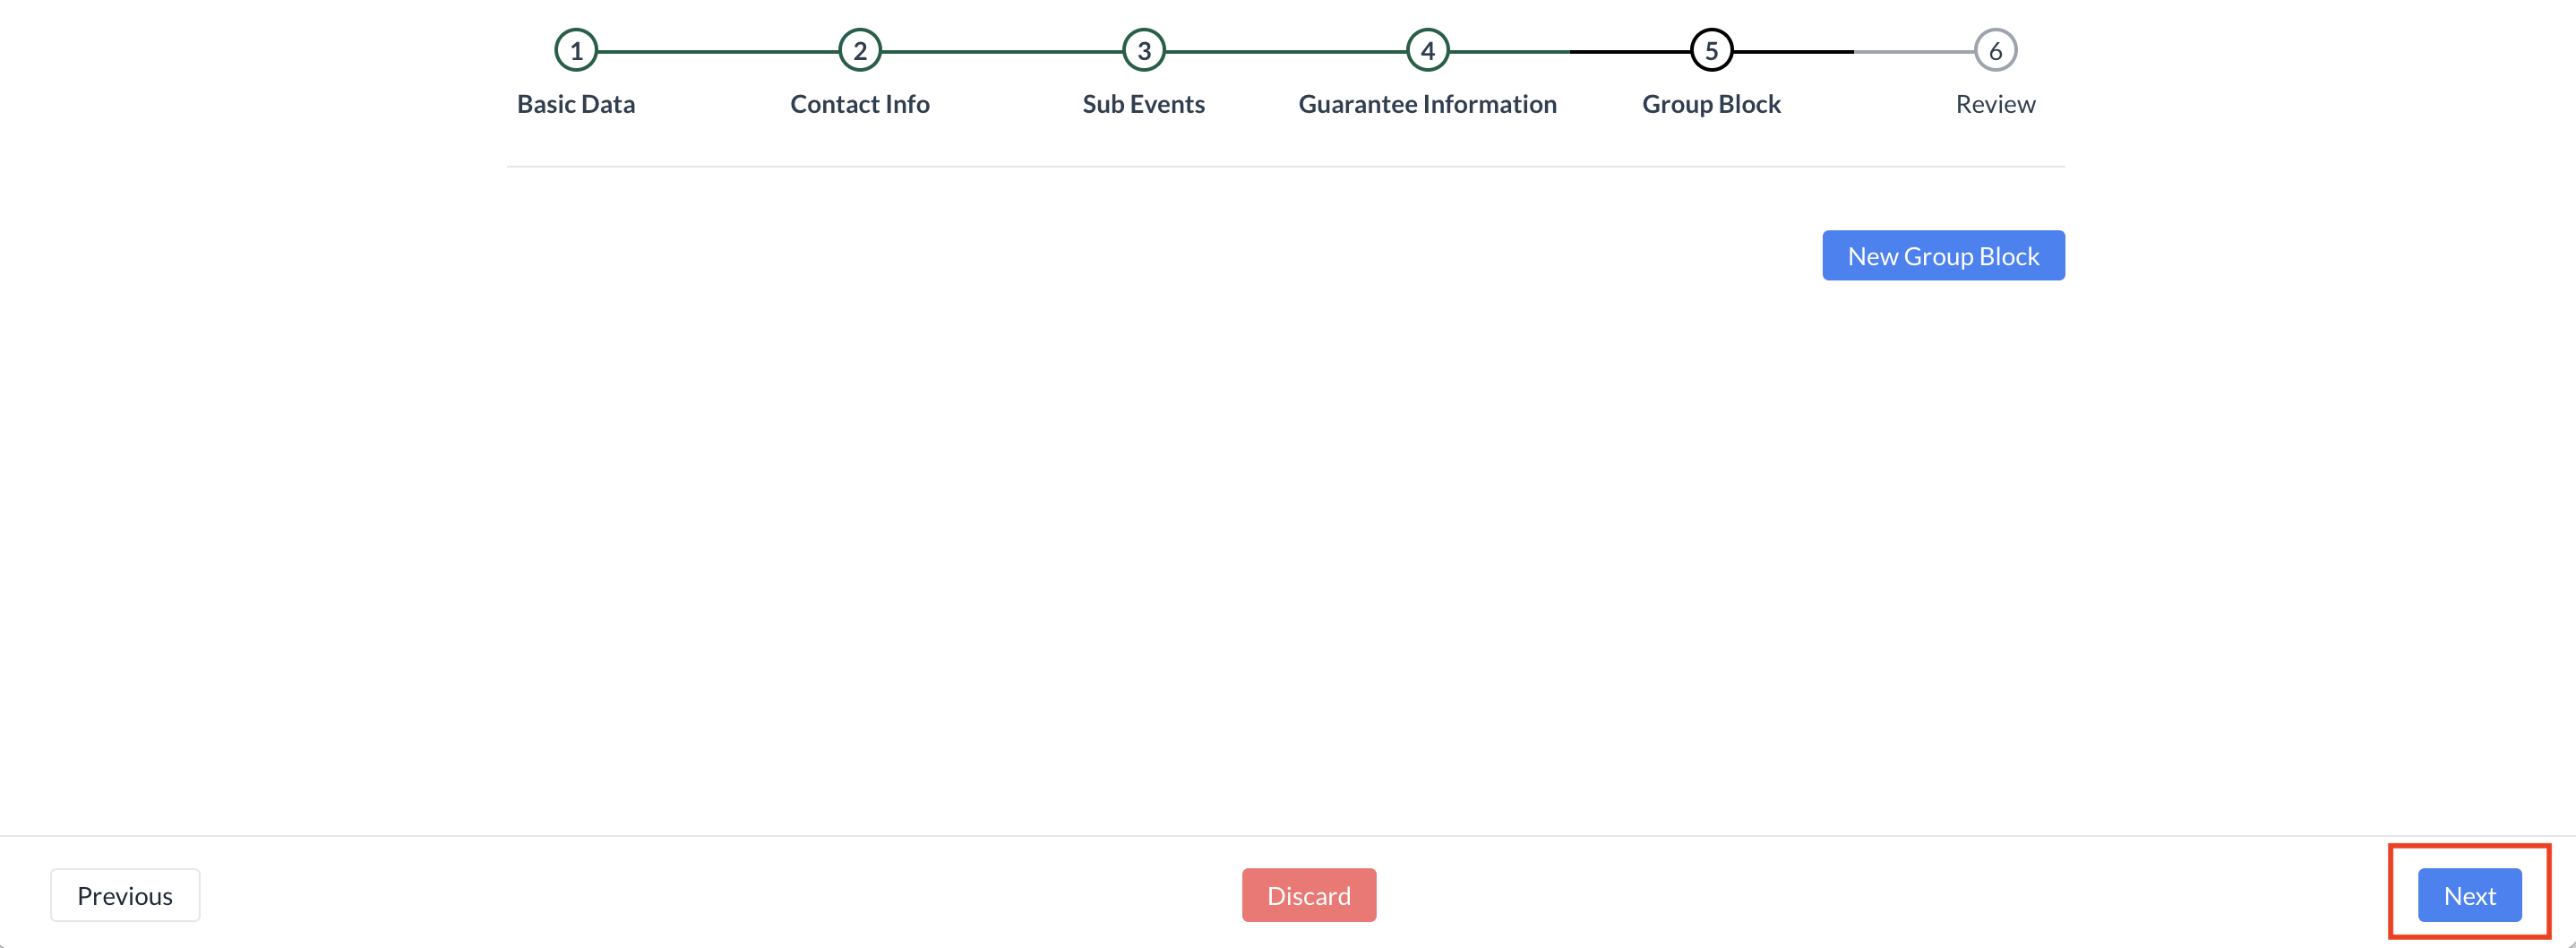 Group Block Bypass |
Step 8: Event Review Screen The Event Review screen provides a final summary of all details entered for the event. This includes:
Take a moment to carefully review each section to ensure all information is accurate. Available Actions:
| 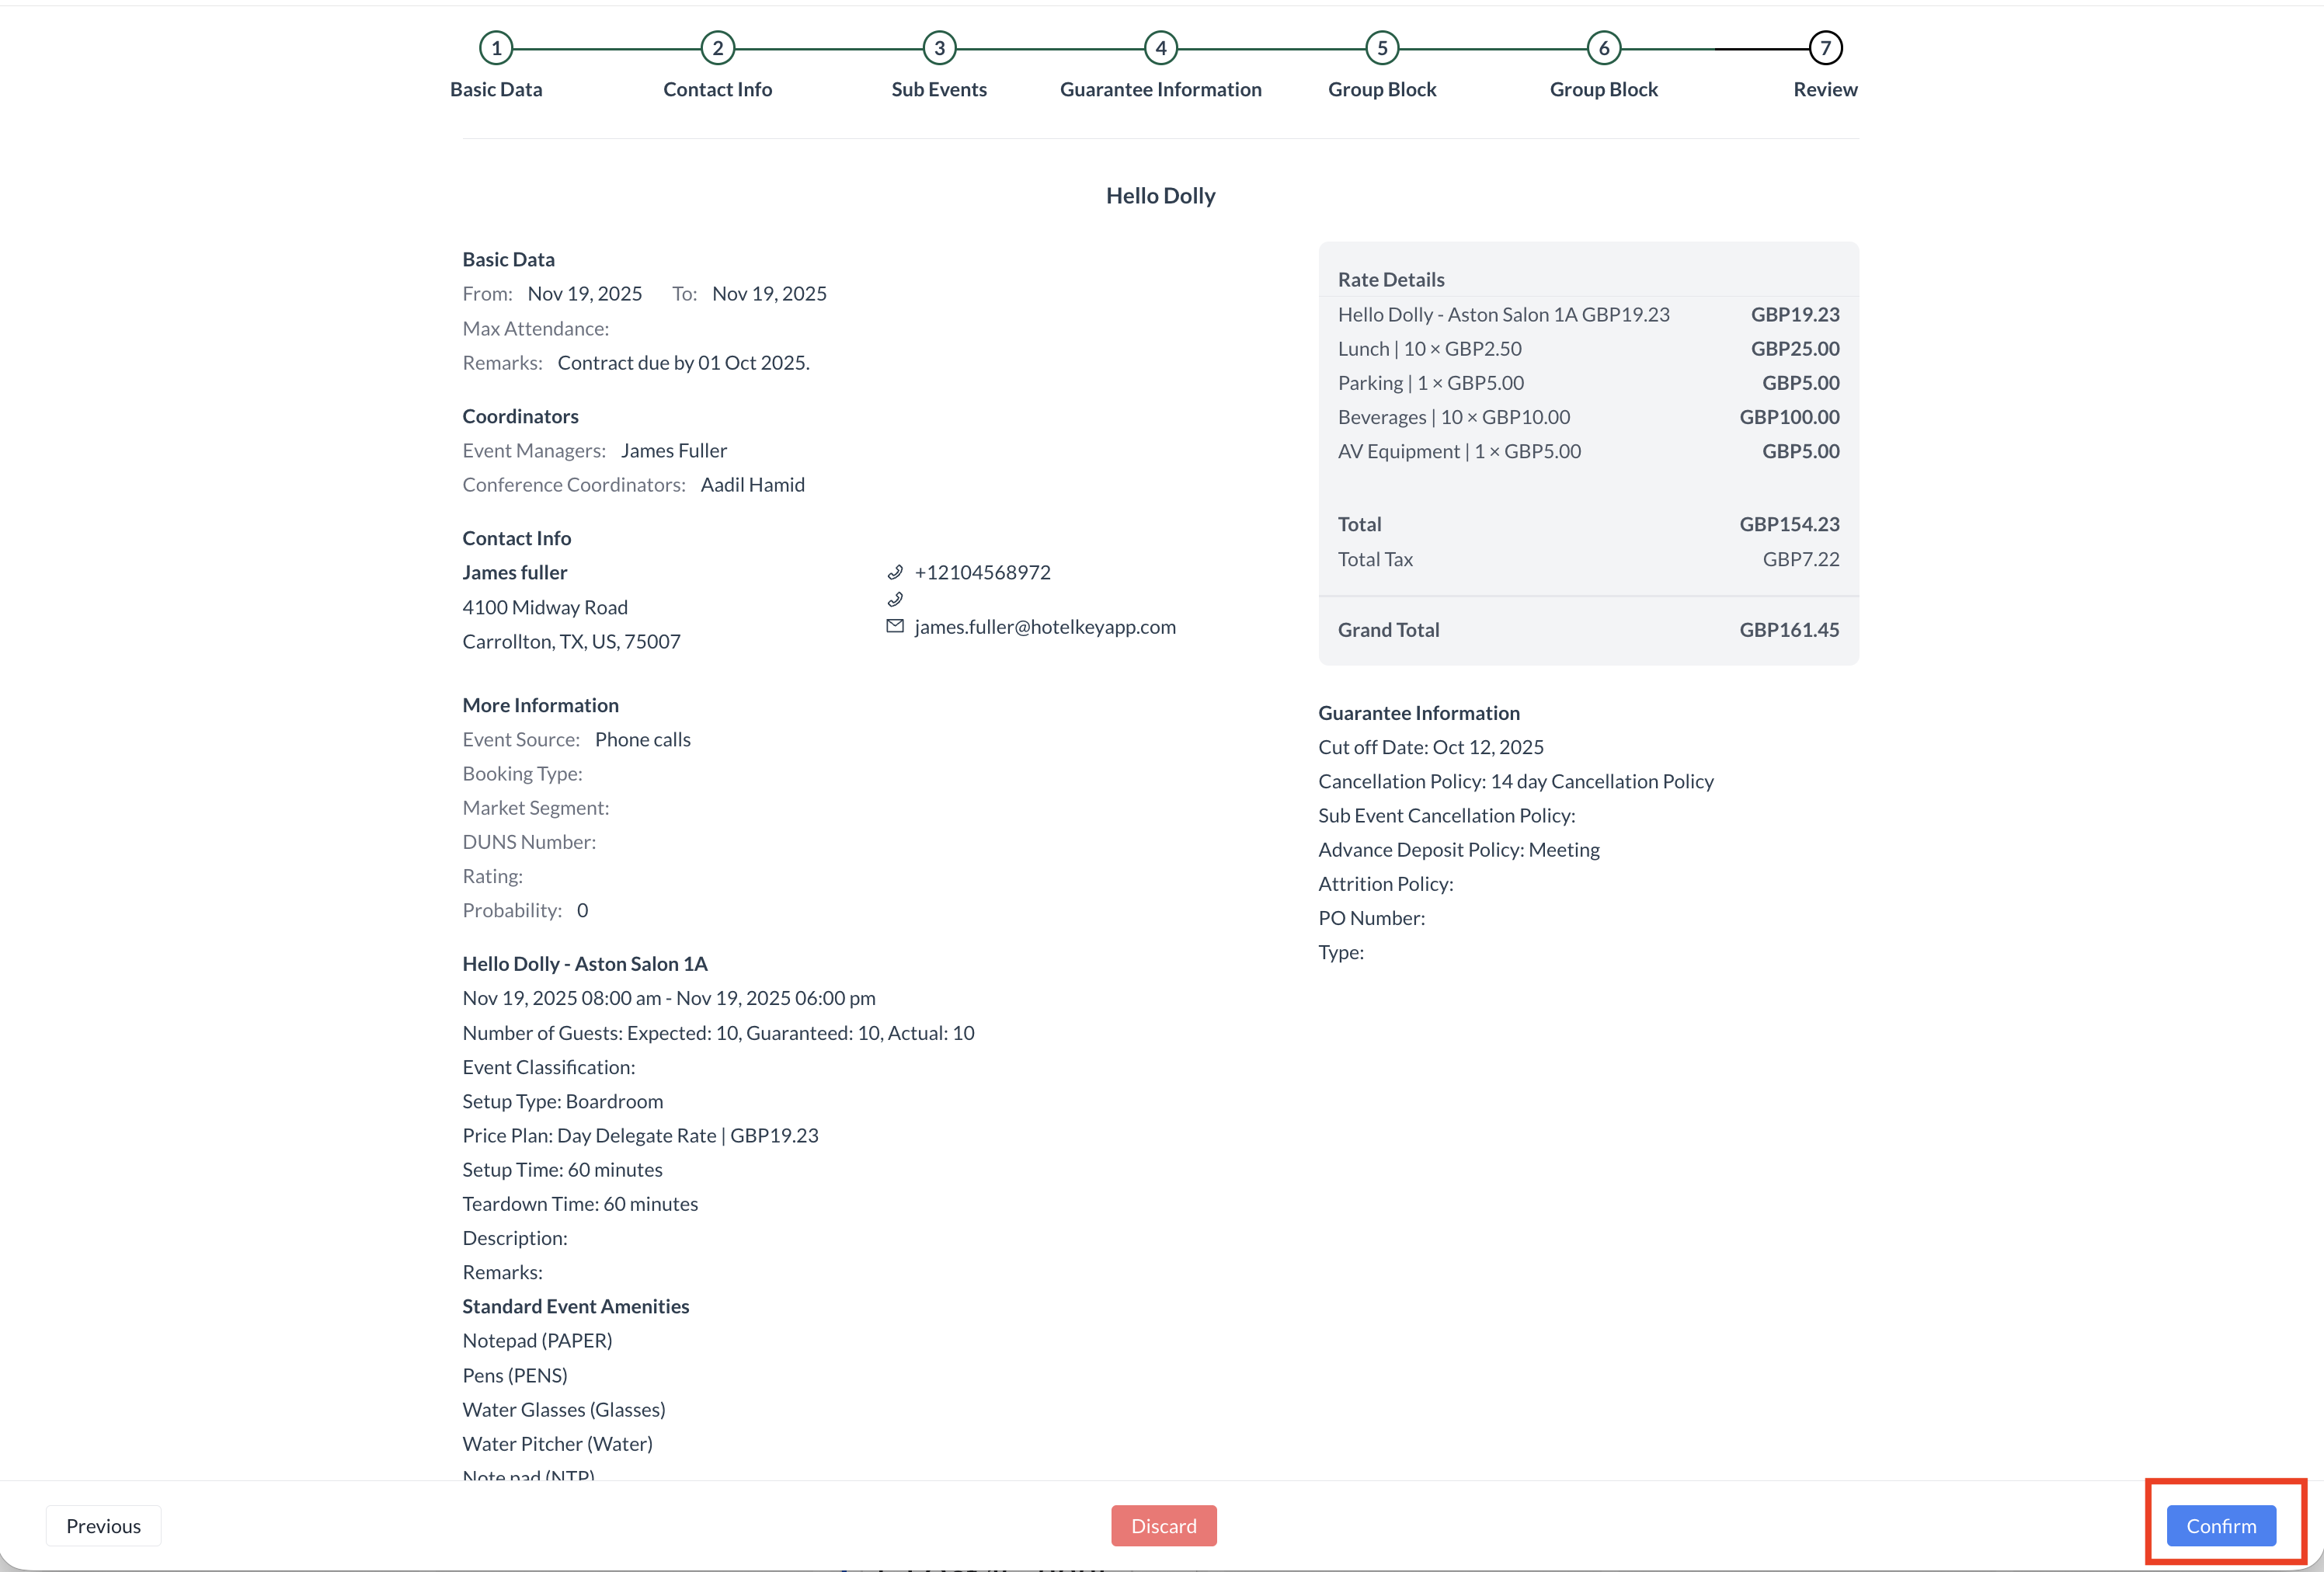 Review and Confirm Event Creation |
The event has been successfully created. You will now be taken to the Event Management screen for the newly created event. | 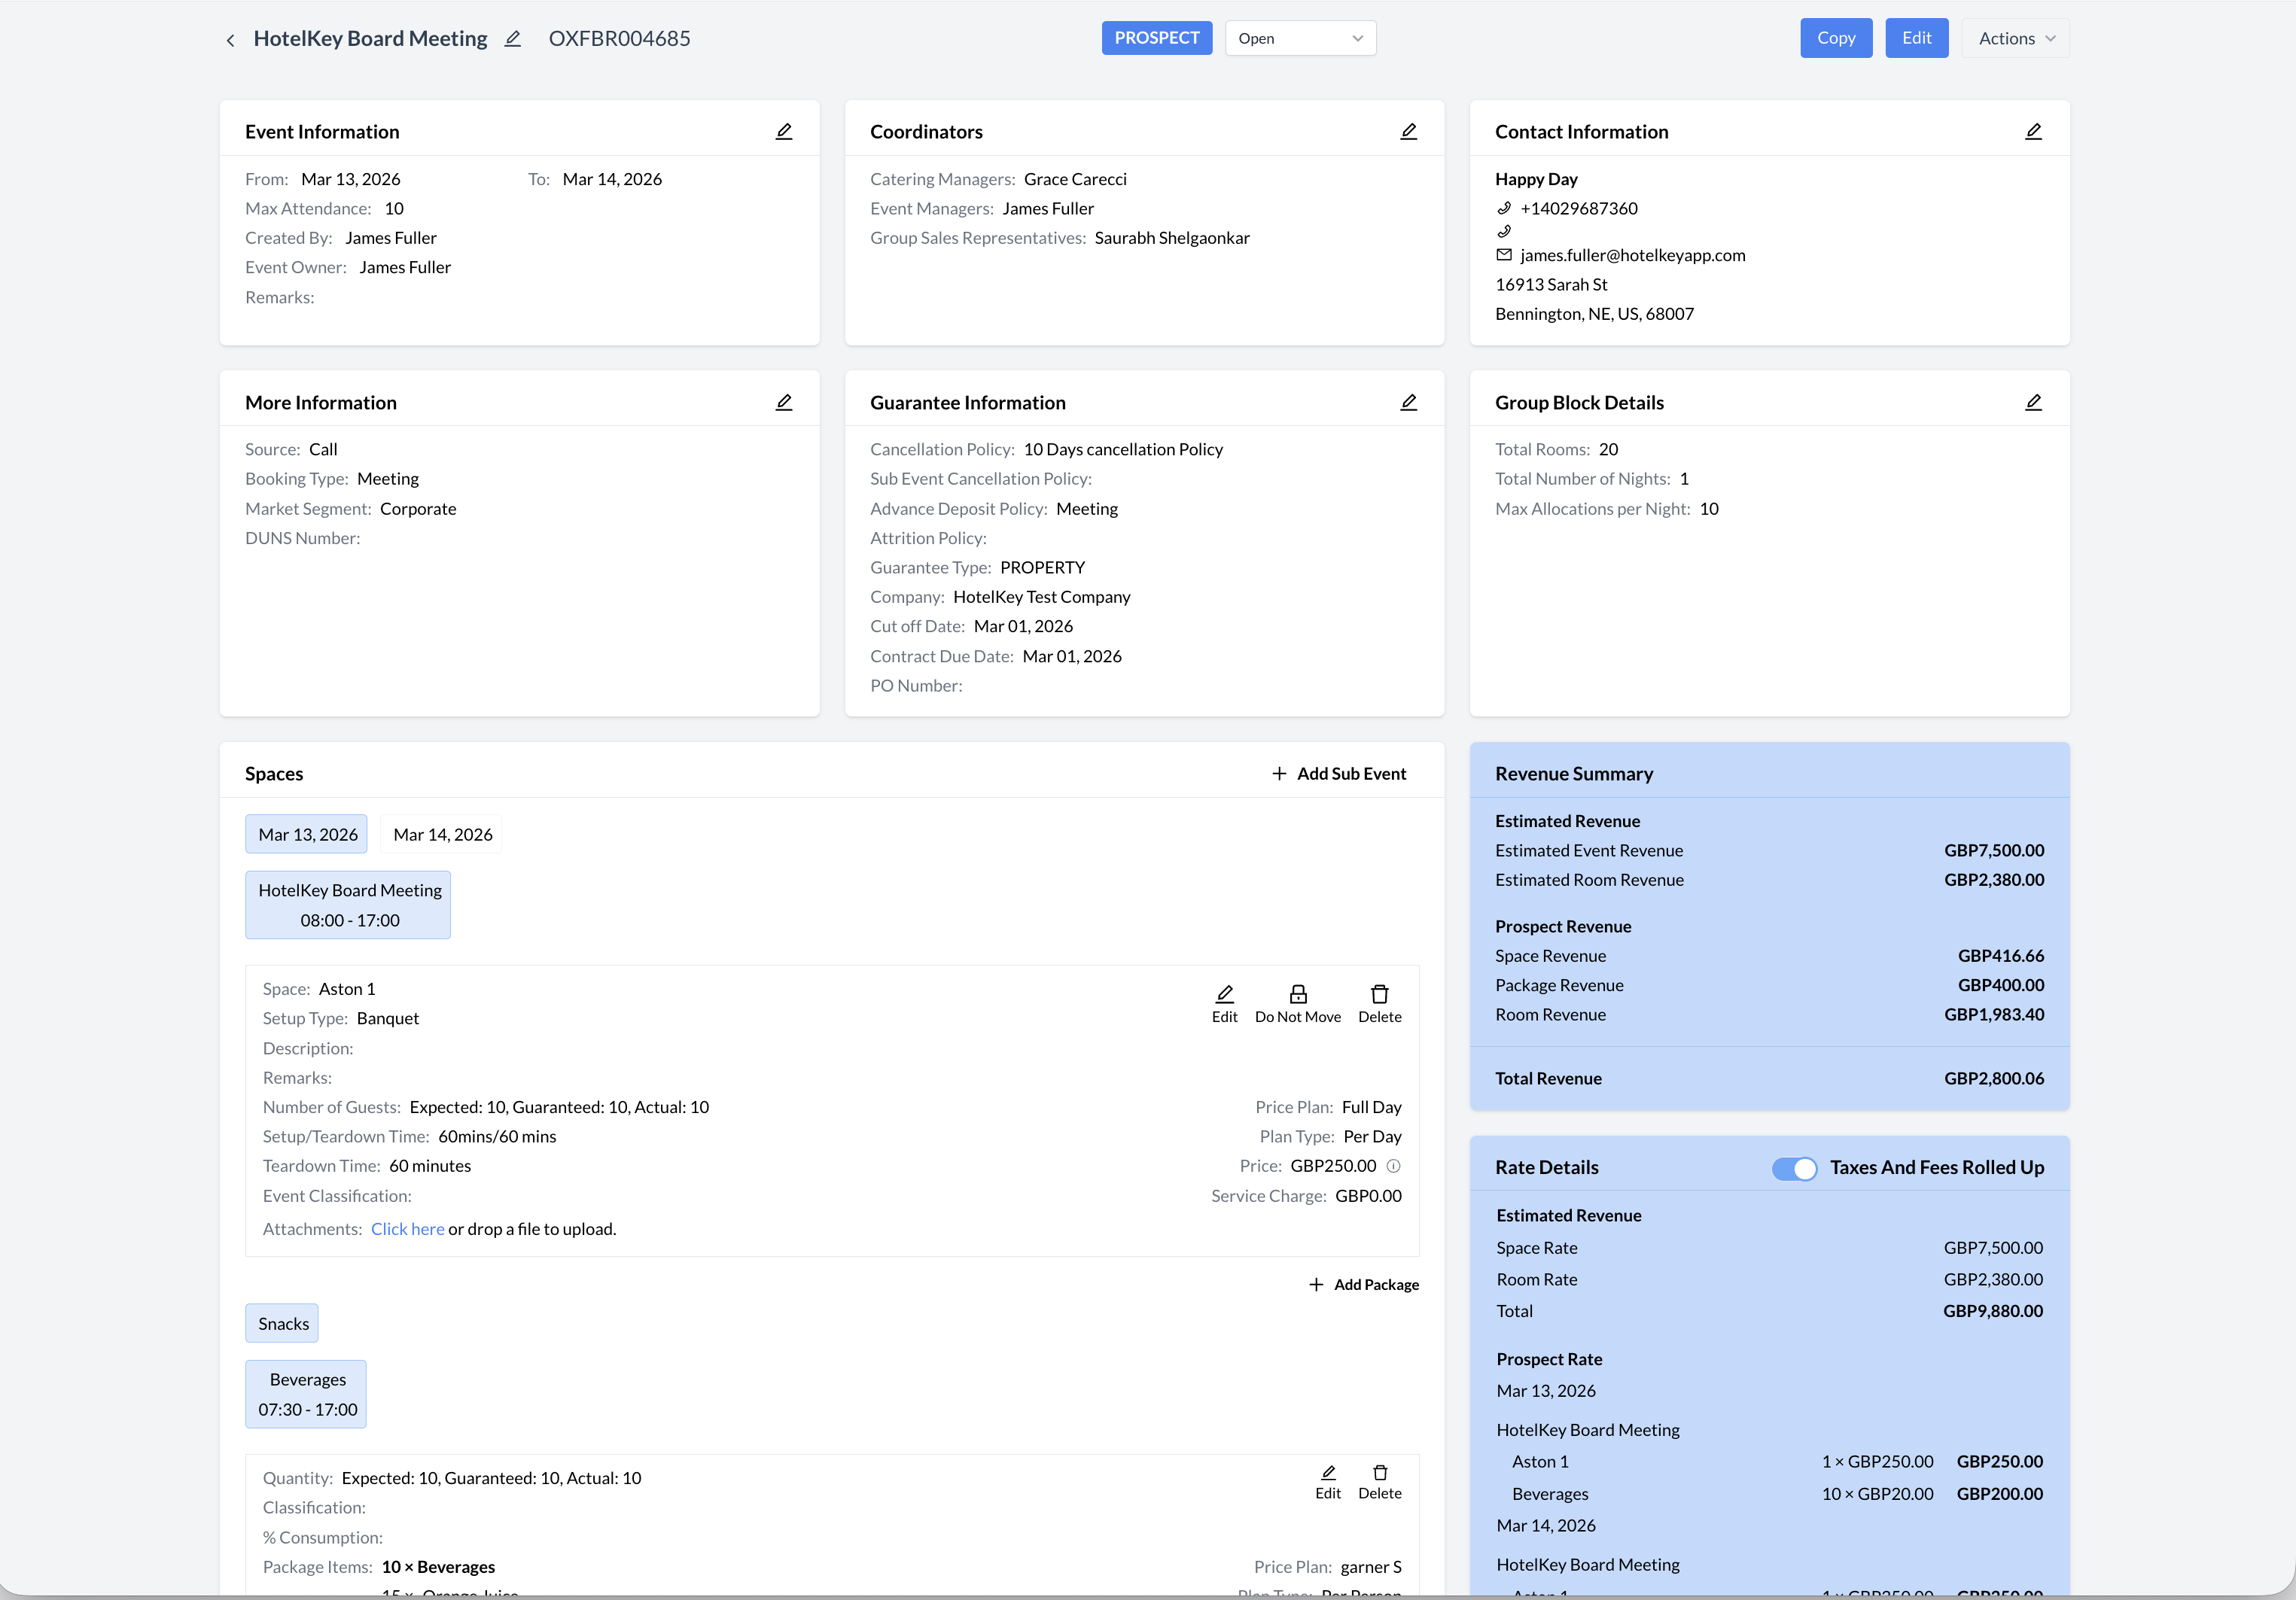 Event Record - Prospect Status |
