Skip table of contents

Deposit Policies

📆 Revision Date:

Deposit Policy

A Deposit Policy for events outlines the terms and schedule by which a client is required to submit payment in advance of their event. This policy helps secure the booking, protects the venue against last-minute cancellations, and ensures a financial commitment from the client. Deposit policies typically specify the amount or percentage of the total estimated charges due, along with due dates (e.g., upon contract signing, 30 days before the event, etc.). In EventKey, deposit policies can be configured to automatically generate tasks, track due dates, and link collected payments to the event folio. Clear deposit policies are essential for maintaining consistent financial practices and setting accurate client expectations.

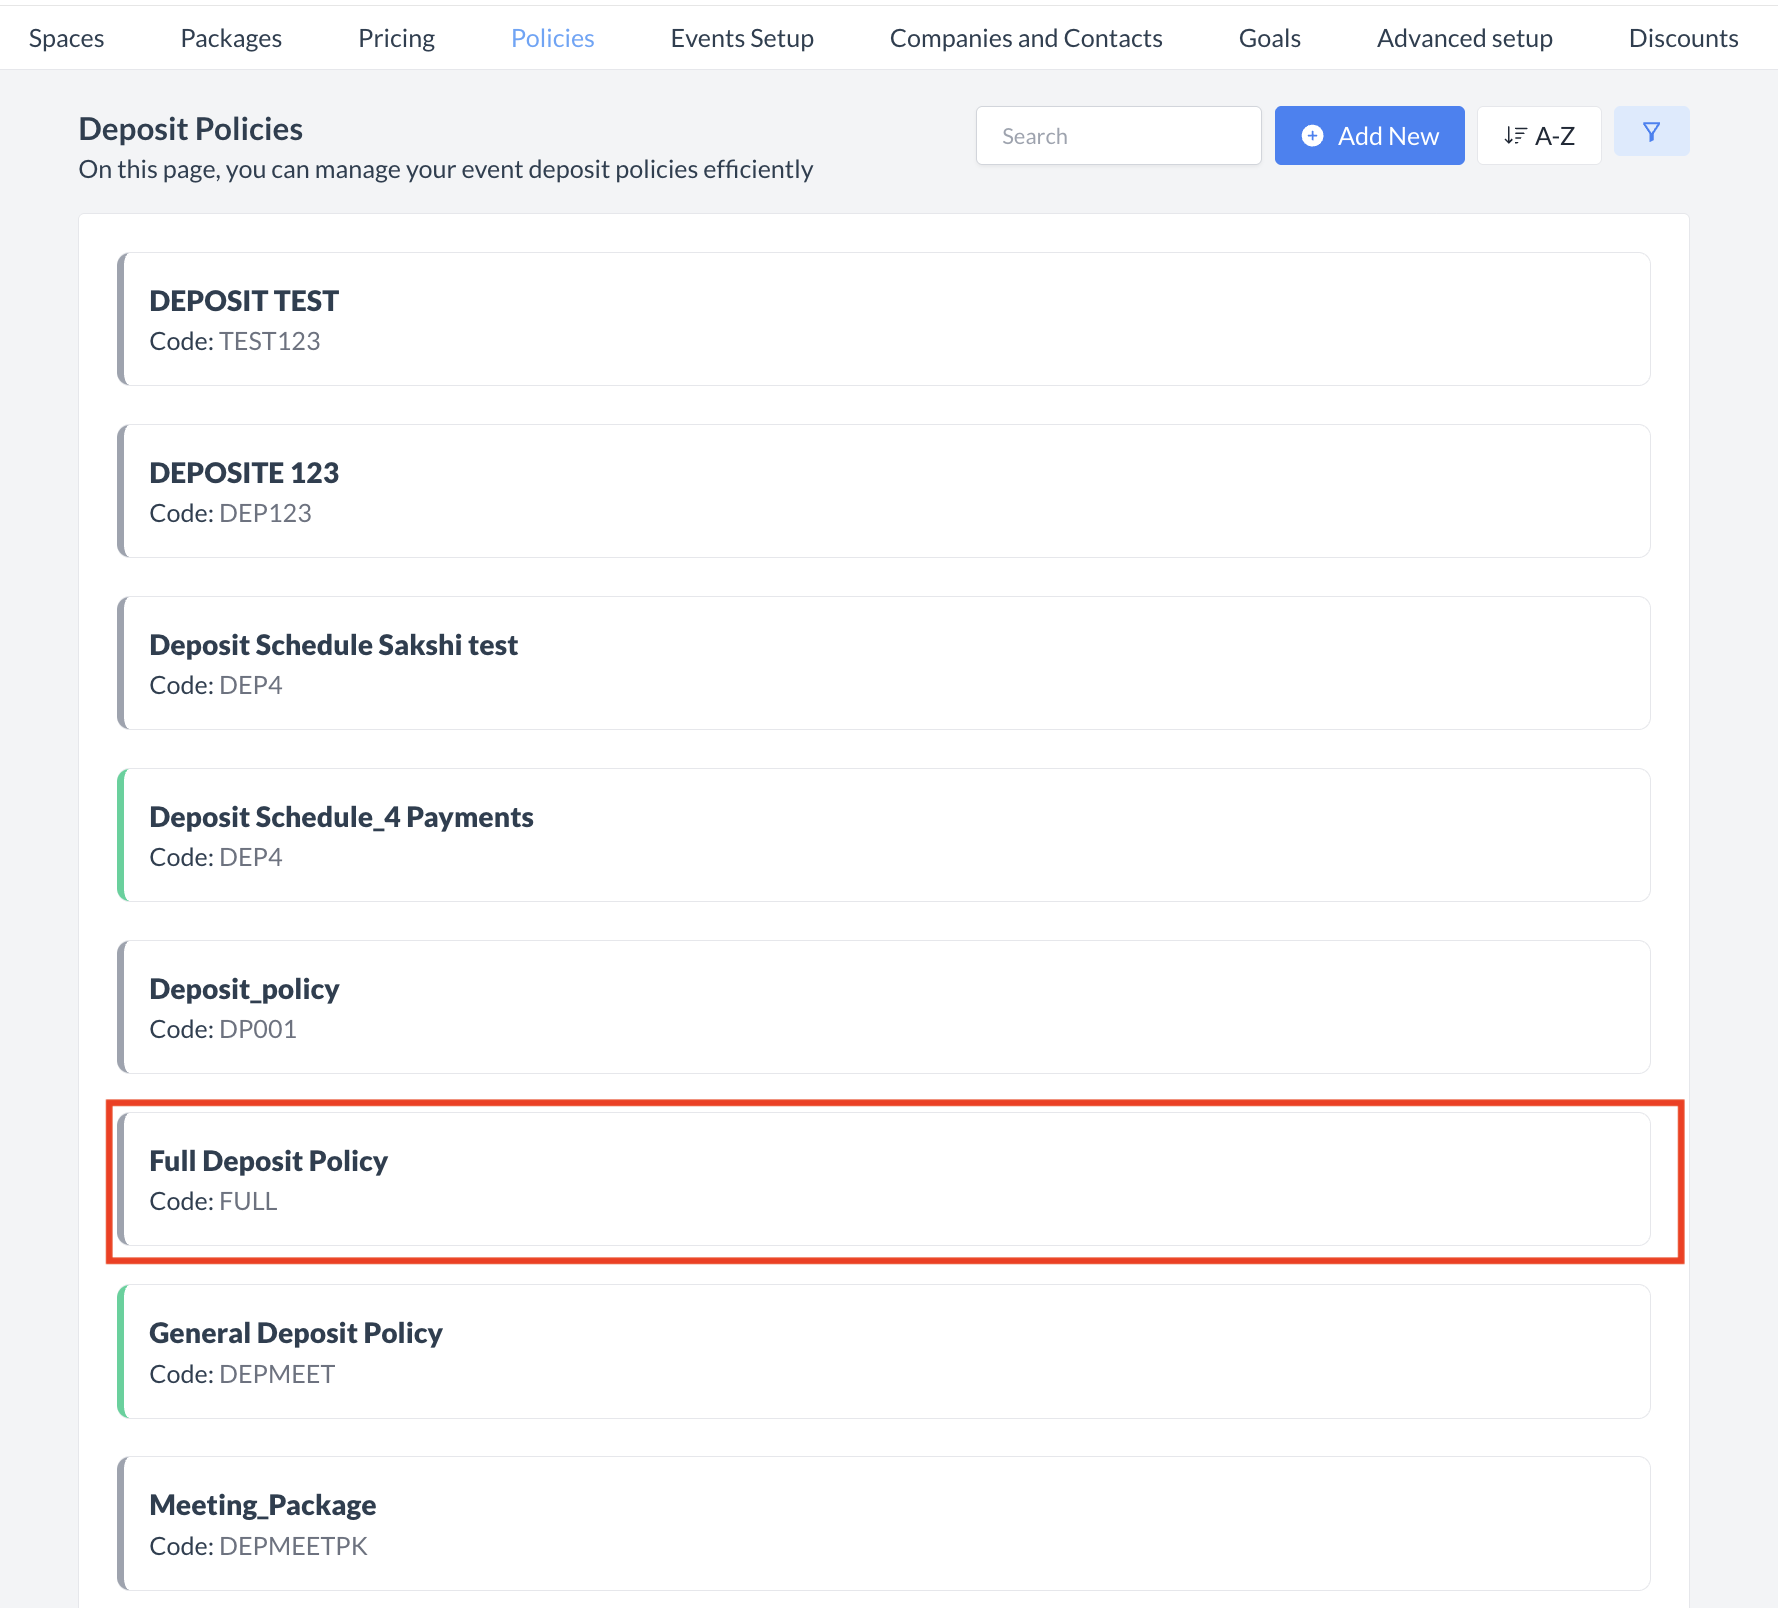
Navigate to Home > Event Administration > Policies > Deposit Policies

Policies_Deposit Policies.png

Policies > Deposit Policies

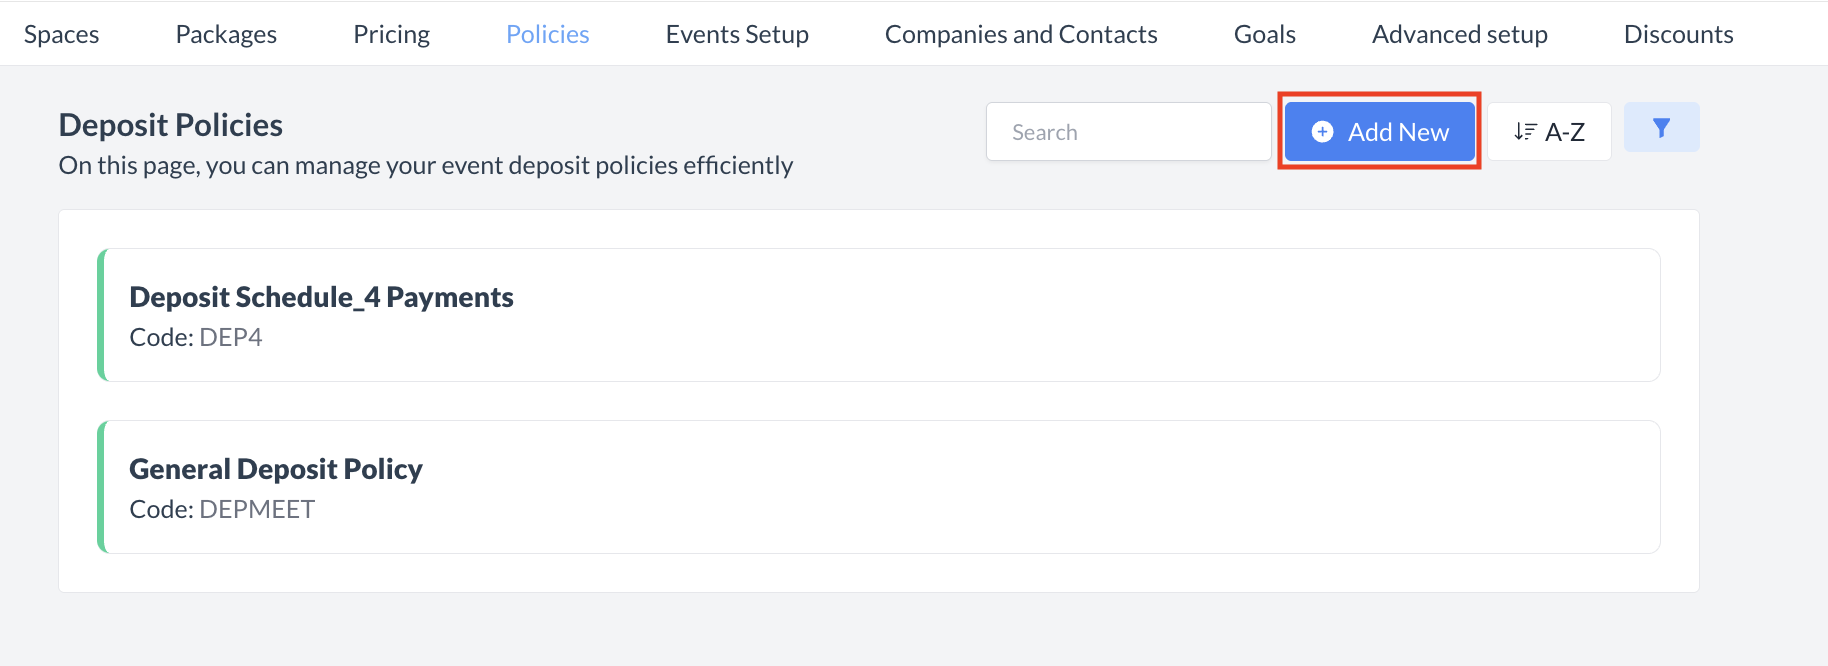
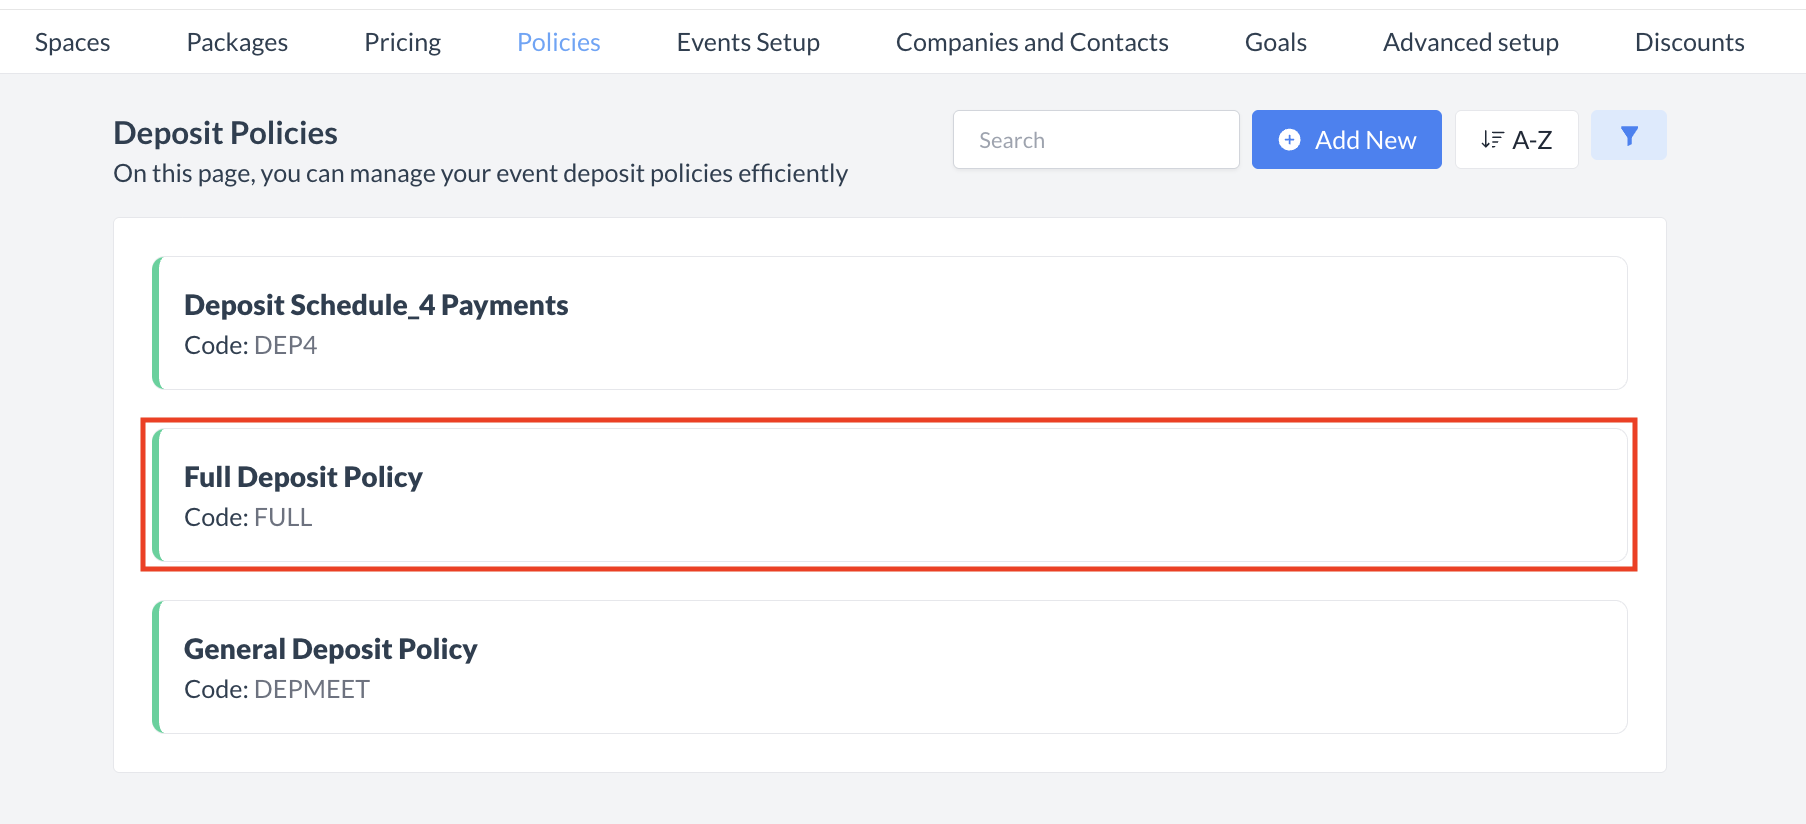
Accessing and Creating Deposit Policies

The Deposit Policies screen displays a list of all existing deposit policies available for use with an event.

To create a new policy:

  1. Navigate to the Deposit Policies screen.

  2. Click the blue Add New button in the top-right corner to begin creating a new deposit policy.

Deposit Policies_Add New.png

Deposit Policies: Add New Policy

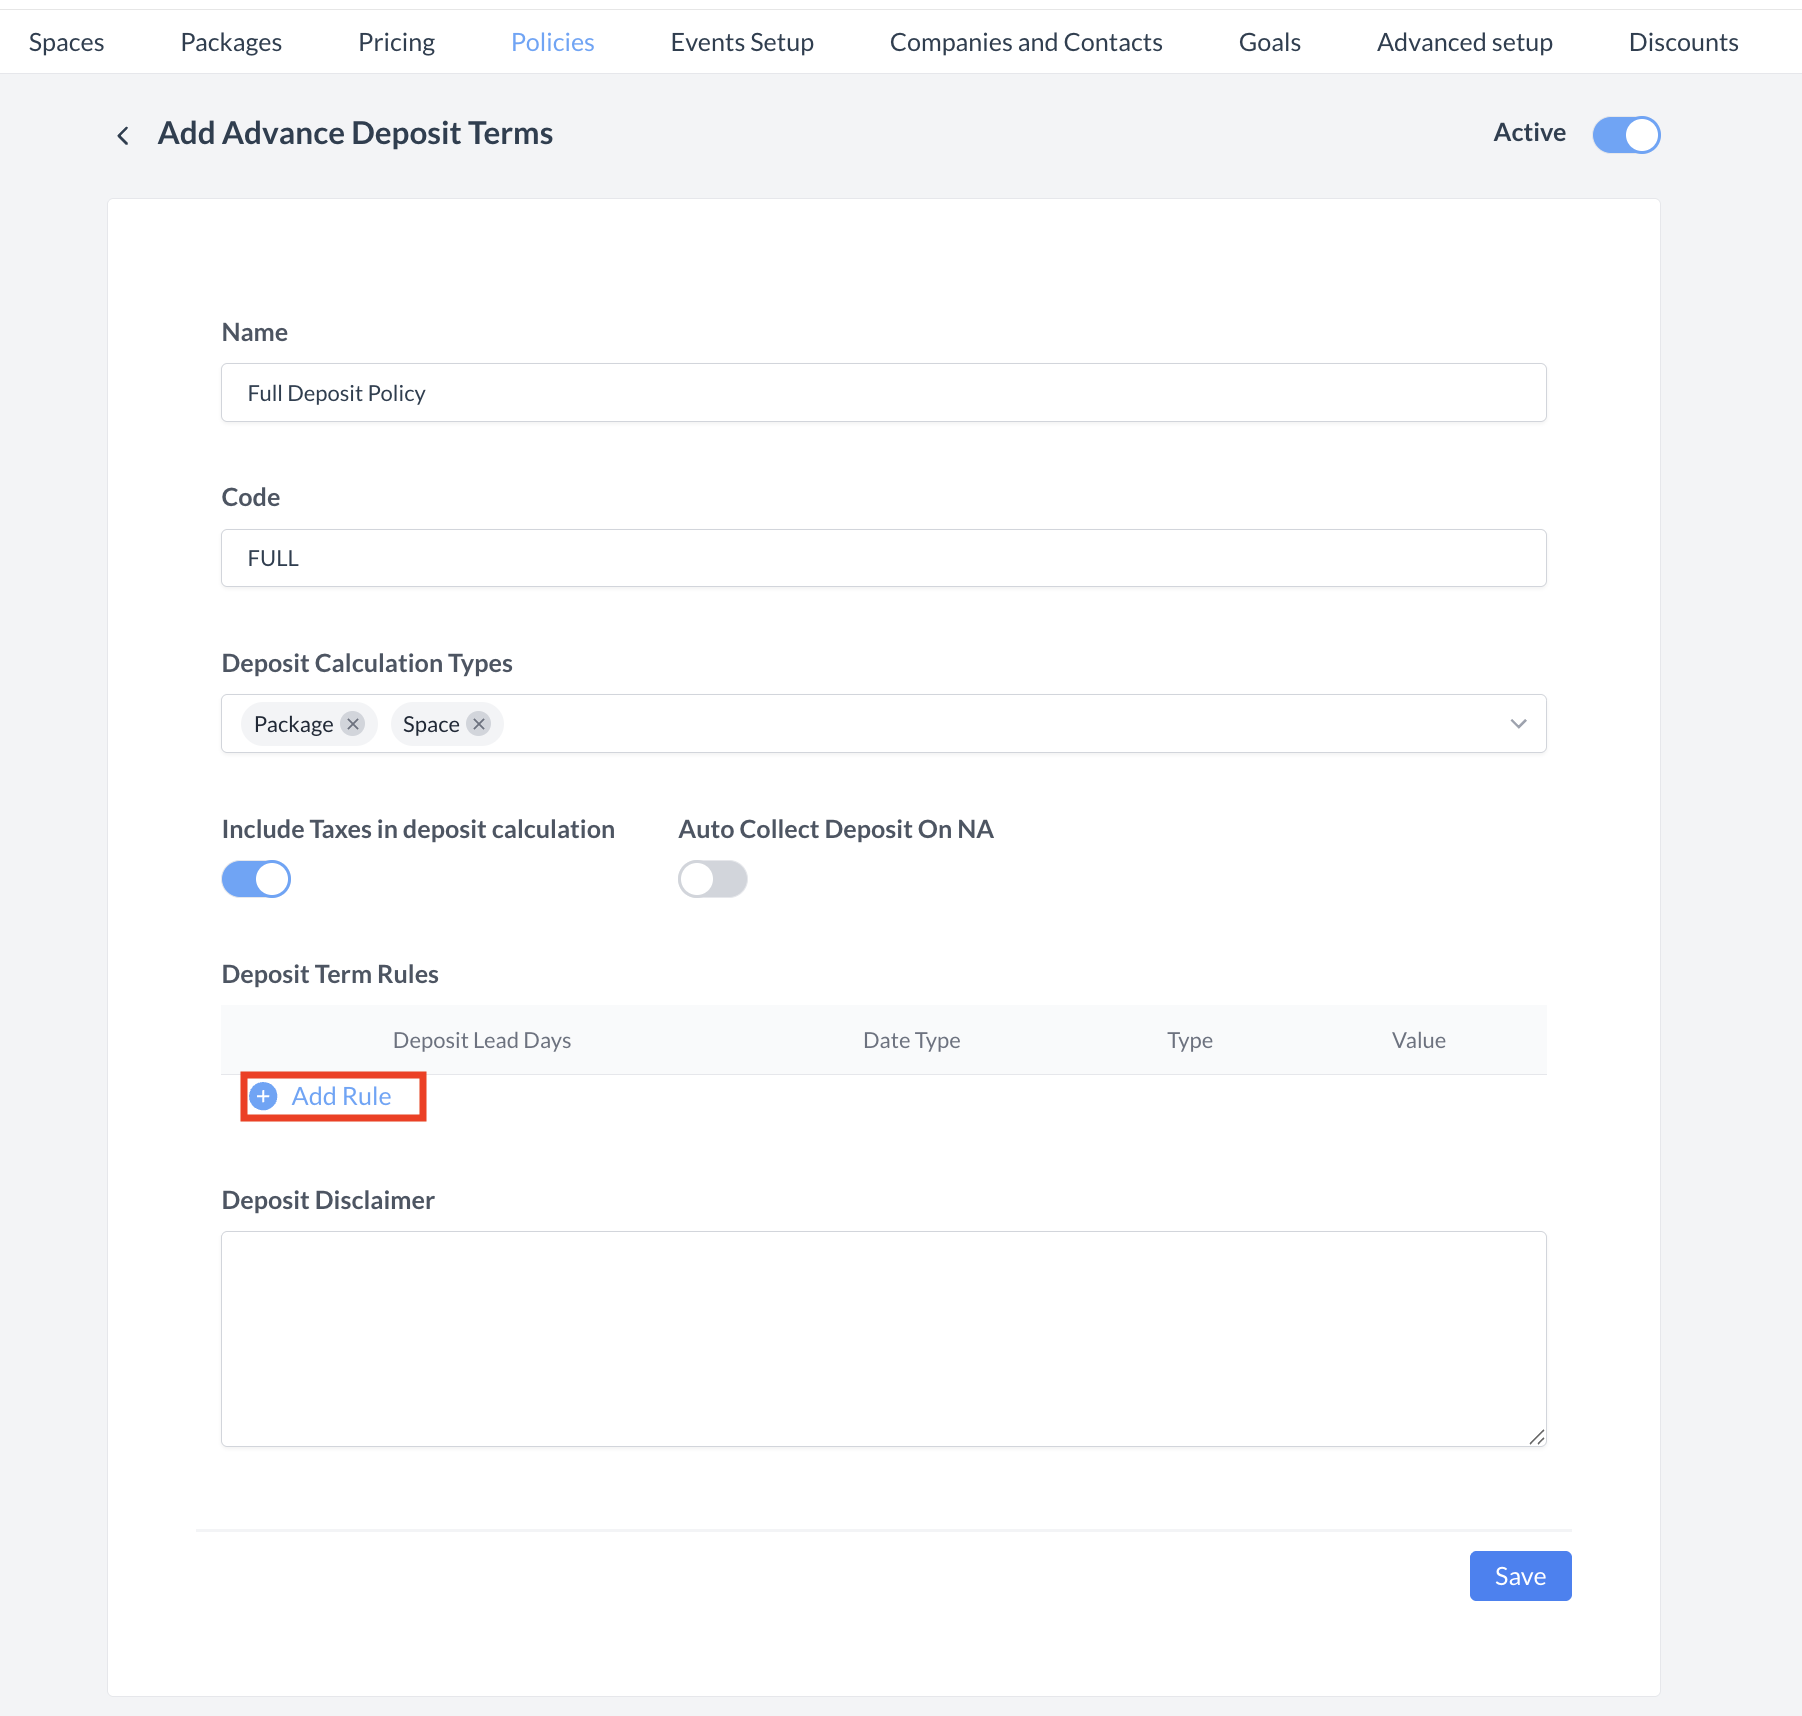
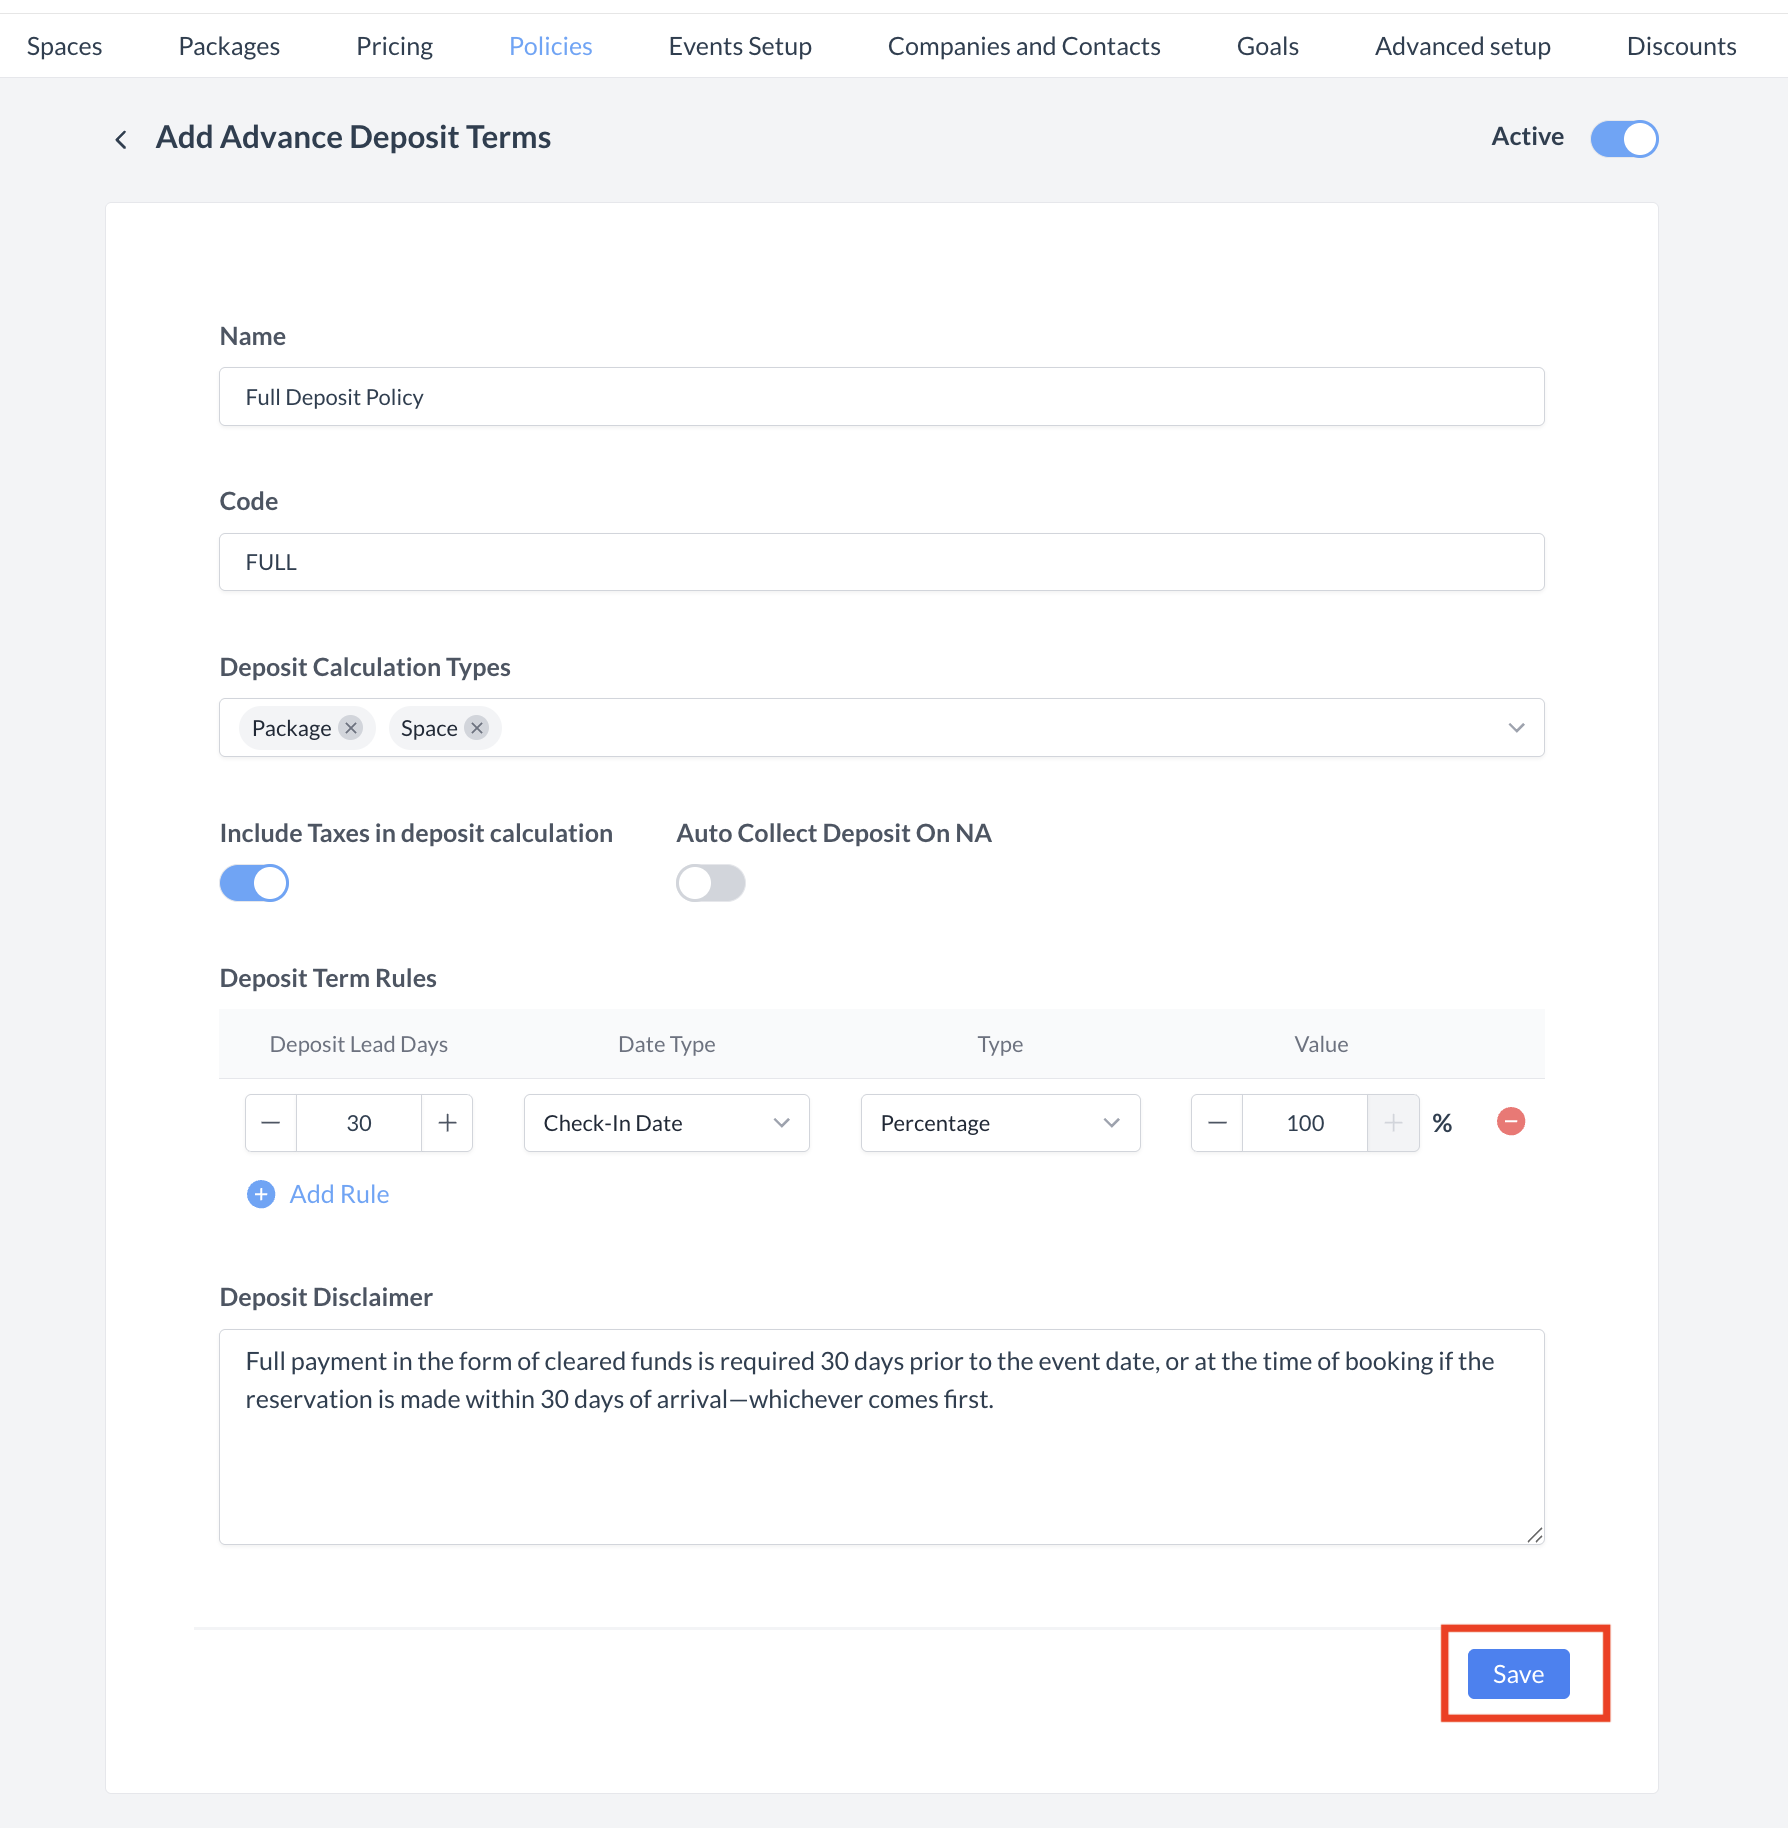
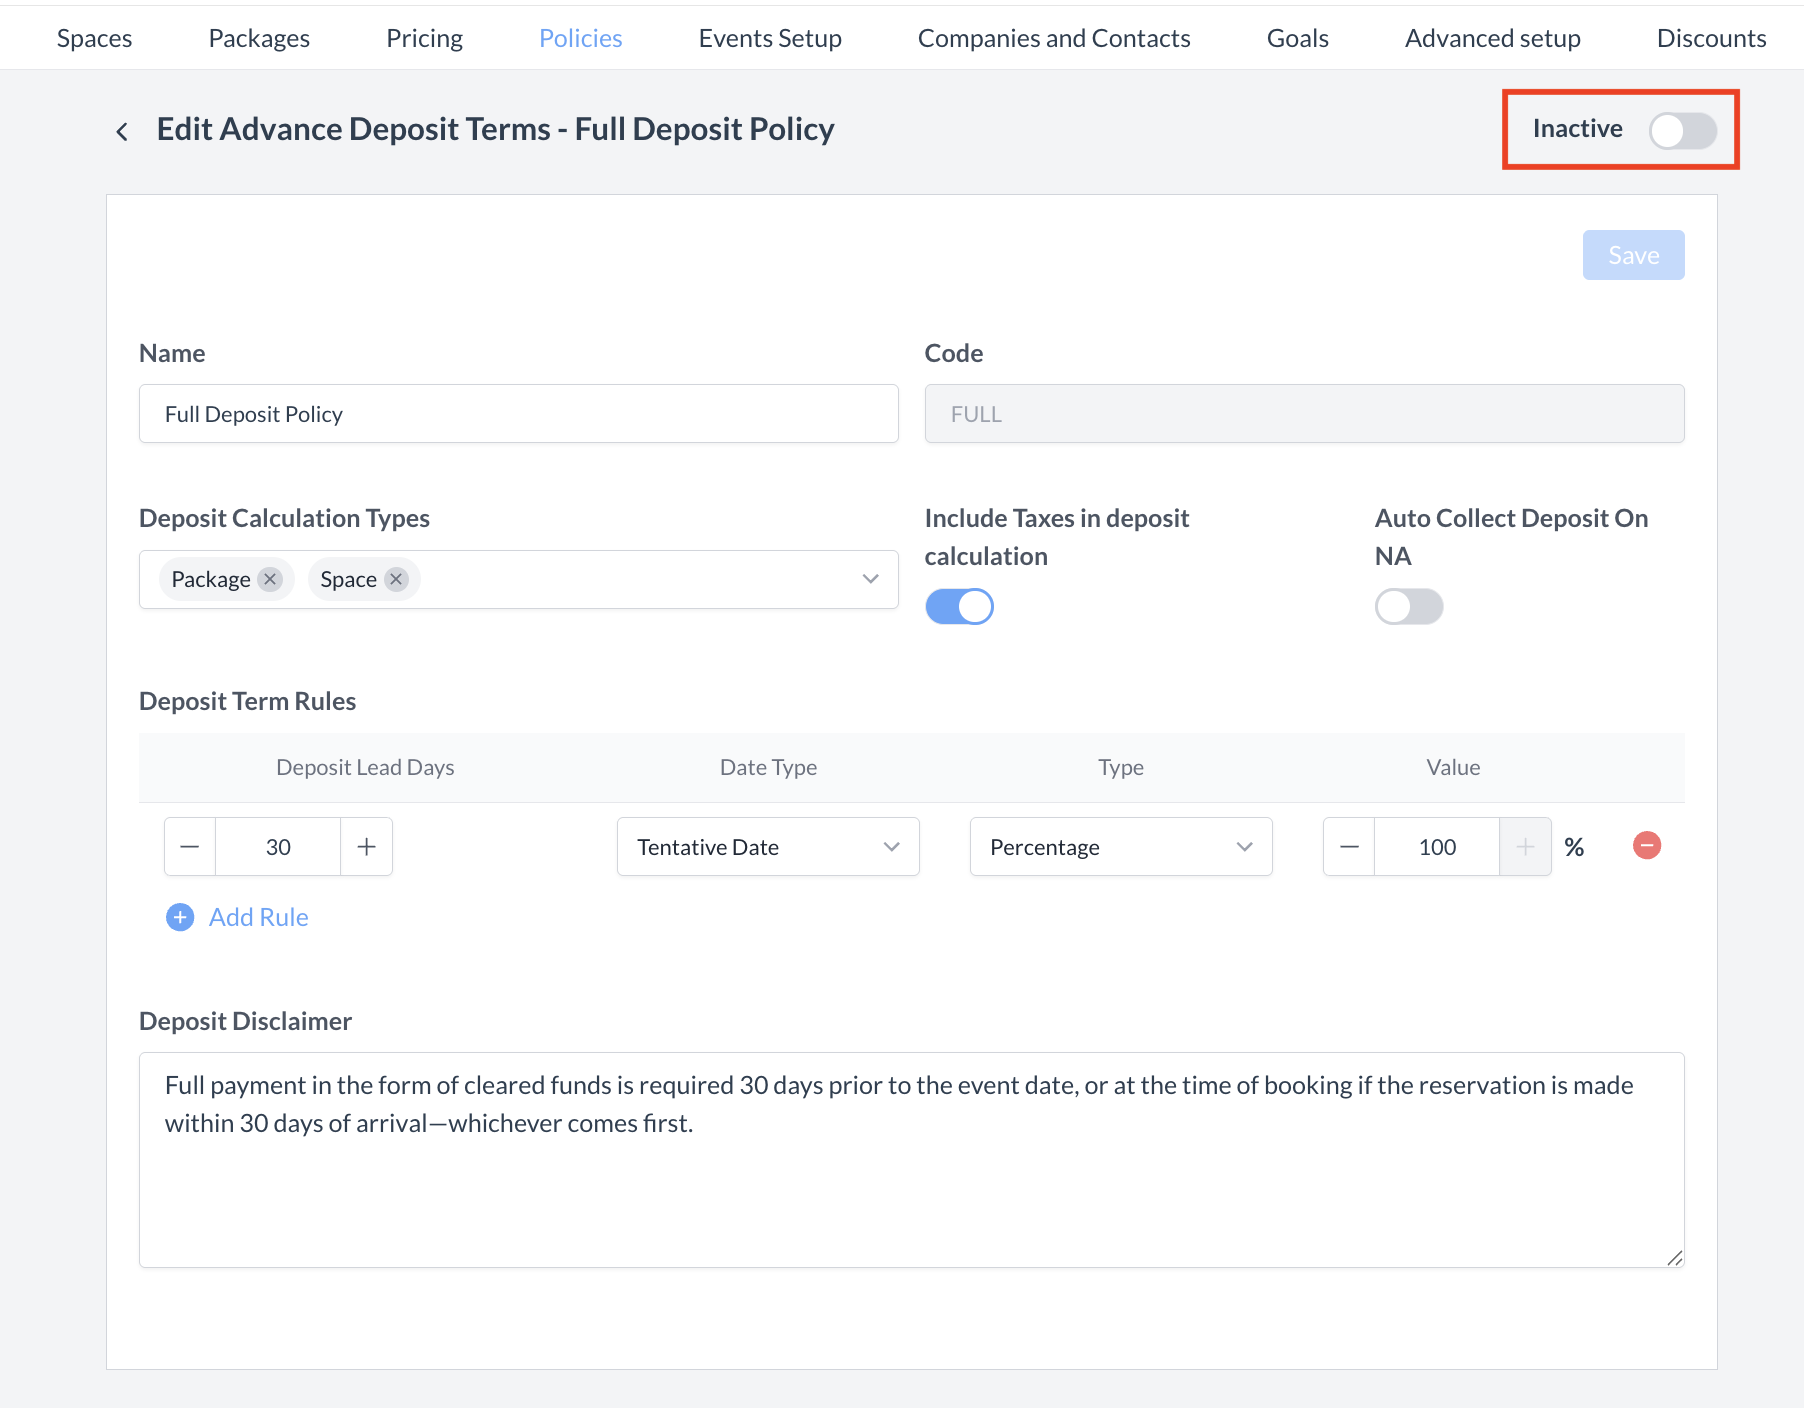
💰 Creating a Deposit Policy

When the Deposit Policy screen opens, follow the steps below to configure your policy settings.

1. Complete the Basic Data Section

  • Name:
    Enter a clear and descriptive name for the deposit policy (e.g., 30-Day Full Deposit).

  • Code:
    Provide a unique identifier for the policy (e.g., DEP30).

  • Deposit Calculation Type:
    Select one or more areas where the deposit should apply:

    • Group

    • Package

    • Space

  • Include Taxes in Deposit Calculation:
    If the deposit amount should include applicable taxes, toggle this setting ON.

  • Auto Collect Deposit During Night Audit:
    Toggle this setting ON if deposits should be automatically collected and posted during Night Audit.

    ⚠️ Note: This feature requires an integrated payment gateway with HotelKey.


2. Create Deposit Rules

Click the blue “+ Add Rule” button to define when and how deposits will be collected.

a. Set Timing

  • Deposit Lead Days:
    Enter the number of days before the event that the deposit is due.

  • Date Type:
    Choose the reference date for calculating deposit due dates:

    • Check-in Date:
      The deposit will be due X days before the event start date.

    • Tentative Date:
      The deposit will be due X days after the event moves to tentative status.

b. Define Deposit Value

  • Value Type:
    Choose how the deposit amount will be calculated:

    • Amount – A flat fee (e.g., $250)

    • Percentage – A percentage of the applicable charges (e.g., 25%)

  • Value:
    Enter the corresponding amount or percentage.

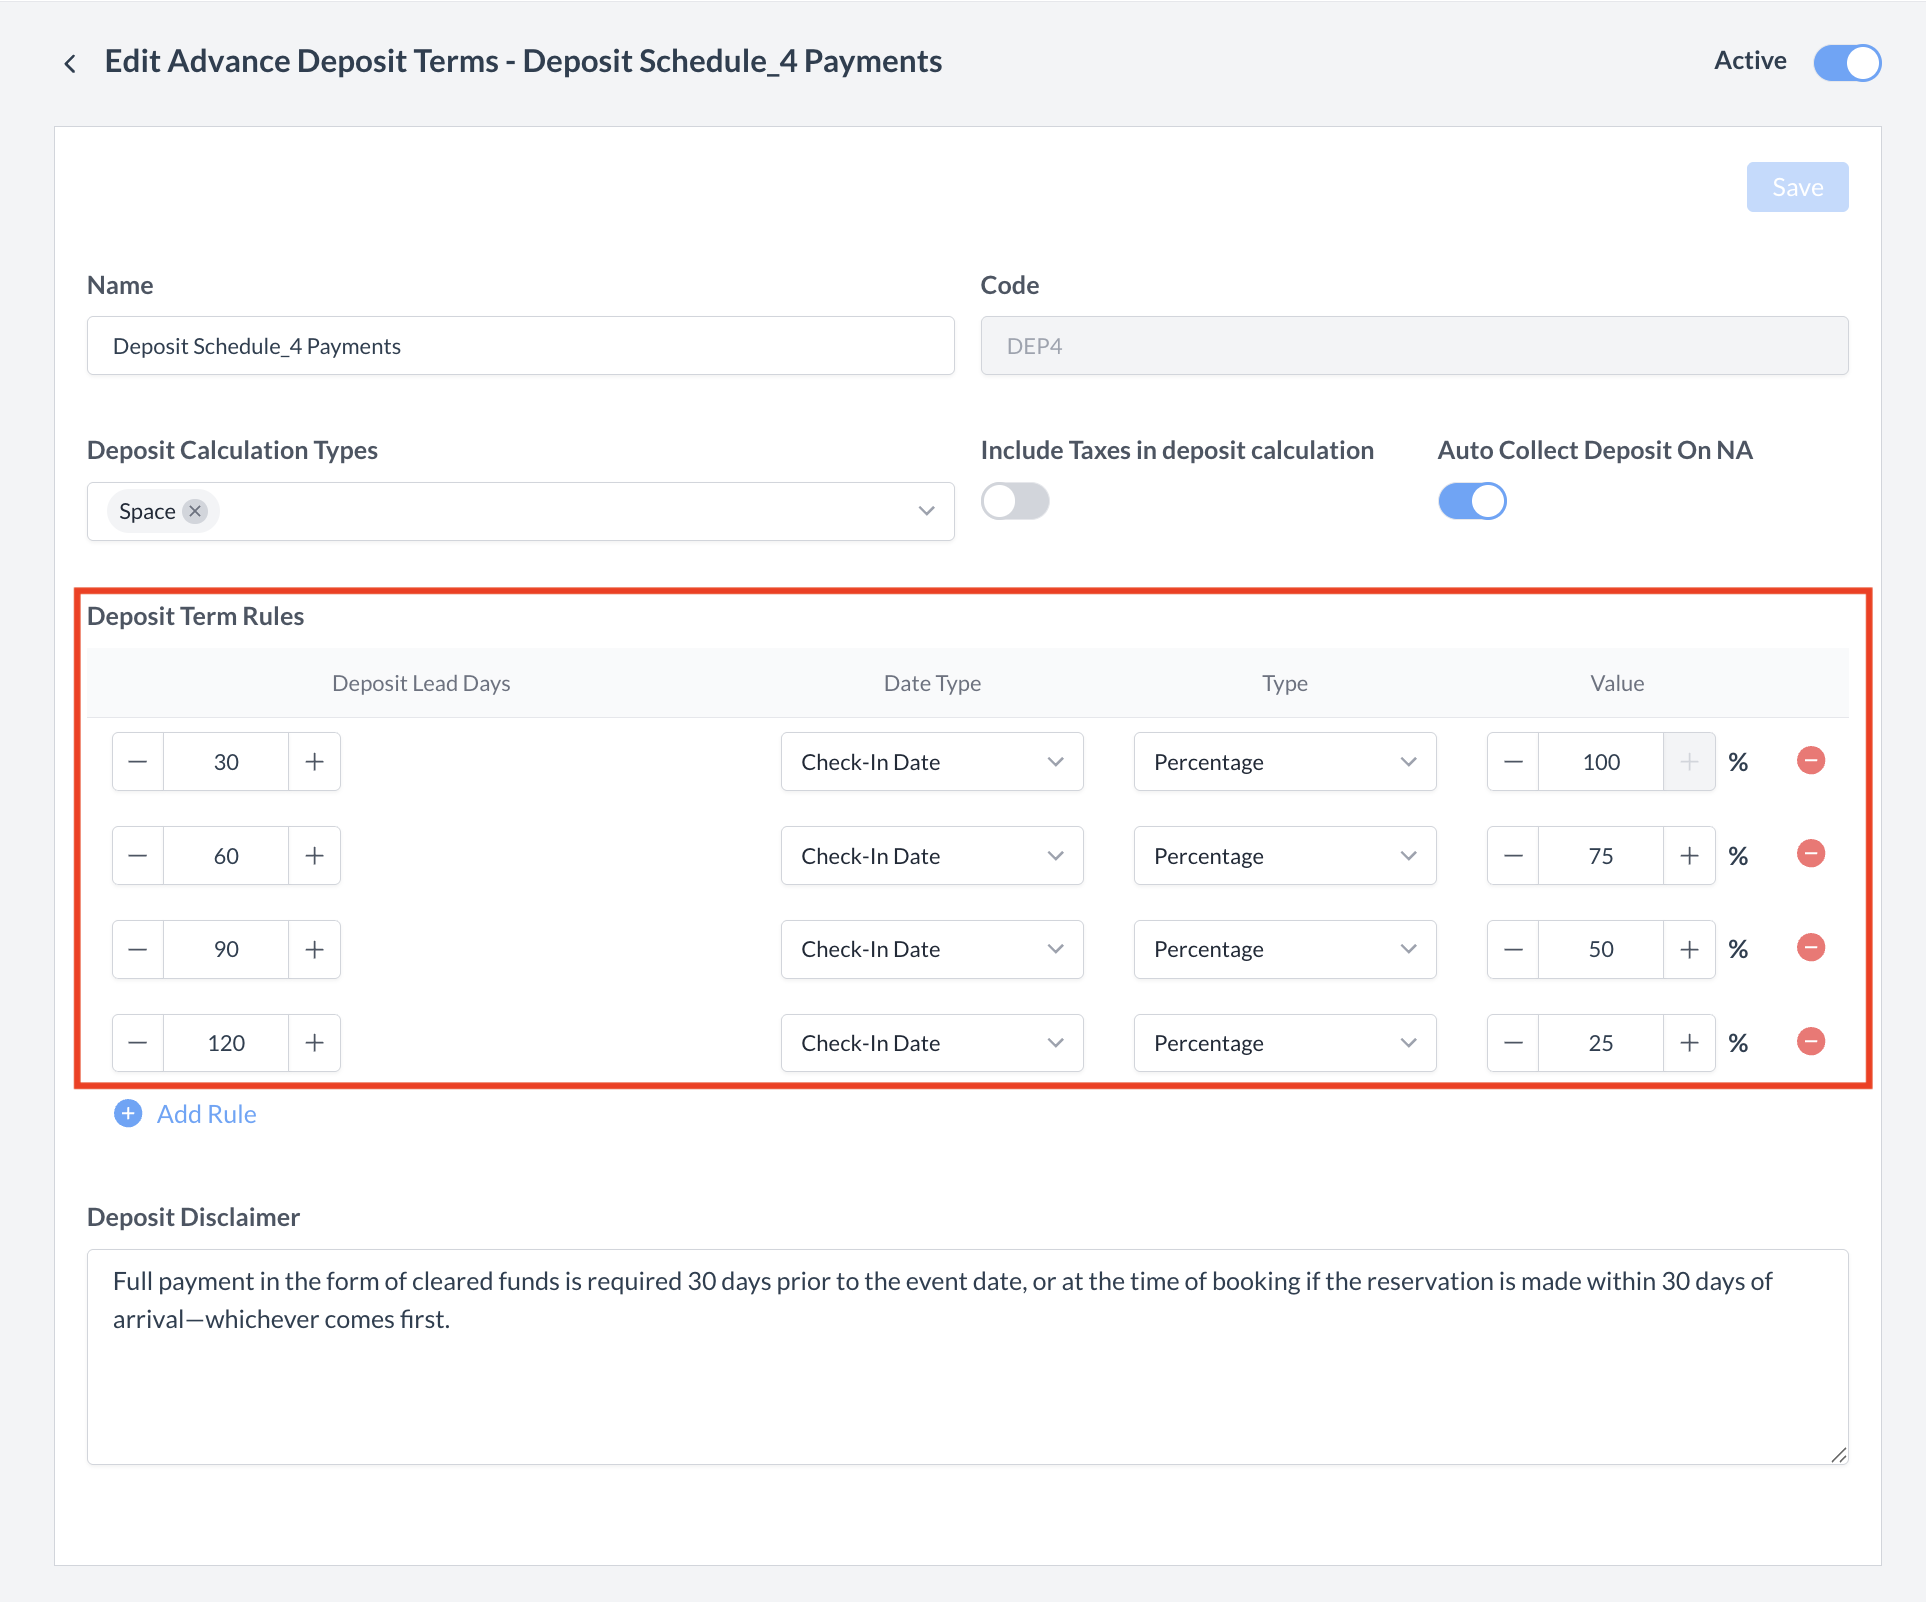
3. Example: Multiple Deposit Schedule

You can define multiple deposit collection points by adding additional rules. For example, to collect 25% of the total event charges at four intervals leading up to the event:

Days from Check-in

Percentage Collected

Example Amount (Total $545)

120 Days

25%

$136.25

90 Days

25%

$136.25

60 Days

25%

$136.25

30 Days

25%

$136.25

To create this:

  • Add four deposit rules using Percentage as the value type.

  • Set each rule with the respective Deposit Lead Days (120, 90, 60, 30).

  • Enter 25% for 120, 50% for 90, 75% for 60 and 100% for 30. You have entered the percent due in 25% increments.

The system will automatically calculate and schedule each payment accordingly.

4. Deposit Disclaimer

Policy Summary
Enter a concise description of the key terms and conditions of the policy.
Example:
“Full payment in cleared funds is required 14 days prior to arrival (or at time of booking, whichever is sooner). Failure to pay may result in denied access to the meeting room.”

⚠️ Note: This field is limited to 250 characters and will appear on the Event Quotation Letter as a disclaimer.

✅ Final Step: Save the Policy

Once all deposit rules are defined, click the blue “Save” button to finalize and activate the deposit policy.

Deposit Policy_Configuration.png

Deposit Policy: Setup

Deposit Policy_Save.png

Deposit Policy: Deposit Term Rules

Multiple Deposit Schedule.png

Deposit Policy: Multi Day Deposit Schedule

Deposit Policy_BEO Example.png

Deposit Policy: BEO Example

Deposit Policy_Event Quotation Letter.png

Deposit Policy: Event Quotation Letter Example

Confirmation

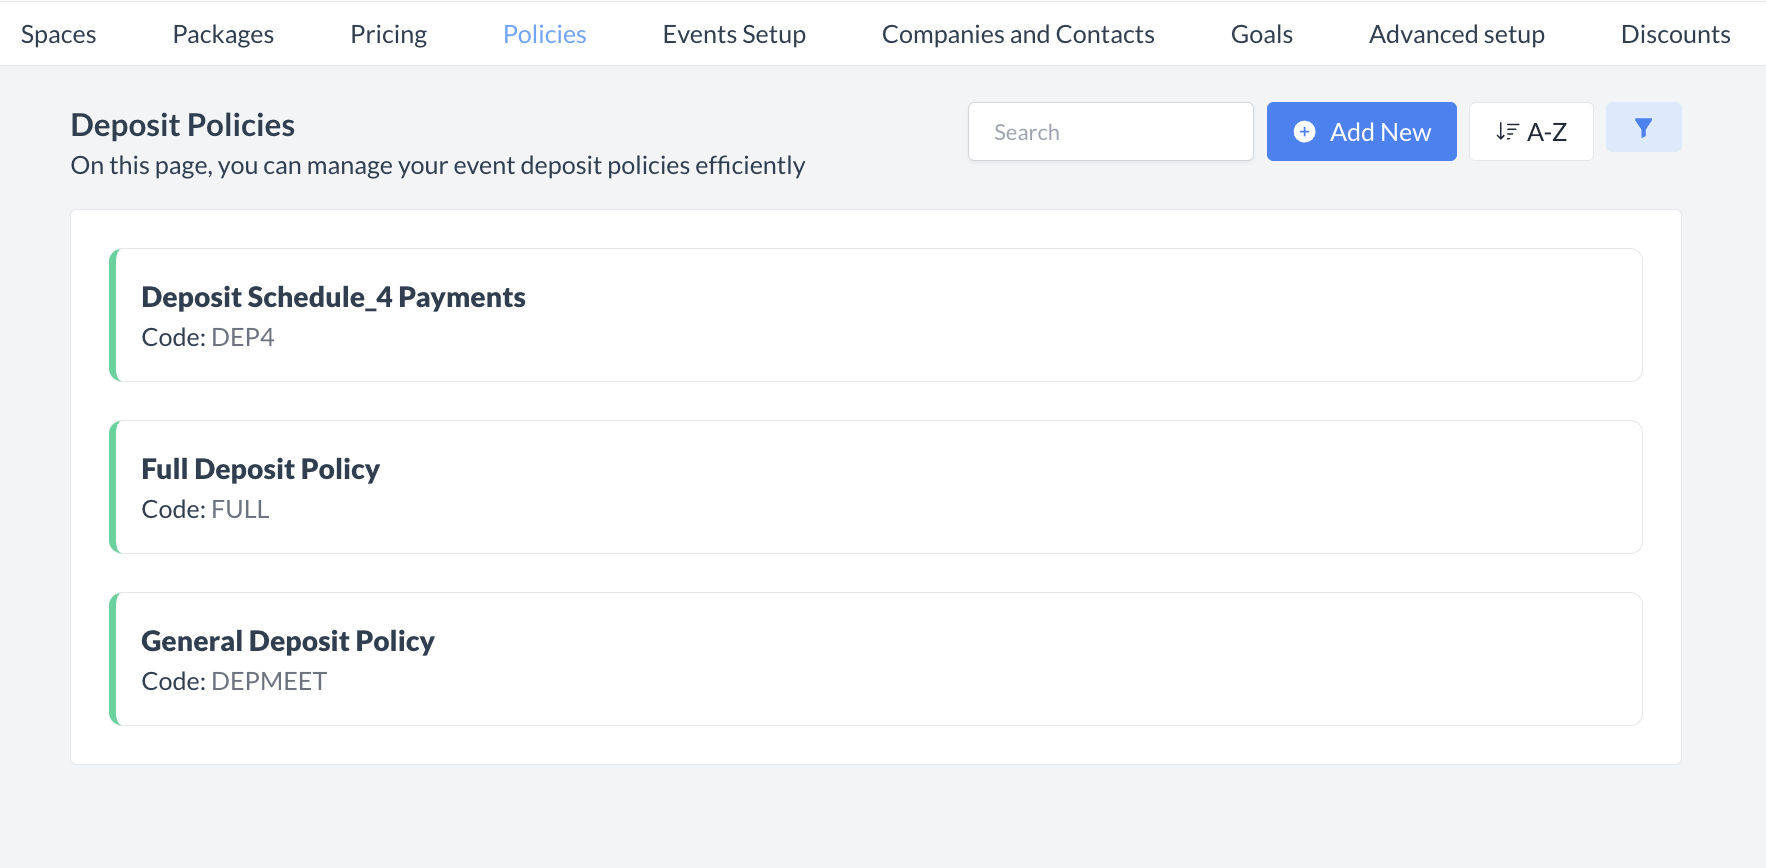
After saving, you will be returned to the Deposit Policies listing screen.
Your newly created policy will now appear in the list and is available for selection when configuring events.

Deposit Policy_New Policy Available.png

Deposit Policy: Policy Created

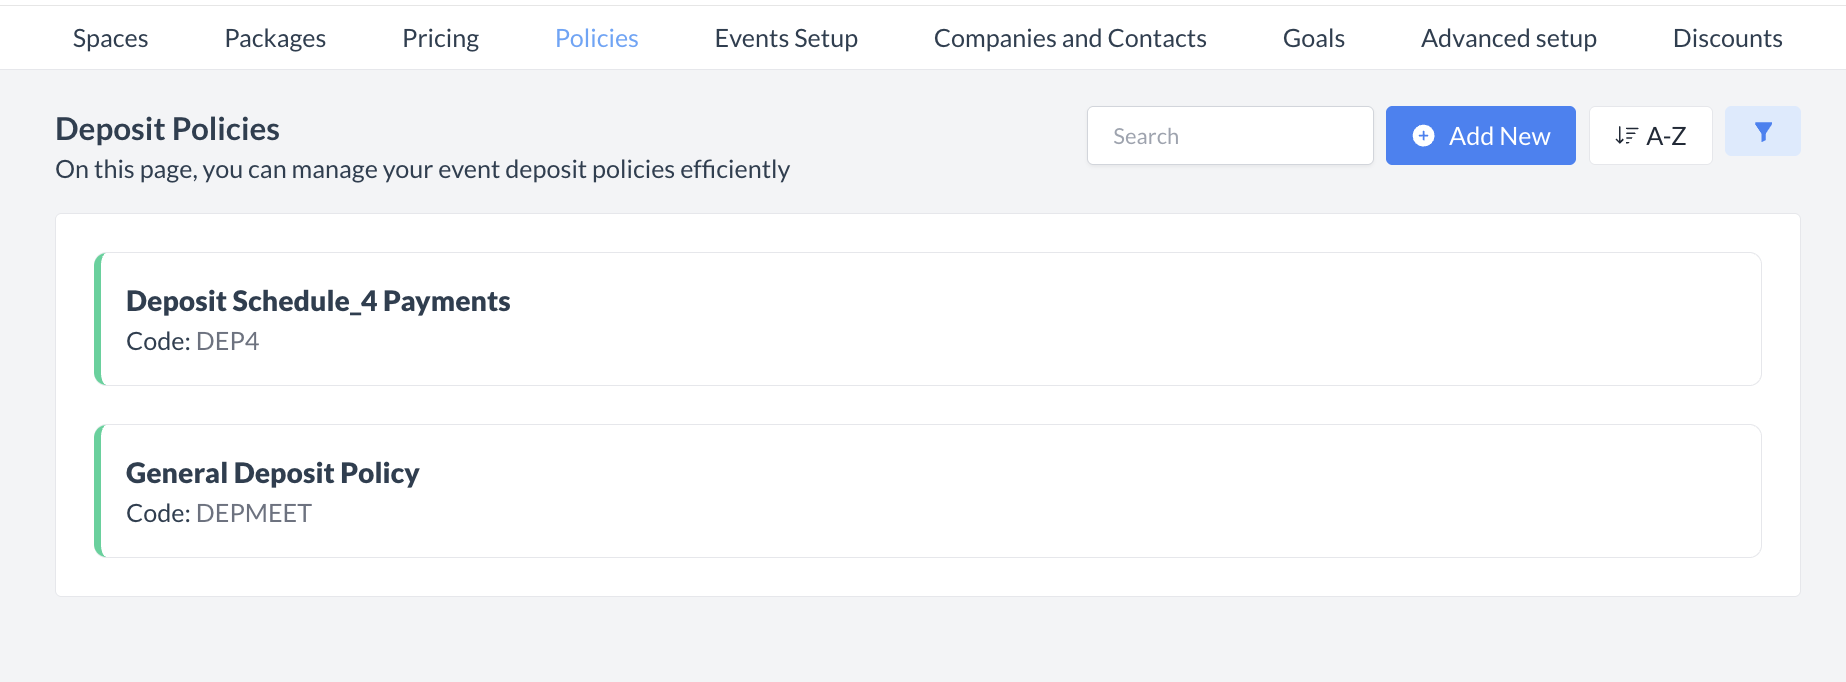
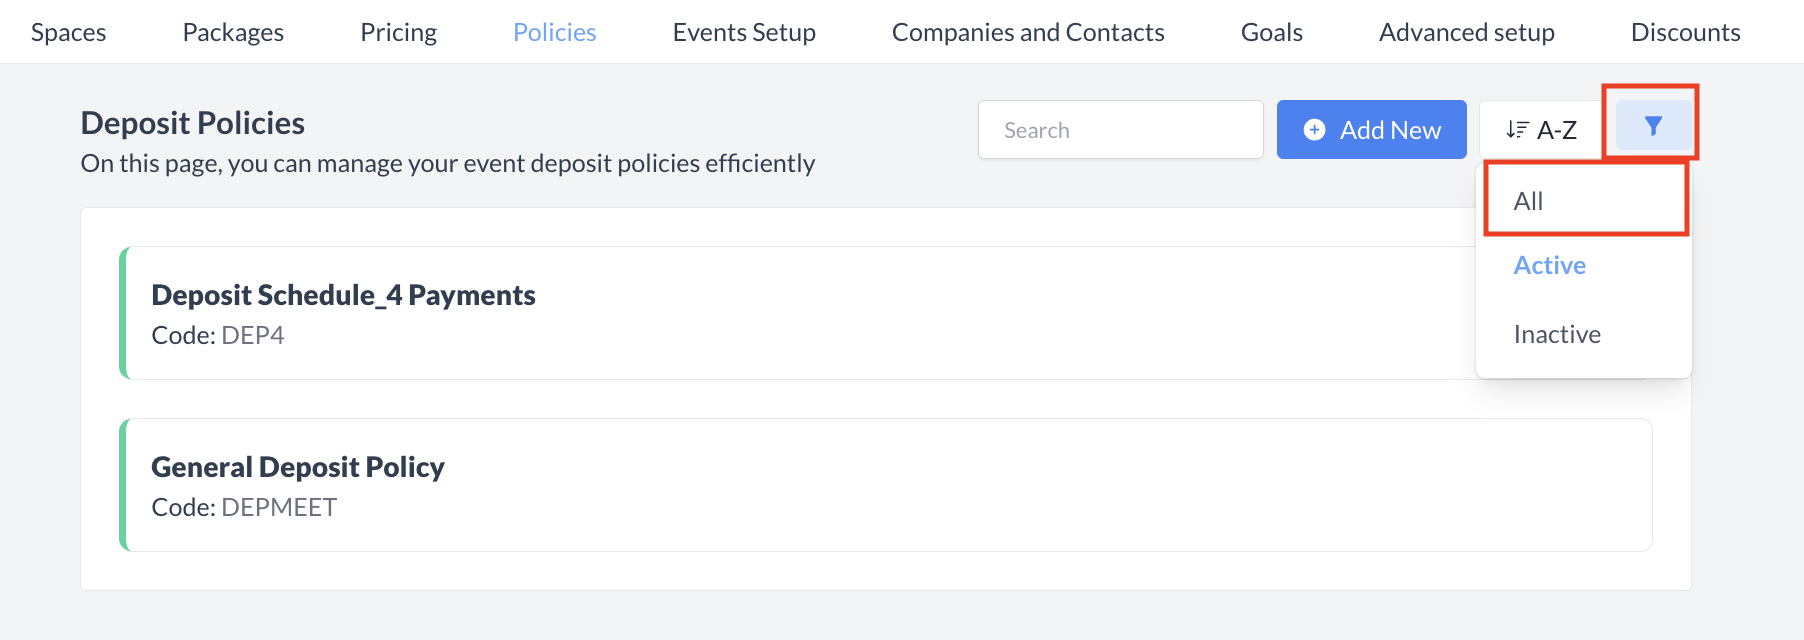
🔄 Inactivating a Deposit Policy

To deactivate a deposit policy:

  1. From the Deposit Policies listing screen, locate and select the policy you wish to inactivate.

  2. In the policy header, click the Active toggle to switch it off.

Once inactivated, the policy will no longer appear in the Deposit Policies listing and will not be available for selection on new events.

Deposit Policy_Select Policy .png

Select Policy to Inactivate

Deposit Policy_Inactive Toggle.png

Active Toggle

Policy Removed from Active List

🔁 Reactivating an Inactive Deposit Policy

To reactivate a deposit policy:

  1. Navigate to the Deposit Policies listing screen.

  2. Use the filter option to display All or Inactive policies.

    • Active policies are marked with a green sidebar.

    • Inactive policies are marked with a grey sidebar.

  3. Locate the inactive policy you wish to reactivate and click to open it.

  4. In the policy header, toggle the Inactive switch to ON.

The policy is now reactivated and will appear in the main Deposit Policies listing screen, making it available for use again.

Deposit Policies _ Filter.png

Deposit Policy Listing Screen: Filter

Deposit Policy_Select Inactive Policy.png

Select Inactive Deposit Policy

Deposit Policy_Active Toggle.png

Inactive Toggle

Deposit Policy_Reactivated.png

Policy Returned on Active List

⏭️ What’s Next
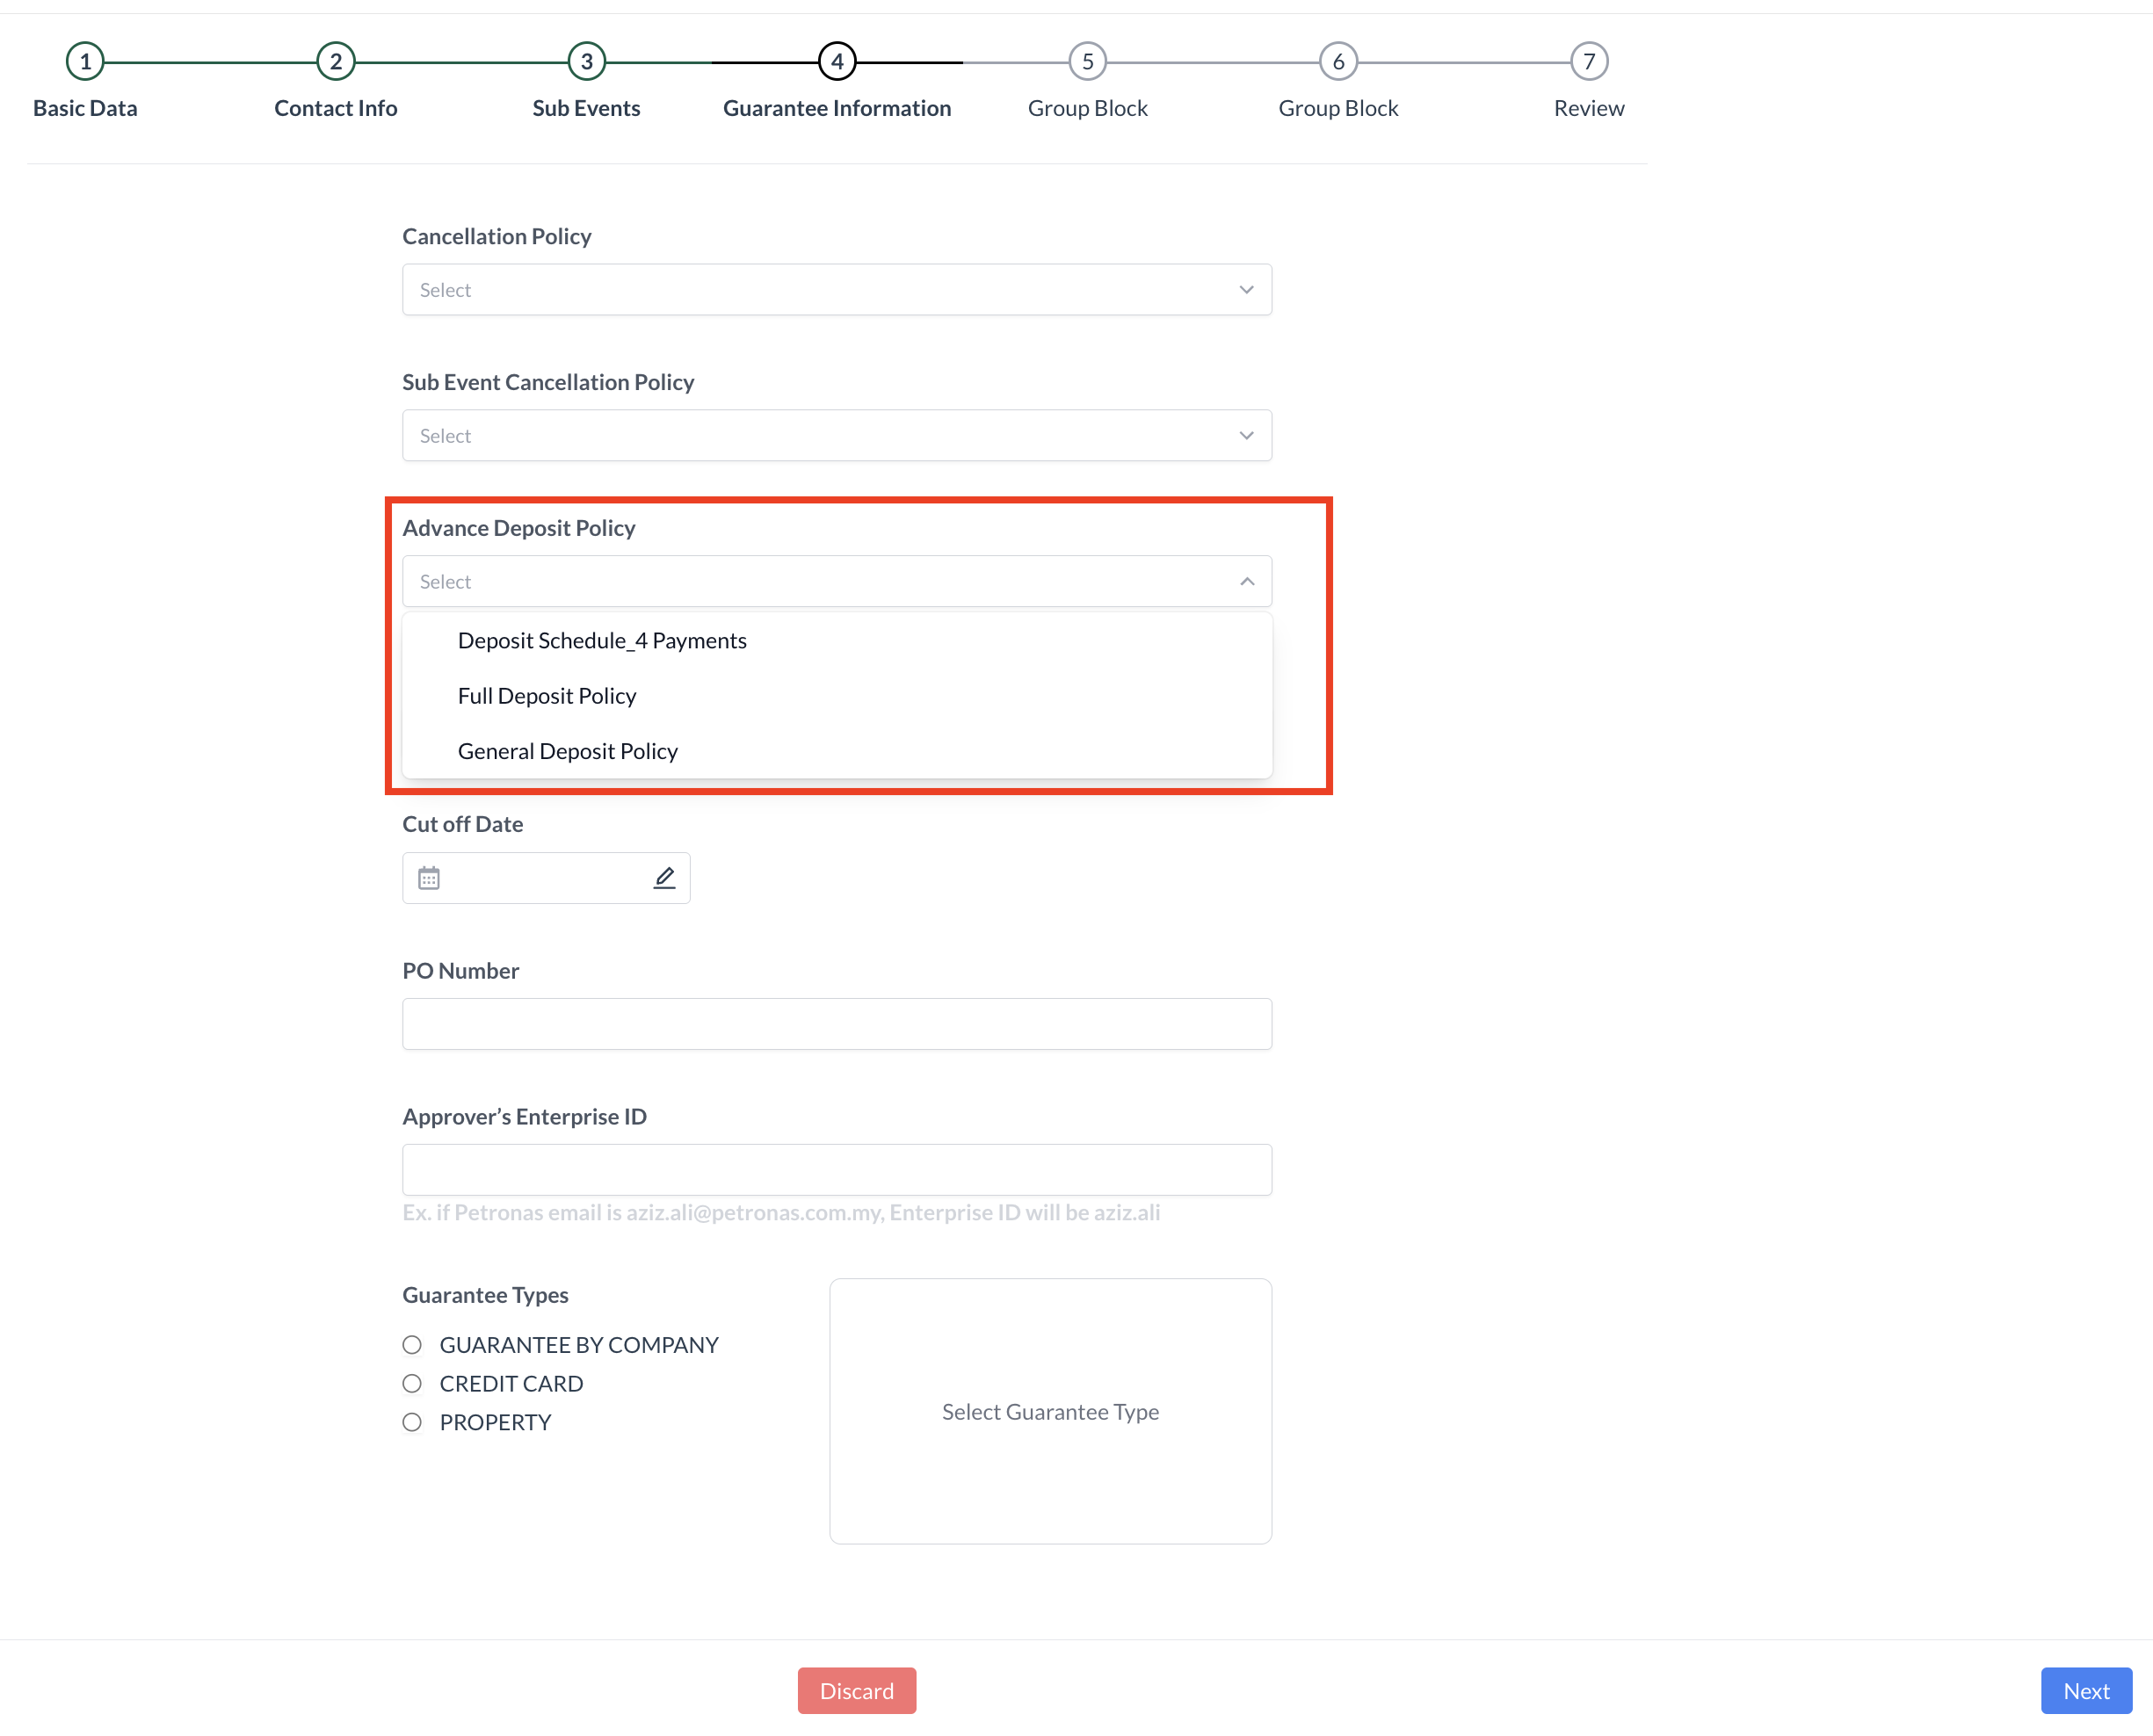
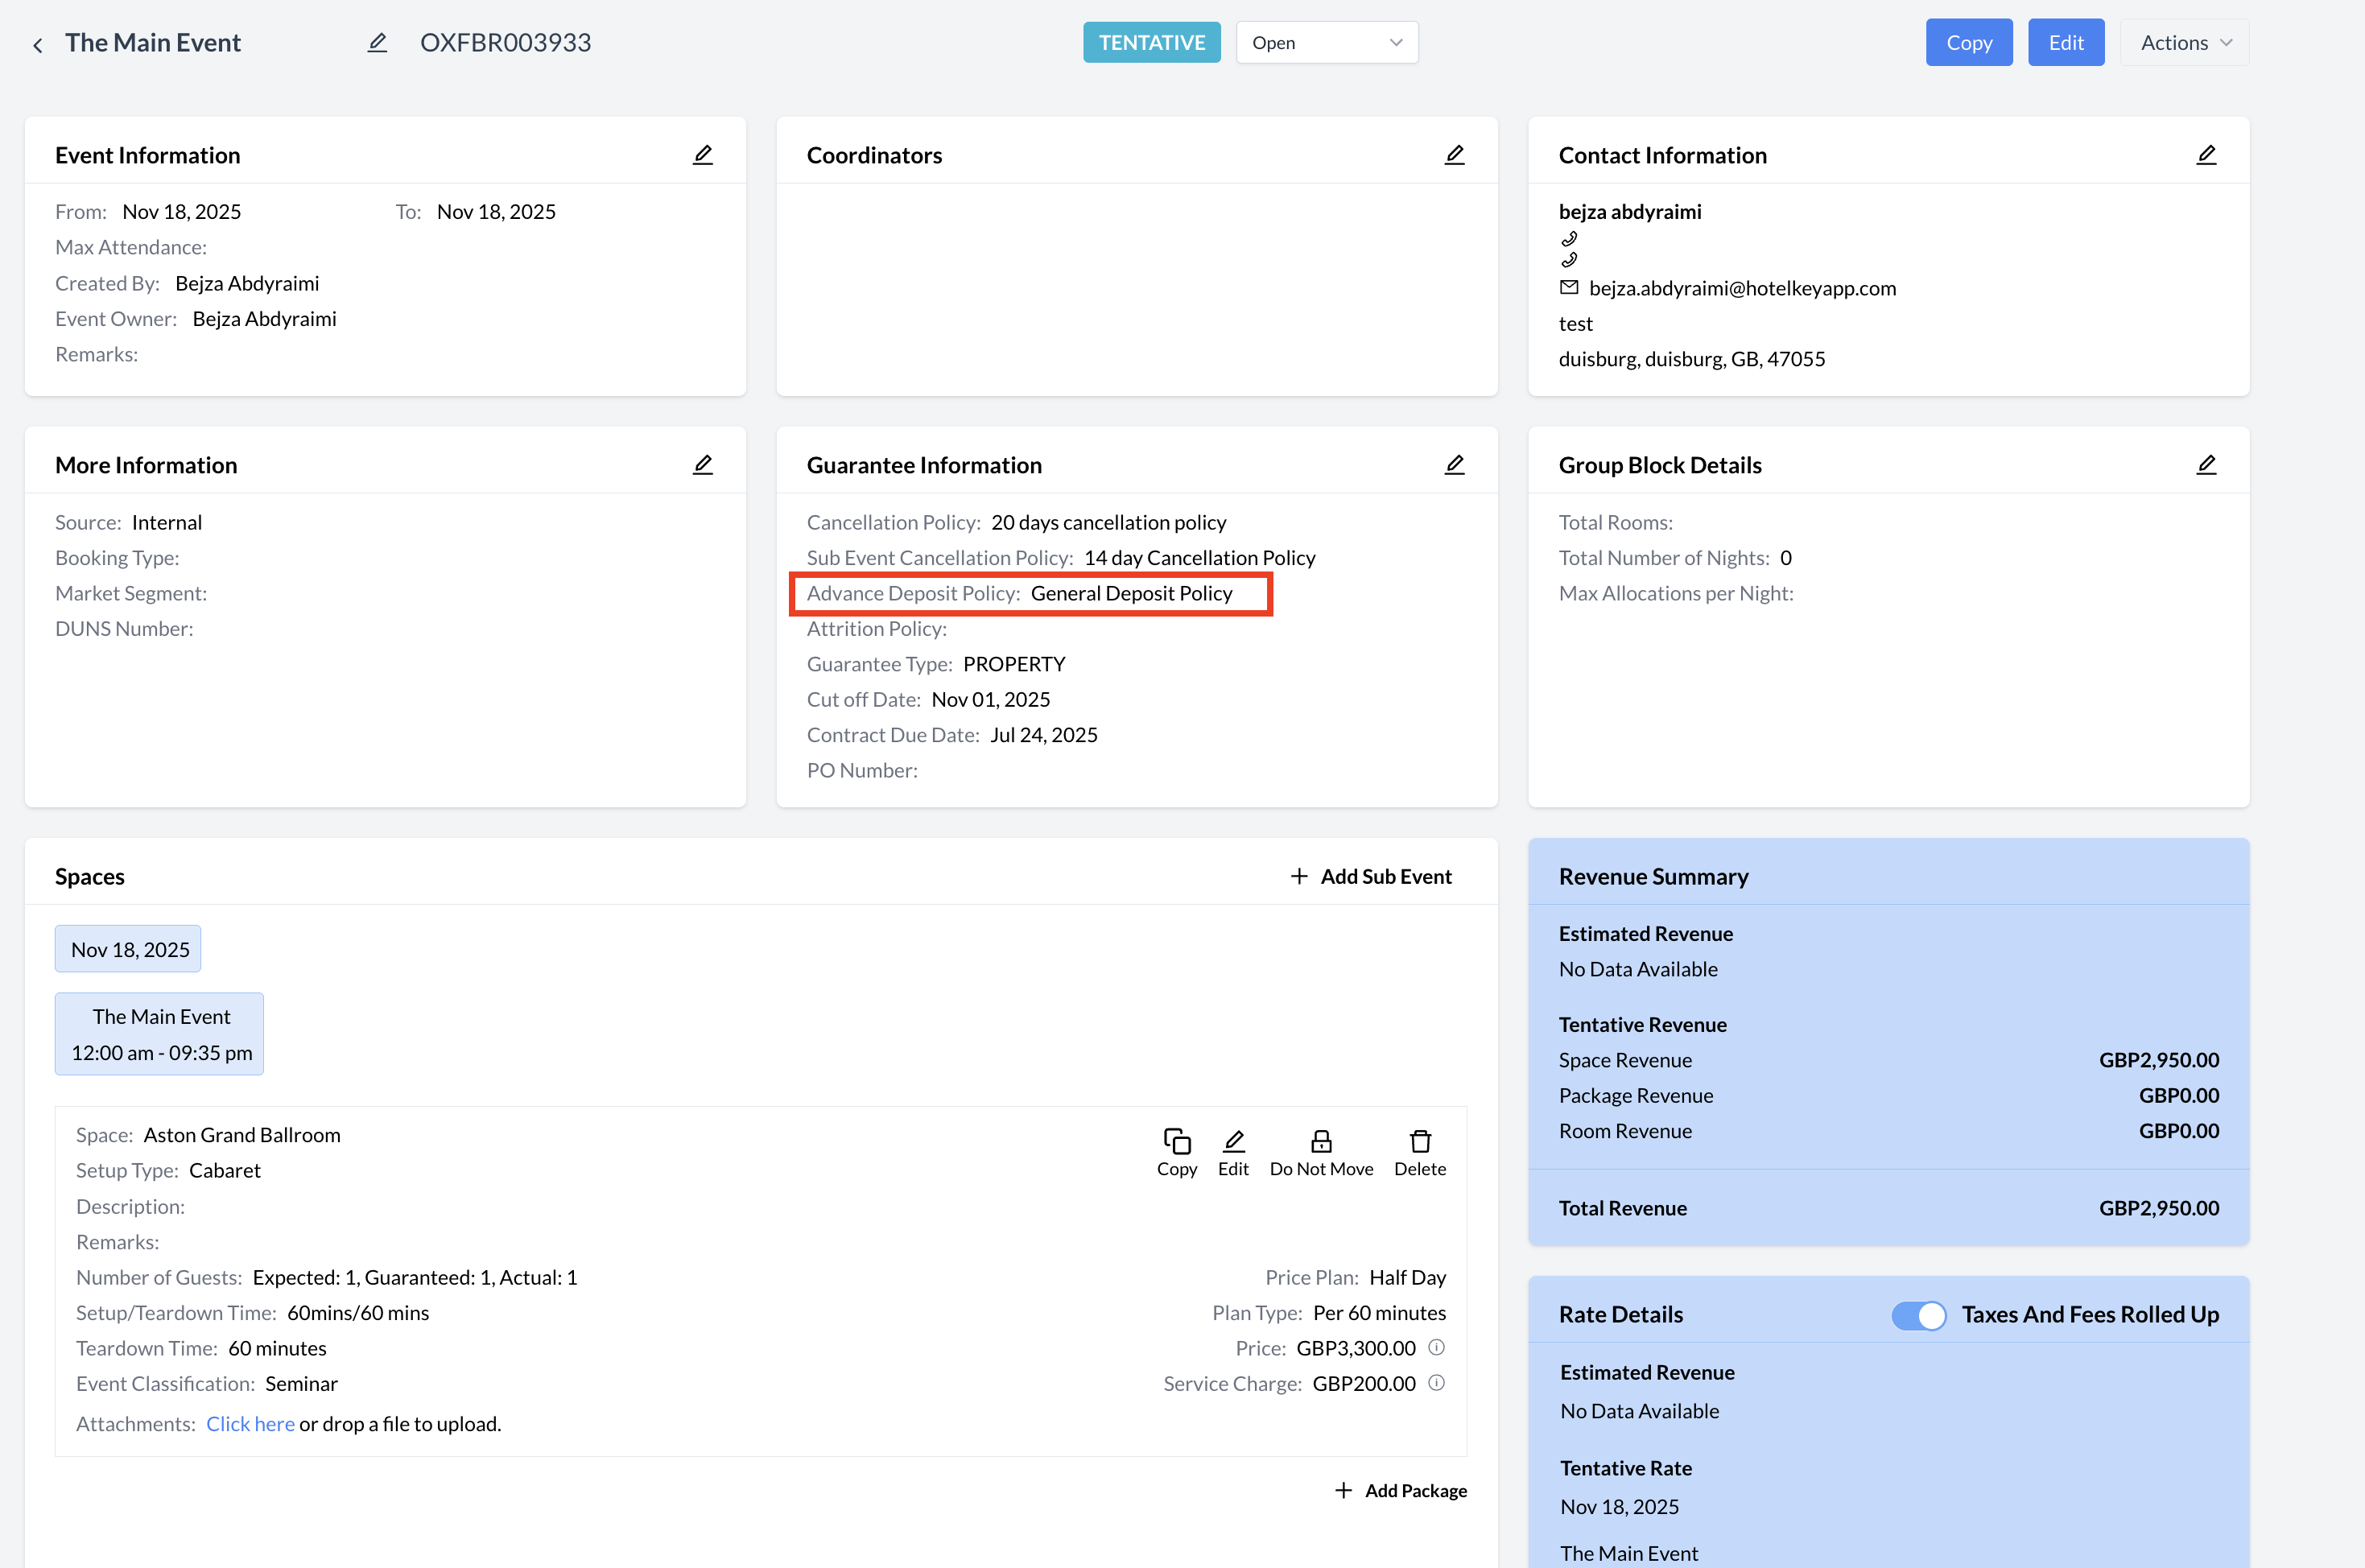
After creating a new Deposit Policy, you may need to apply it to existing event records. To update an event, navigate to the event record and click the Edit (pencil) icon located under the Guarantee Information section. In the Deposit Policy dropdown menu, select the newly created policy, then click Save to confirm your changes. The event record will now display and use the updated cancellation policy.


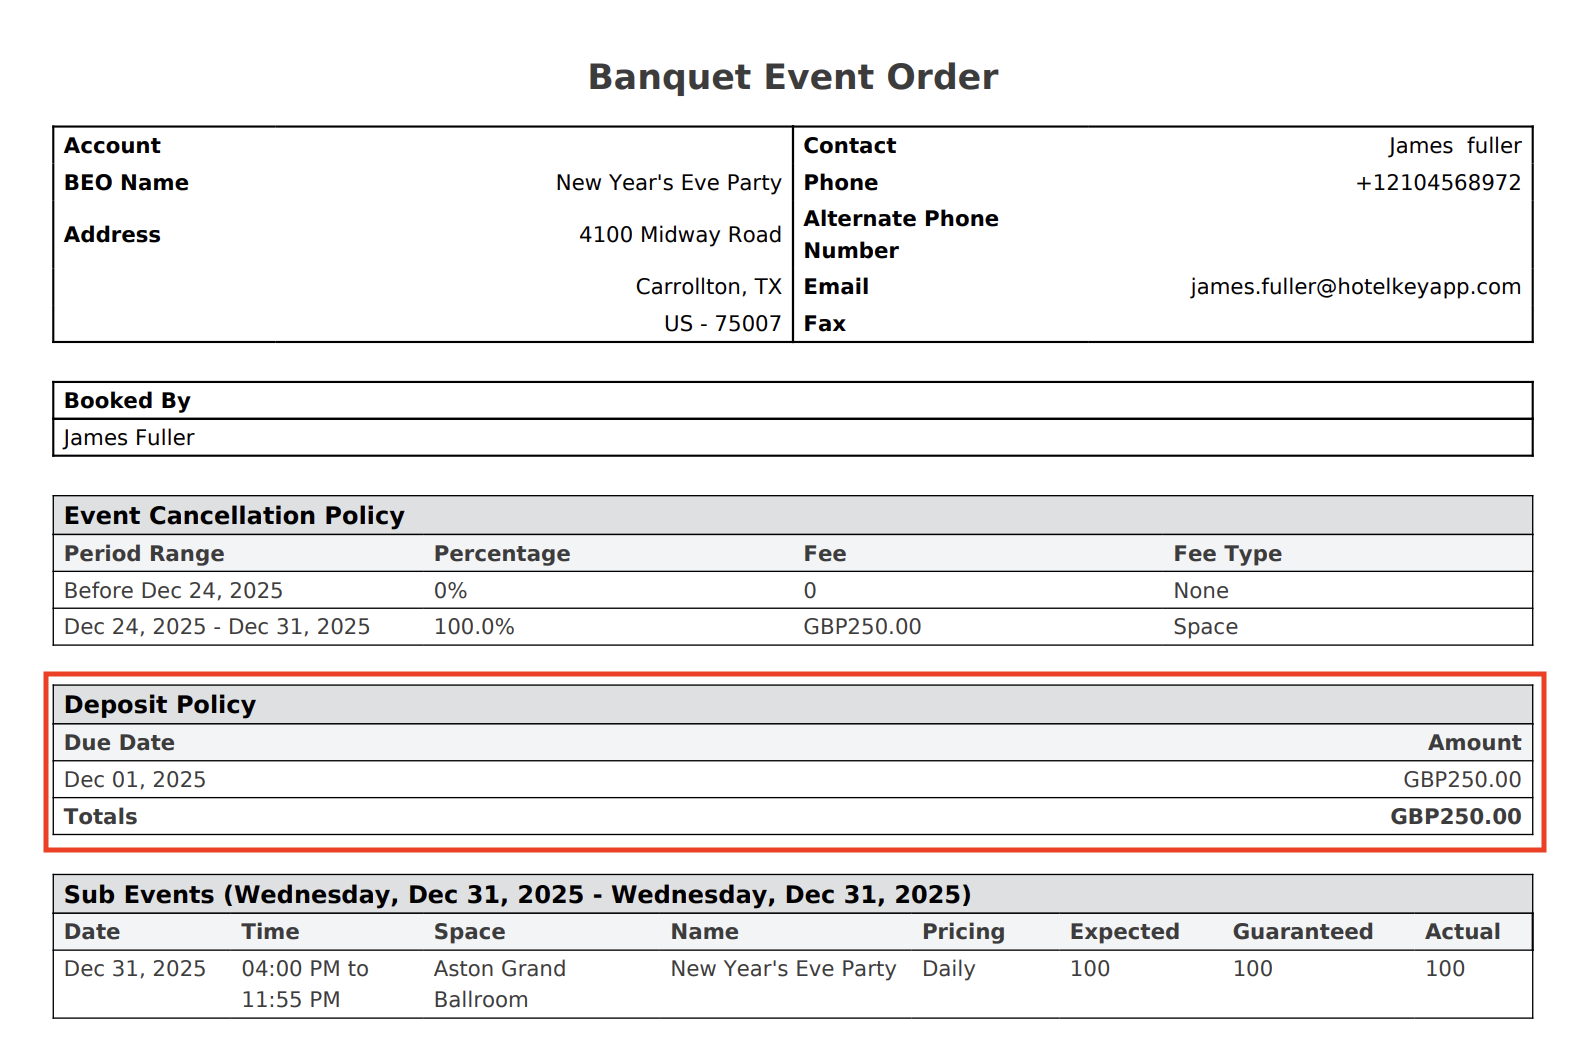
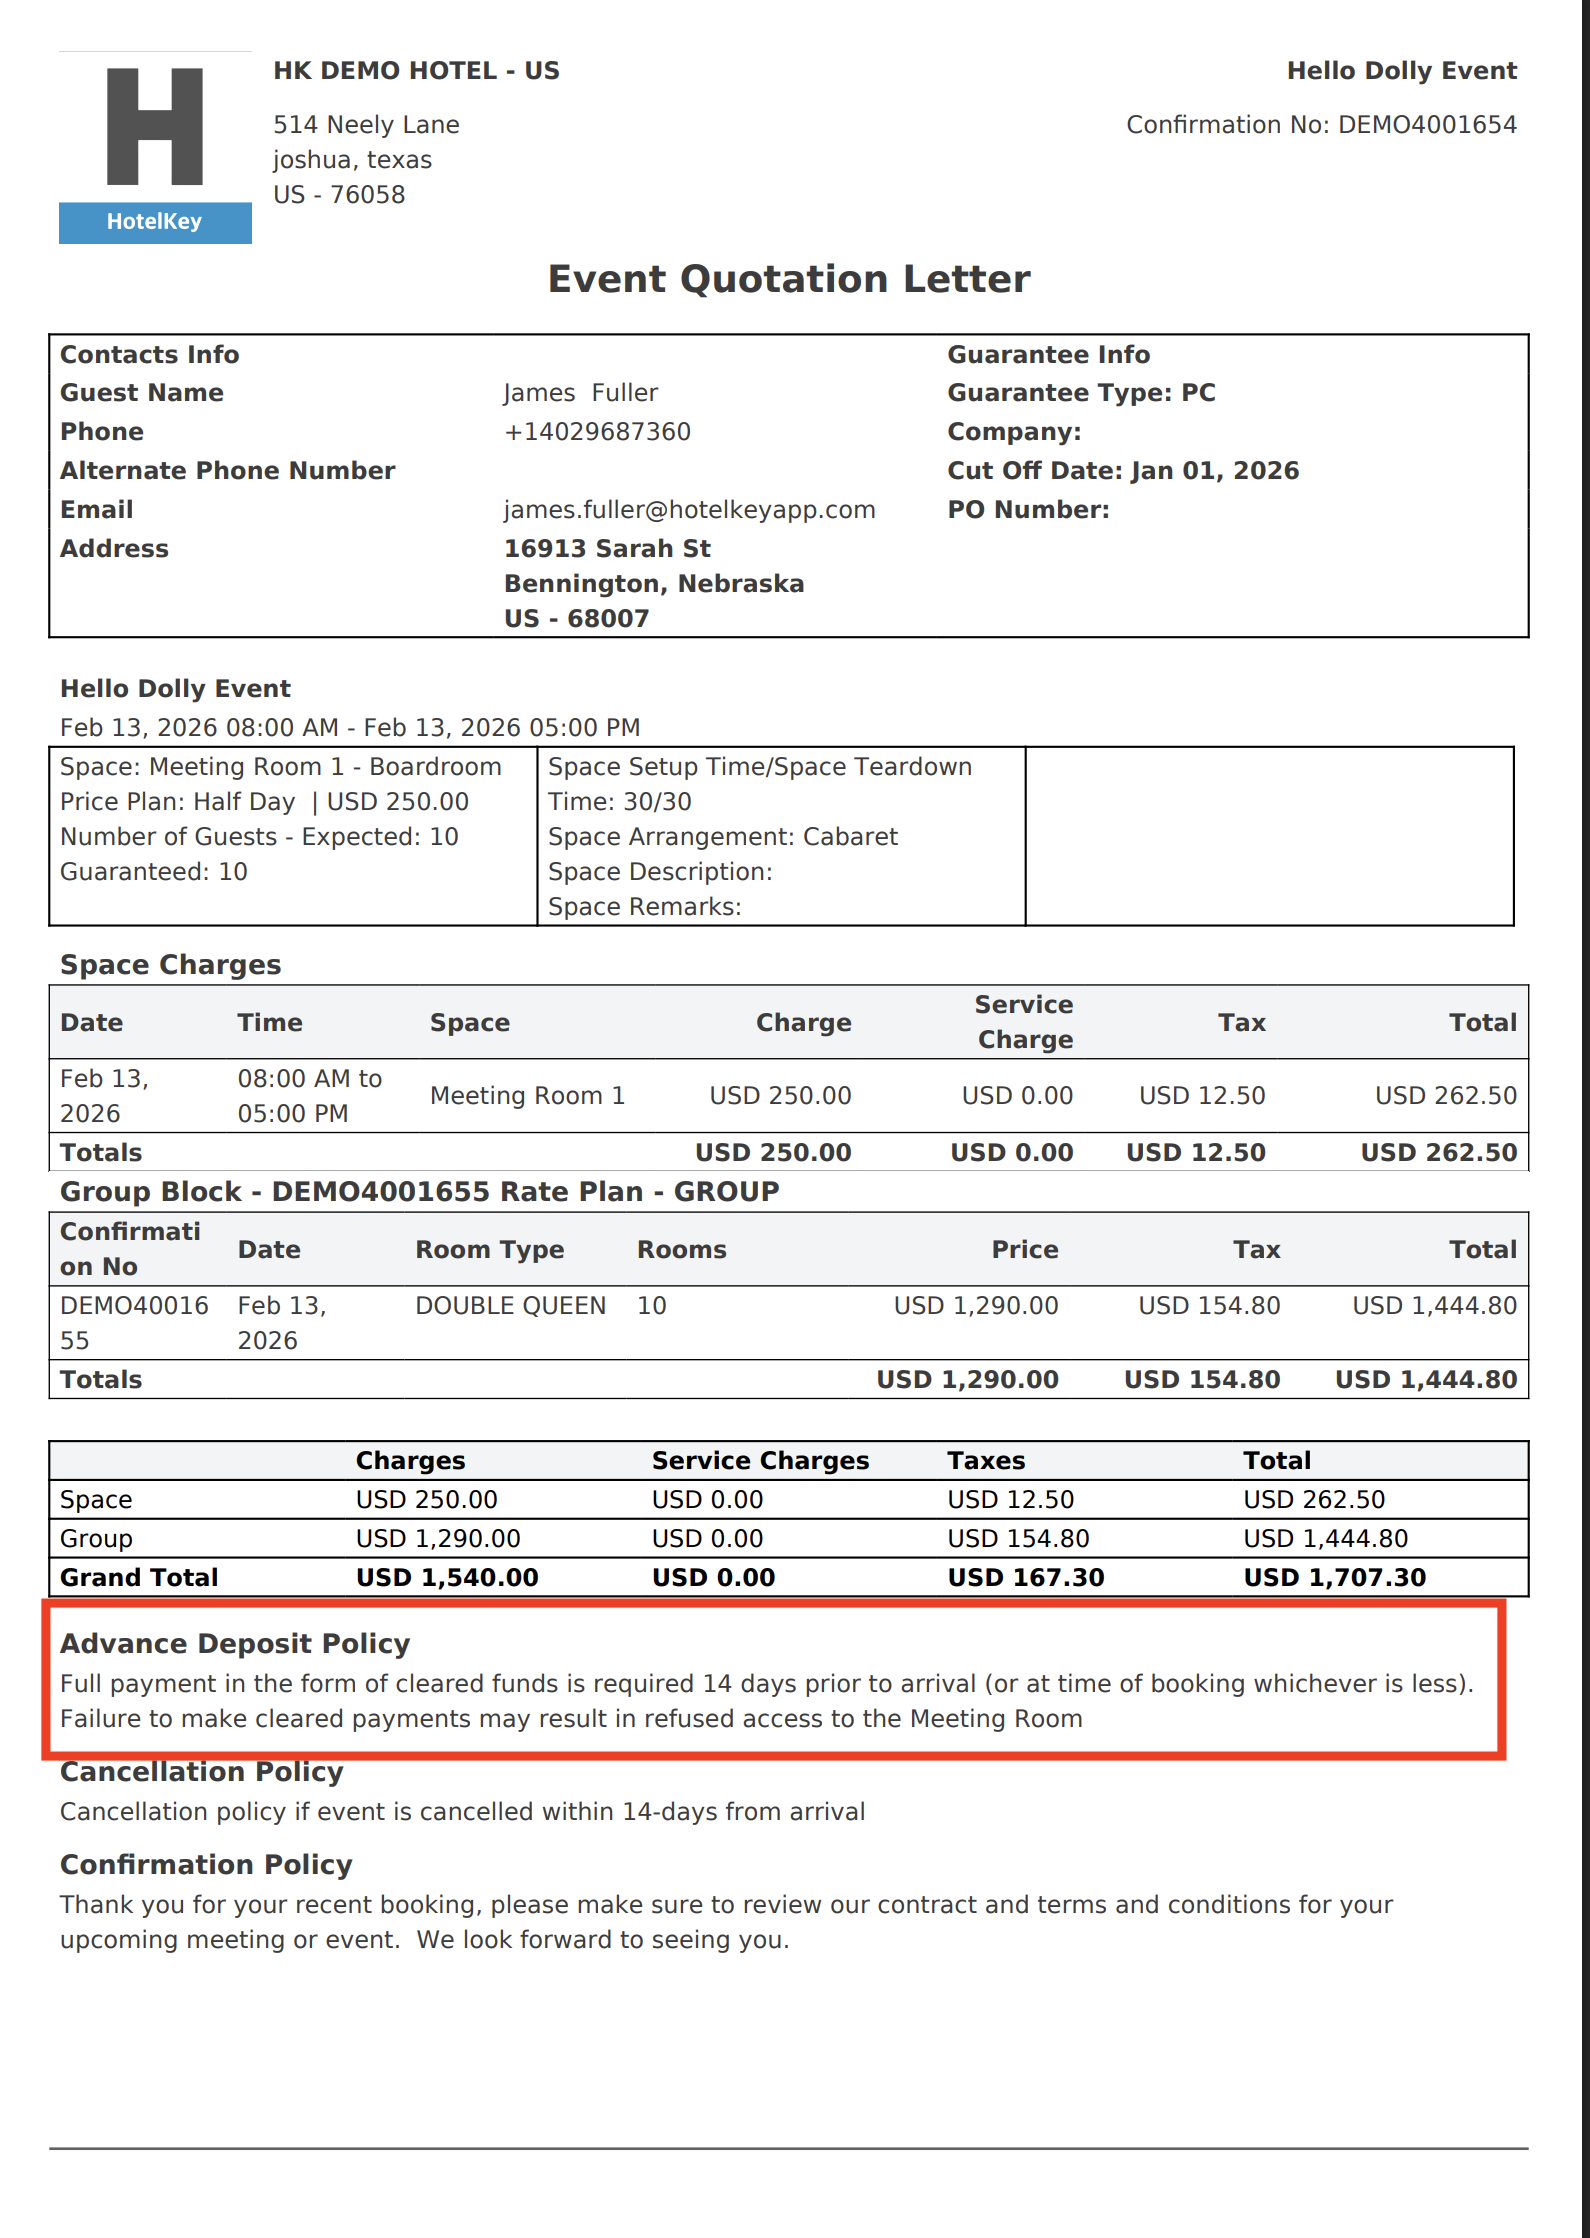
🖥️ Where “Deposit Policies” Appears in the User Interface (UI)

There are several locations within EventKey deposit policies will appear both in the UI & Reports. Below are a few more common examples:

Advance Deposity_Event Creation Flow.png

Deposit Policy: Event Creation_Guarantee Information

Advance Deposit_Event Record.png

Deposit Policy: Event Record (Reservation)

Deposit Policy_BEO.png

Deposit Policy: BEO

JavaScript errors detected

Please note, these errors can depend on your browser setup.

If this problem persists, please contact our support.