📆 Revision Date:
Event Auto Actions Overview
Event Auto Actions in EventKey allow you to automate task creation and assignment based on specific triggers or conditions. This feature helps ensure that important follow-ups and actions are never missed by automatically generating tasks for the appropriate team members. For example, if an event inquiry remains open for more than 15 days, the system can automatically create and assign a follow-up task to the event coordinator. By using Auto Actions, properties can streamline workflows, maintain accountability, and improve response times throughout the event management process.
🛑 Prerequisites
Before creating an Event Auto Task, ensure that an Event Task Type named AUTO_TASK has been created. This task type is required for Event Auto Actions to generate automated tasks.
|
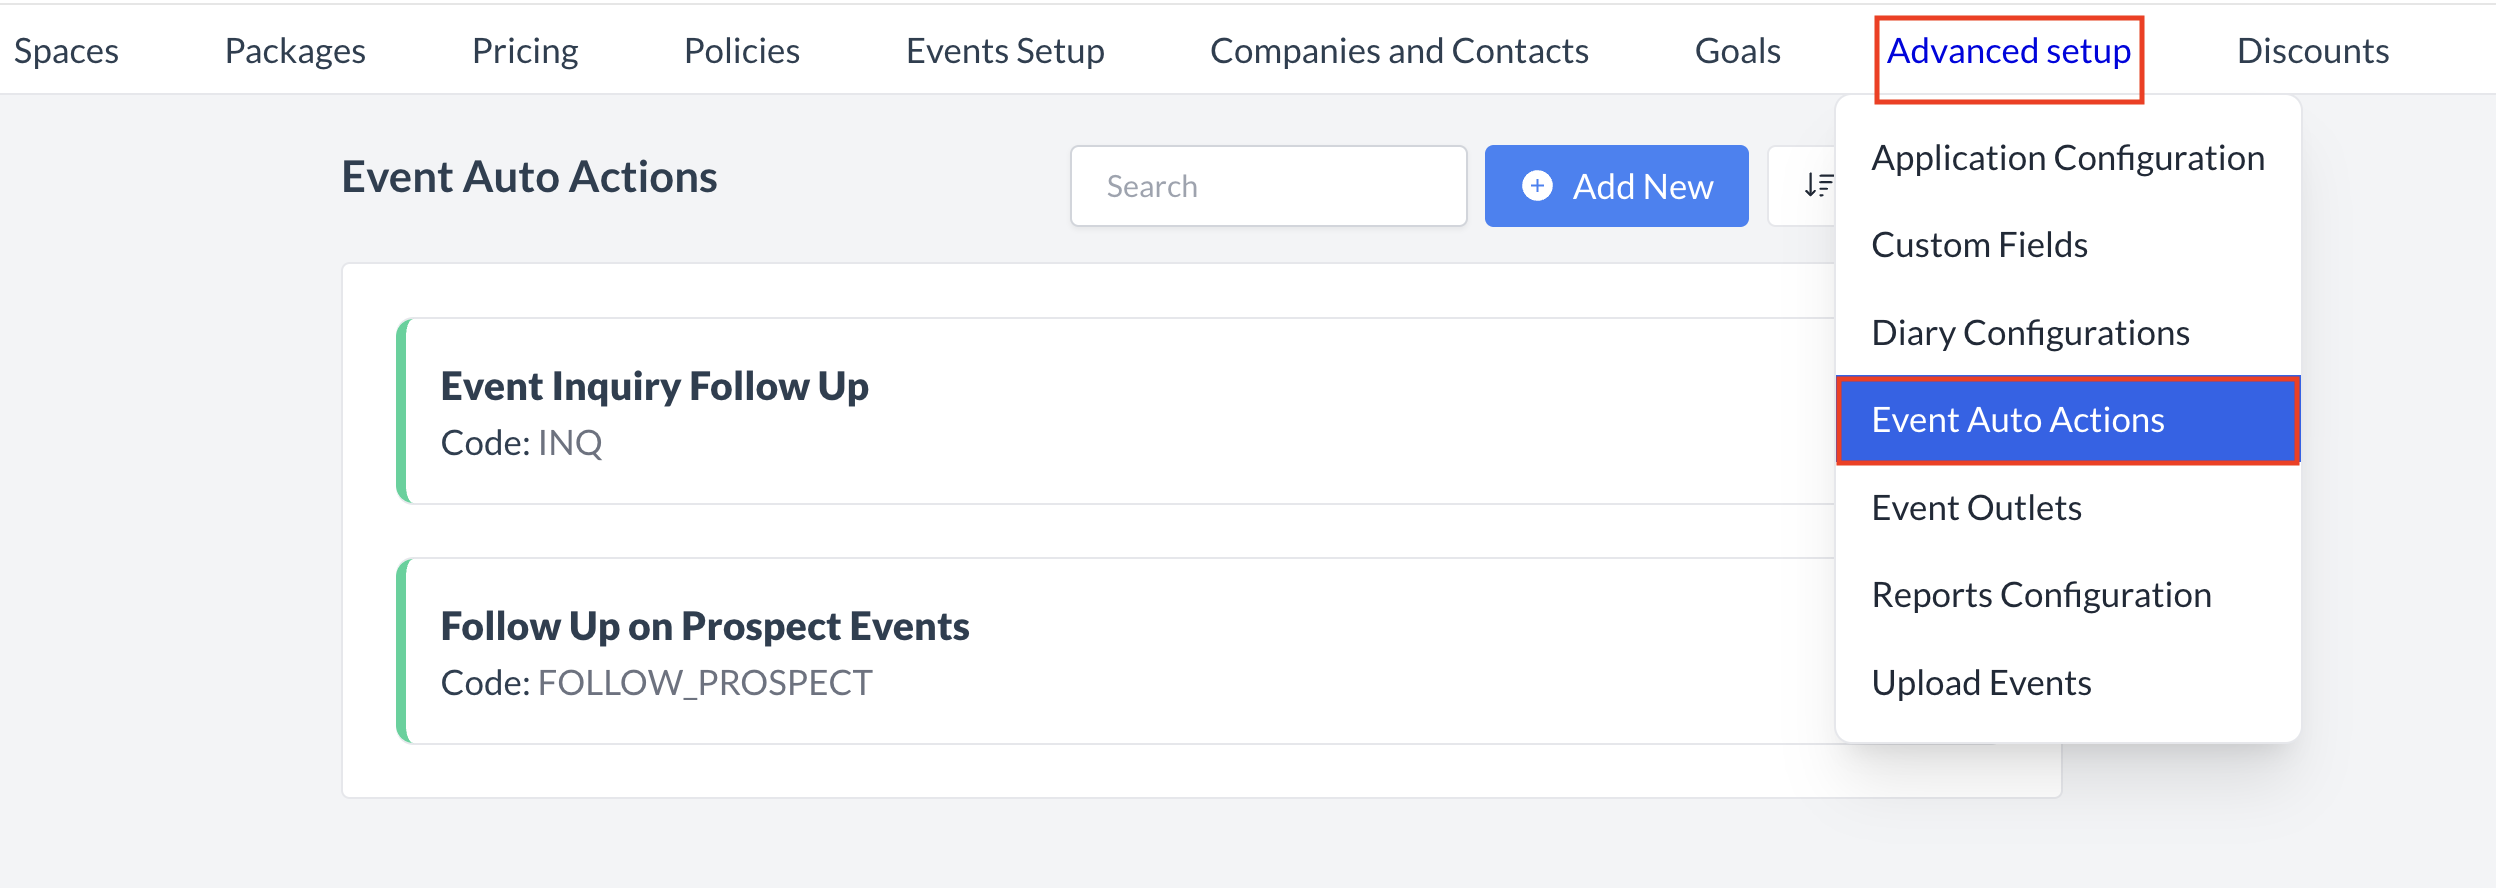
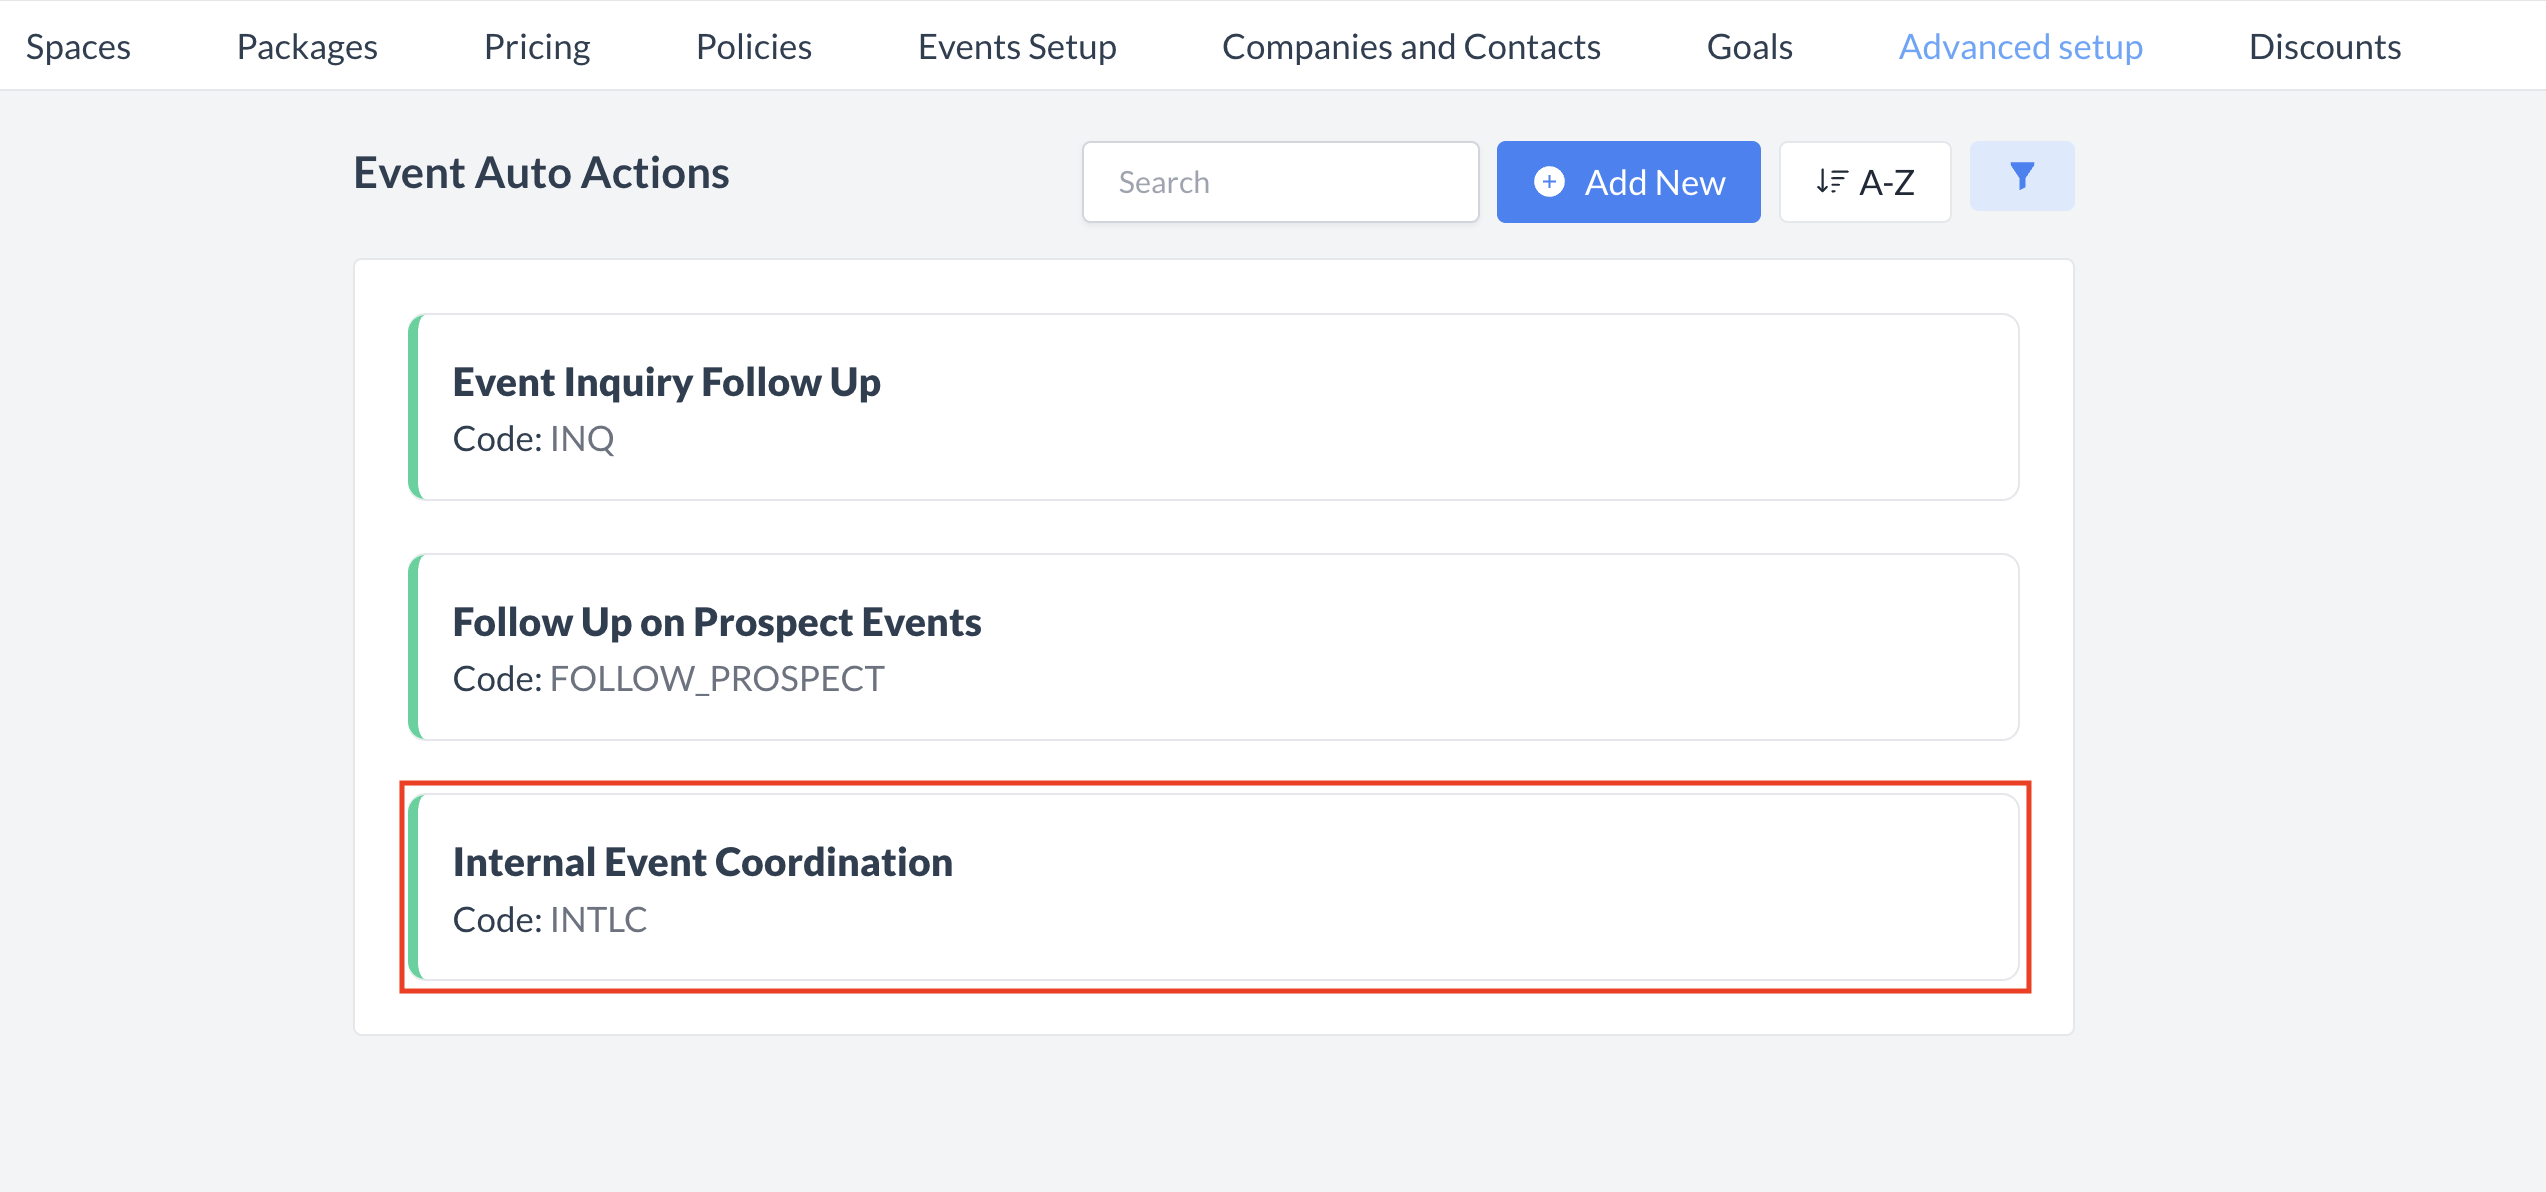
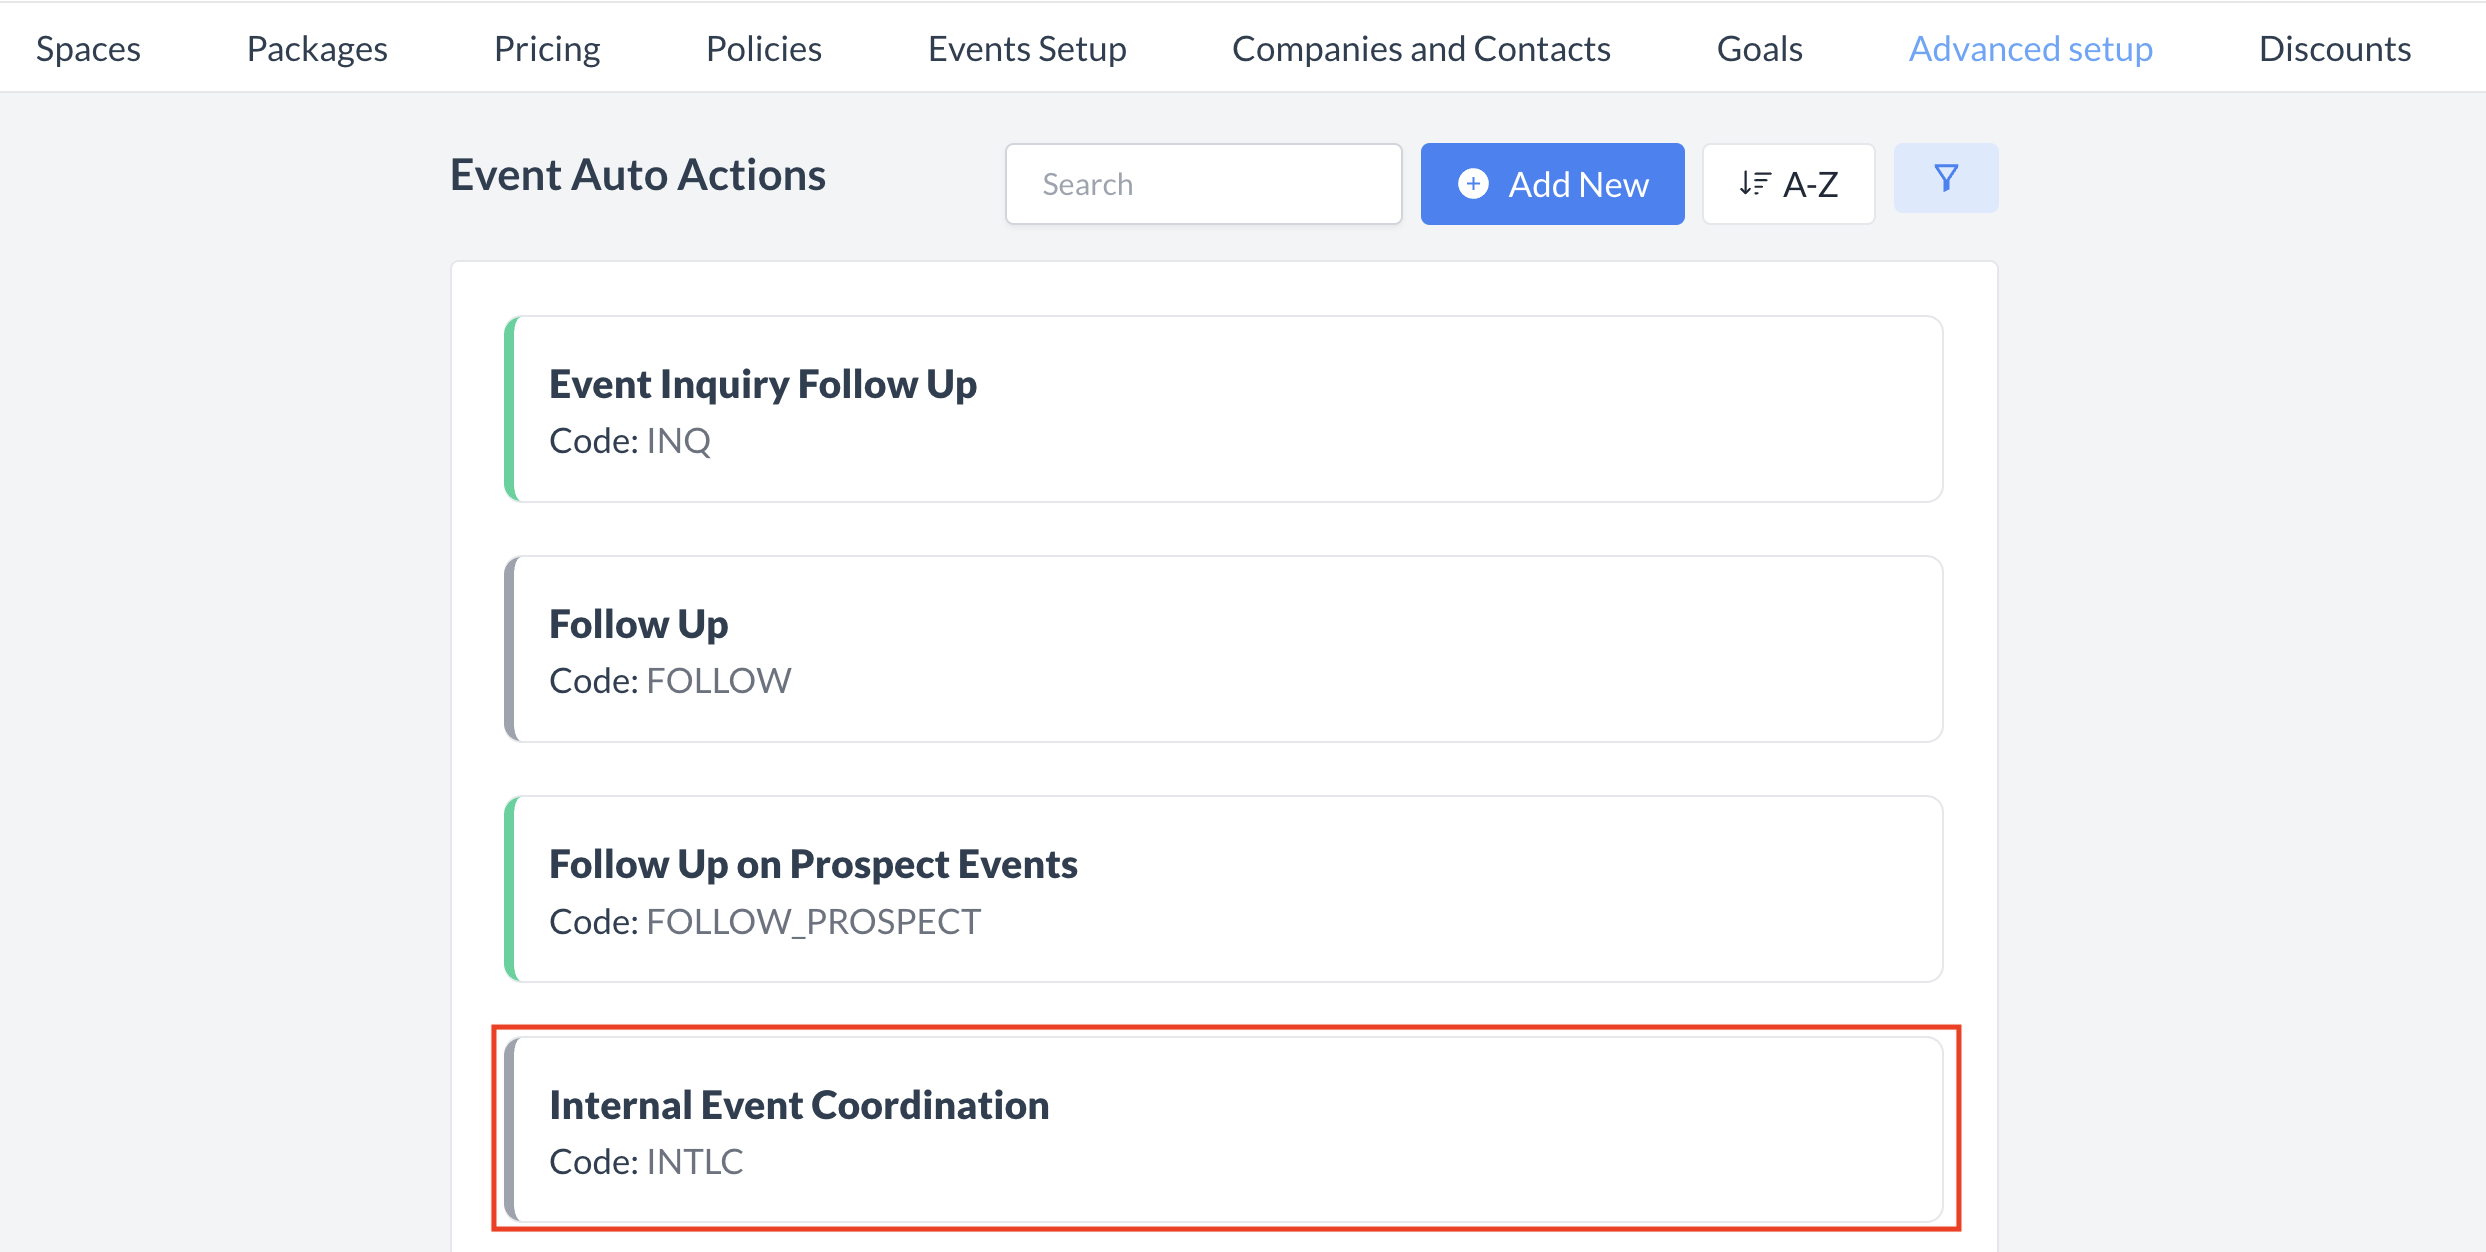
Navigate to Home > Event Administration > Advanced Setup > Event Auto Actions |
|
Accessing and Creating Event Auto Actions
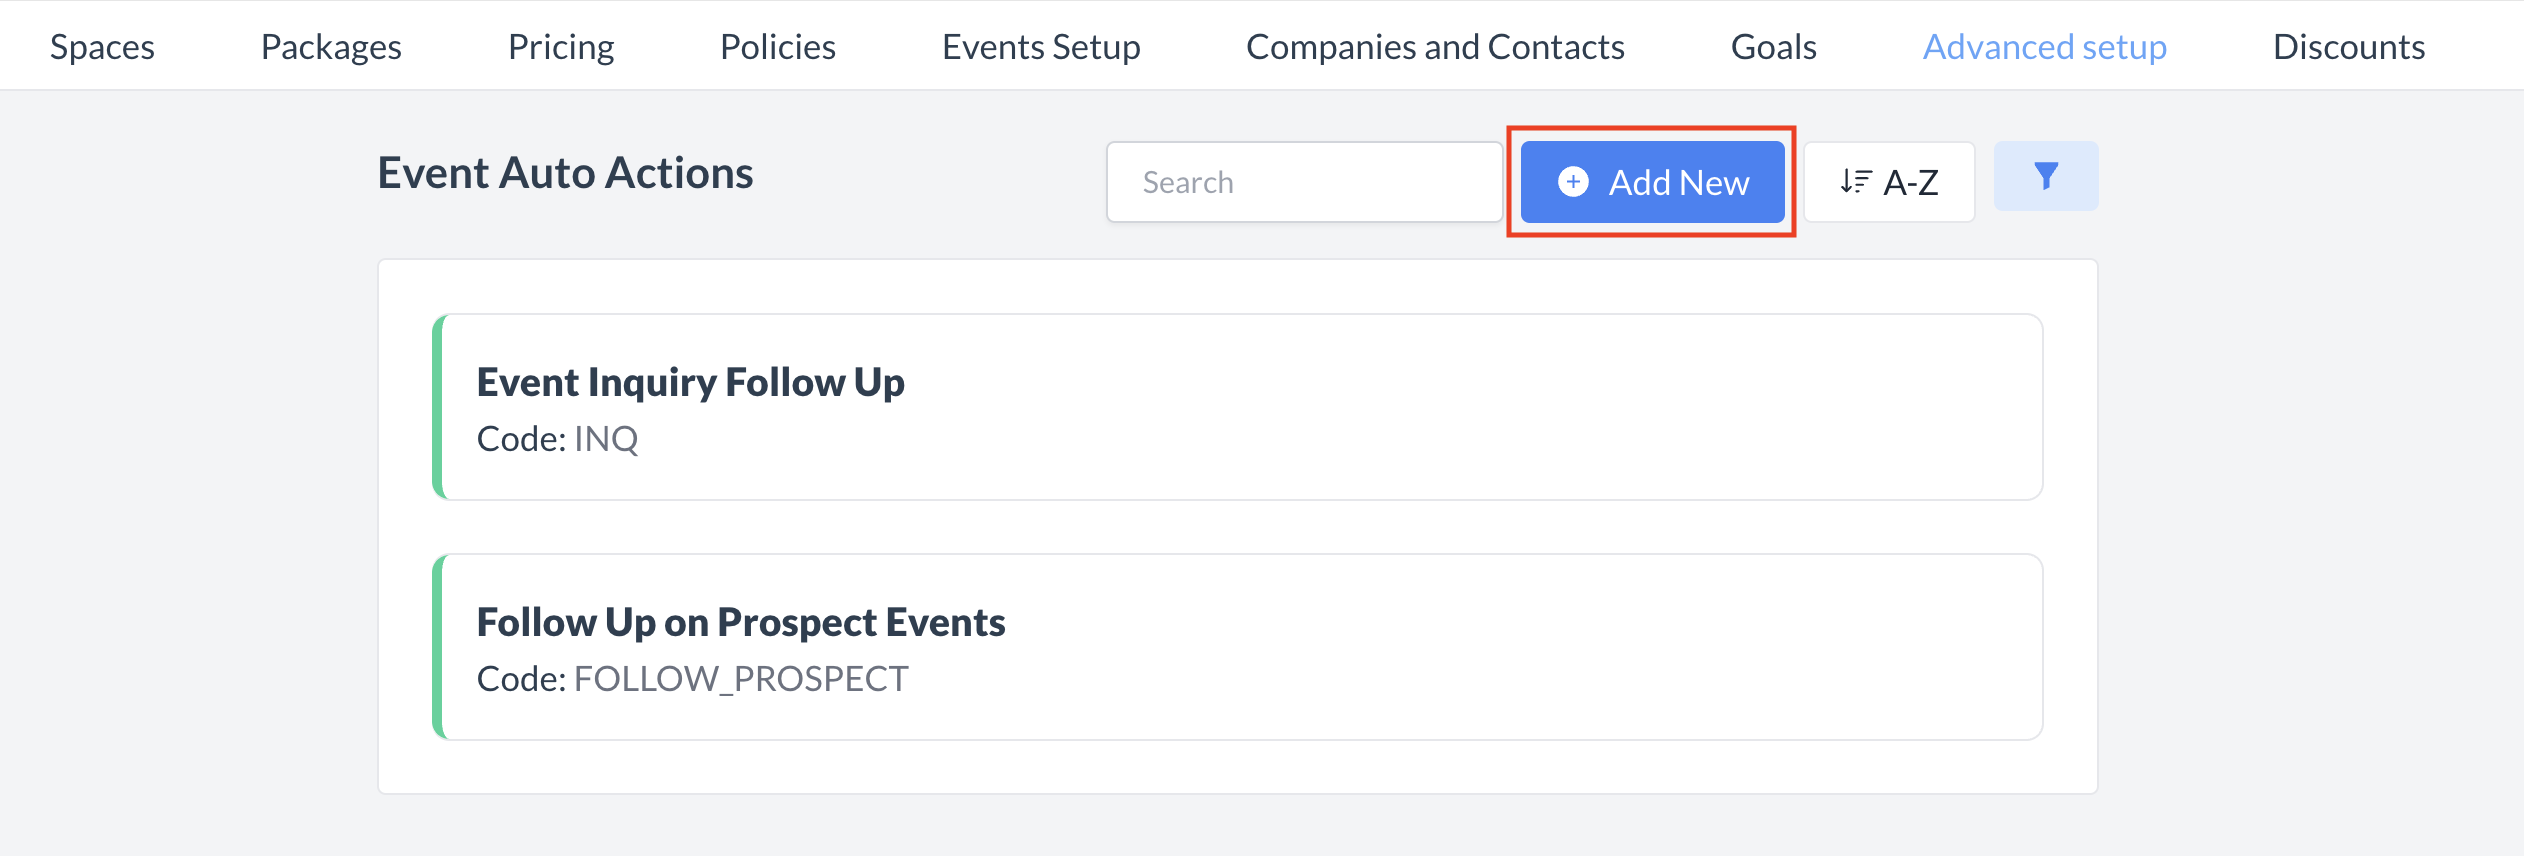
The Event Auto Actions screen displays a list of all existing auto actions available for use. To create a new auto action:
|
|
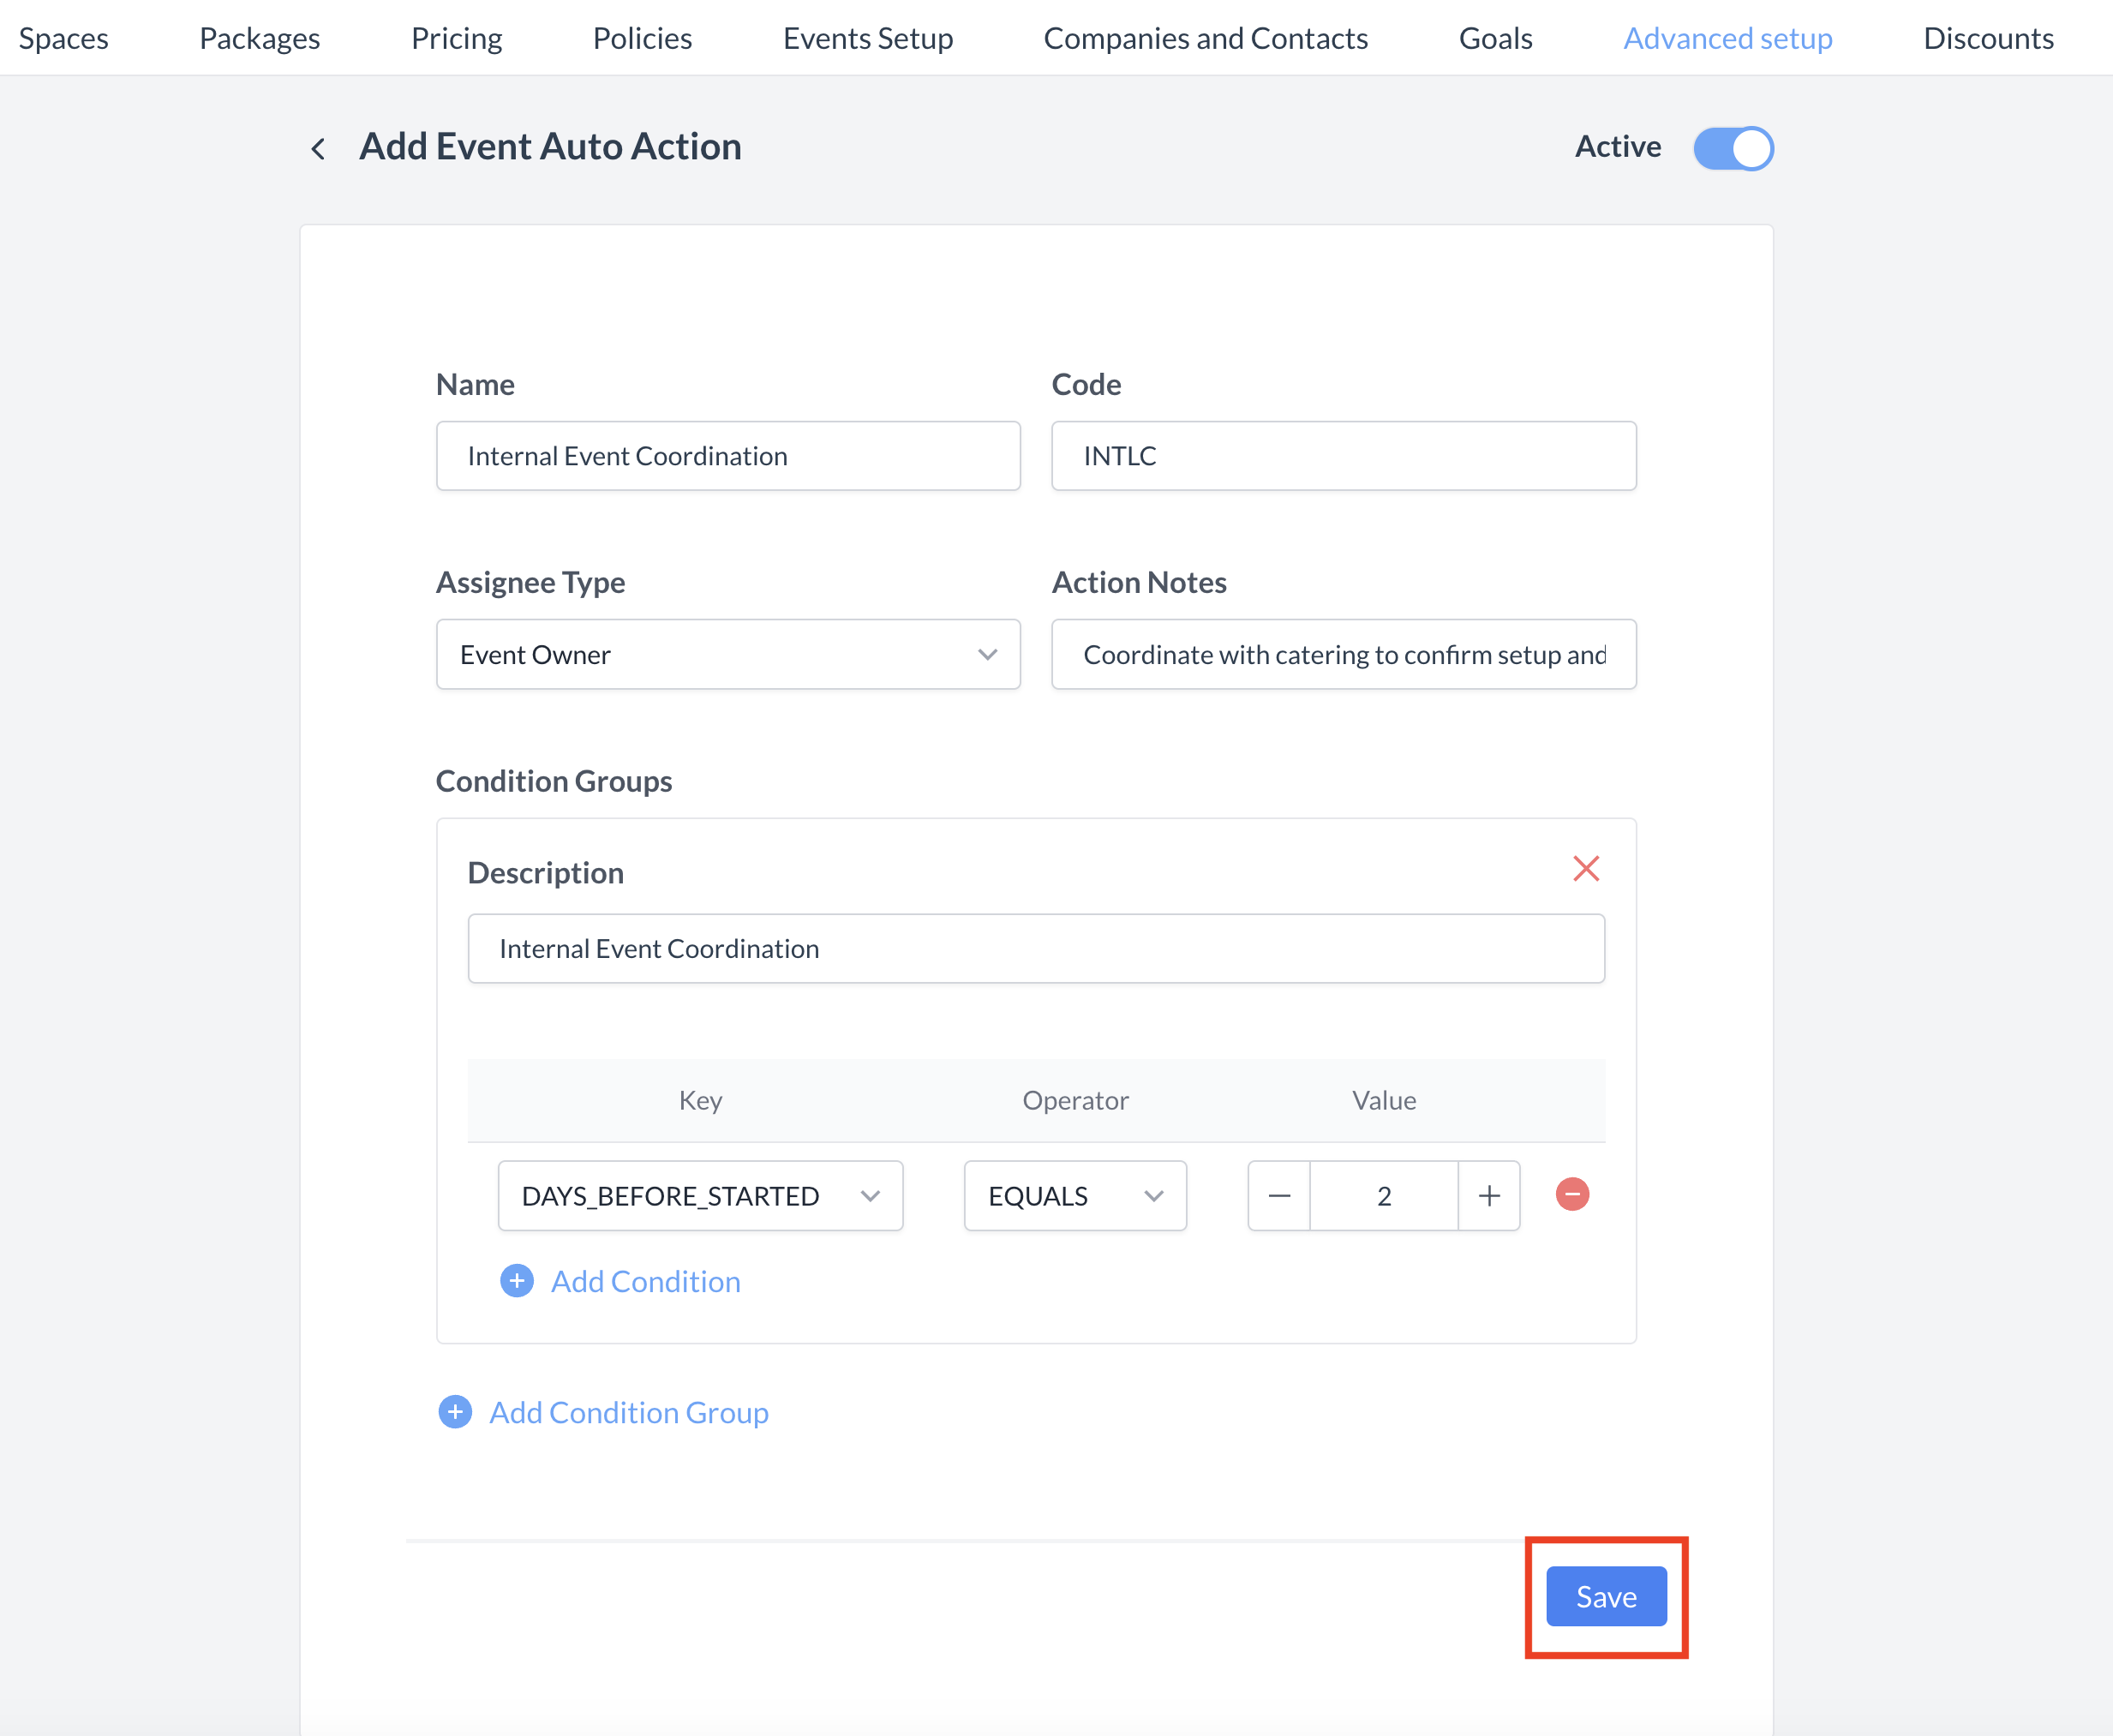
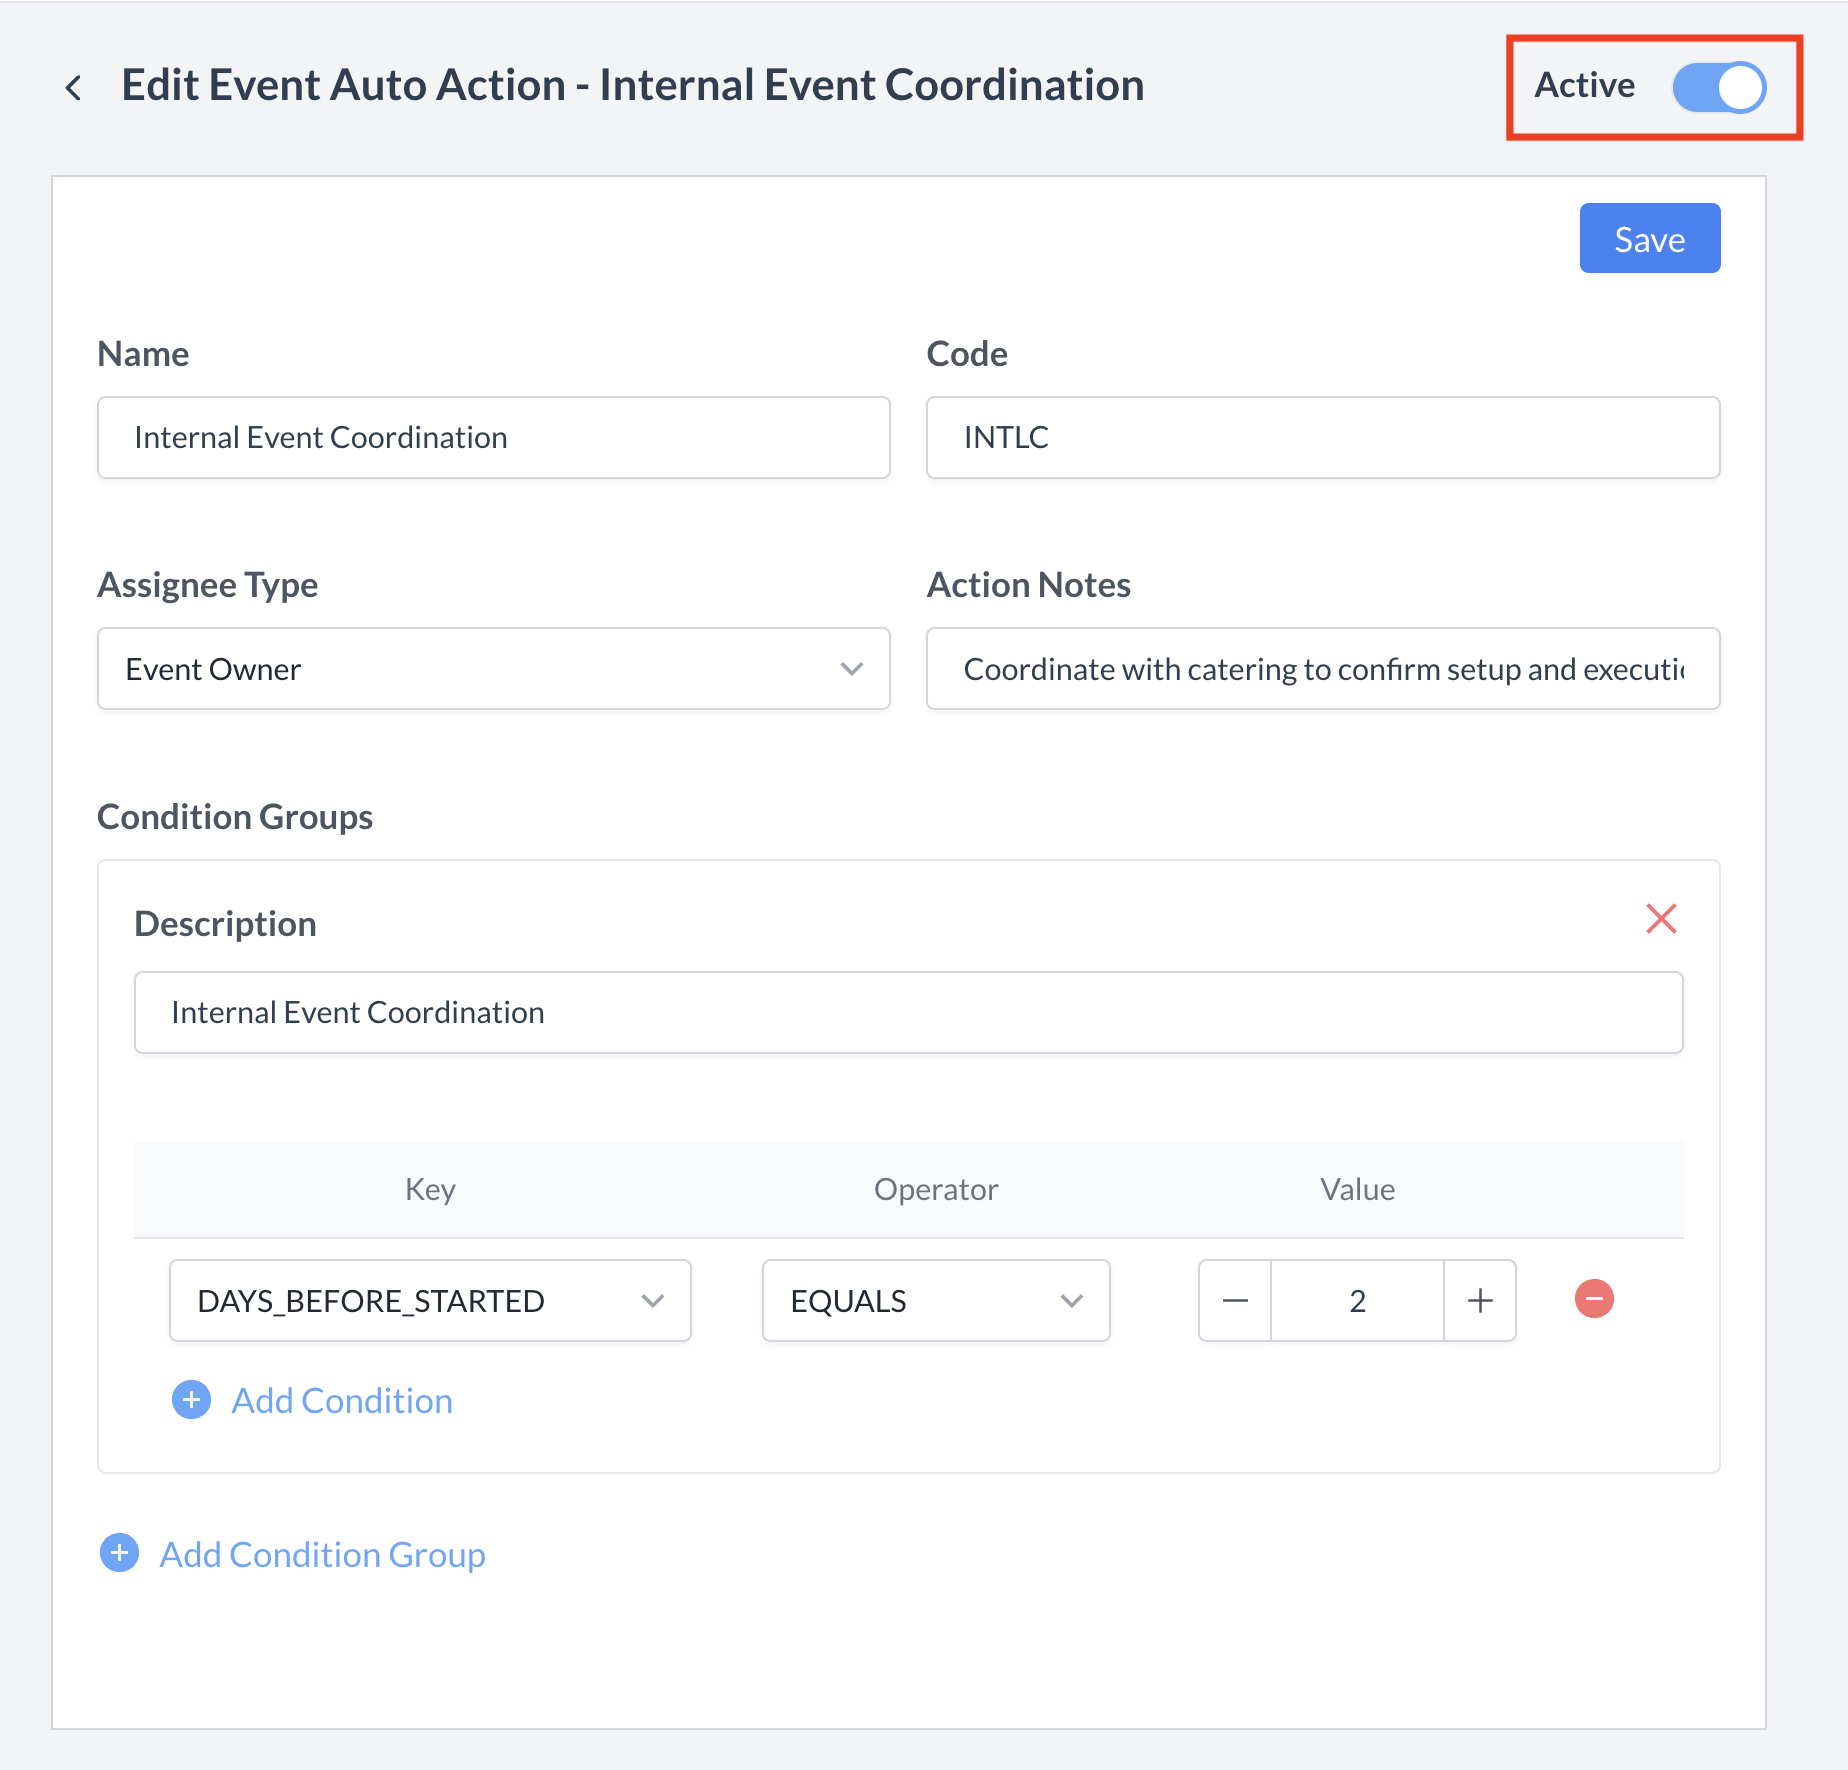
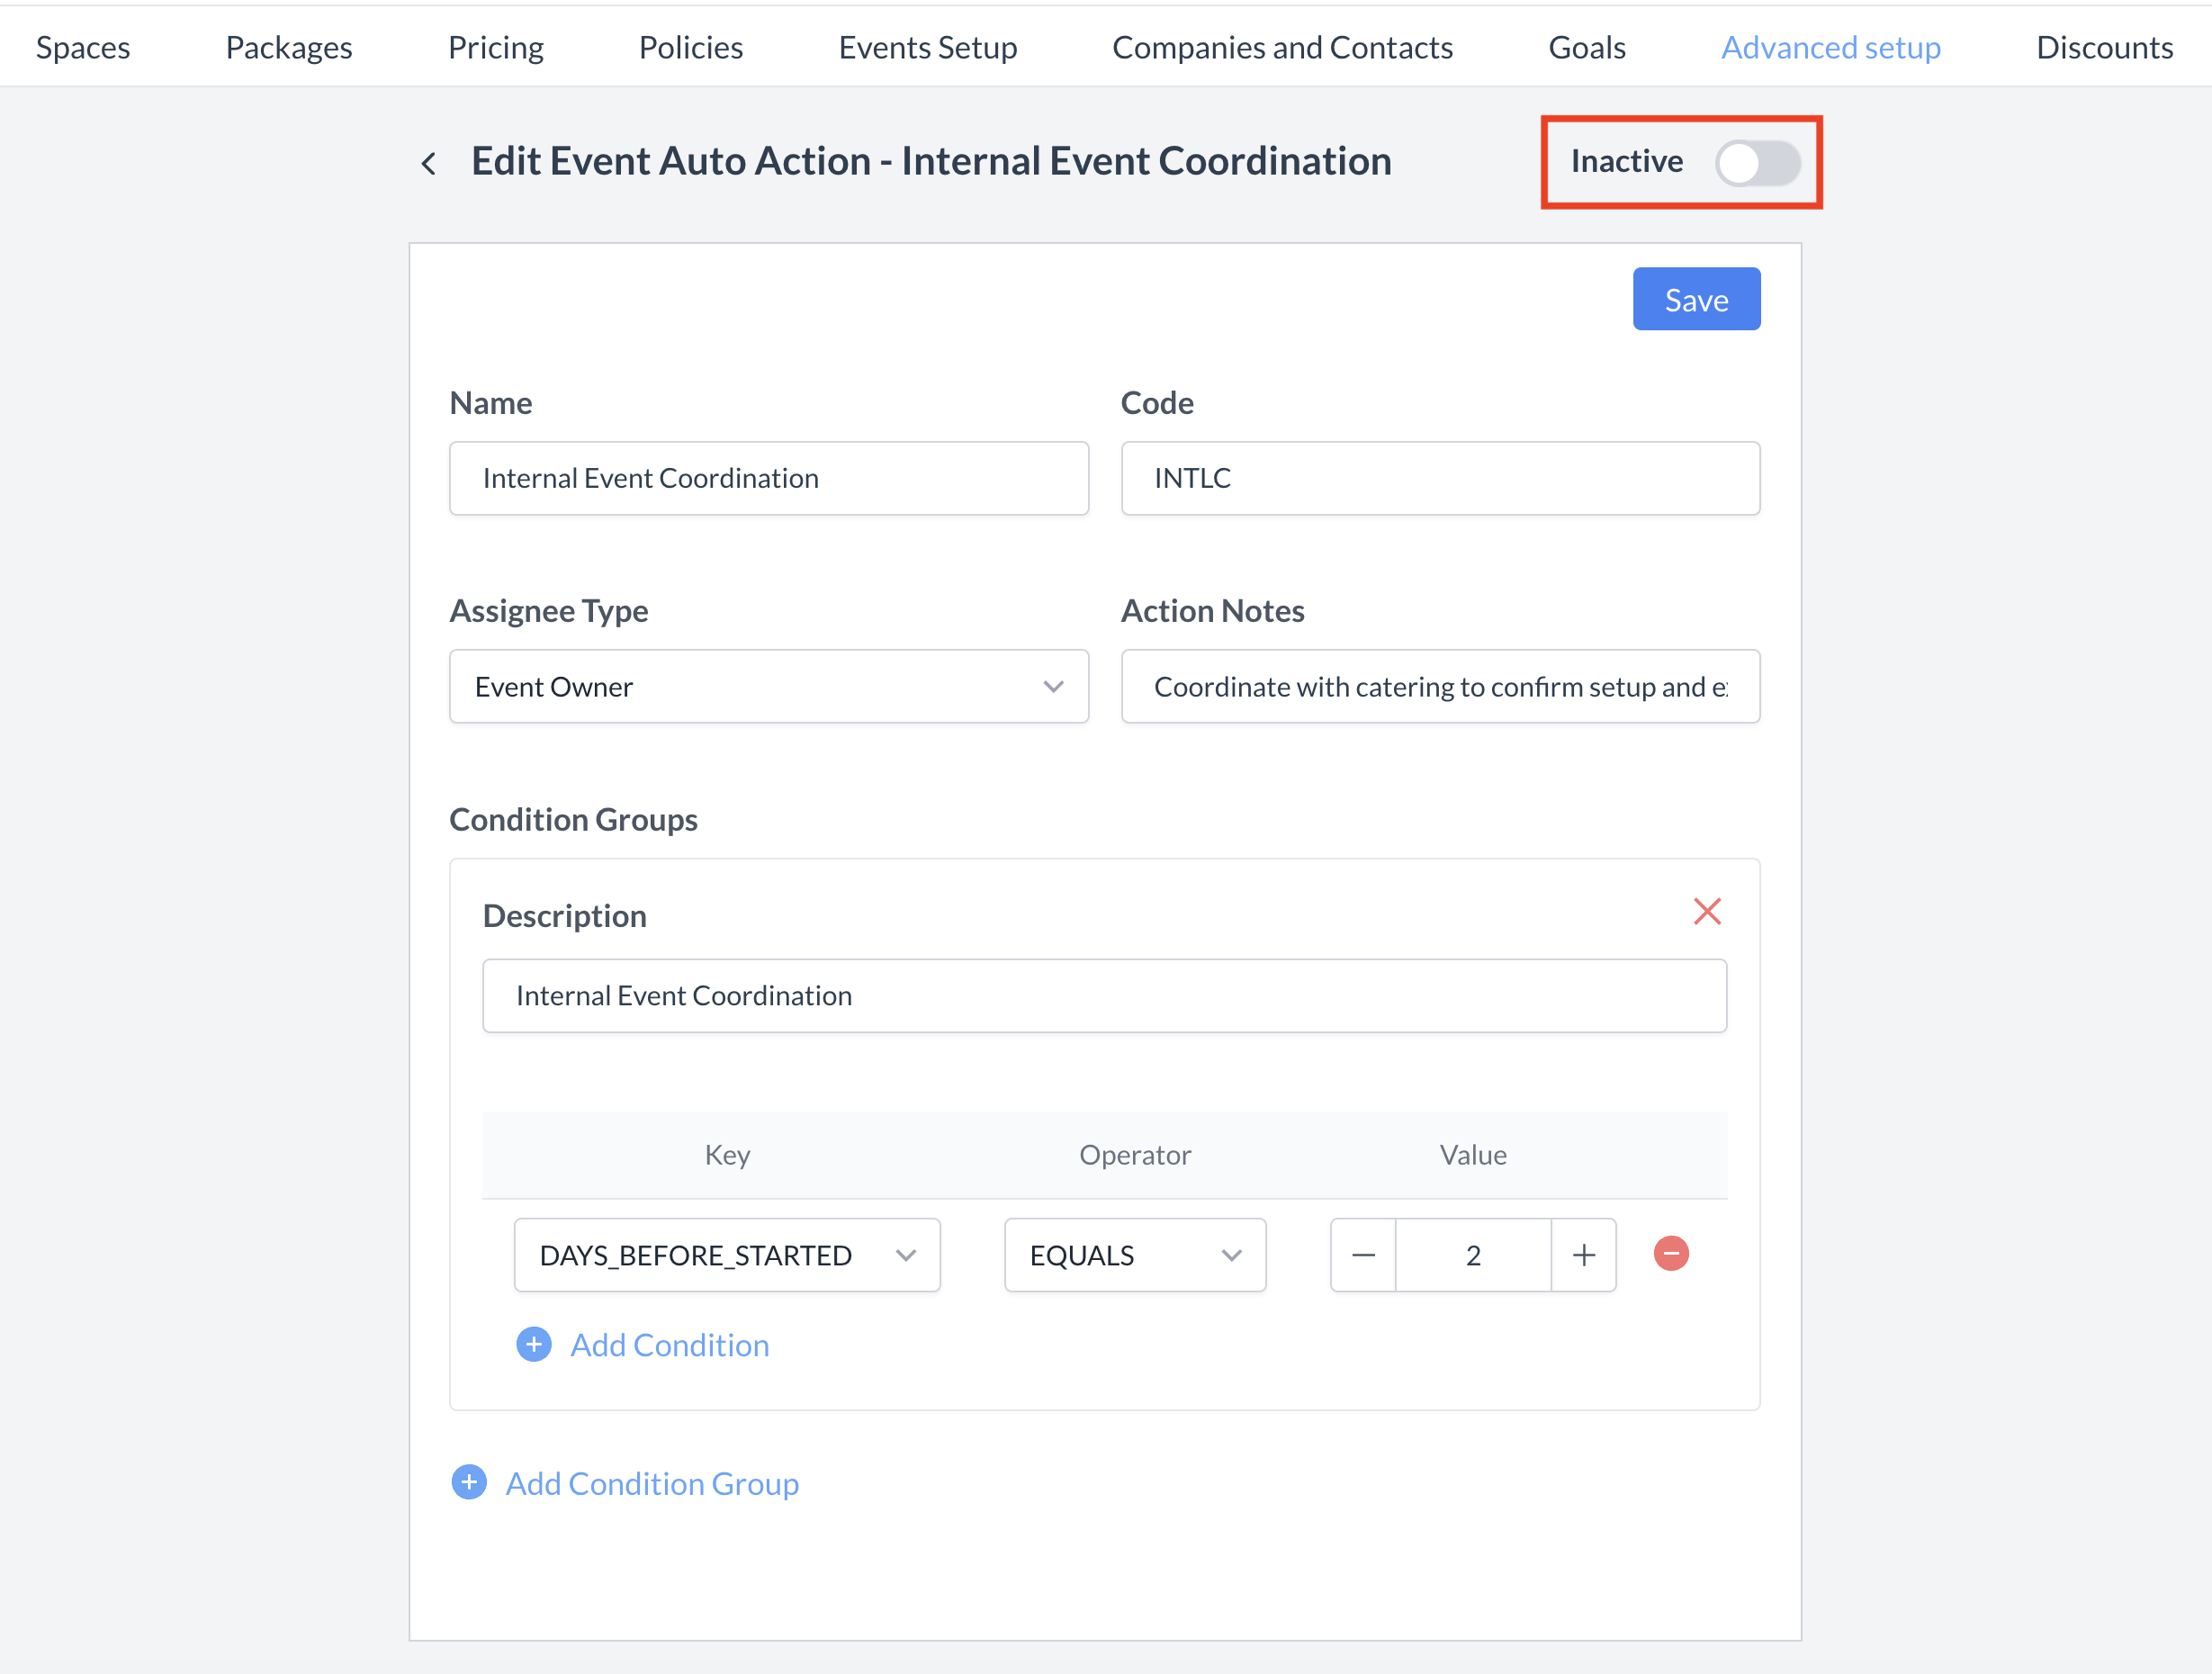
Add Event Auto Action
The Add Event Auto Action screen allows you to set up a new automated task (Auto Action) in EventKey. Follow the steps below to complete the setup. 1. General Information
Name:
Code:
2. Assignee Type
Use the dropdown menu to select who the Auto Task should be assigned to. Options include:
3. Action Notes
Enter the description of the action that should appear as the “To Do” item when the task is created. 4. Condition Groups
Condition Groups define the triggers that cause the Auto Task to be created. Description:
Key:
Operator:
Value:
5. Adding Additional Conditions
To include more criteria:
6. Save the Auto Action
When all required fields are complete, click the Save button (blue) to create the new Auto Action. |
|
Confirmation
After saving, you will be returned to the Event Auto Actions listing screen.
|

|
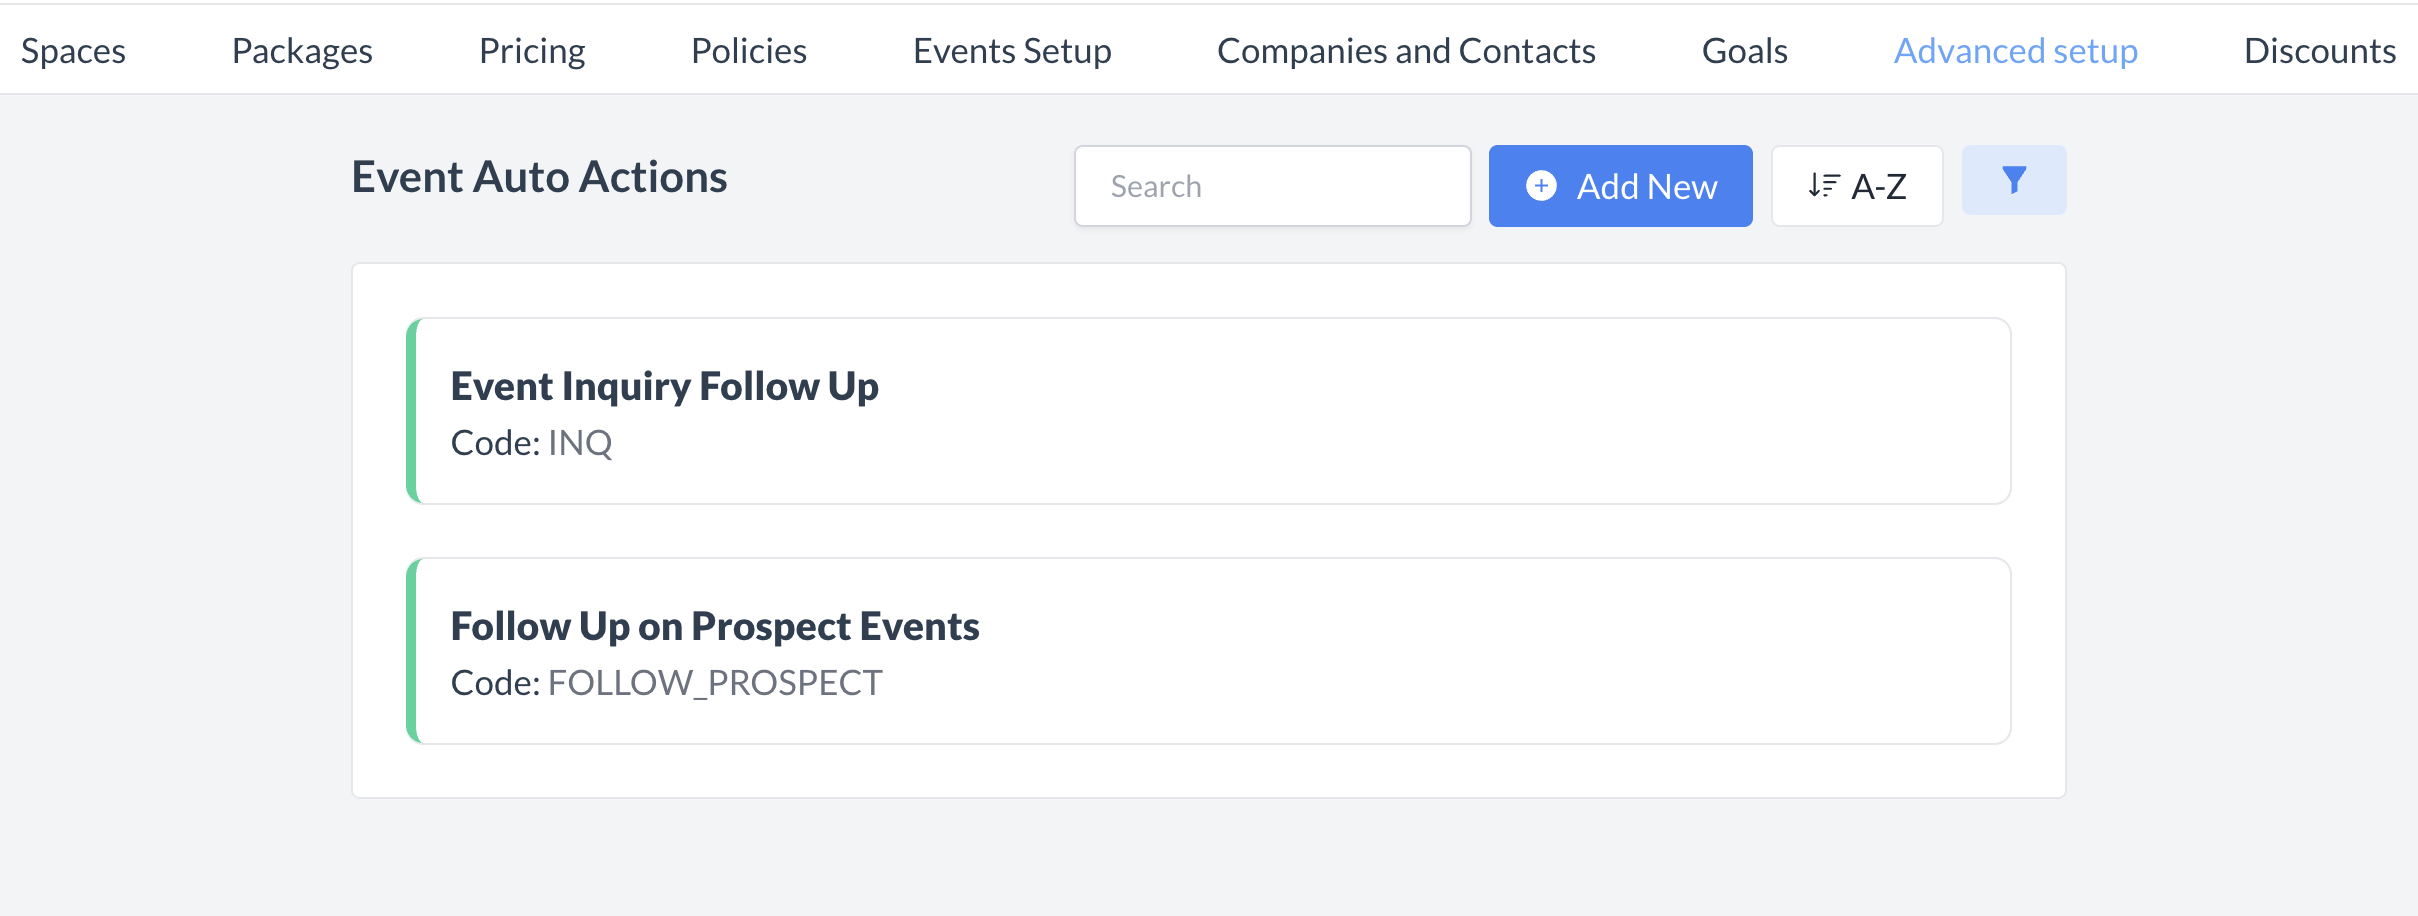
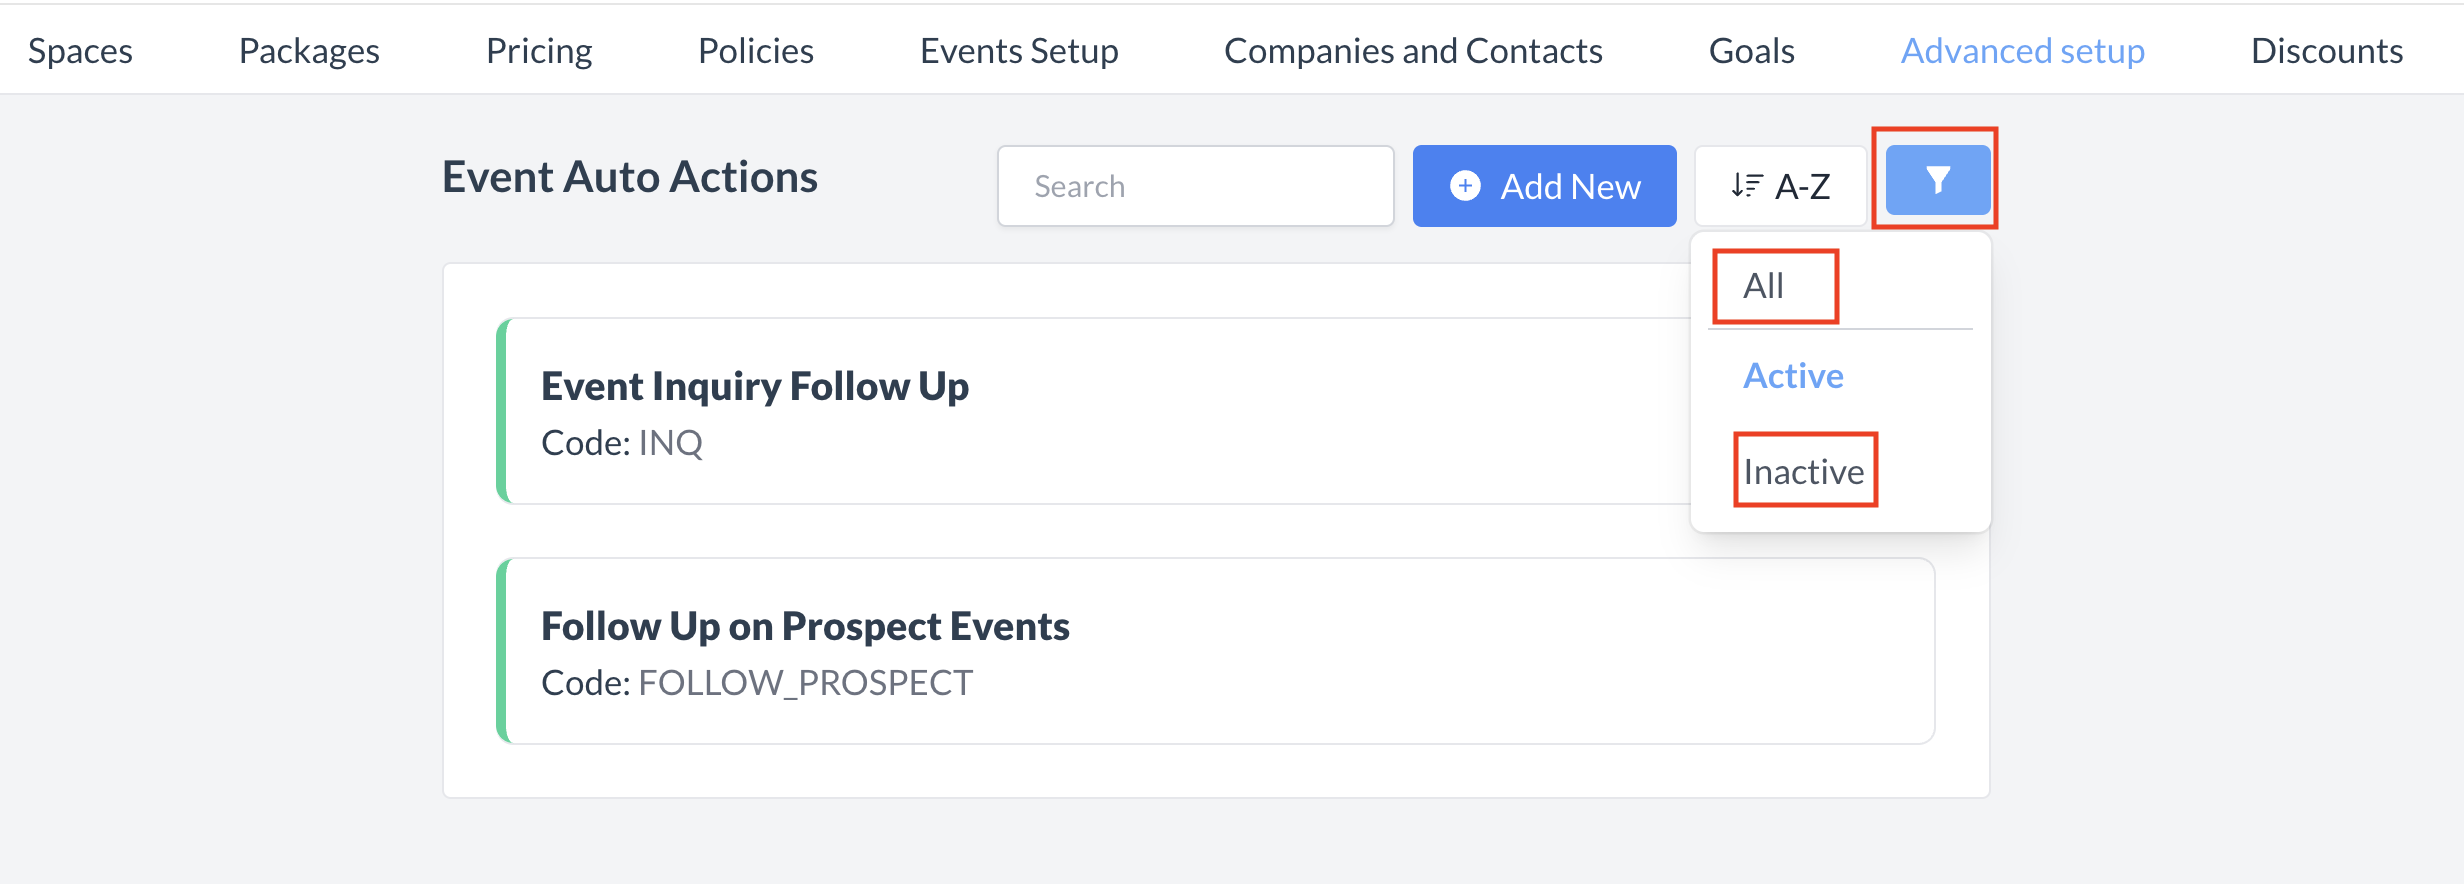
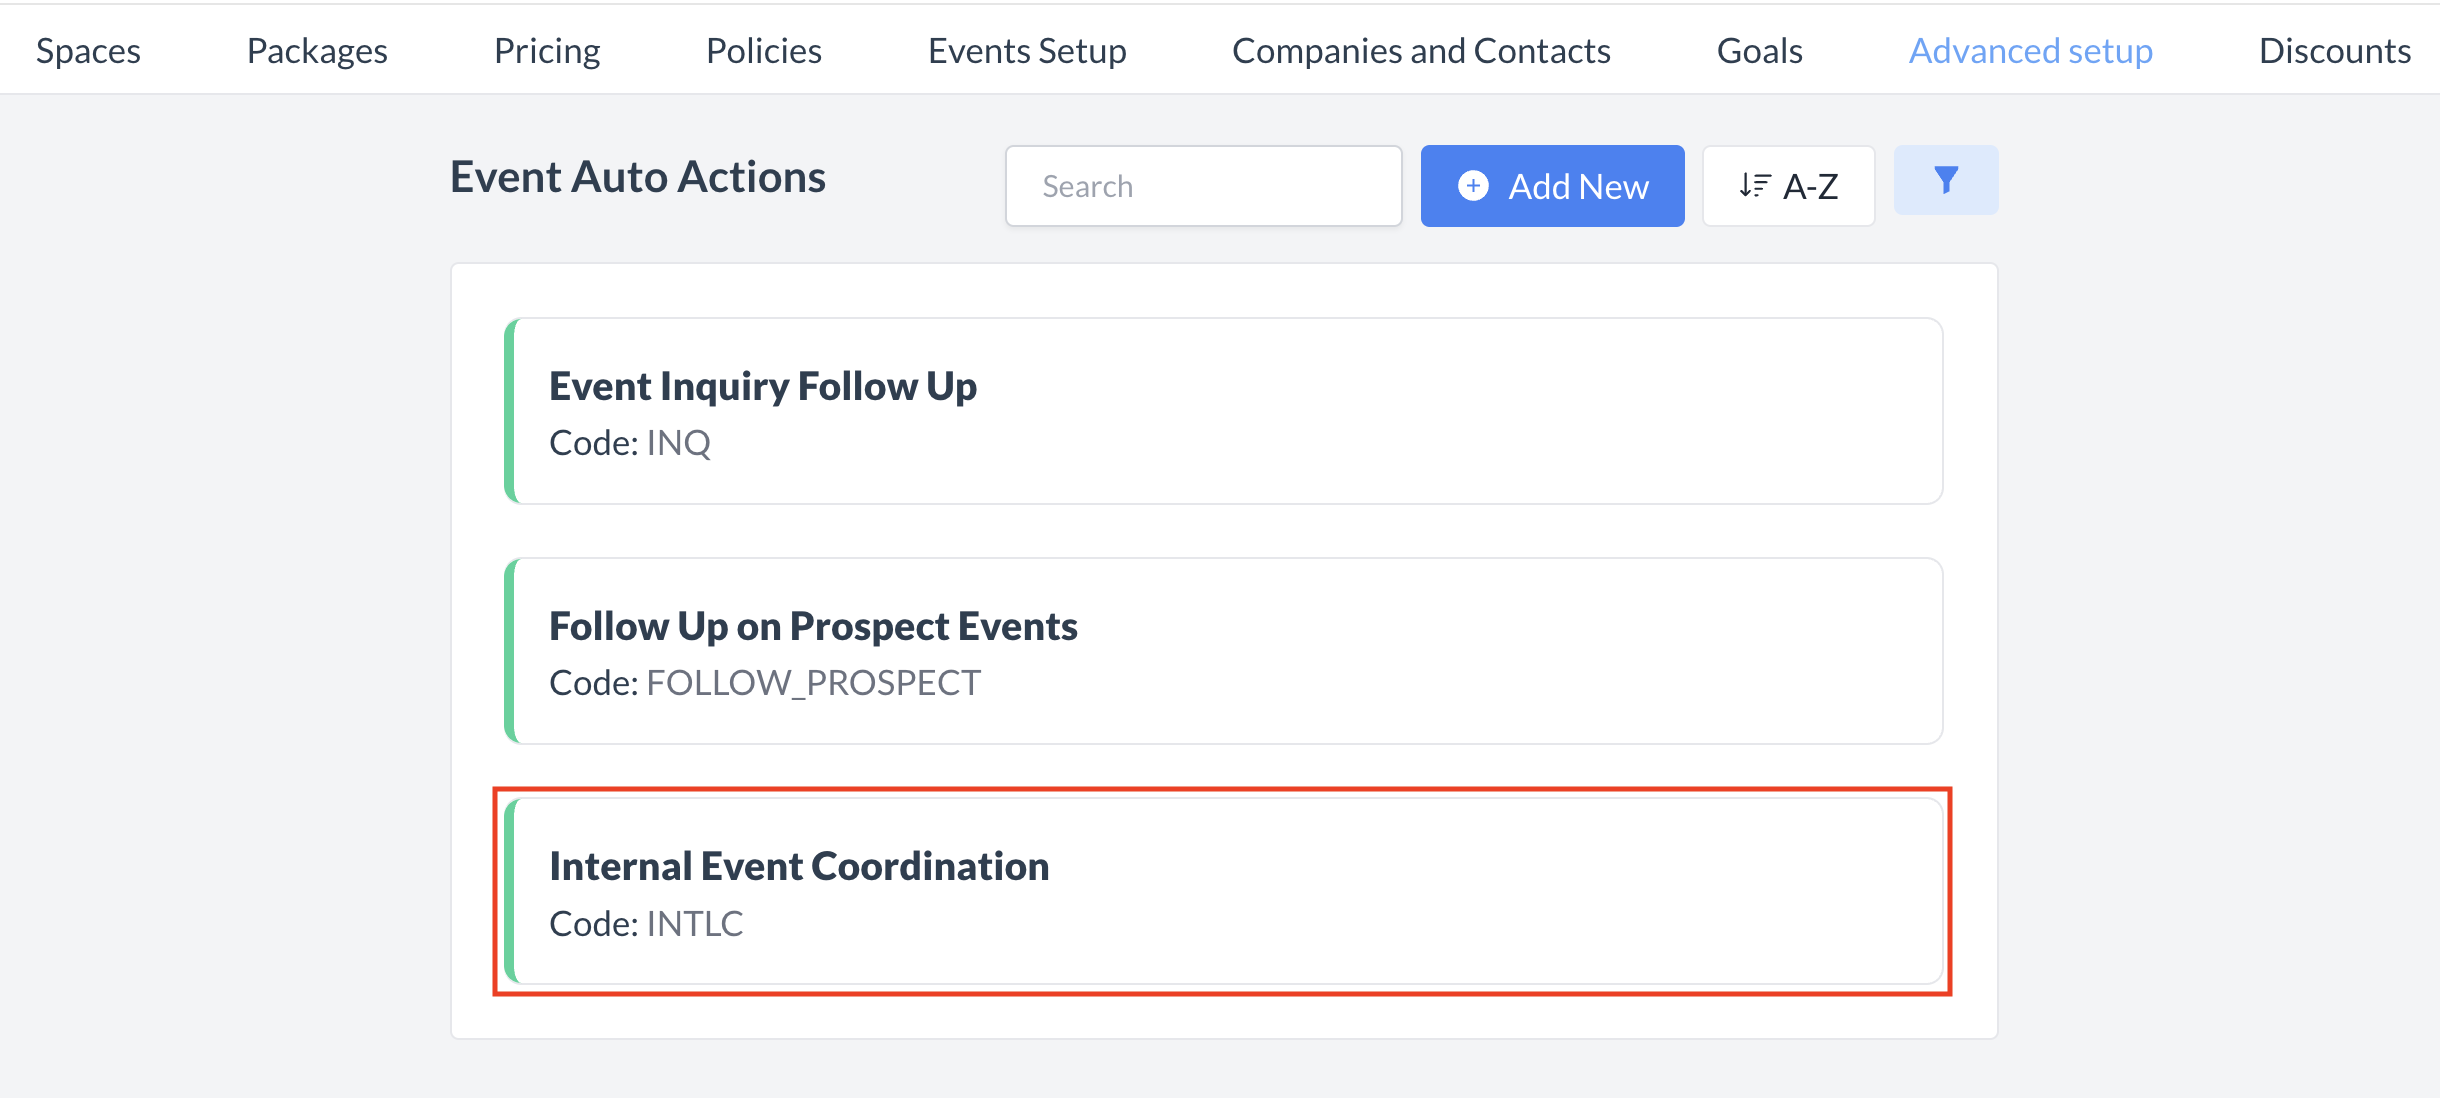
🔄 Inactivating a Event Auto Action
To deactivate a auto action
Once inactivated, the auto action will no longer appear in the Event Auto Actions listing and will no longer auto generate tasks. |
|
🔁 Reactivating a Event Auto Action
To reactivate a auto task:
The auto task is now reactivated and will appear in the main Event Auto Actions listing screen. Auto Task creations will resume based on the conditions configured on the task. |
|
🖥️ Where “Event Auto Actions” Appears in the User Interface (UI)
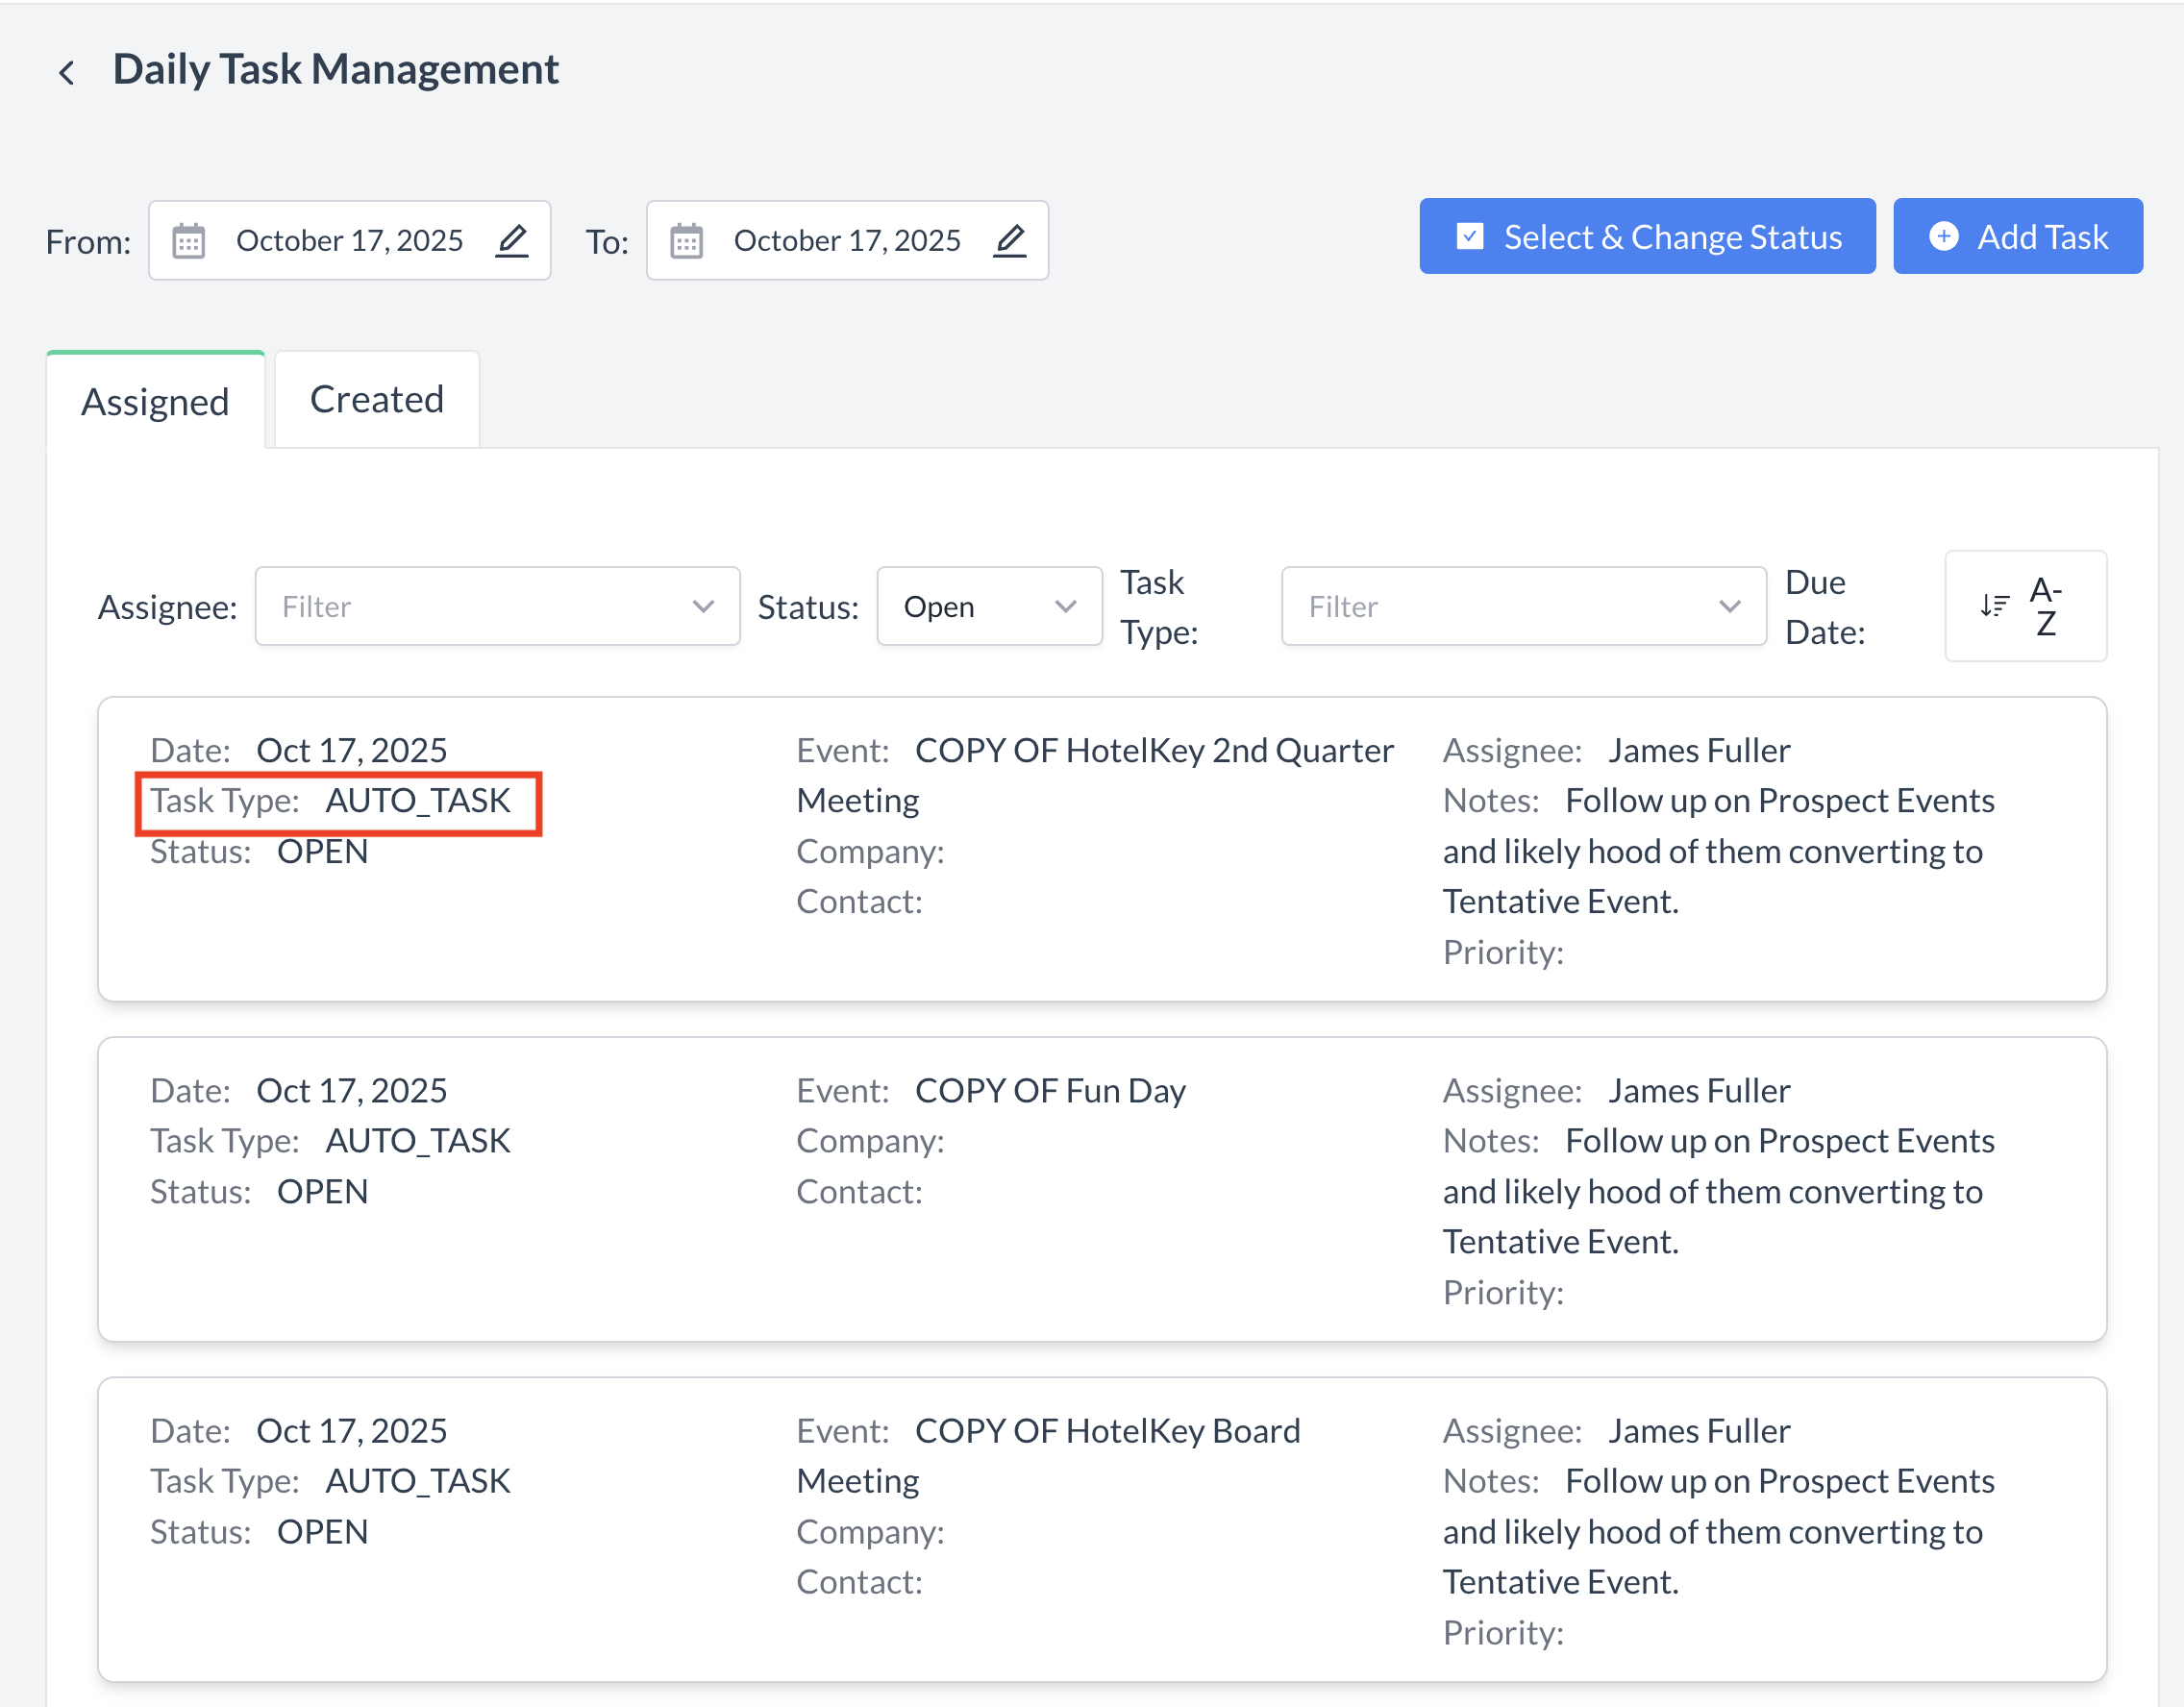
Event Auto Actions will appear under the “Tasks” section with a task type labeled “Auto Task.”