
📆 Revision Date:
Event Profiles Overview
In EventKey, Event Profiles function similarly to Booking Profiles in that they define the structure and rules applied during the event booking process. When an Event Profile is used to create an event, it determines key aspects such as the restrictions that apply to the event, the screens and steps that appear in the event creation workflow, which coordinators can or must be assigned, and which sources are available for selection. Essentially, the Event Profile shapes the entire booking experience and ensures consistency based on the specific requirements tied to that profile.
🛑 Prerequisites
Before creating an Event Profile, the following items must be set up in advance:
1. Event Type
-
Why it's needed: Event Profiles are built around a specific Event Type, which defines the structure and rules applied to the event.
-
Action required:
-
Create the Event Type first.
-
⚠️ Note: An Event Type cannot be reused if it's already linked to an existing Event Profile.
-
2. Event Coordinators
-
Why it's needed: Event Coordinators can be assigned to Event Profiles to determine which coordinators are responsible for specific event types.
-
Action required:
-
Create the necessary Event Coordinators before attaching them to an Event Profile.
-
3. Event Sources
-
Why it's needed: Event Sources can be assigned to Event Profiles to determine which sources are available for selection during the event creation.
-
Action required:
-
Create the necessary Event Sources before attaching them to an Event Profile.
-
|
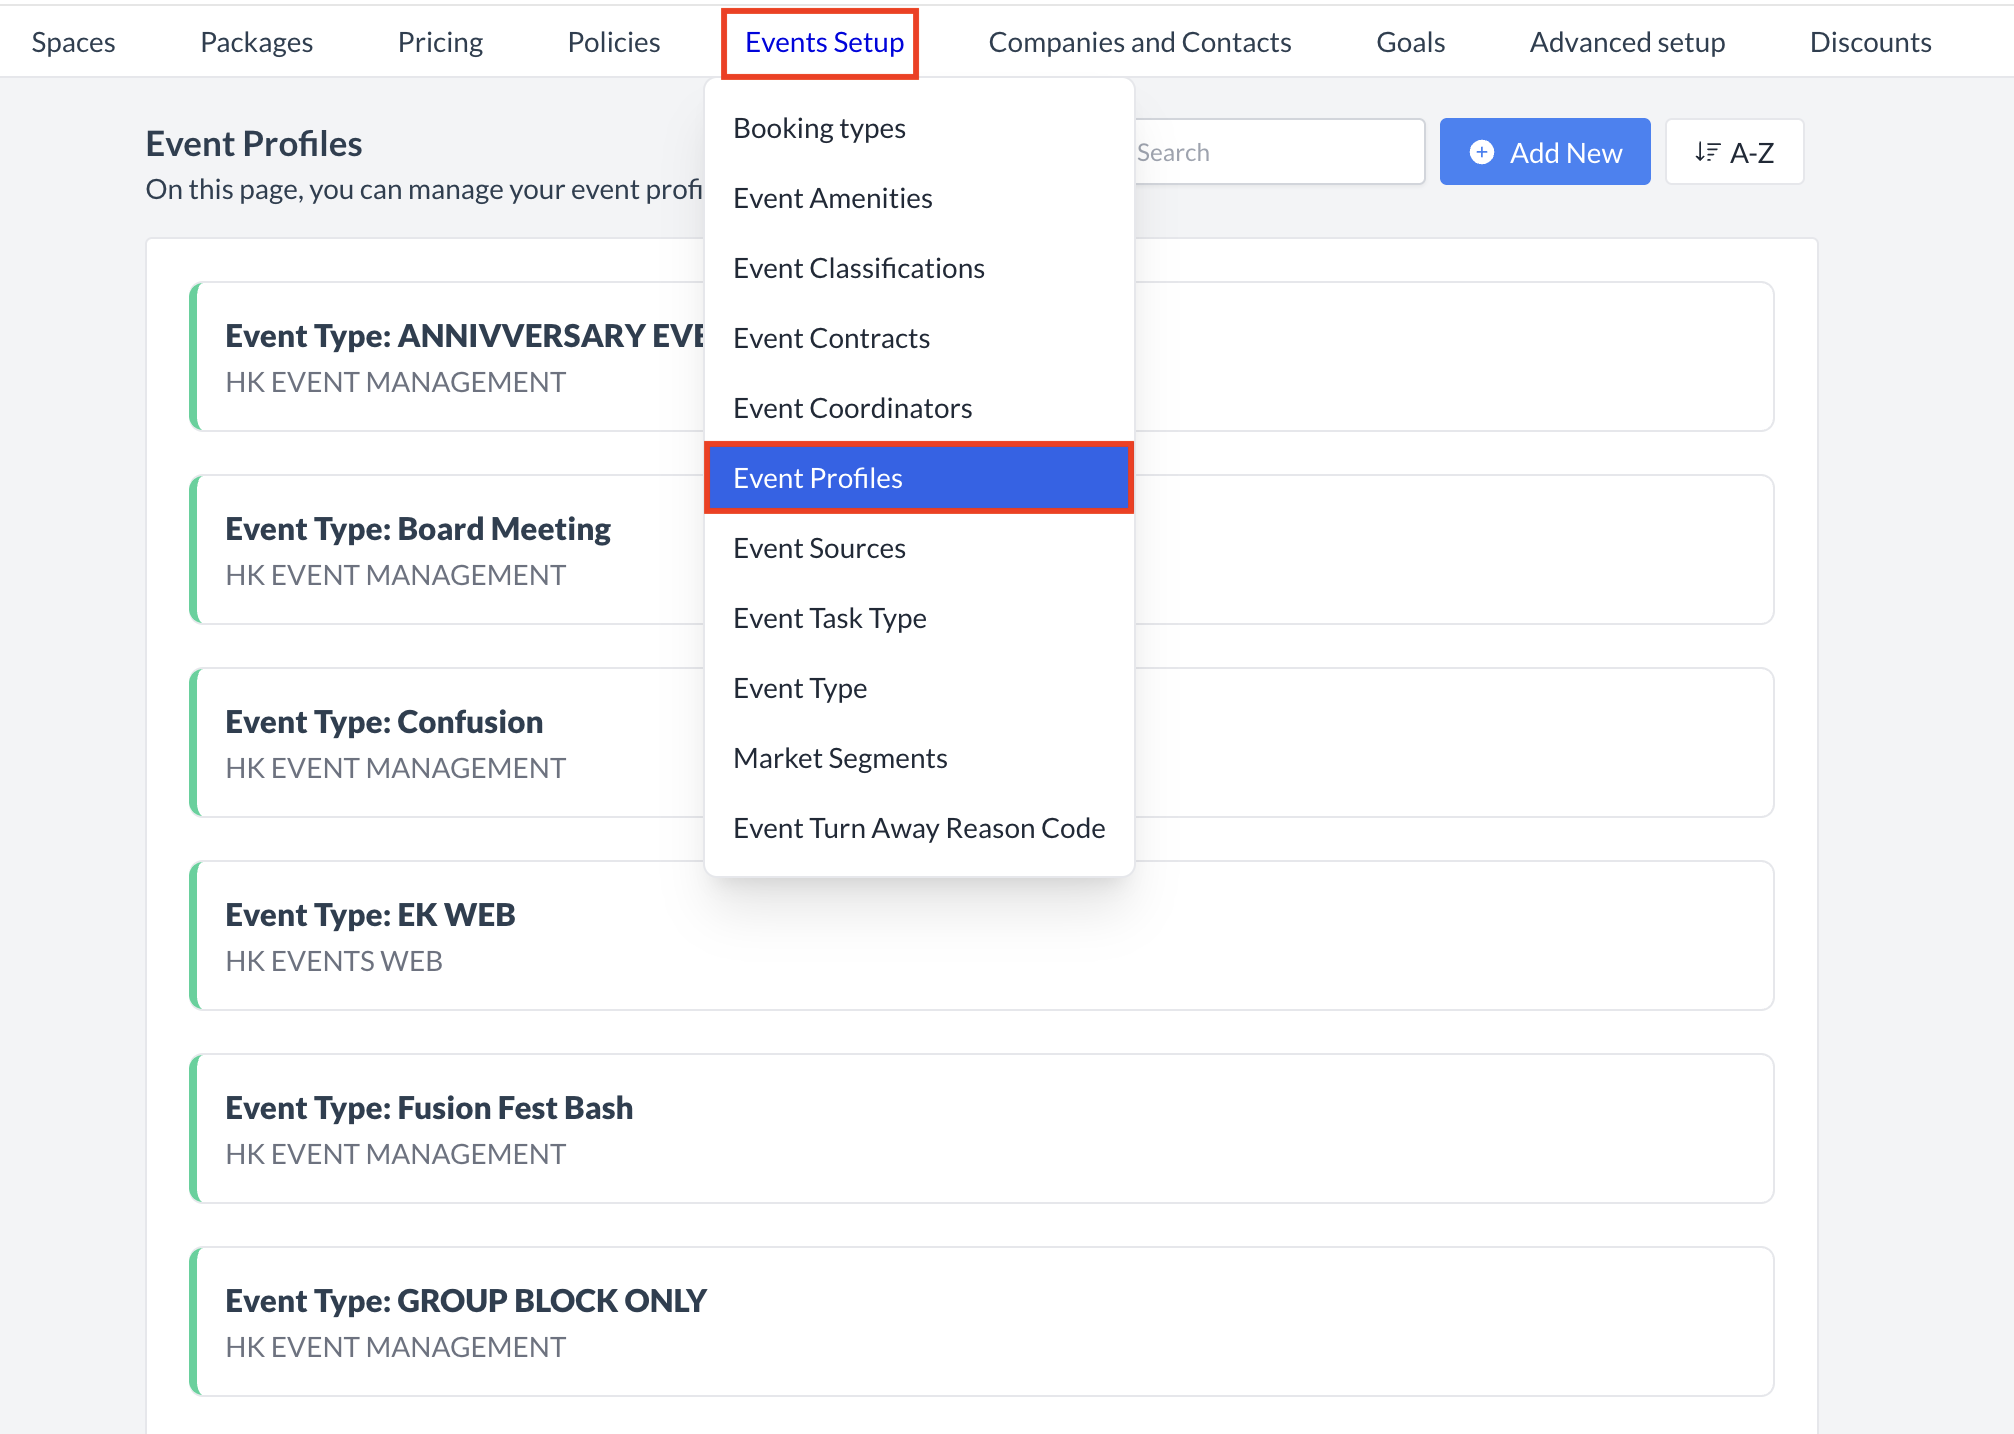
Navigate to Home > Event Administration > Event Setup > Event Profiles |
|
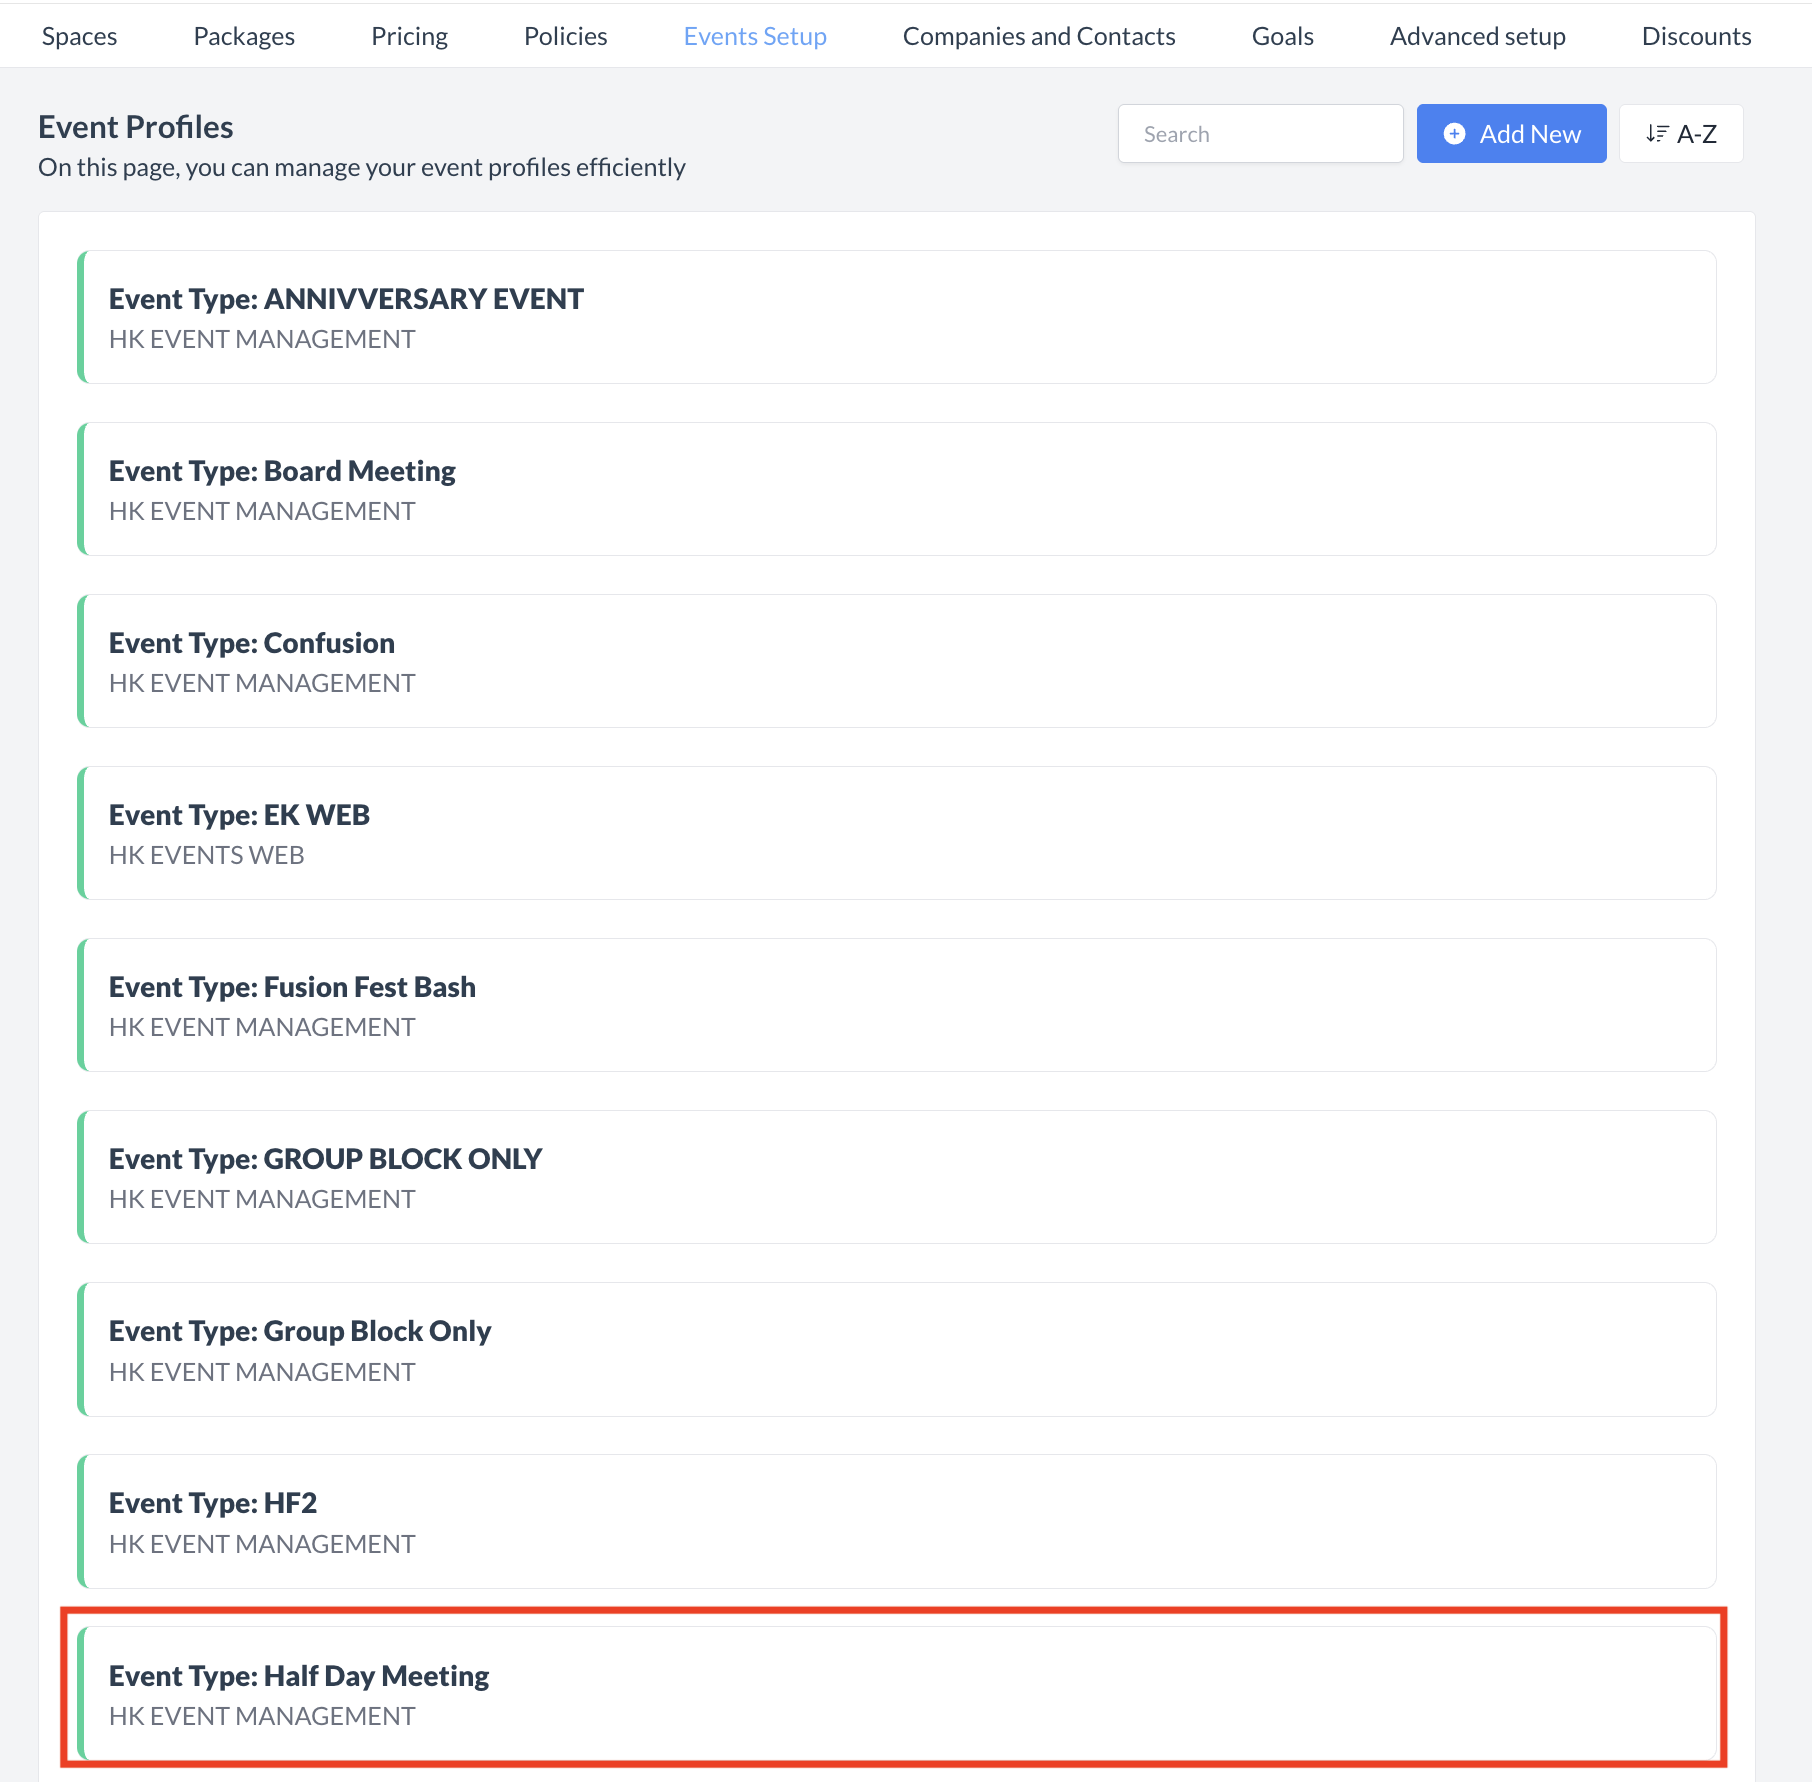
Accessing and Creating Event Profiles
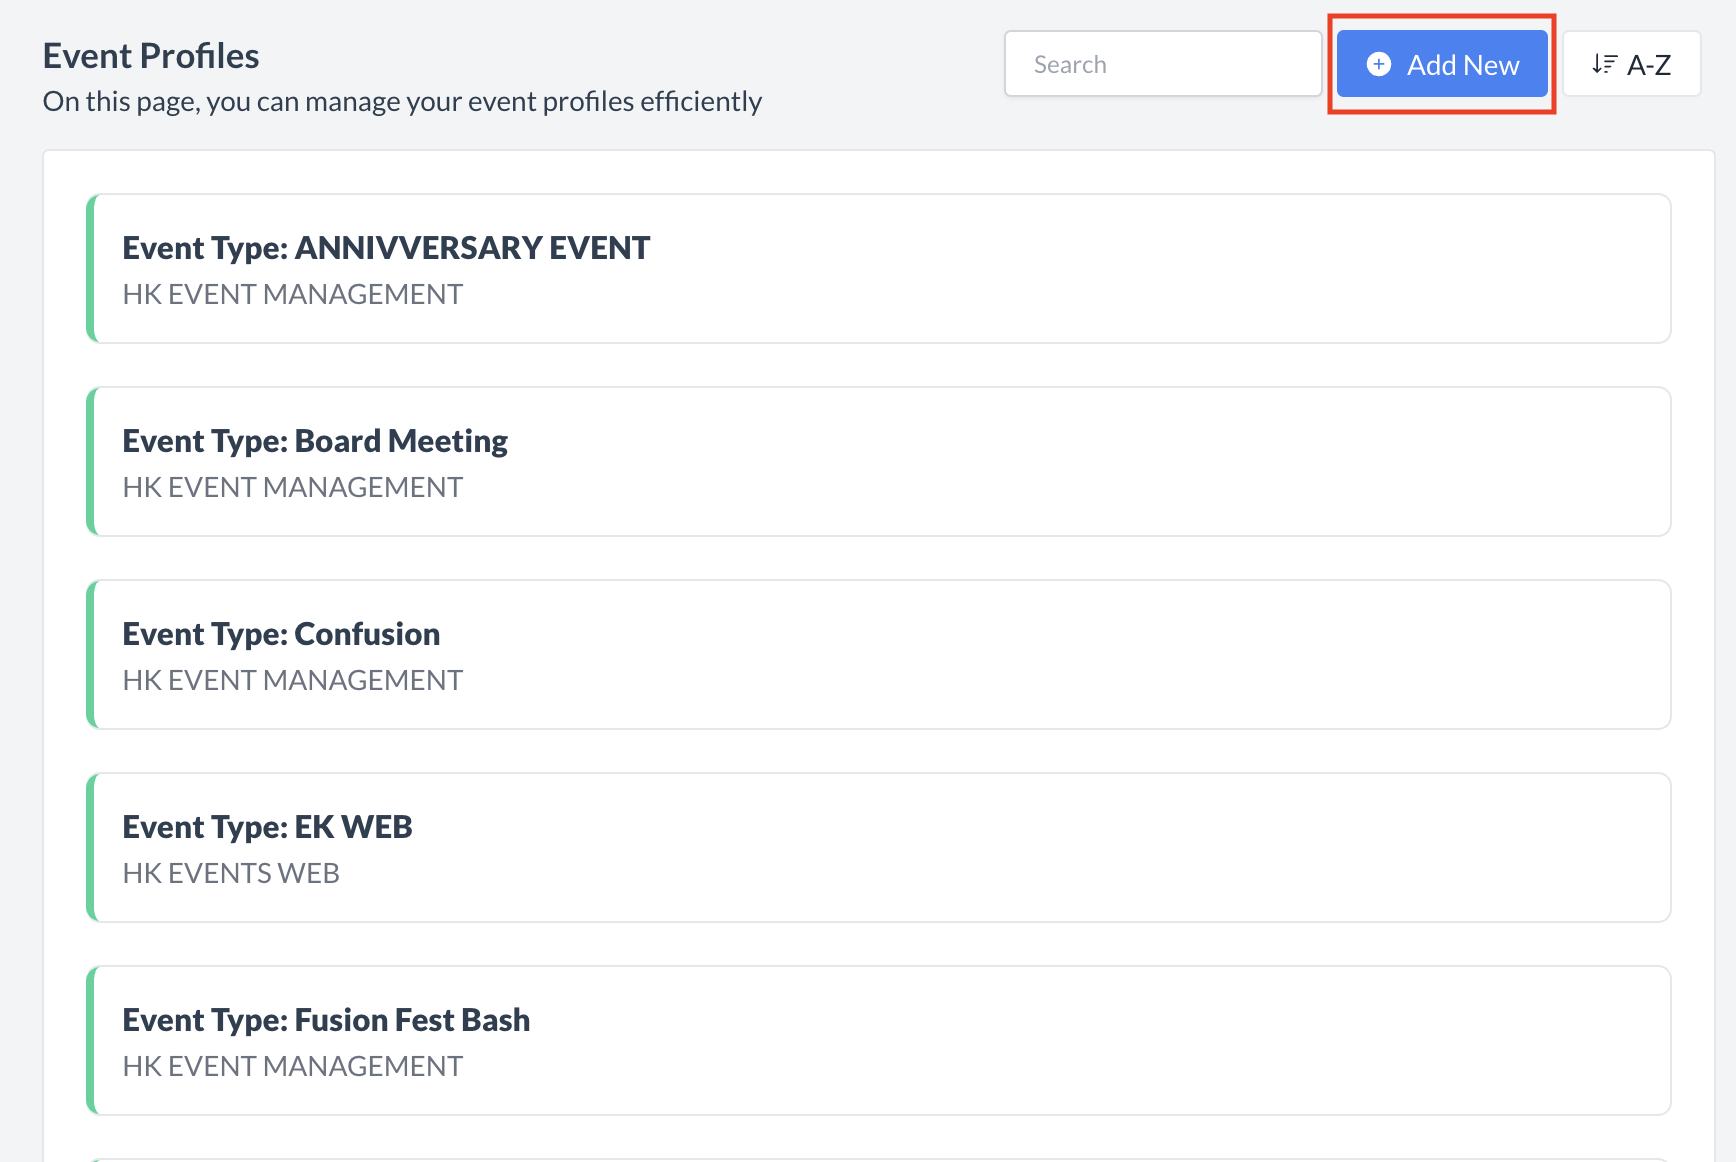
The Event Profiles screen displays a list of all existing event profiles available for use with an event. To create a new event profile:
|
|
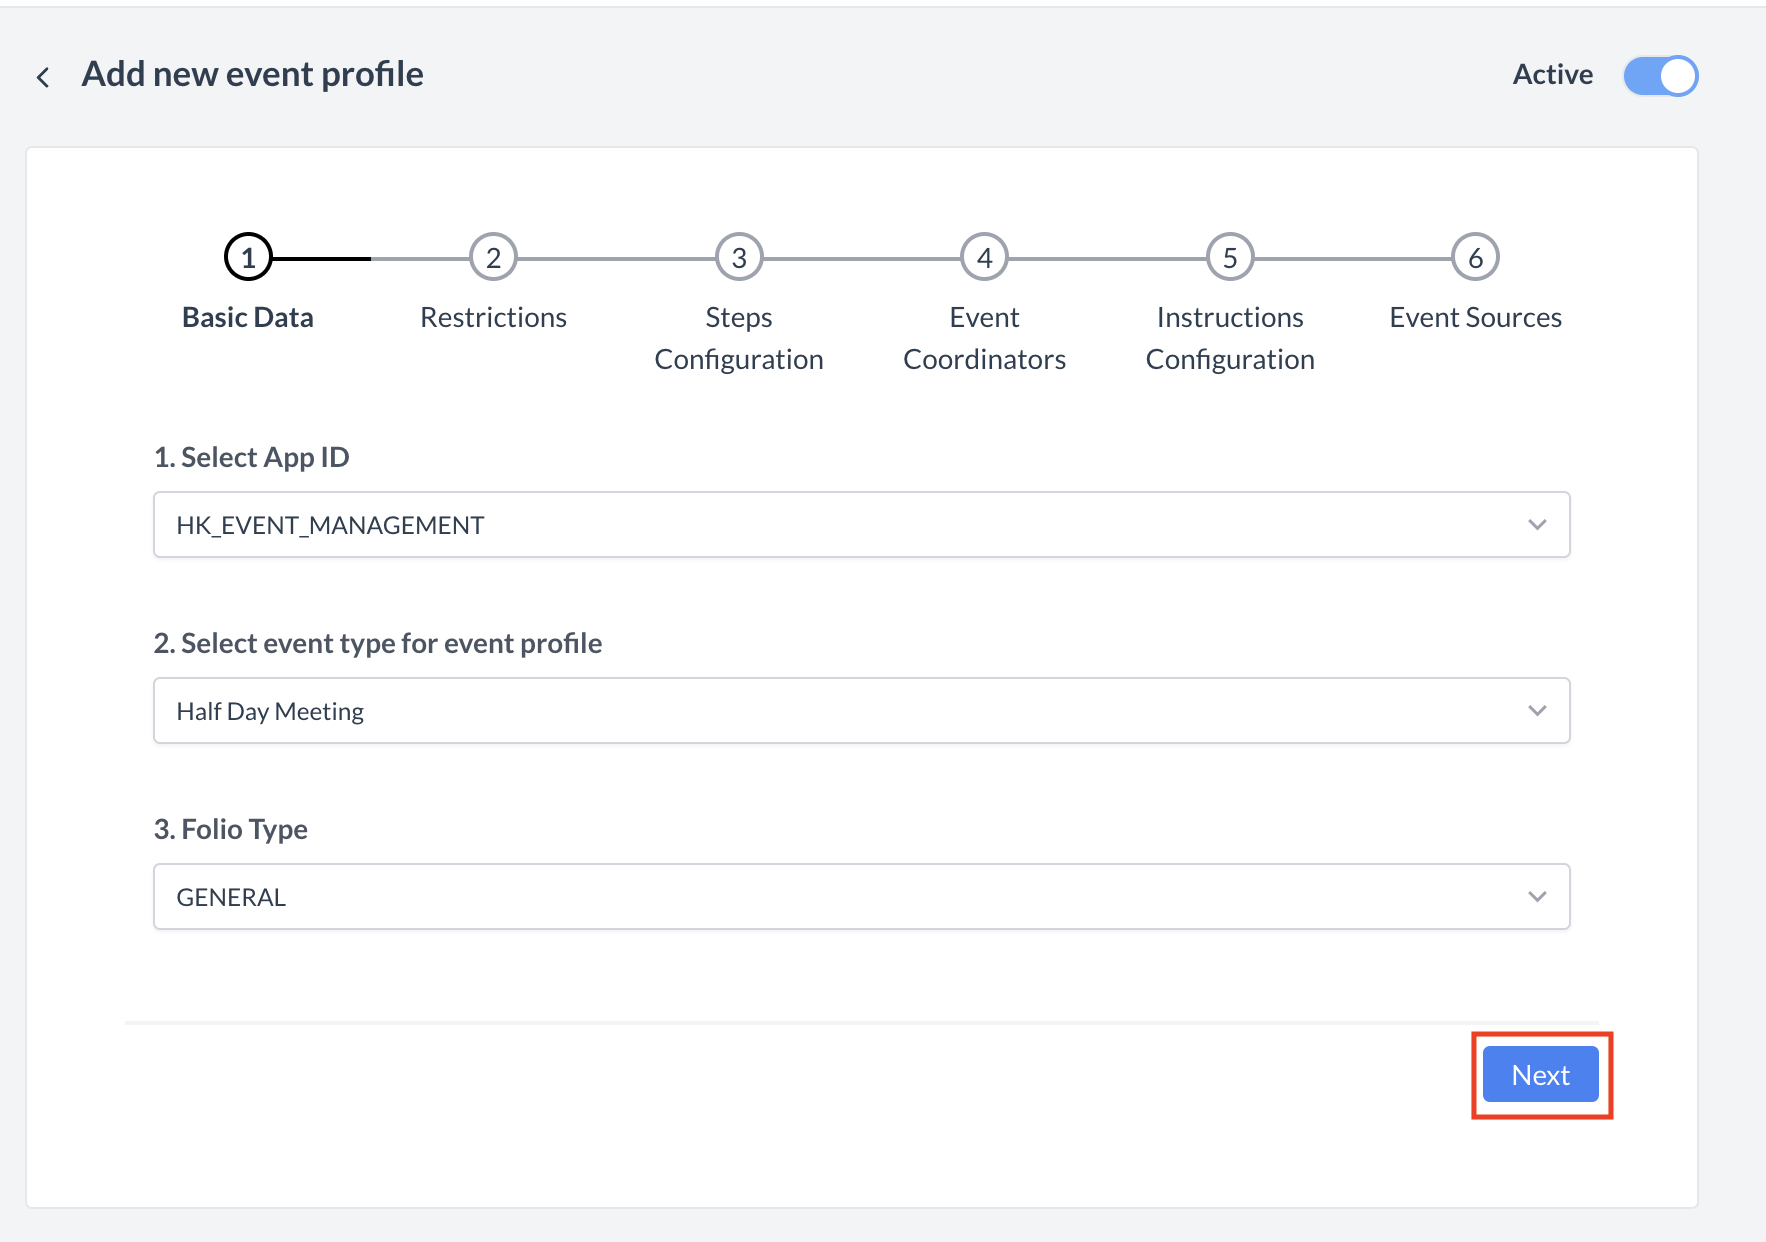
Adding a New Event Profile
When you click Add New Event Profile, the Add Event Profile screen will appear. You will begin on Step 1: Basic Data. Step 1: Basic Data
Once all fields are completed, click the blue "Next" button to proceed to Step 2: Restrictions. |
|
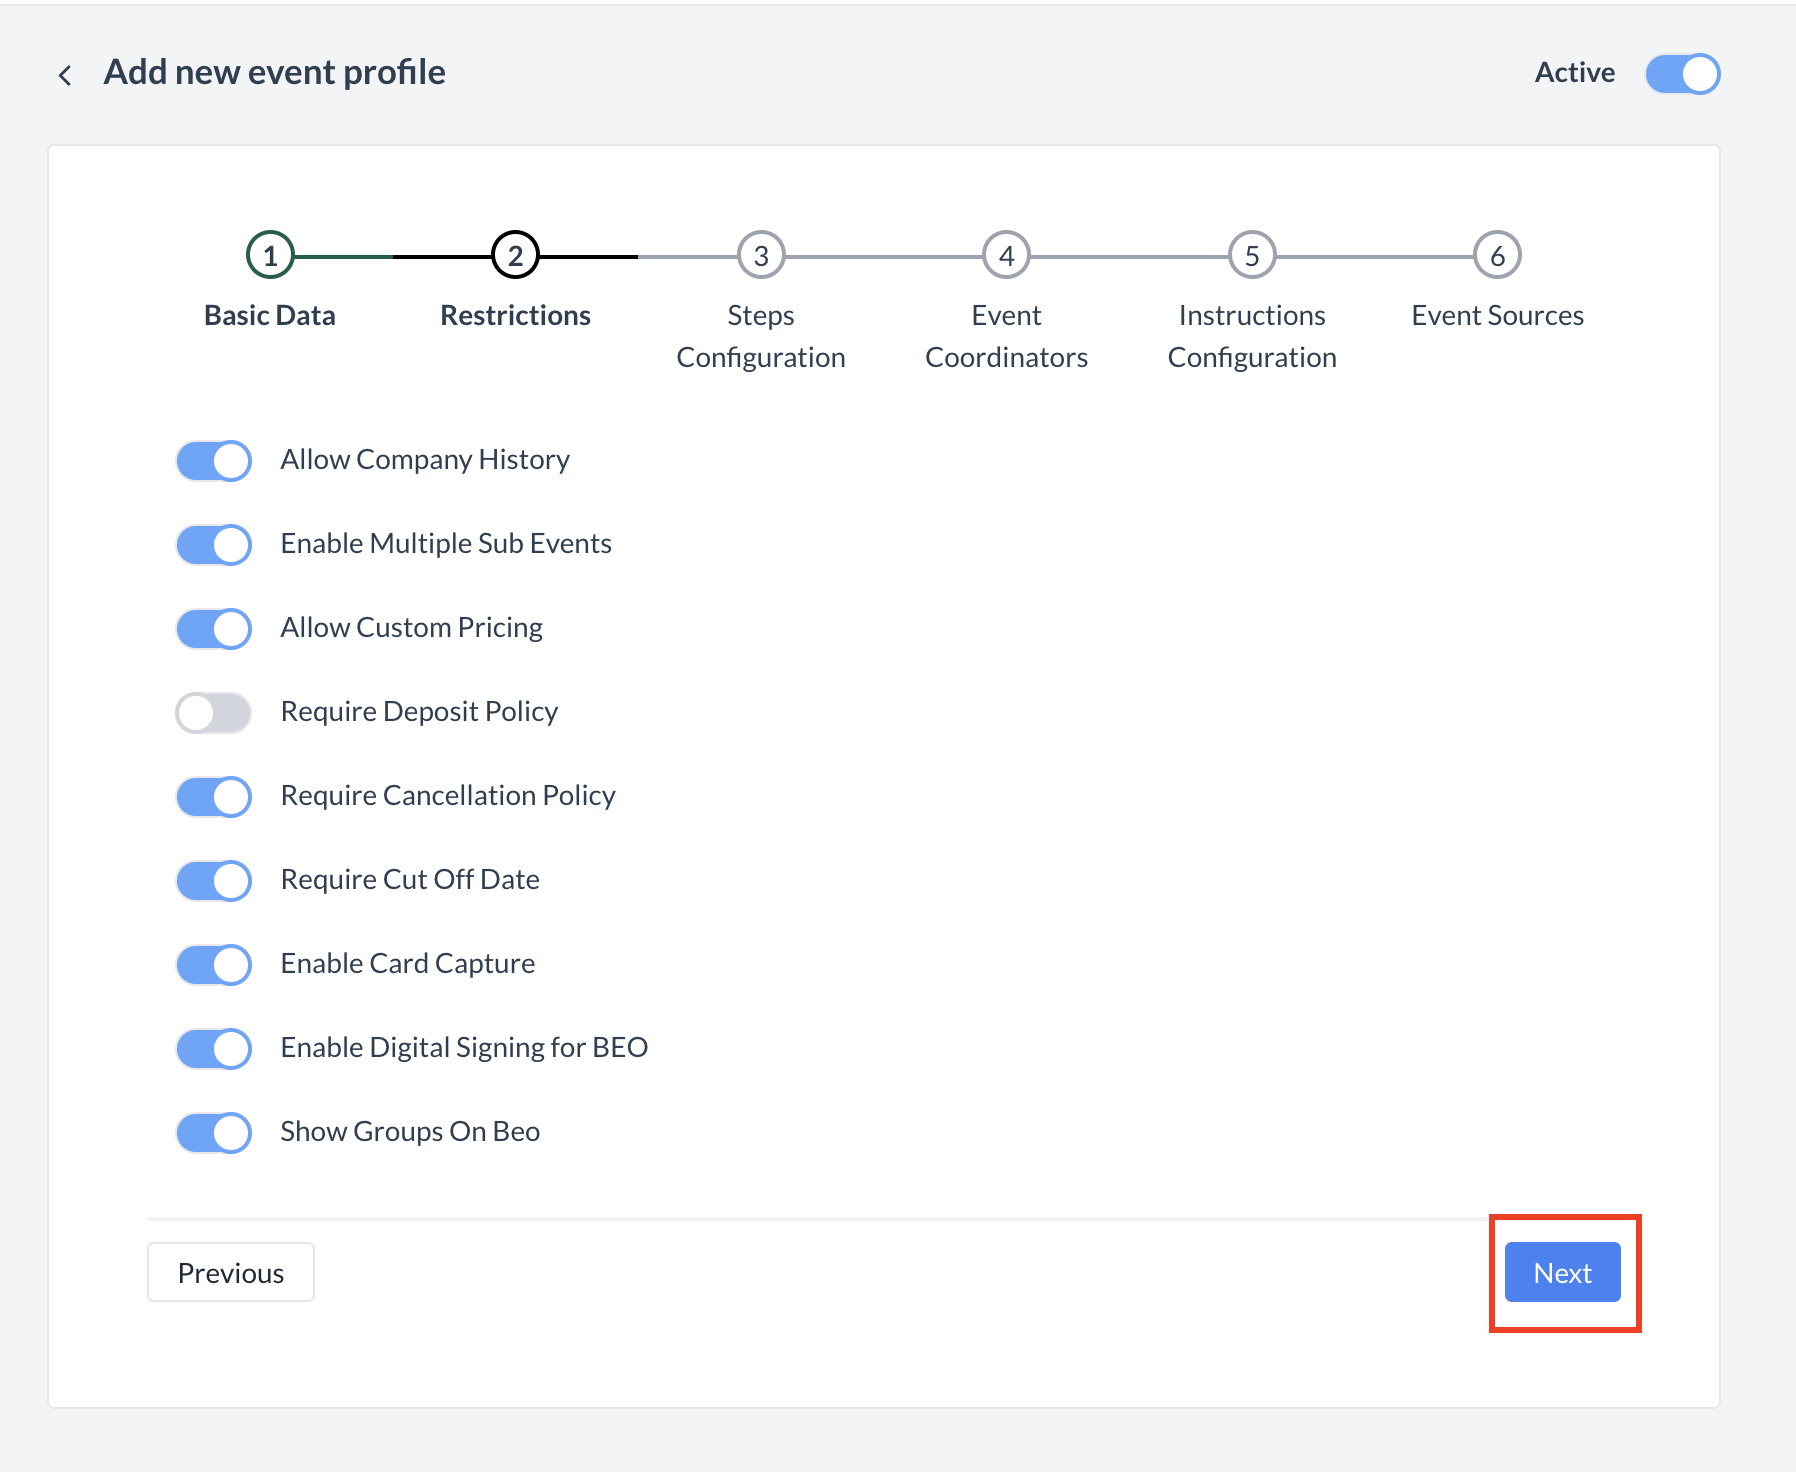
Step 2: Restrictions
In this step, you will define the rules and behaviors that apply to the Event Profile. Use the toggles to turn each option ON or OFF, depending on the needs of the profile. Below is a description of each setting: 🔘 Allow Company History
Enable this option to allow access to the company's booking history within the event. 🔘 Enable Multiple Sub Events
This option allows the creation of multiple sub-events (or spaces) under a single main event. Example:
🔘 Allow Custom Pricing
Enable this to allow users to define custom pricing for the event during the booking process. 🔘 Require Deposit Policy
When enabled, users will be required to select a deposit policy when creating the event booking. 🔘 Require Cancellation Policy
This requires users to select a cancellation policy during event creation. 🔘 Require Cut-Off Date
Enables a field that requires users to set a cut-off date for the event (e.g., reservation or booking deadline). 🔘 Enable Card Capture
Allows a credit card to be added as the payment source for the event booking. 🔘 Enable Digital Signing for BEO
Activates the ability to digitally sign the Banquet Event Order (BEO) through the contract signing flow. 🔘 Show Groups on BEO
When enabled, group block information will be displayed on the printed or emailed BEO. Once all applicable settings are configured, click the blue "Next" button to proceed to Step 3: Steps Configuration. |
|
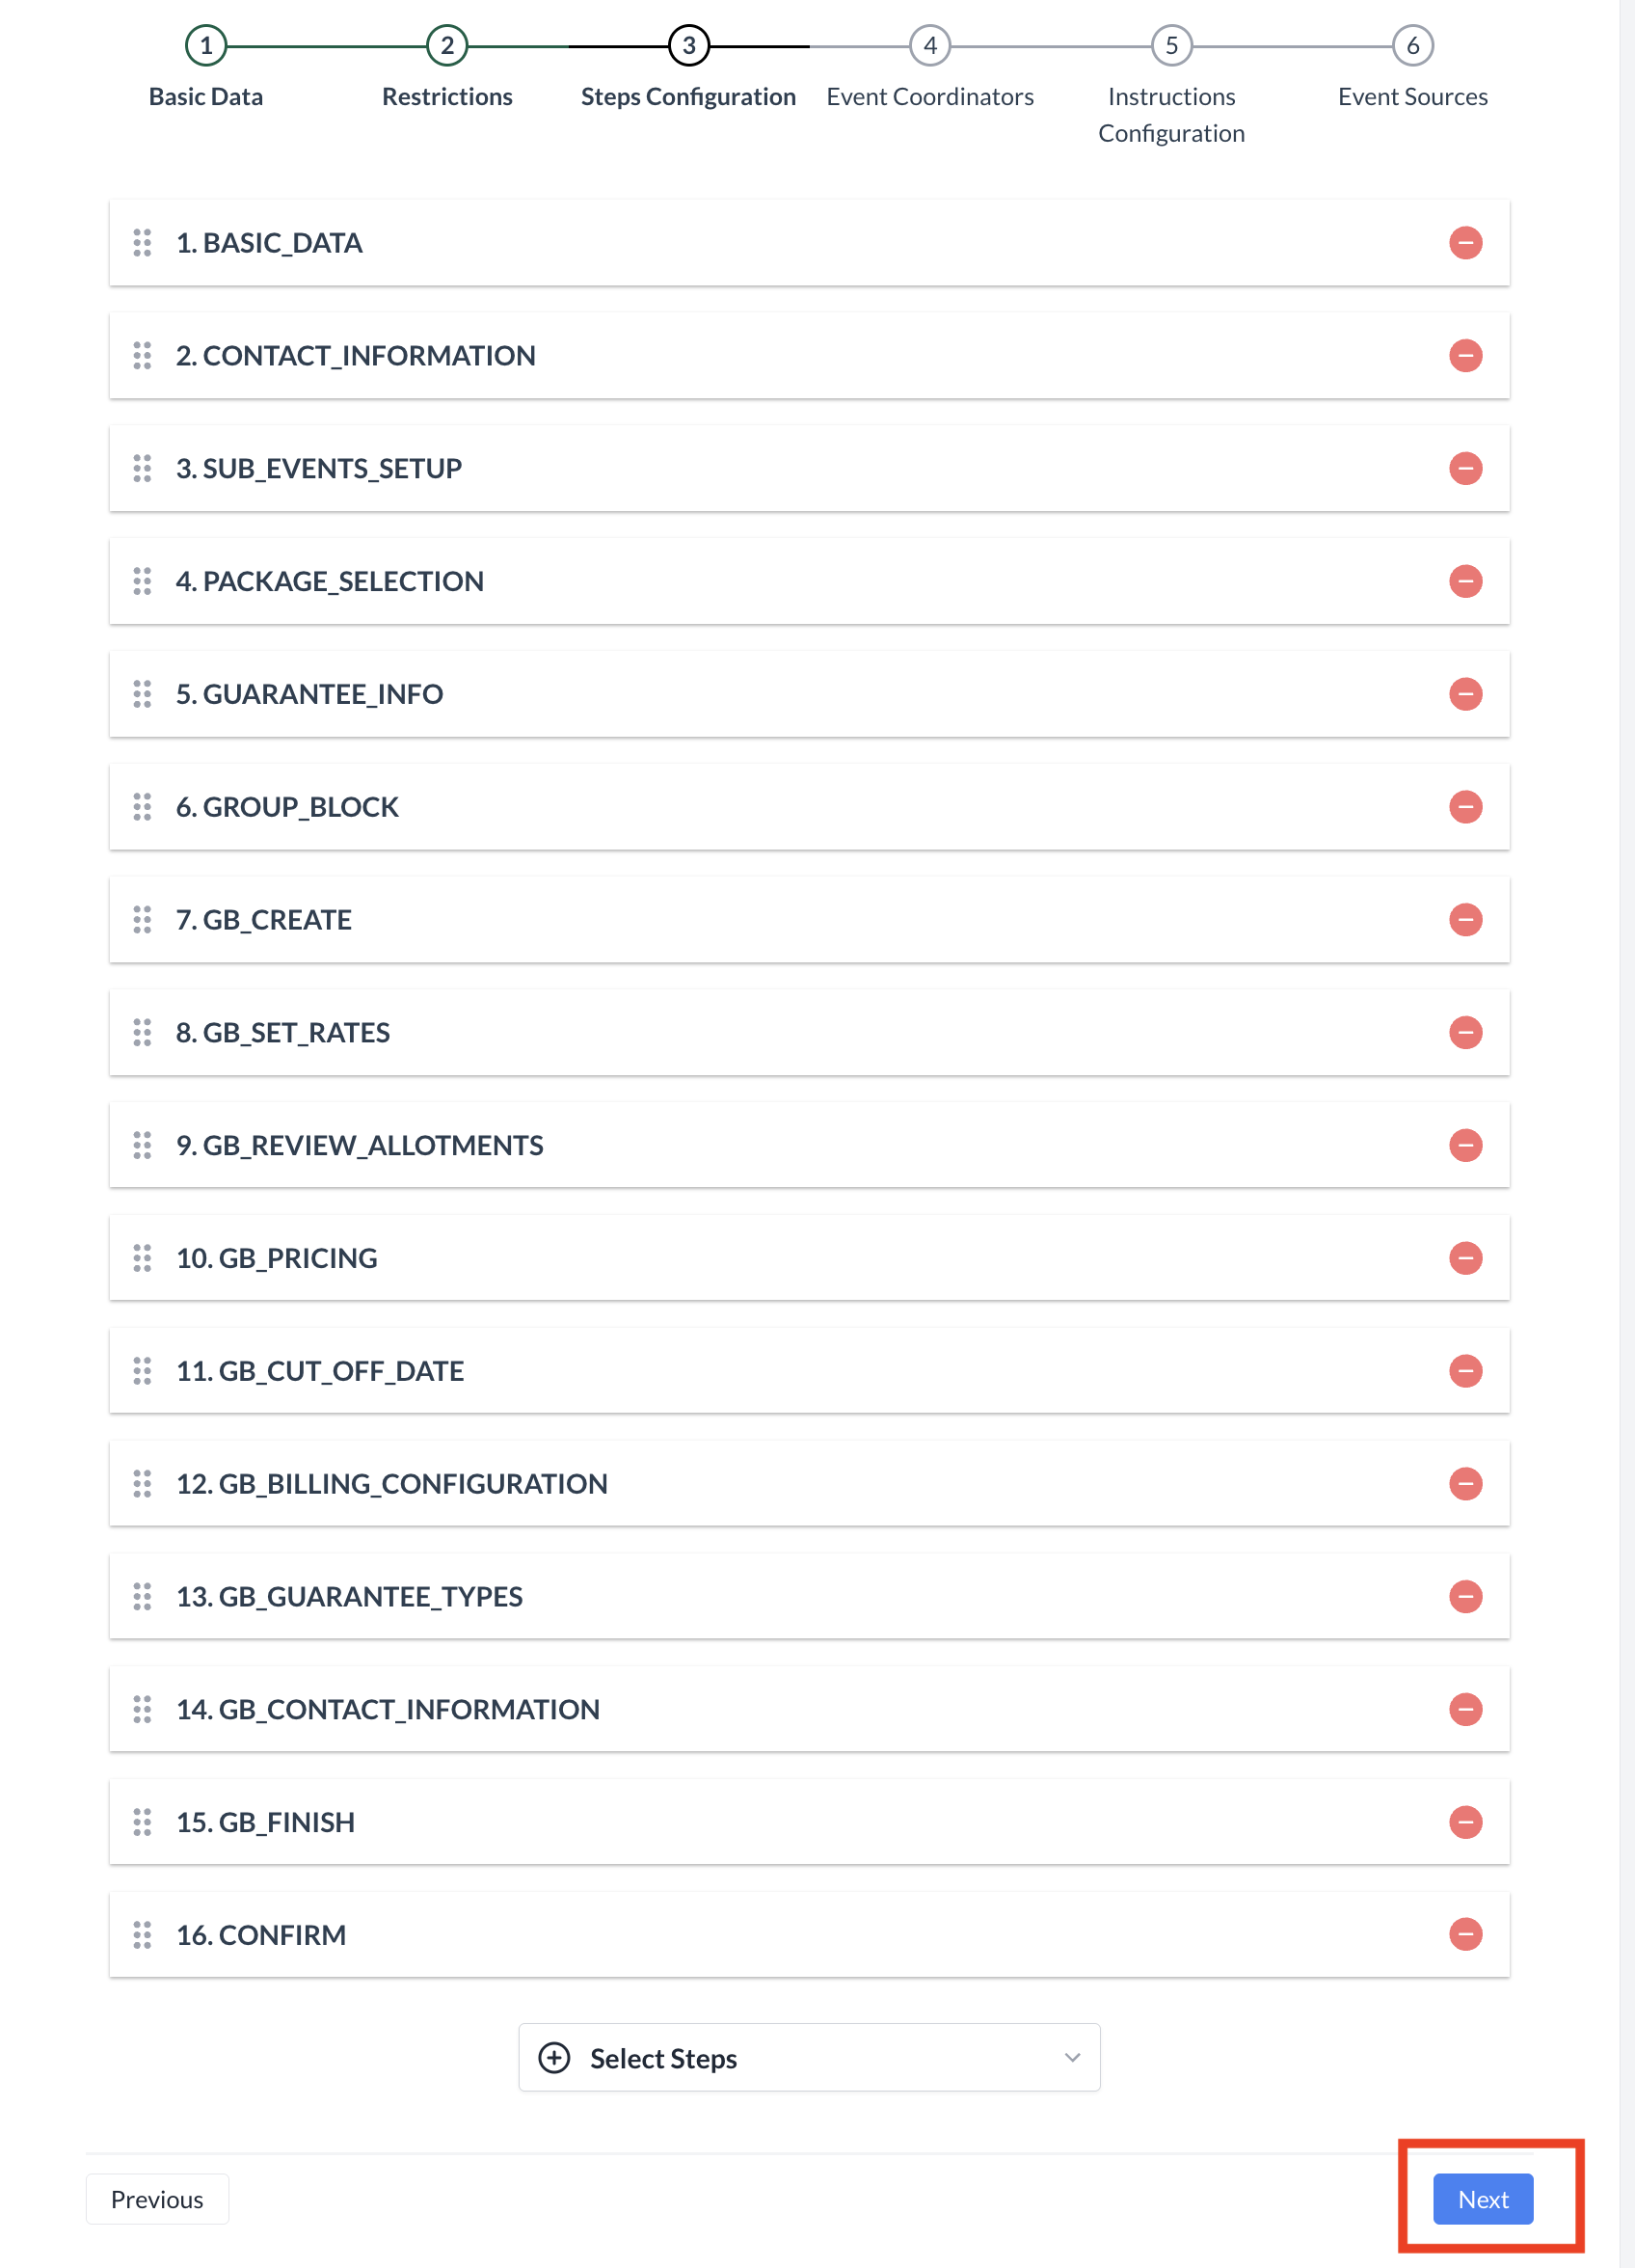
Step 3: Steps Configuration
In this step, you'll define the screens that appear during the Event Creation Flow. The order and selection of screens are critical, as they determine the workflow when users create an event. ⚠️ Important Note:
The screens must be added in a specific order, and the configuration differs depending on whether the event includes a Group Block. There are two types of configurations:
📘 Events With Group Blocks
To begin:
Required Screen Order (with Group Blocks): 📘 Events Without Group Blocks
Follow the same process to add the following screens in order: Required Screen Order (without Group Blocks): Once all applicable screens are added in the correct order, click the blue "Next" button to proceed to Step 4: Event Coordinators. |
|
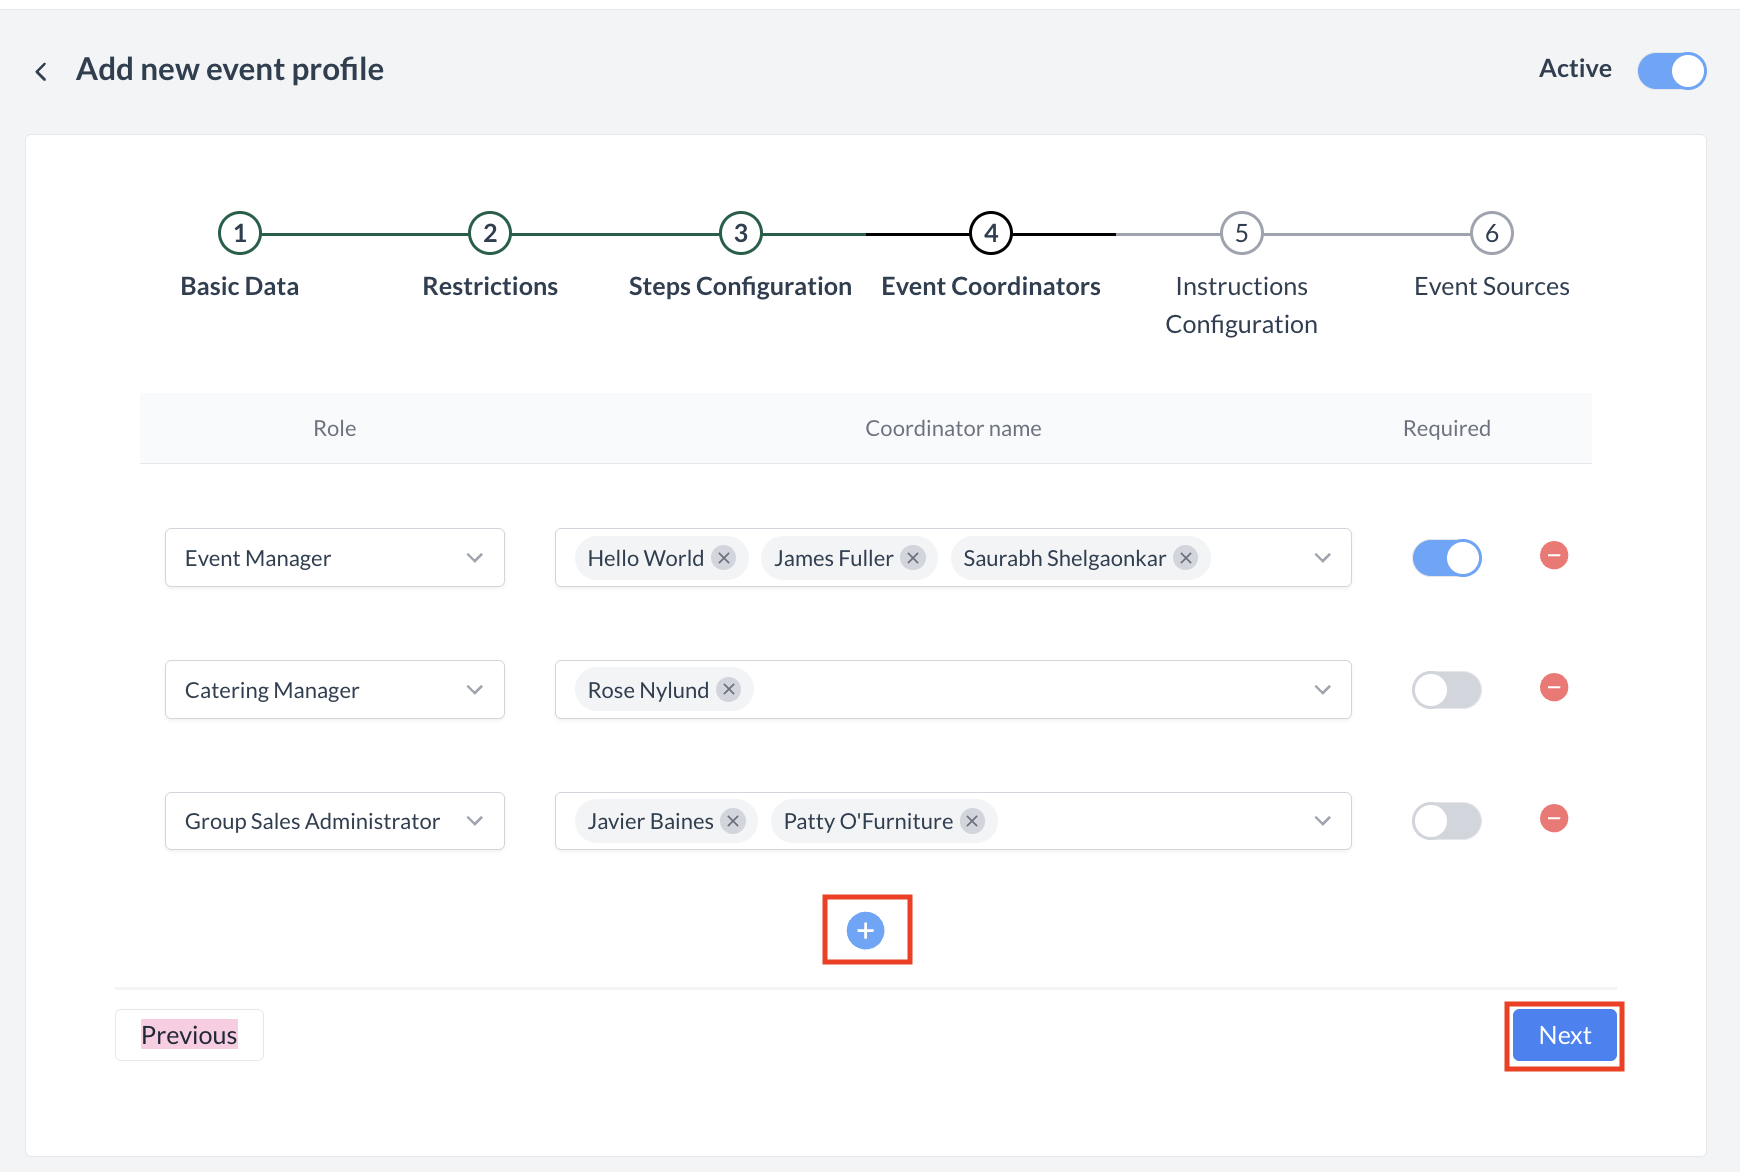
Step 4: Event Coordinators
In this step, you will define which coordinators can be assigned to events using this Event Profile and whether their selection is optional or required during the event creation process. 🔹 Adding Coordinators
Once all applicable coordinators have been added and configured, click the blue “Next” button to proceed to Step 5: Instructions Configuration. |
|
Step 5: Instructions Configuration
In this step, you will define any special instructions that should be captured during the event booking process. These instructions may be directed to specific departments such as:
🔹 Making Instructions Mandatory
For each instruction type, use the Required toggle to indicate whether users must enter information before completing the event booking:
Once all instruction fields have been configured as needed, click the blue “Next” button to proceed to Step 6: Event Sources. |

|
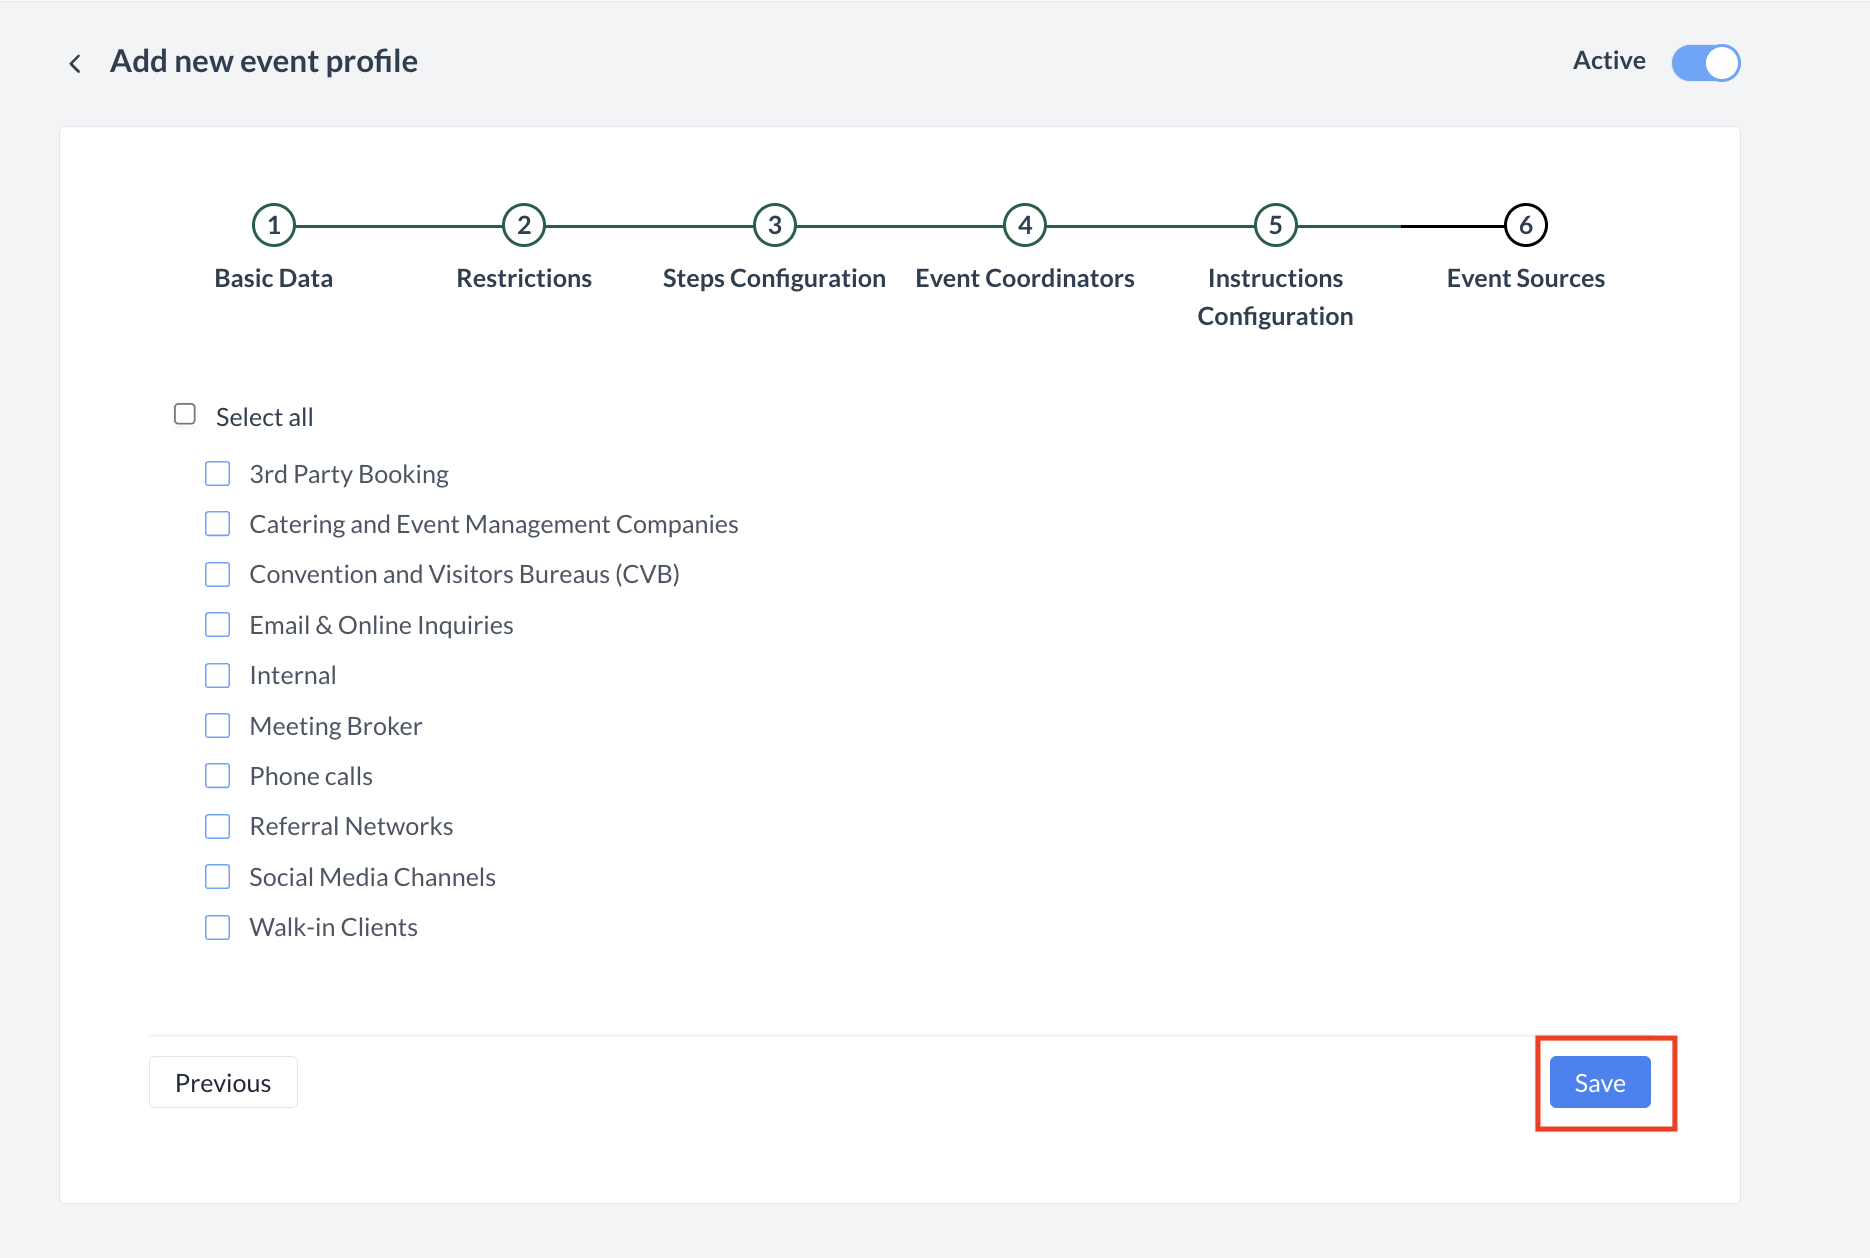
Step 6: Event Sources
In the final step, you will attach the event sources that should be available for selection when using this Event Profile during the event booking process. 🔹 Selecting Event Sources
Once all applicable sources have been selected, click the blue “Save” button to complete and create the Event Profile.
|
|
Confirmation
After clicking Save, you will be returned to the Event Profiles listing screen.
⚠️ Important Notes
|
|
🖥️ Where “Event Profiles” Appears in the User Interface (UI)
"Event Profiles are backend configurations that define the booking rules and restrictions used when creating event types in EventKey."