📆 Revision Date:
In EventKey, an Event Type represents the category or classification of an event based on its purpose, format, or business function. Event Types help define the appropriate structure, workflow, and requirements for managing each type of event within the system.
Each Event Profile is built around a specific Event Type. The selected Event Type determines which screens, rules, and policies will be applied to events using that profile. This connection ensures that every event follows a consistent and appropriate process based on its classification.
For example, a Wedding may require different coordinators, contracts, and room setups than a Corporate Meeting. By linking the Event Profile to the correct Event Type, EventKey can automatically apply the right templates, steps, and configuration—streamlining operations for both sales and service teams.
🛑 Prerequisites
Before creating an Event Type, the following items must be set up in advance to ensure proper configuration and functionality:
1. Cut-Off Policy
-
Why it’s needed:
When an Event is created using an Event Type, the system will automatically apply the default Cut-Off Policy associated with that Event Type. -
Action required:
Create the required Cut-Off Policy before setting up the Event Type.
2. Event Amenities
-
Why it’s needed:
Any Event Amenities linked to an Event Type will automatically populate in the BEO (Banquet Event Order) when the event is created, ensuring consistency and saving time. -
Action required:
Create the necessary Event Amenities prior to linking them to an Event Type.
|
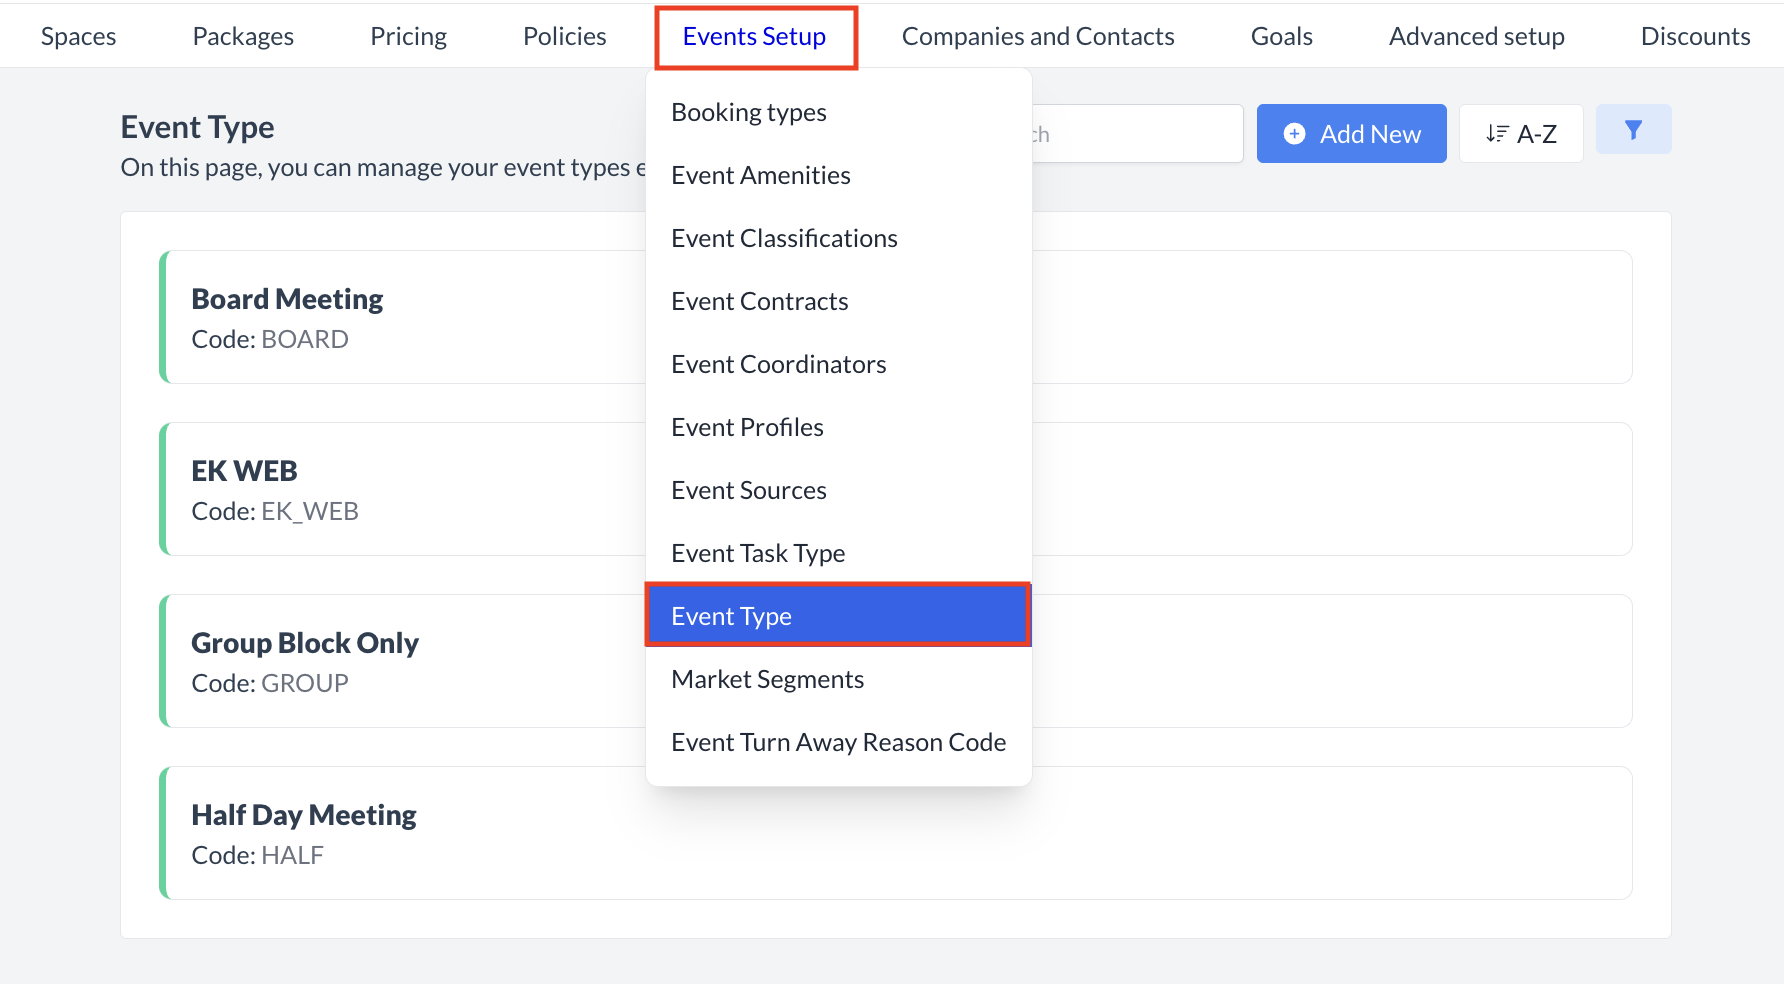
Navigate to Home > Event Administration > Event Setup > Event Type |
|
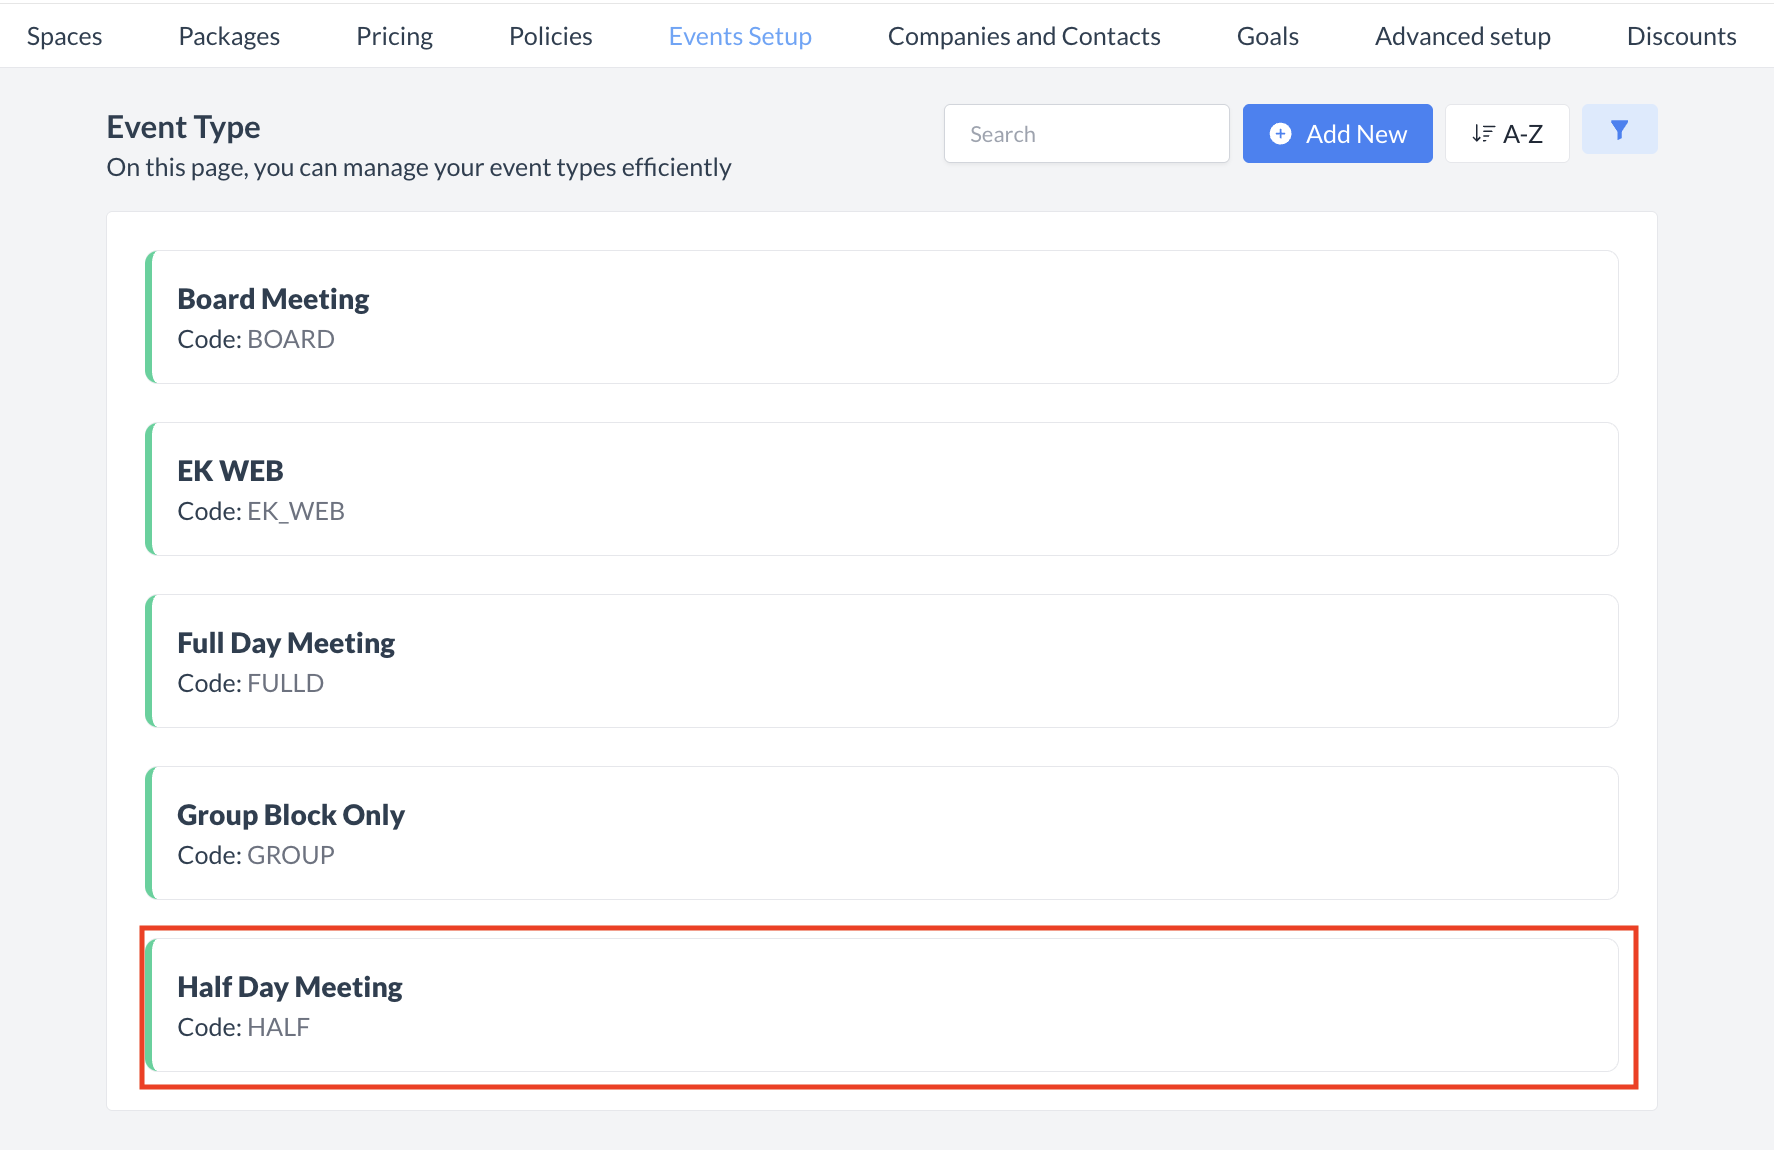
Accessing and Creating Event Types
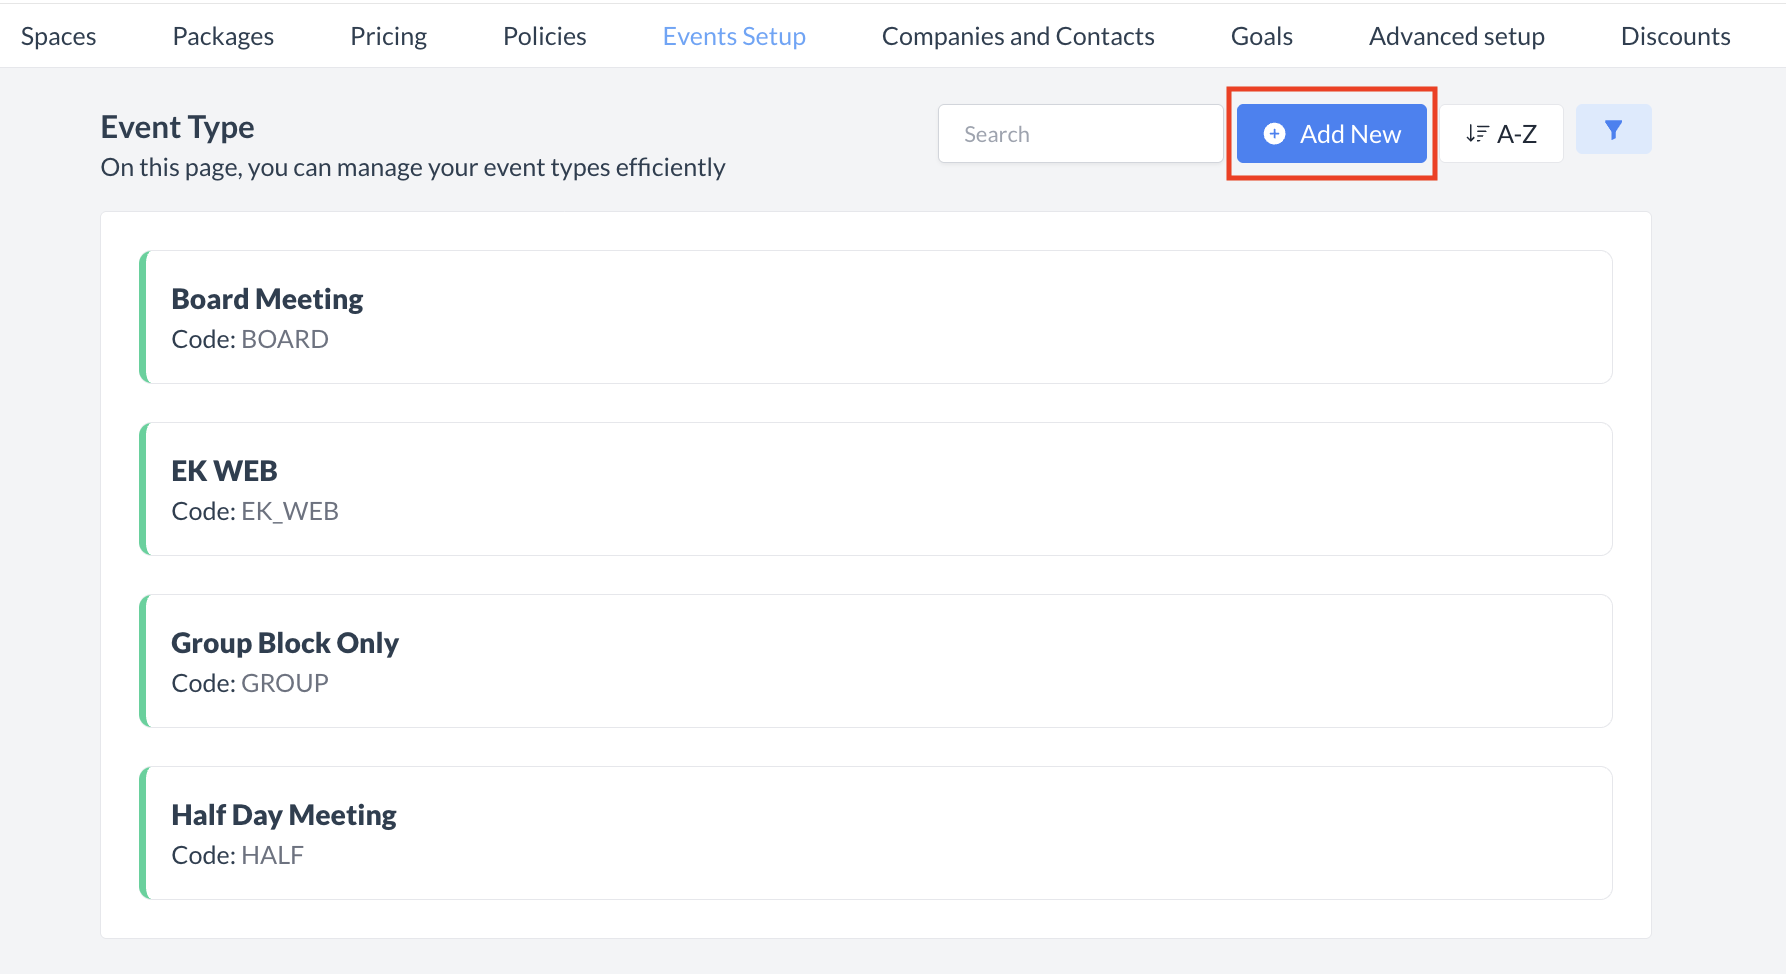
The Event Types screen displays a list of all existing event types available for use with an event. To create a new event type:
|
|
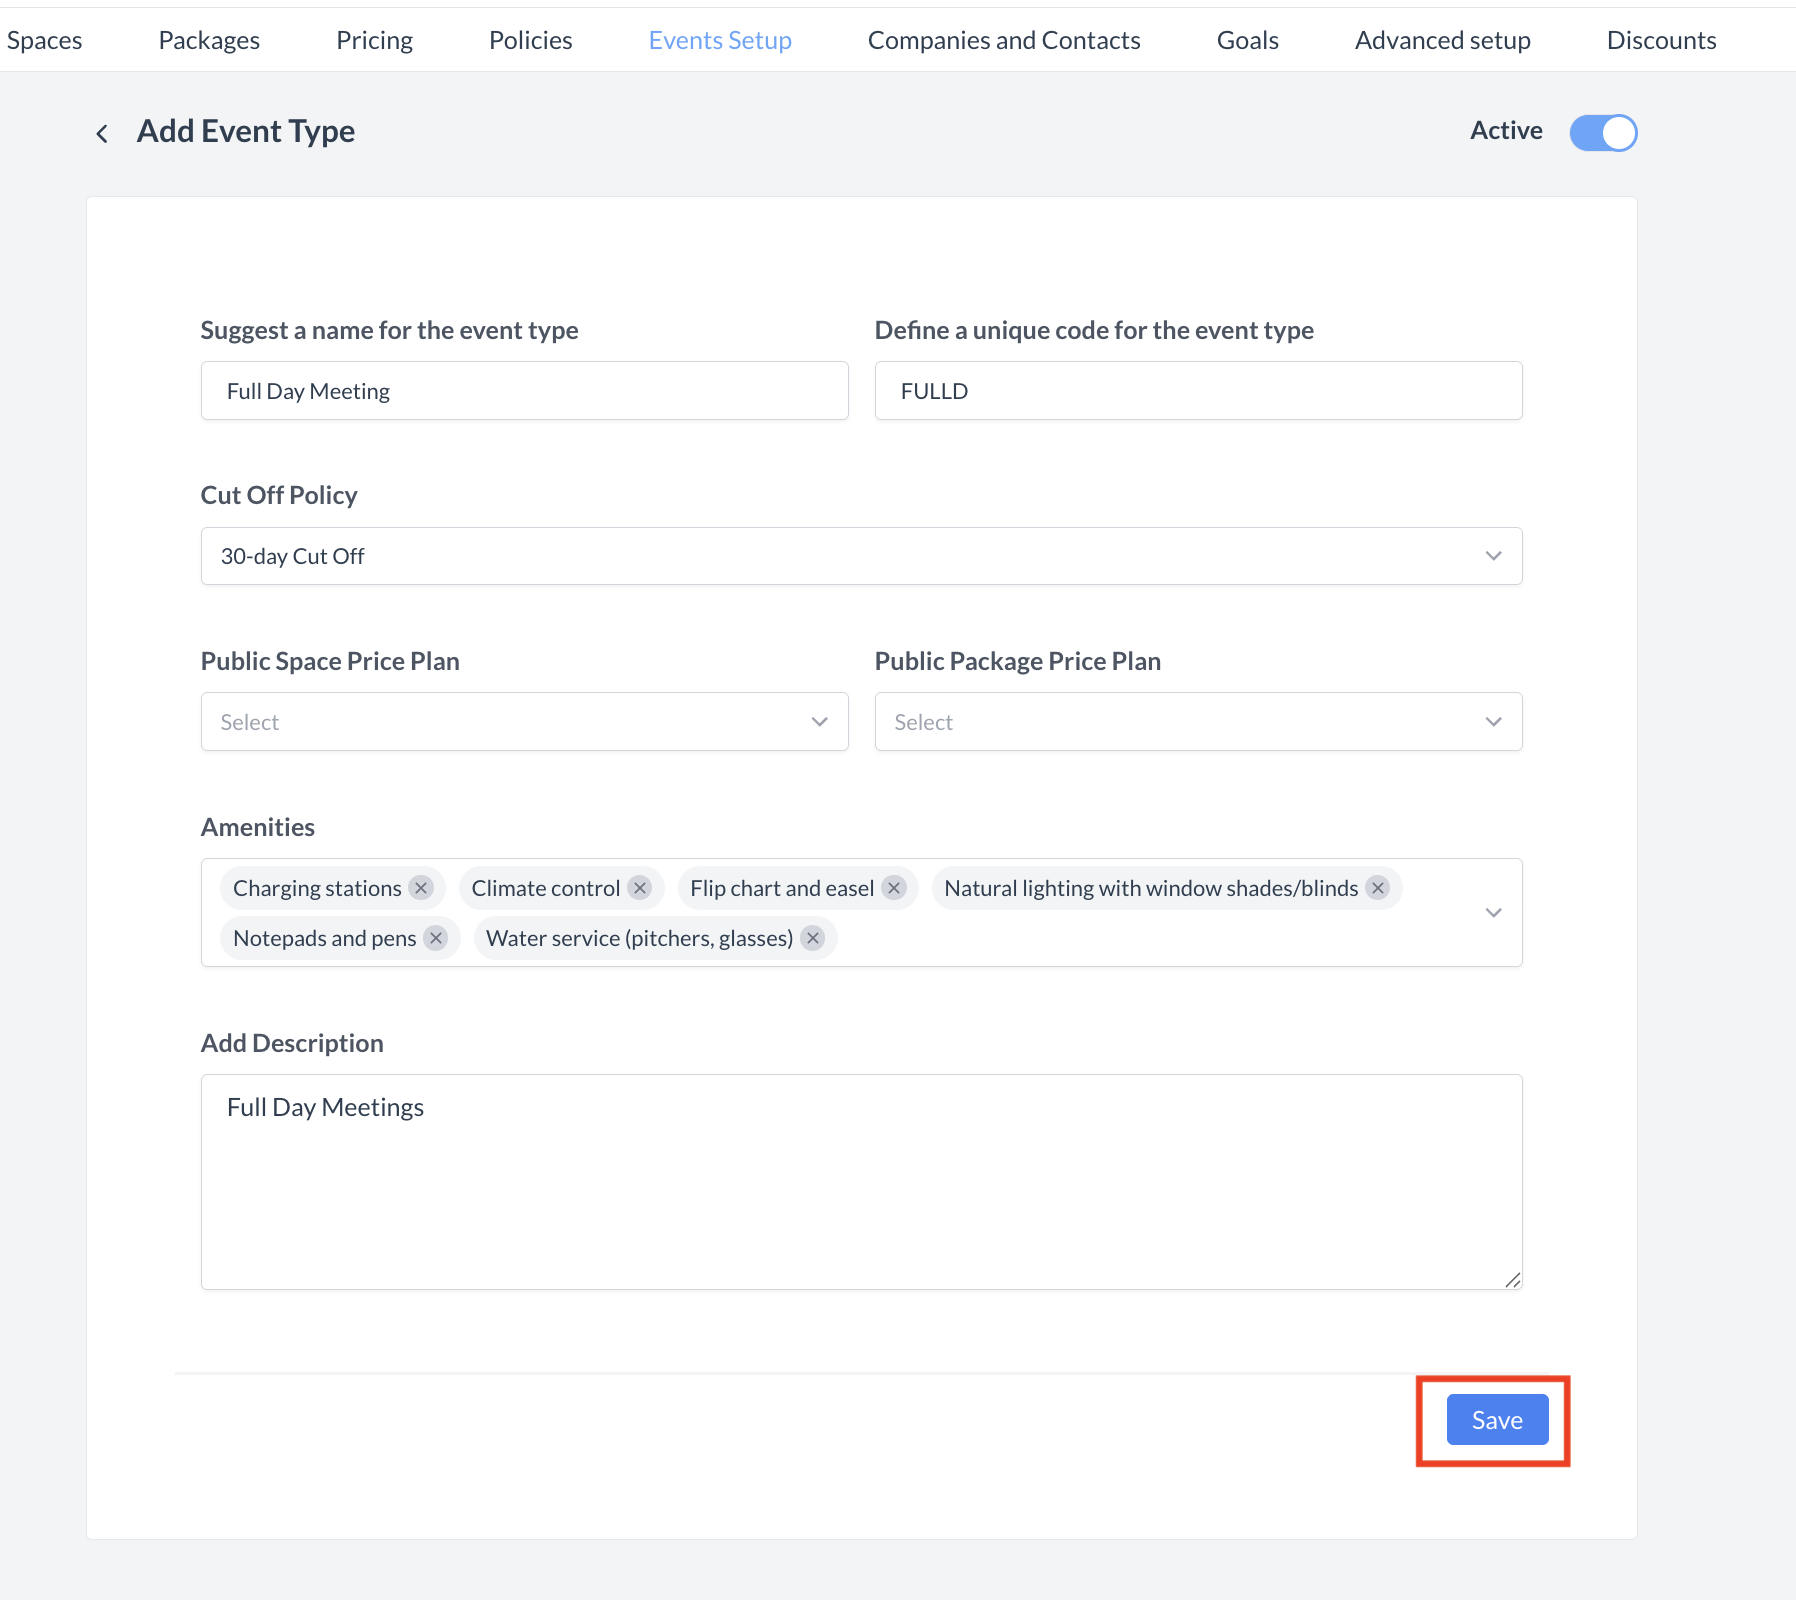
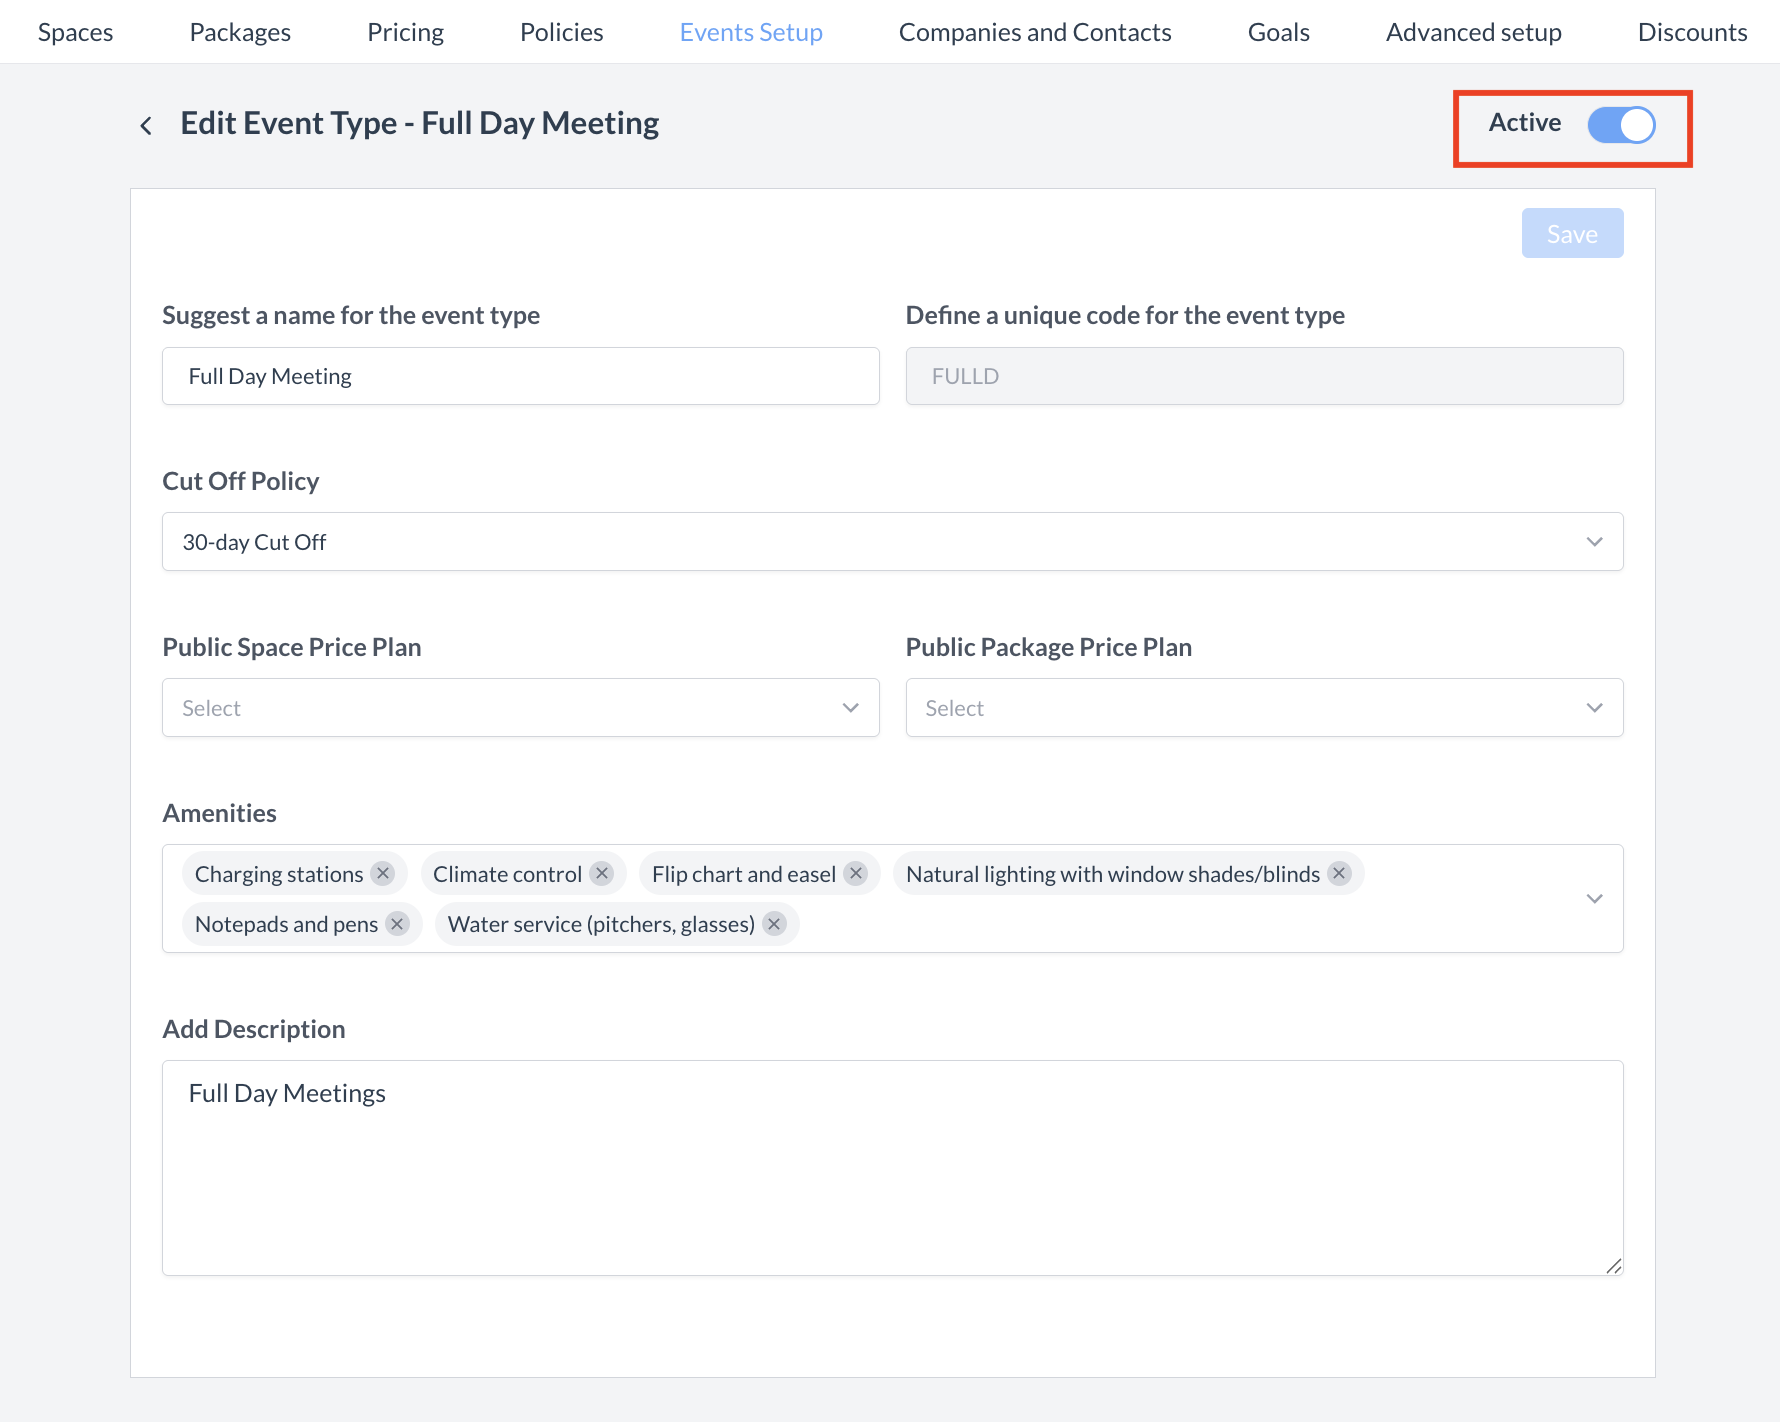
Adding a New Event Type
When you click Add Event Type, the Add Event Type screen will appear. Complete the fields below to configure the new Event Type: 1. Name
2. Code
3. Cut-Off Policy
4. Public Space Price Plan (Not in Use)
5. Public Package Price Plan (Not in Use)
6. Amenities
7. Description
Once all required information is entered, click the blue “Save” button to create the Event Type. |
|
Confirmation
After saving, you will be returned to the Event Type listing screen.
|
|
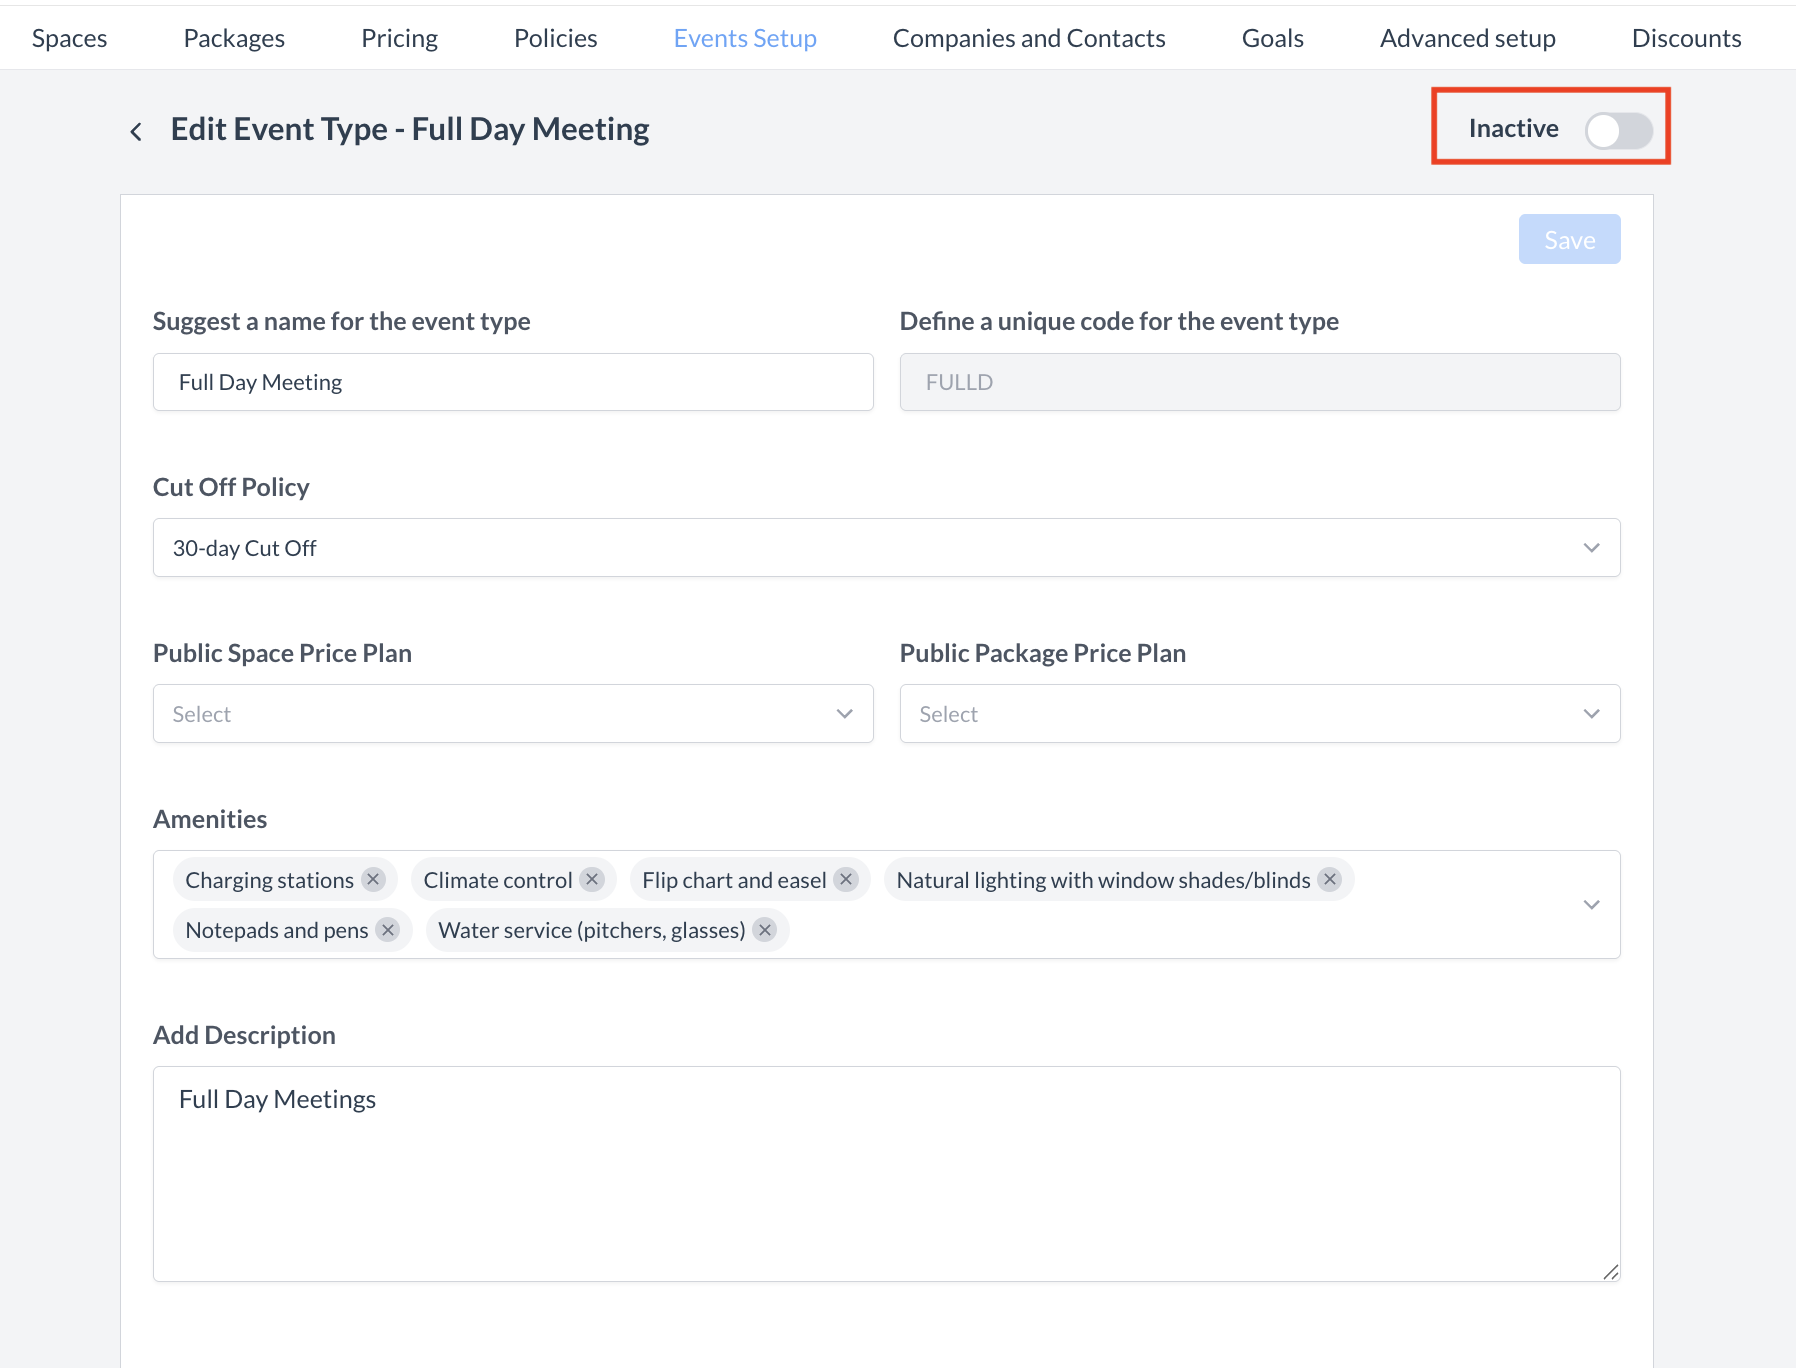
🔄 Inactivating a Event Type
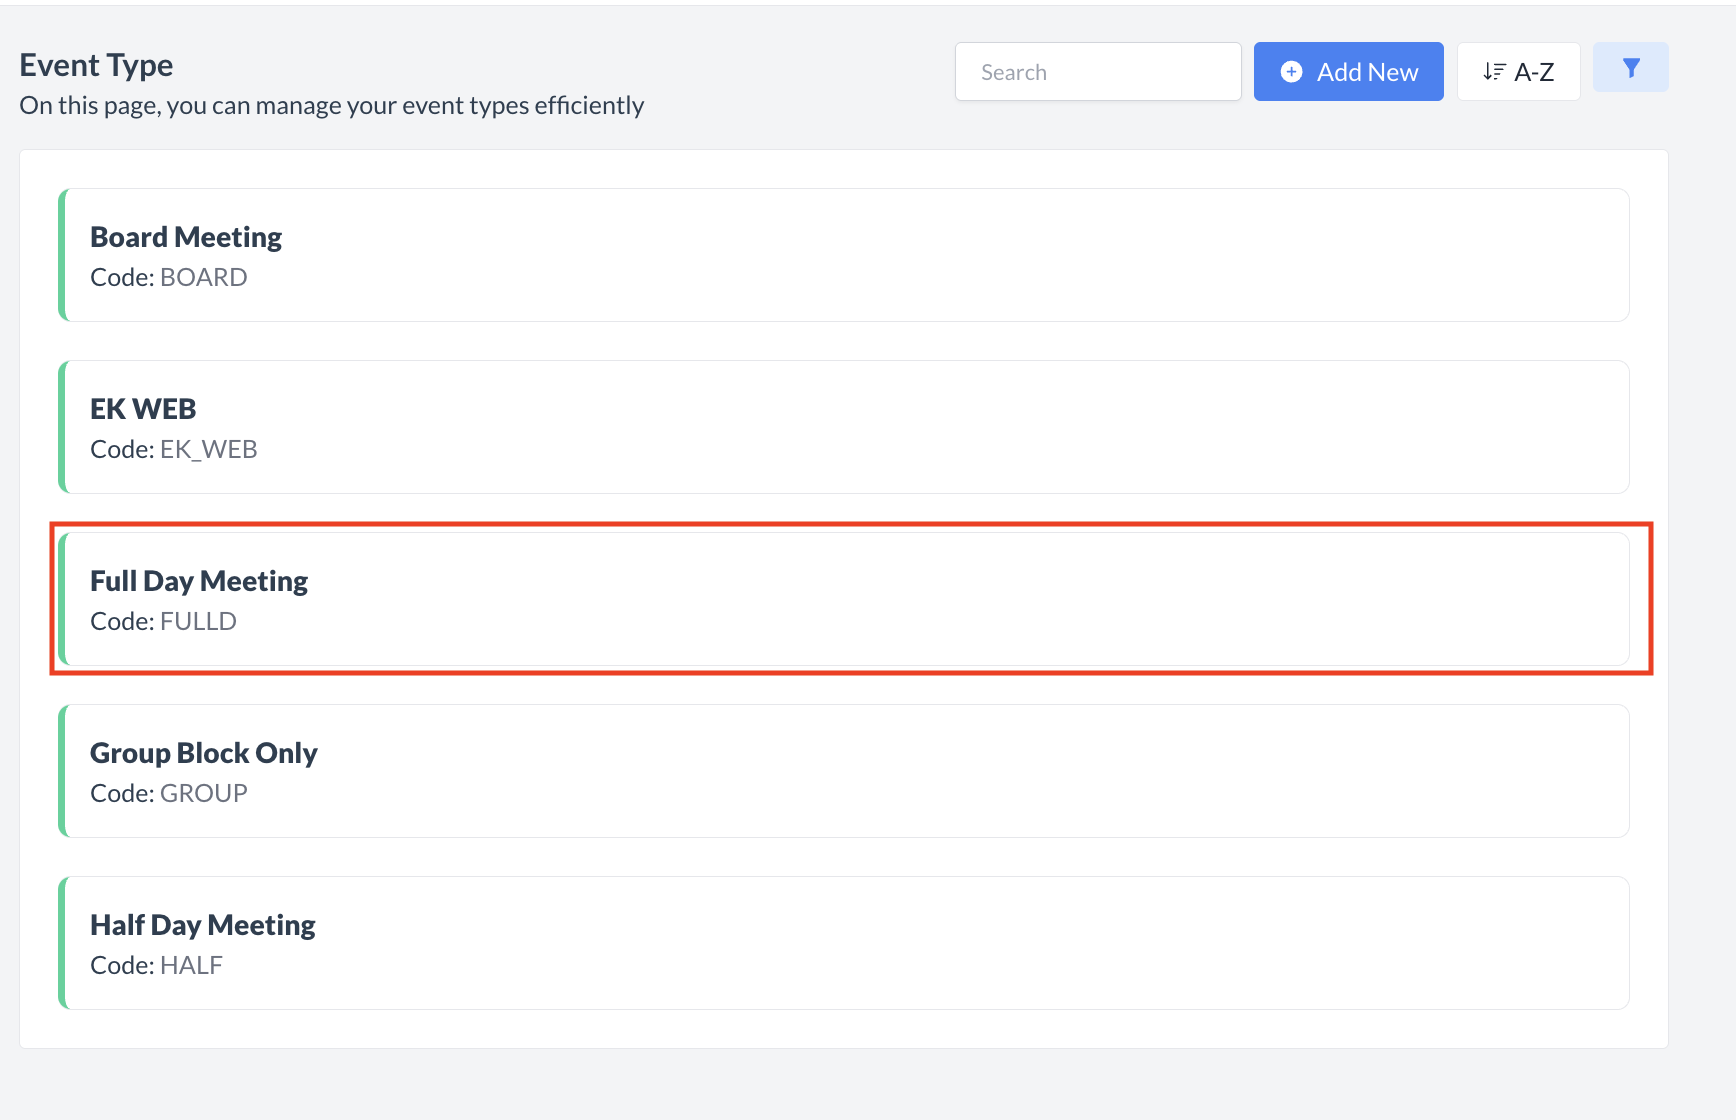
To deactivate a event type:
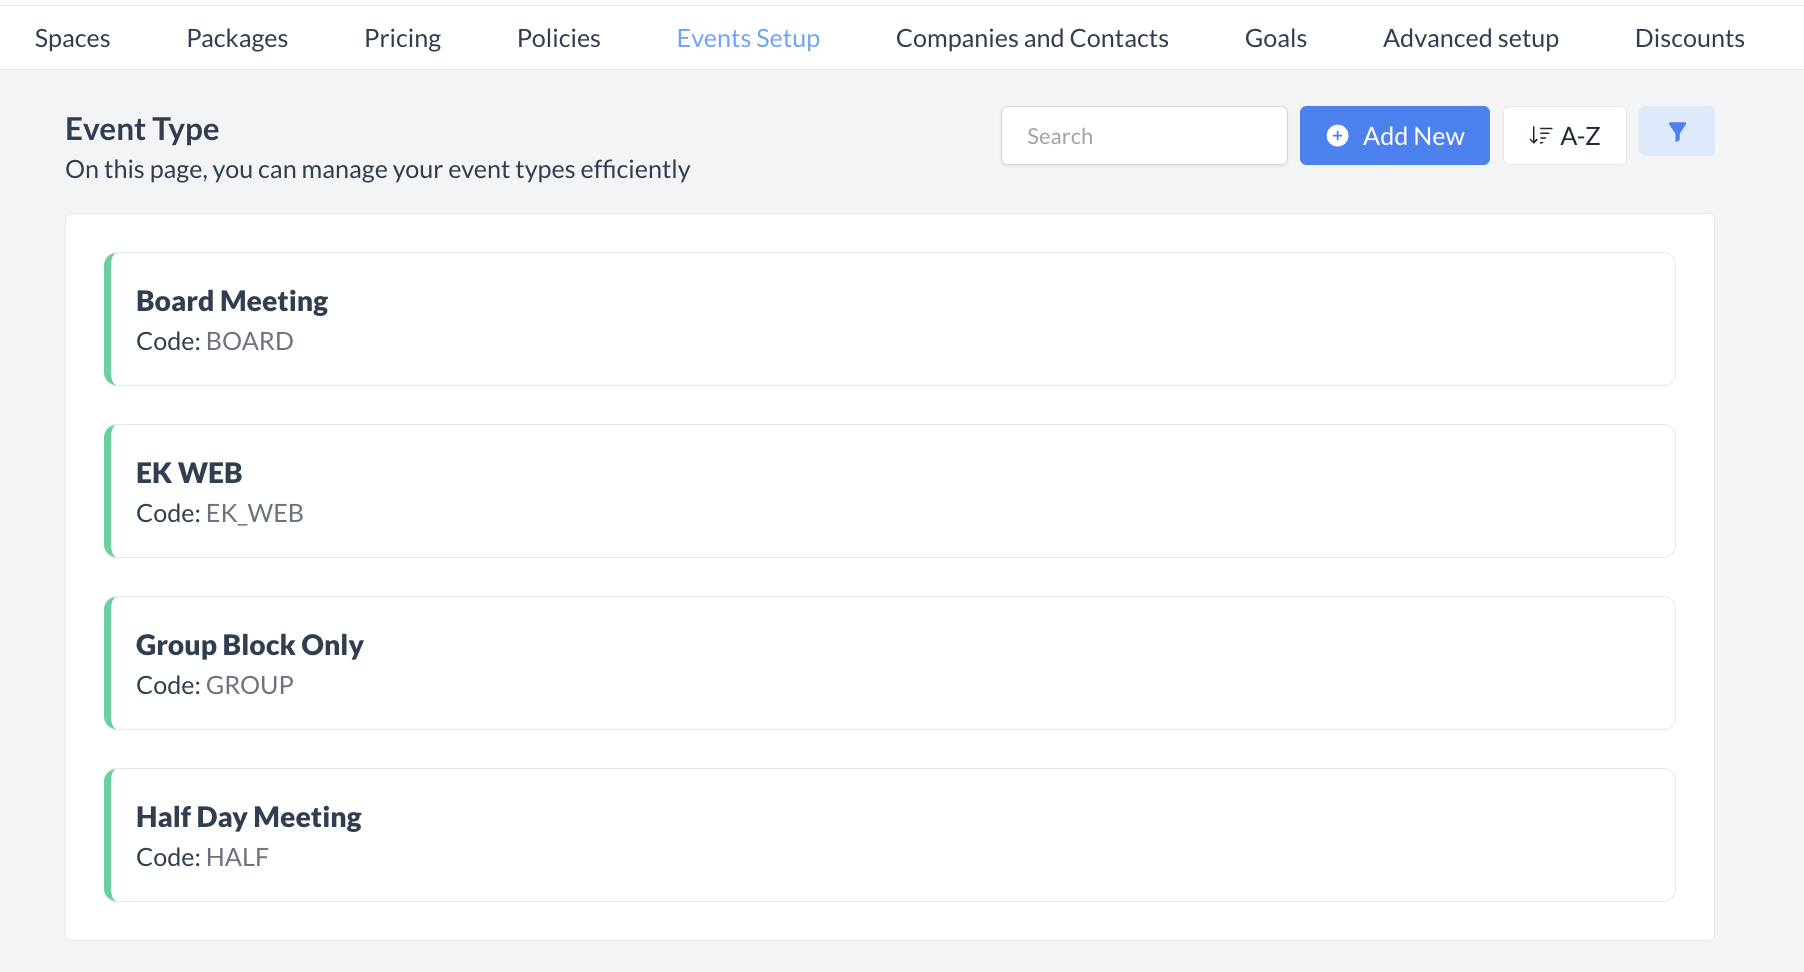
Once inactivated, the event type will no longer appear in the Event Type listing and will not be available for selection on new events. |
|
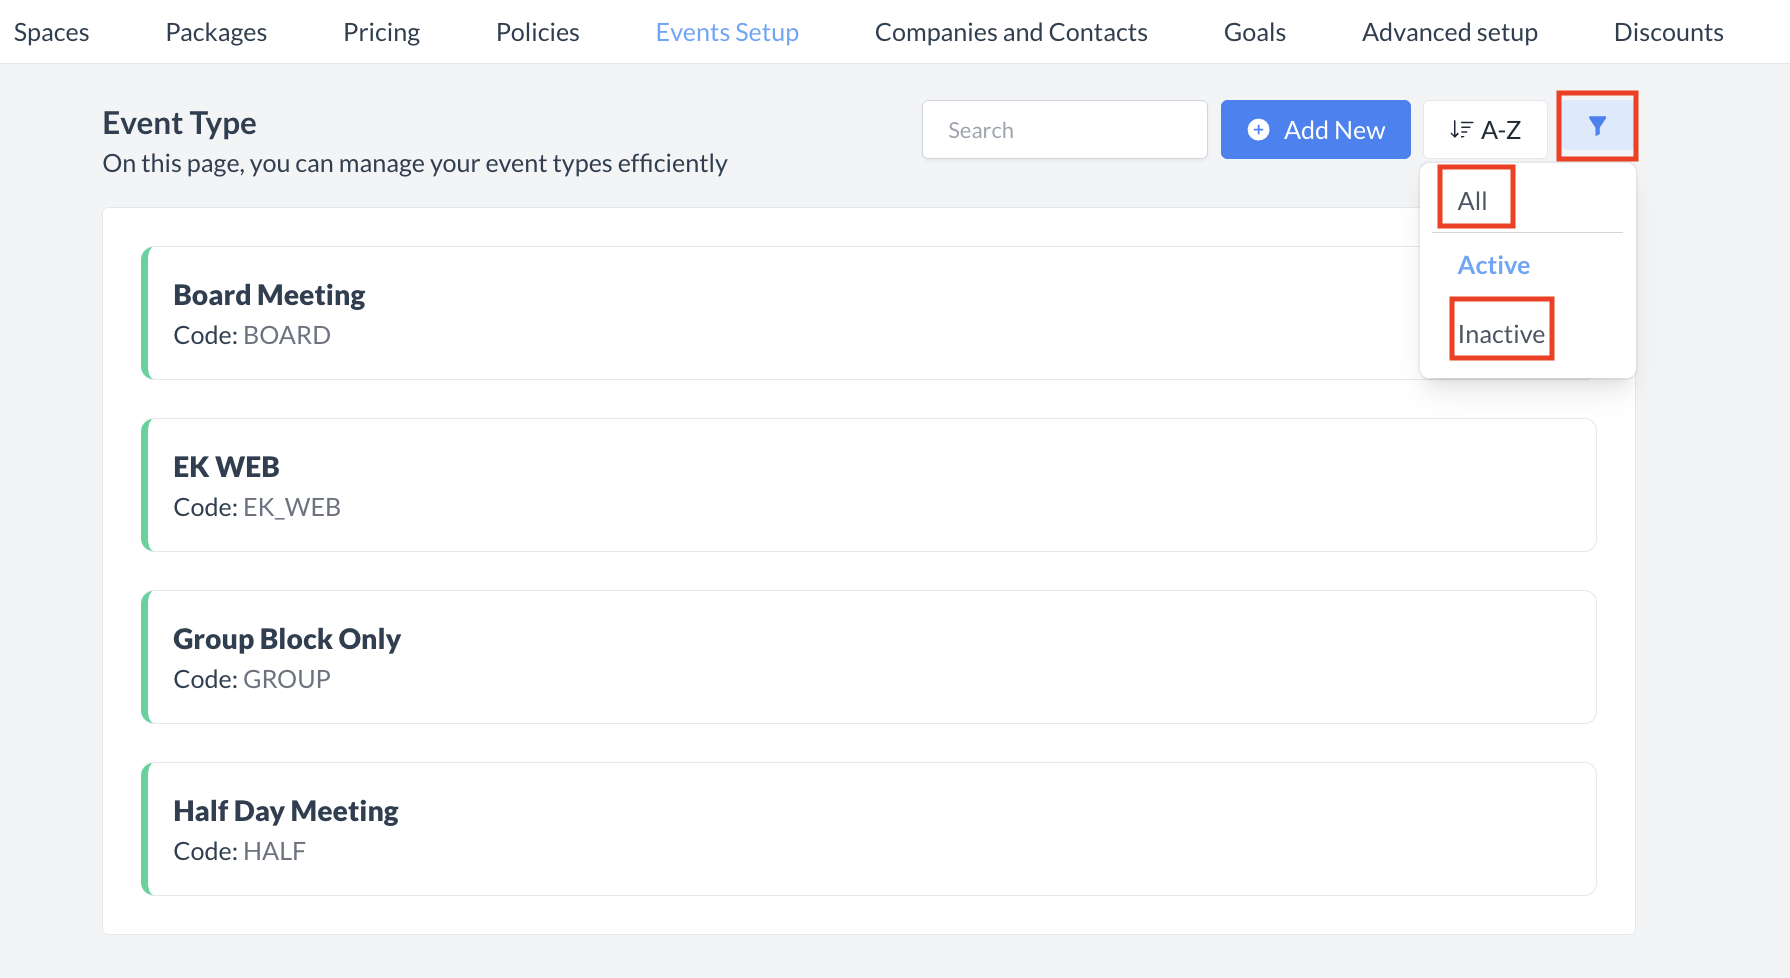
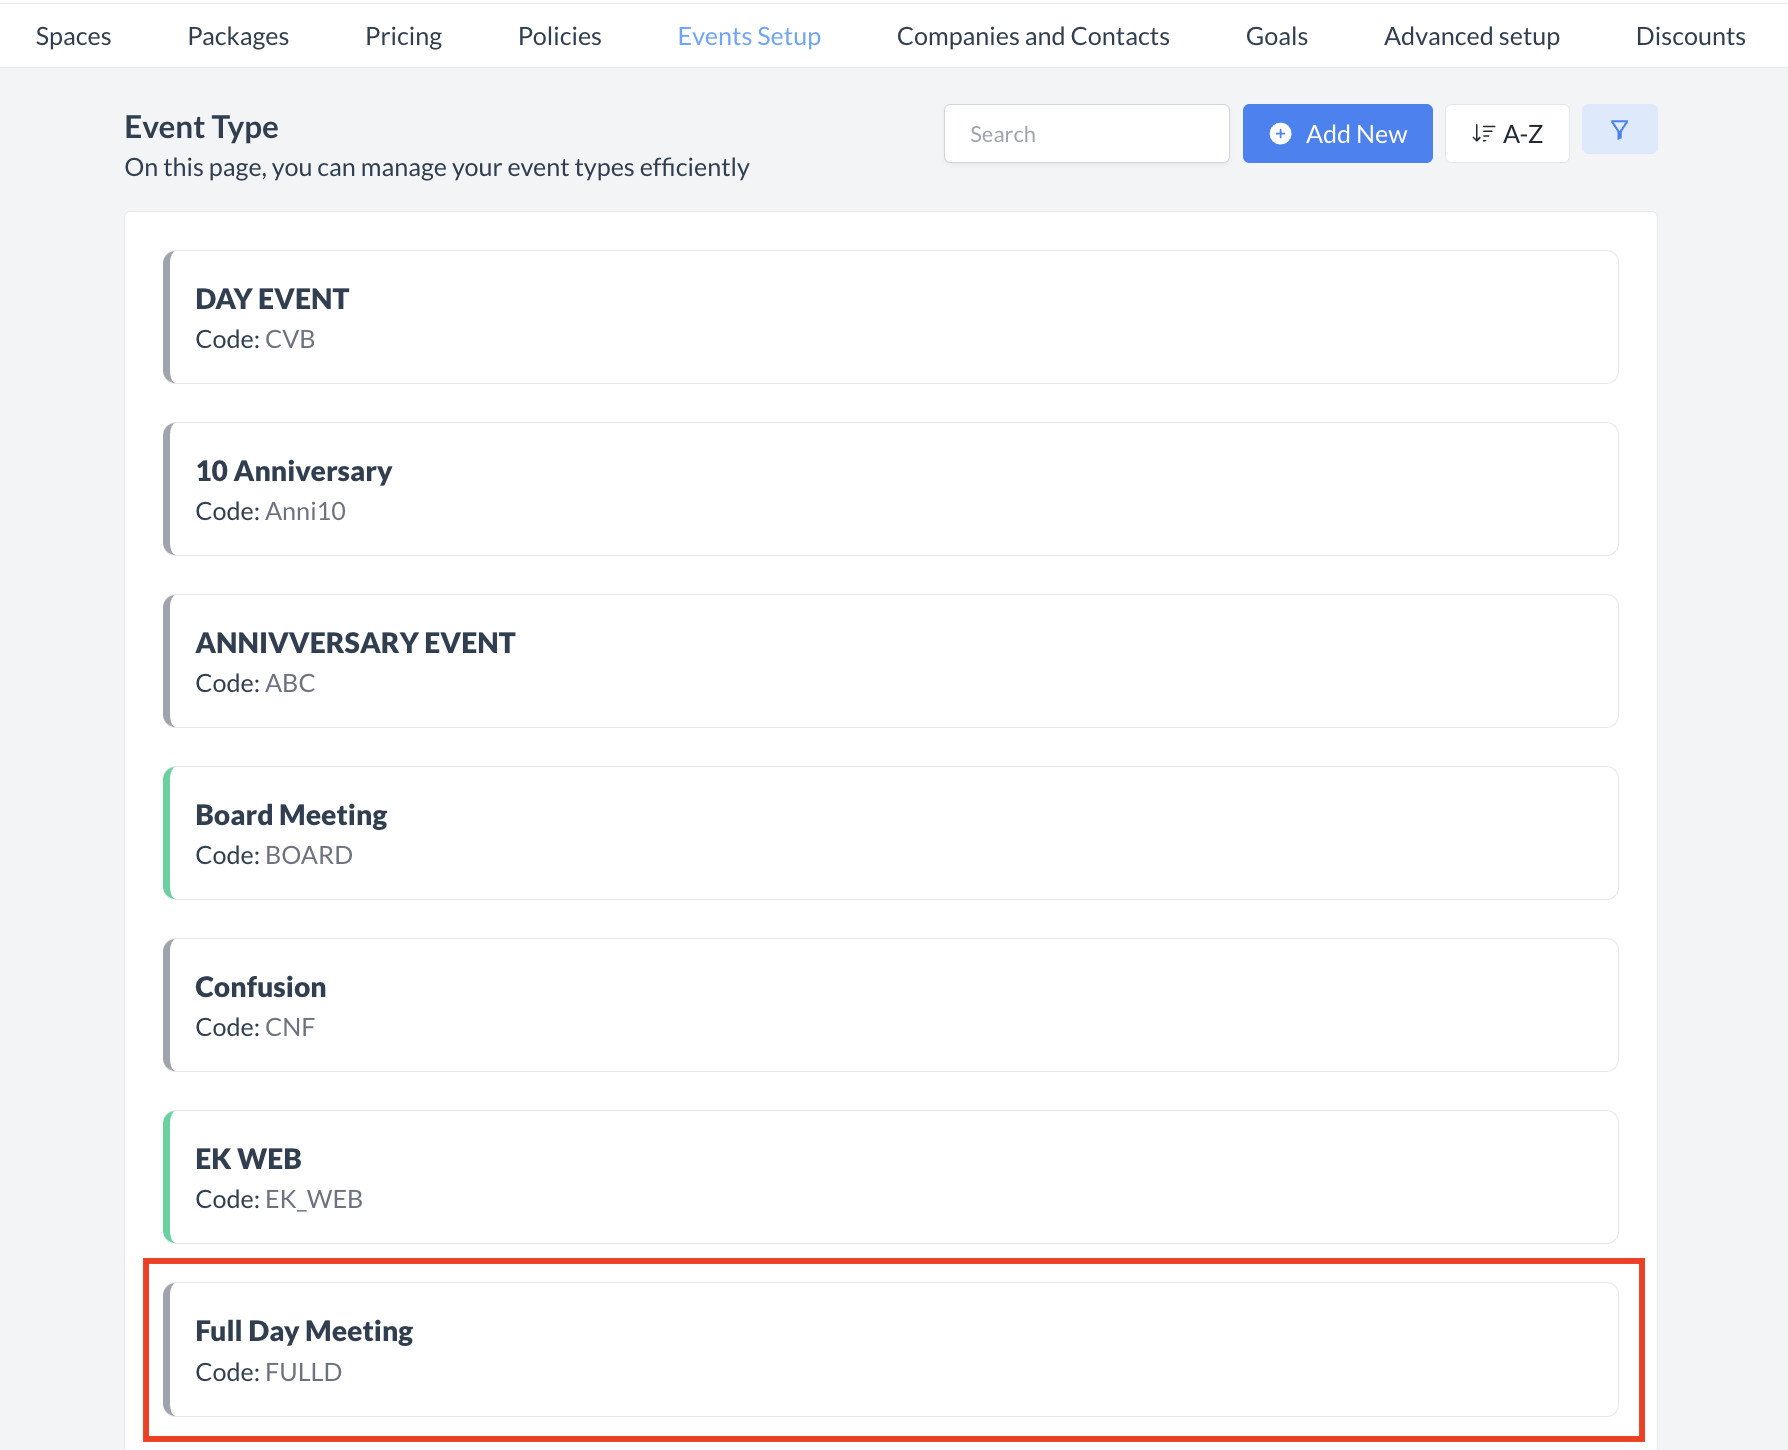
🔁 Reactivating an Inactive Event Type
To reactivate a event type:
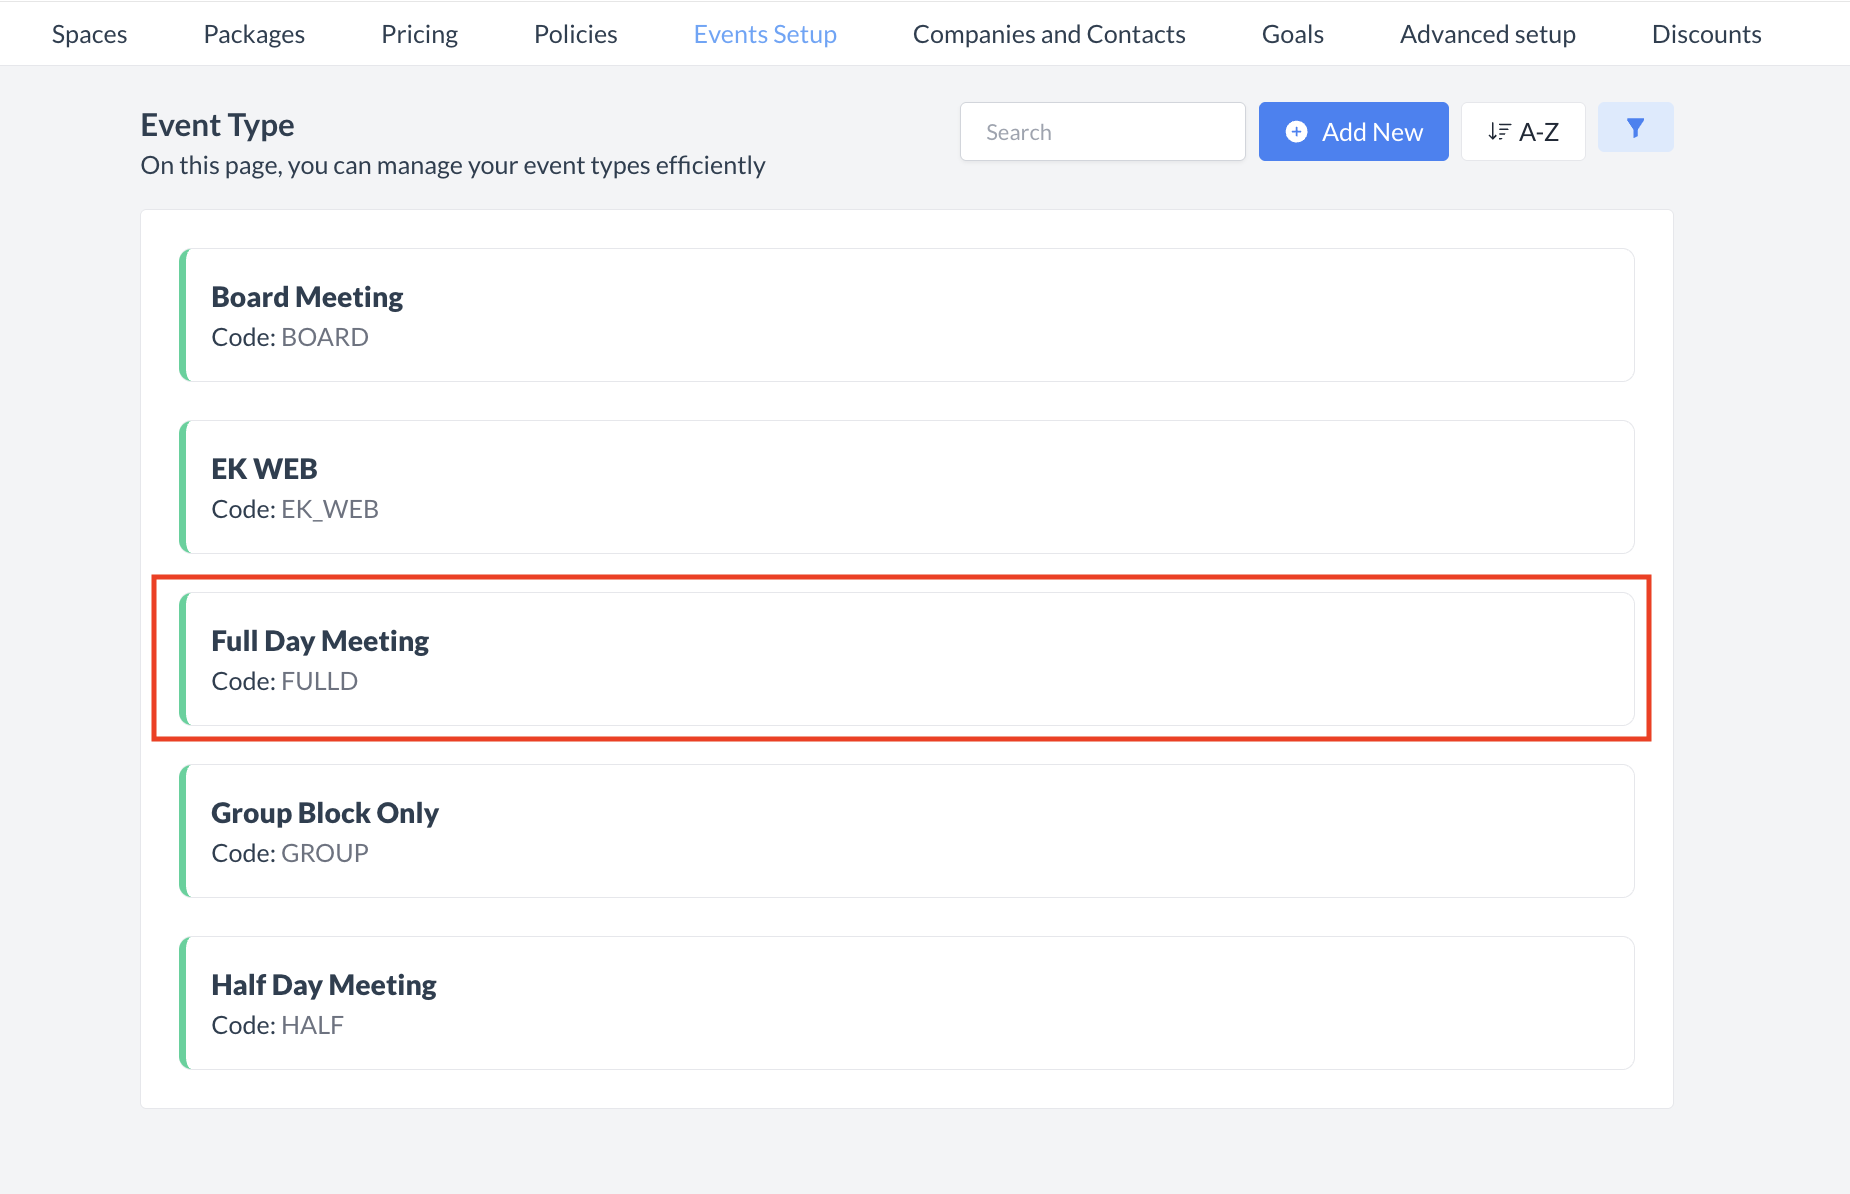
The event type is now reactivated and will appear in the main Event Type listing screen, making it available for use again. |
|
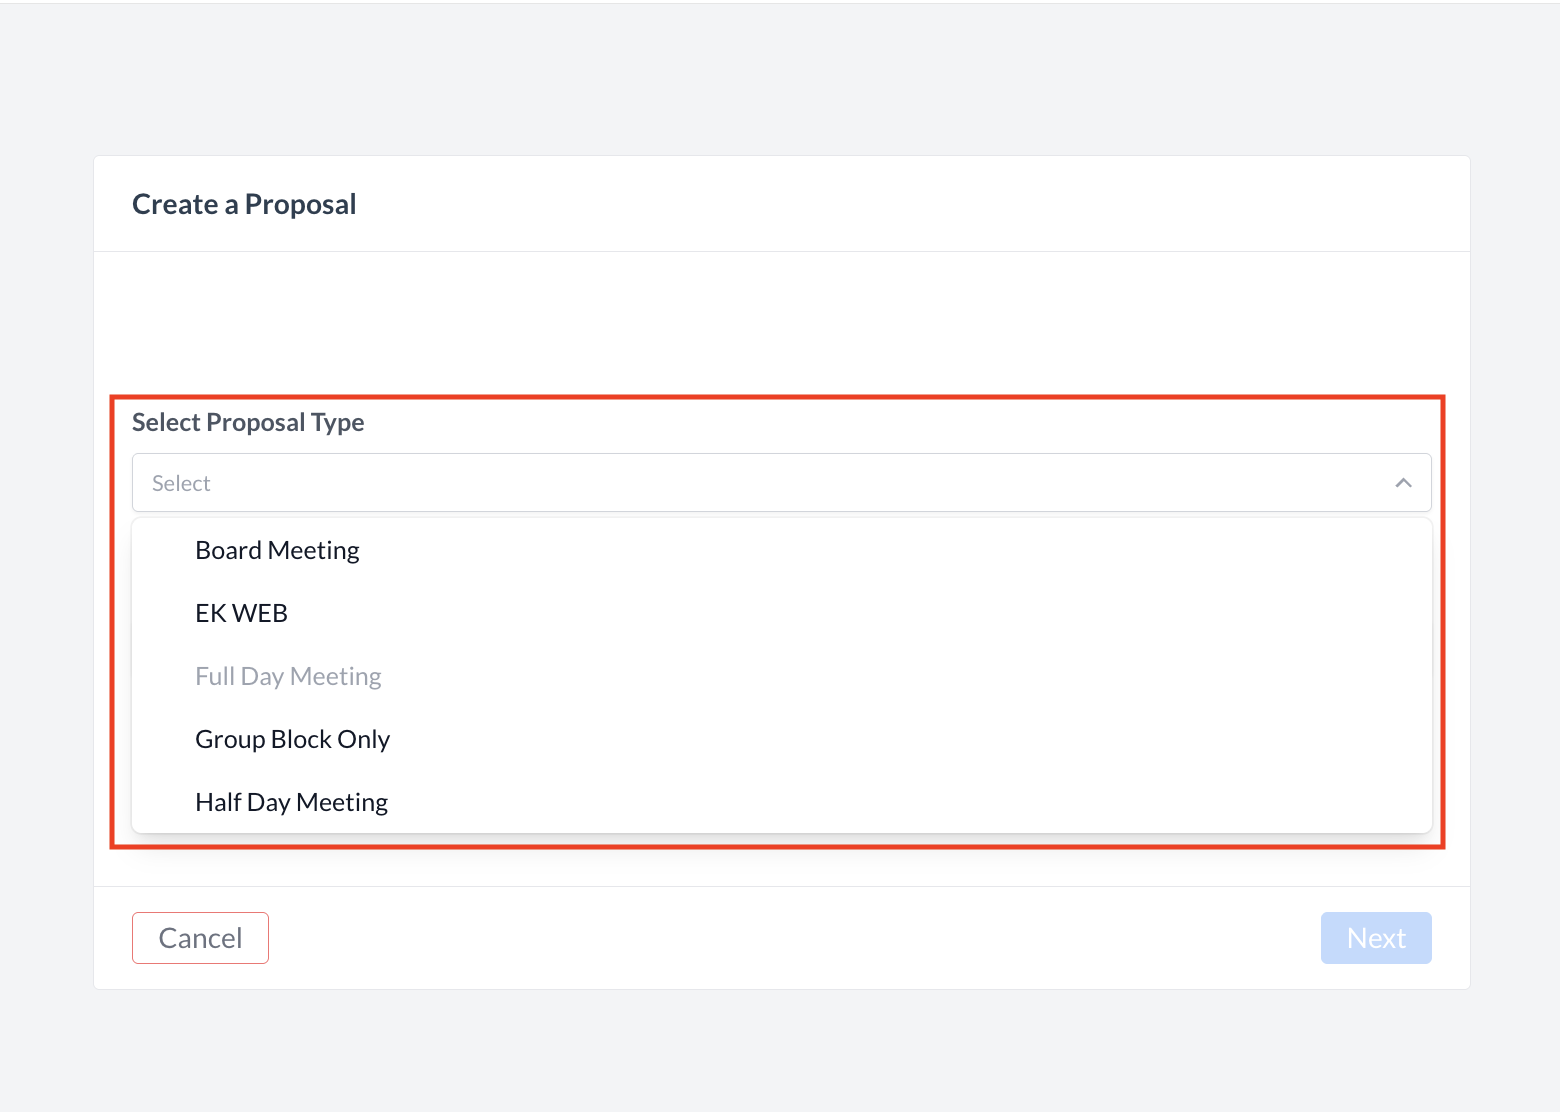
🖥️ Where “Event Types” Appears in the User Interface (UI)
Event Types are listed under Proposal Type when creating a new event booking.