Skip table of contents

Manage Group Blocks

📆 Revision Date:

Overview: Managing PMS Group Blocks in EventKey

EventKey allows seamless management of Group Blocks that are attached directly to the Event Record within EventKey. This integration enables users to efficiently manage group room blocks without switching between EventKey and the Property Management System (PMS).

By linking the PMS Group Block to the event in EventKey, users can:

  • View and adjust room allocations by room type and date

  • Set or update group pricing directly within the Event Record

  • Monitor pick-up and availability in real time

  • Cancel or release the group block if the event is no longer active

  • Maintain full visibility of room block performance in the context of the event

This functionality ensures that both sales and front desk teams are aligned, reduces double entry, and allows for more efficient, centralized group management—all from within the familiar EventKey interface.

Navigate to Home > Event Management

EventKey Dashboard (Home Screen)

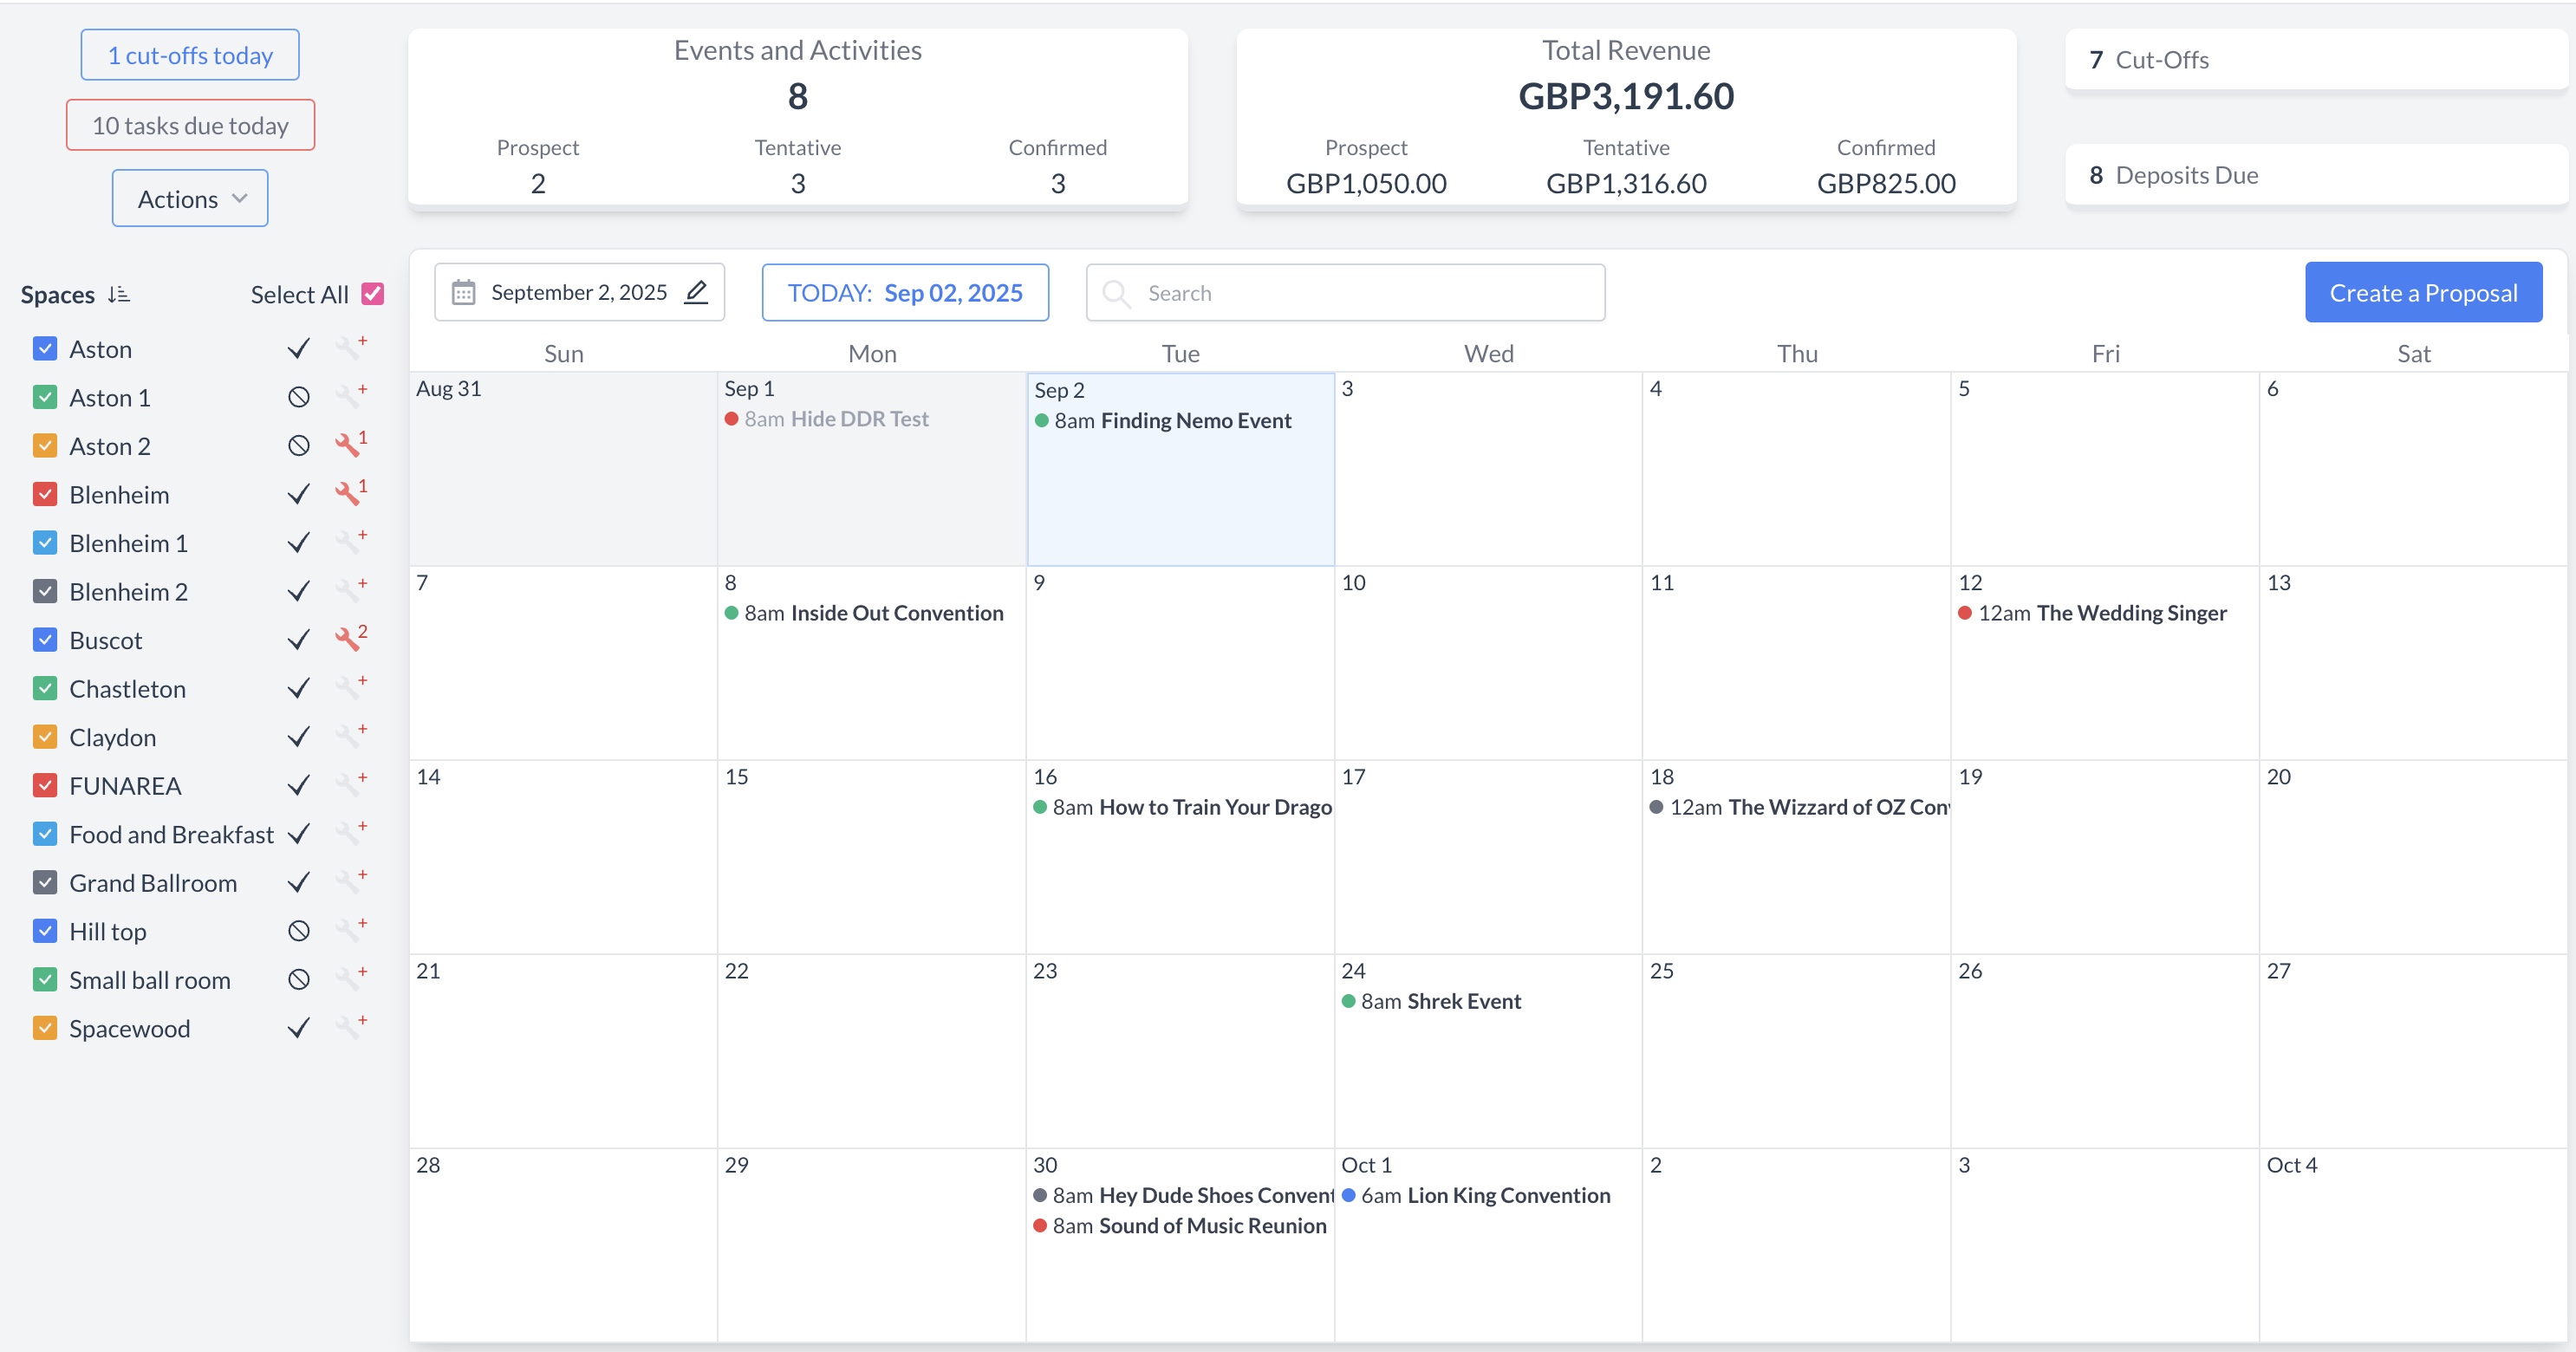
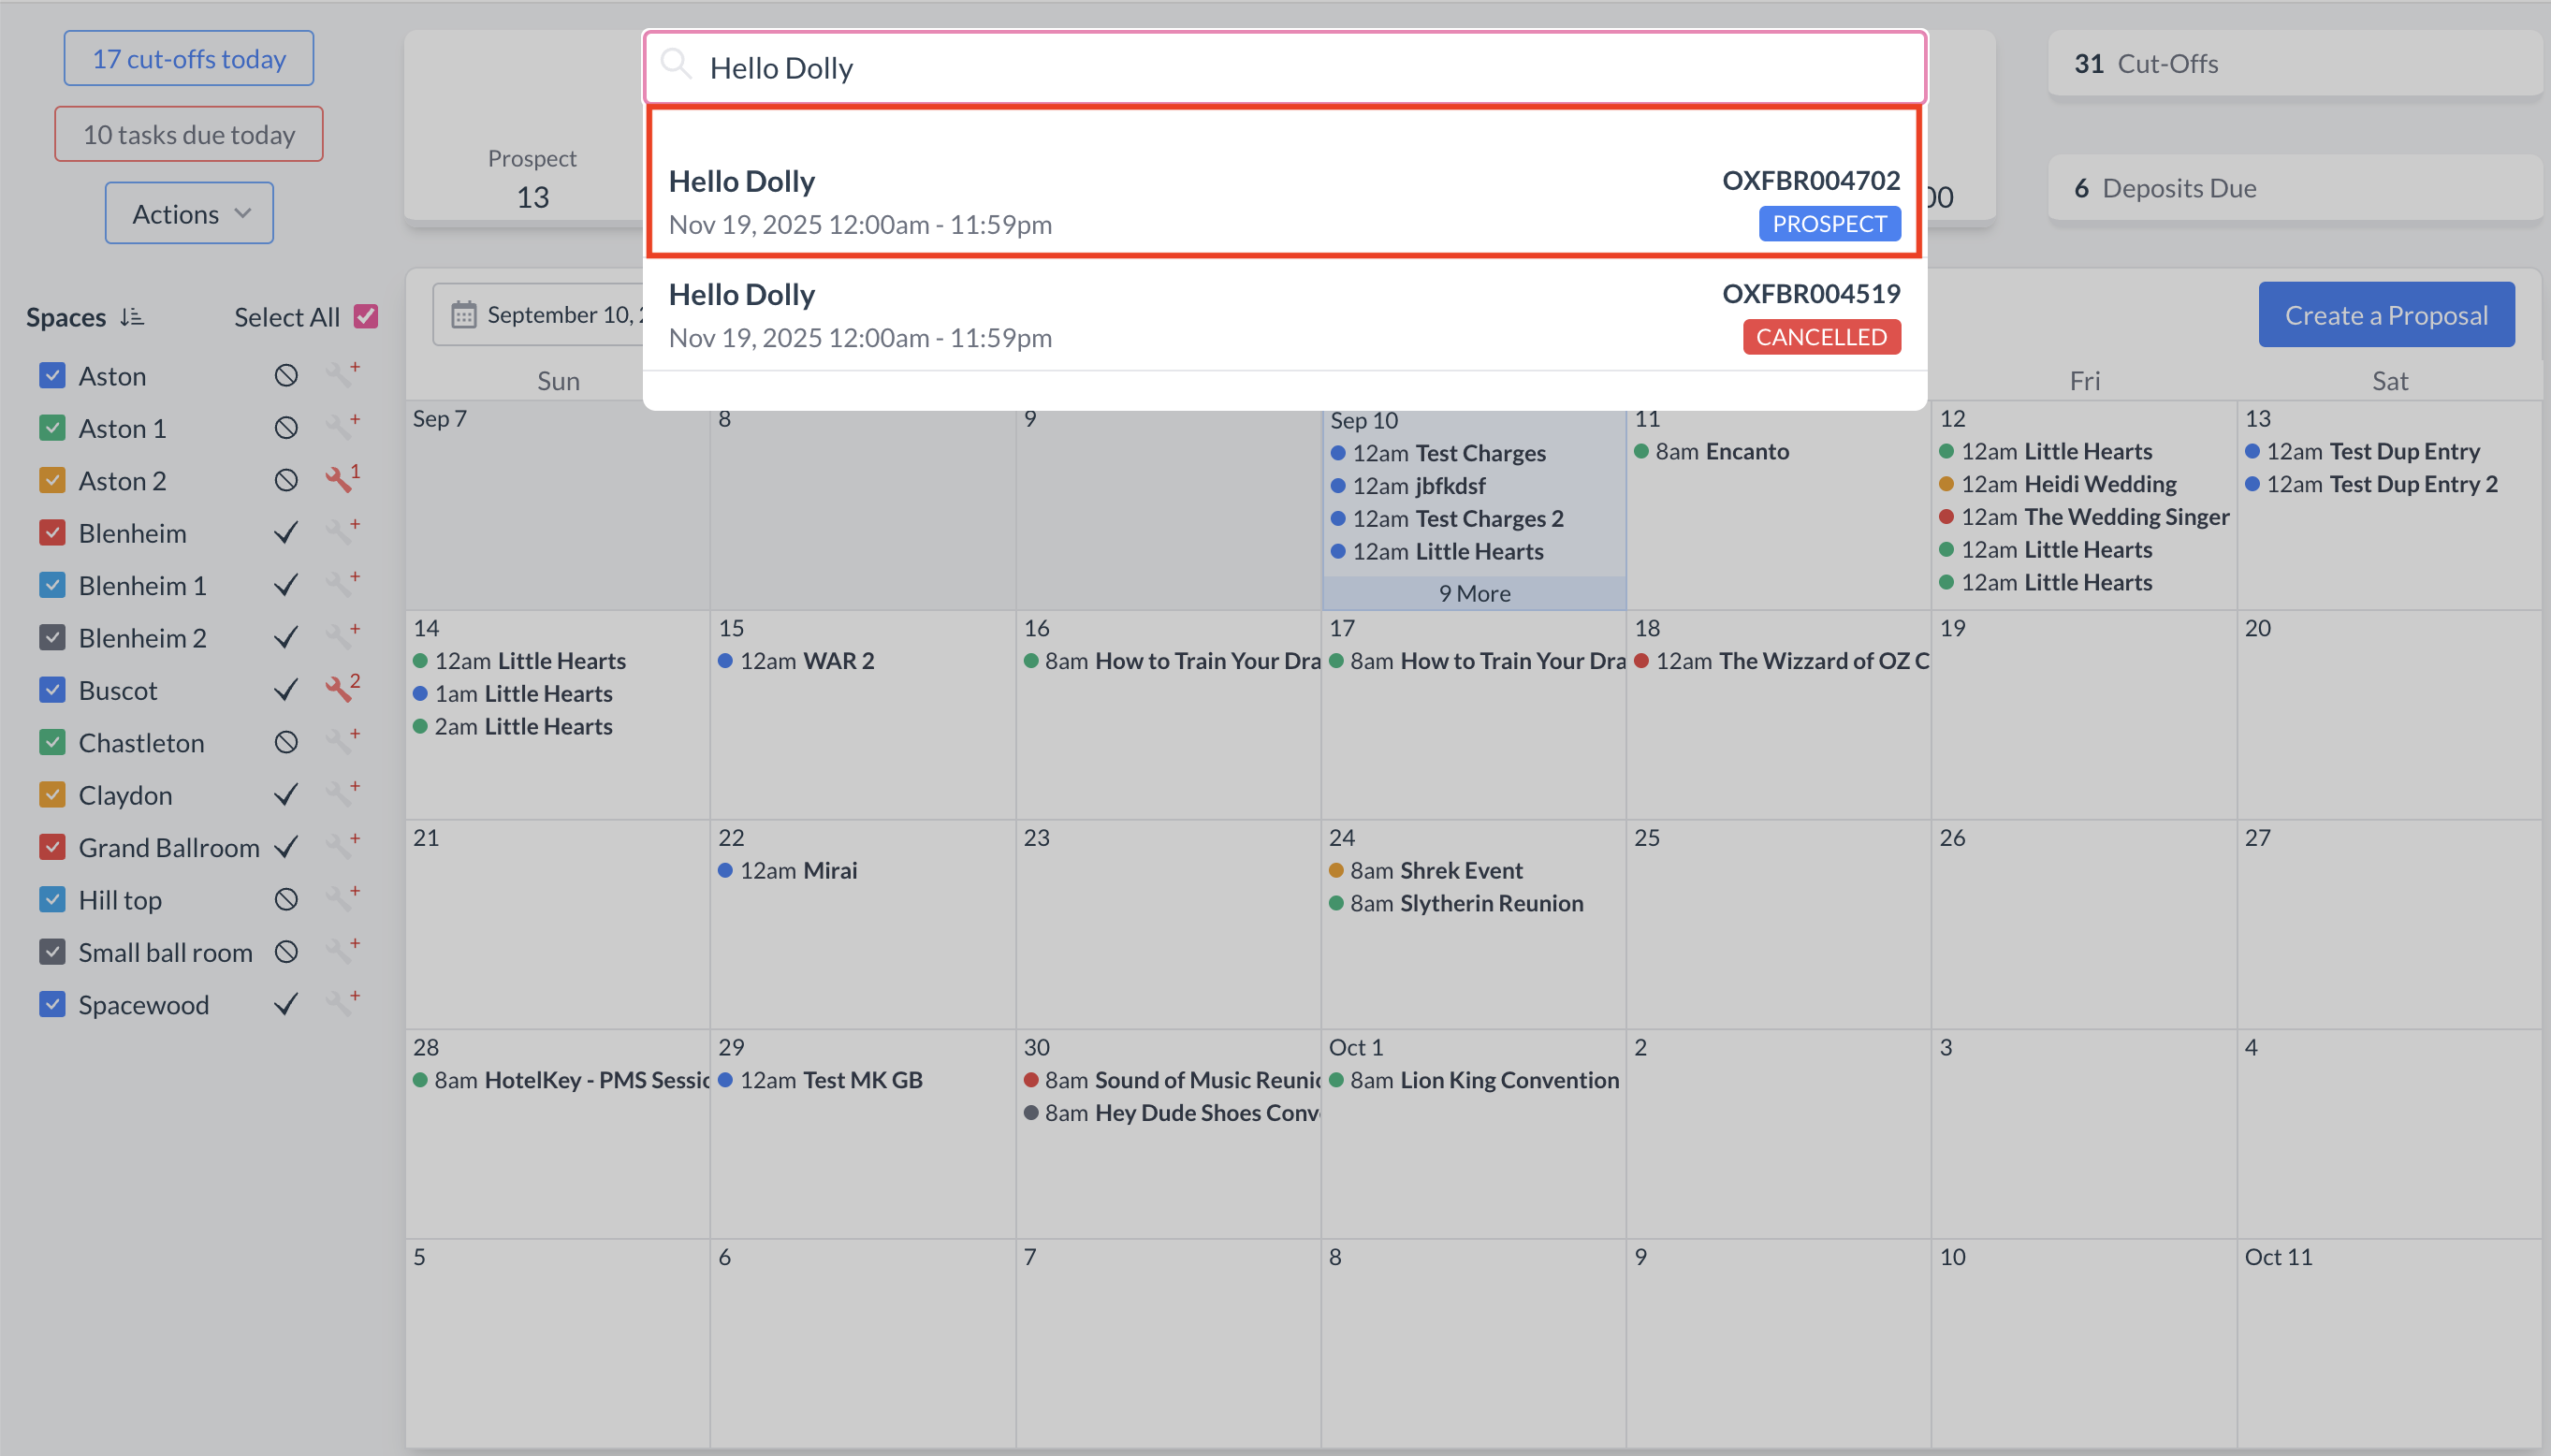
To begin, navigate to the Dashboard and use the Search box to locate the event.

Enter the full or partial Event Name into the search field. The system will display a list of matching events, or, if there is an exact match, it will appear directly.

Once you’ve identified the correct event, simply click on the event name to open it.

Event Search Field

Event Search Results

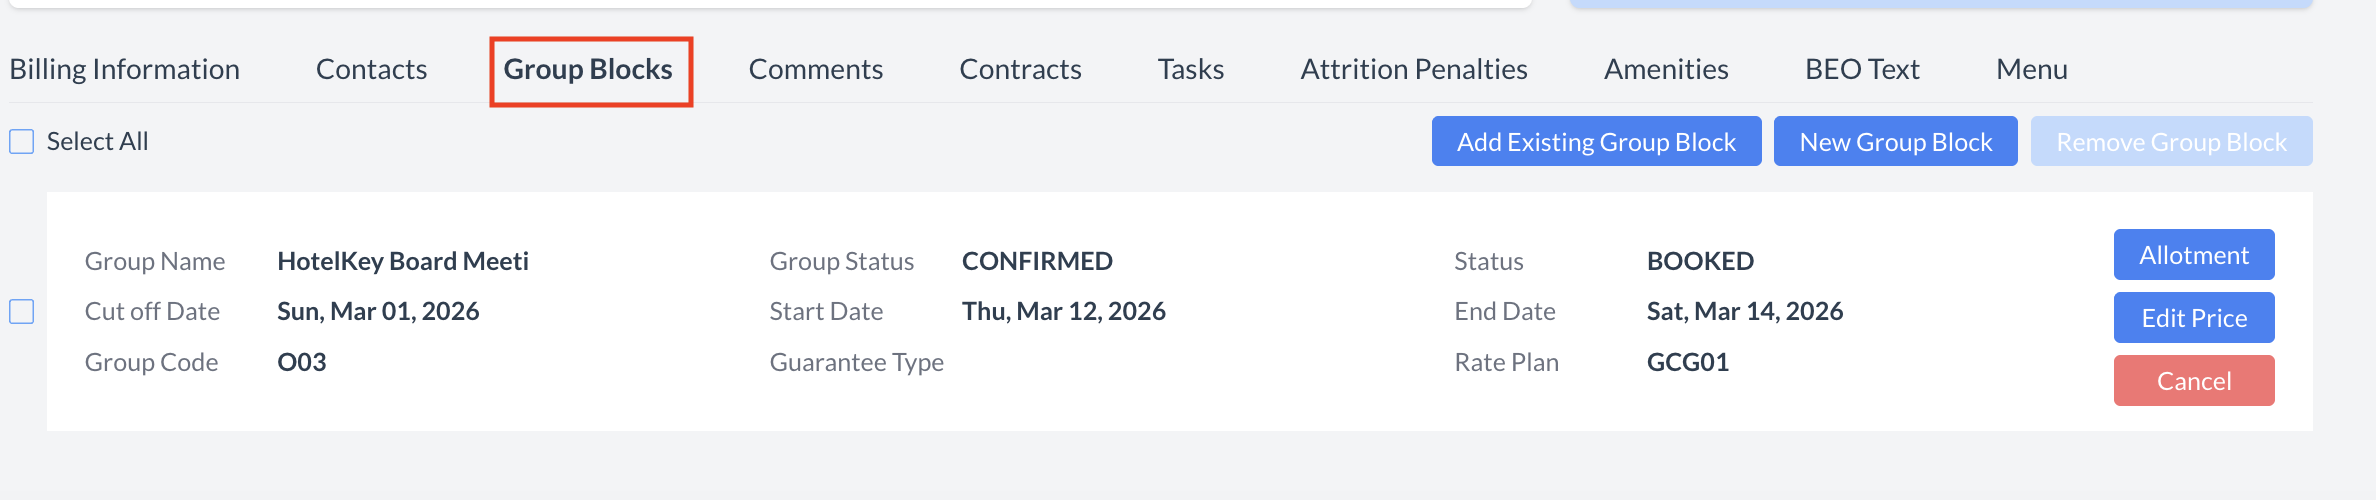
To manage group room blocks associated with an event:

  1. Navigate to the Event Record (Reservation) screen.

  2. Scroll to the bottom of the screen.

  3. Click on the “Group Blocks” section to expand and view or manage any linked room blocks.

Group Block Section.png

Event Reservation - Group Blocks Section

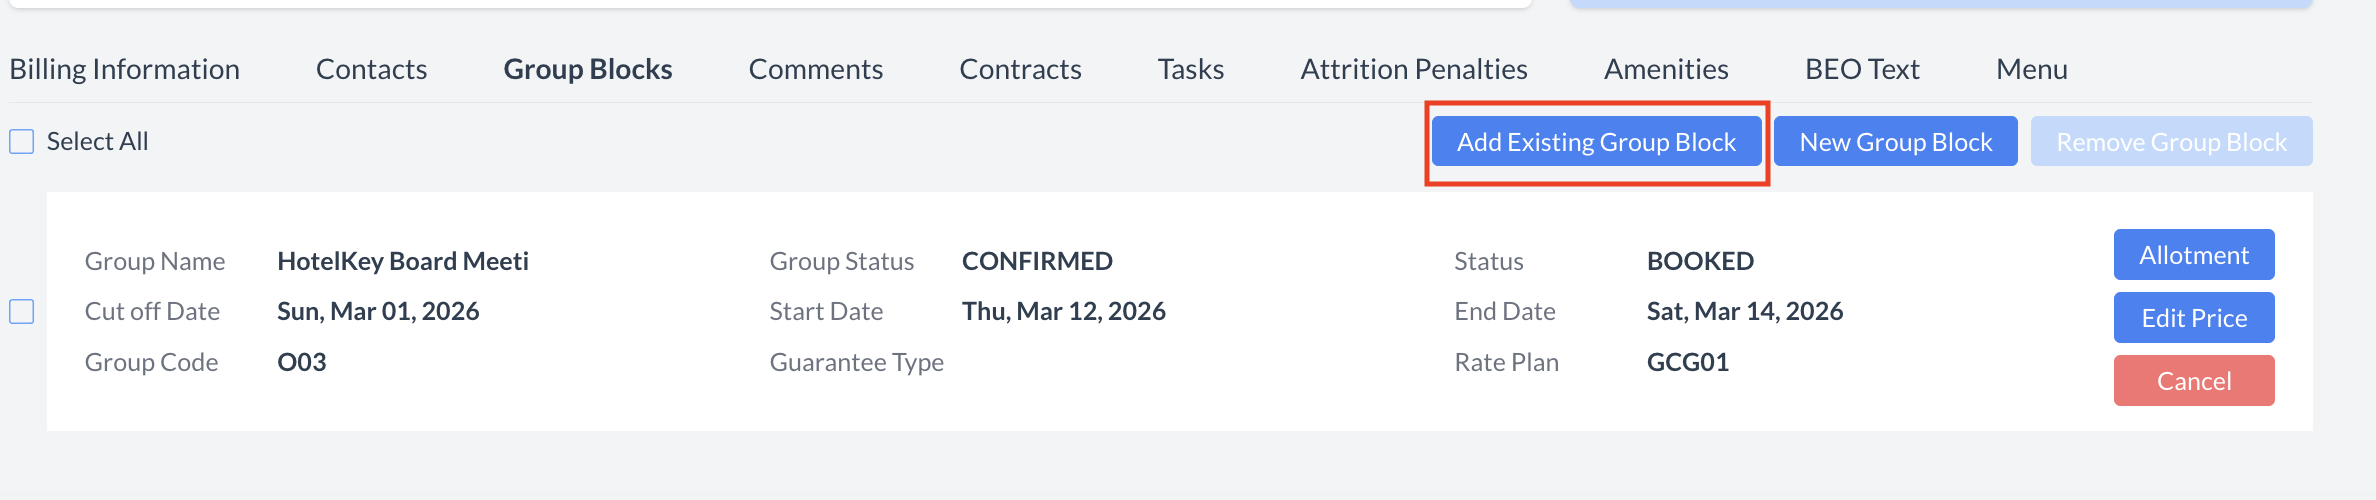
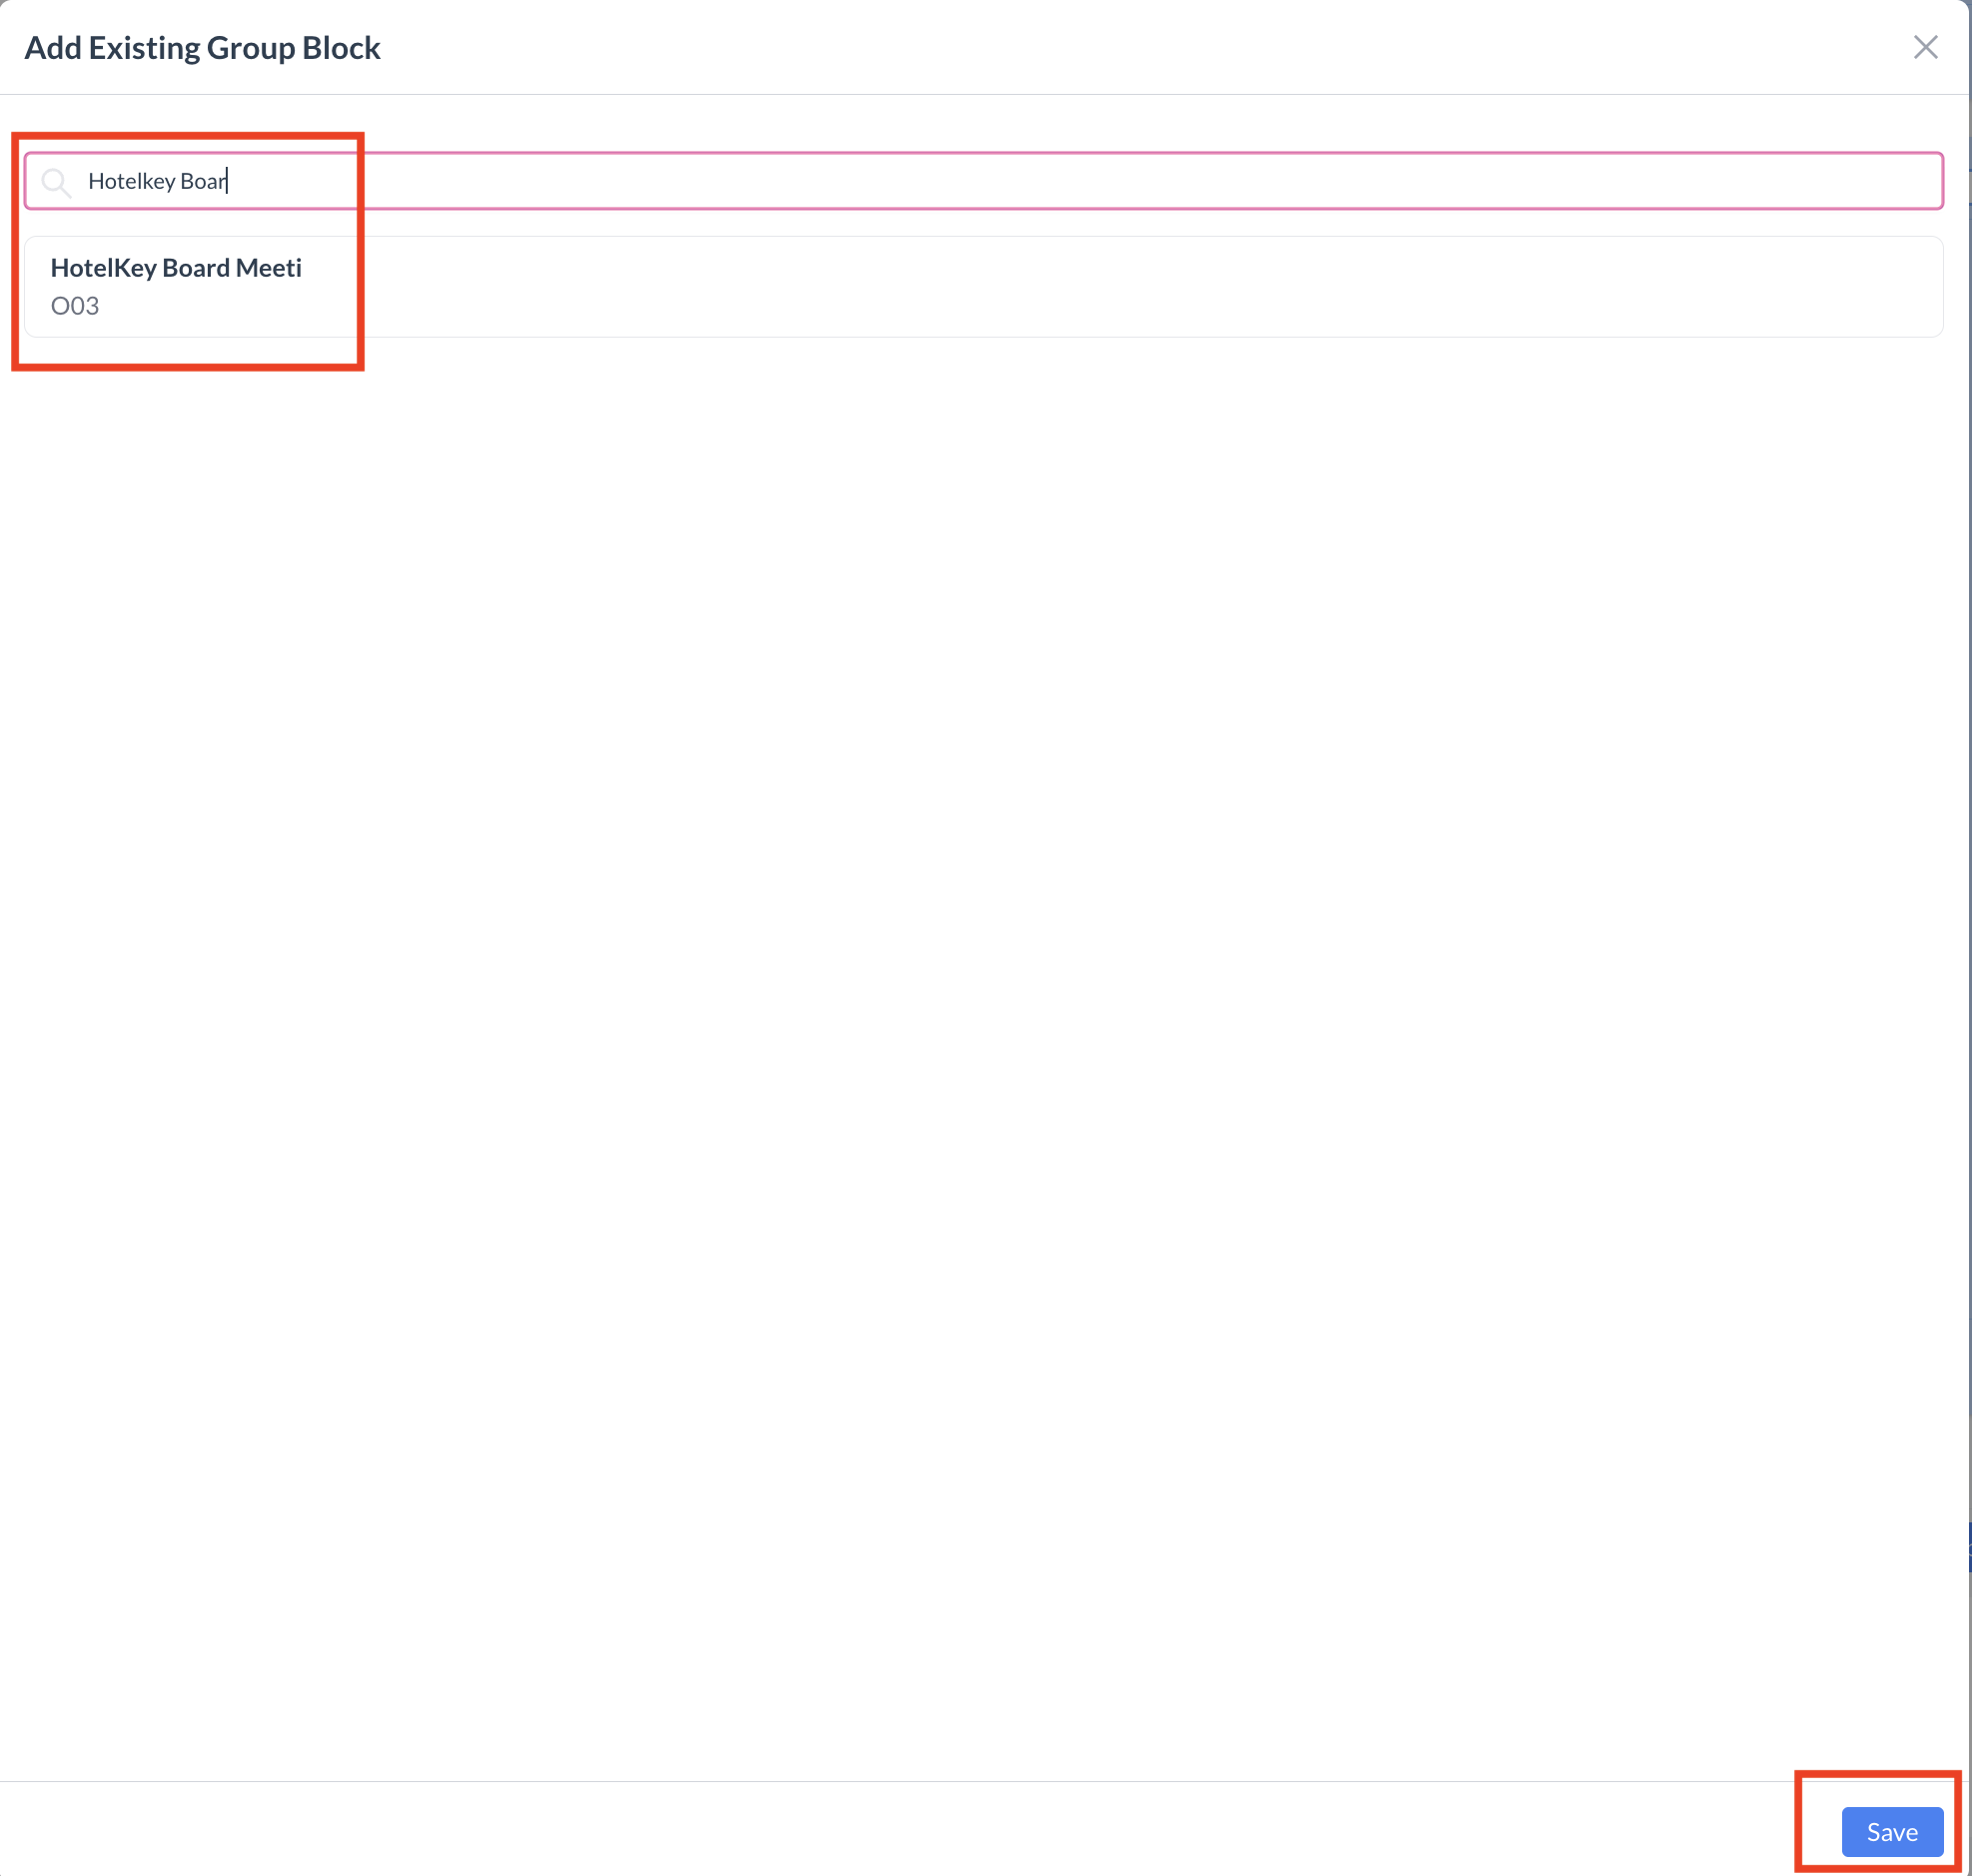
Attaching an Existing PMS Group Block

If a group block already exists in the Property Management System (PMS) but is not yet linked to the event:

  1. Scroll to the Group Blocks section within the Event Record (Reservation).

  2. Click the blue “Attach Existing Group Block” button.

  3. Use the search tool to locate the group block from the PMS.

  4. Select the appropriate block to link it to the event.

Note: This action connects the PMS group block to the Event Record, allowing you to manage allocations and pricing directly within EventKey.

Add Existing Group Block Button.png

Group Block Section - Add Existing Block Button

Selecting an Existing Group Block saave.png

Group Block Section - Add Existing Block Search

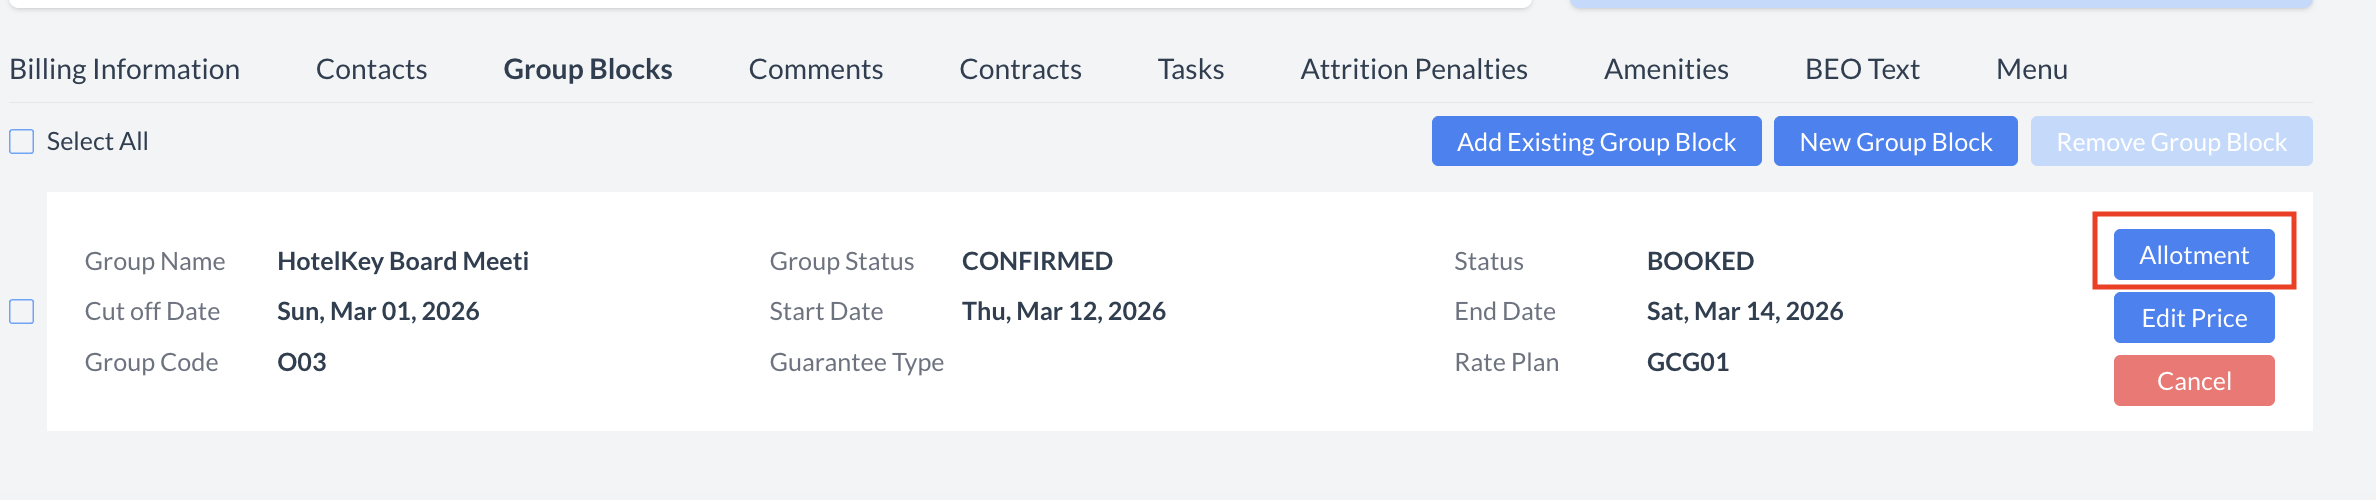
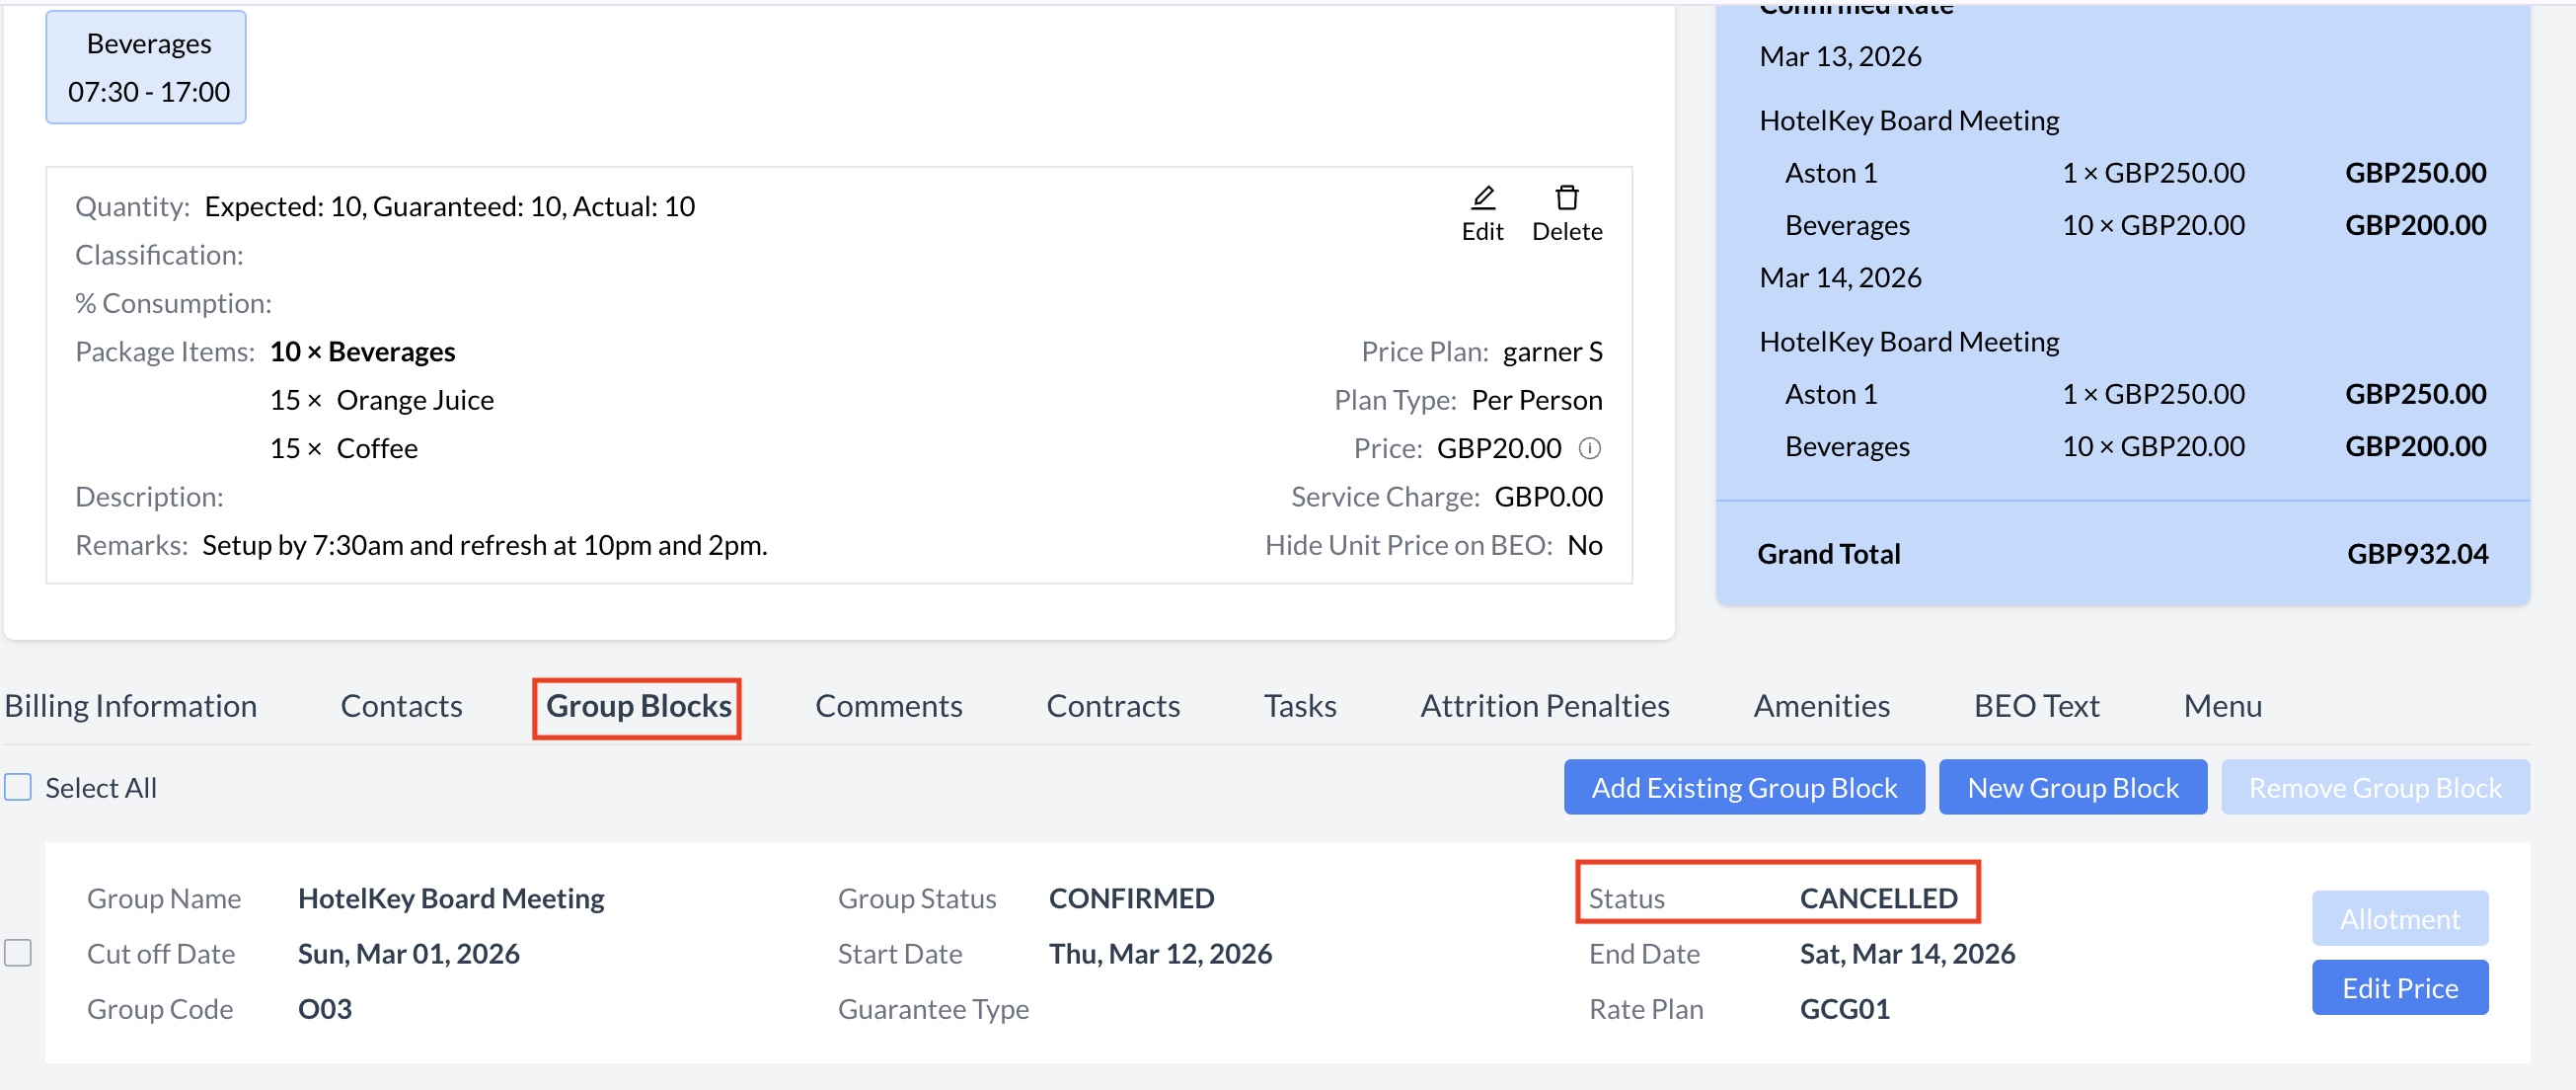
Managing Group Block Allotments and Pricing

Once a Group Block is attached to the Event Record (Reservation), you can view and manage room allotments and pricing directly within EventKey—without navigating to the PMS.

⚠️ Important: The PMS remains the system of record for all group block data. While EventKey allows for convenient updates, full management and control of the block still resides in the PMS.

To View or Edit Allotments:

  1. In the Group Blocks section of the Event Record,

  2. Click the blue “Allotment” button to open the current room allocation details.

Manage Group Block Blue Allotment .png

Group Block Section - Manage Allotments

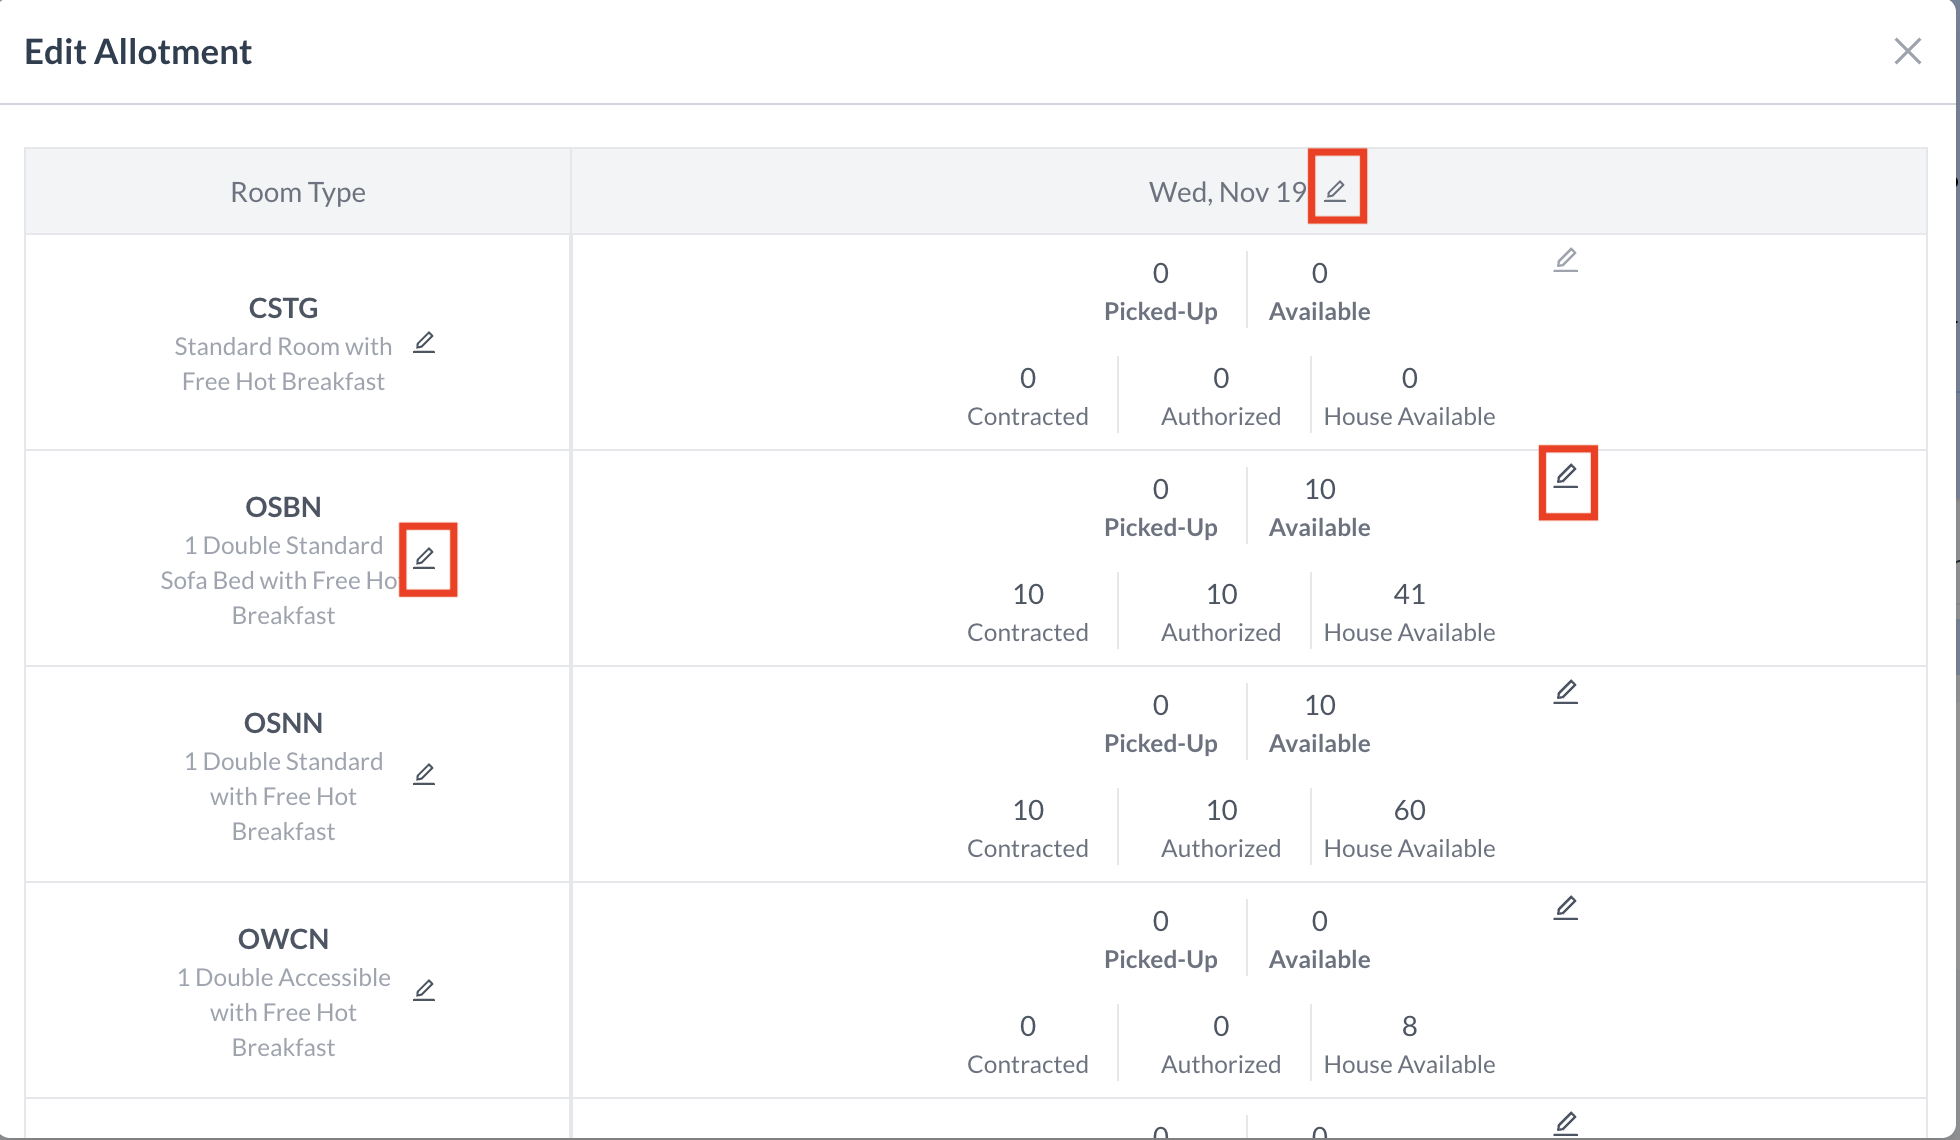
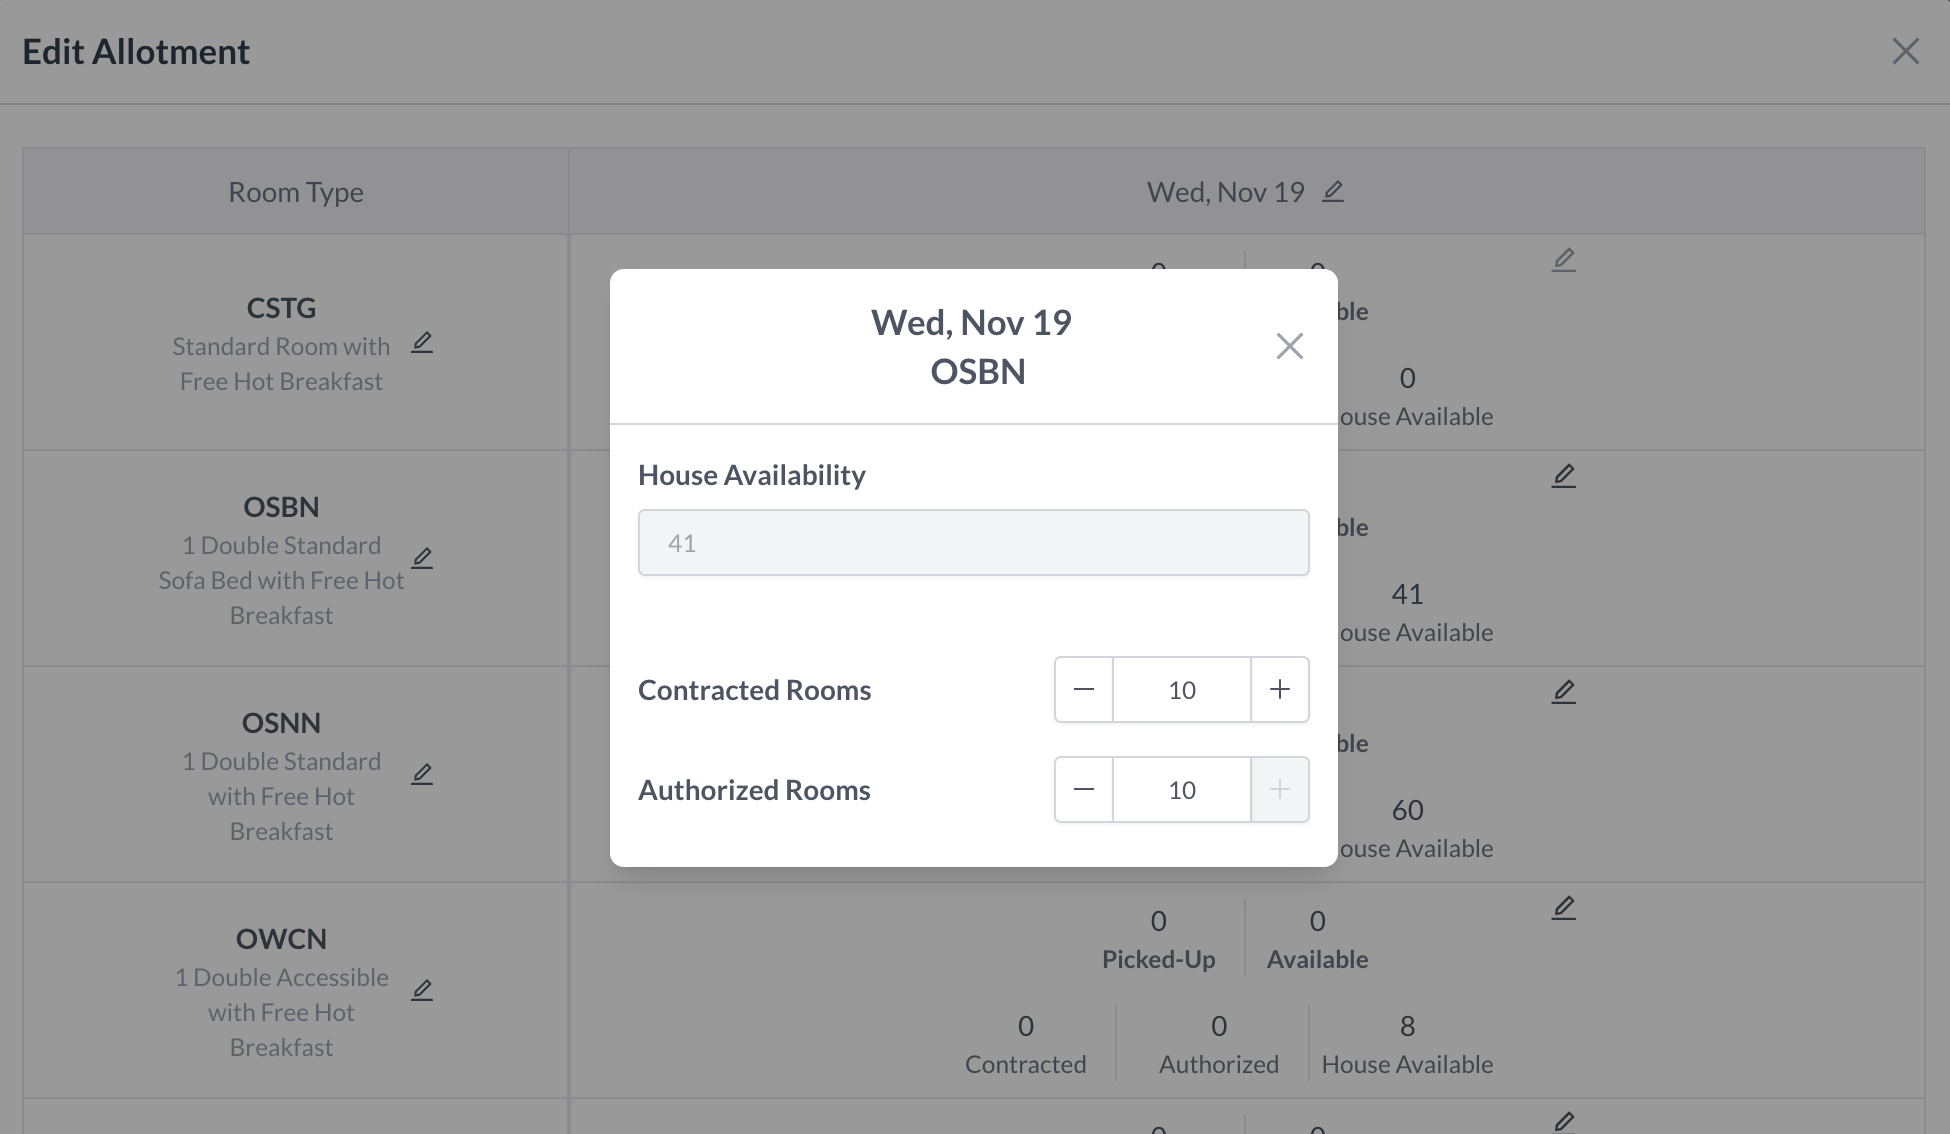
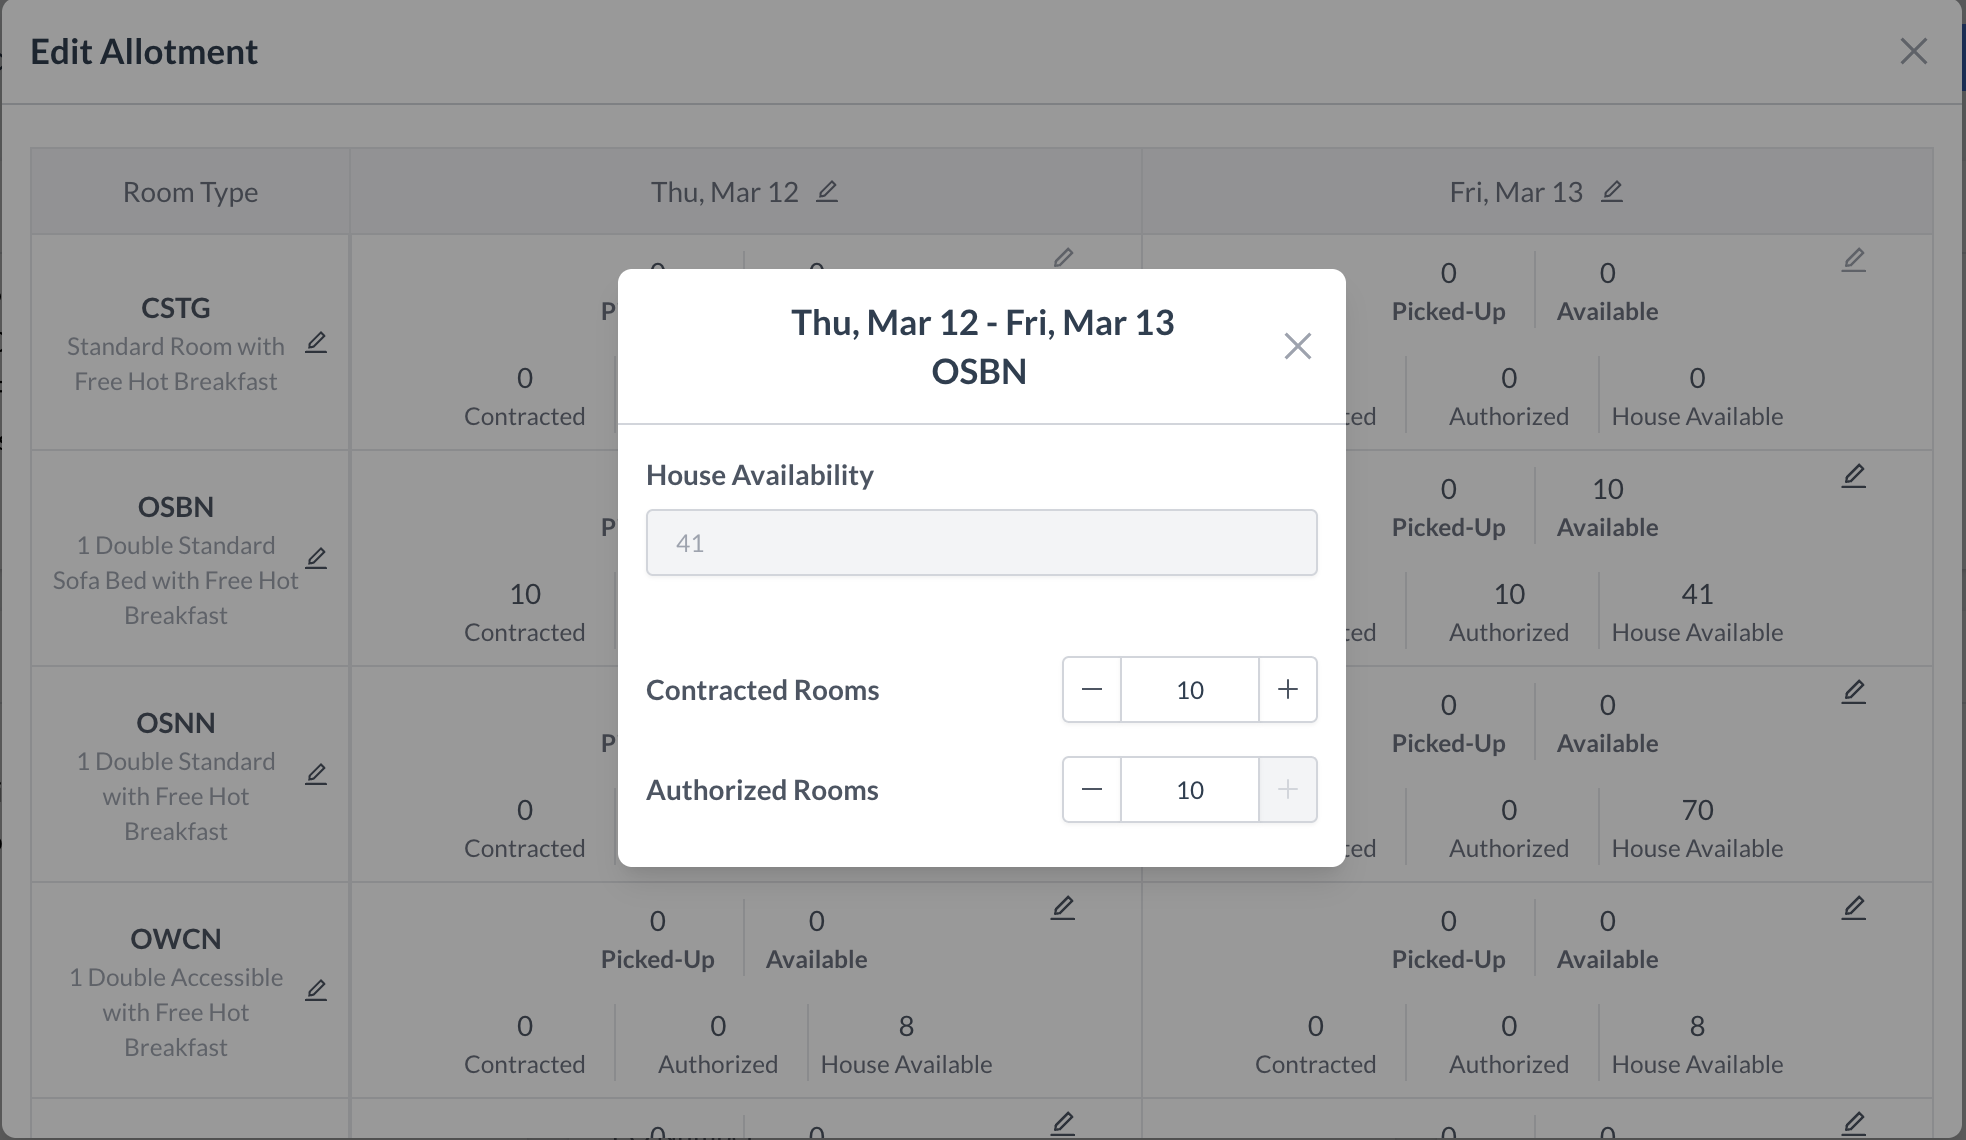
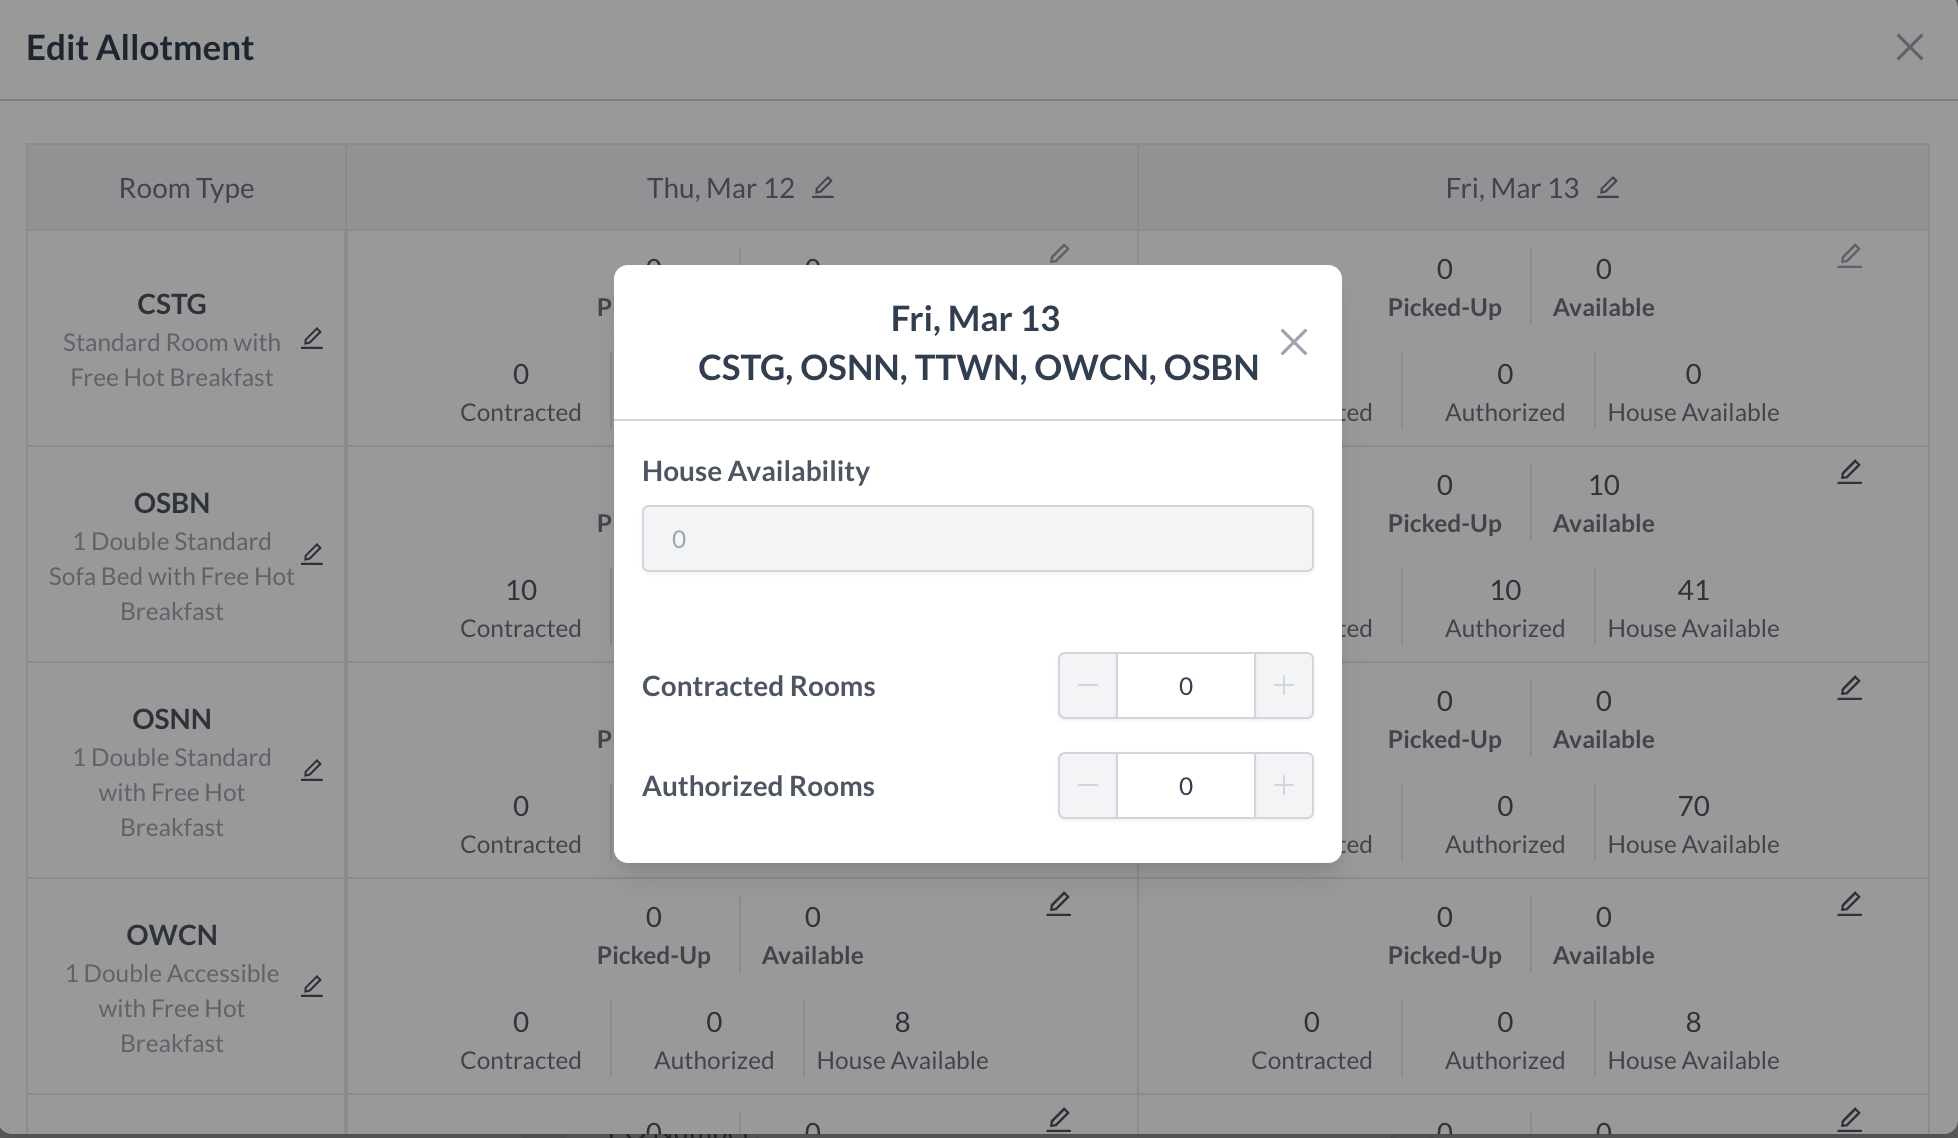
🛏️ Editing Group Block Allotments

After clicking the “Allotment” button, the Edit Allotment screen will open, allowing you to update room allocations for the group block.

🔧 Allocation Editing Options

You have three flexible ways to modify room allotments based on your needs:

1. Edit a Single Day for a Specific Room Type

  • Click the pencil icon under the date column for the desired room type.

  • The Allocation screen will open, allowing you to update the following for that day and room type:

    • Contracted Rooms

    • Authorized Rooms

2. Edit All Dates for a Specific Room Type

  • Click the pencil icon next to the room type name.

  • This opens the Allocation screen for that room type across all dates.

  • Any changes made will apply to every day for the selected room type.

3. Edit All Room Types for a Specific Date

  • Click the pencil icon next to the date.

  • This opens the Allocation screen for all room types on that specific day.

  • Any changes will apply to every room type for the selected date only.


💾 Saving Your Changes

  • As you adjust Contracted or Authorized Room values, the system will automatically save your updates.

  • To exit the Allocation screen, simply click the "X" in the top-right corner.

⚠️ Important Note: Allotment edits made in EventKey reflect in real time in the PMS

Edit Allocations

Edit Allocation - Individual Day & Room Type

Edit Allocation - All Dates for a Room Type

Edit Allocations - All Room Types for a Single Date

To View or Edit Pricing:

  1. In the Group Blocks section of the Event Record,

  2. Click the blue “Edit Price” button to open the current room pricing details.

groups edit pirce button.png

Group Block Section - Edit Price Button

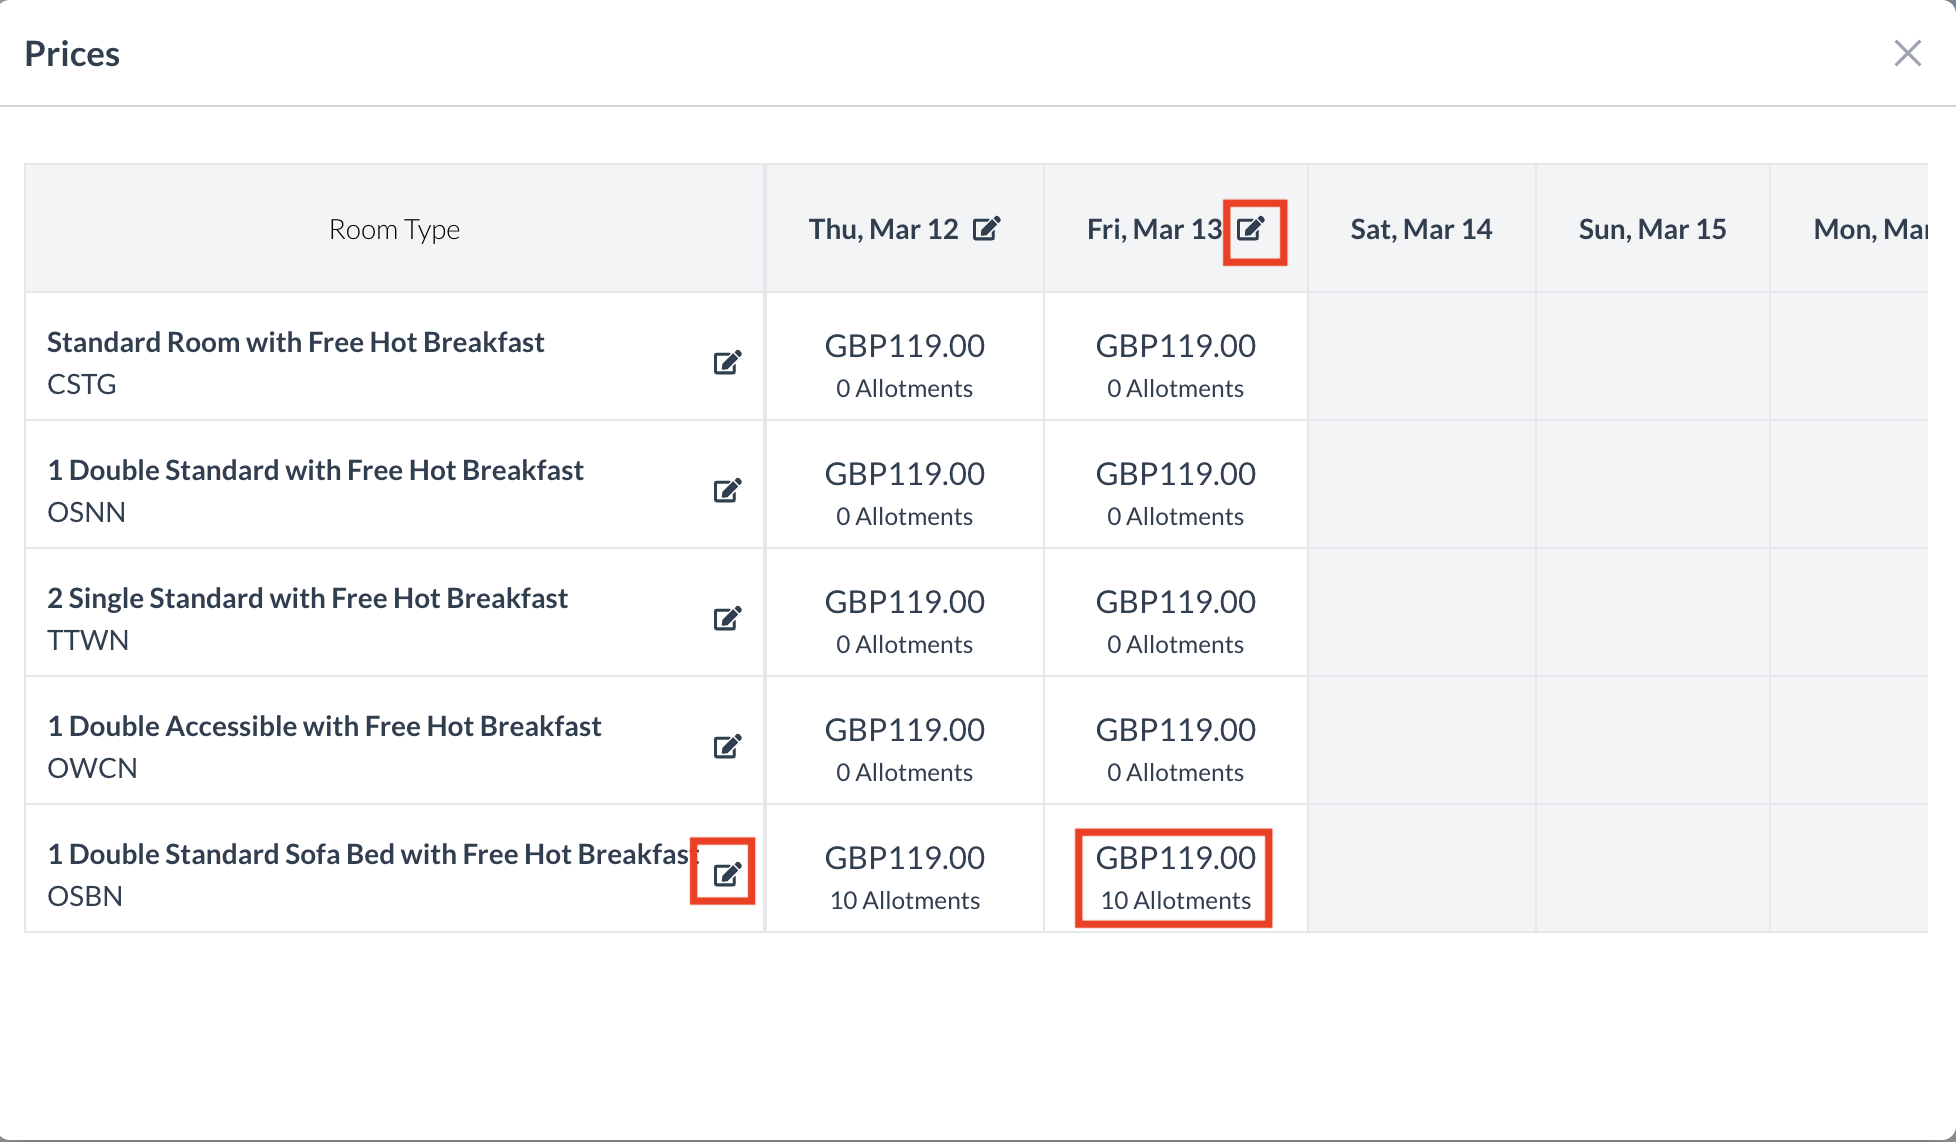
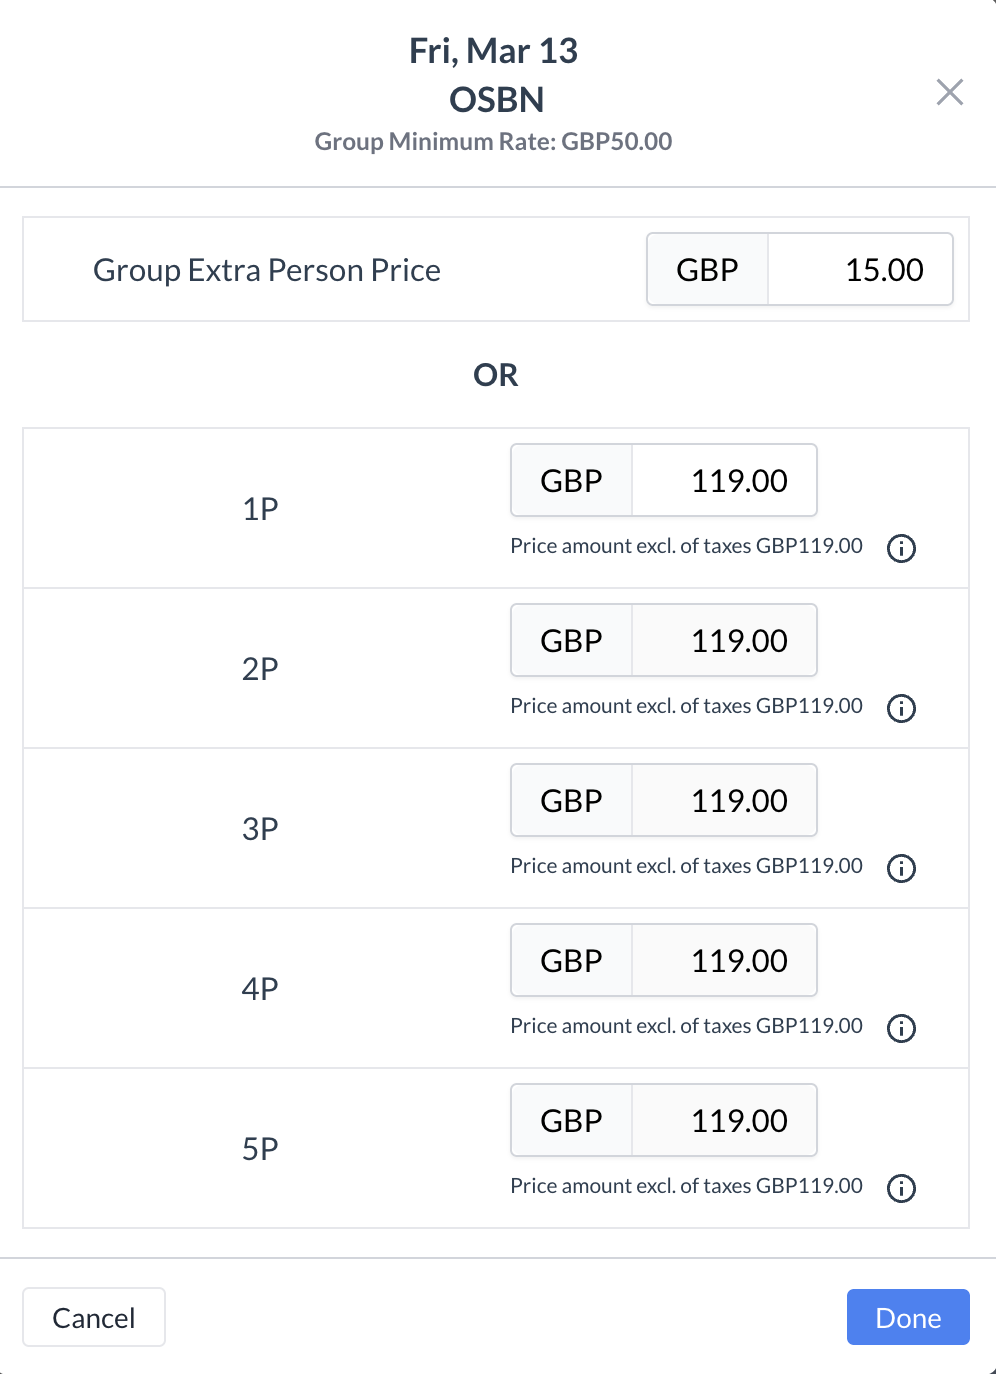
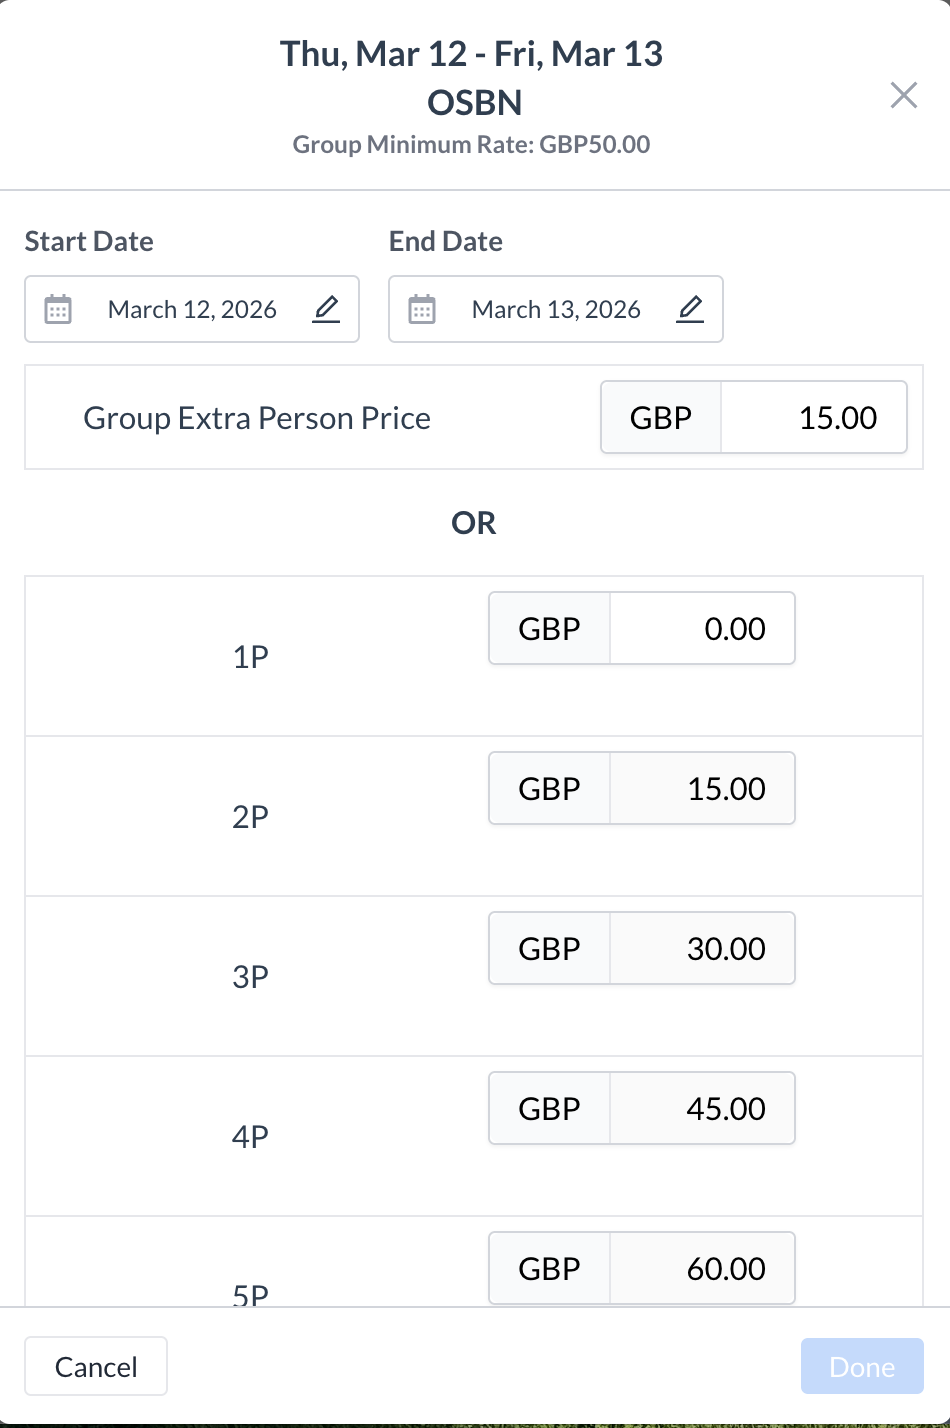
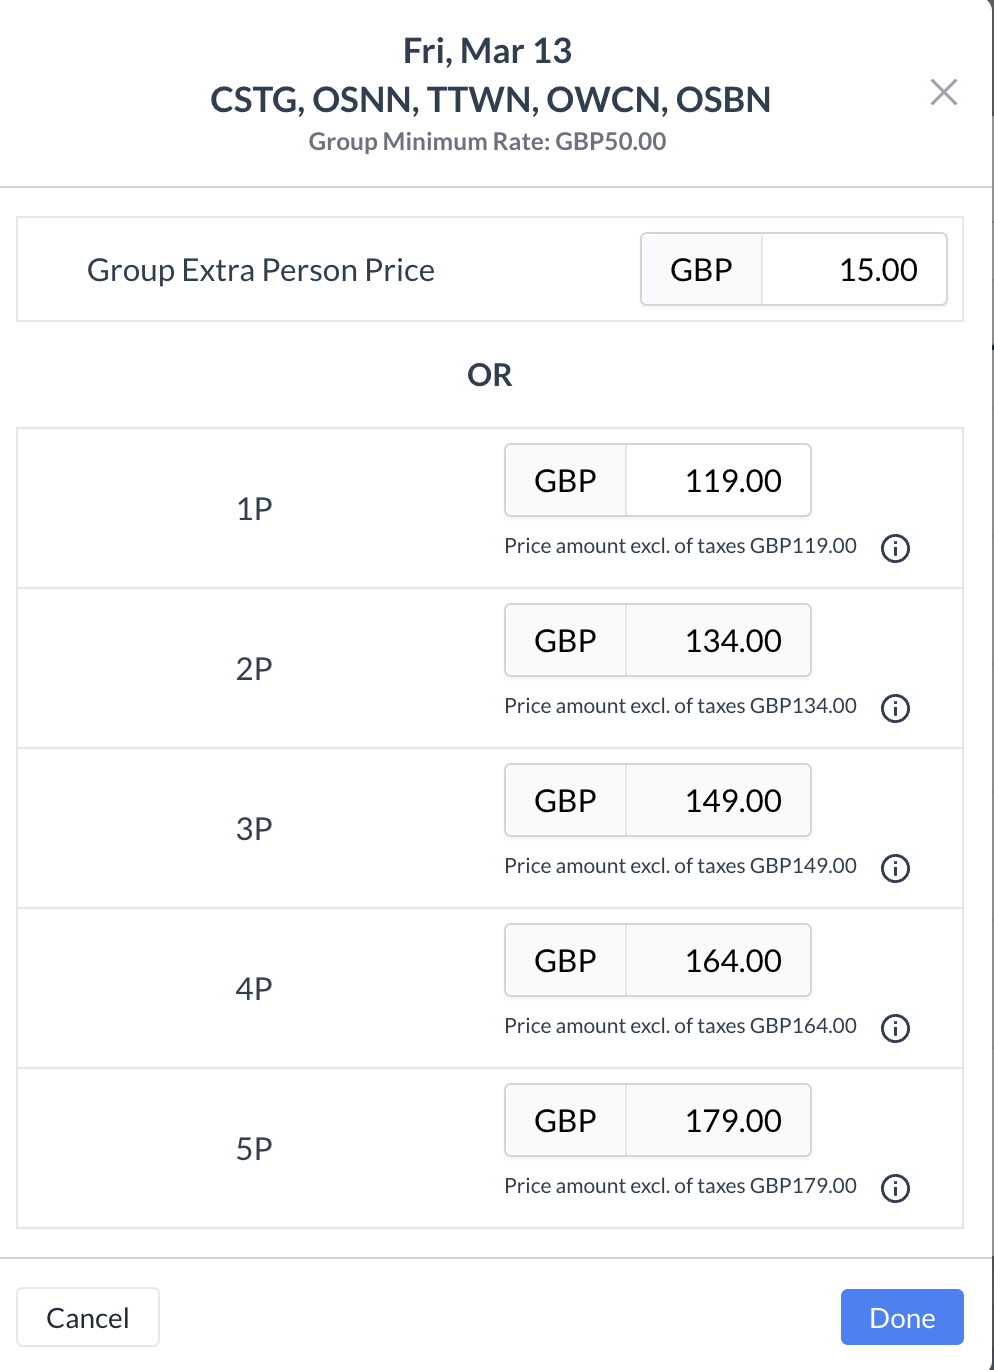
💲 Editing Room Type Pricing

After clicking the “Edit Price” button, the Prices screen will open, allowing you to update room prices for the group block.

🔧 Editing Options

You have three ways to update pricing:

1. Edit an Individual Day & Room Type

  • Click directly on the rate amount for a specific day and room type.

  • This will open the Update Pricing screen where you can adjust the rate for that specific day and room type only.

2. Edit All Dates for a Room Type

  • Click the pencil icon next to the room type name.

  • This opens the Update Pricing screen.

  • Any changes made here will apply to all dates for that room type.

3. Edit All Room Types for a Single Date

  • Click the pencil icon next to the date.

  • This opens the Update Pricing screen.

  • Changes made here will apply to all room types for the selected date only.

✅ Final Step

After reviewing and making any necessary changes, click the blue “Done” button to save the pricing changes.
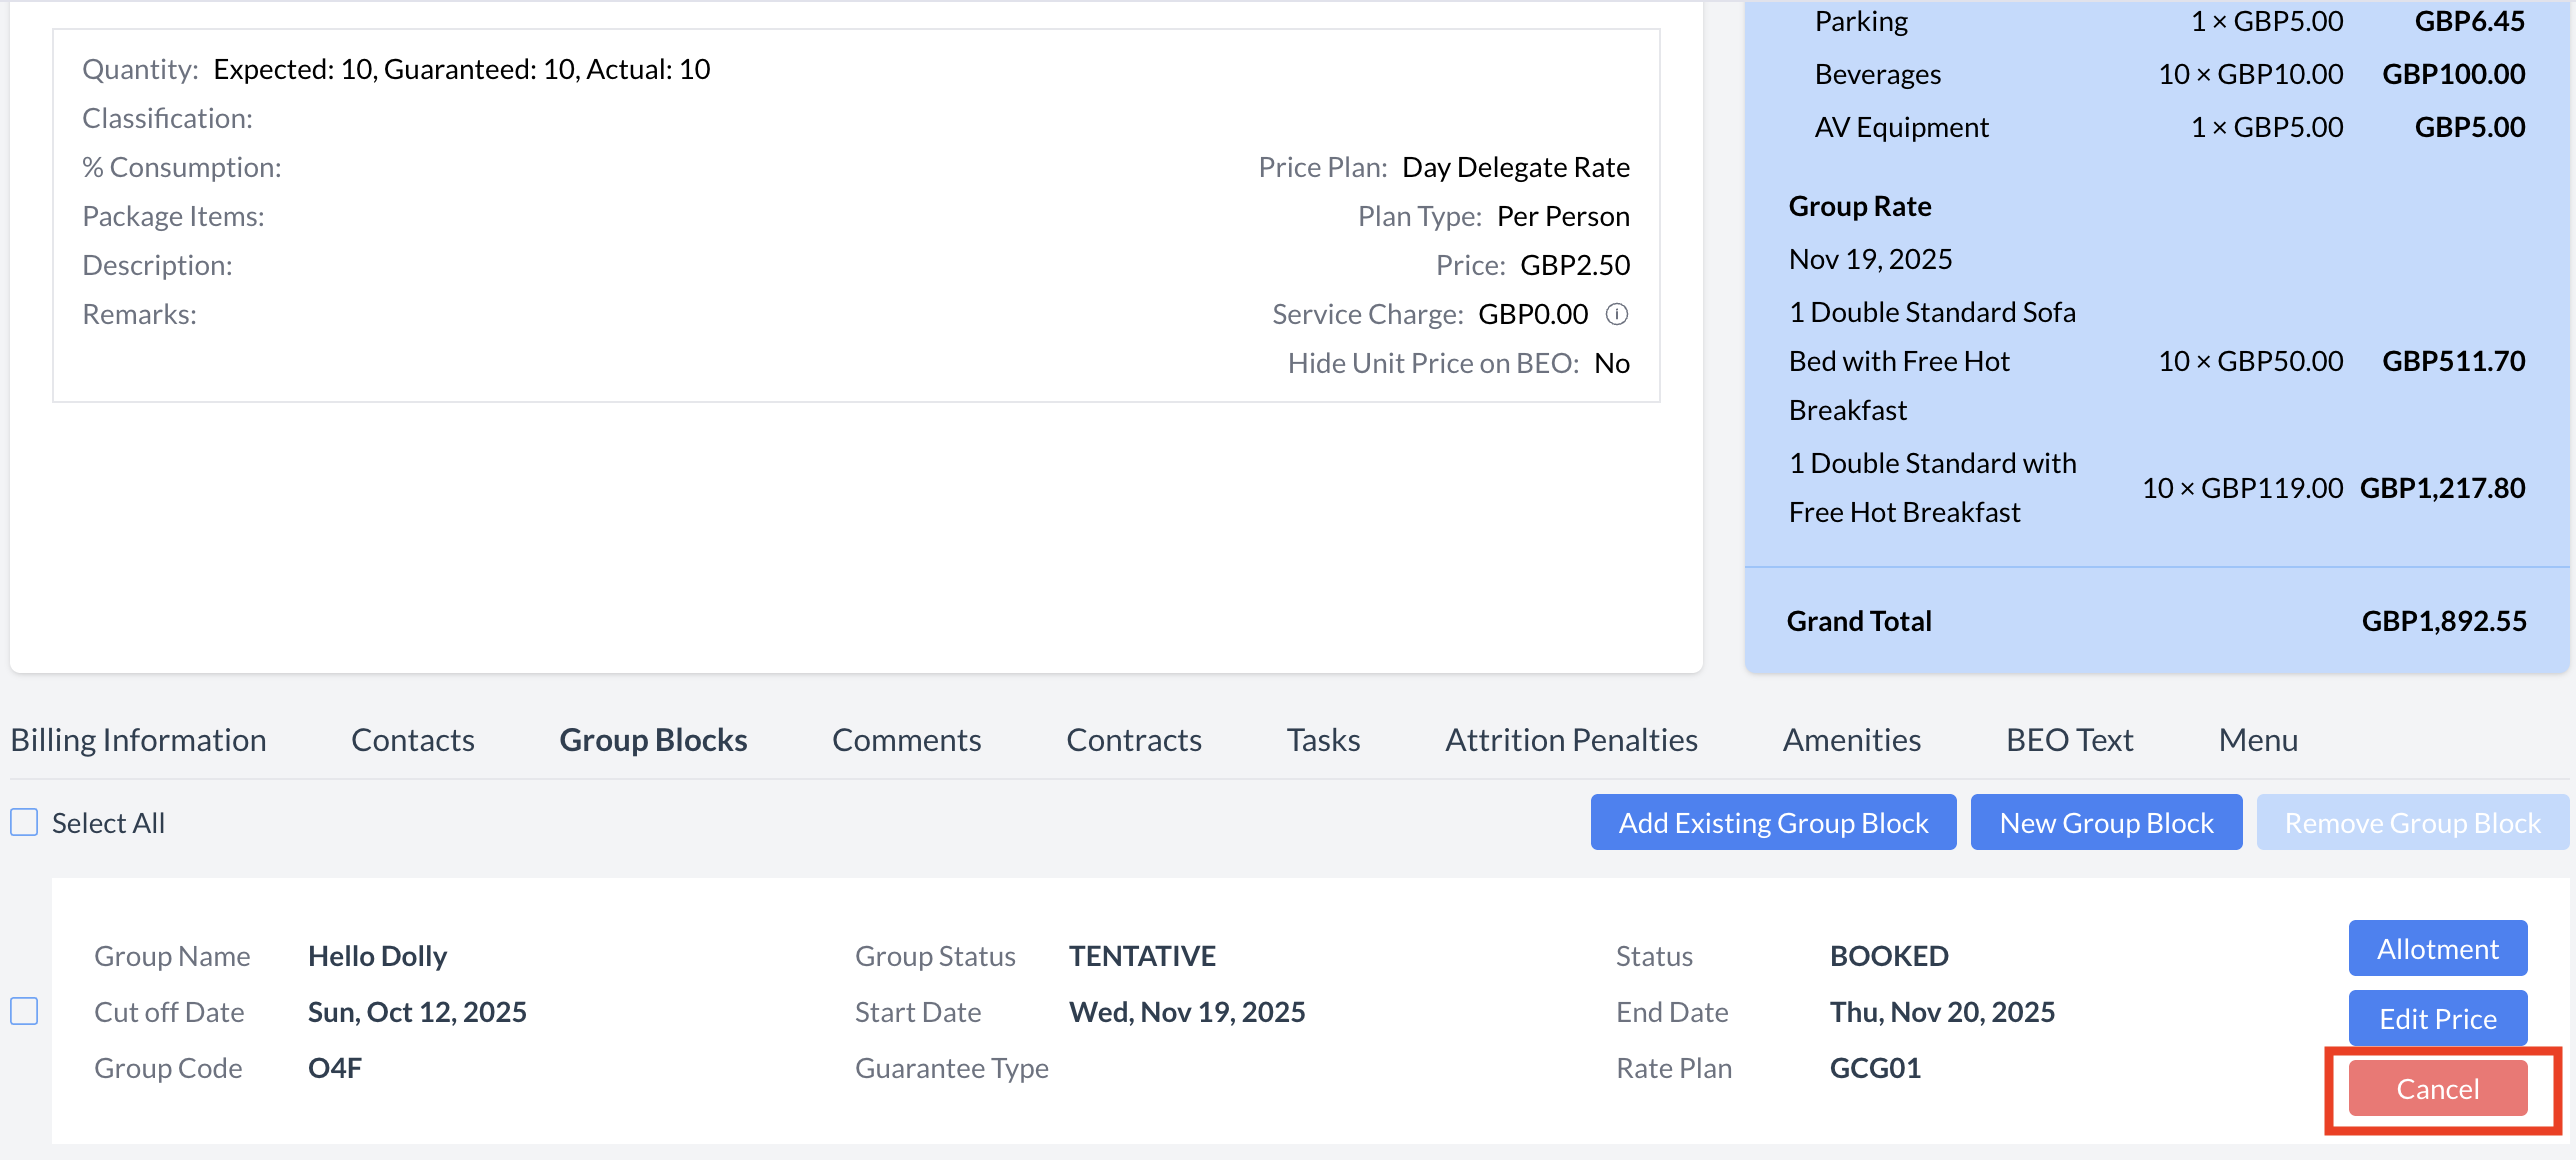
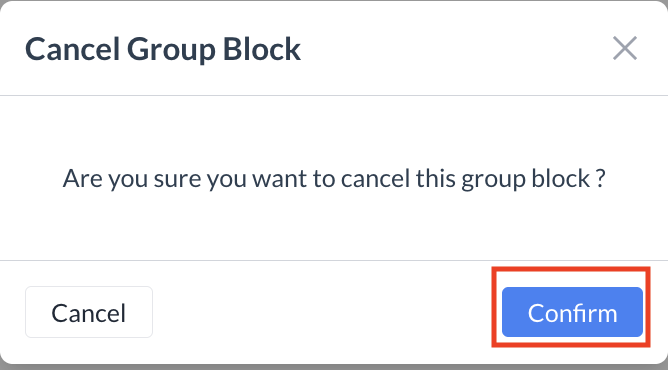
Edit Pricing

Edit Pricing - Individual Day & Specific Room Type

Edit Pricing - All Dates for a Room Type

Edit Pricing - All Room Types for a Single Day

Cancelling a Group Block

If the group block is no longer needed, you can cancel it directly from the Group Blocks section of the Event Record.

Steps to Cancel:

  1. In the Group Blocks section, click the red “Cancel” button next to the block you wish to cancel.

  2. The Cancel Group Block confirmation screen will appear.

  3. Click the blue “Confirm” button to proceed with the cancellation.

Result:
The group block will remain visible in the Event Record, but its status will update to “Cancelled.”

Group Block - Canceling the Block

group block cancel confirm.png

Group Block - Confirm Cancel Button

Group Block - Cancelled Status

JavaScript errors detected

Please note, these errors can depend on your browser setup.

If this problem persists, please contact our support.