Skip table of contents

Manage Started Events

📆 Revision Date:

Started Status

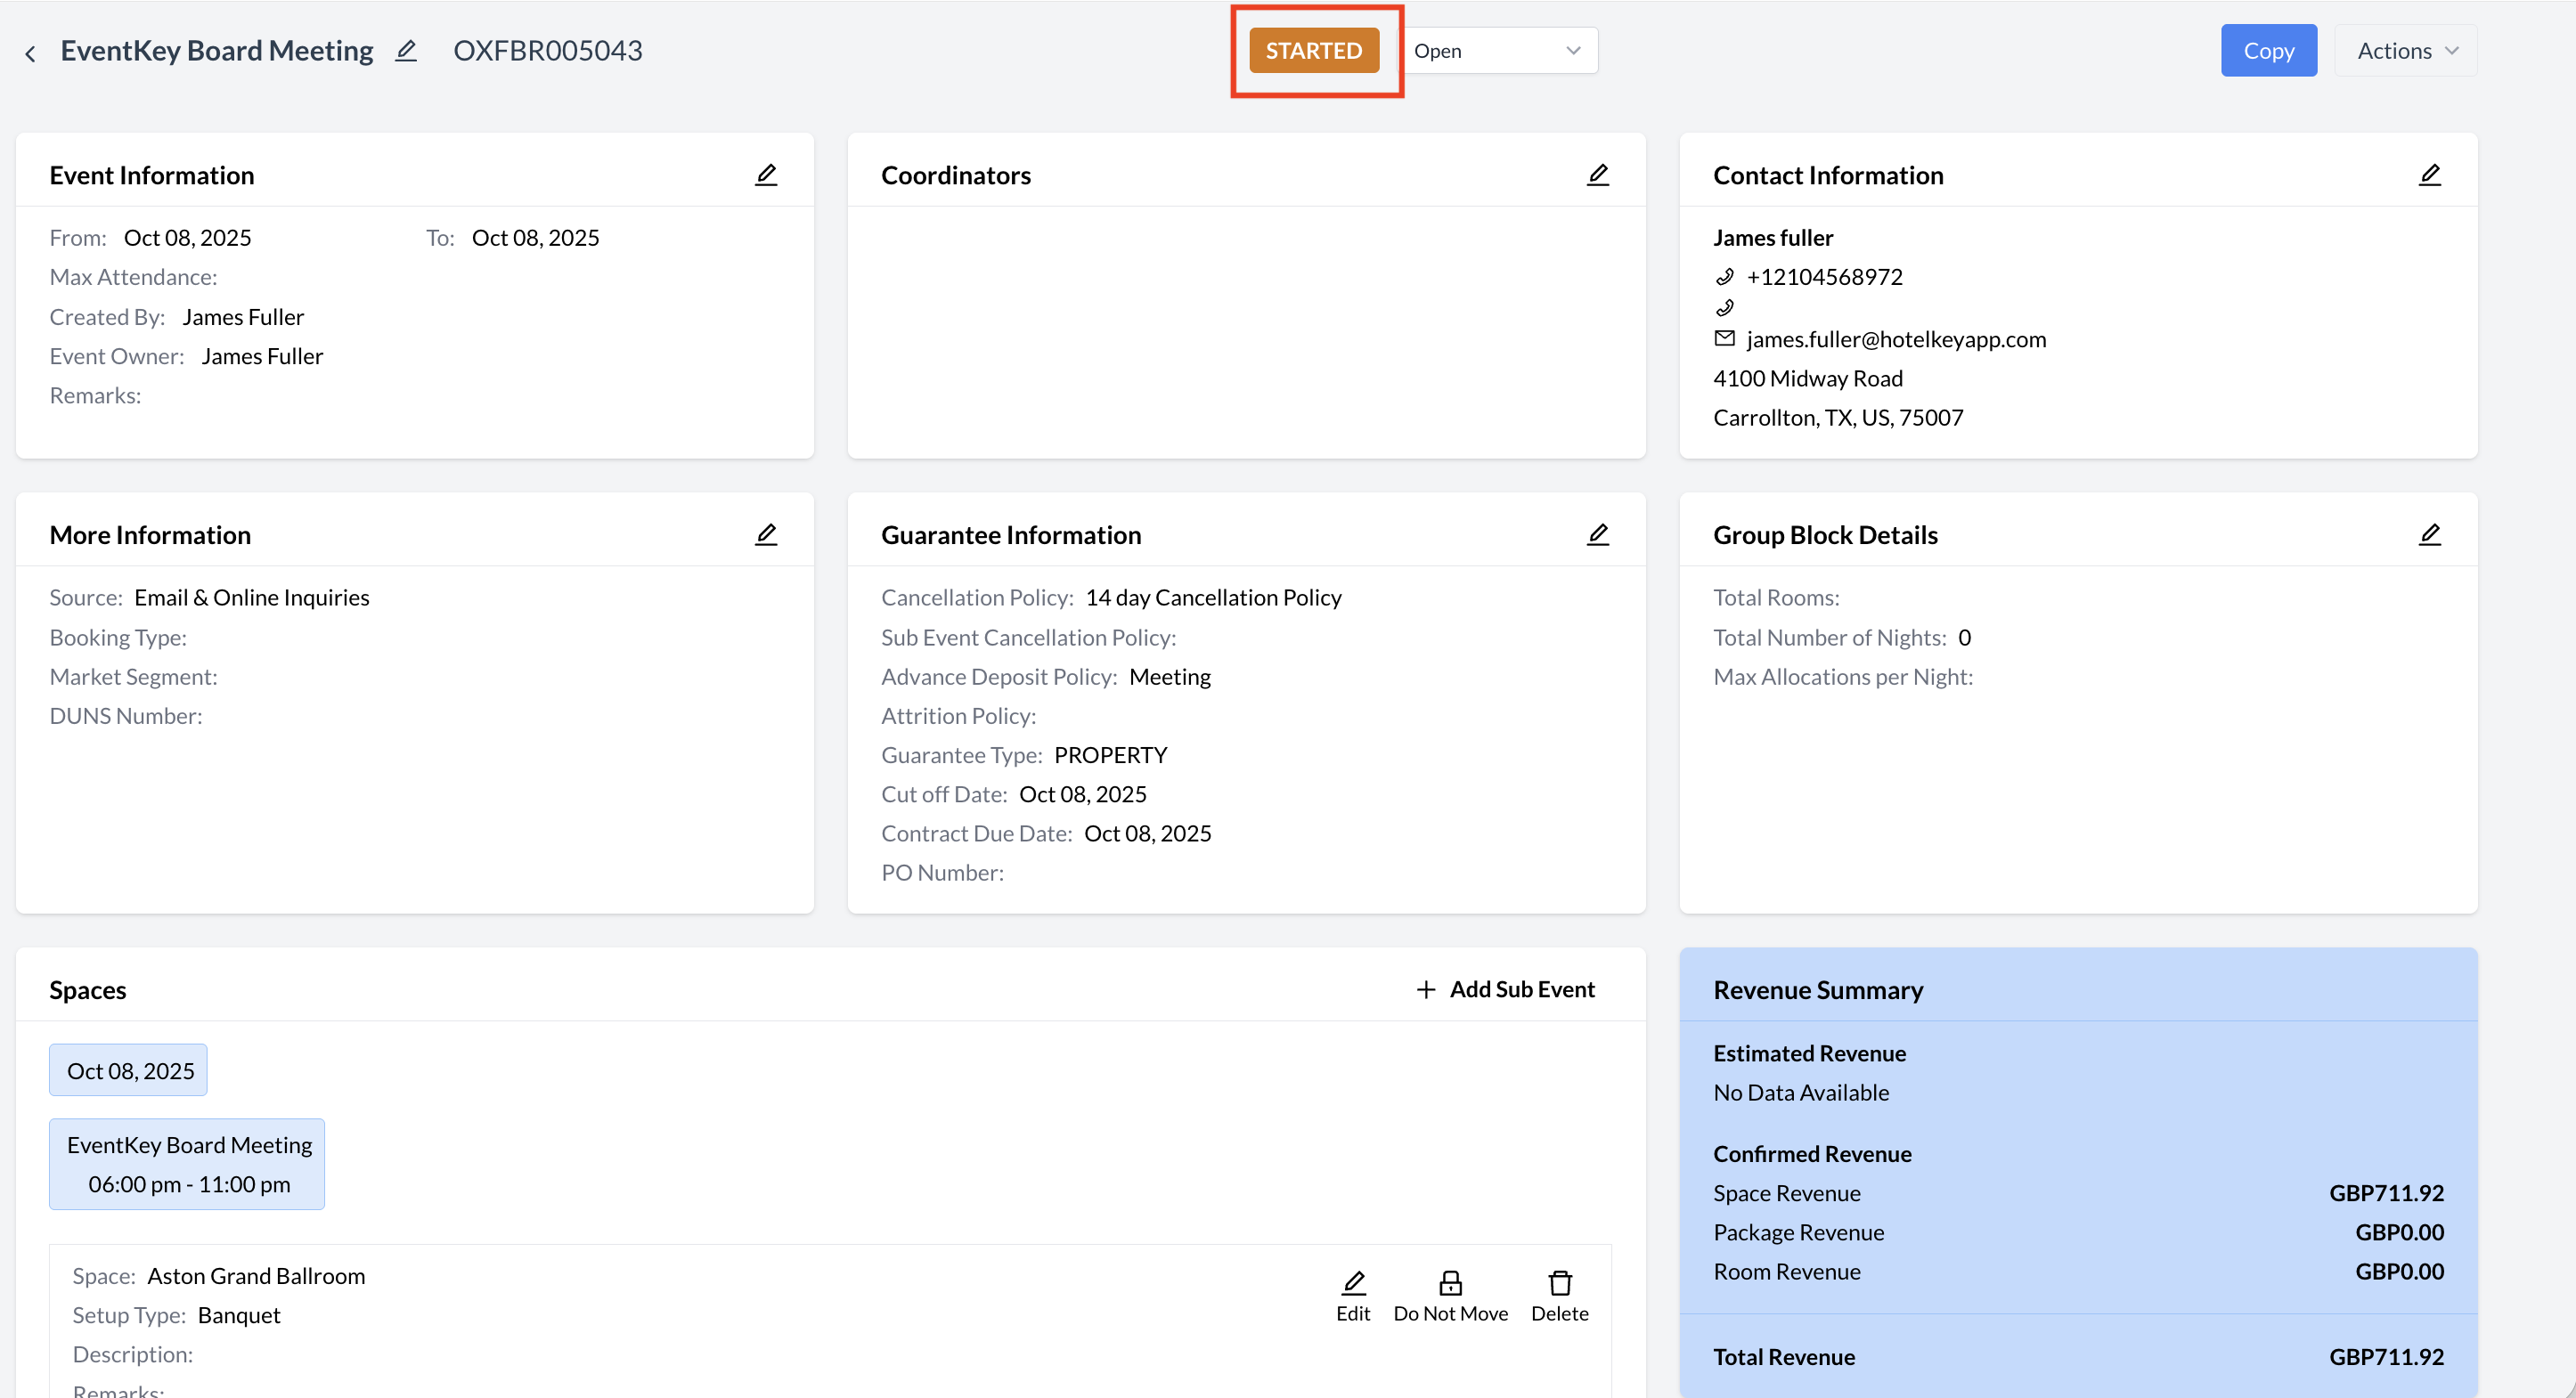
The Started status indicates that the event is actively taking place.
It serves as a trigger for operational teams—such as Banquets, AV, and Catering—to begin executing services based on the finalized event details.

⚠️ IMPORTANT NOTE:
If an event is in Confirmed status, it will automatically move to Started status on the first day of the event. At that time, all first-day event charges will be automatically posted to the Event Folio.

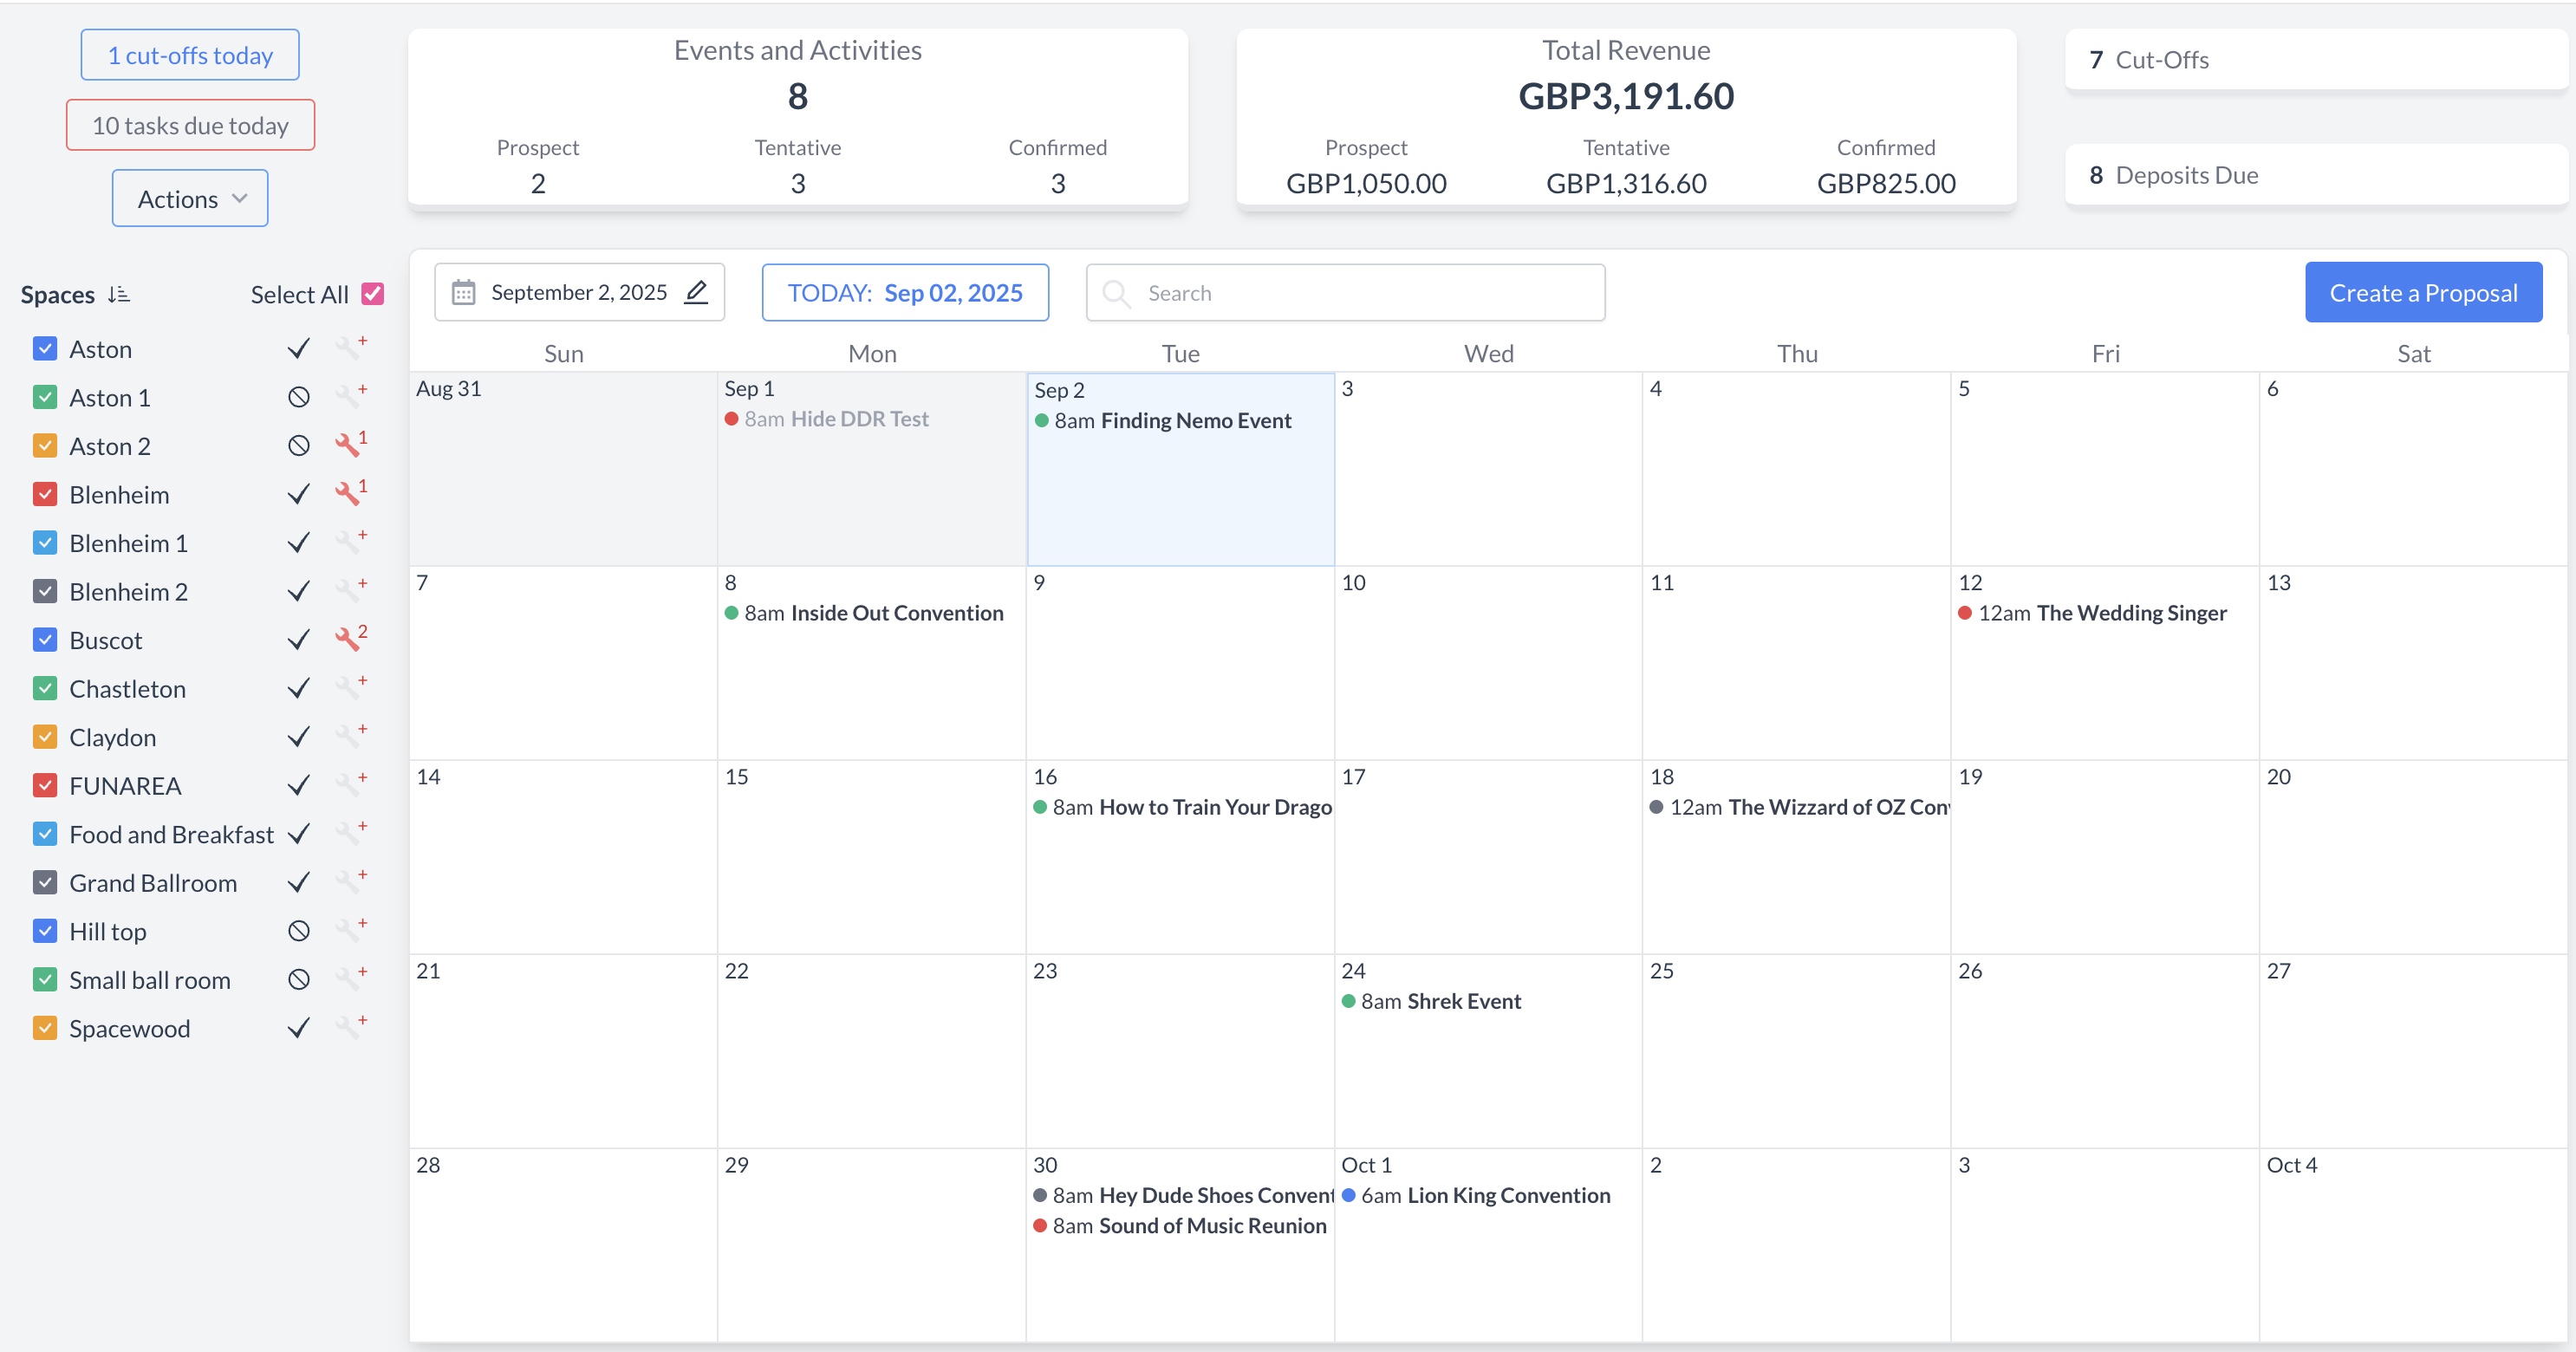
Navigate to Home > Event Management

EventKey Dashboard (Home Screen)

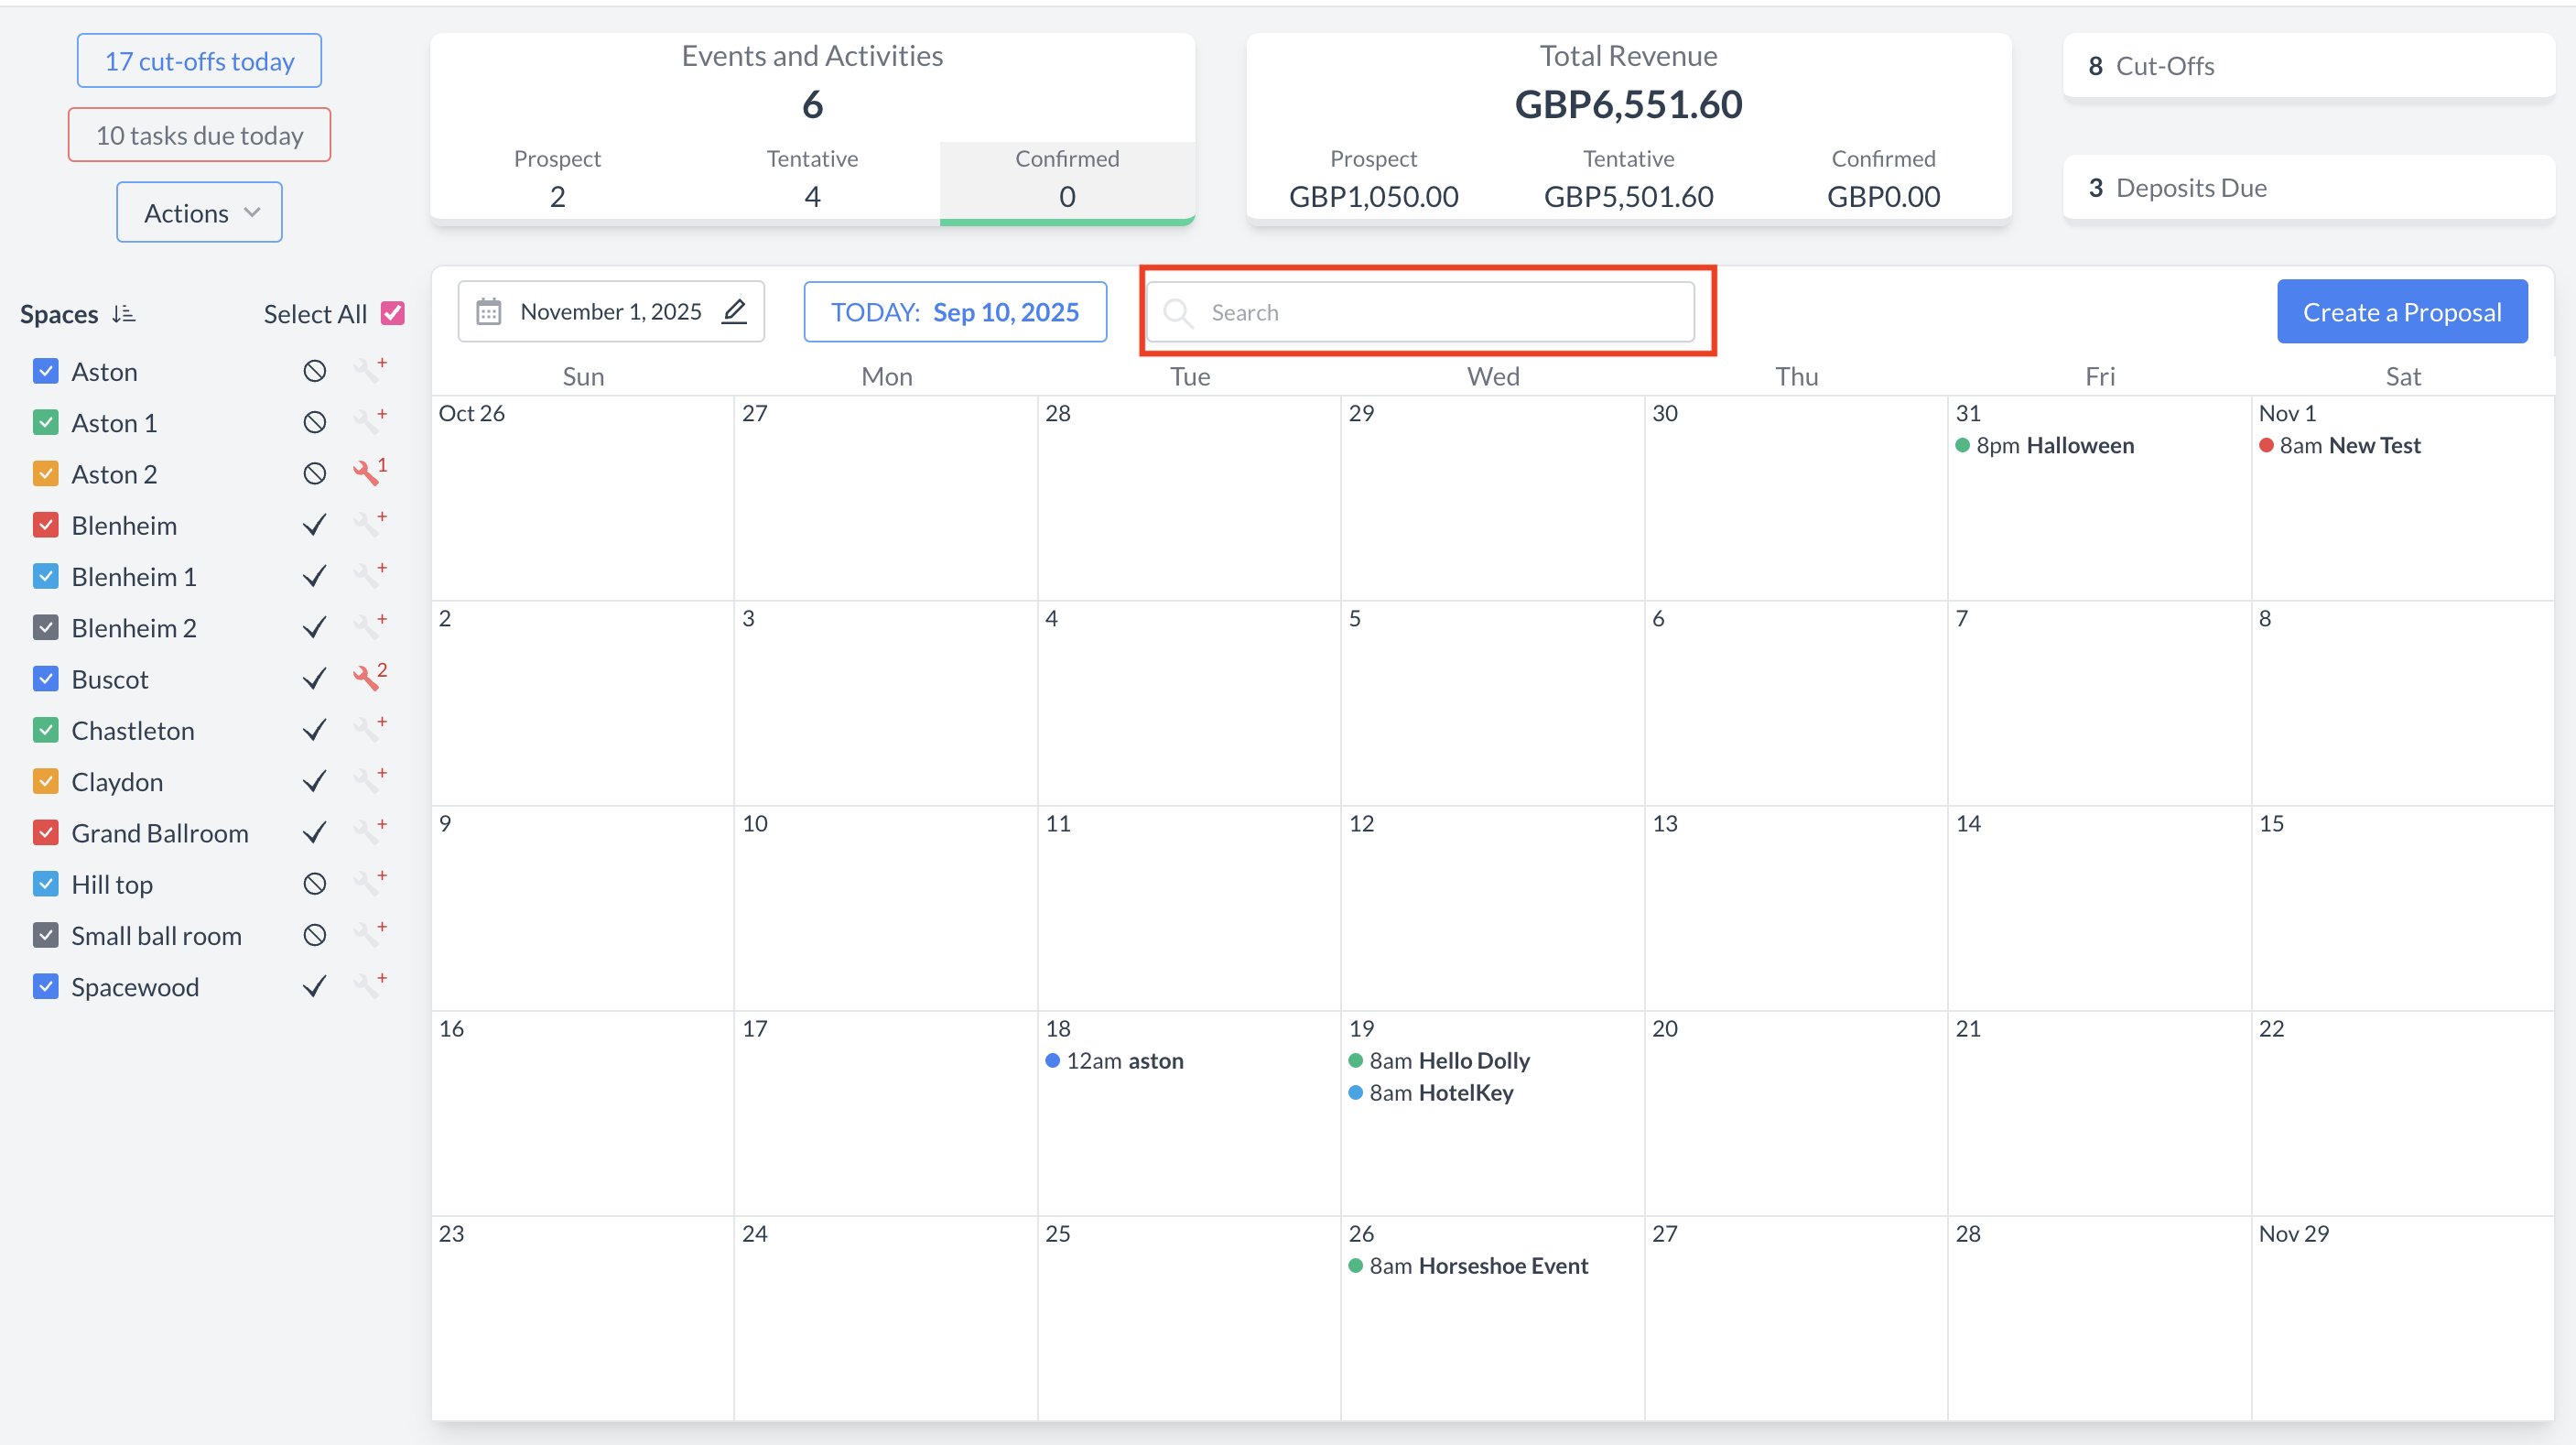
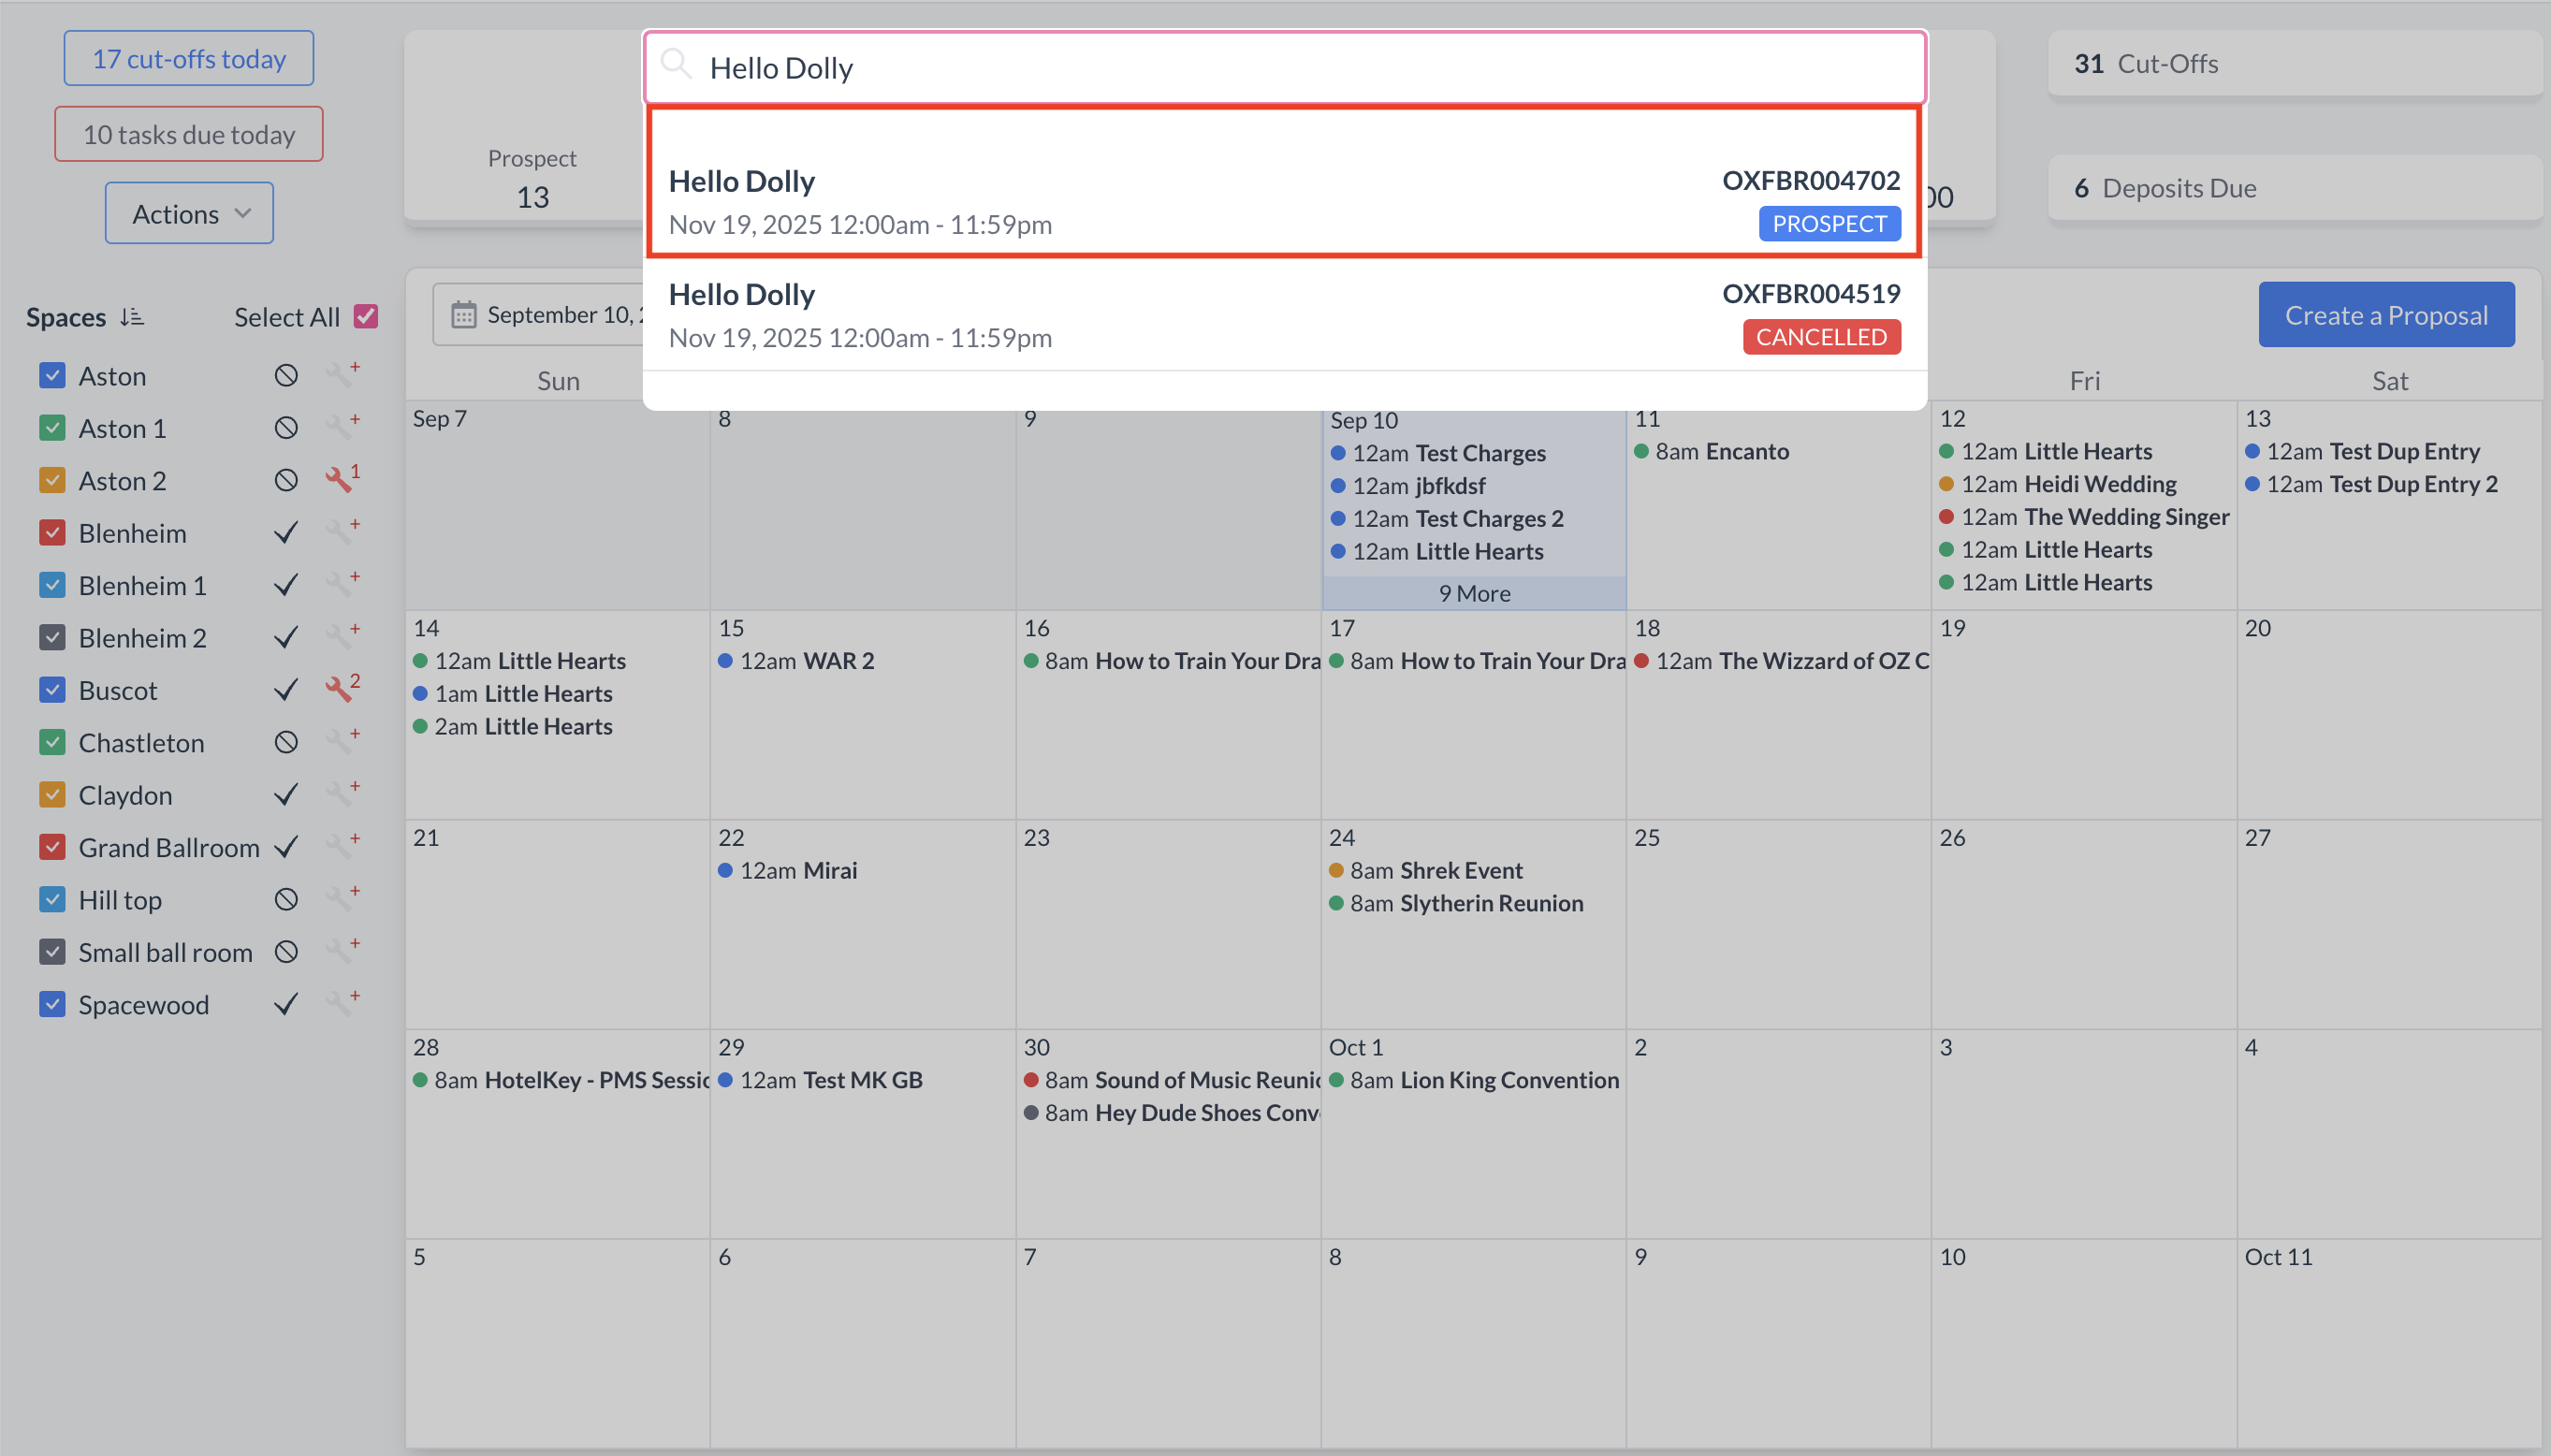
To begin, navigate to the Dashboard and use the Search box to locate the event.

Enter the full or partial Event Name into the search field. The system will display a list of matching events, or, if there is an exact match, it will appear directly.

Once you’ve identified the correct event, simply click on the event name to open it.

Event Search Field

Event Search Results

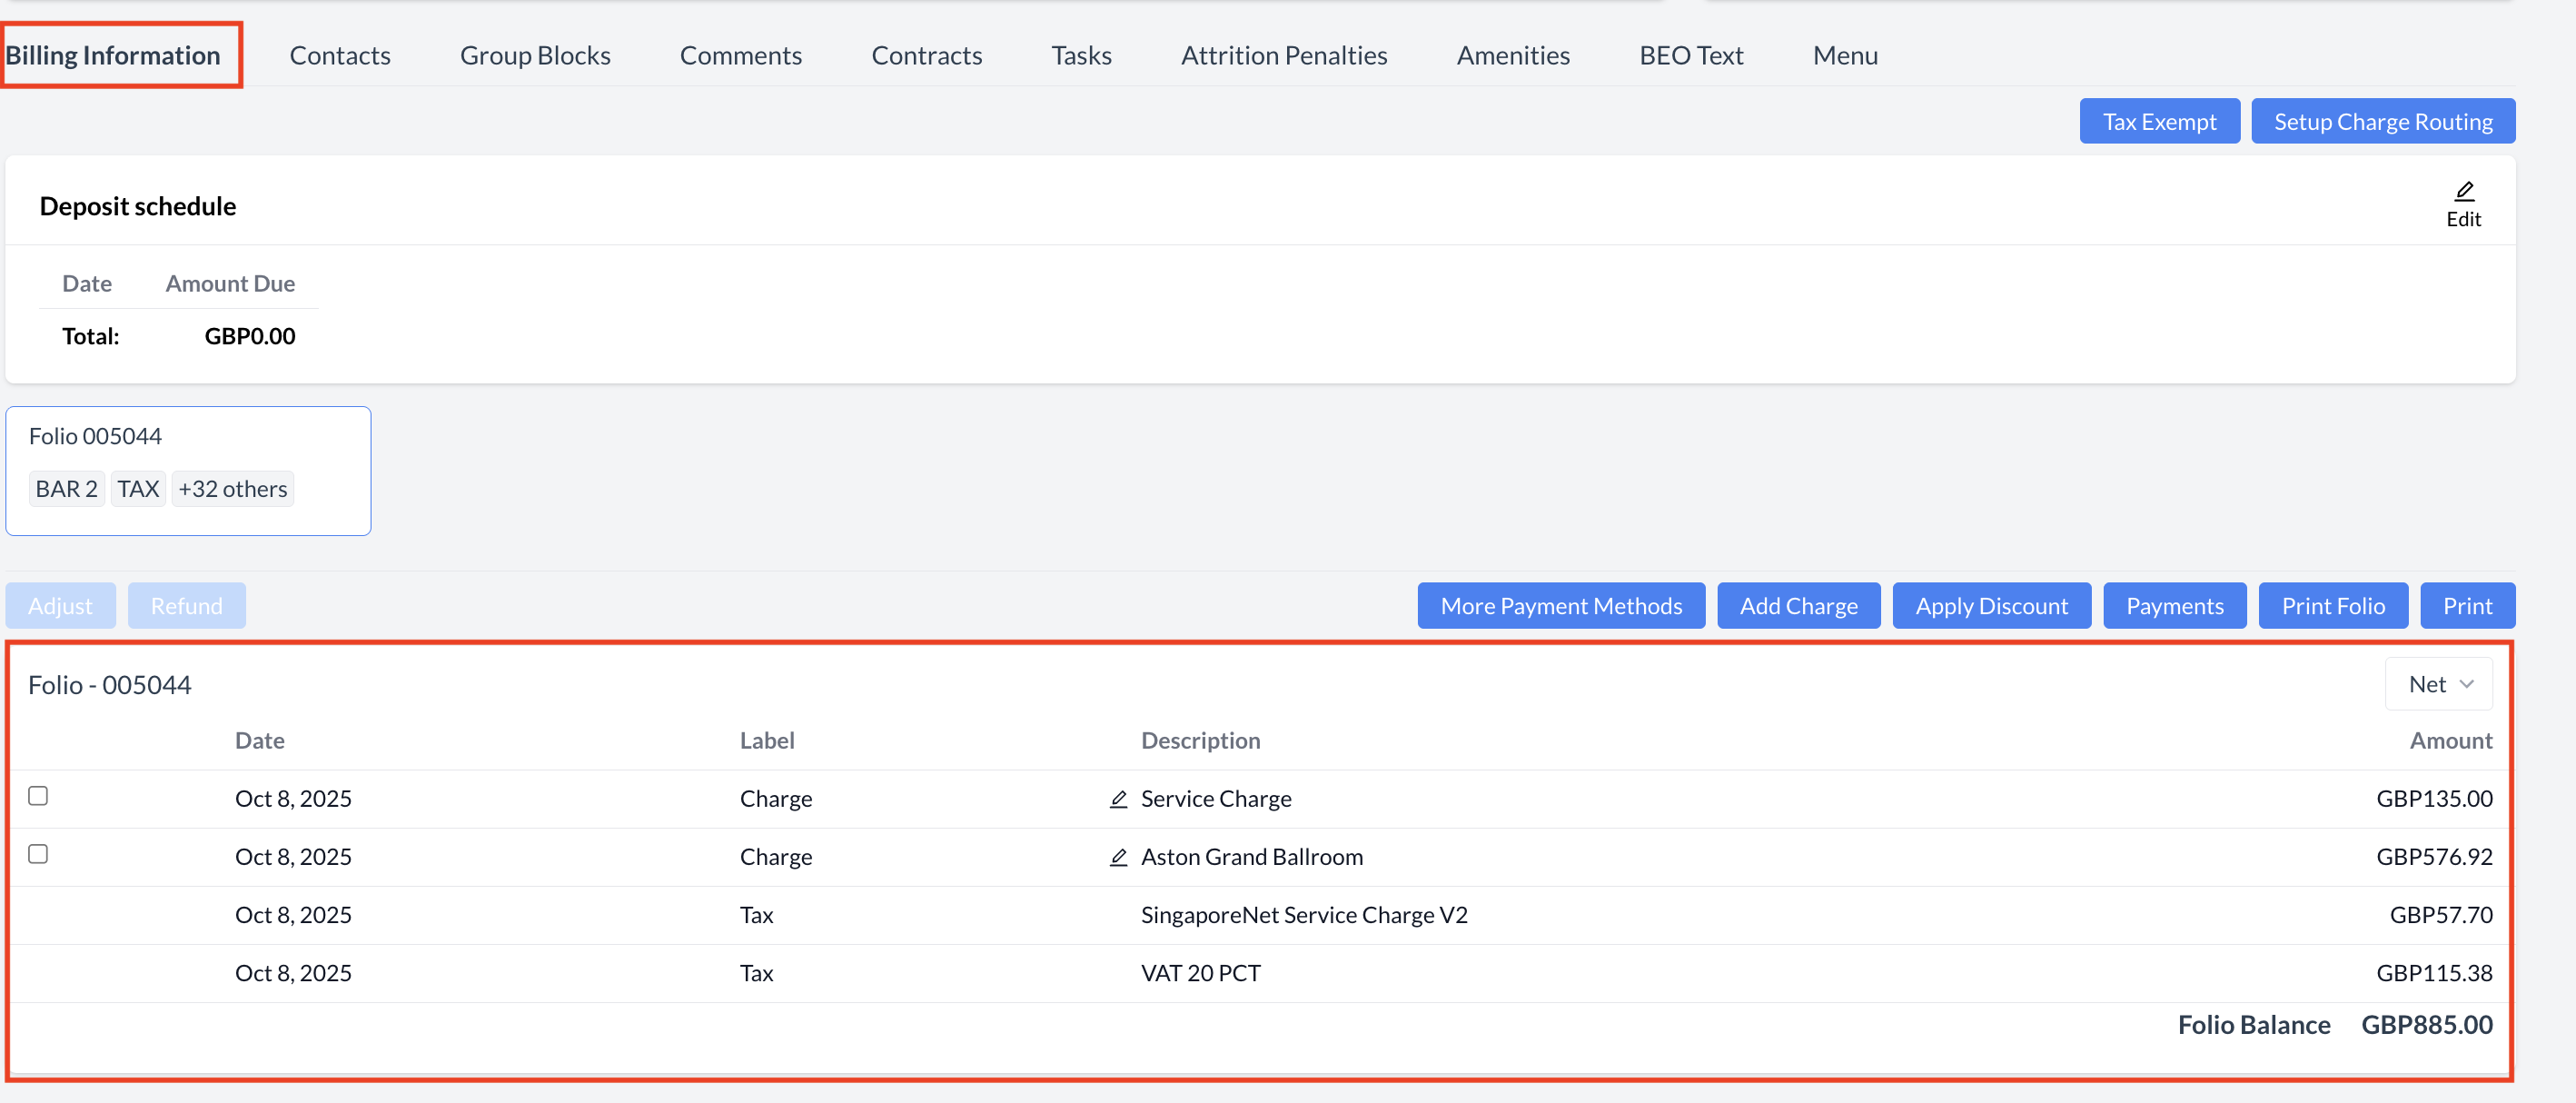
When viewing an event that is currently in Started status, you will notice that the space and package charges associated with the event have already been automatically posted for today's date.

🔄 How Automatic Posting Works:

  • If an event is in Confirmed status, the system will automatically update the event to Started status on the first day of the event.

  • At that time, all first-day charges (including space rental and package fees) will be automatically posted to the Event Folio.

  • No manual action is required to post these charges — the system handles this transition and posting process.

📅 For Multi-Day Events:

  • For events spanning multiple days, charges are posted daily as the event progresses.

  • Each night during the Night Audit process, EventKey will automatically:

    • Advance to the next business day

    • Post the corresponding day's space and package charges to the Event Folio

Tip: Ensure that all event details, including pricing and packages, are finalized before the event begins to avoid billing discrepancies or manual posting.

Event in Started Status.png

Event in Started Status

Charges Auotmatically Posted.png

Space & Package Charges Auto Posted

🧾 Manually Posting Charges to an Event

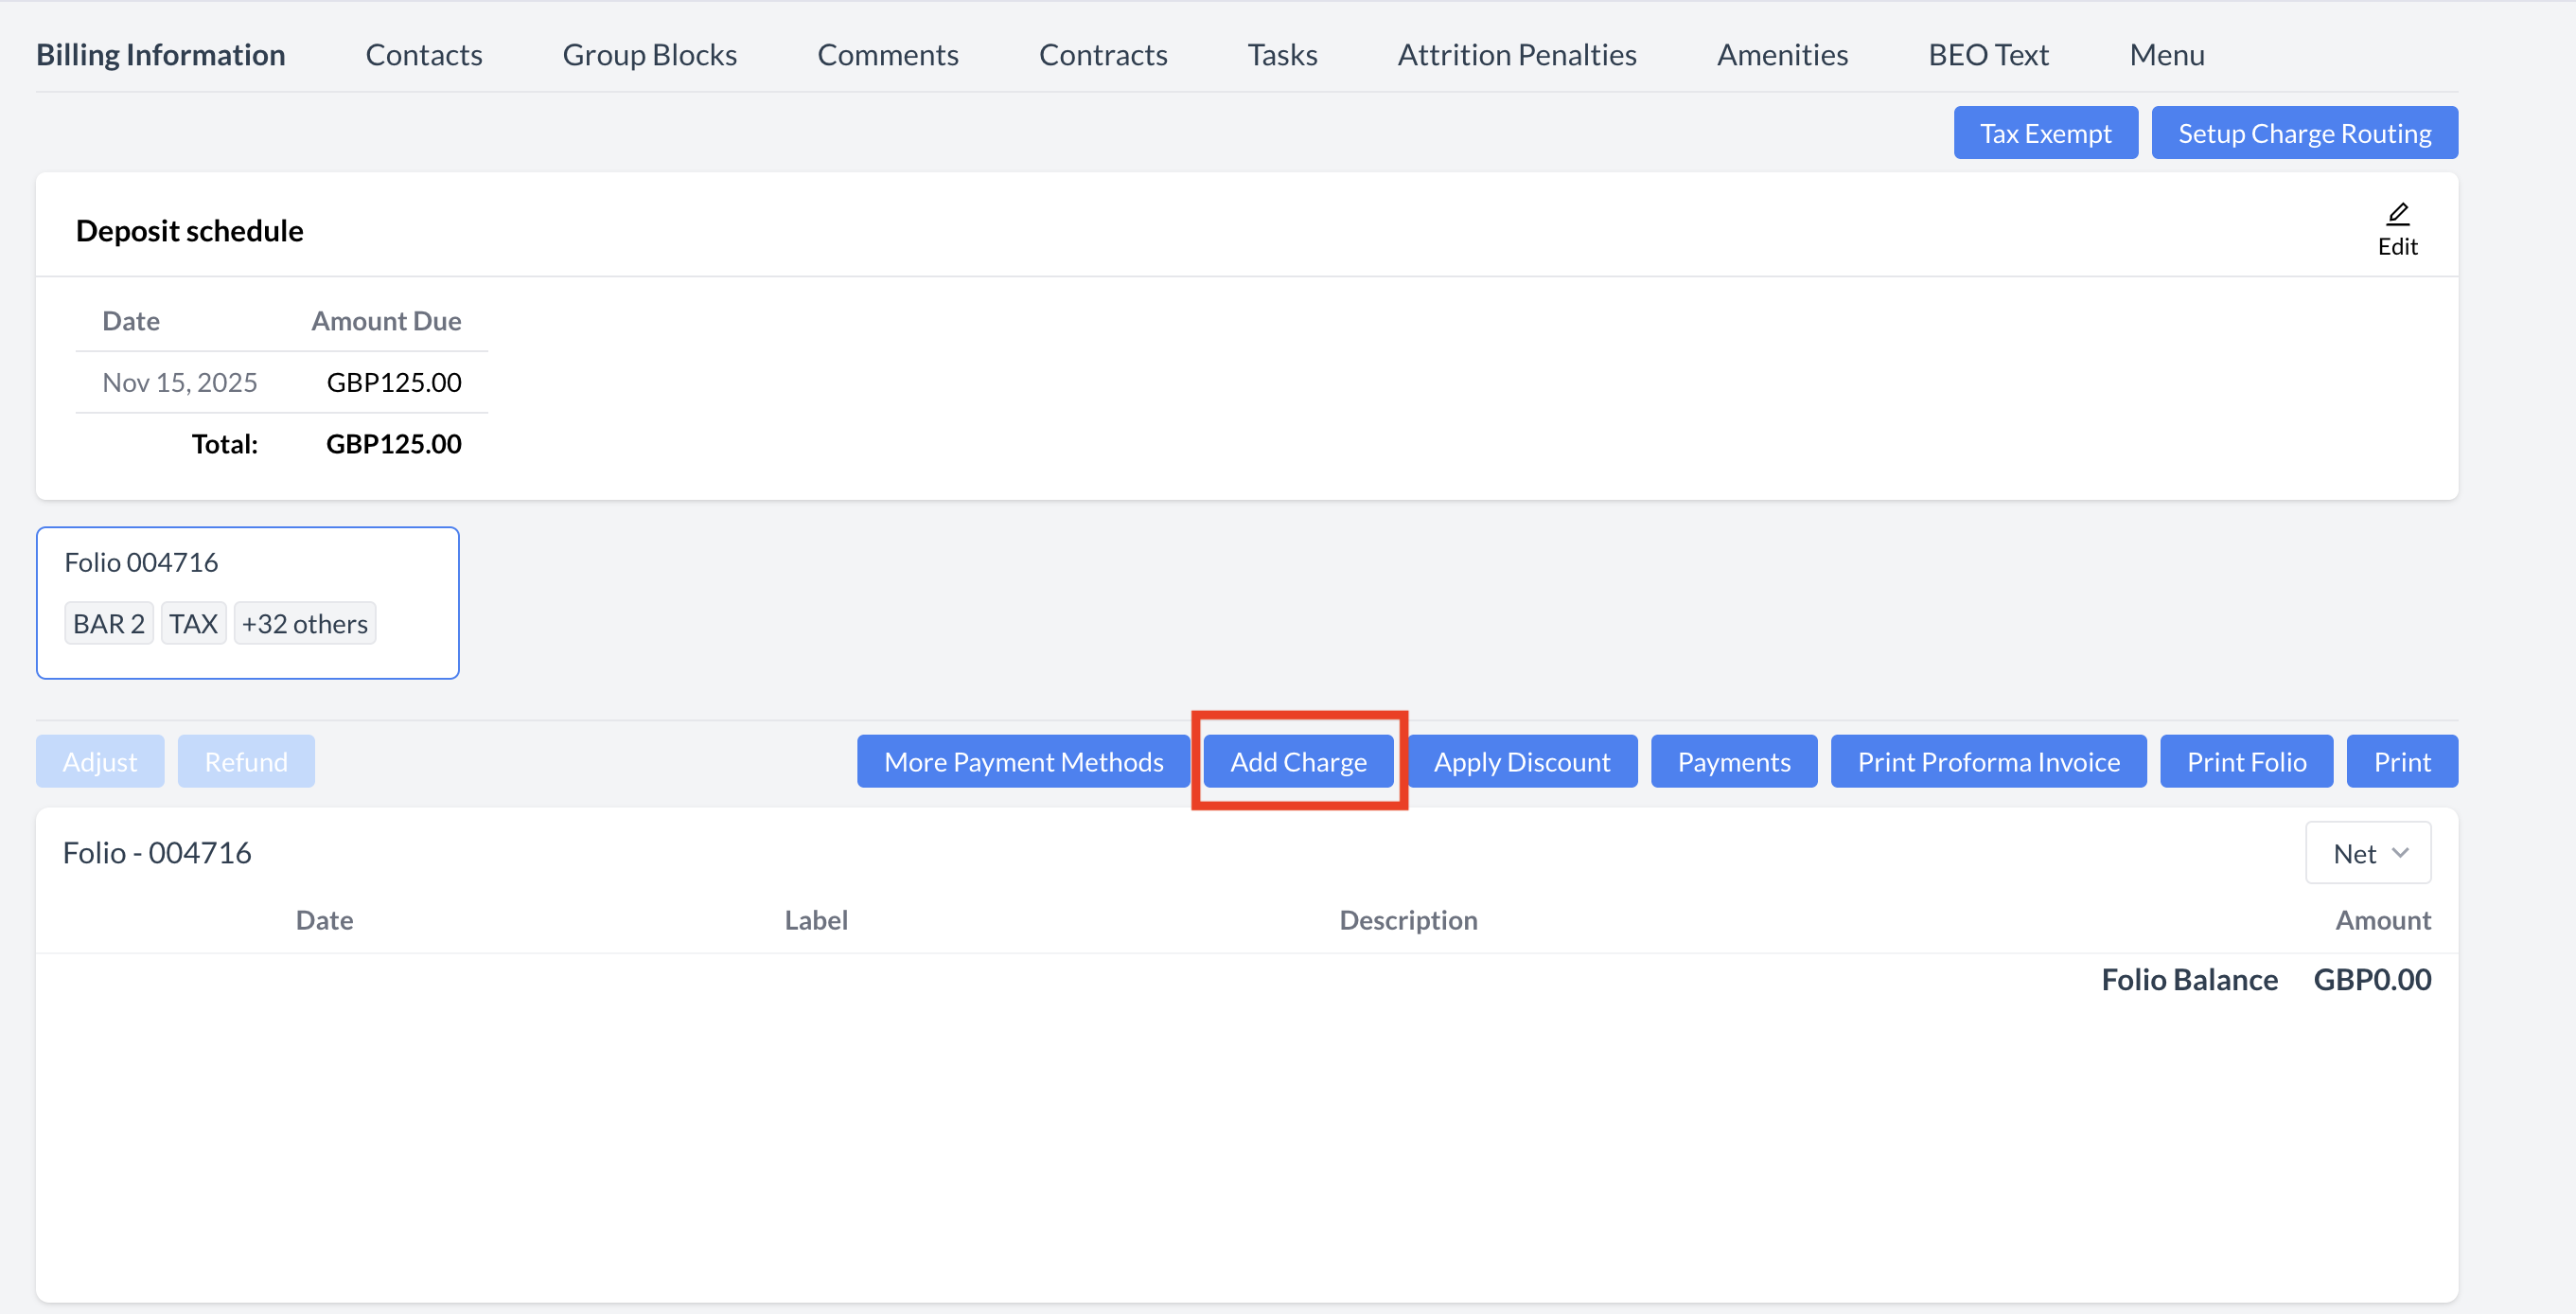
While charges are typically posted automatically, there may be situations where you need to manually post charges to an event. This can be done quickly through the Billing Information screen.

Follow the steps below to add a charge manually:

🔹 Step 1: Access the Add Charge Function

  1. Open the event's Billing Information screen.

  2. Click the blue “Add Charge” button.

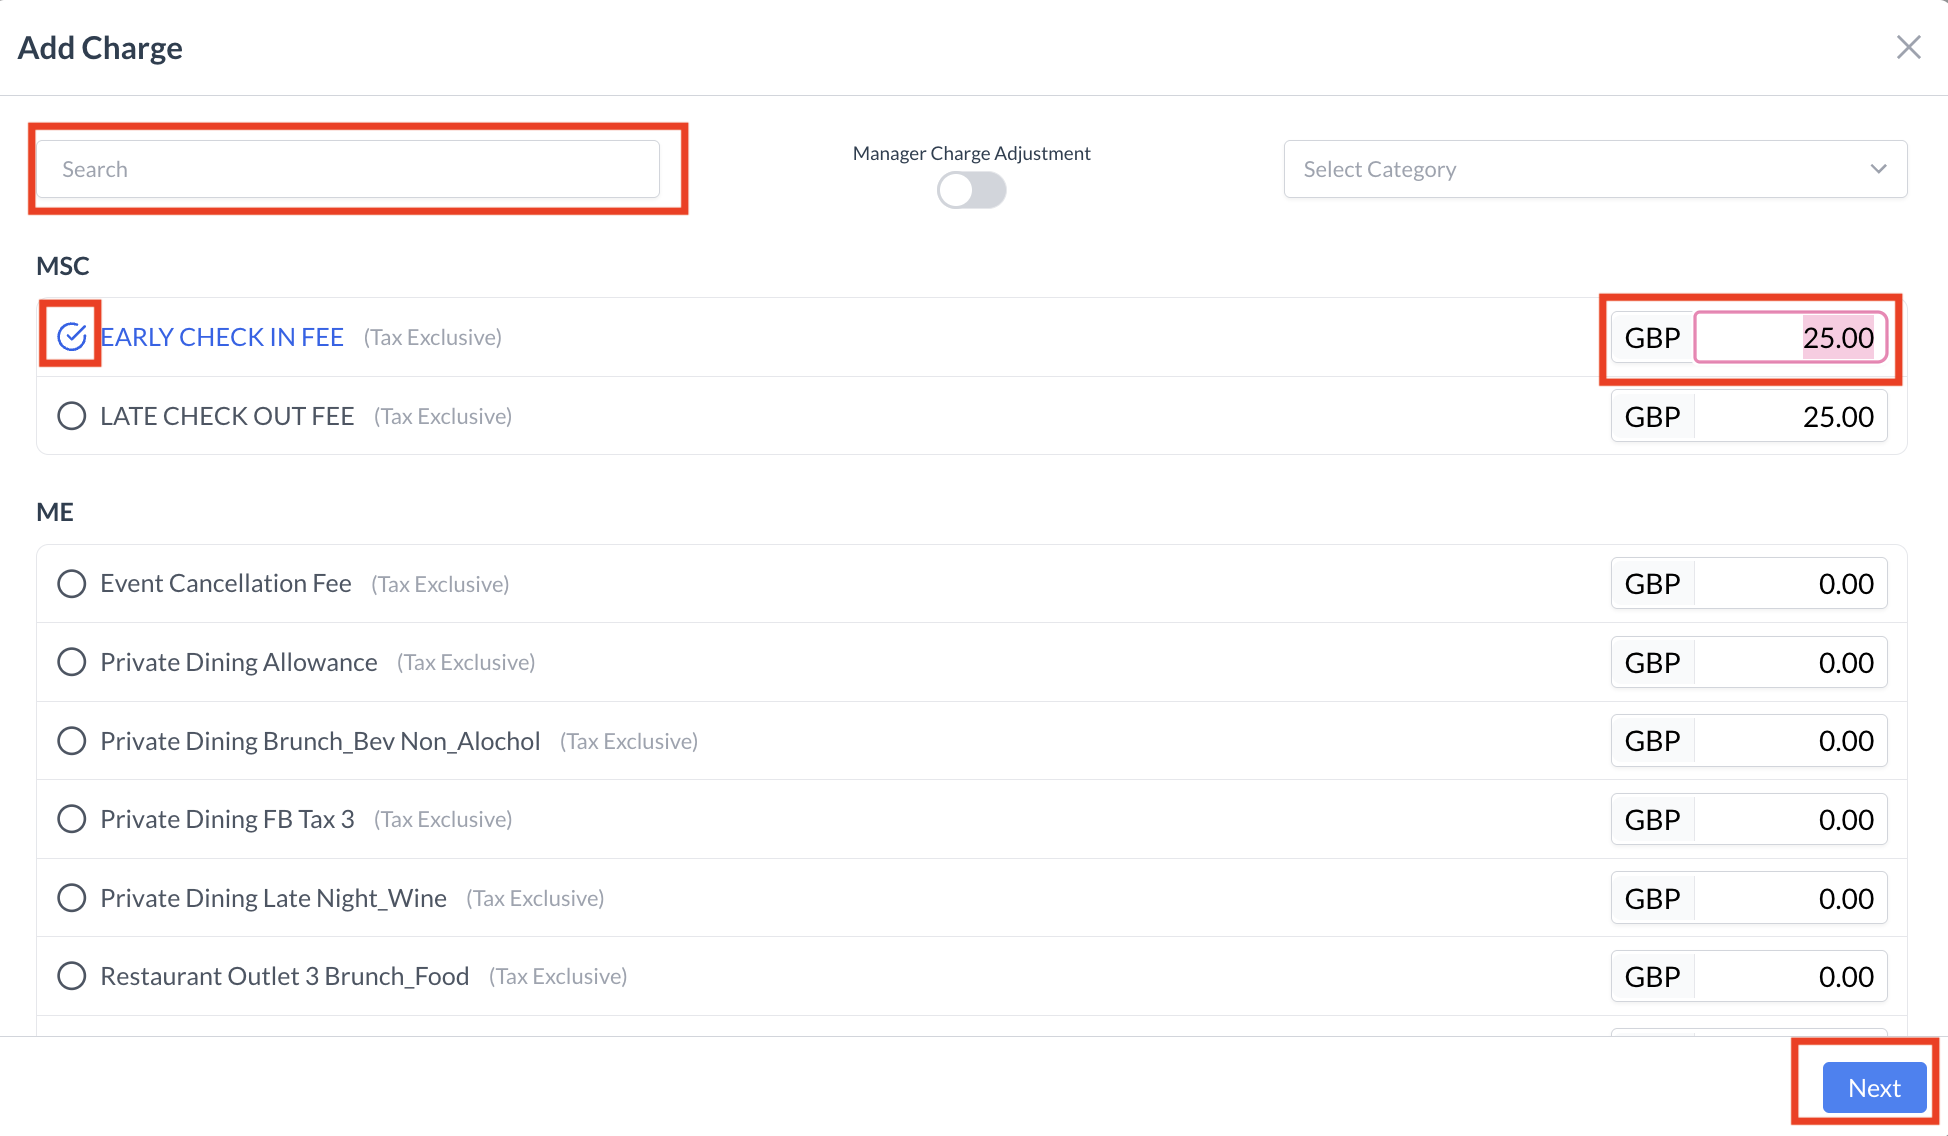
🔹 Step 2: Select a Charge Type

  1. The Add a Charge screen will appear.

  2. In the search box, begin typing the name of the charge type you wish to post — or scroll through the list to locate it.

  3. Click to select the appropriate charge type.

Note: Some charge types may automatically populate with a fixed amount that cannot be edited.

  1. Confirm or enter the Amount.

  2. Click the blue “Next” button to proceed.

🔹 Step 3: Set the Charge Frequency

  • By default, the Charge Frequency is set to One Time.

  • To post the charge on multiple days, select Recurring.

    • Enter the Start Date and End Date to define the charge period.

🔹 Step 4: Enter Quantity

  • Enter the Quantity for the charge.

  • 📌 Example: If you're manually posting a plated dinner, enter the number of dinners served.

🔹 Step 5: Add the Charge

  • Click the blue “Add Charge” button to finalize and post the charge.

🔹 Step 6: Review the Charge

You will be returned to the Billing Information – Folio screen, where the newly added charge will now be visible.

Tip: Double-check the posted charges for accuracy, especially when entering manual amounts or quantities.

Billing Information - Add a Charge

Add a Charge - Charge Selection Screen

Add A Charge - Frequency and Quantity

Billing Information - Posted Charge


📚 For more details:
To explore all available features and functions related to managing billing, please refer to the Billing Information Knowledge Base Article (KBA).

JavaScript errors detected

Please note, these errors can depend on your browser setup.

If this problem persists, please contact our support.