Skip table of contents

Managing Tasks From the Event Record

📆 Revision Date:

Overview: Managing Tasks from the Event Record

The Task Management feature within the Event Record enables Event Owners to efficiently assign and track tasks related to a specific event or company. This functionality allows you to delegate responsibilities to key team members—such as event coordinators, catering staff, or group administrators—ensuring that every detail is handled within a centralized, event-specific workflow.

By managing tasks directly from the Event Record, teams can improve communication, stay organized, and maintain accountability throughout the event planning and execution process.

Navigate to Home > Event Management

EventKey Dashboard (Home Screen)

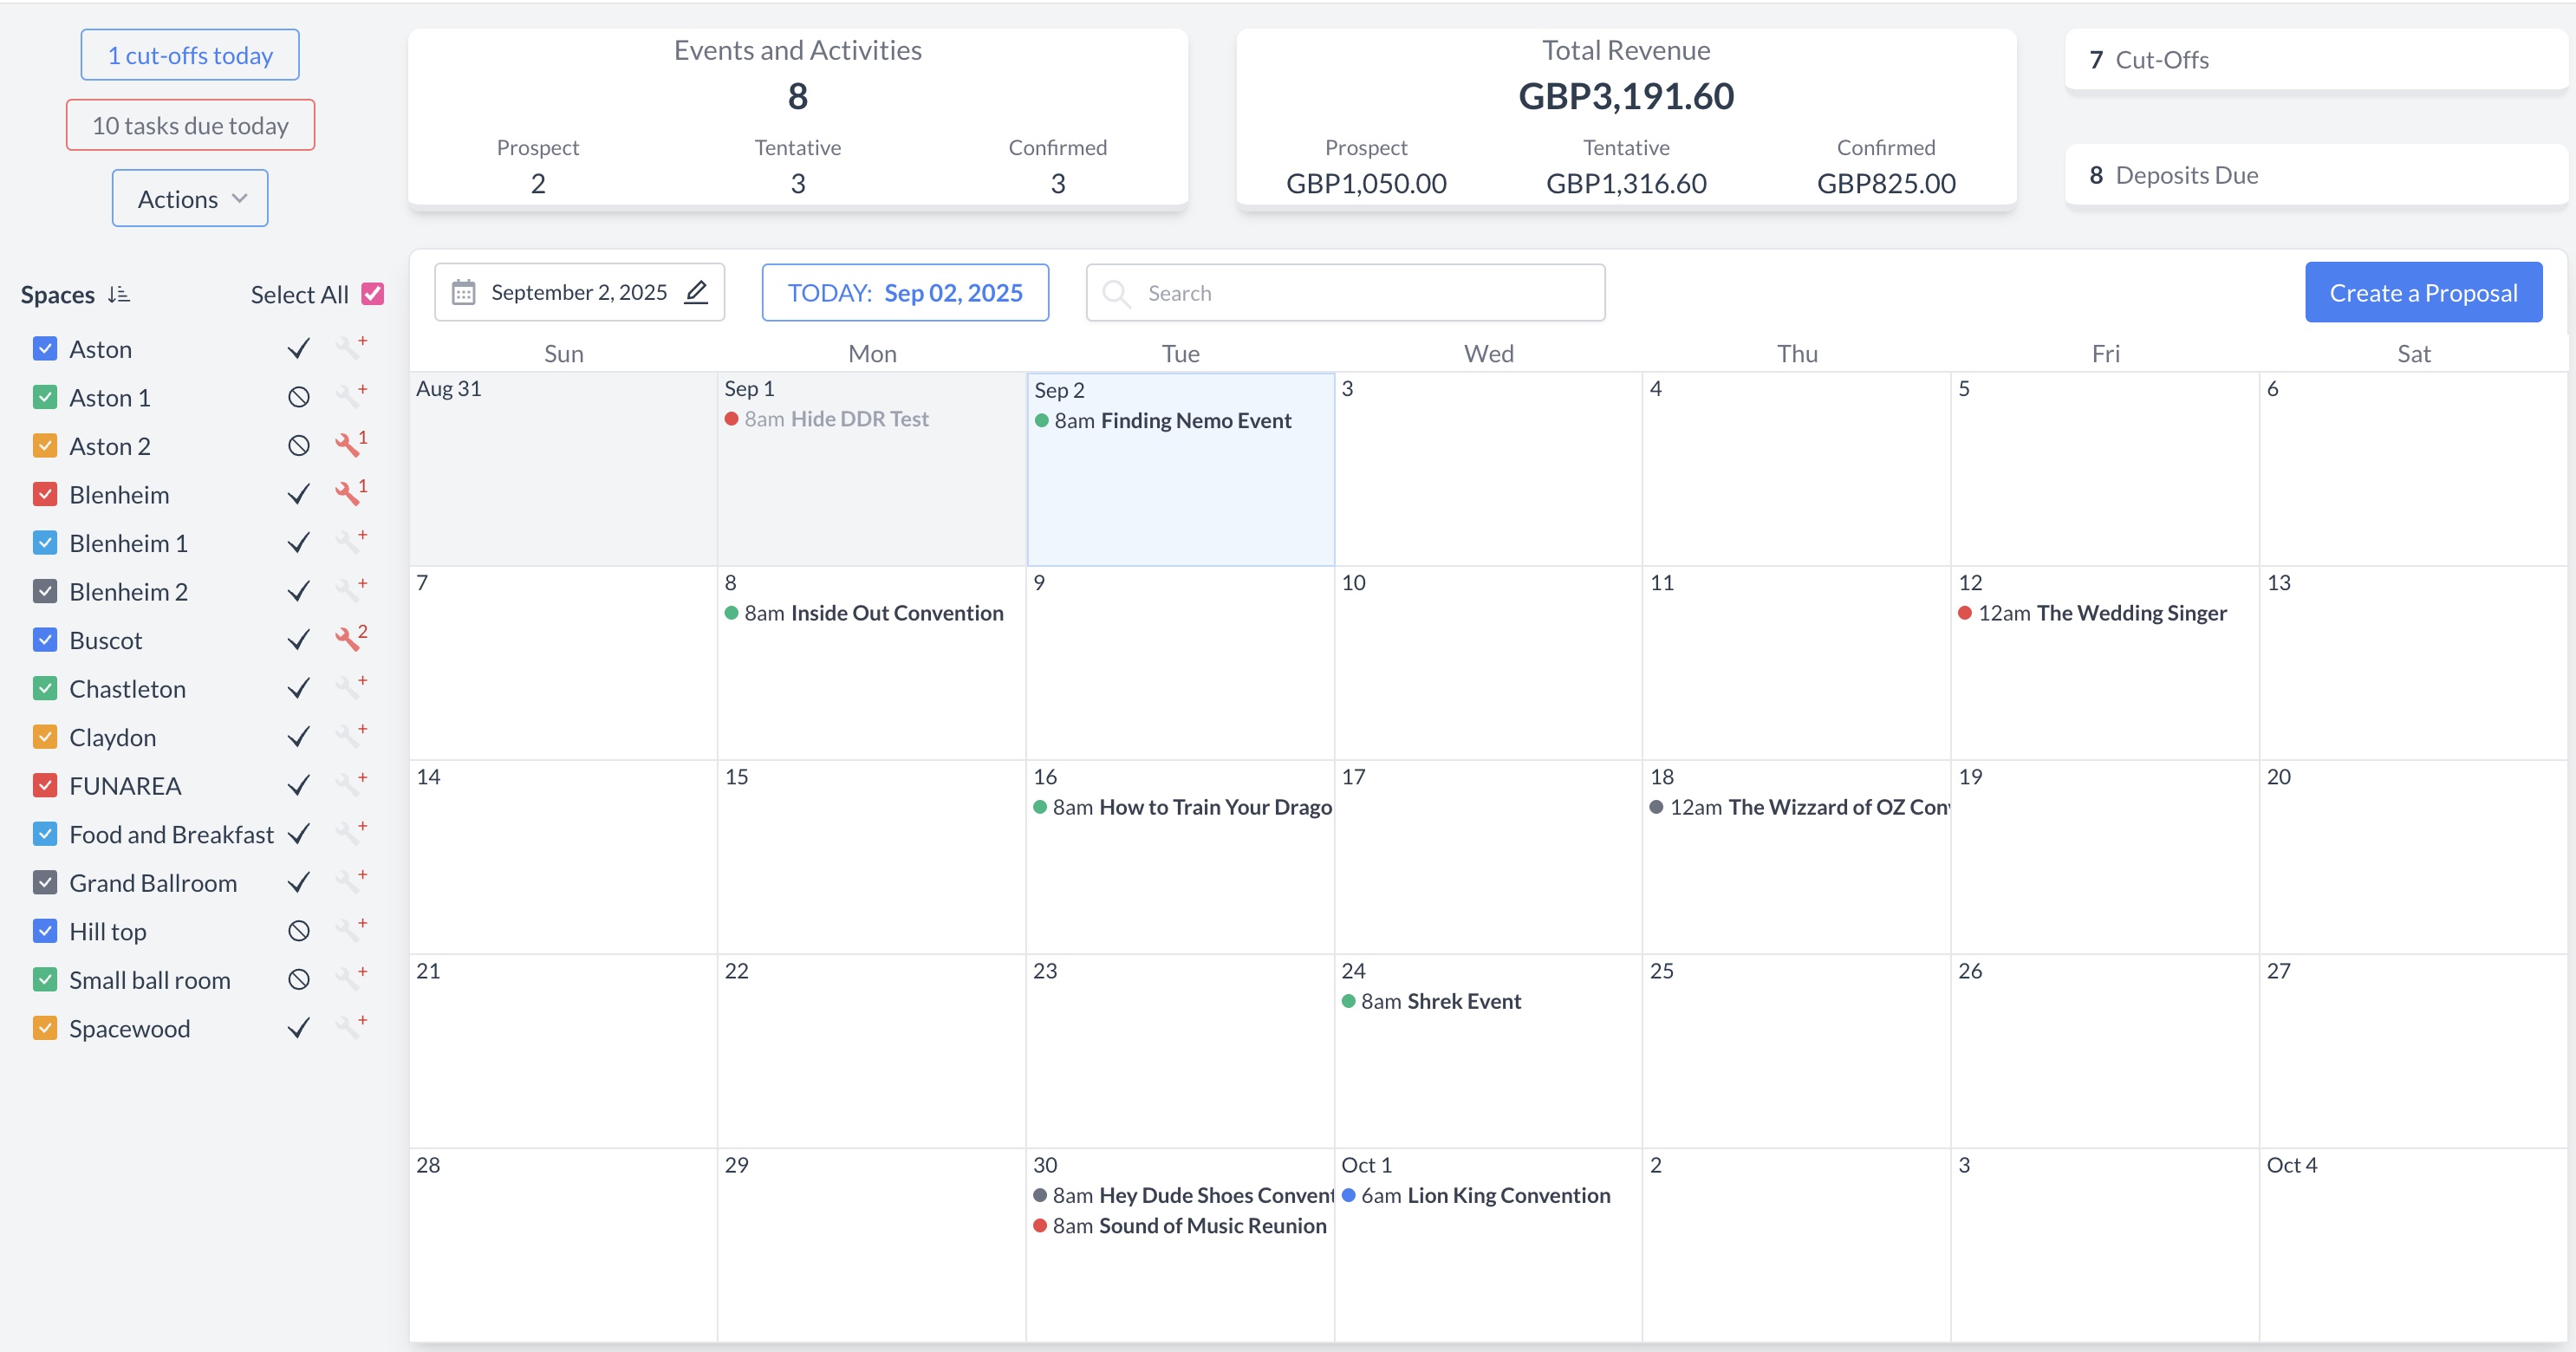
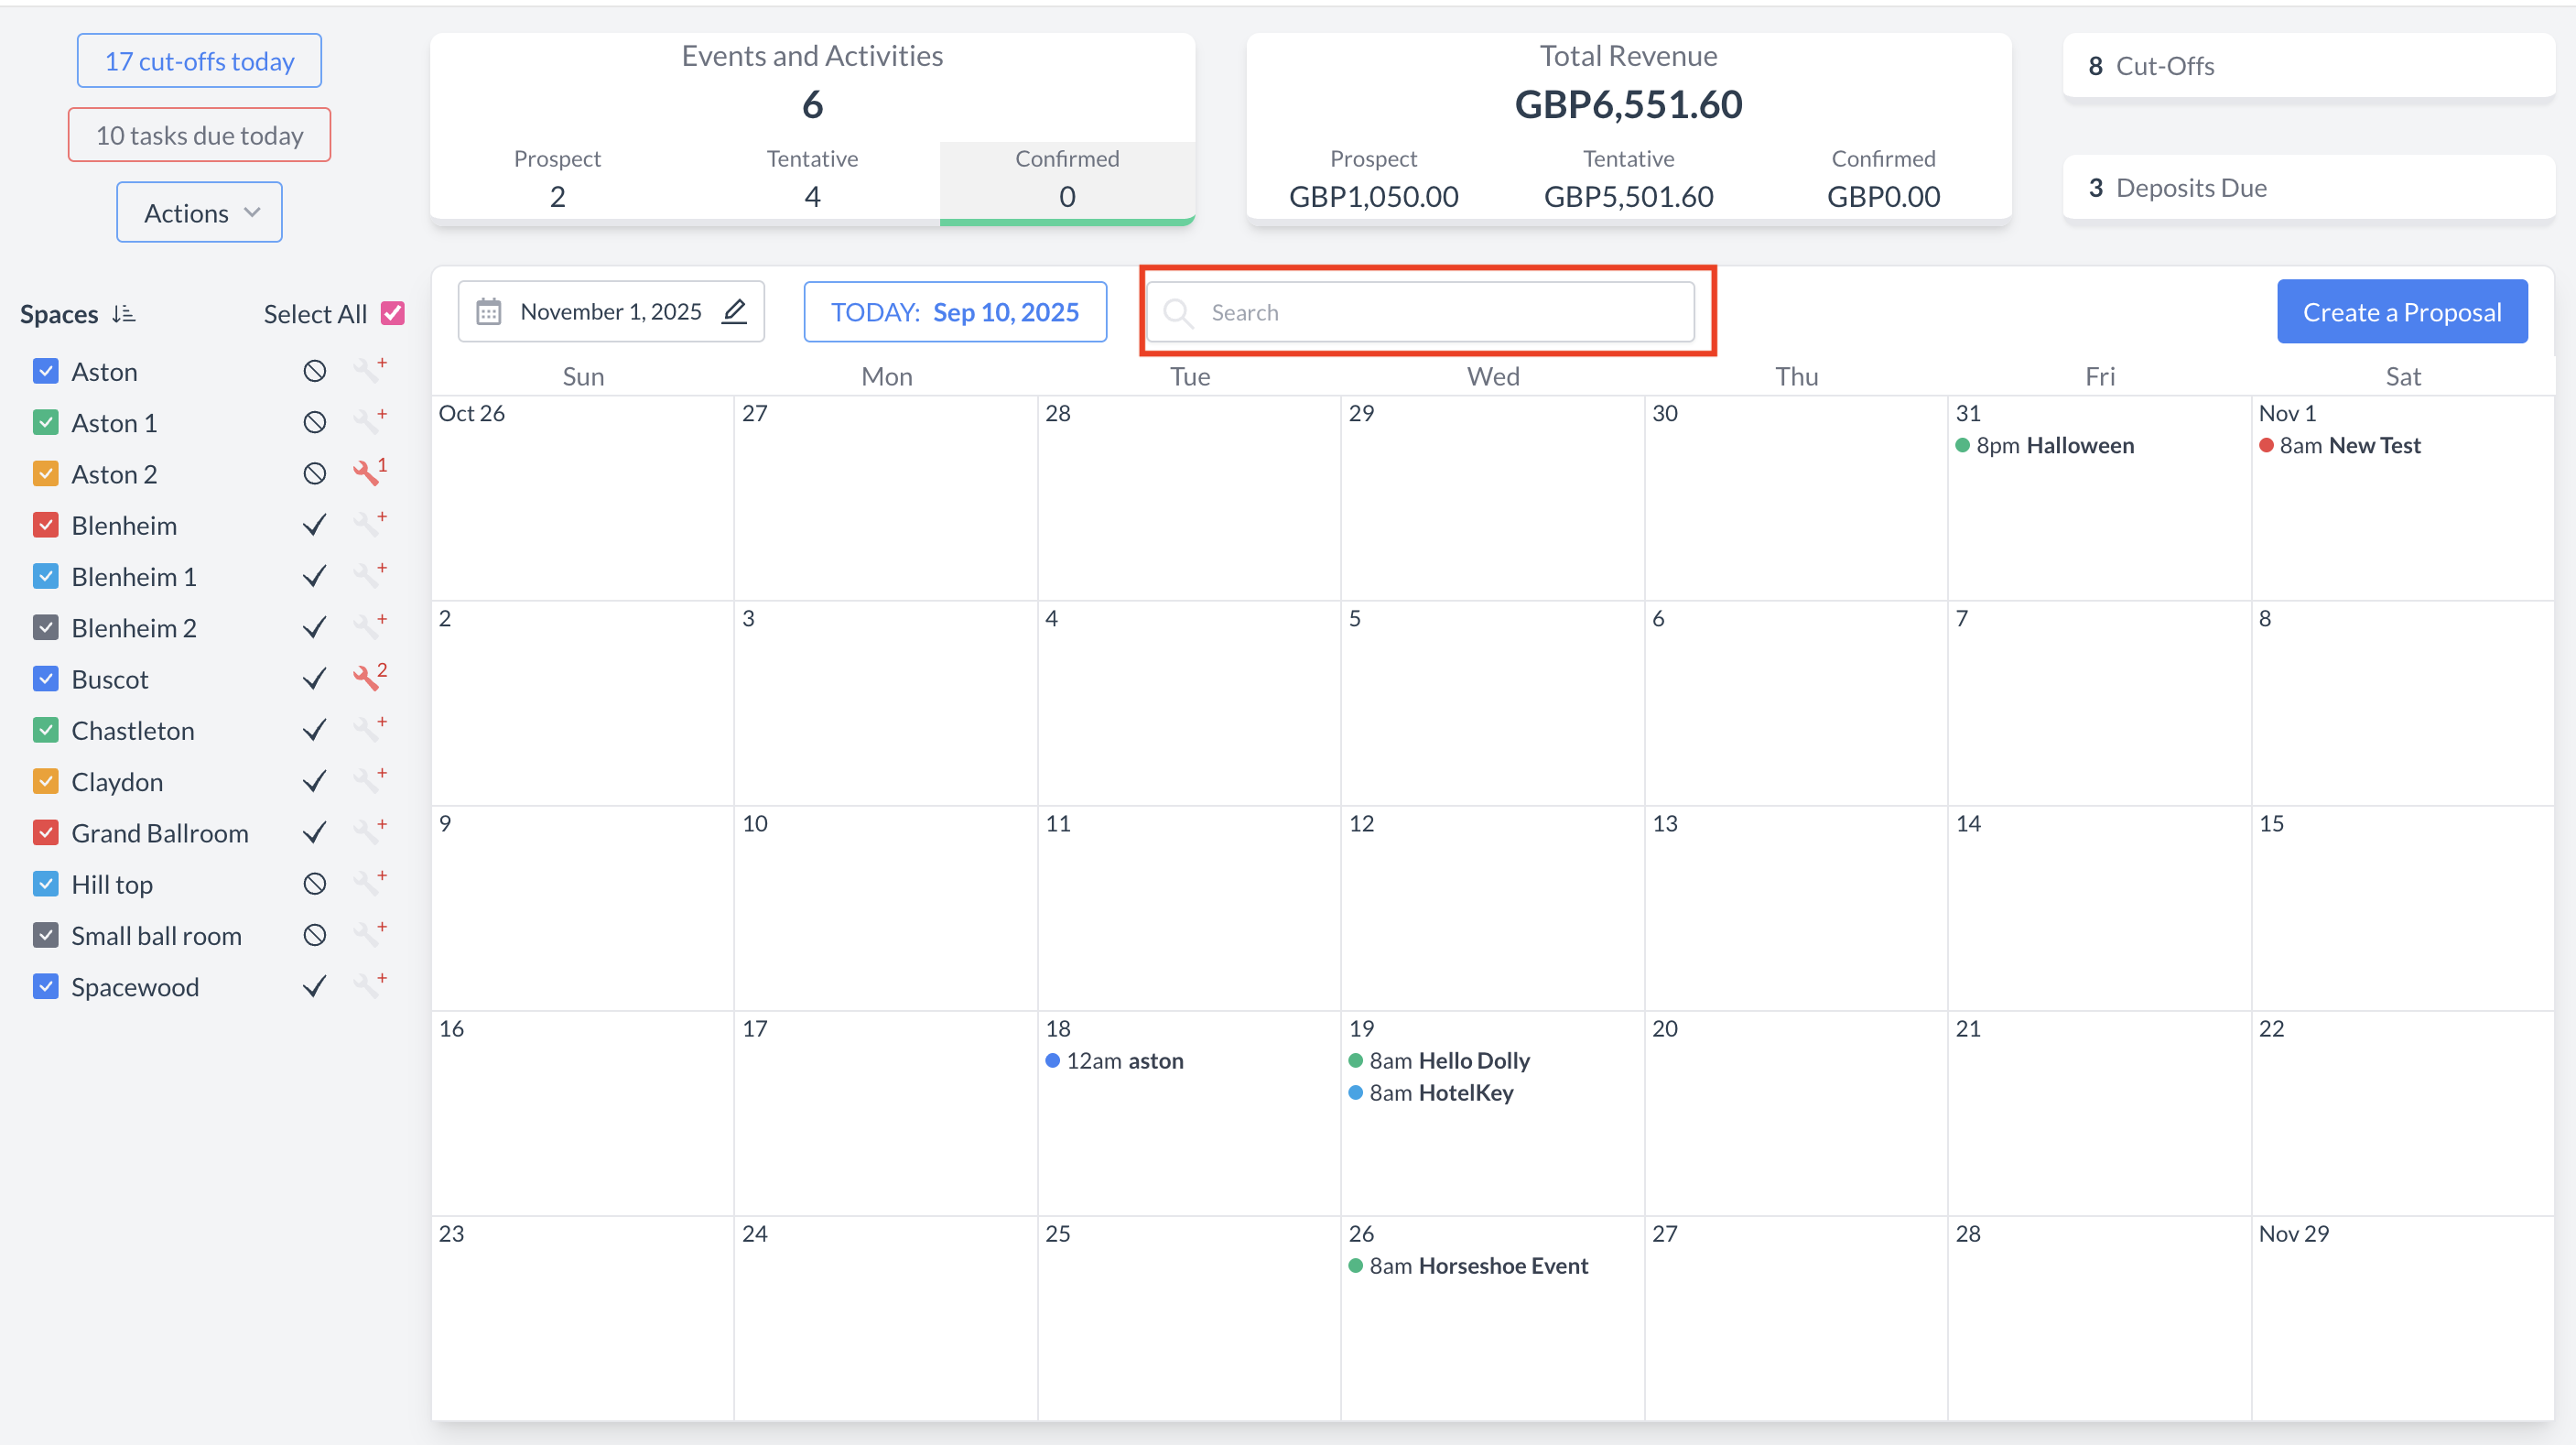
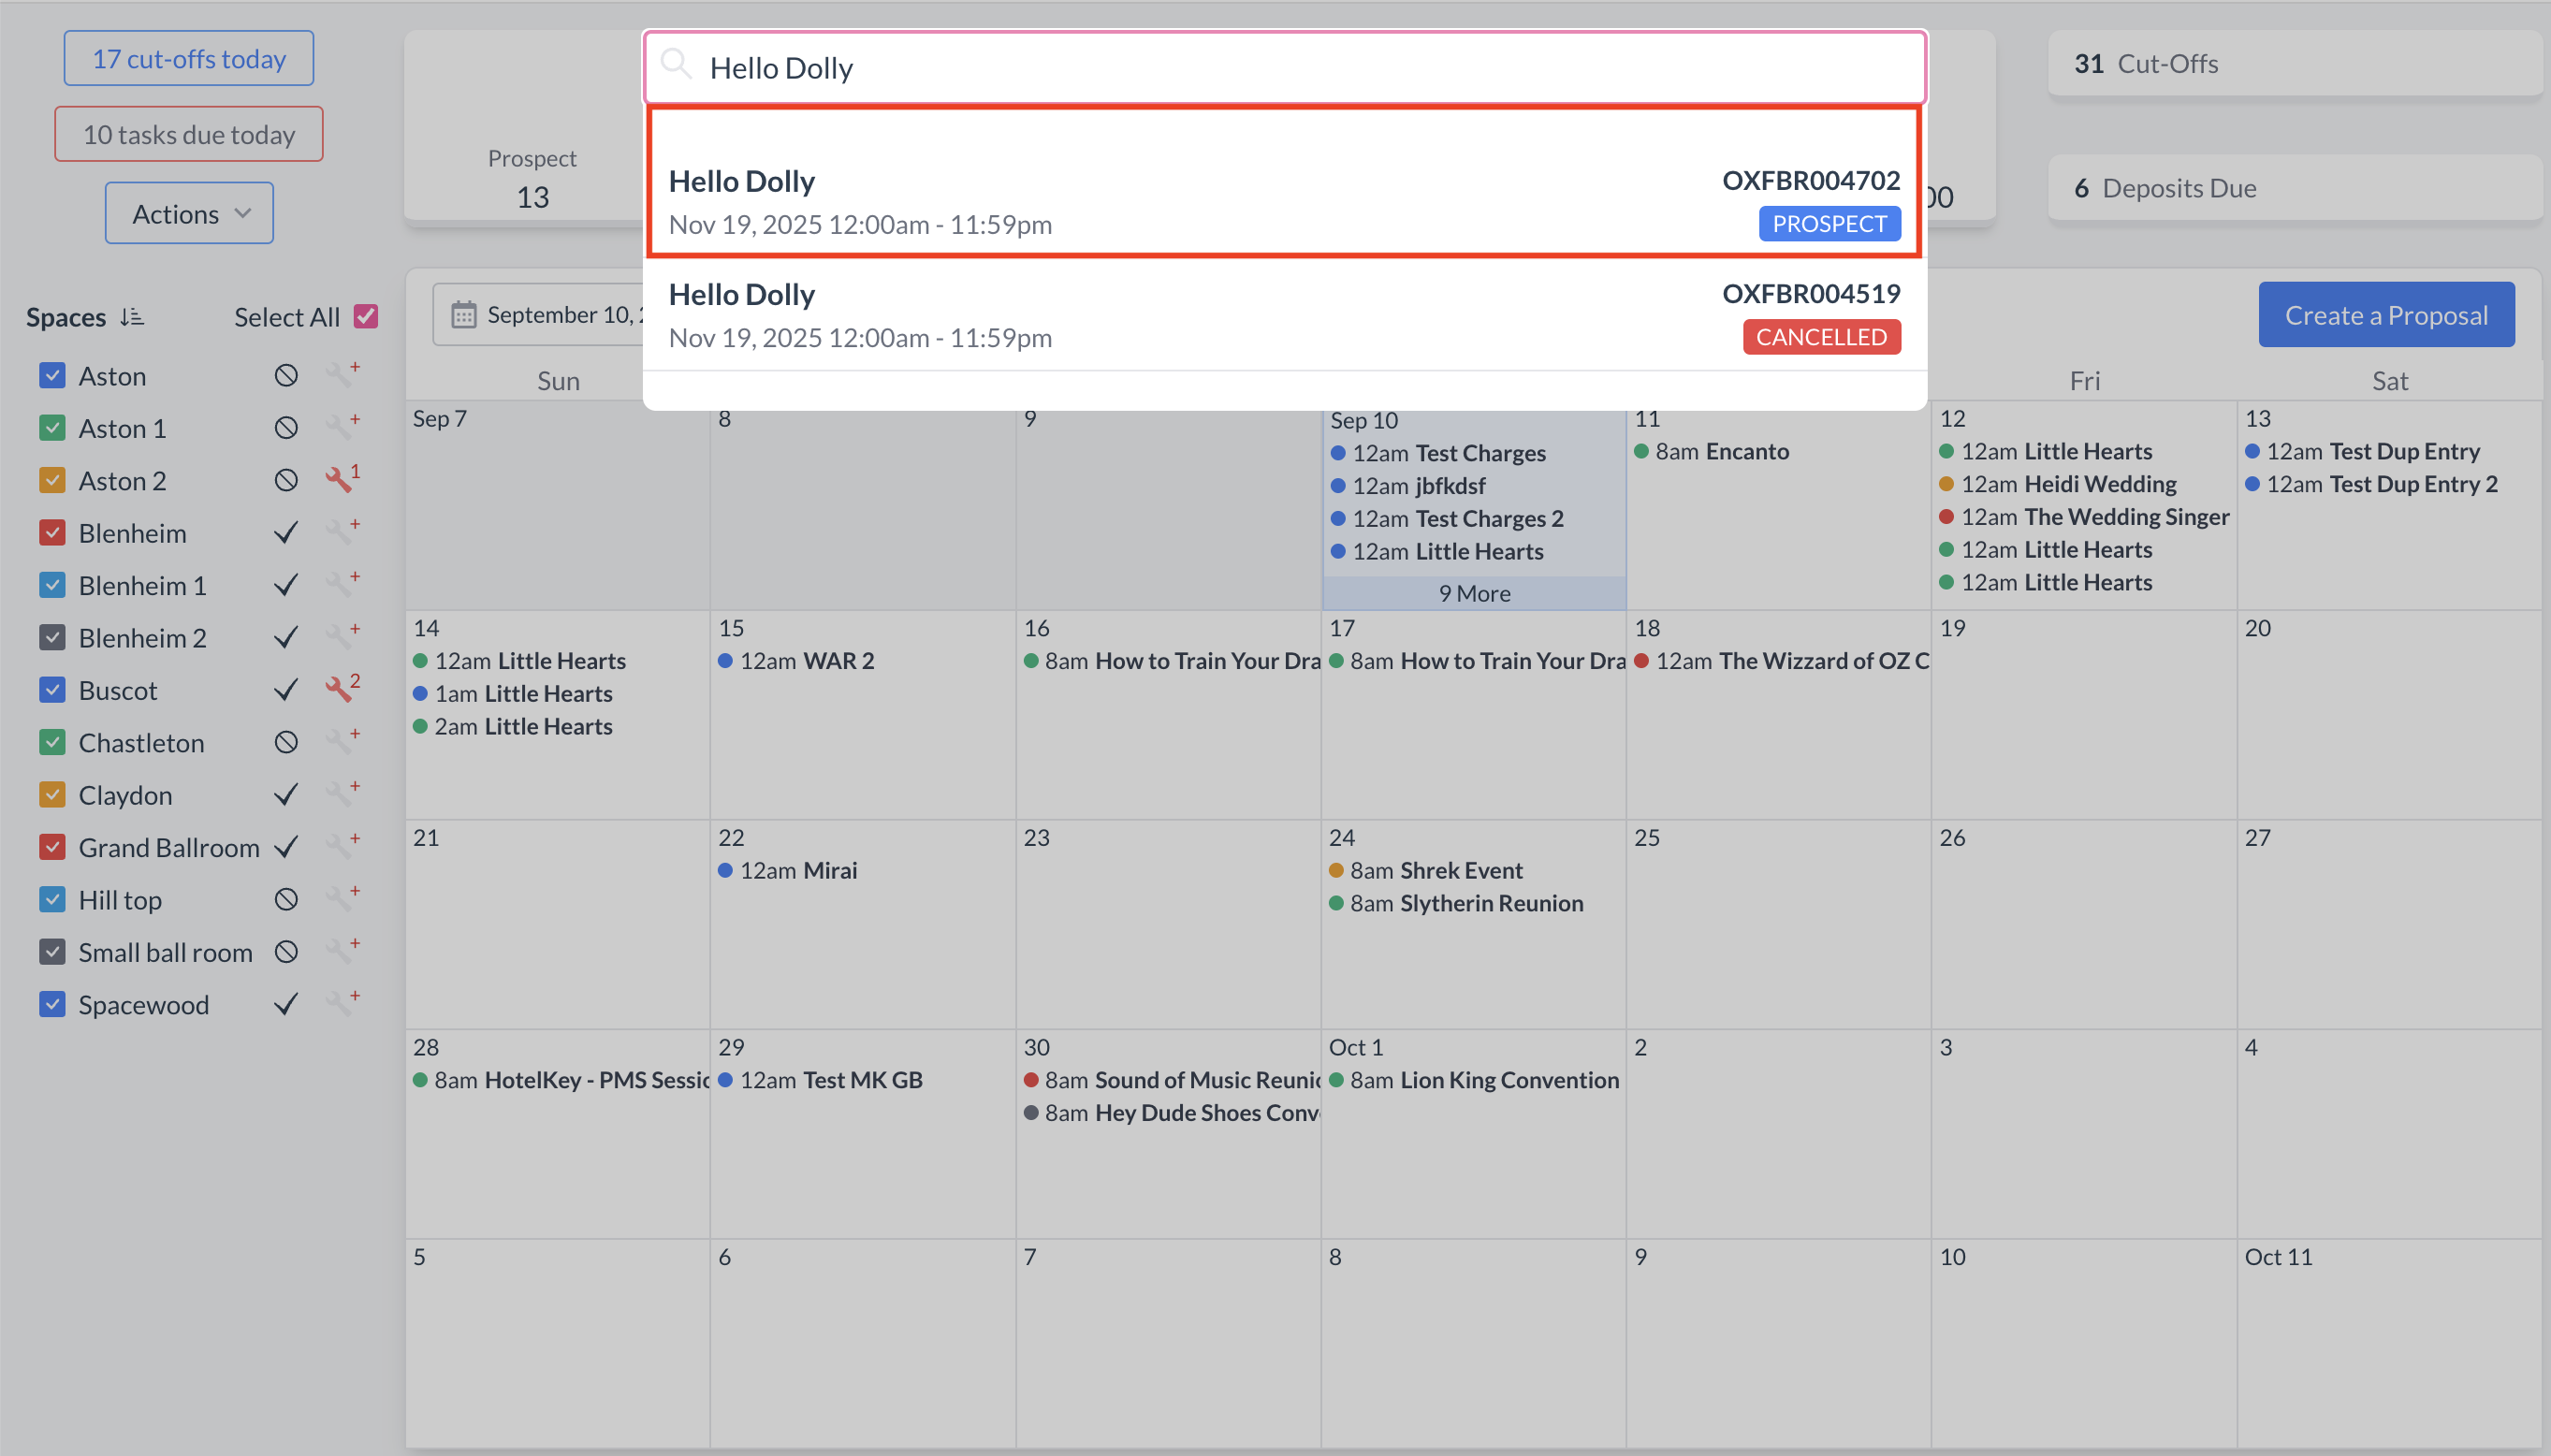
To begin, navigate to the Dashboard and use the Search box to locate the event.

Enter the full or partial Event Name into the search field. The system will display a list of matching events, or, if there is an exact match, it will appear directly.

Once you’ve identified the correct event, simply click on the event name to open it.

Event Search Field

Event Search Results

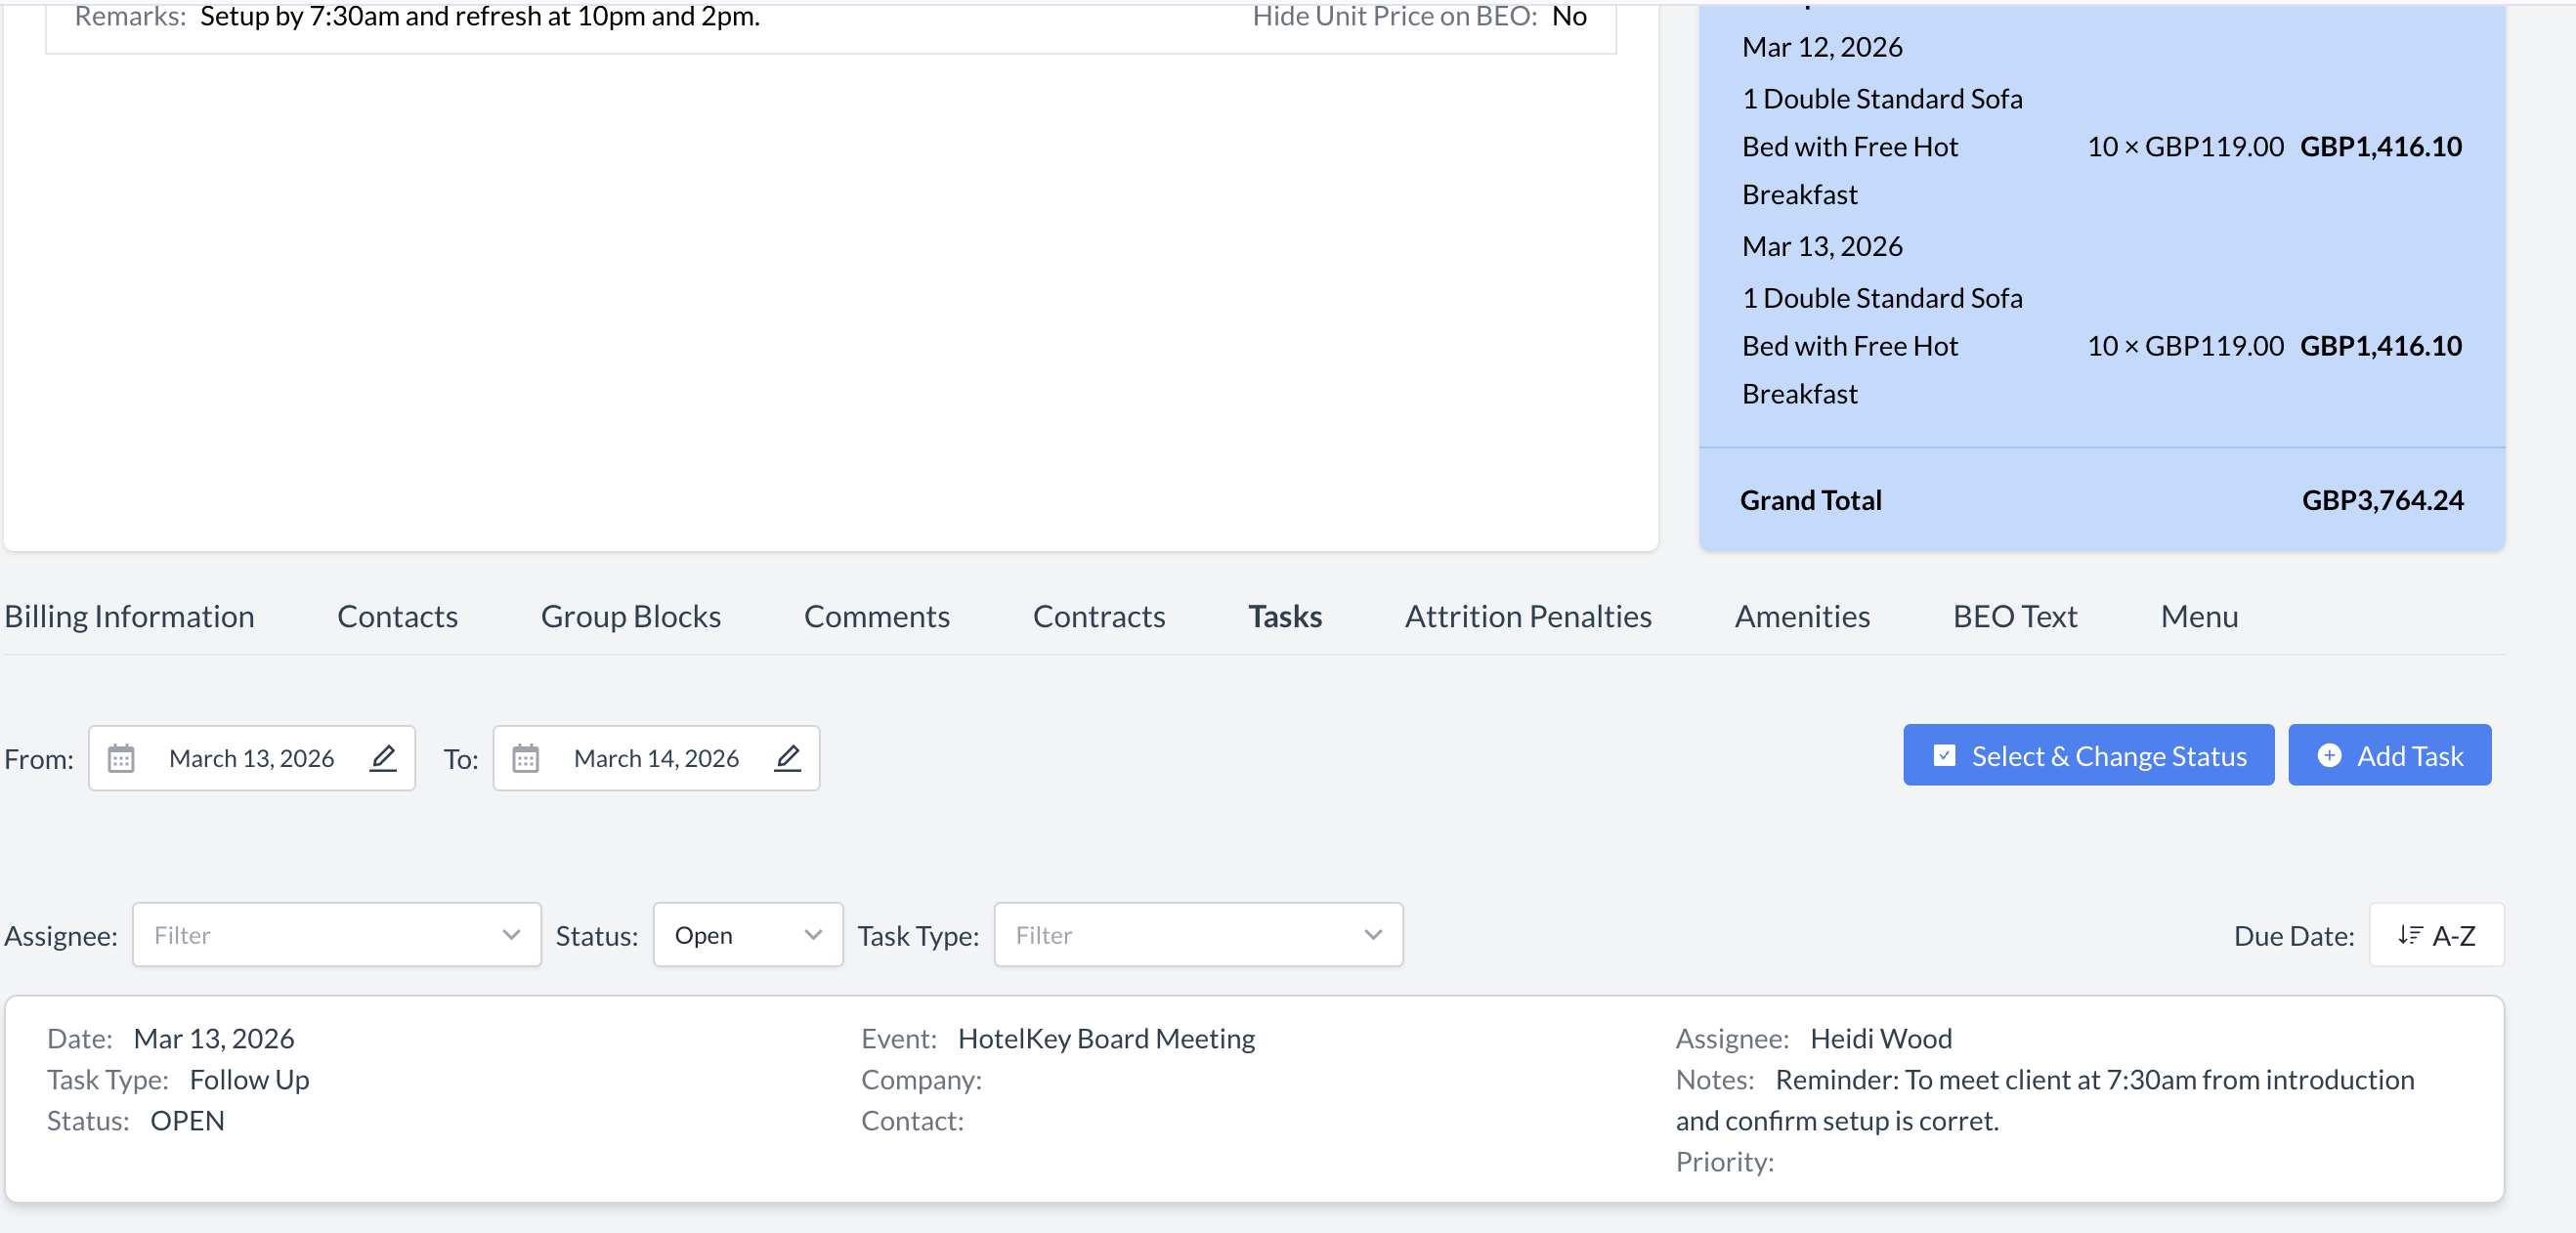
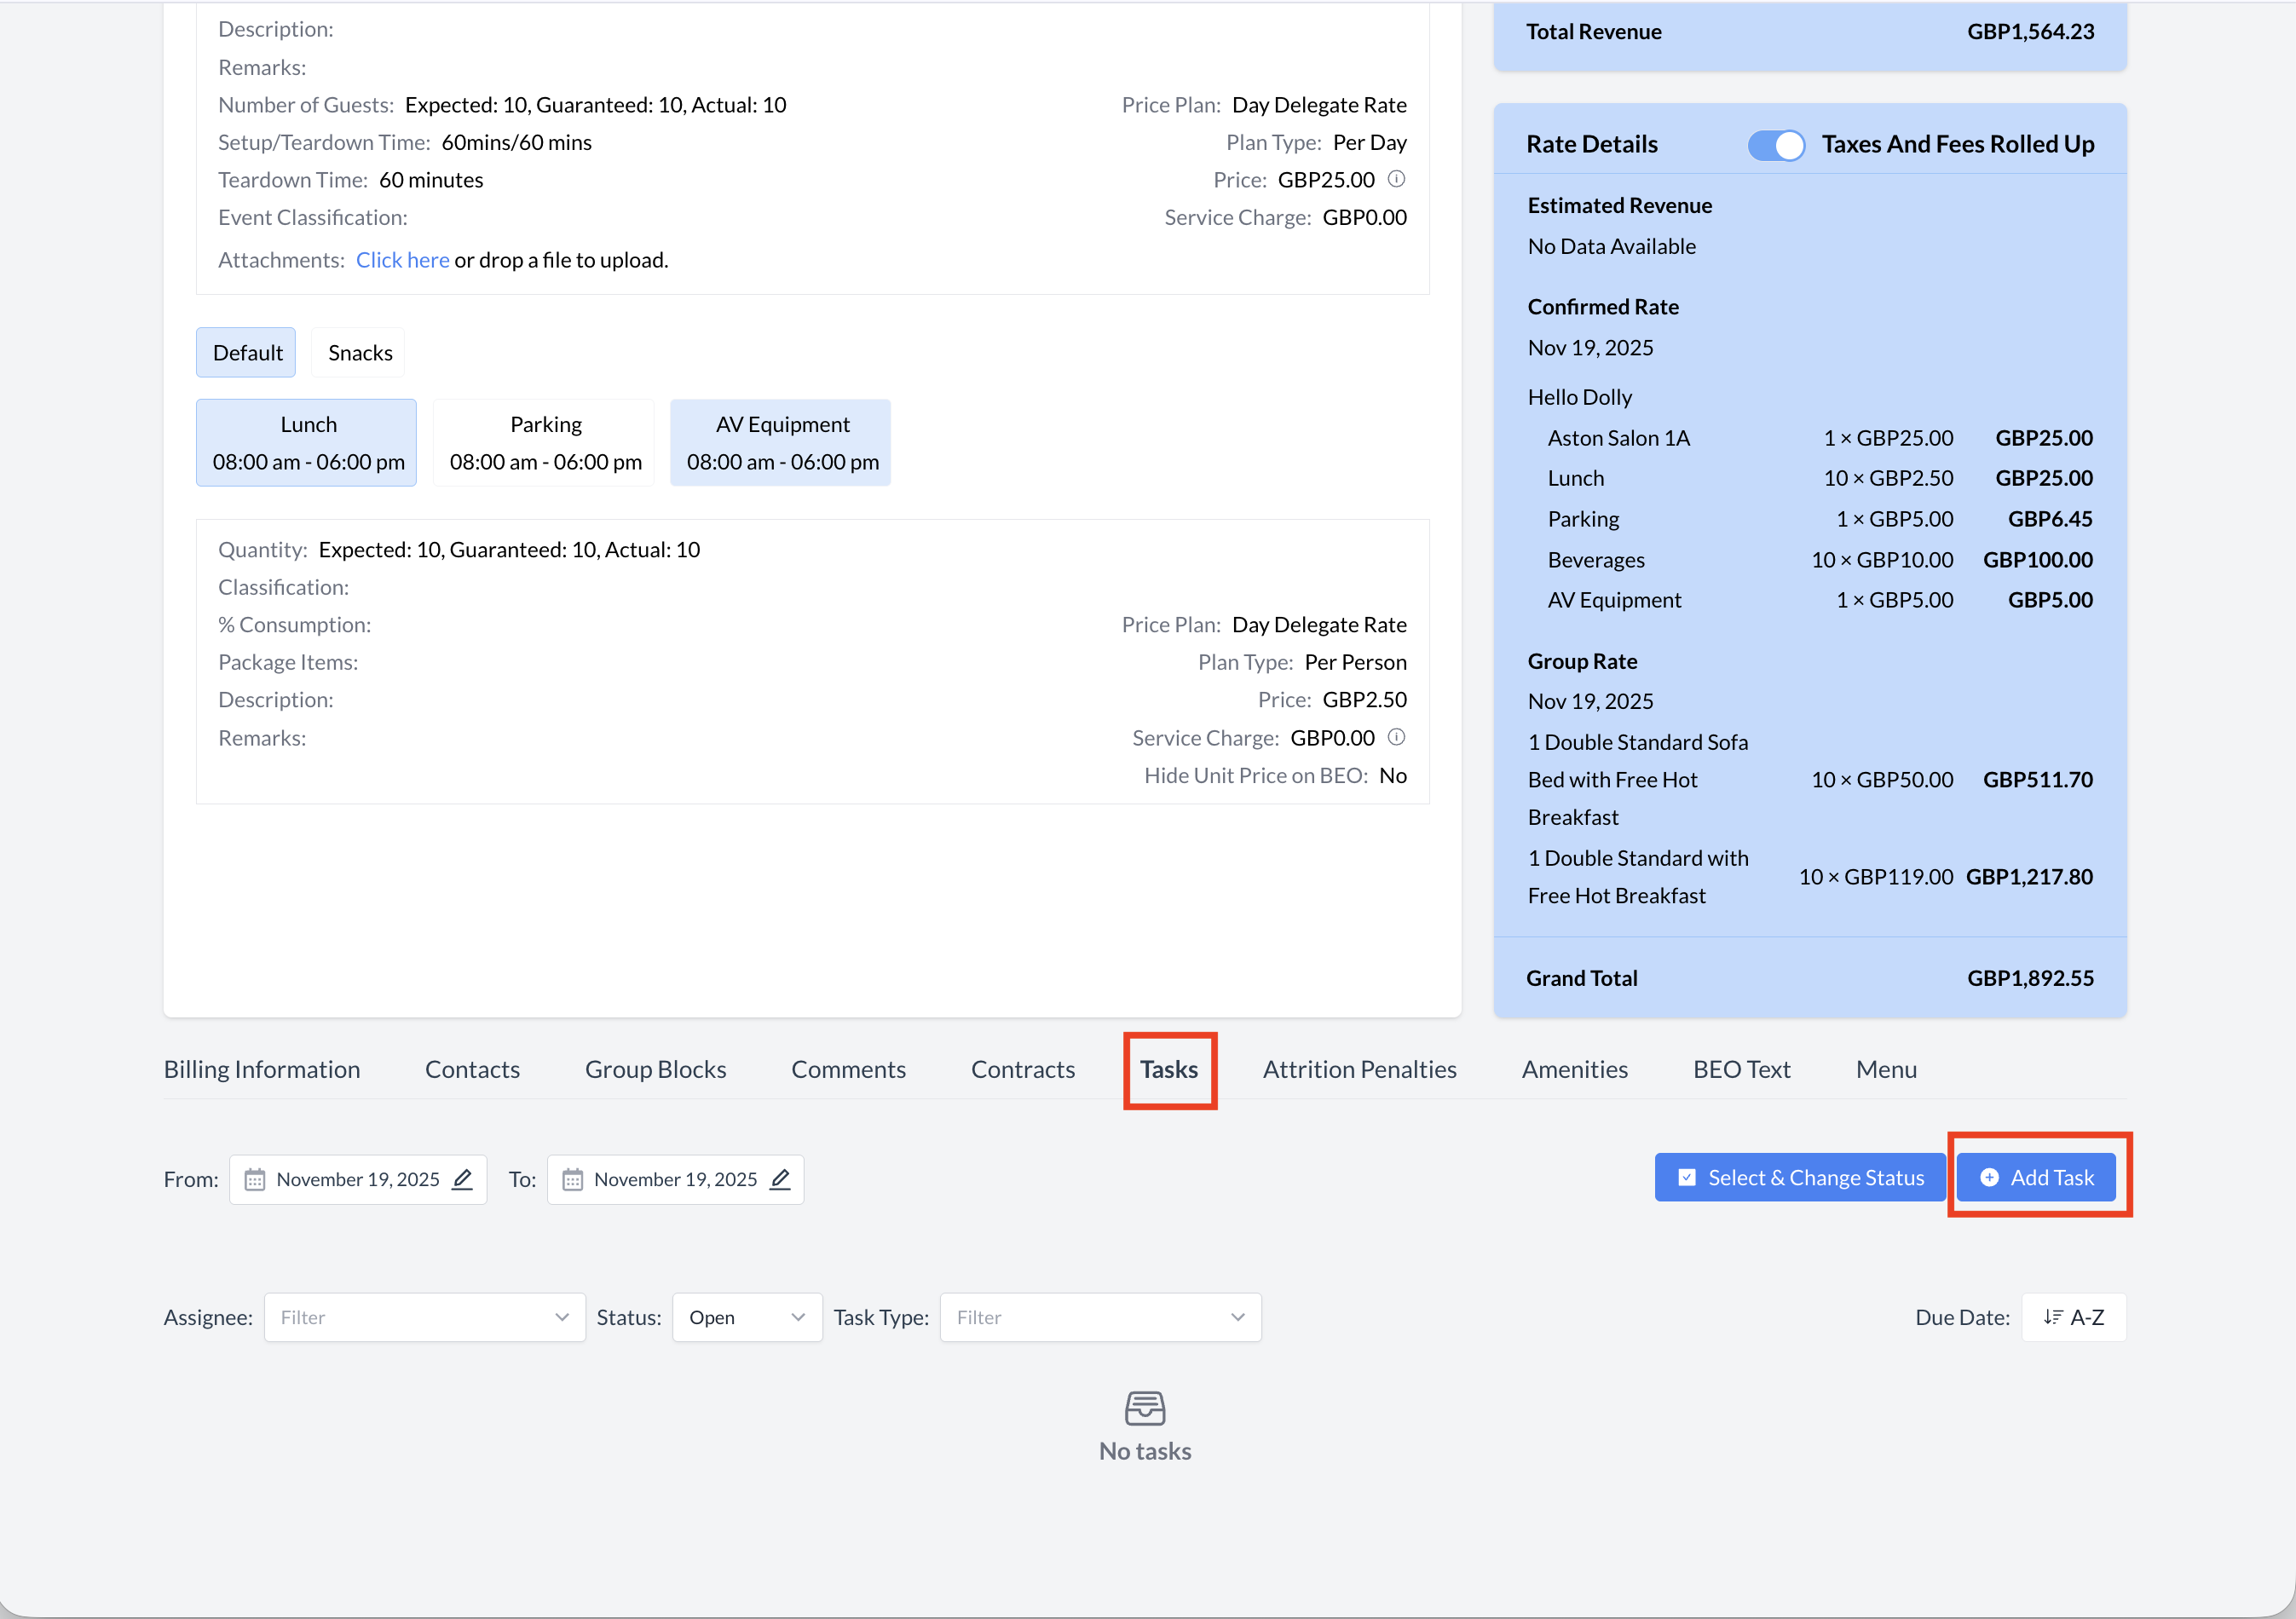
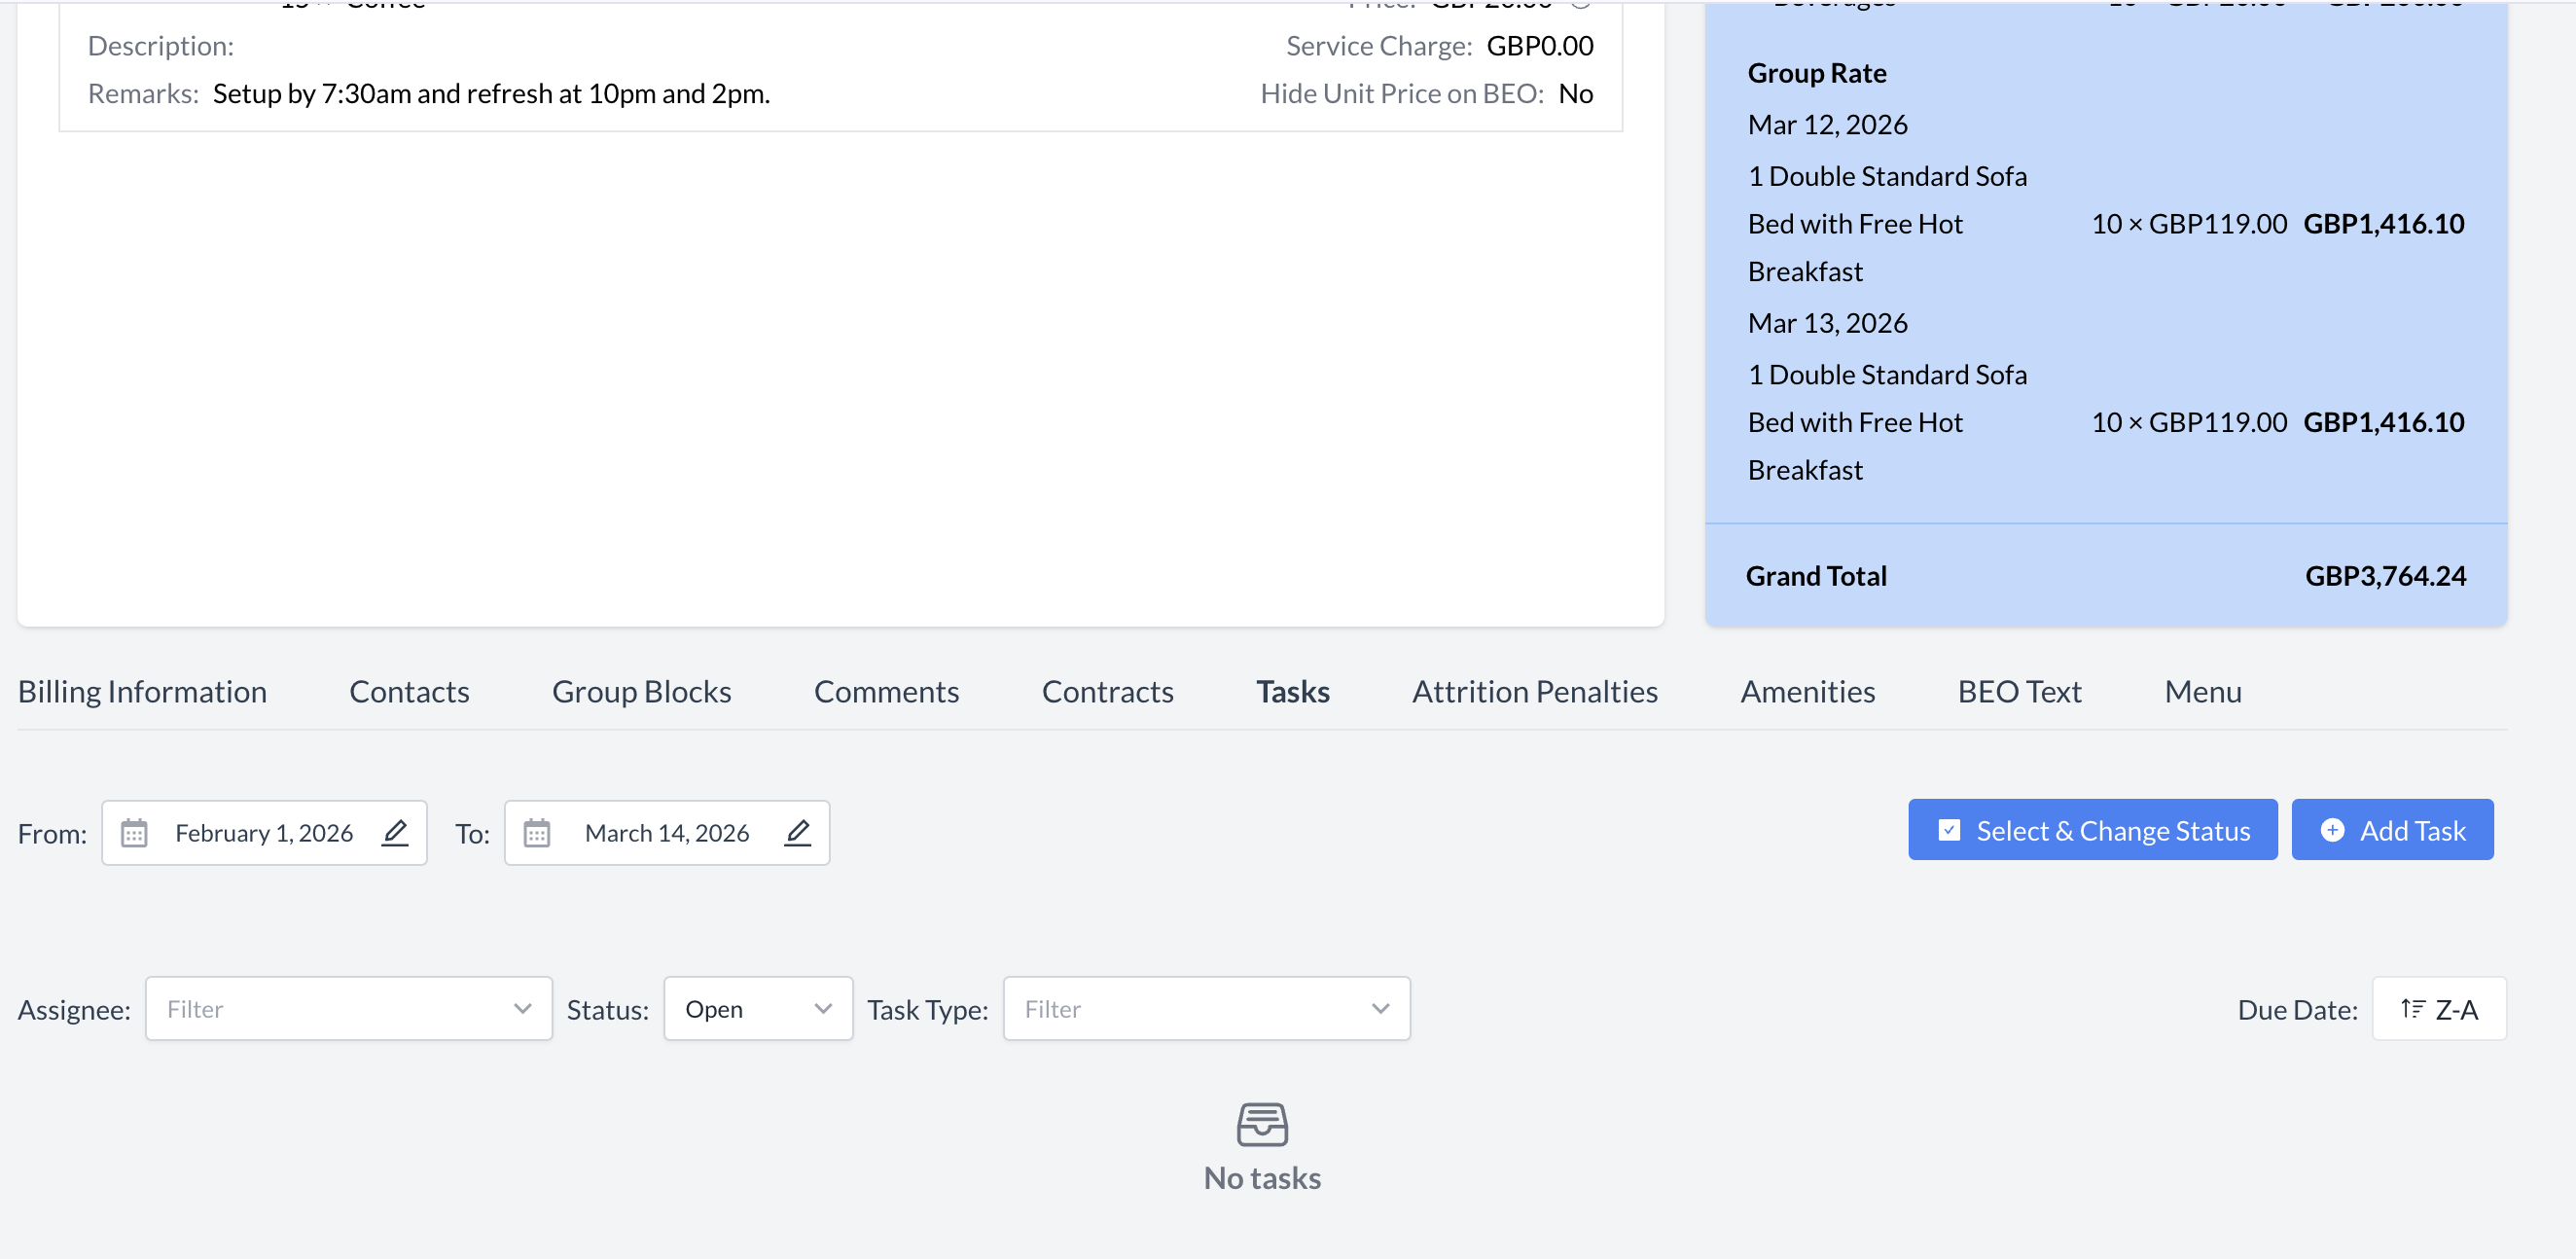
Viewing and Filtering Tasks

When you open the Tasks section on the Event Record, you will see a list of all tasks that fall within the From and To date range.

Date Range (From / To)

  • By default, the From Date and To Date are set to match the event’s Start and End dates.

  • To view tasks outside of this default range, click on either date field to open the Date Picker and select a new date range.

Example:
If your event is on March 14, 2025, but a task is scheduled for February 12, 2025, you’ll need to adjust the From Date to start earlier in order to see the task in the list.

Filtering Tasks

To help manage events with multiple tasks, use the available filters to narrow your results:

  • Assignee – Filter by the person responsible for the task

  • Status – Filter by task status (e.g., All, Closed or Open)

  • Task Type – Filter by the category or type of task

These filters make it easier to locate specific tasks and streamline task management for your event.

Event Record - Task Secton

Creating Tasks from the Event Record

To create or manage tasks associated with a specific event:
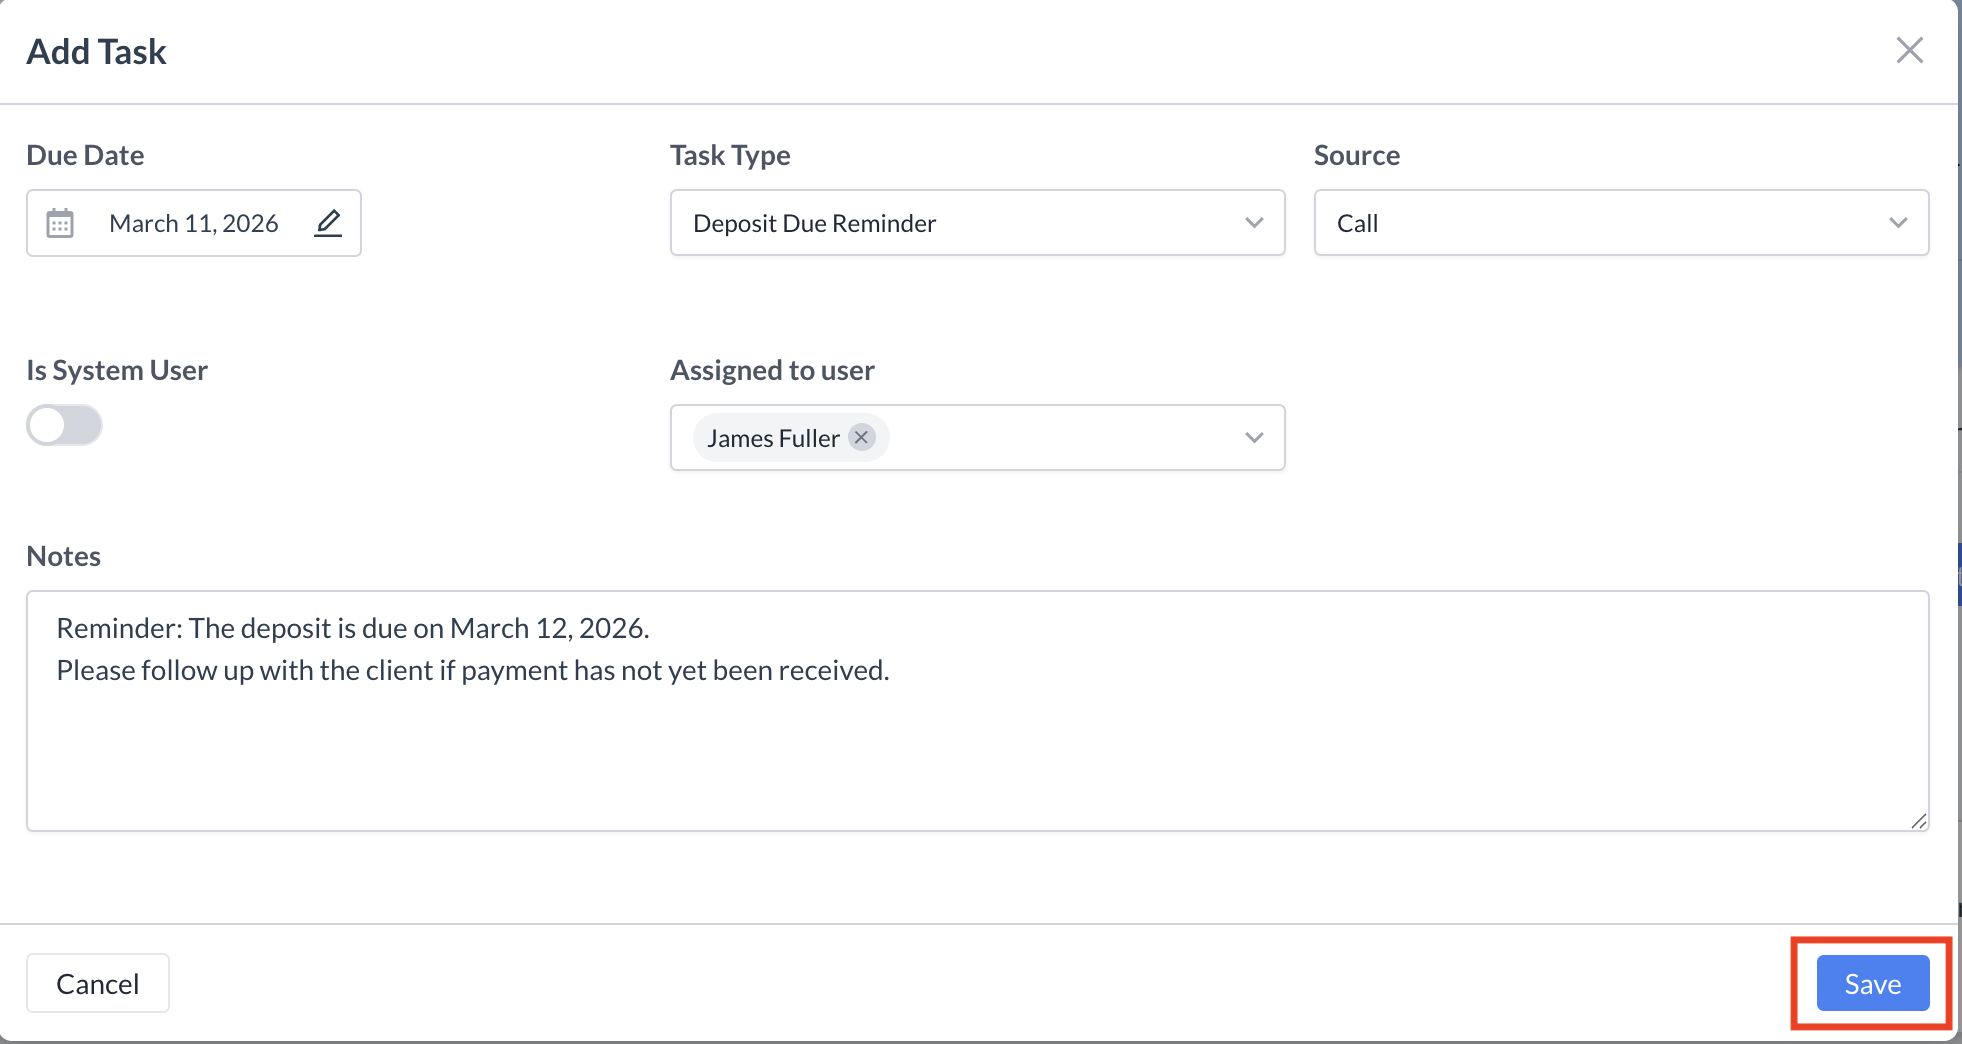
  1. Open the Event Record (Reservation).

  2. Scroll to the bottom of the page and click on the Tasks section to expand it.

  3. To create a new task, click the blue “Add Task” button.

Tasks - Event New.png

Tasks Section - Add Task Button

Adding a New Task

When you click Add Task, a new screen will open where you can enter the task details. Complete the following fields:

  • Due Date
    Select the date by which the task should be completed.

  • Task Type
    Choose the appropriate category or type of task from the dropdown list.

  • Source
    Indicate how the task should be fulfilled (e.g., email, phone call, internal action).

  • Assigned to User
    Select the team member responsible for completing the task.

  • Notes
    Enter a description of the action required or any relevant details for completing the task.

đź’ˇ Note:
Since the task is being created from the Event Record, the event is automatically linked to the task.
If a Company profile is associated with the event, it will also be automatically linked to the task.

Once all required information is entered, click the blue "Save" button to create the task.

The task has been successfully created.

Tasks Section - Add a Task Screen

Tasks Section - Created Task

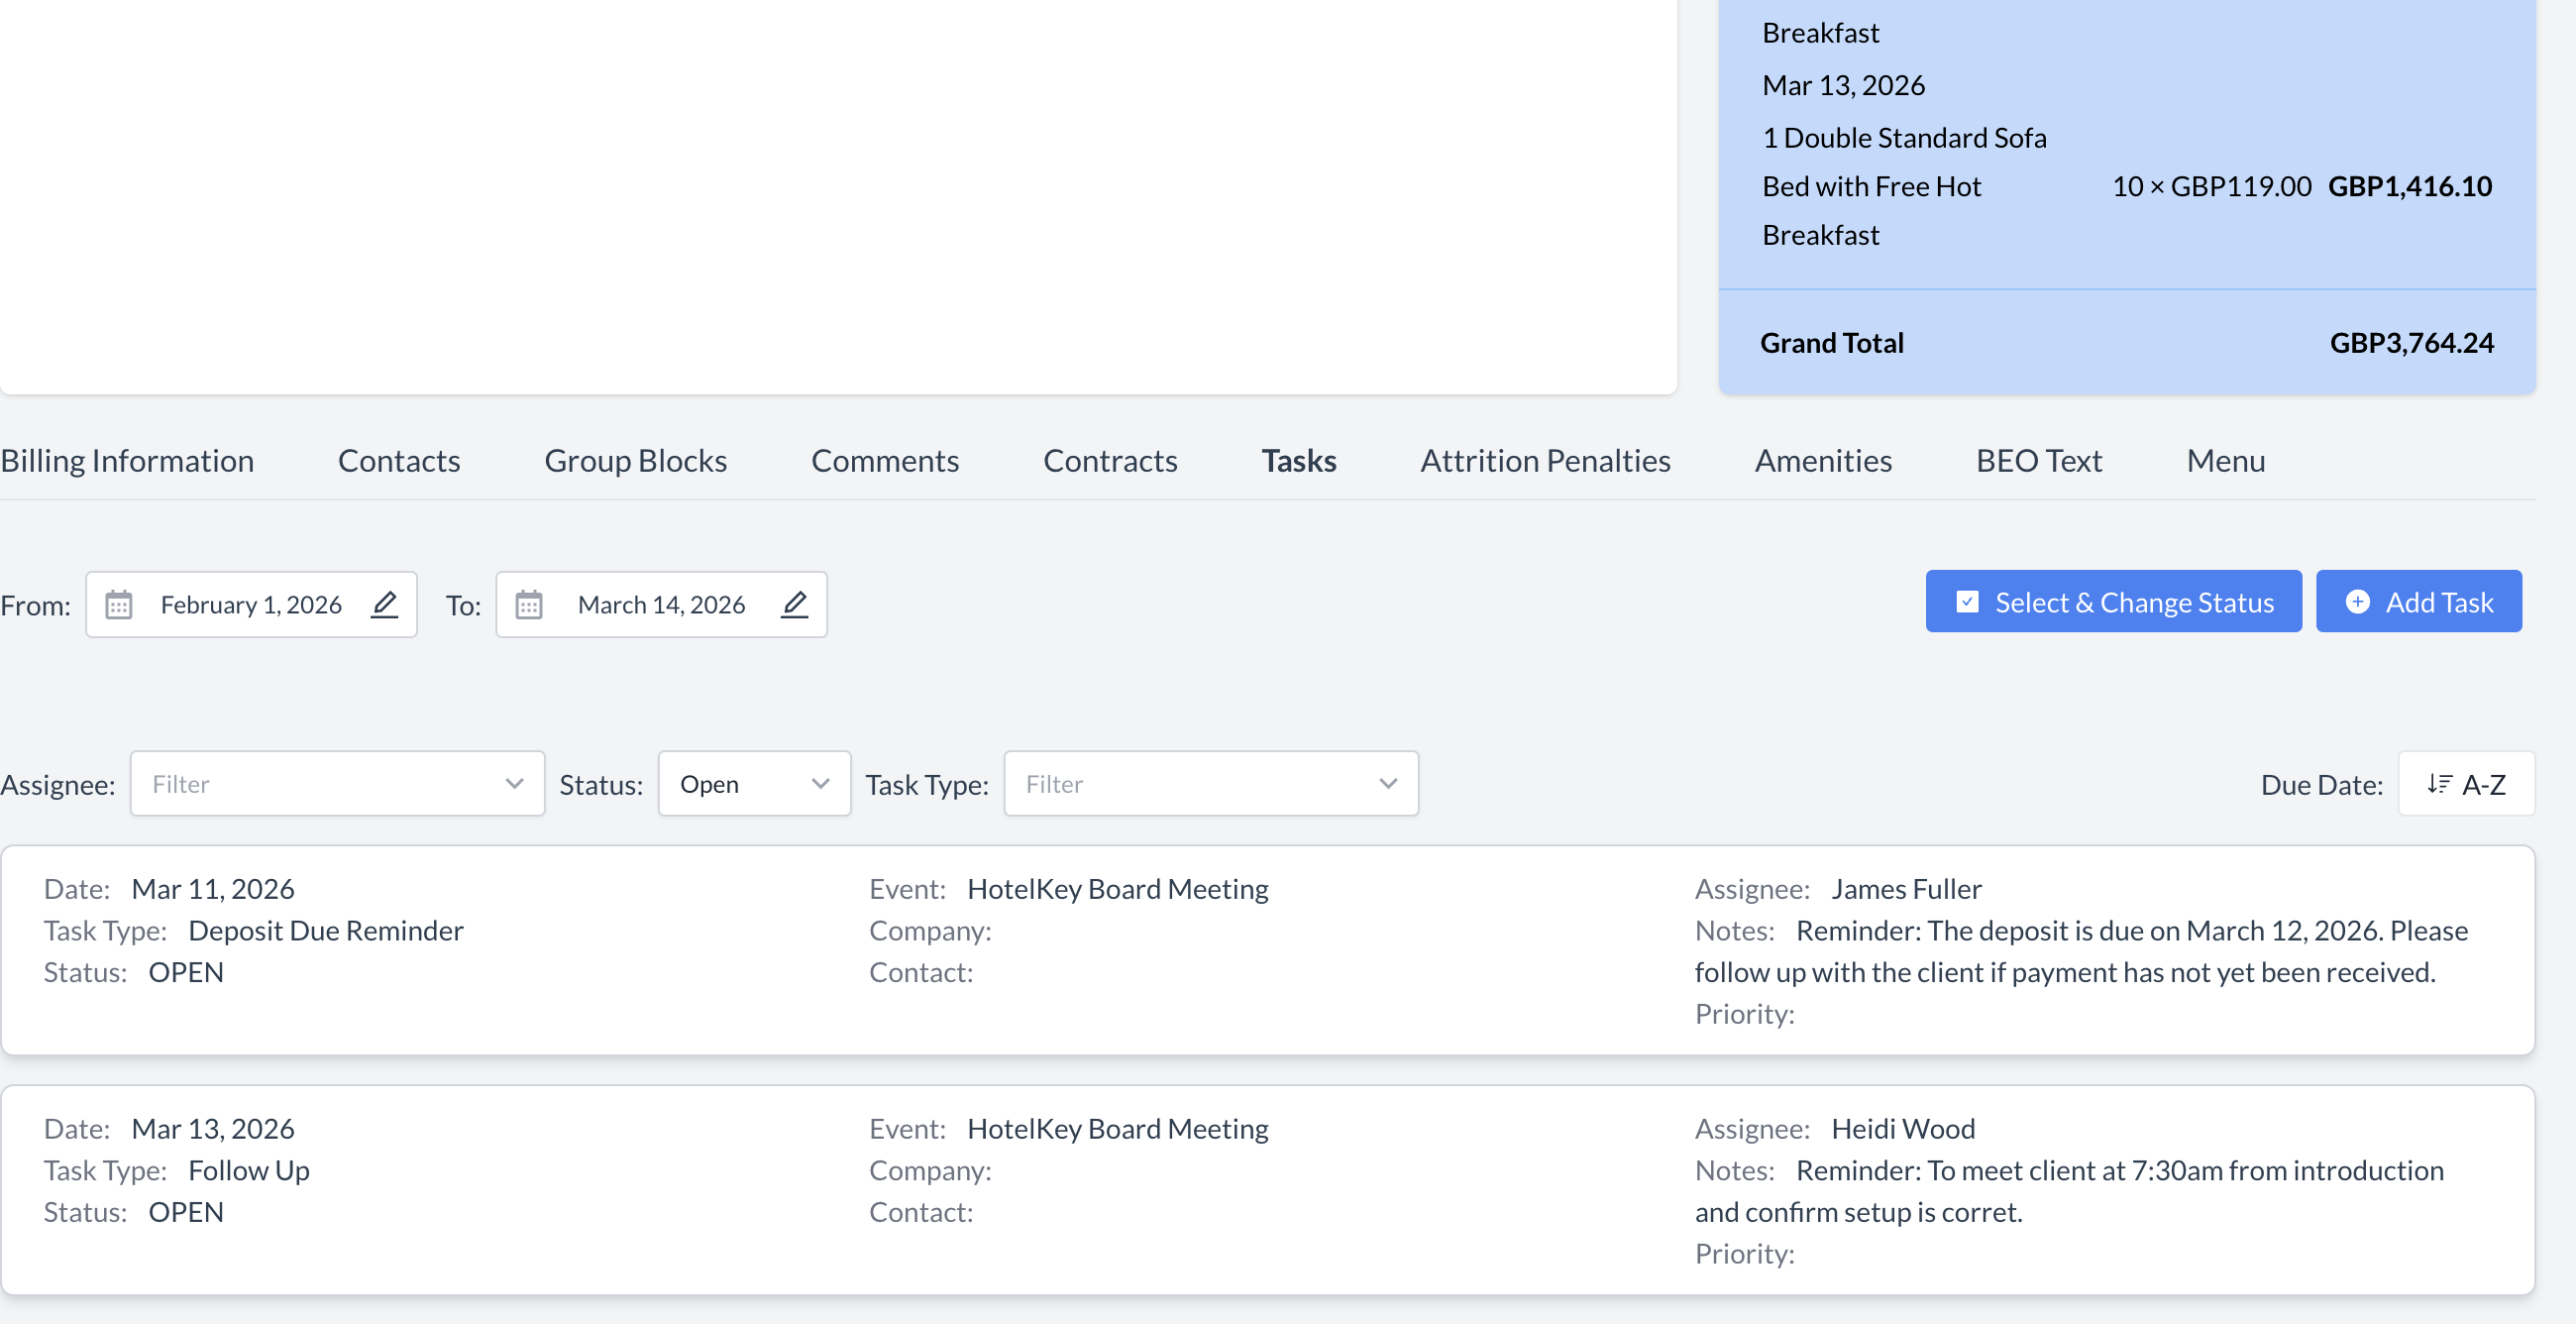
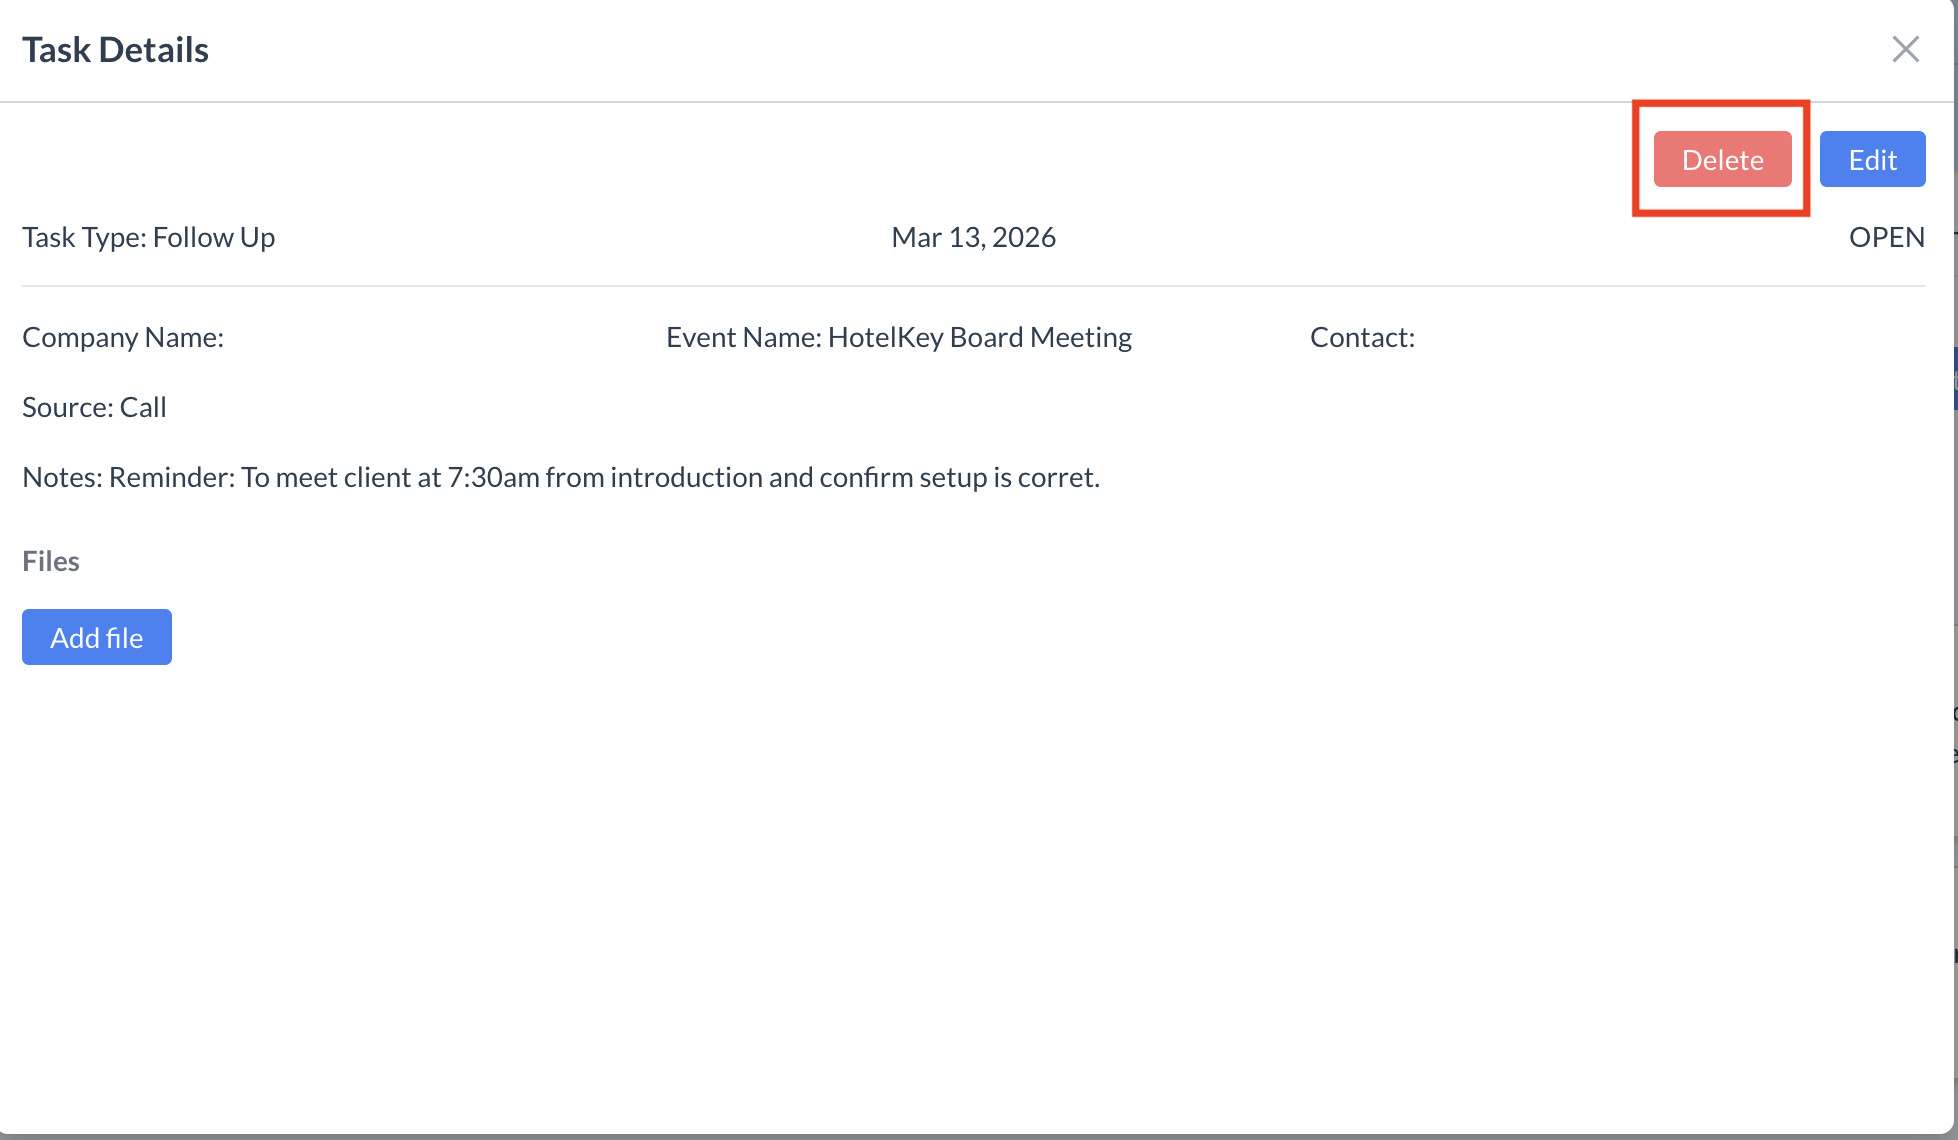
Editing an Existing Task

To edit a task that has already been created, follow these steps:

  1. Open the Event Record (Reservation).

  2. Scroll to the bottom of the page and expand the Tasks section.

  3. Locate the task you want to update and click on it to open the task details.

Add a File (Optional)
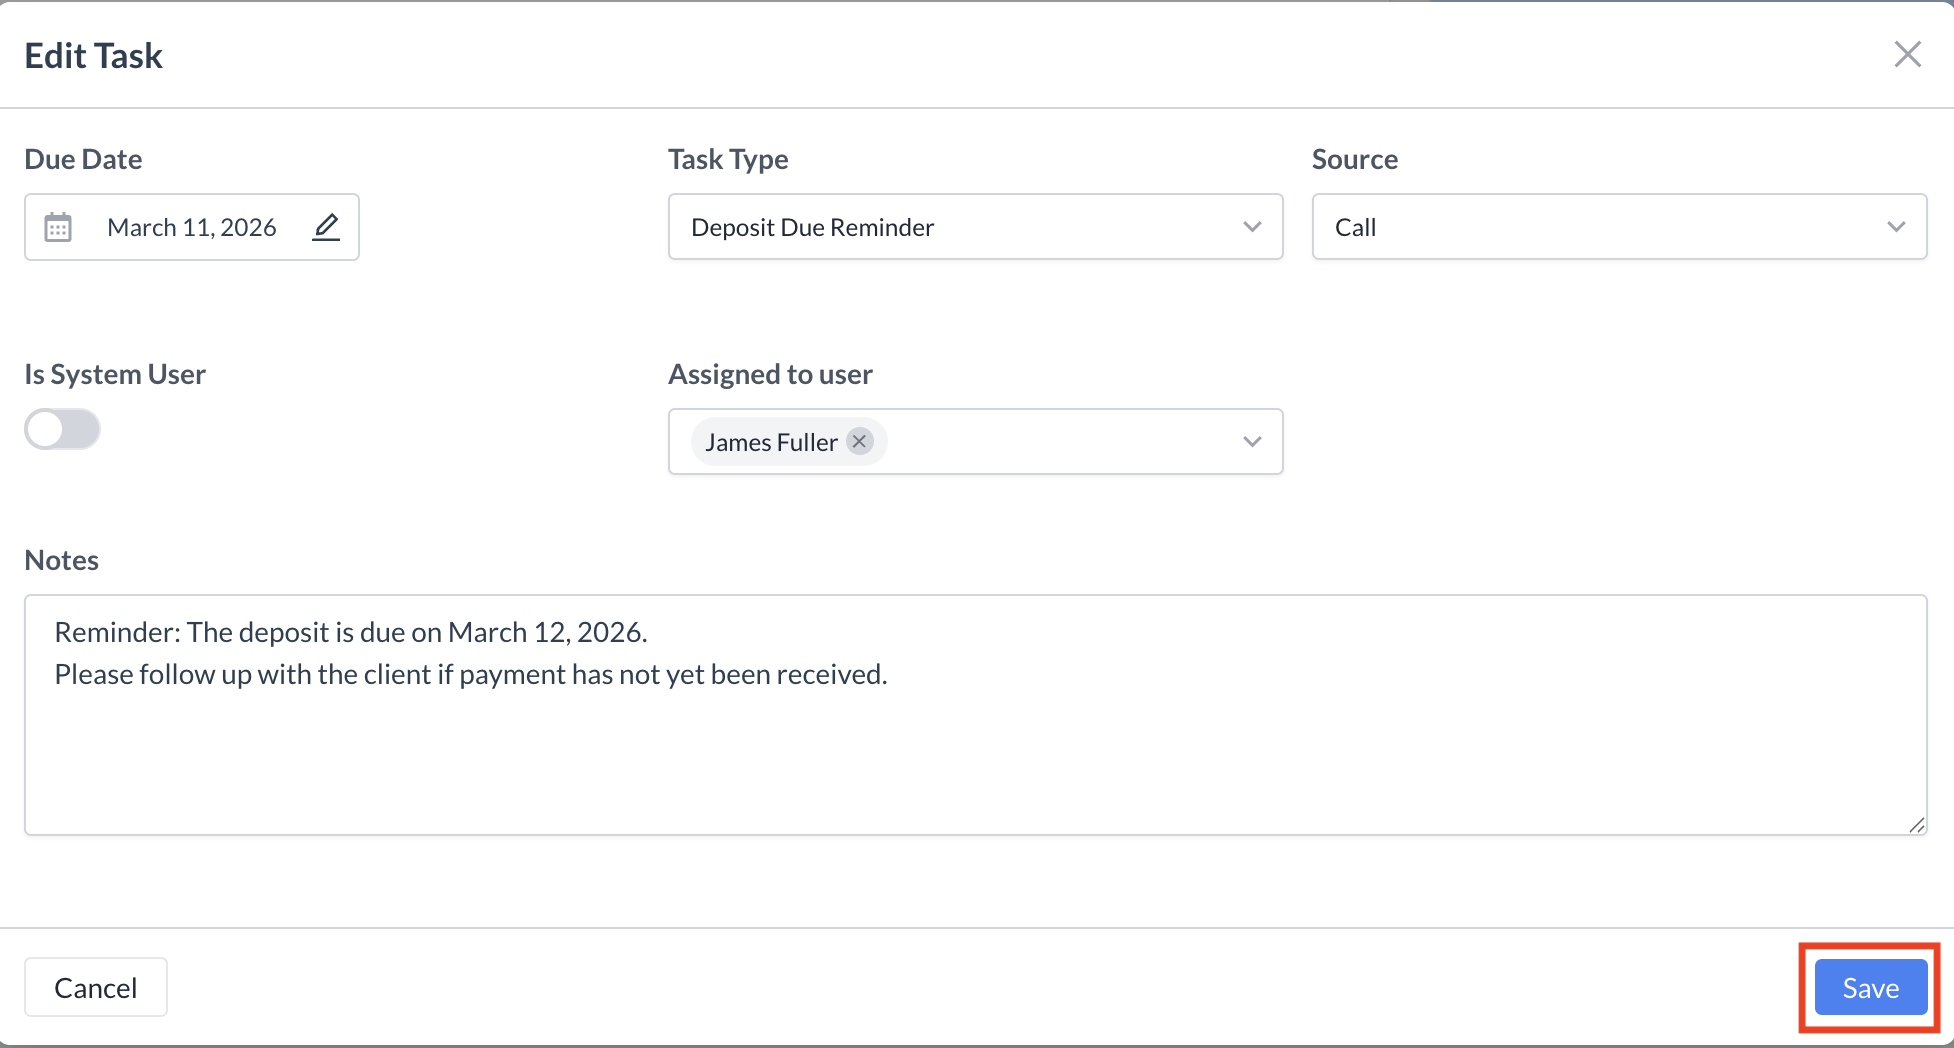
  • To attach a file to the task, click the blue "Add File" button.

  • A file picker window will appear. Browse your computer and select the file you wish to upload.

Edit Task Details

  • To make changes to the task (such as the Due Date, Assignee, or Task Description), click the blue "Edit" button.

  • The Edit Task screen will appear. Make the necessary updates.

  • When finished, click the blue "Save" button to apply your changes.

After saving, you will be returned to the Tasks section within the Event Record, where your updates will be reflected.
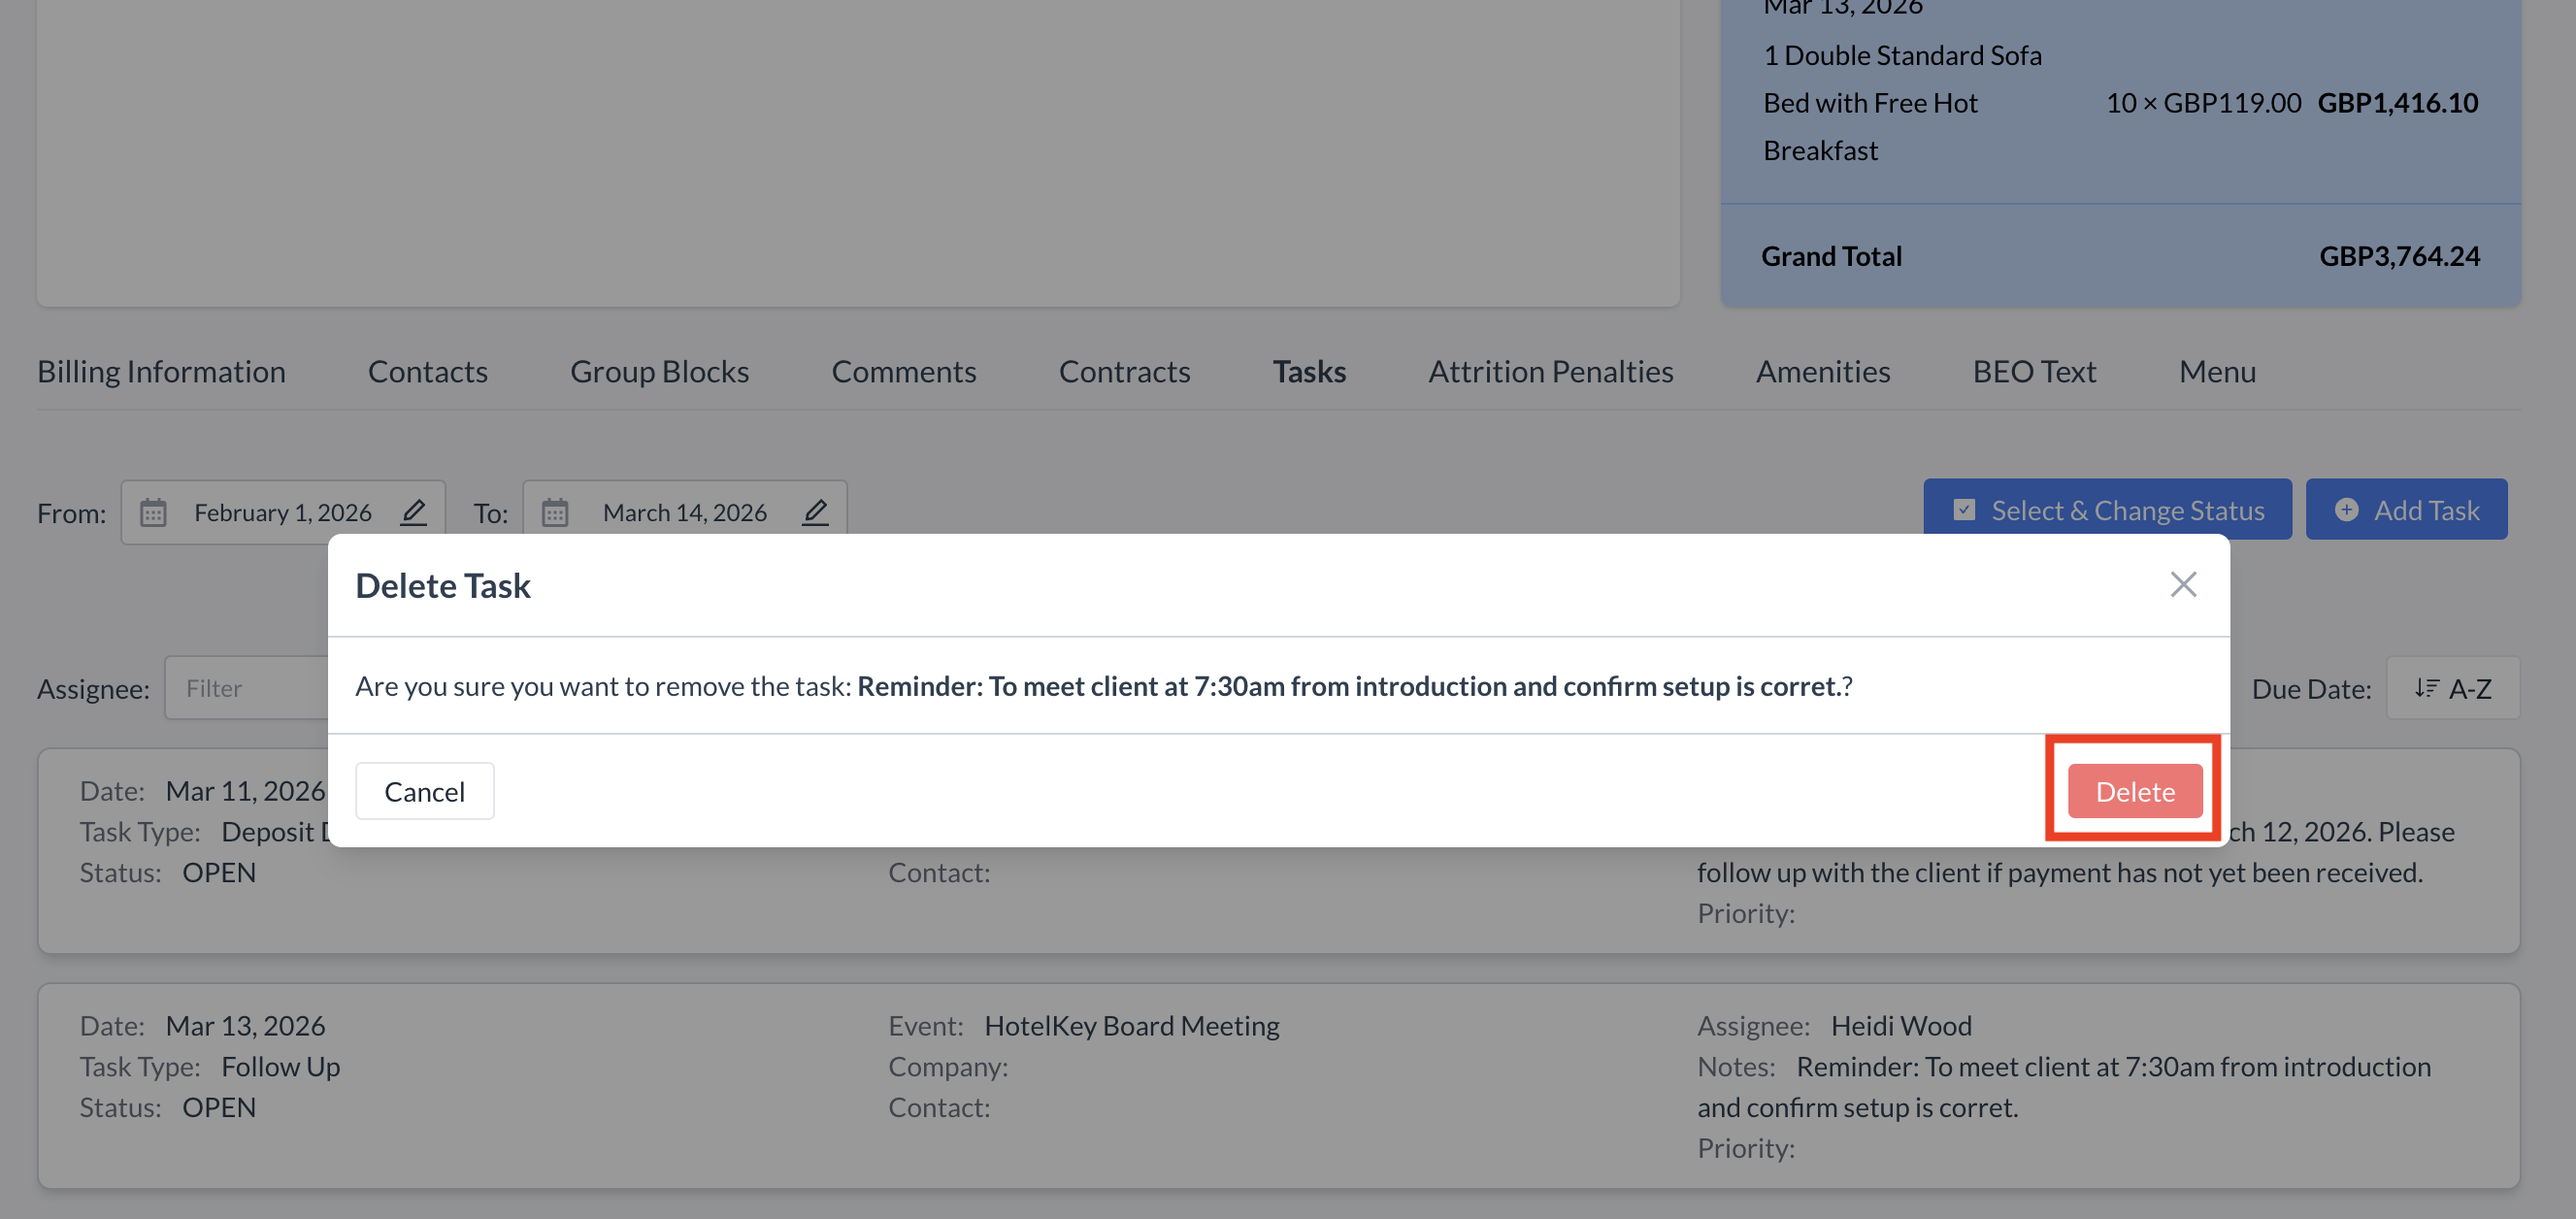
Tasks Section - Select Task to Edit

Tasks Section - Task Details Screen

Tasks Section - Edit Task

Deleting a Task

To delete an existing task from the Event Record, follow these steps:

  1. Open the Event Record (Reservation).

  2. Scroll to the bottom of the page and expand the Tasks section.

  3. Find the task you wish to delete and click on it to open the task details.

  4. In the Task Details screen, click the red "Delete" button.

  5. A confirmation window will appear. Click the red "Delete" button again to confirm.

  6. You will be returned to the Tasks section. The task will no longer appear in the list, indicating it has been successfully deleted.

⚠️ Note: Deleted tasks cannot be recovered. Be sure you no longer need the task before confirming deletion.

Tasks Section - Select Task to Delete

Tasks Section - Task Details Delete Button

Tasks Section - Delete Task Confirmation

Tasks Section - Task Removed Example

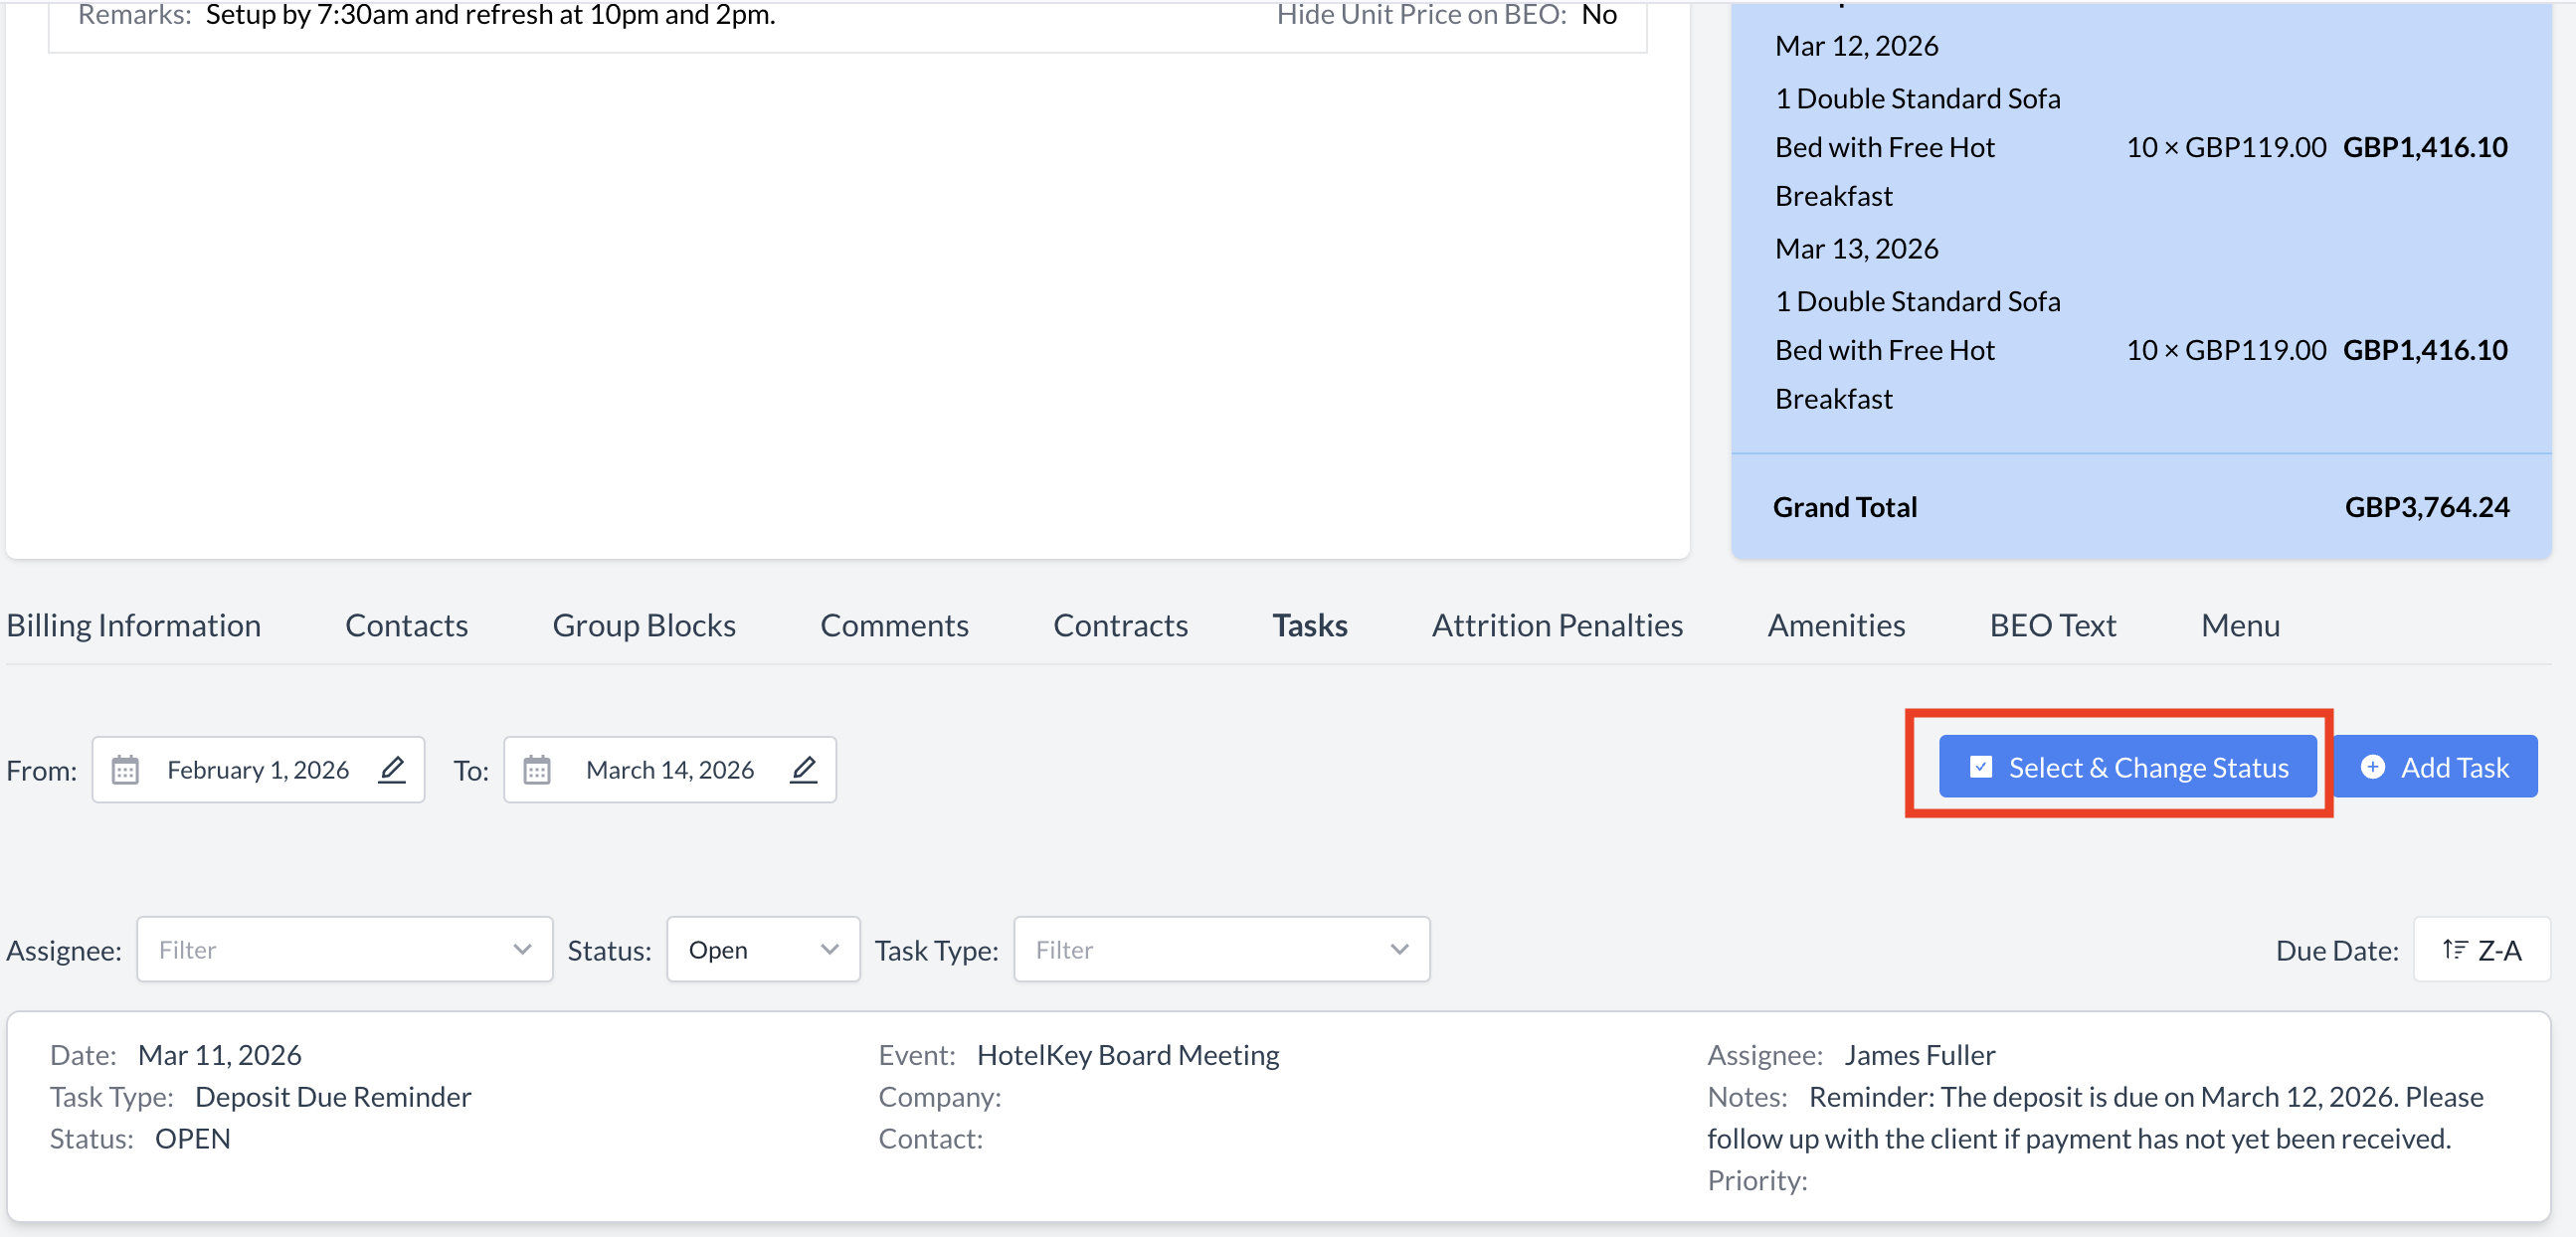
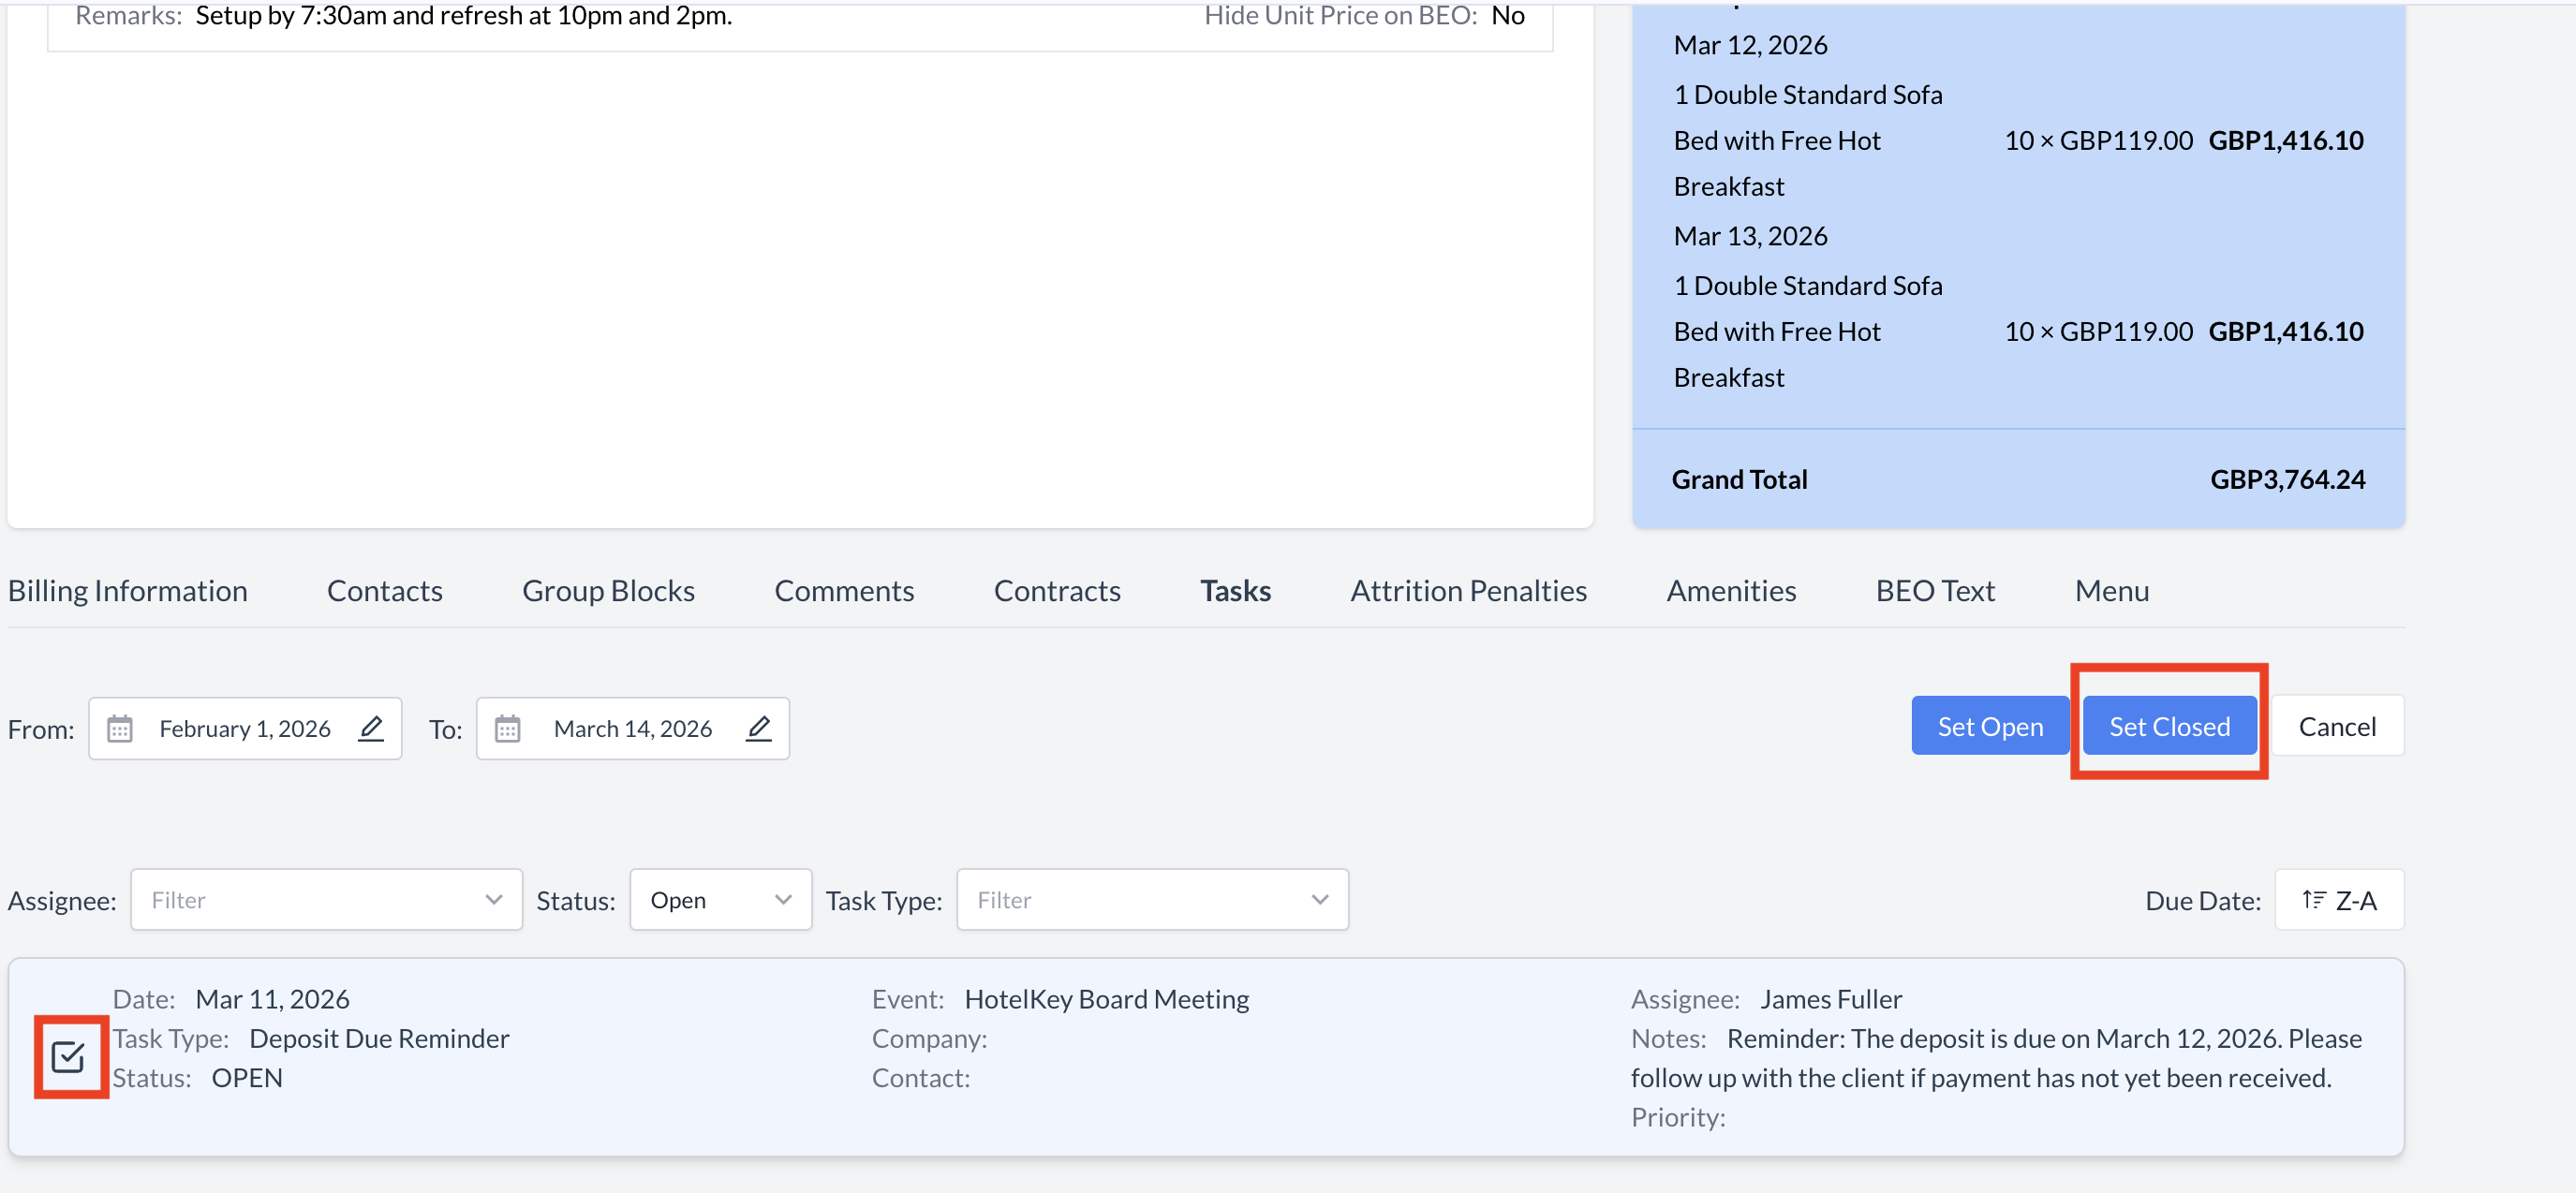
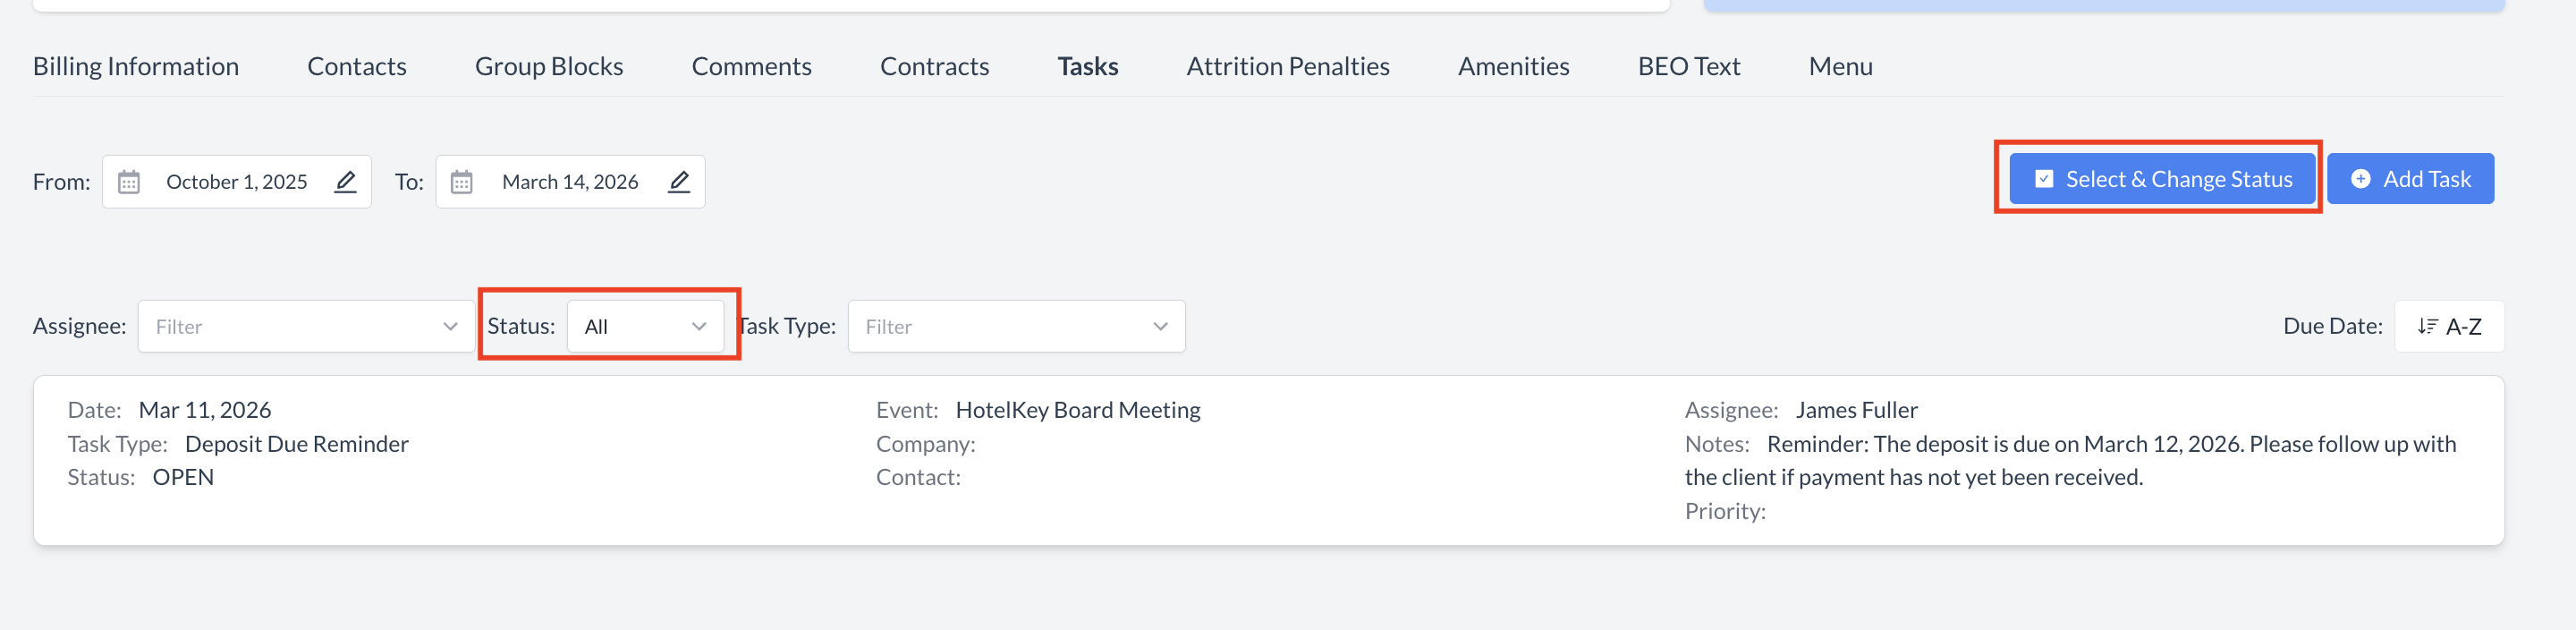
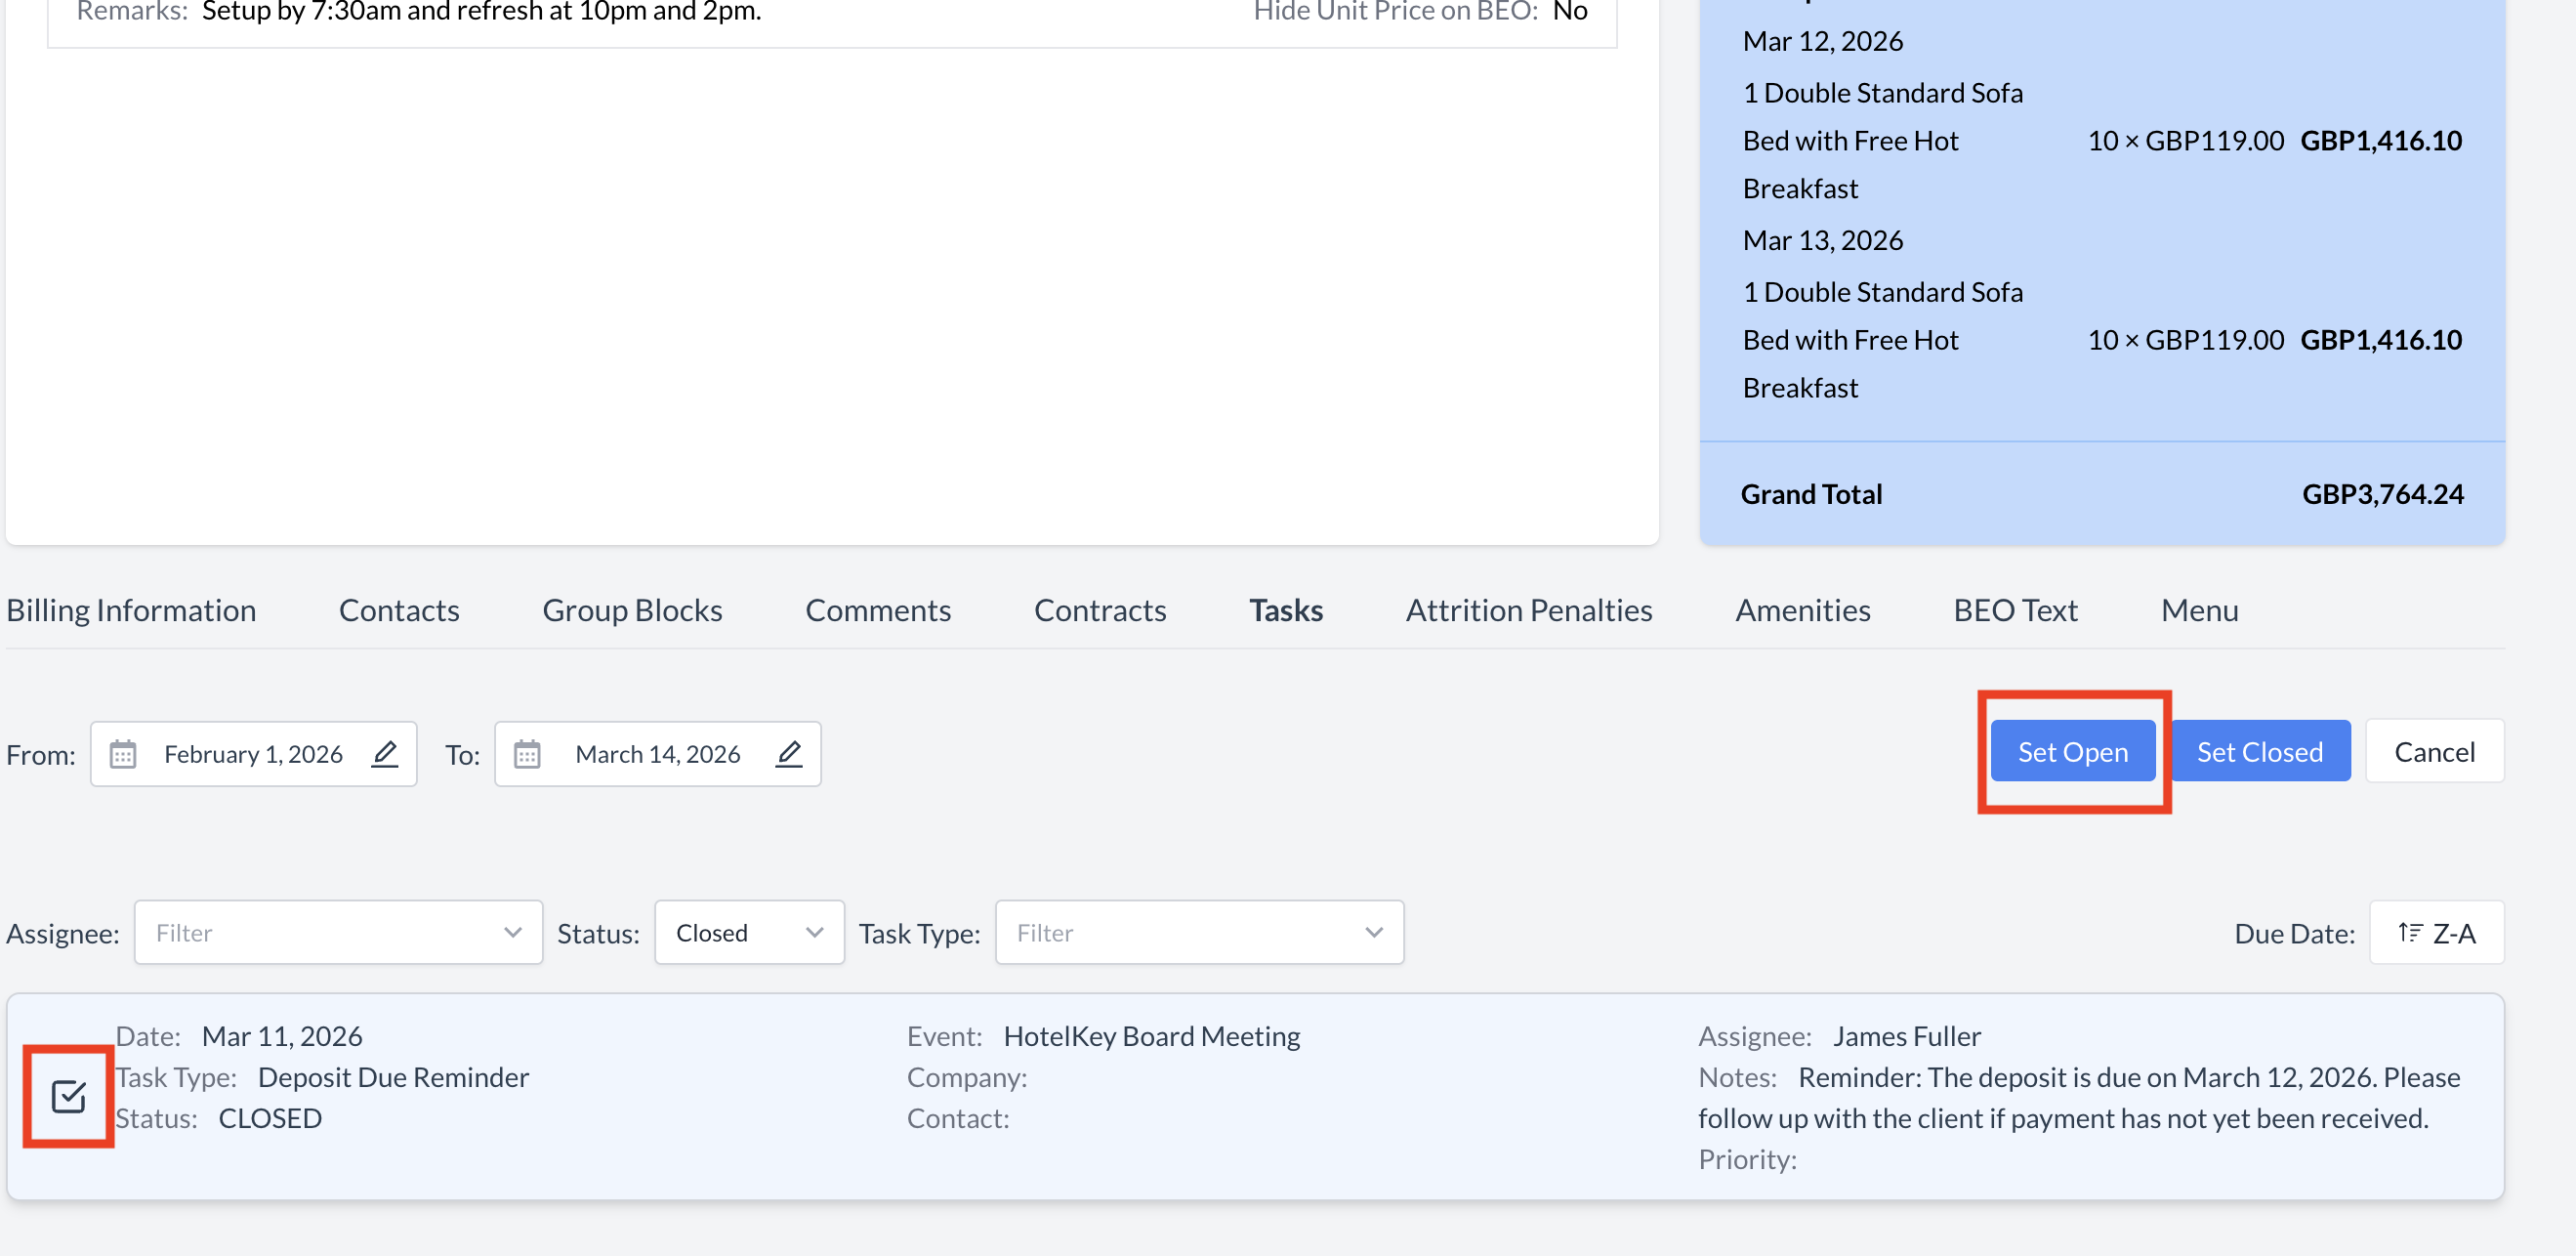
Closing an Open Task

To mark an open task as Closed, follow these steps:

  1. Open the Event Record (Reservation).

  2. Scroll to the bottom of the page and expand the Tasks section.

  3. Click the blue "Select & Change Status" button.

  4. A checkbox will appear next to each task.
    Select the task(s) you want to close by clicking the checkbox.

  5. Click the blue "Set Closed" button.

  6. The selected task(s) will now be marked as Closed.

🔍 Note: The default view only displays tasks with an Open status. Once closed, the task will no longer appear unless you update the Status Filter to Closed or All.

Tasks Section - Select & Change Status Button

Tasks Section - Select a Task

Tasks Section - Task Closed Example

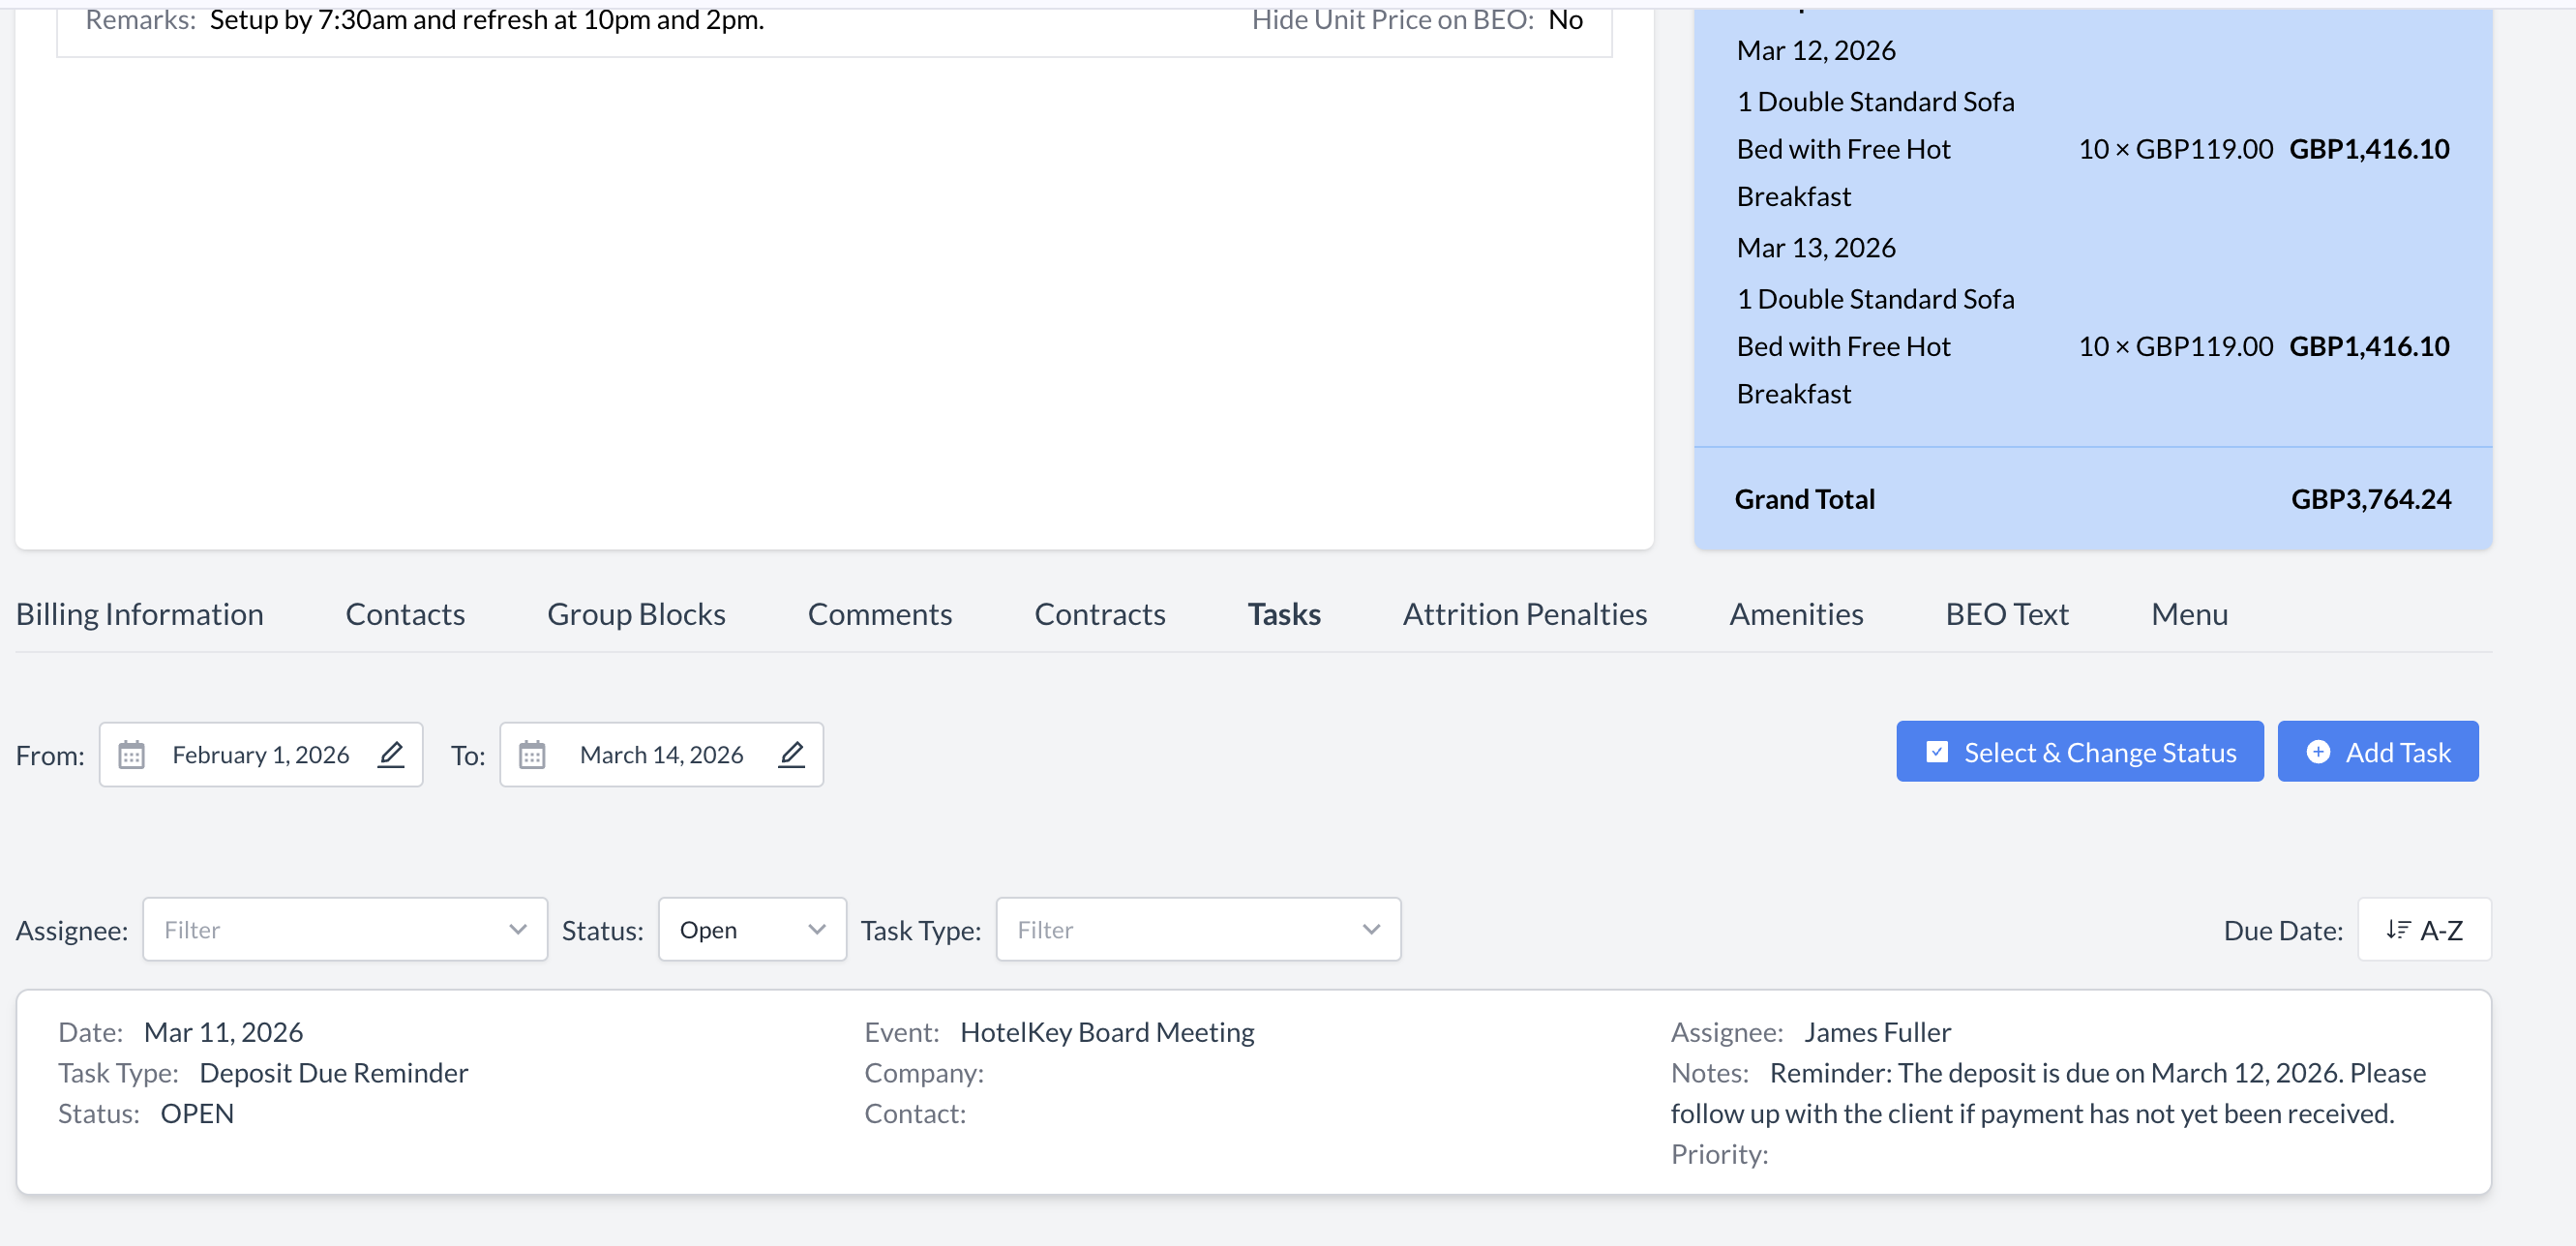
Reopening a Closed Task

If you need to mark a closed task as Open, follow the steps below:

  1. Open the Event Record (Reservation).

  2. Scroll to the bottom of the page and expand the Tasks section.

  3. In the Status Filter, change the view to Closed or All to display all previously closed tasks.

  4. Click the blue "Select & Change Status" button.

  5. A checkbox will appear next to each closed task.
    Select the task(s) you want to reopen by clicking the checkbox.

  6. Click the blue "Set Open" button.

  7. The selected task(s) will now be marked as Open.

🔍 Note: After reopening a task, the view will reset based on the event's Start and End dates.
If the reopened task has a due date outside of that range, you will need to adjust the From Date using the date picker to make the task visible again.

status all and select status.png

Task Section Screen

Tasks Section - Select a Task

Tasks Section - Task Open Example

JavaScript errors detected

Please note, these errors can depend on your browser setup.

If this problem persists, please contact our support.