
📆 Revision Date:
Banquet Menu Overview
The Banquet Menu feature in EventKey allows you to efficiently share curated or customized menus with your clients directly from the Event Record.
You can select from pre-loaded banquet menus or tailor a menu based on the client’s specific needs, using the available templates. Once finalized, the menu can be sent directly to the client for review—streamlining communication, saving time, and ensuring accuracy.
This tool helps standardize offerings while allowing flexibility for custom events, making it easier to manage client expectations and deliver consistent, high-quality service.
|
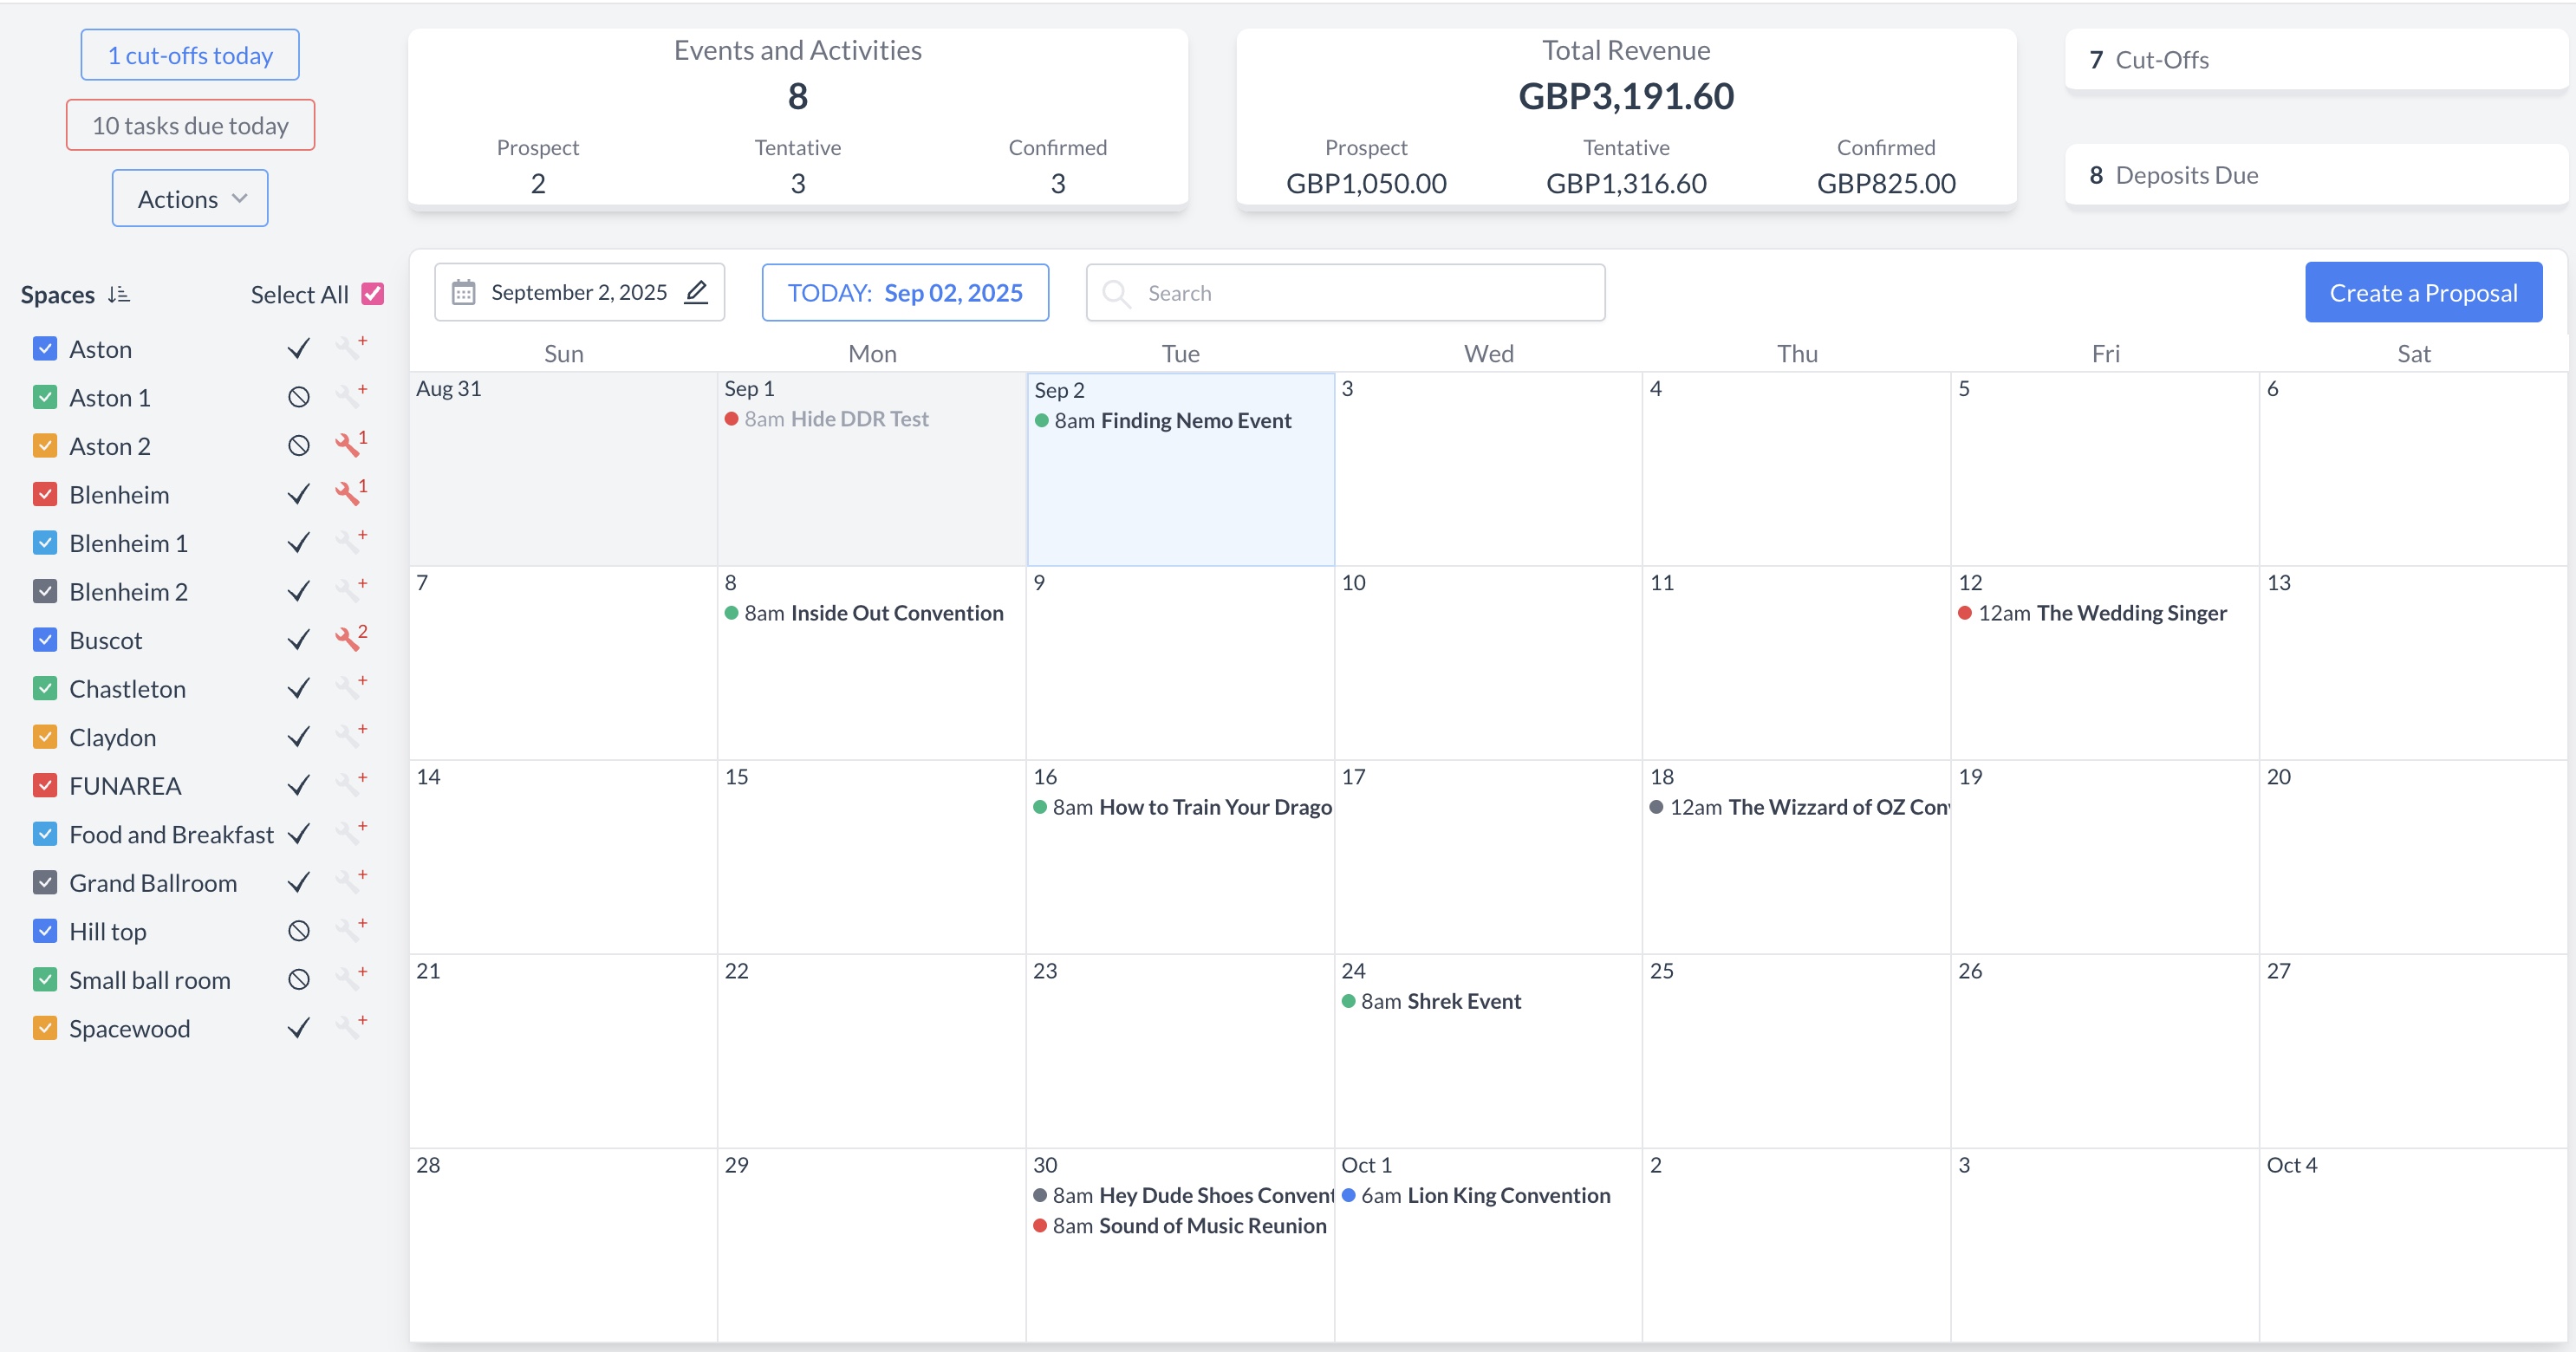
Navigate to Home > Event Management |
|
|
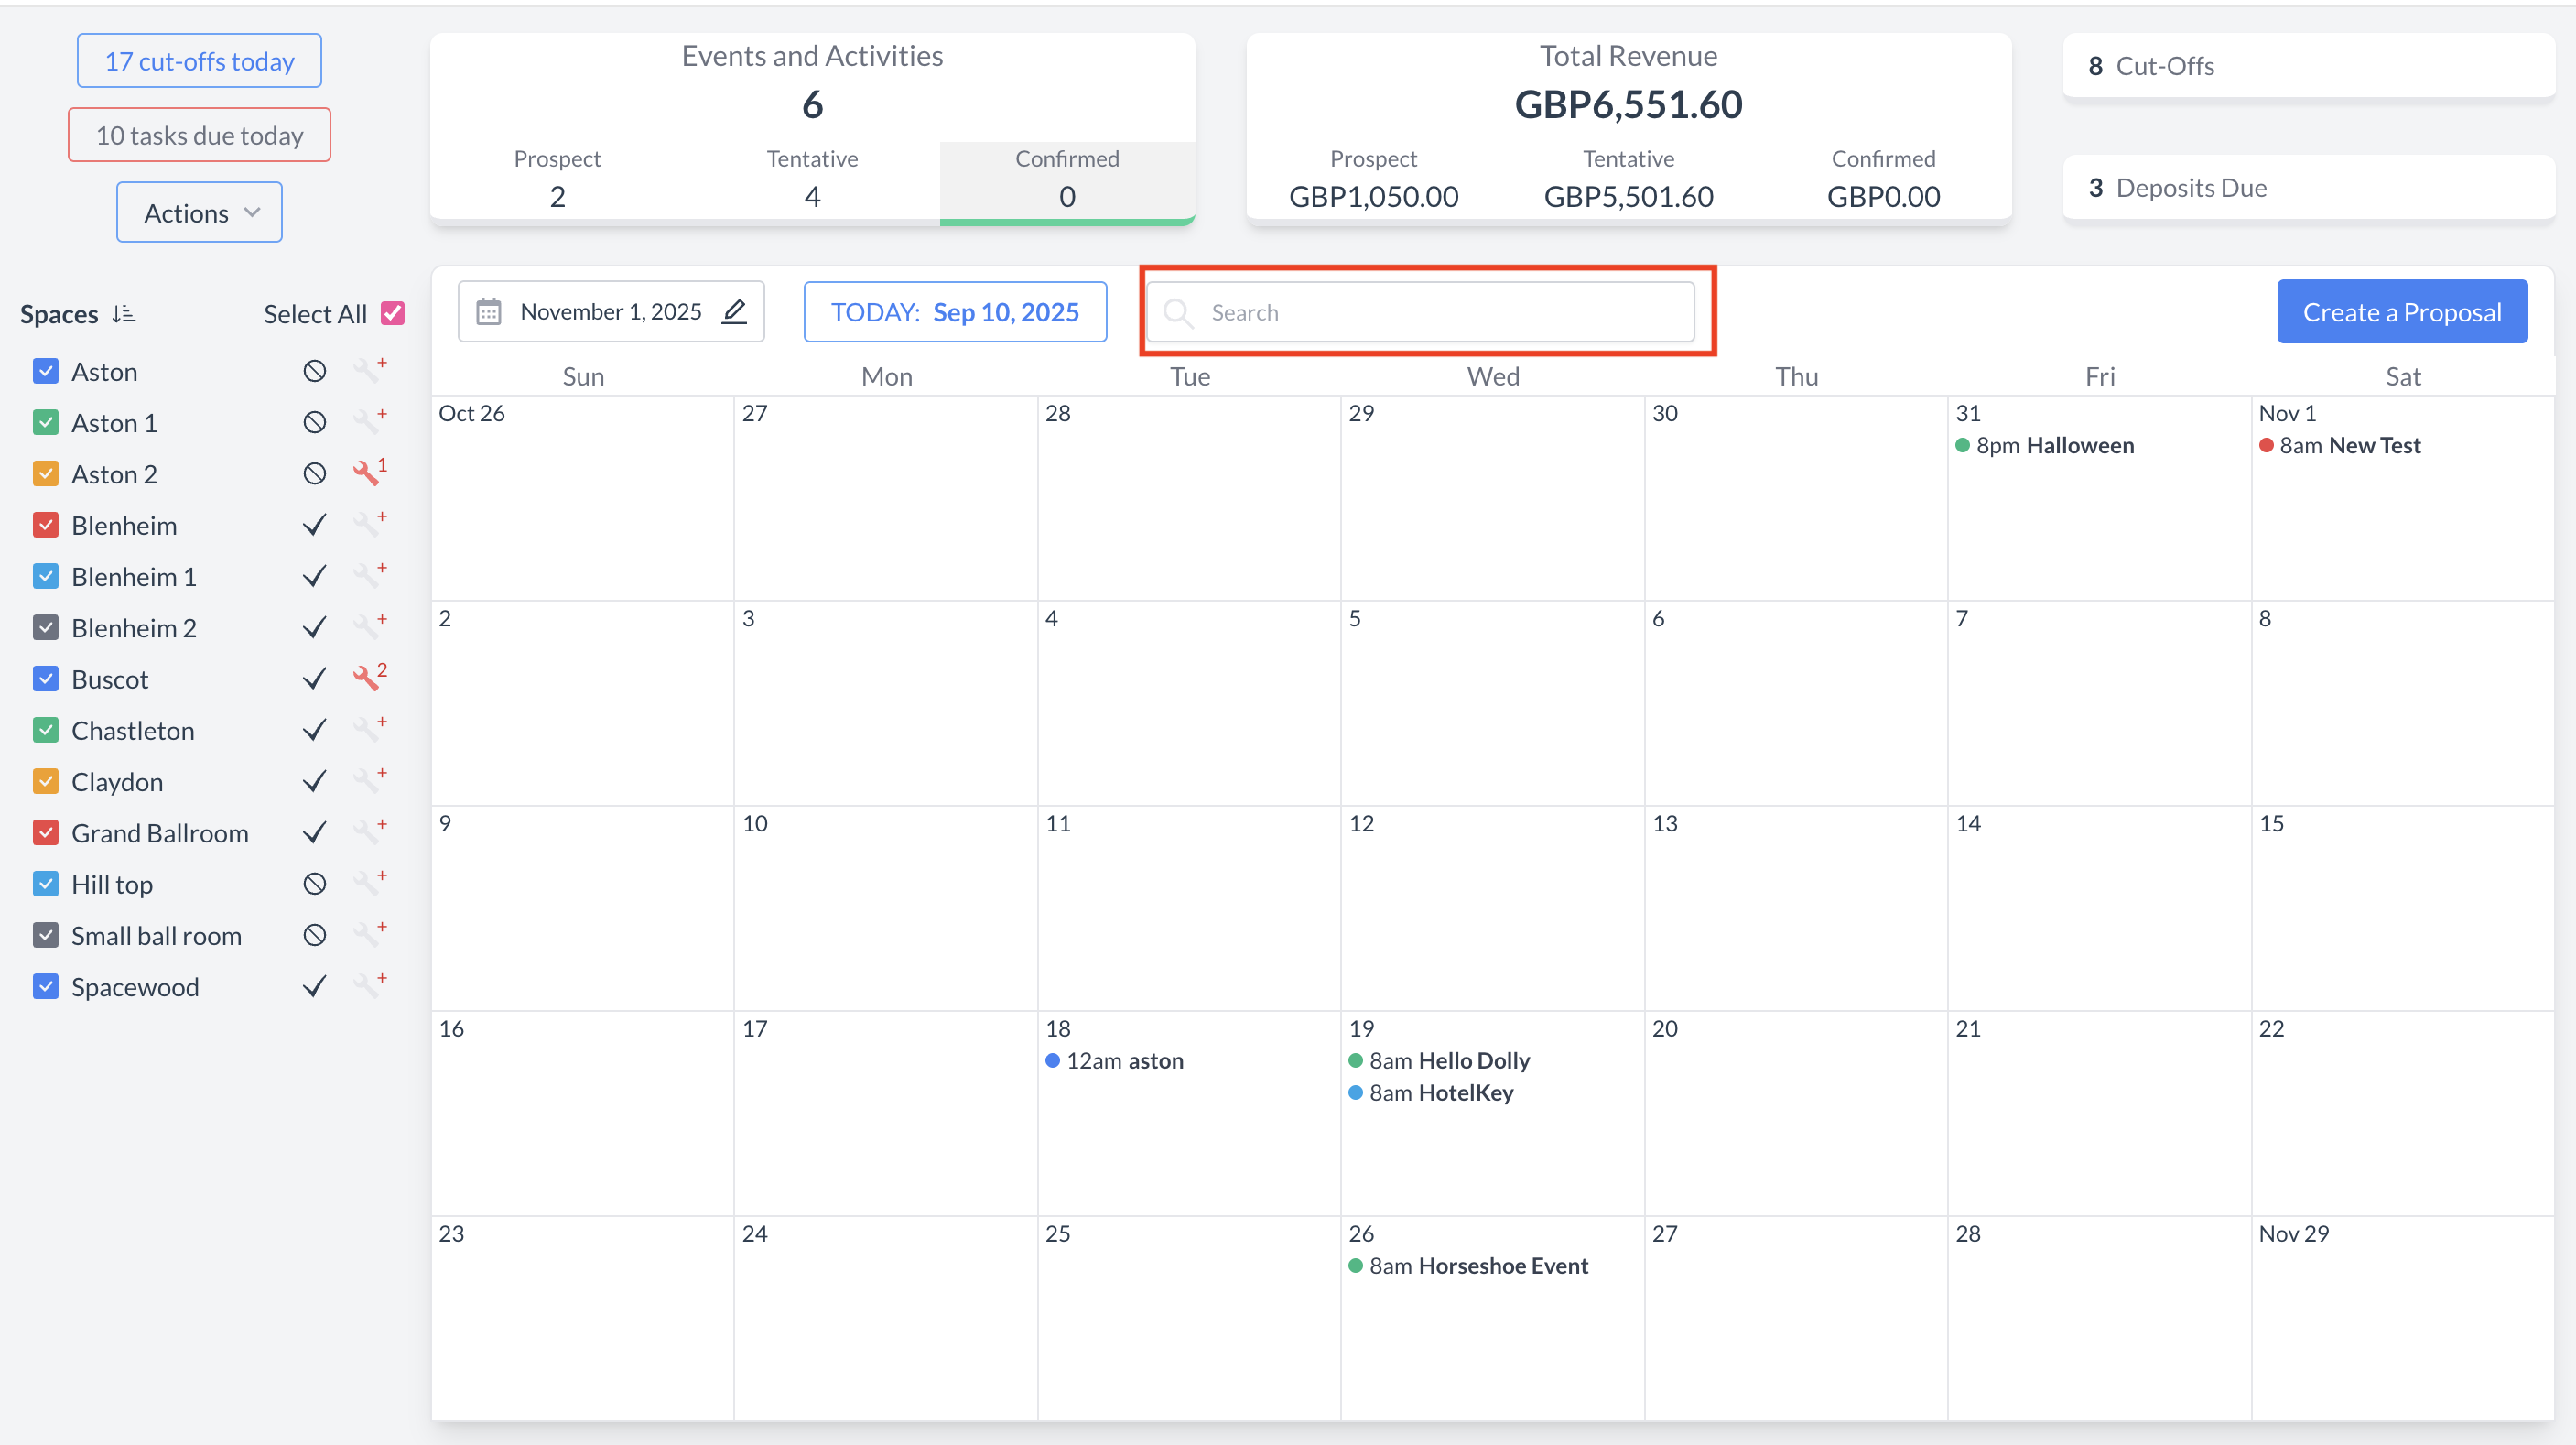
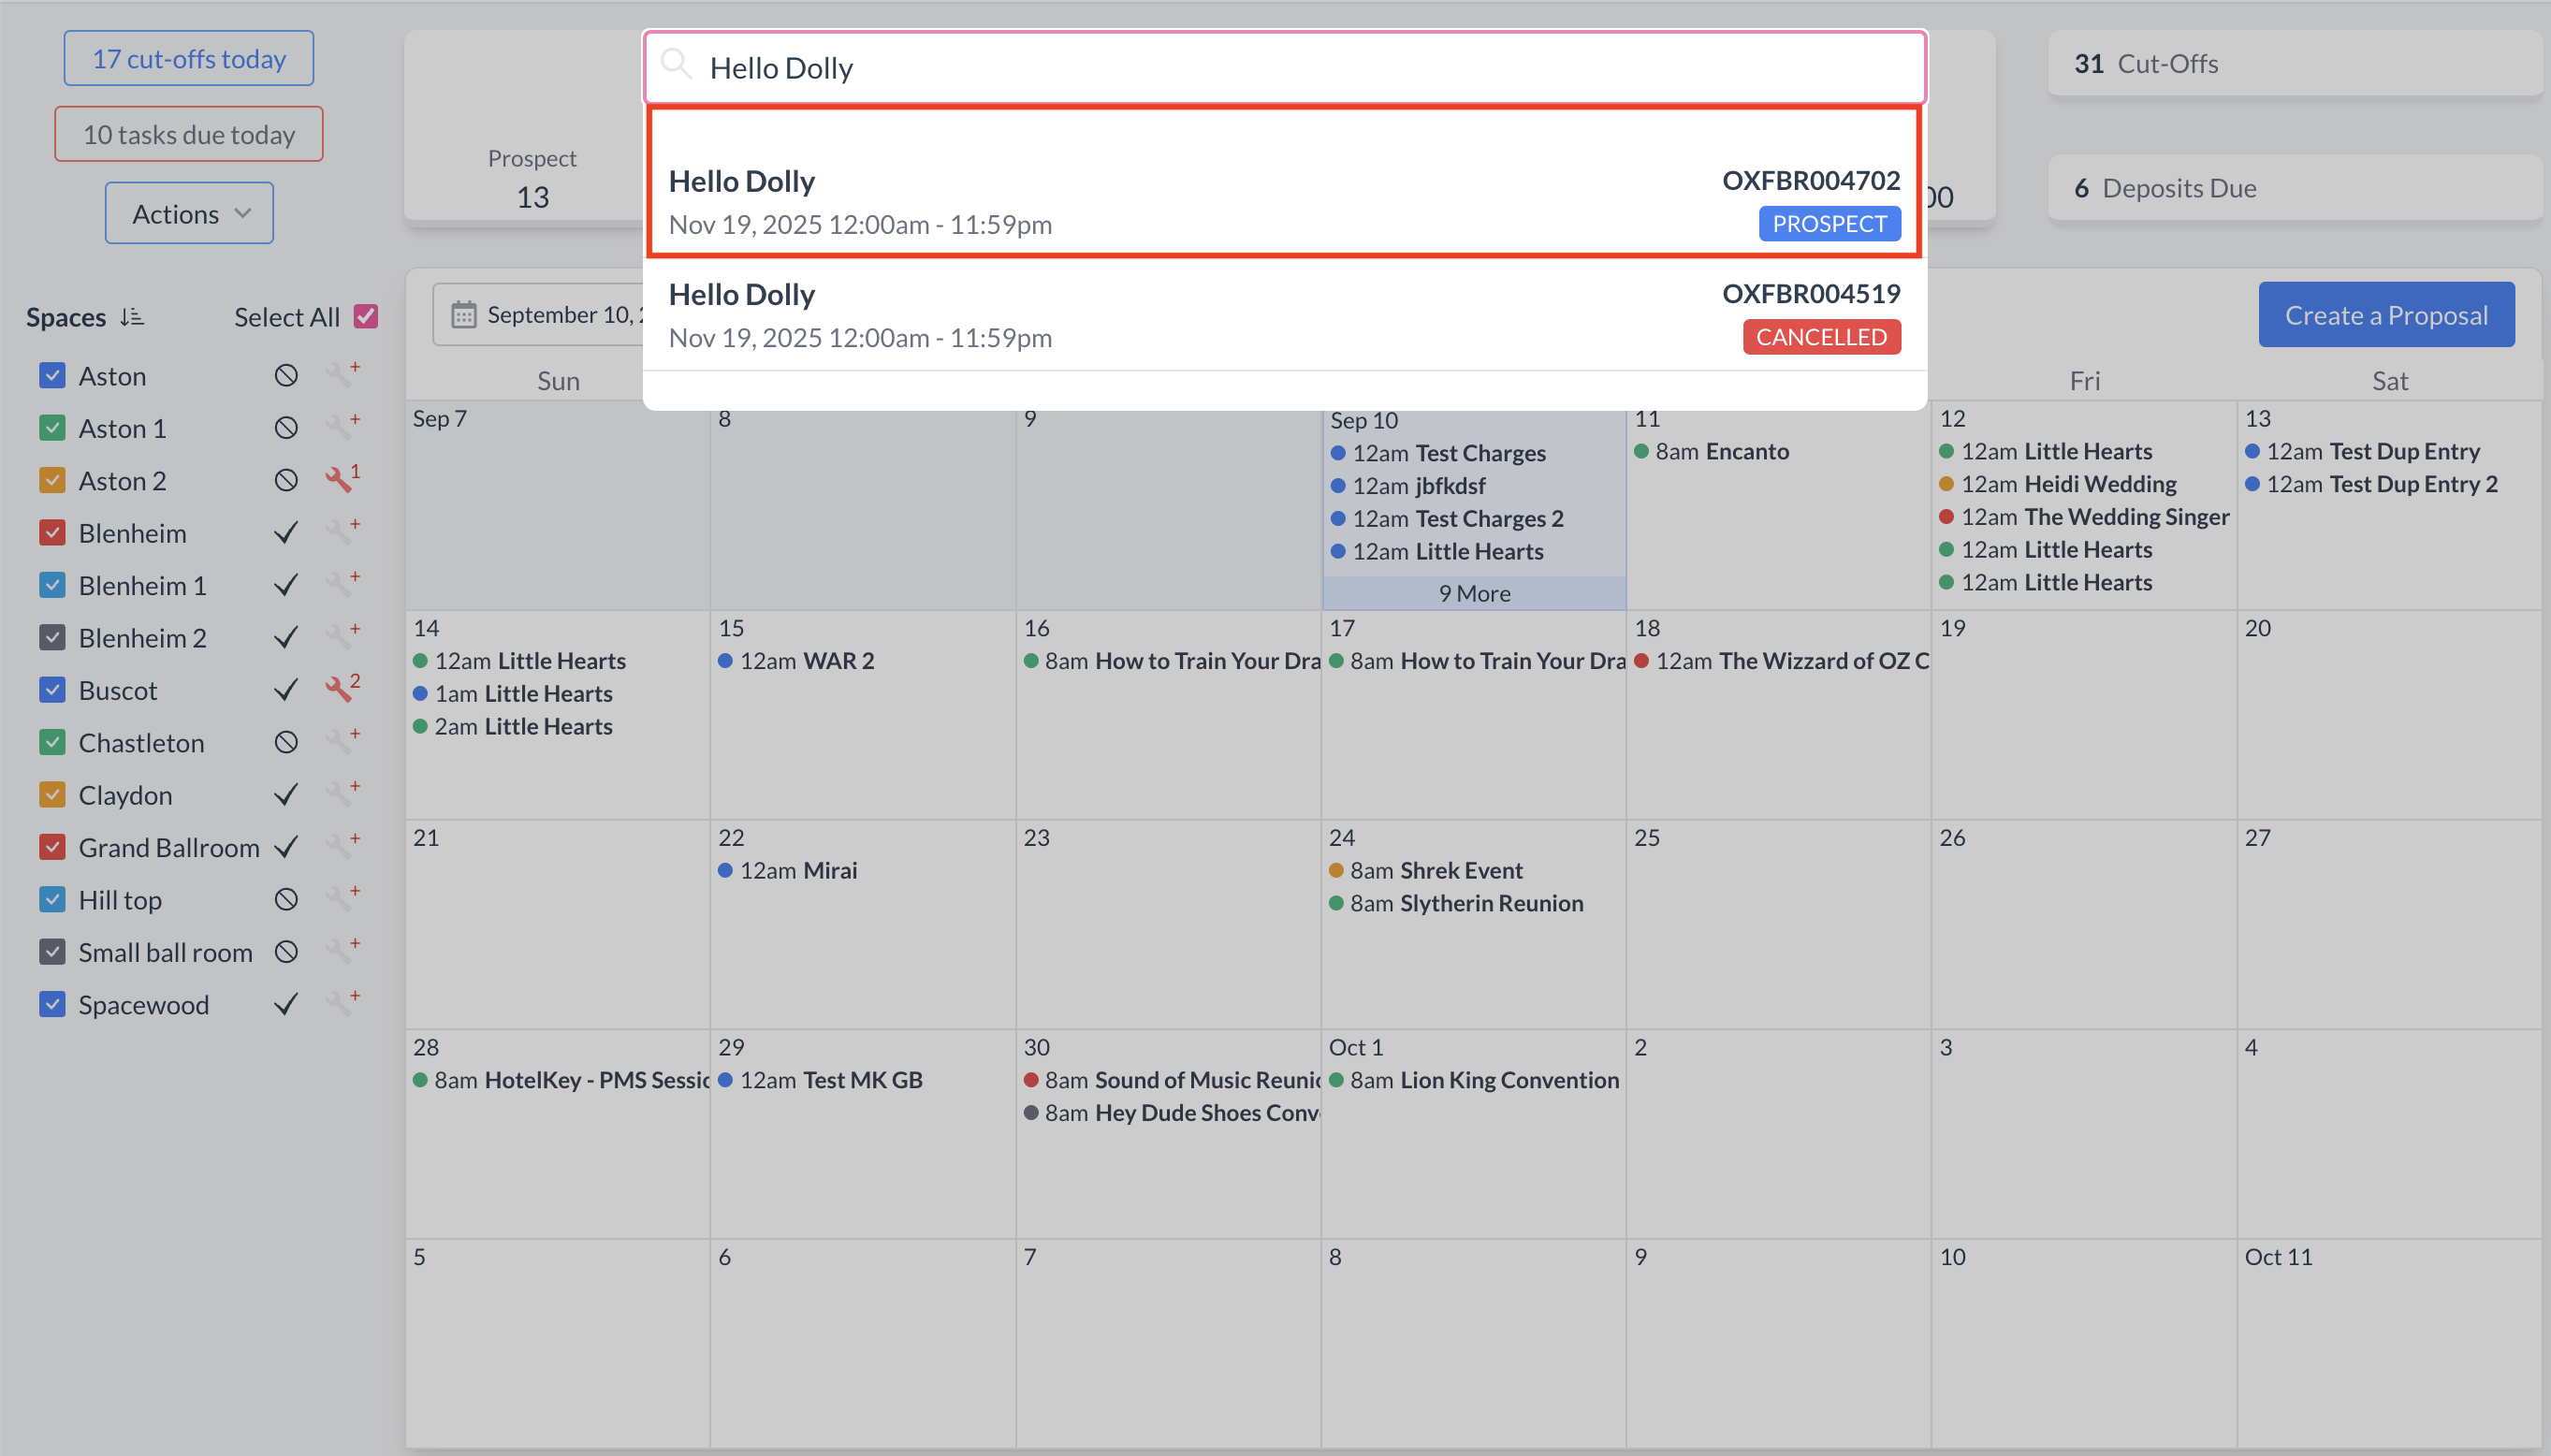
To begin, navigate to the Dashboard and use the Search box to locate the event. Enter the full or partial Event Name into the search field. The system will display a list of matching events, or, if there is an exact match, it will appear directly. Once you’ve identified the correct event, simply click on the event name to open it. |
|
Accessing the Menu Section
On an Event Record (Reservation):
|

|
Steps to Attach a Menu:
|
.png?cb=0bb2d50b13be0244c0a0ff5980b0d781)
|
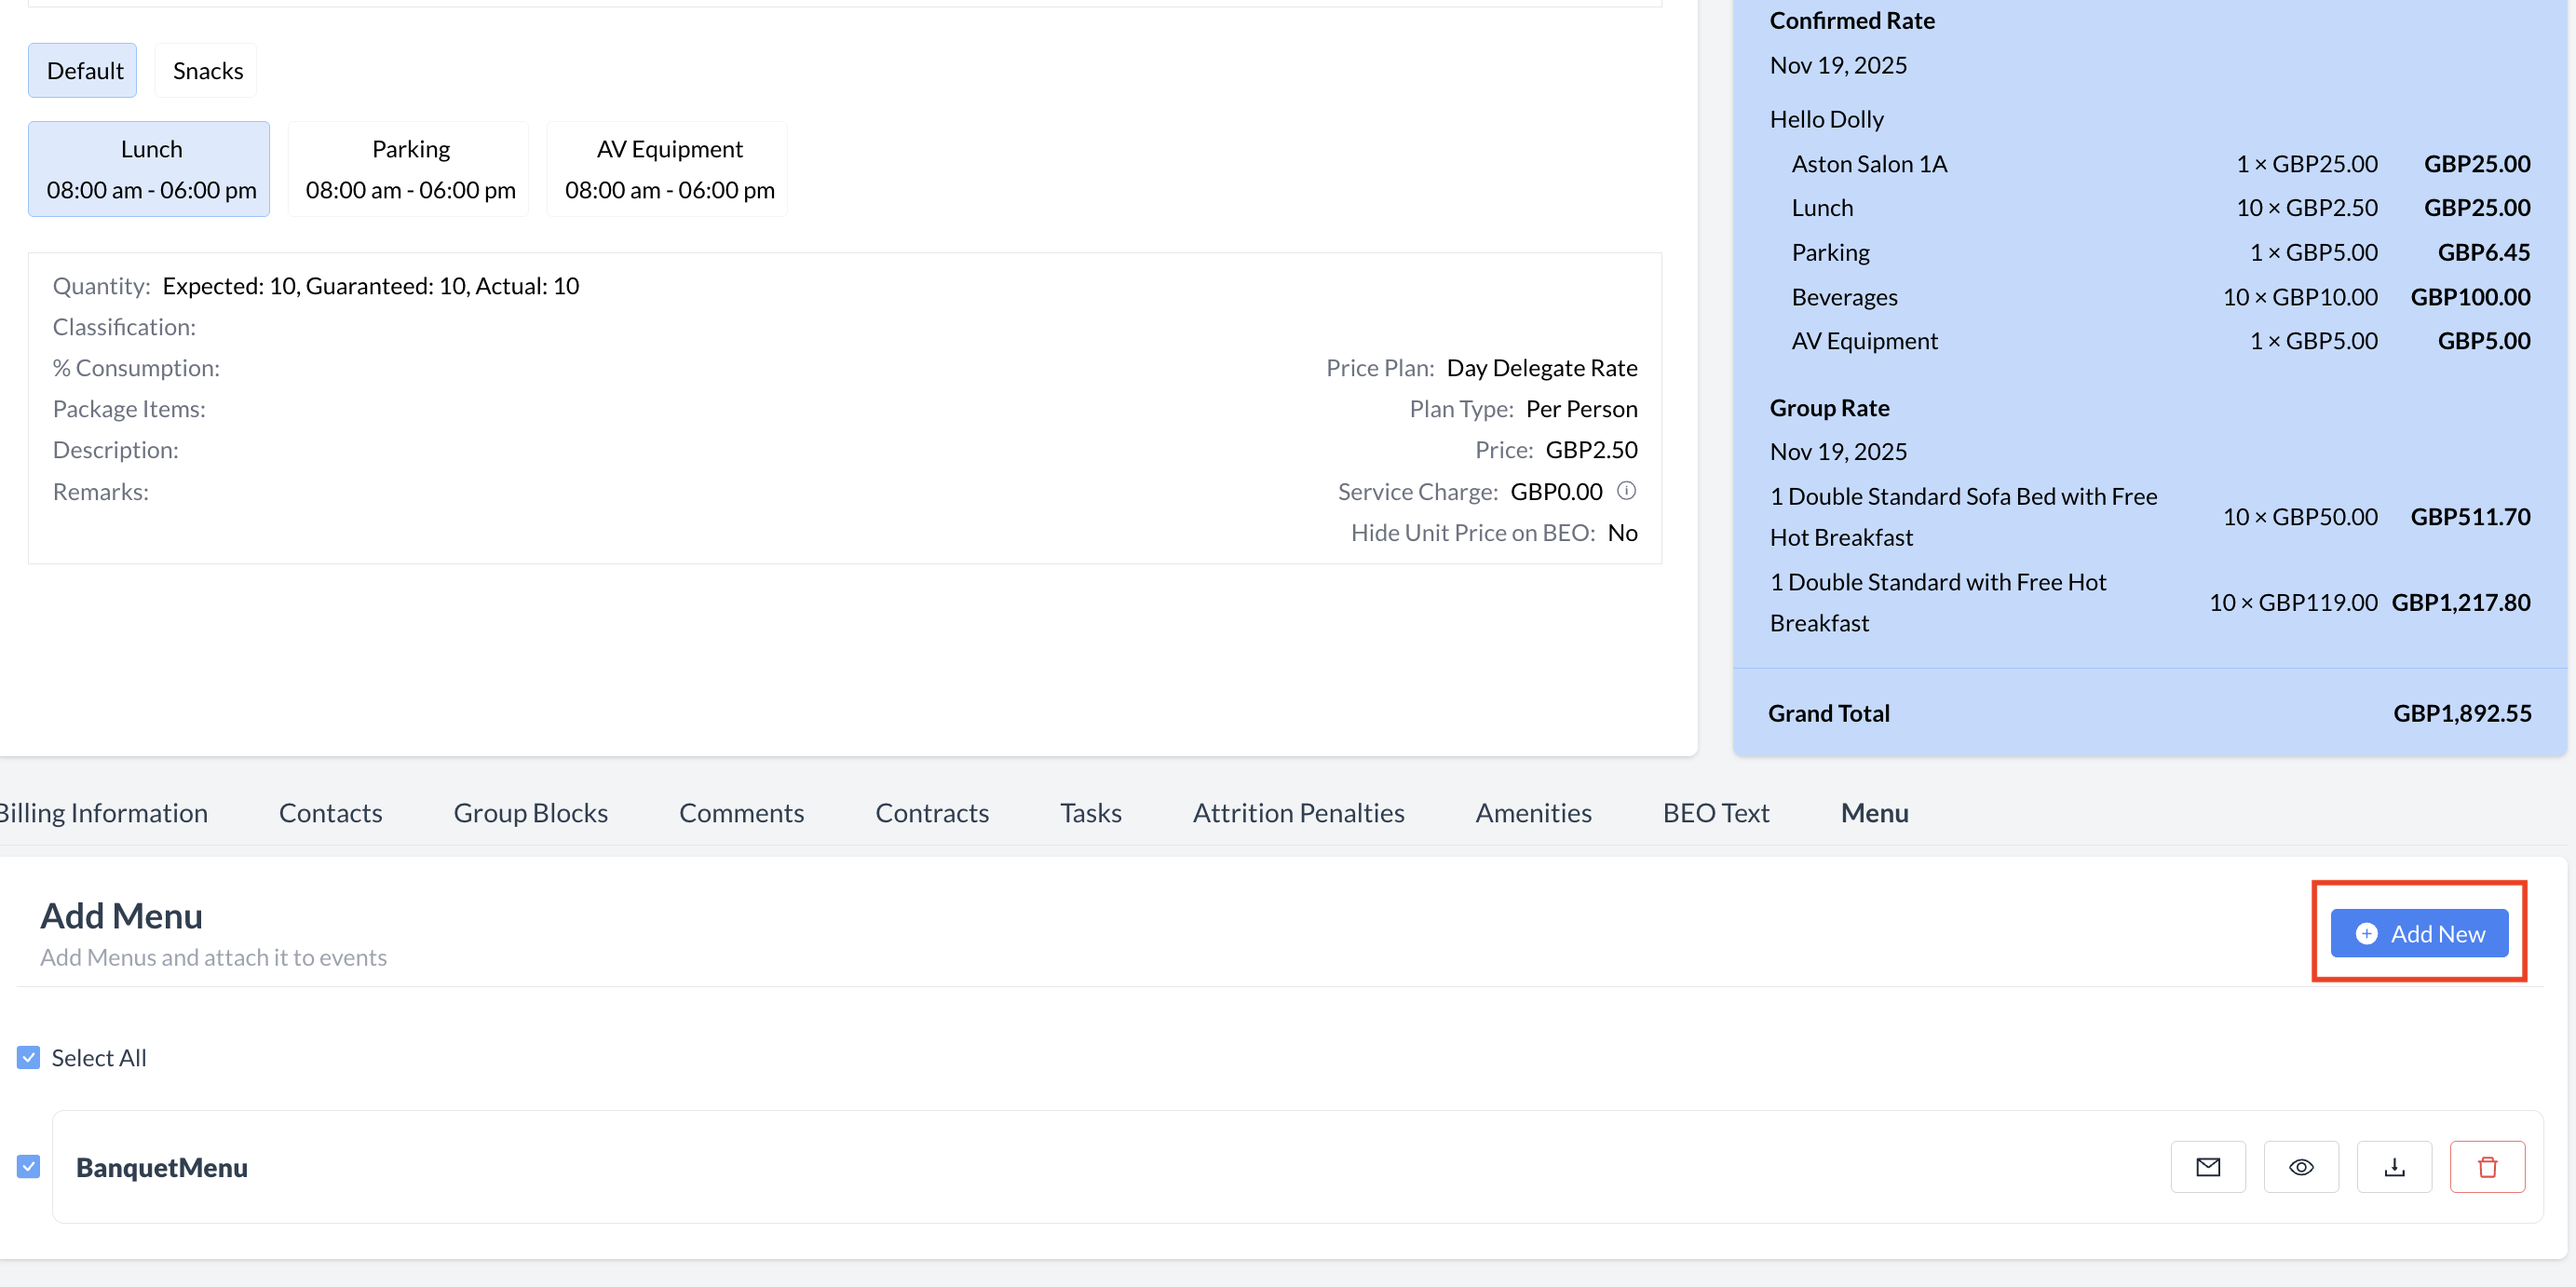
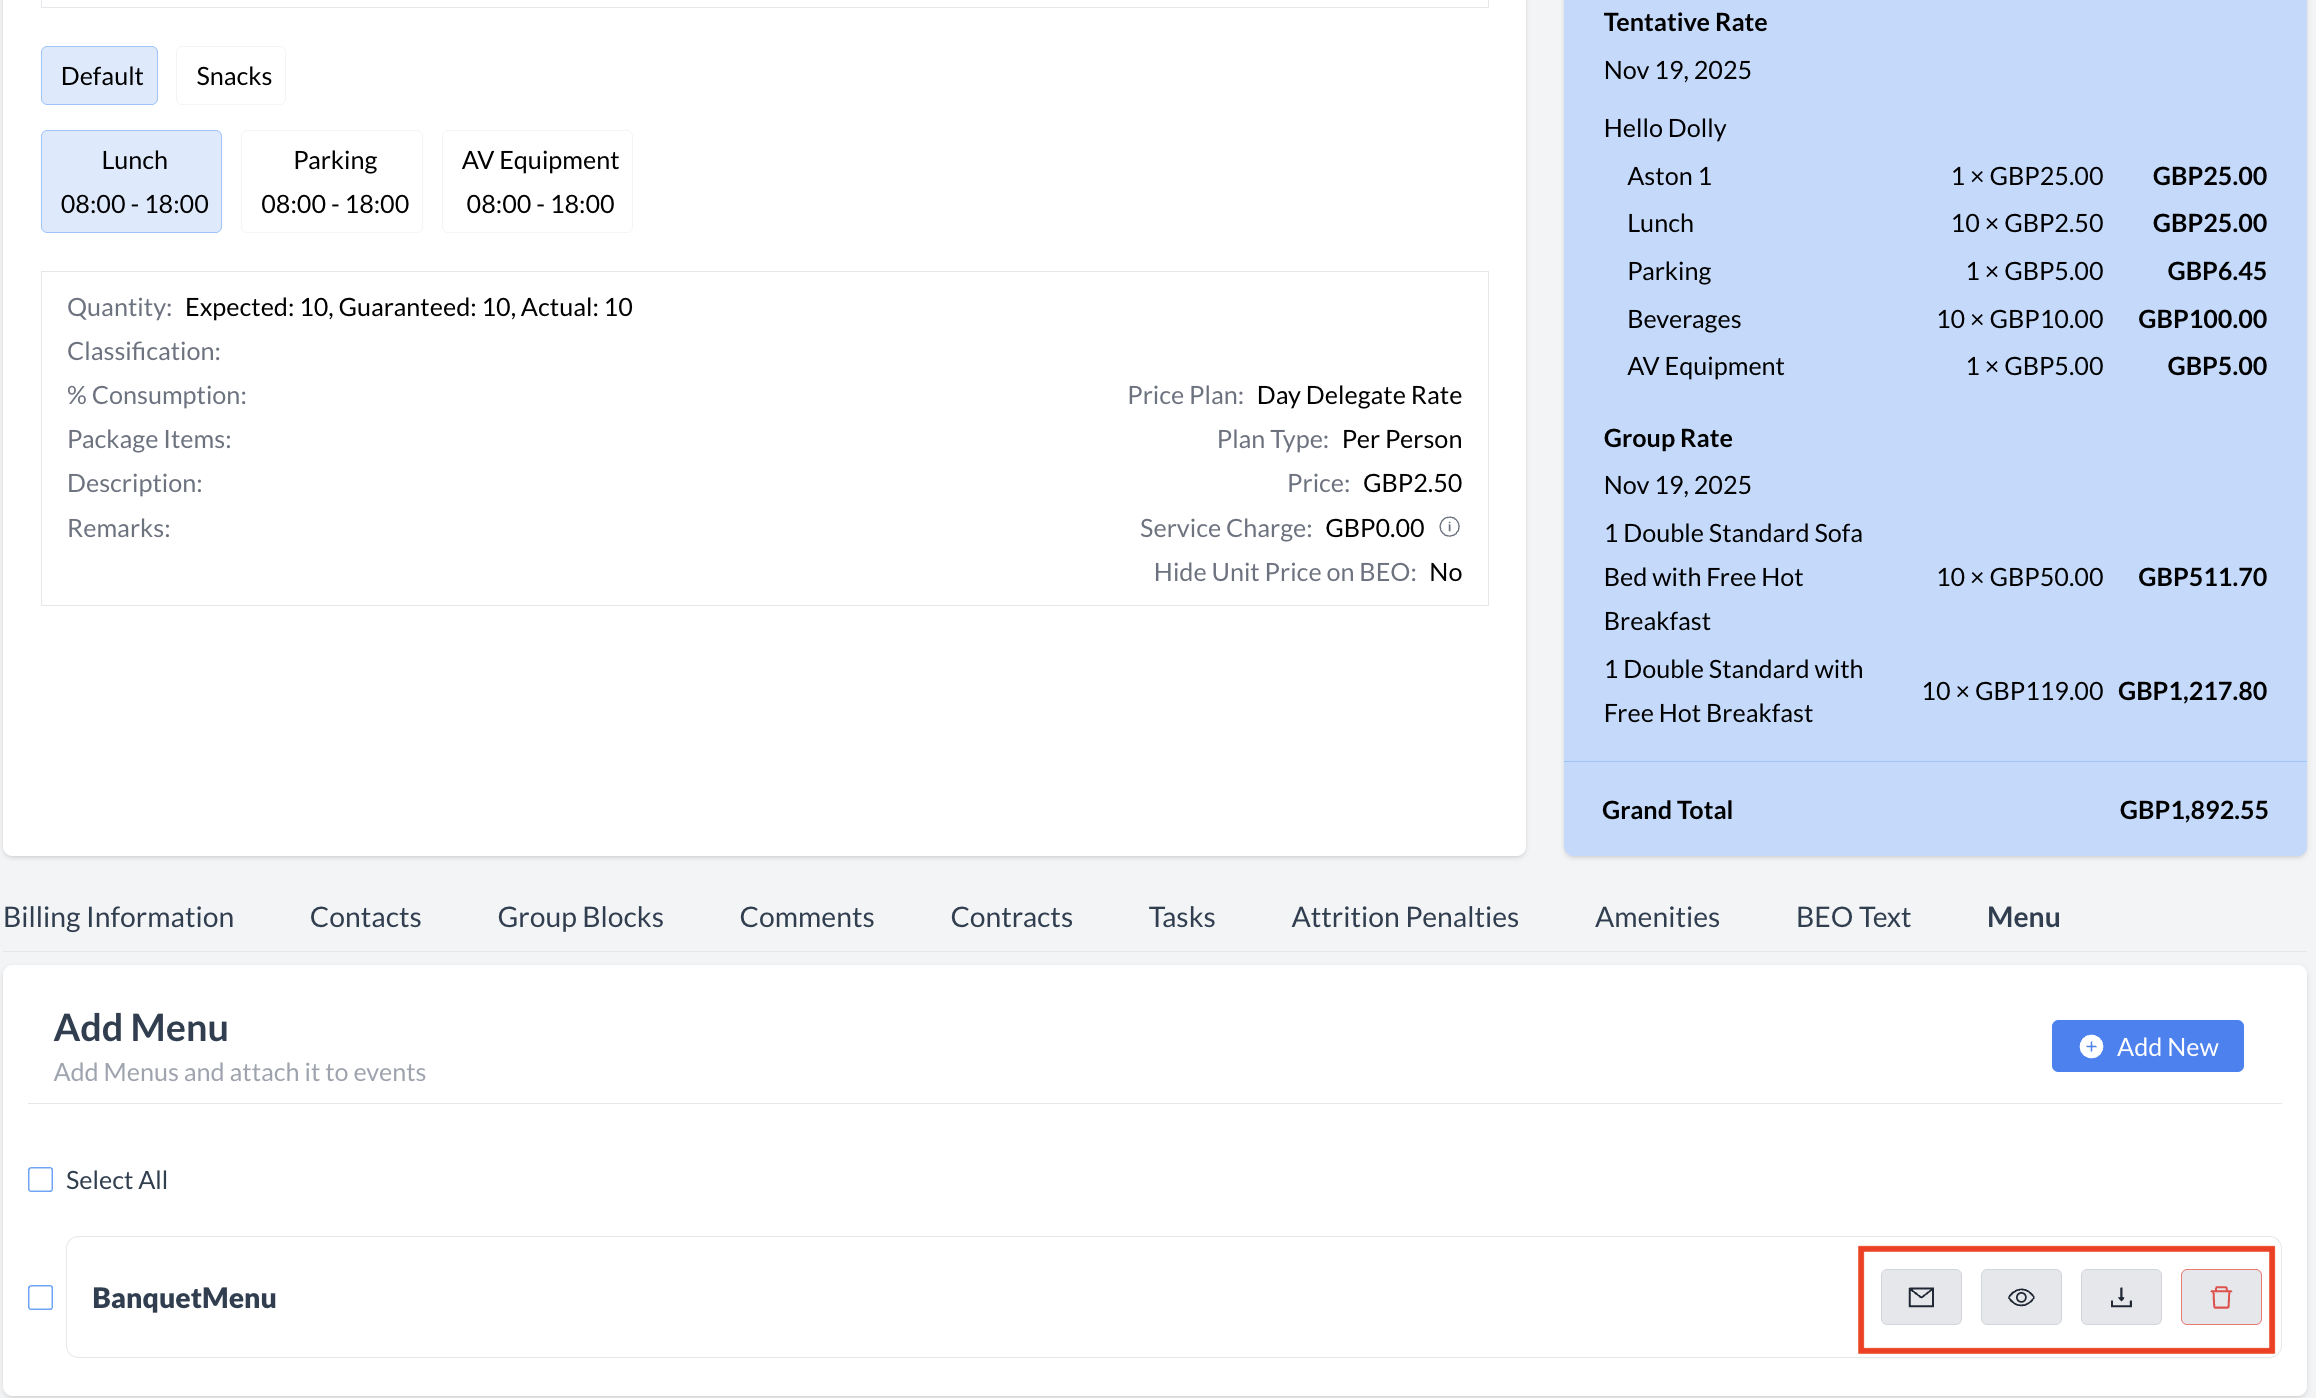
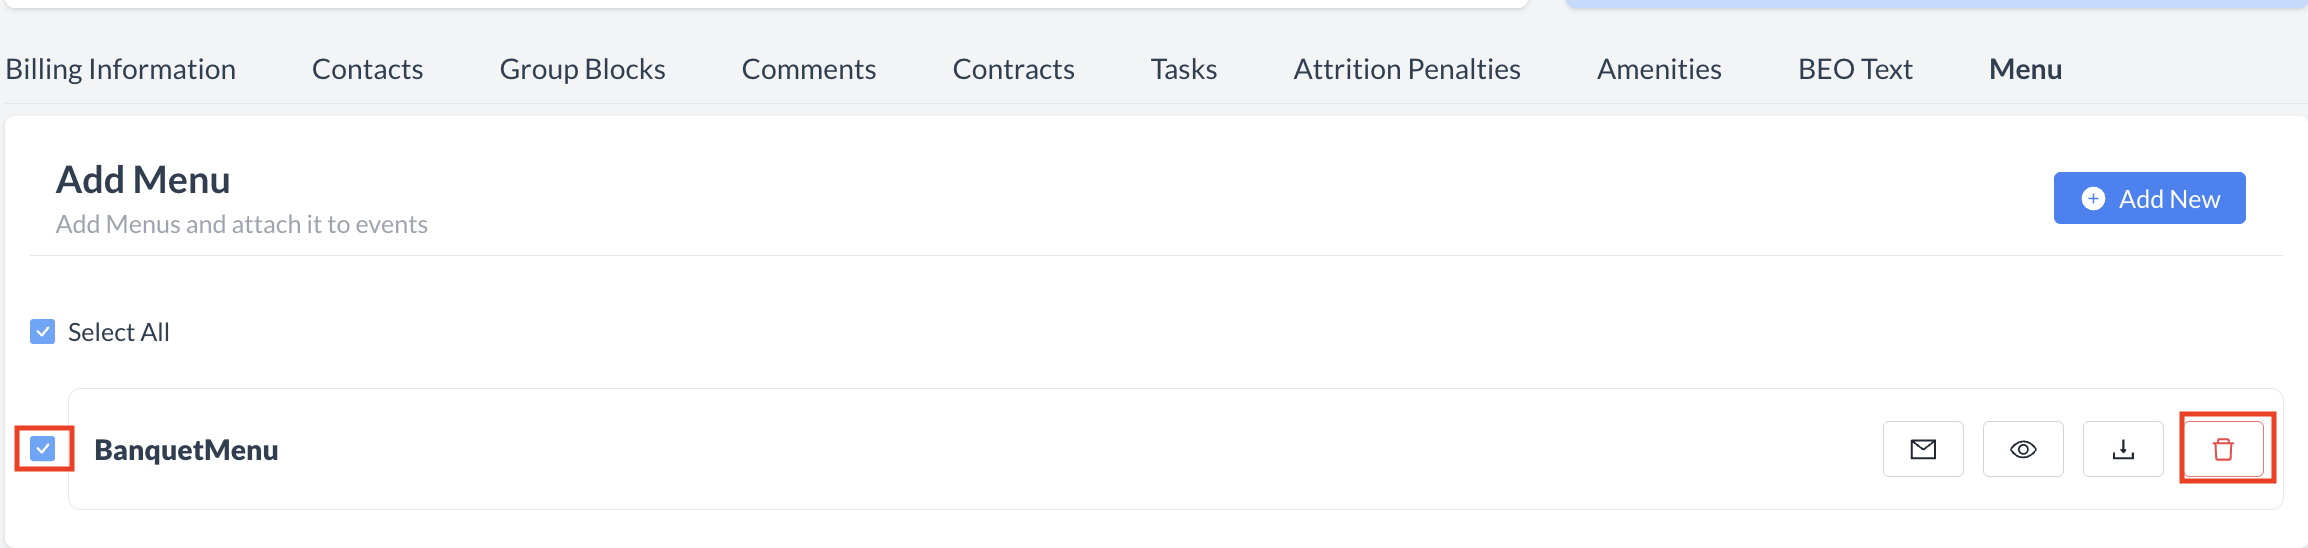
Managing the Banquet Menu in the Event Record
Once a menu has been attached to the Event Record, it will appear in the Menu section. A toolbar will be displayed with the following action buttons:
|
|
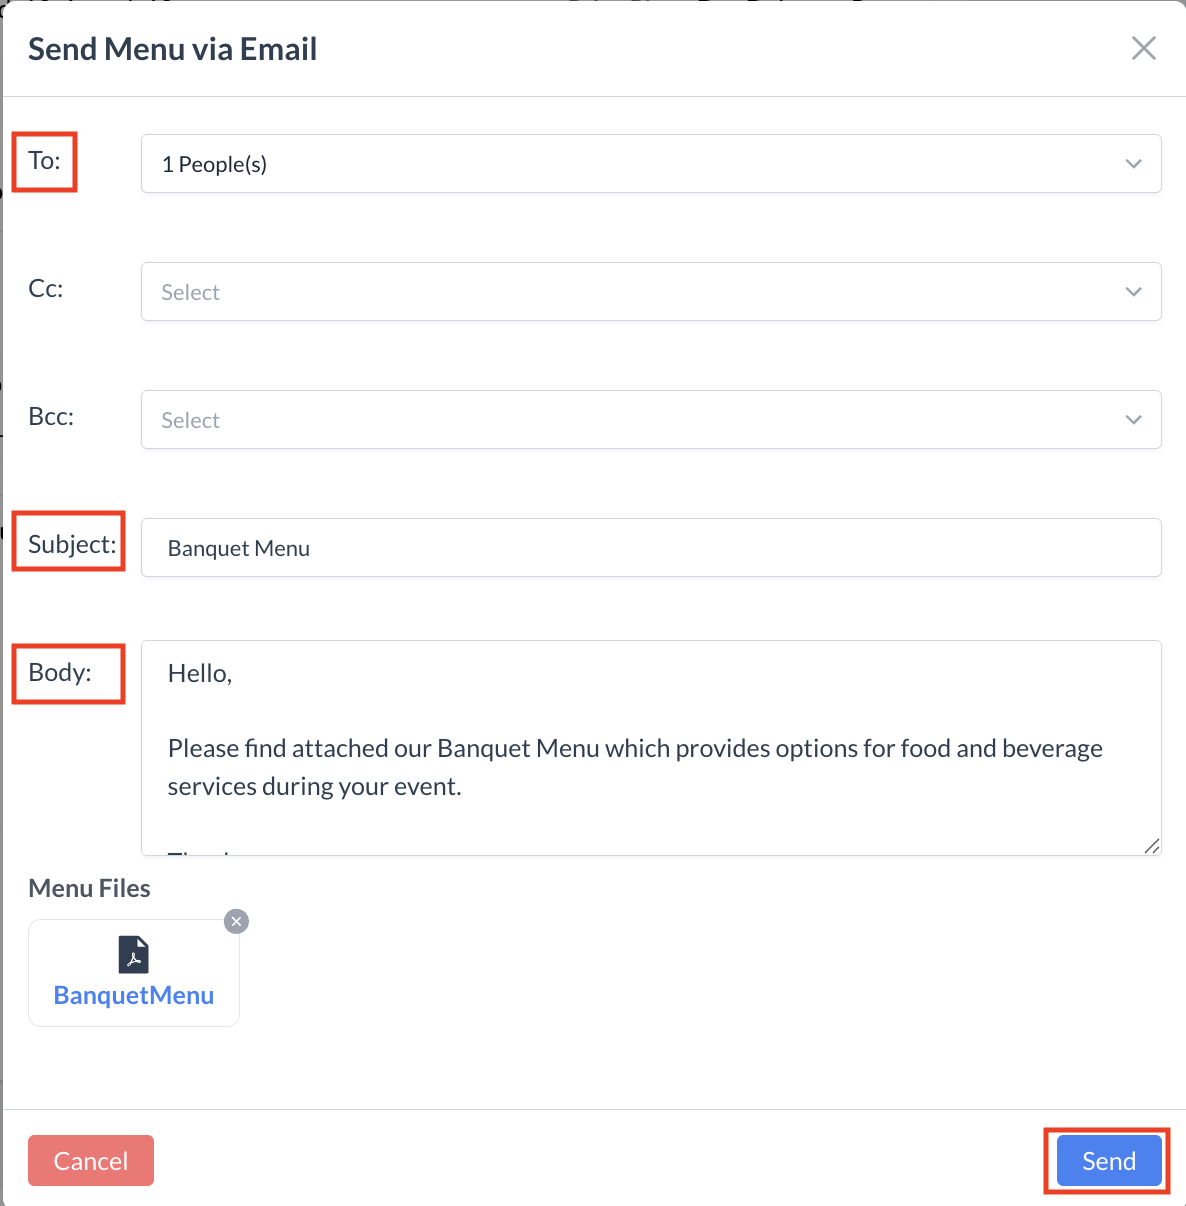
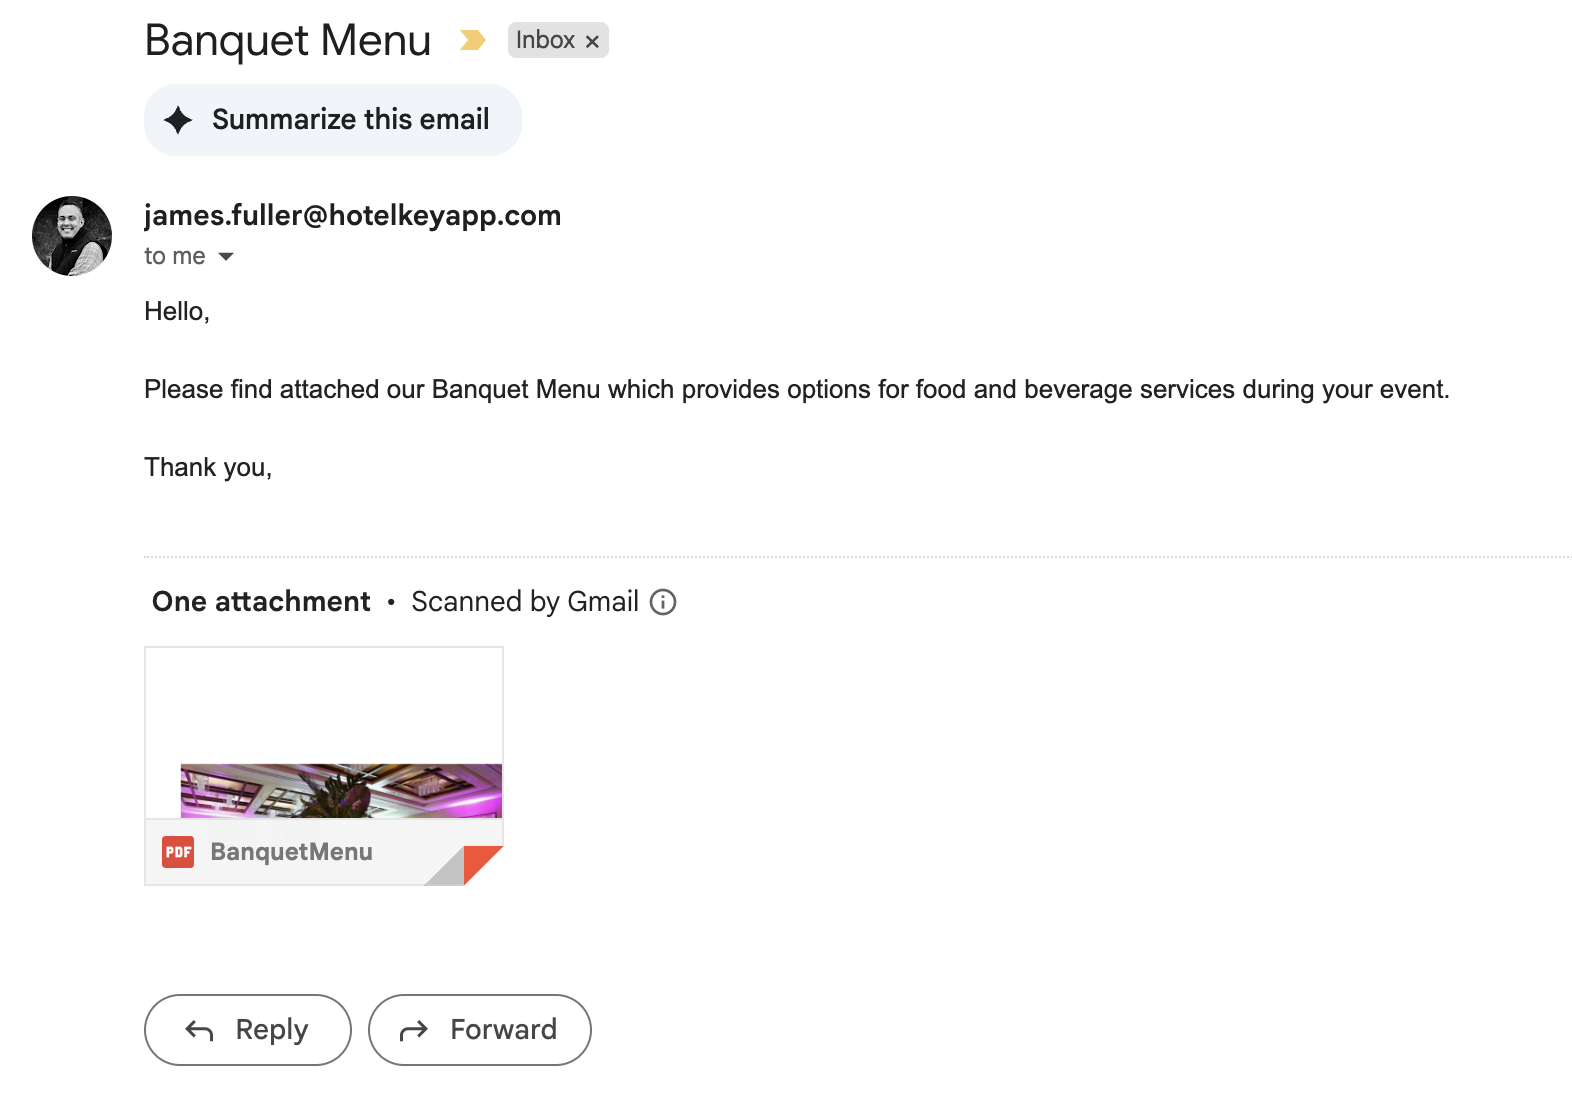
Sending the Banquet Menu via Email
You can easily email the selected banquet menu to your client directly from the Event Record. Steps to Send the Menu:
Complete the Email Details:
Send the Email:
Click the blue "Send" button to email the banquet menu to the client. |

|
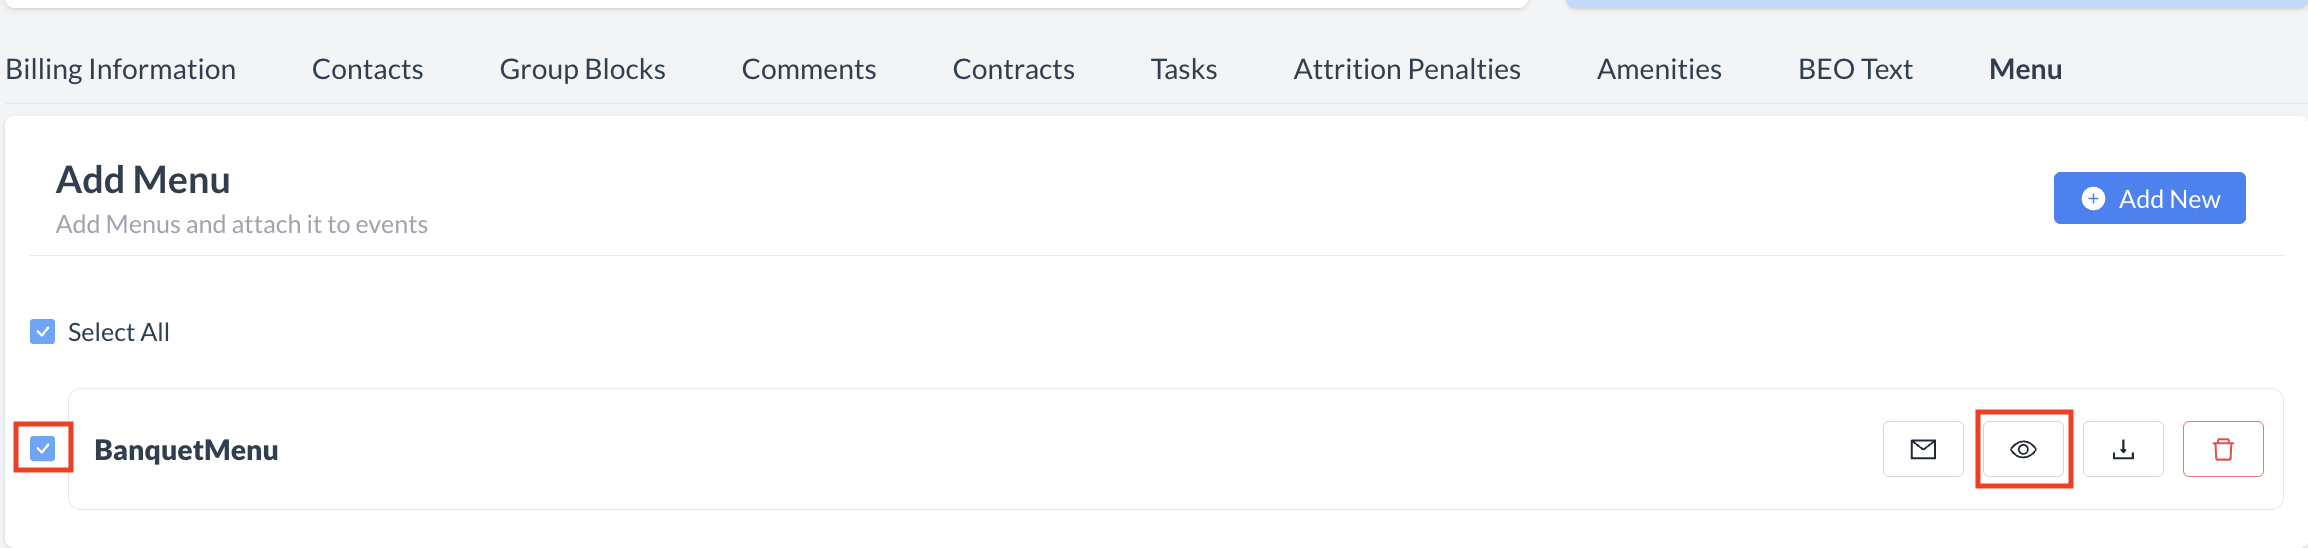
Steps to View:
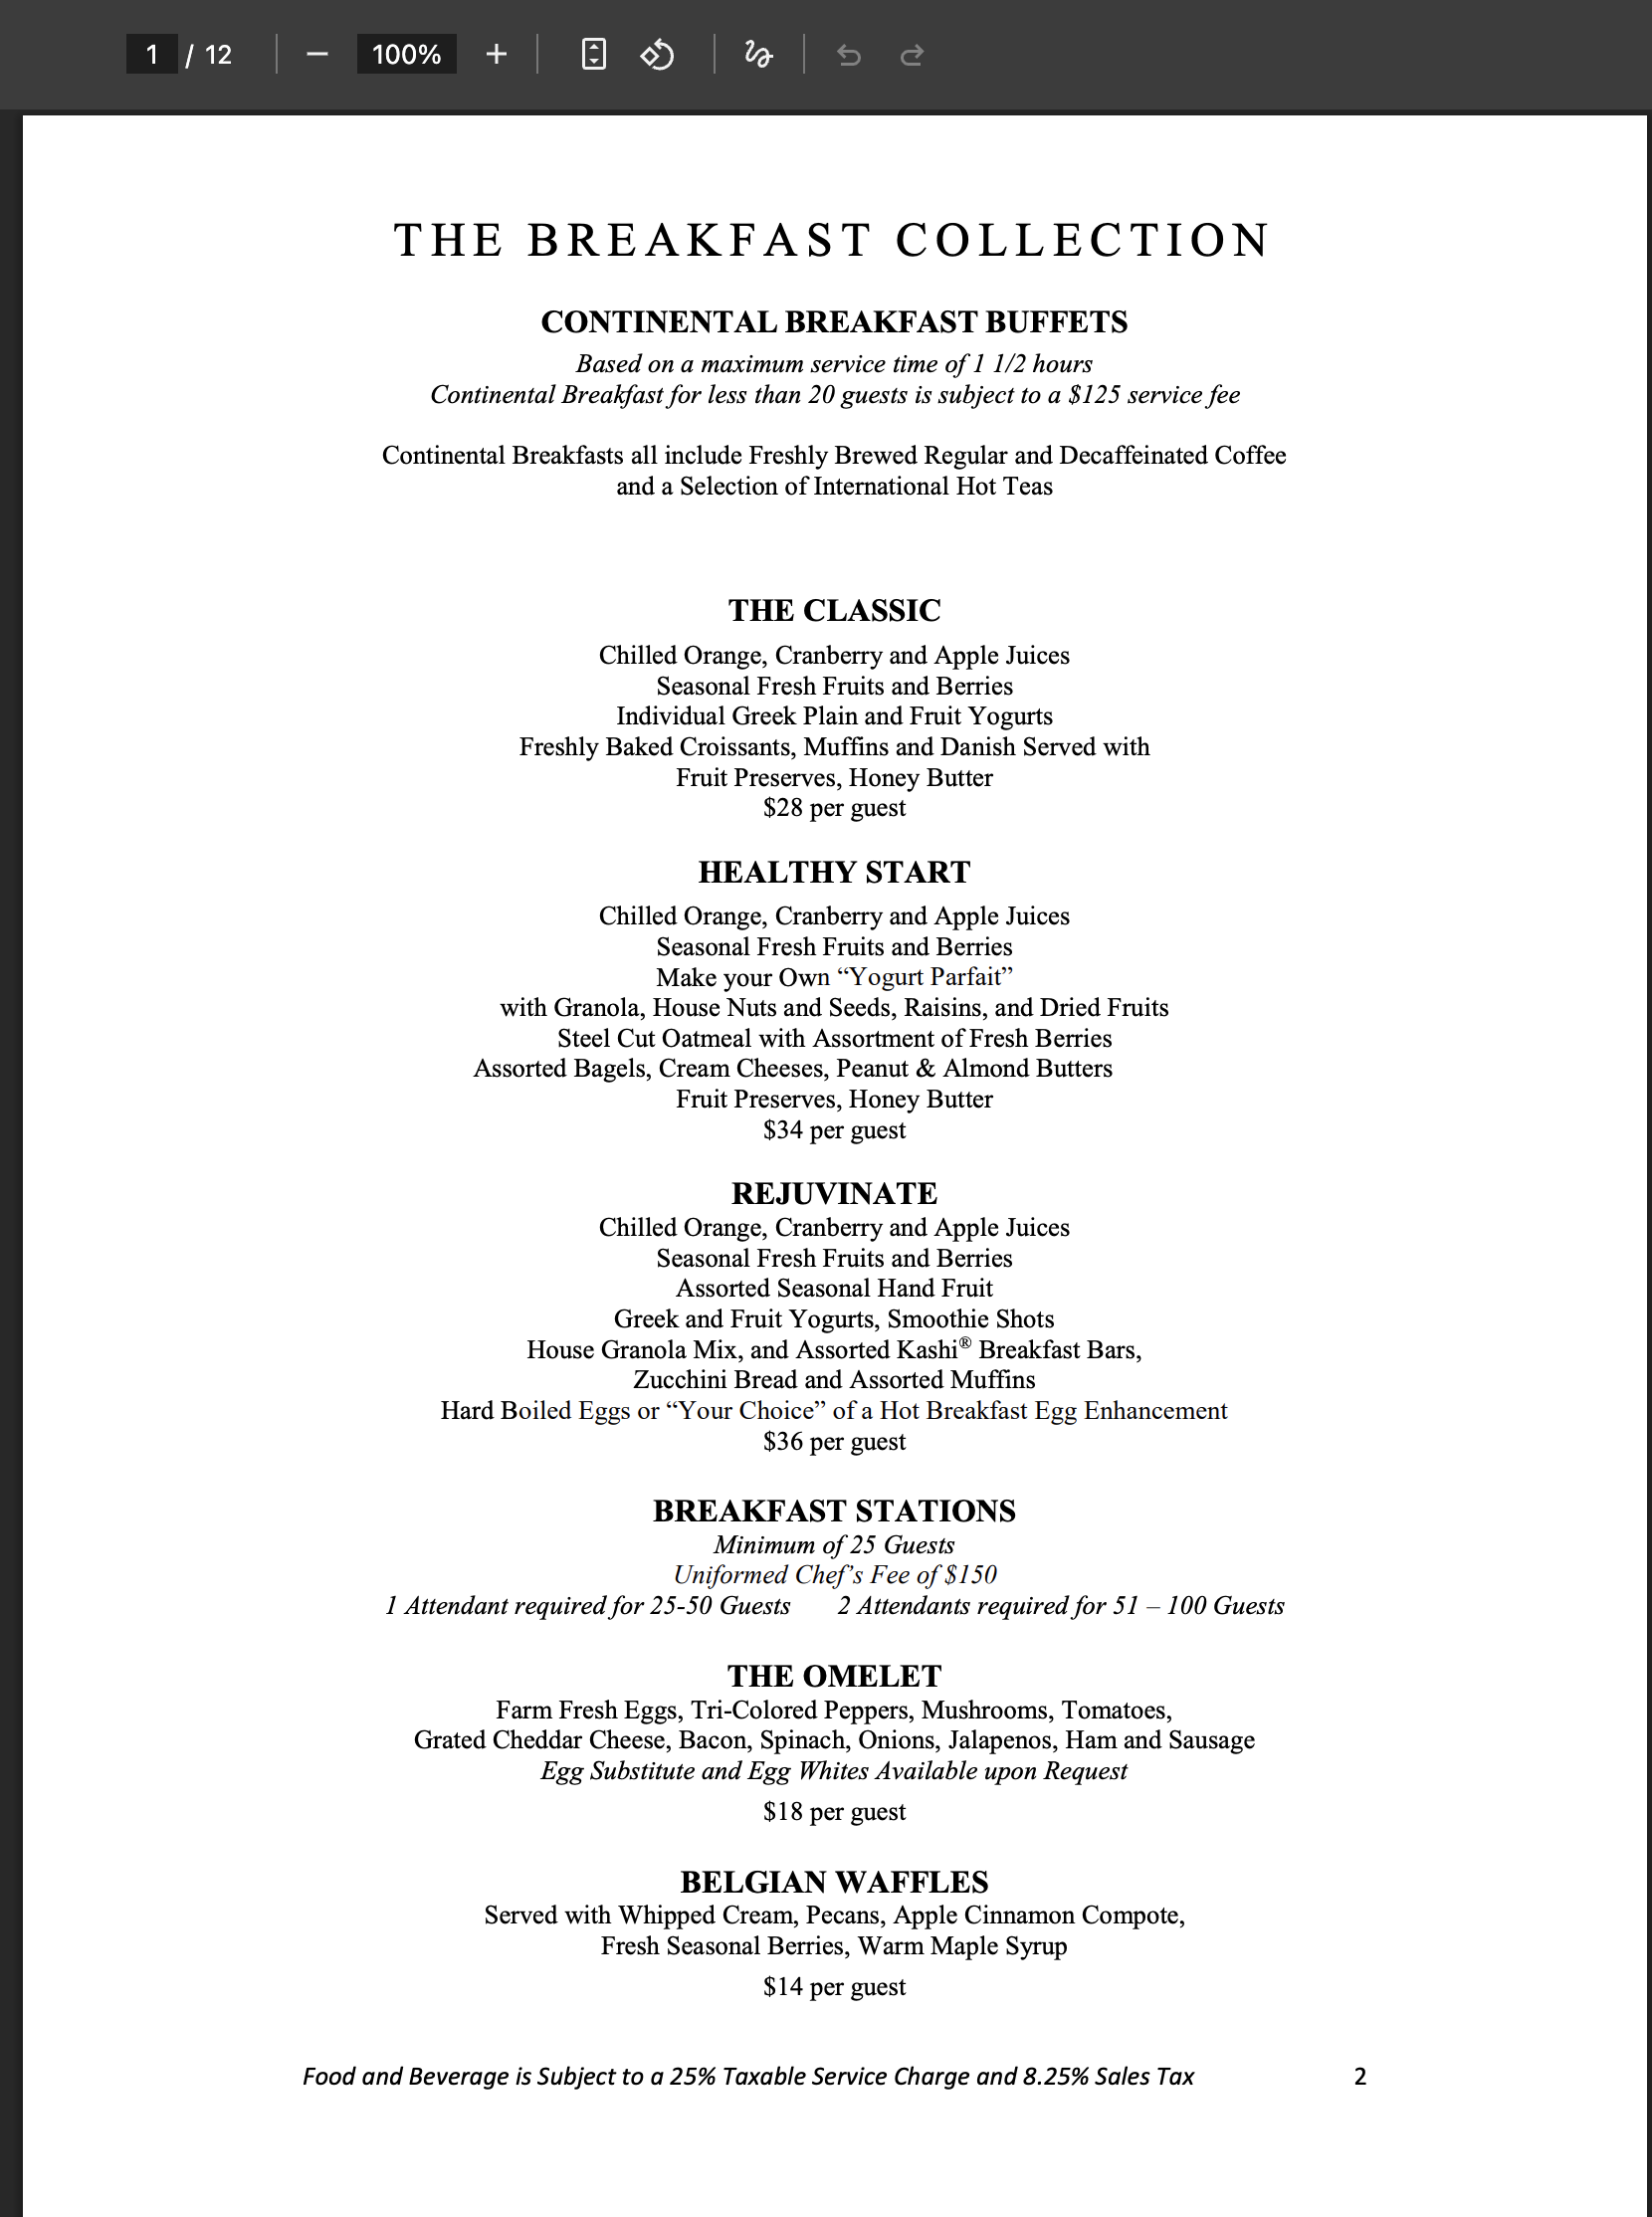
To view the menu, use the checkbox to select the desired menu then click on the 👁️ icon. The document will open in PDF. The menu will open in a PDF viewer. From here, you can choose to either:
Once downloaded, you can attach the Menu to an email and send it to the client from your email inbox. Tip: When saving the PDF, use a clear file name that includes the event name and date to help with future reference.
|
|
Steps to Download:
The menu will automatically download as a PDF file to your computer. After Downloading:
Once the PDF opens in your browser or PDF viewer, you can:
💡 Tip:
When saving the PDF, use a clear and consistent file name—such as the event name and date—to make it easy to reference later (e.g.,
|

|
Steps to Delete a Menu:
|

|