Skip table of contents

Products

📆 Revision Date:

Products Overview

In EventKey, a Product refers to any individual item that can be included in an event package, menu, or setup—whether it’s perishable or non-perishable. Perishable products typically include food and beverage items such as scrambled eggs, bacon, Caesar salad, or filet mignon. Non-perishable products refer to event-related equipment and supplies like tables, chairs, linens, utensils, and serving trays. Products serve as the building blocks for packages and are used to define what is being offered to clients. Each product can be categorized, priced, and tracked to ensure accurate planning, quoting, and service delivery across all event types.

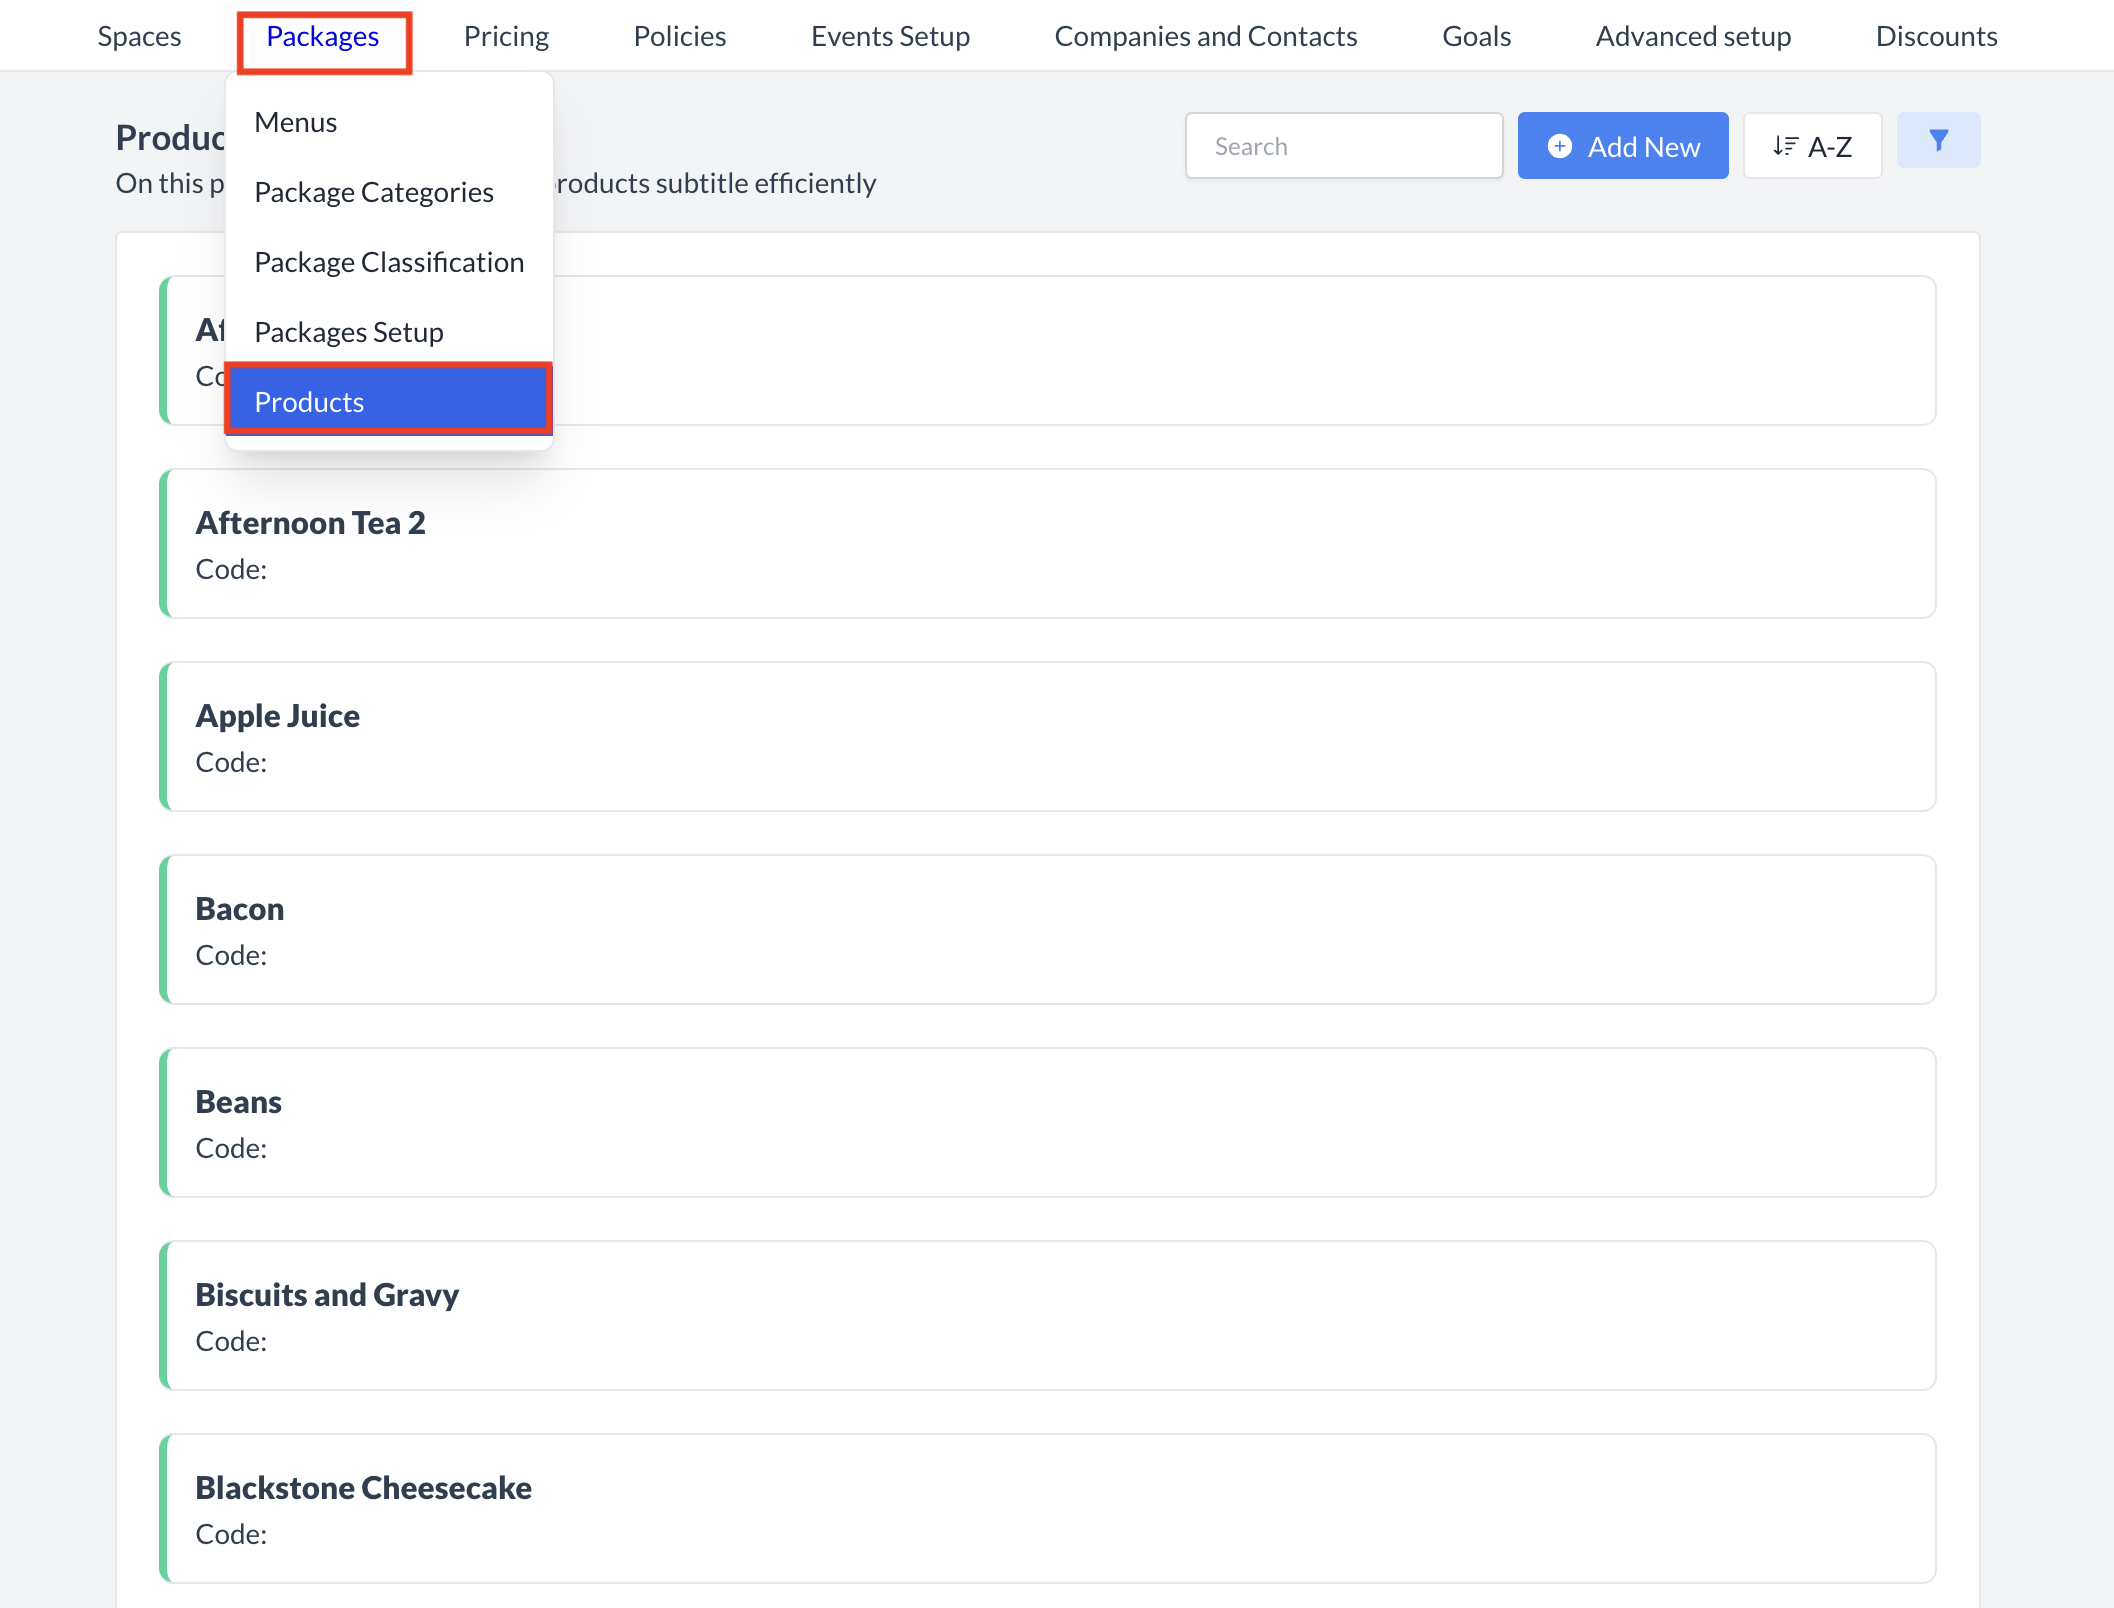
Navigate to Home > Event Administration > Packages > Products

Packages_Products.png

Packages > Products

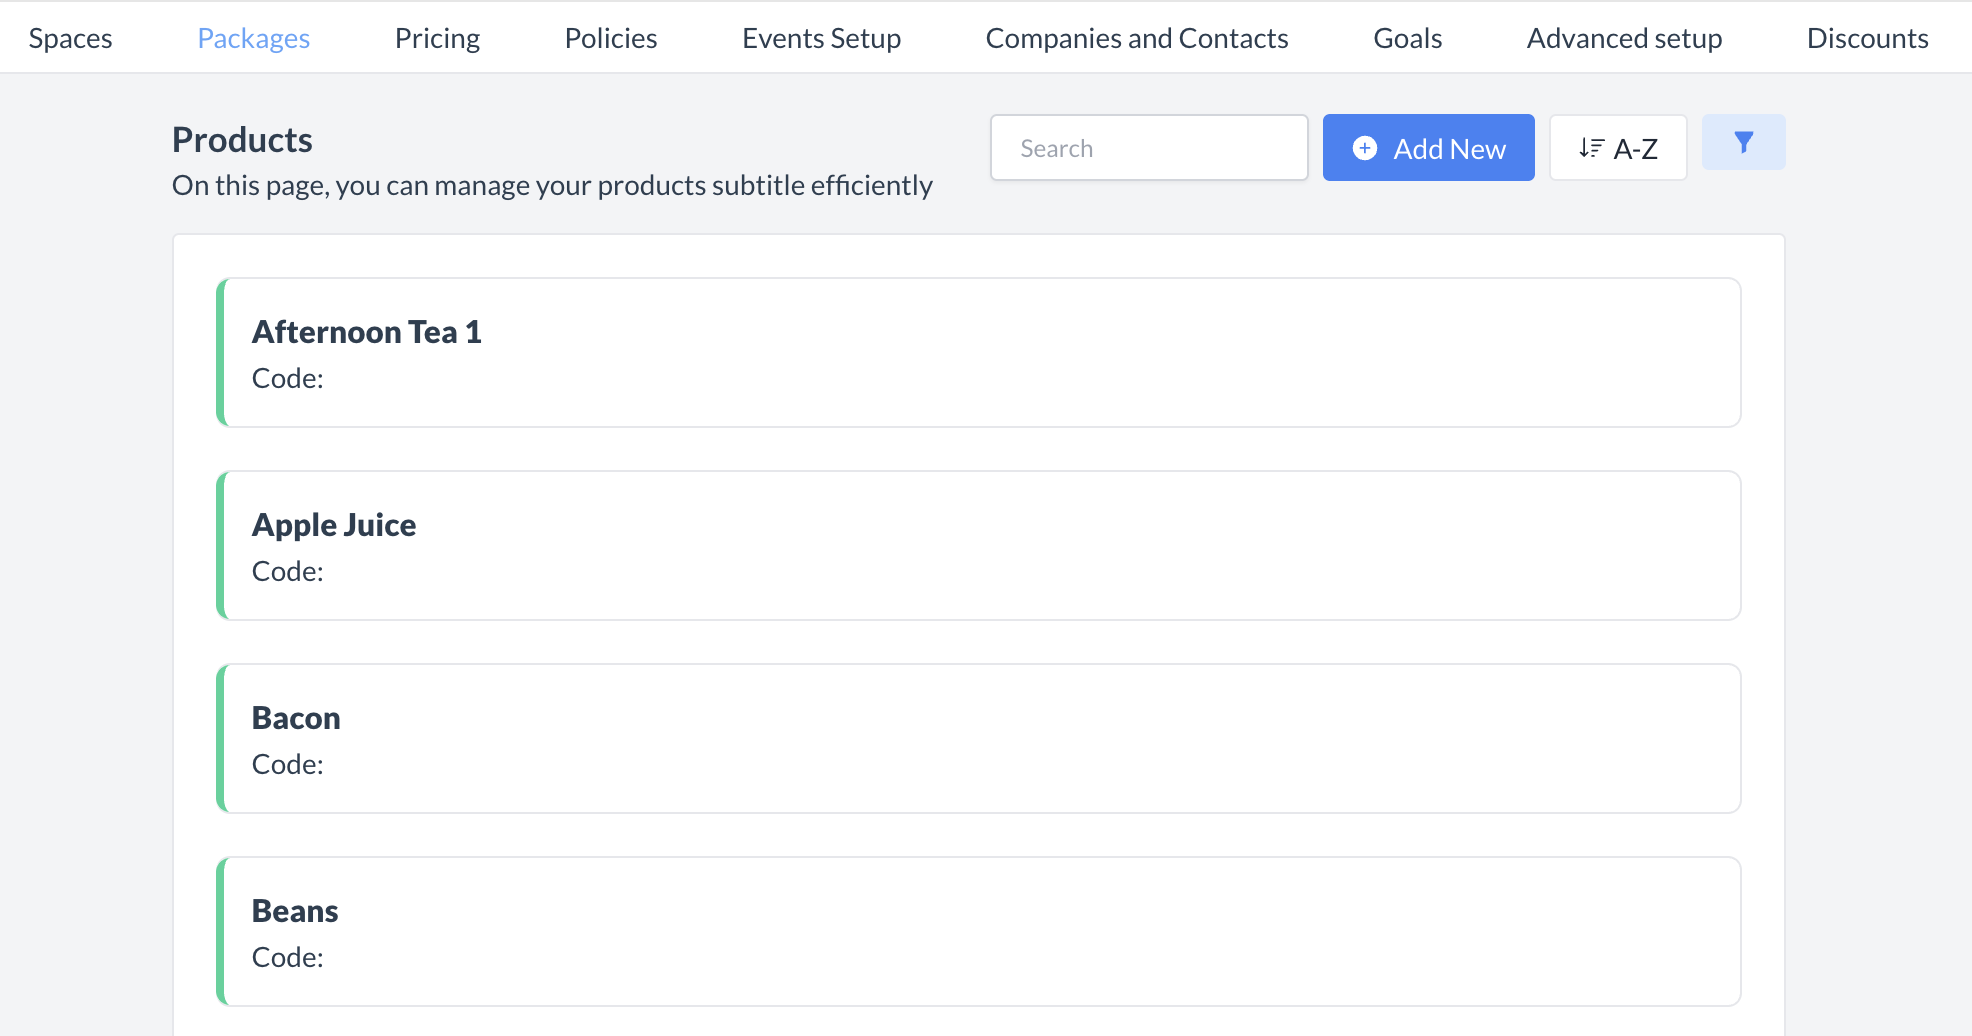
Accessing and Creating Products

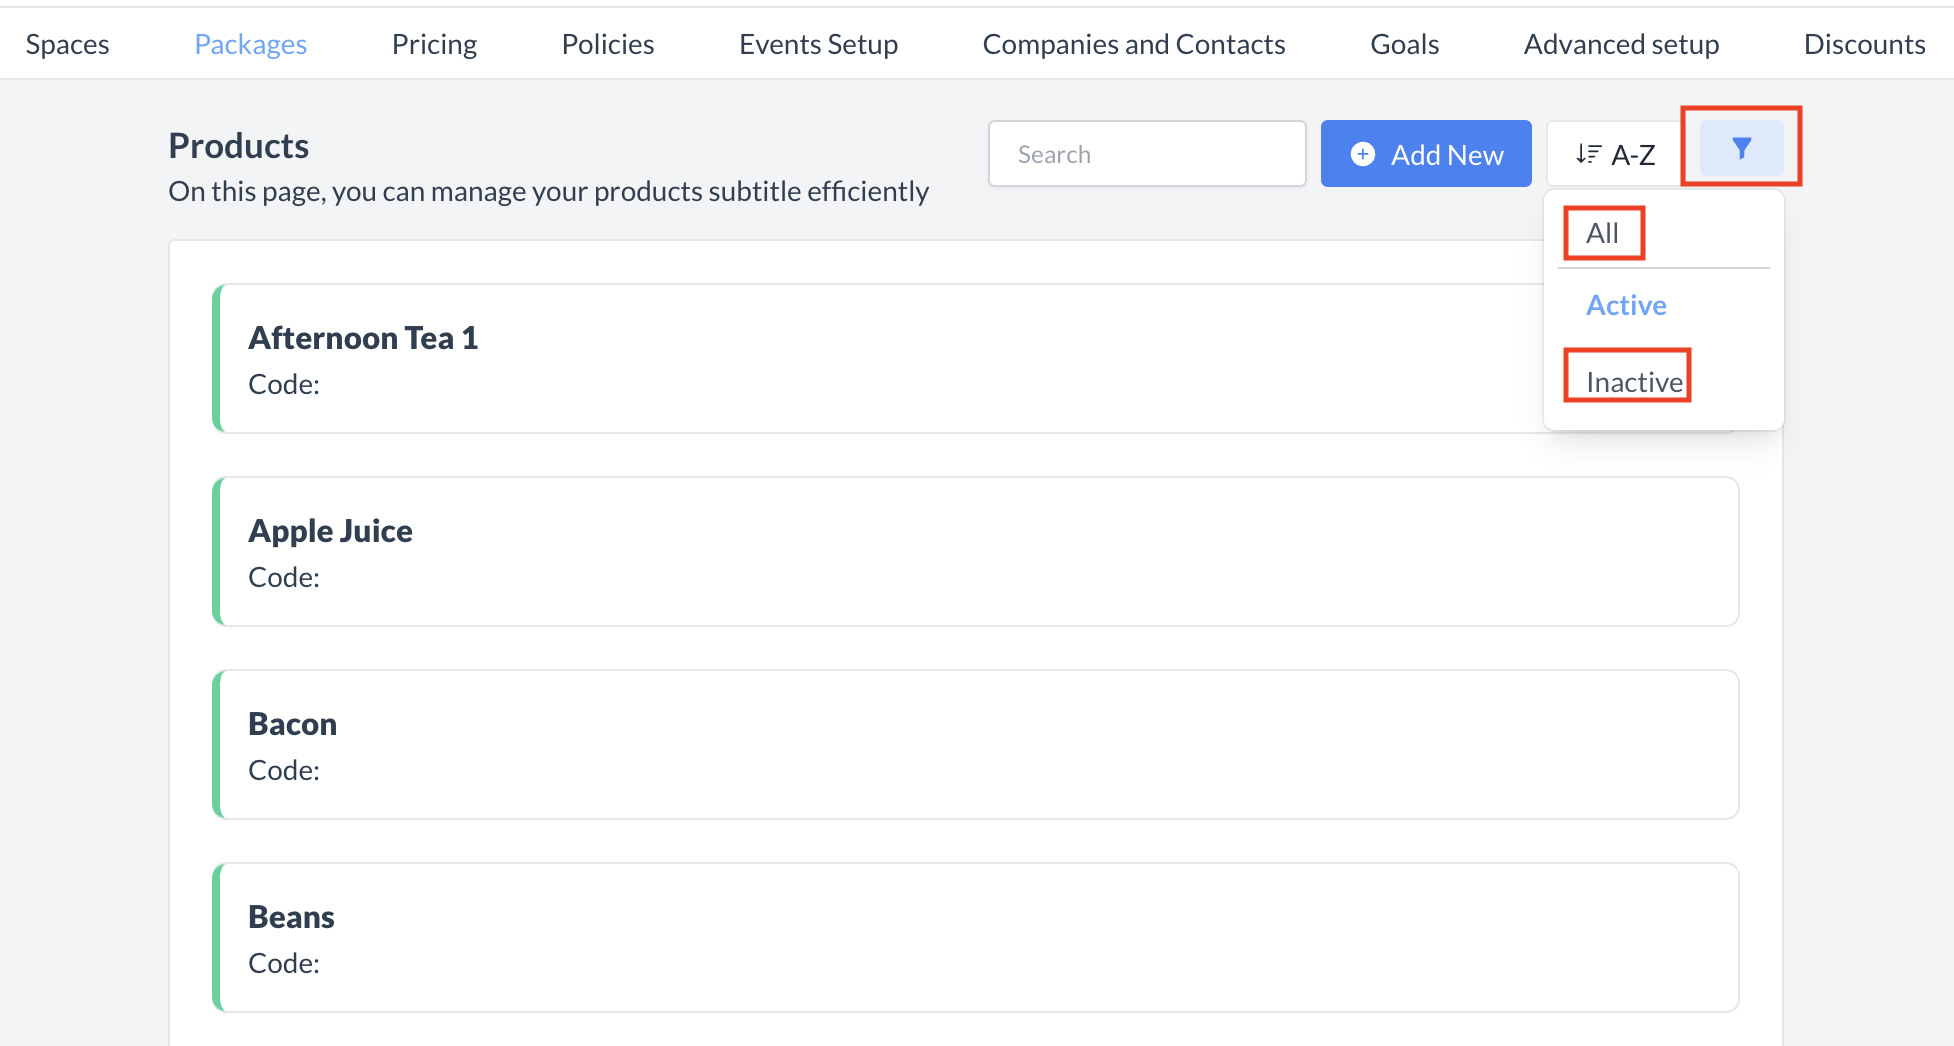
The Products screen displays a list of all existing products available for use with an package.

To create a new product:

  1. Navigate to the Products screen.

  2. Click the blue Add New button in the top-right corner to begin creating a new product.

Products_Add New.png

Products: Add New

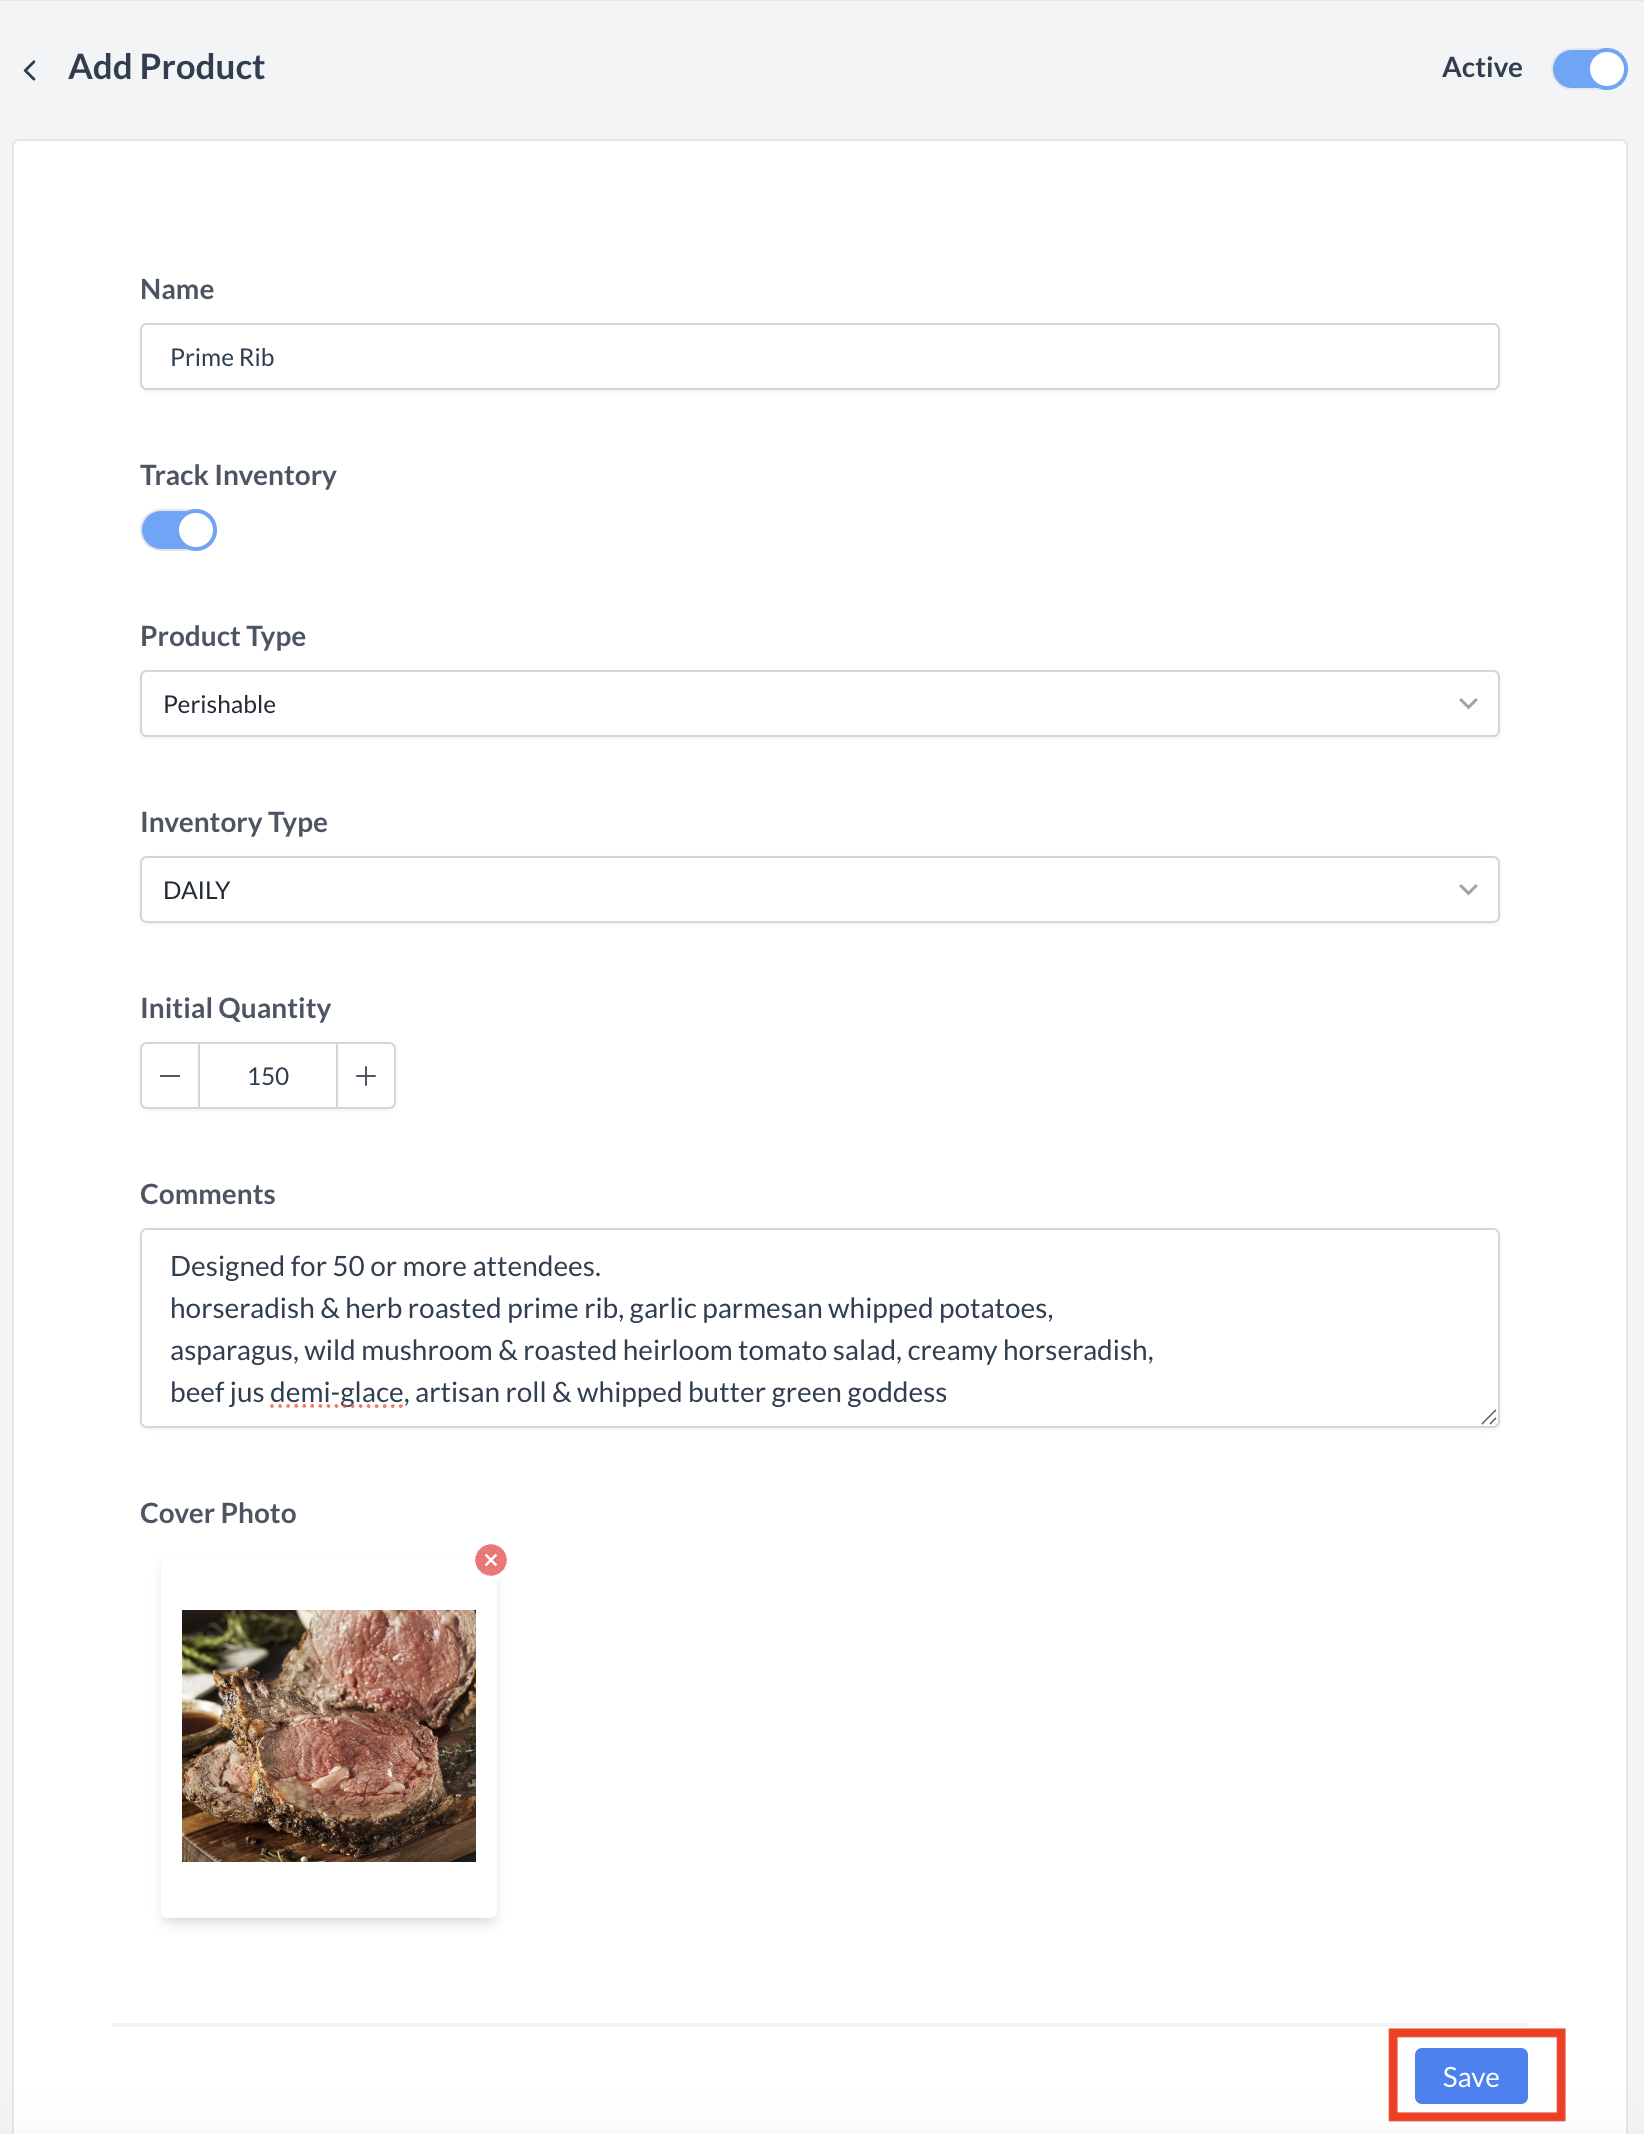
Adding a New Product

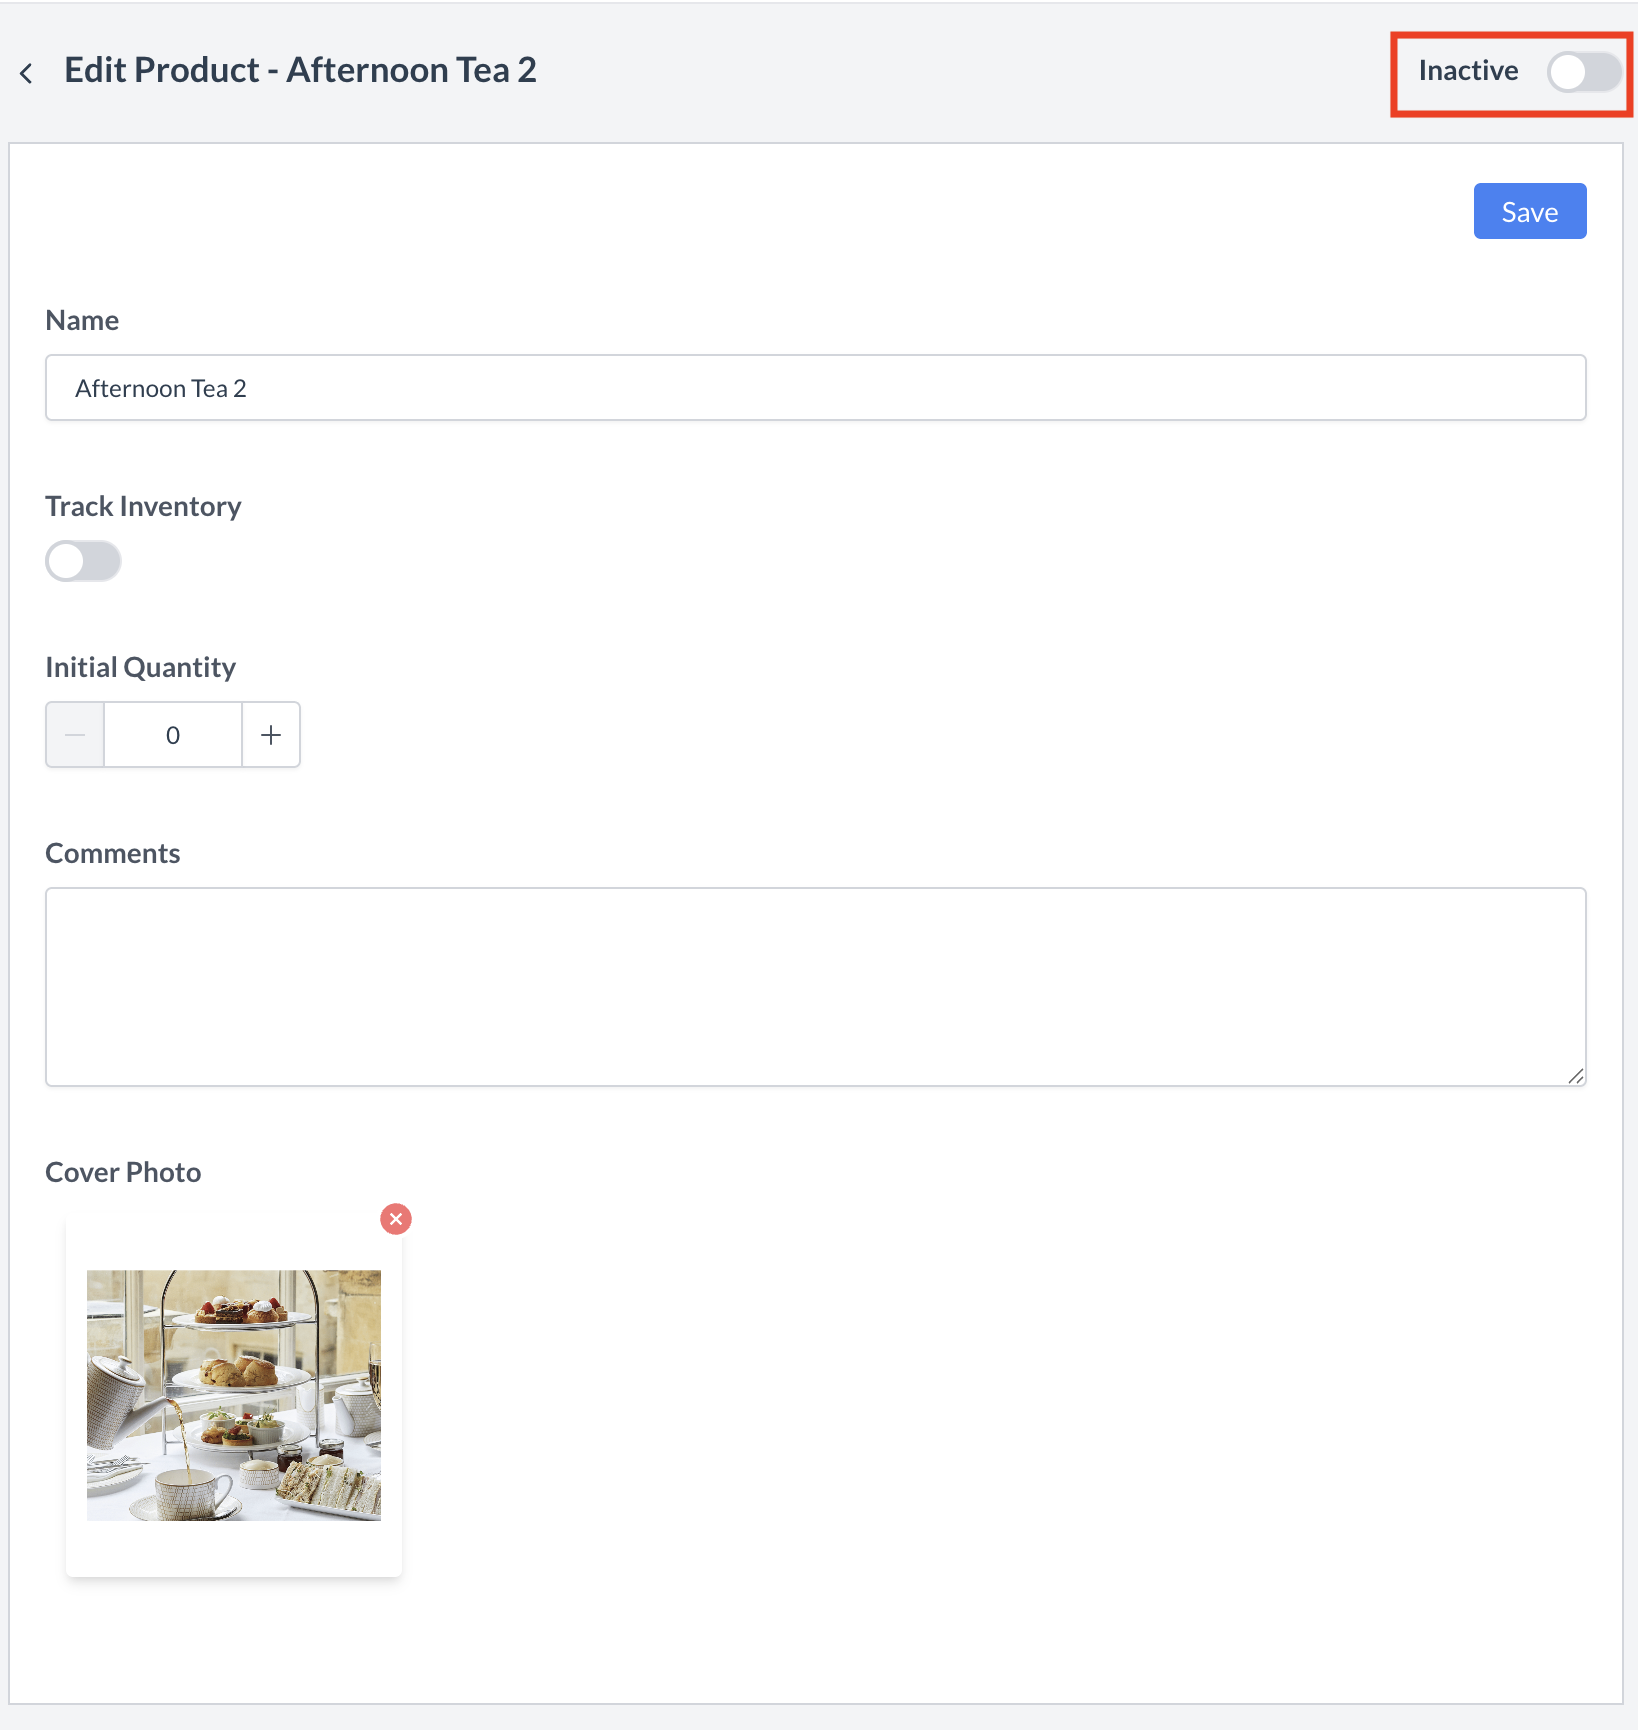
When the Add Product screen appears, complete the following fields to create your new product:

  • Name
    Enter a clear and descriptive name for the product.
    Example: "Prime Rib"

  • Track Inventory
    Toggle ON if you want EventKey to track the inventory levels for this product.

  • Product Type
    Choose whether the product is Perishable or Non-Perishable:

    • Perishable: Items that can spoil or expire (e.g., eggs, milk, bacon, prime rib).

    • Non-Perishable: Items that do not expire (e.g., chairs, tables, tablecloths).

  • Inventory Type
    Define how inventory is managed:

    • Daily: Inventory resets to the initial quantity each day.

    • Rolling: Inventory carries over from day to day based on usage.

  • Initial Quantity
    Enter the starting quantity available for the product. This value will behave according to the Inventory Type selected.

  • Comments
    Optionally, add a description or notes about the product for internal reference.

  • Photo (Optional)
    Upload an image of the product to help with visual identification.

Once all required fields are completed, click the Save button.
Your new product will now appear in the Product Listing screen.

Products_New Product .png

Products: Create New

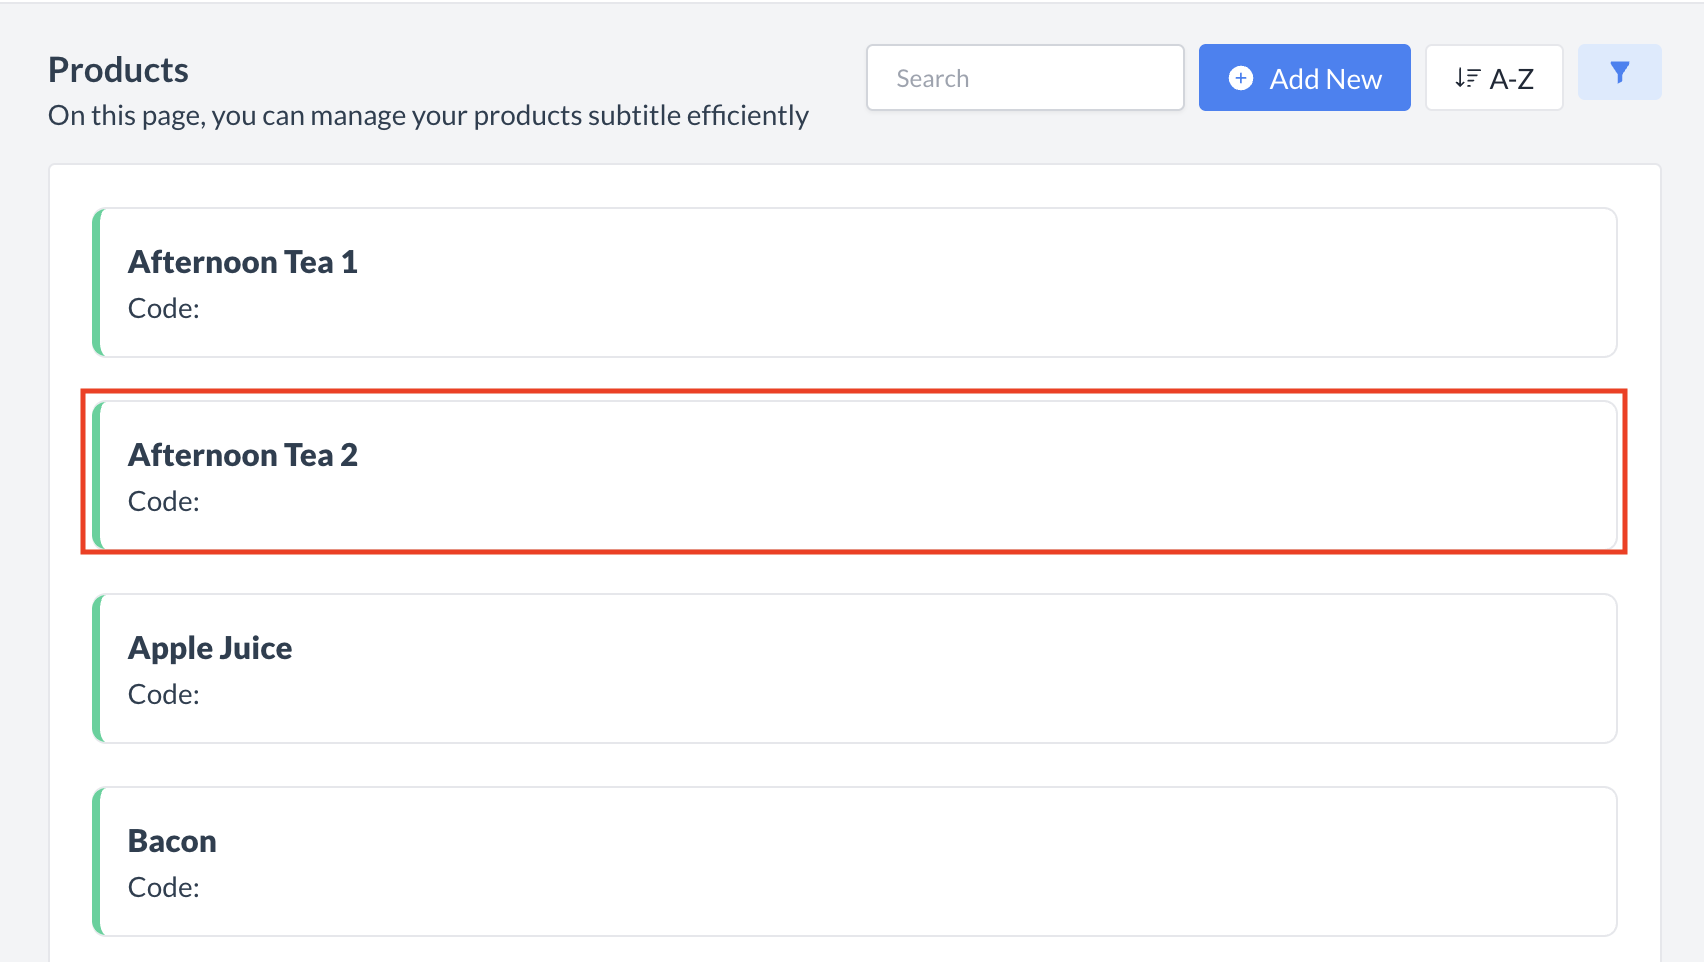
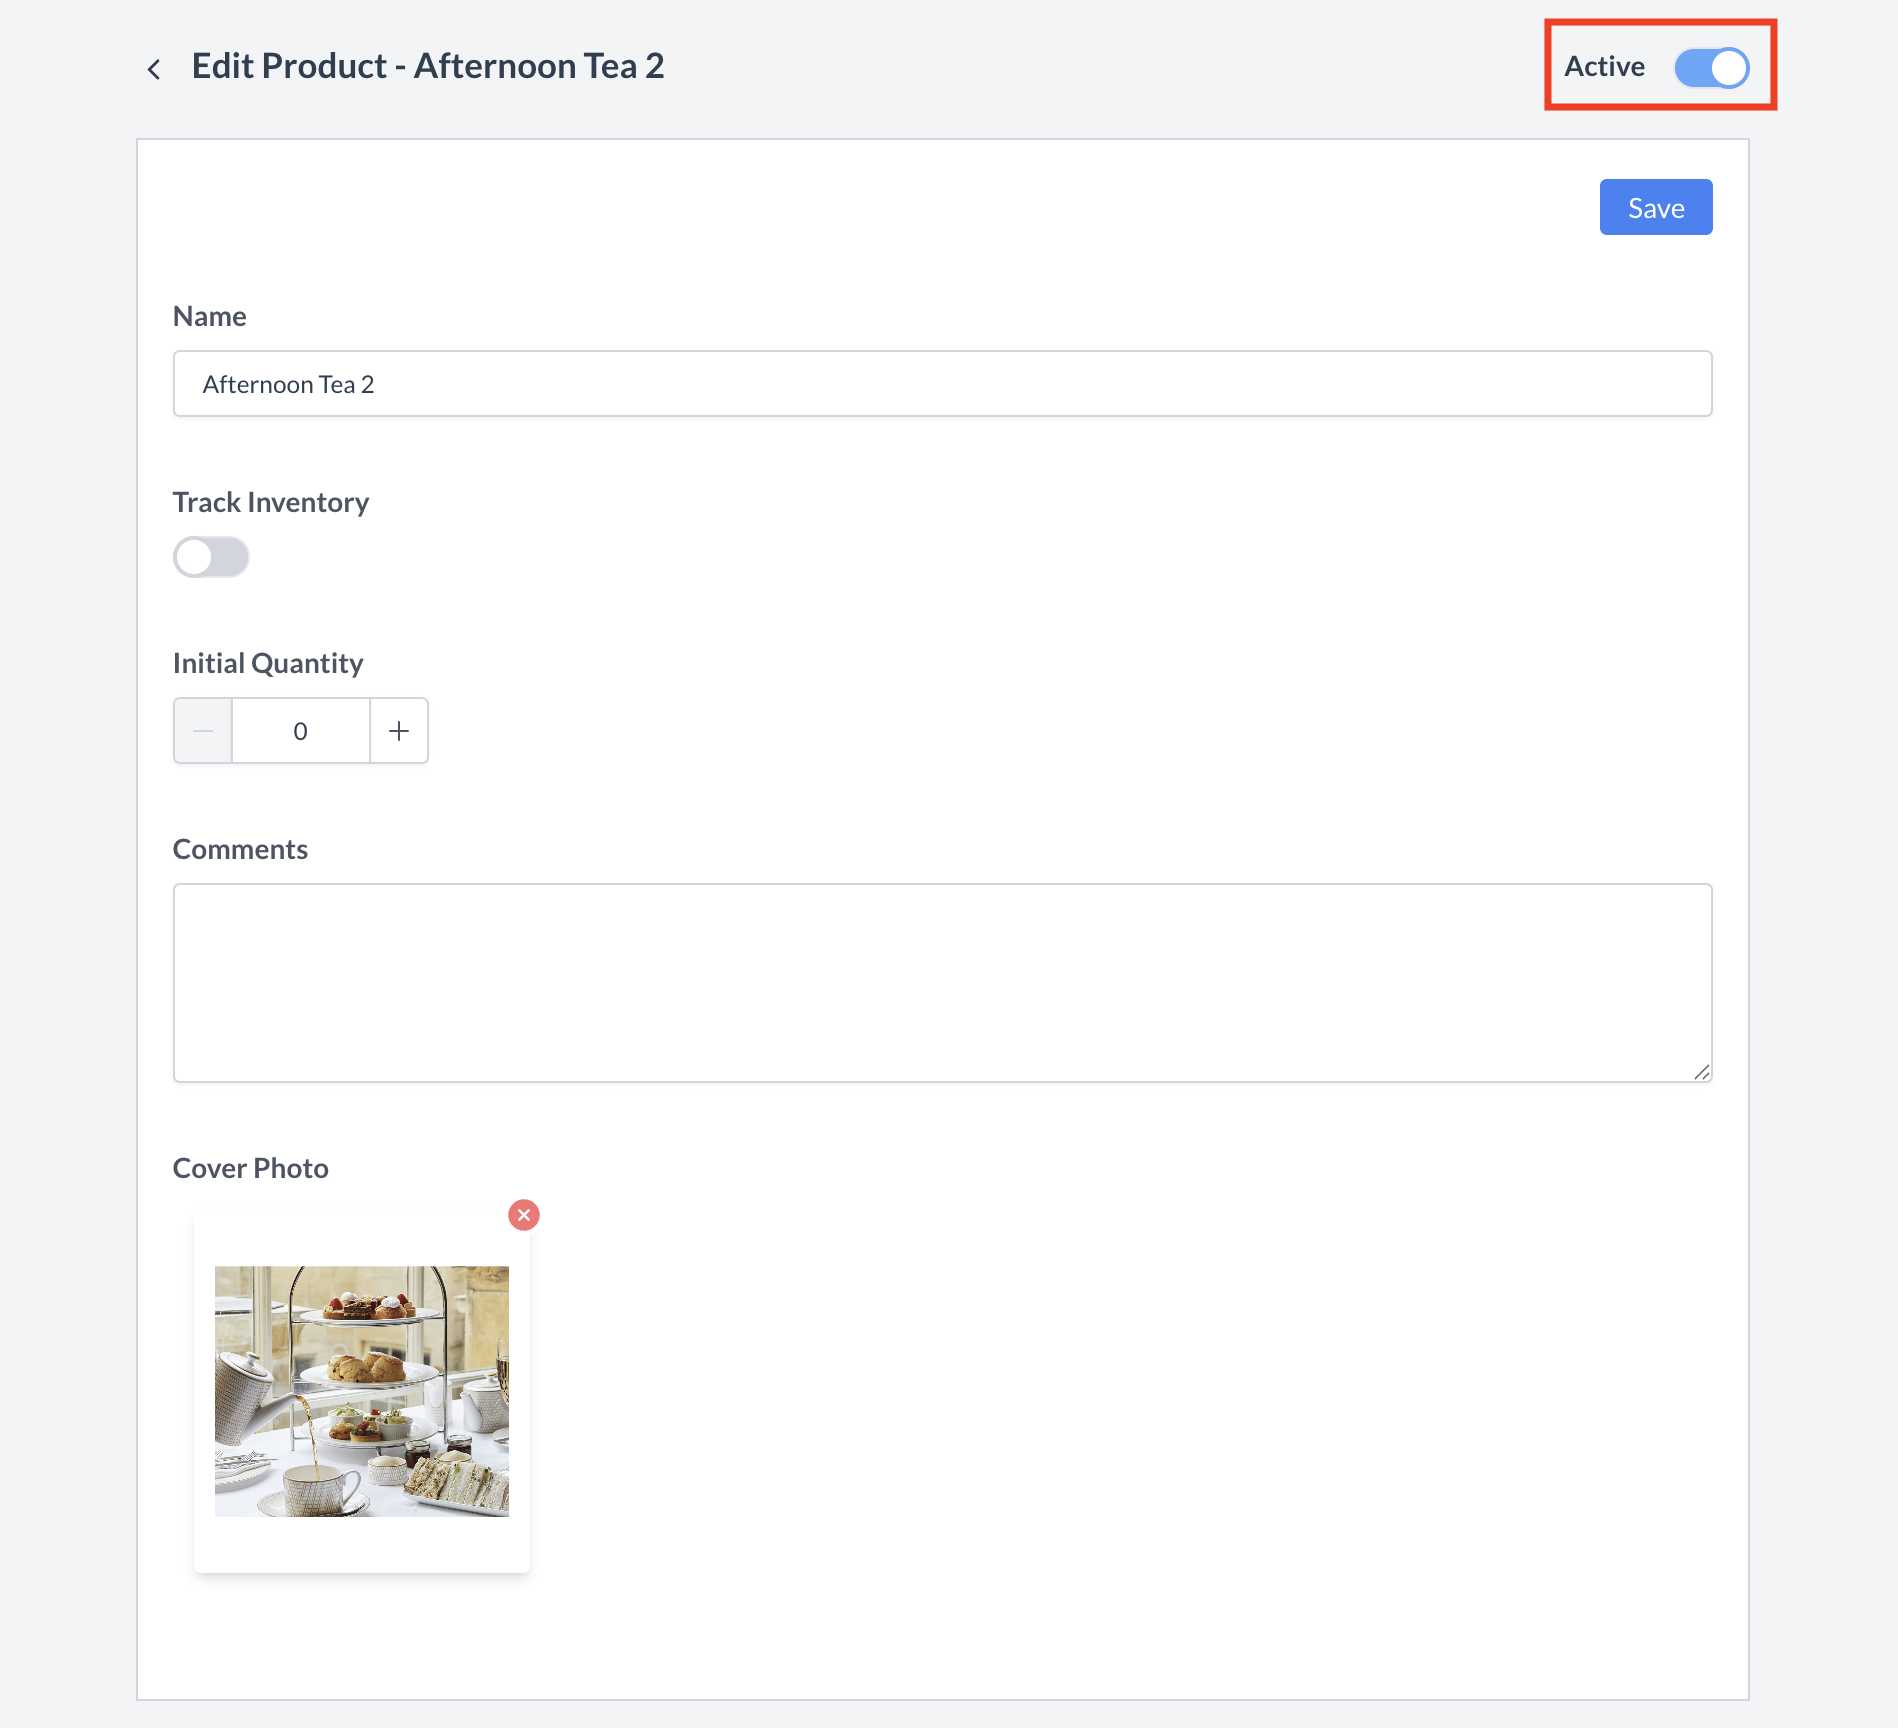
🔄 Inactivating a Product

To deactivate a product:

  1. From the Product listing screen, locate and select the product you wish to inactivate.

  2. In the product header, click the Active toggle to switch it off.

Once inactivated, the product will no longer appear in the Product listing and will not be available for selection on packages.

Product_Select Product.png

Products: Select Product to Inactivate

Products_Active Toggle.png

Products: Active Toggle

Products_Removed from Listing Screen.png

Products: Product Removed from Listing Screen

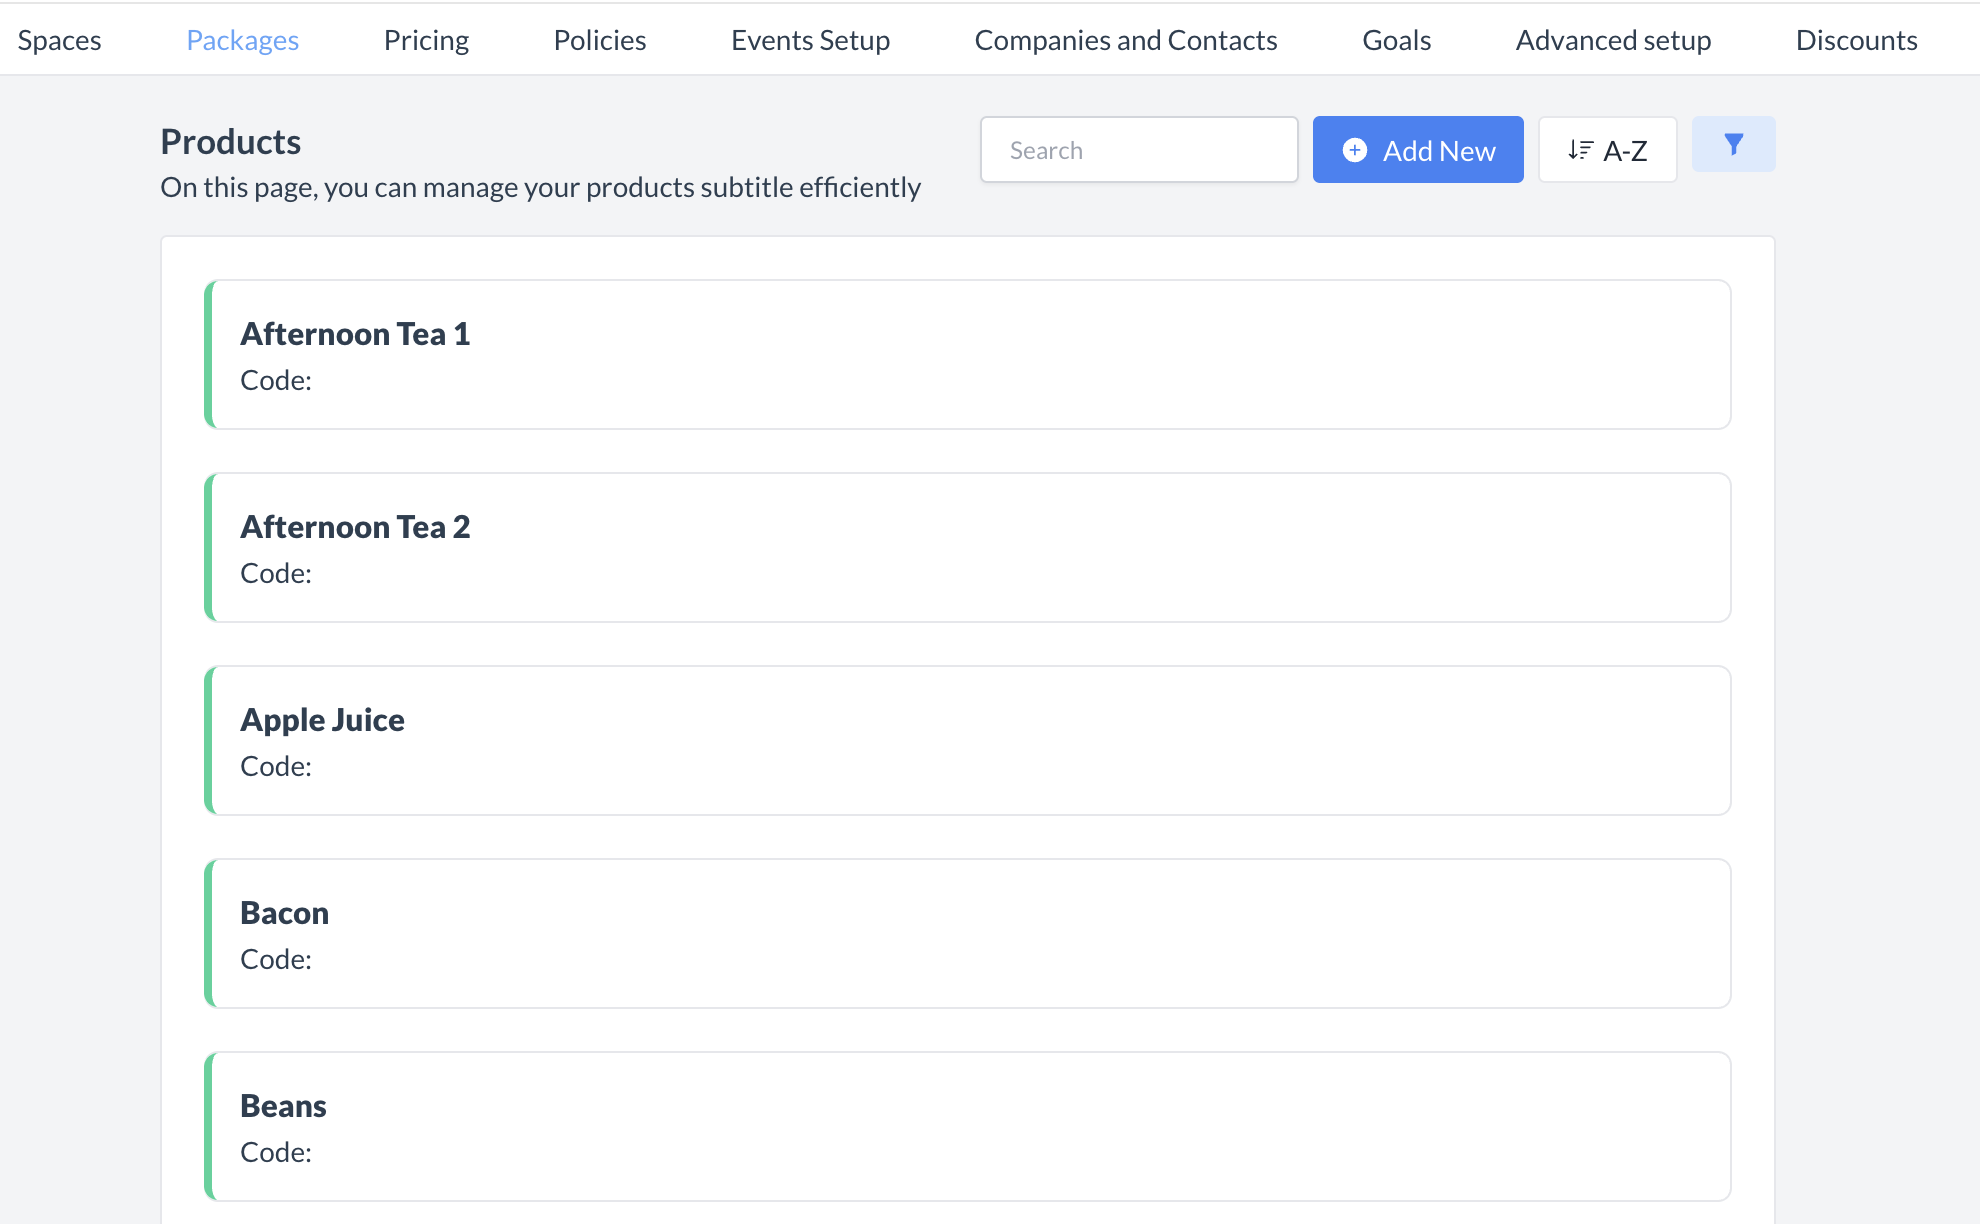
🔁 Reactivating a Product

To reactivate a product:

  1. Navigate to the Products listing screen.

  2. Use the filter option to display All or Inactive products.

    • Active products are marked with a green sidebar.

    • Inactive products are marked with a grey sidebar.

  3. Locate the inactive product you wish to reactivate and click to open it.

  4. In the product header, toggle the Inactive switch to ON.

The product is now reactivated and will appear in the main Product listing screen, making it available for use again.

Products_Filter Menu.png

Products: Filter Menu

Products_Select to Reactivate.png

Products: Select Product to Reactivate

Products_Inactive Toggle.png

Products: Inactive Toggle

Product_Reactivated.png

Products: Product Reactivated

⏭️ What’s Next
After creating a new Product, go to Packages > Package Setup and attach the Product in the Package Details section for each relevant package. For more information, refer to the “Package Setup” Knowledge Base article located under the Packages menu.


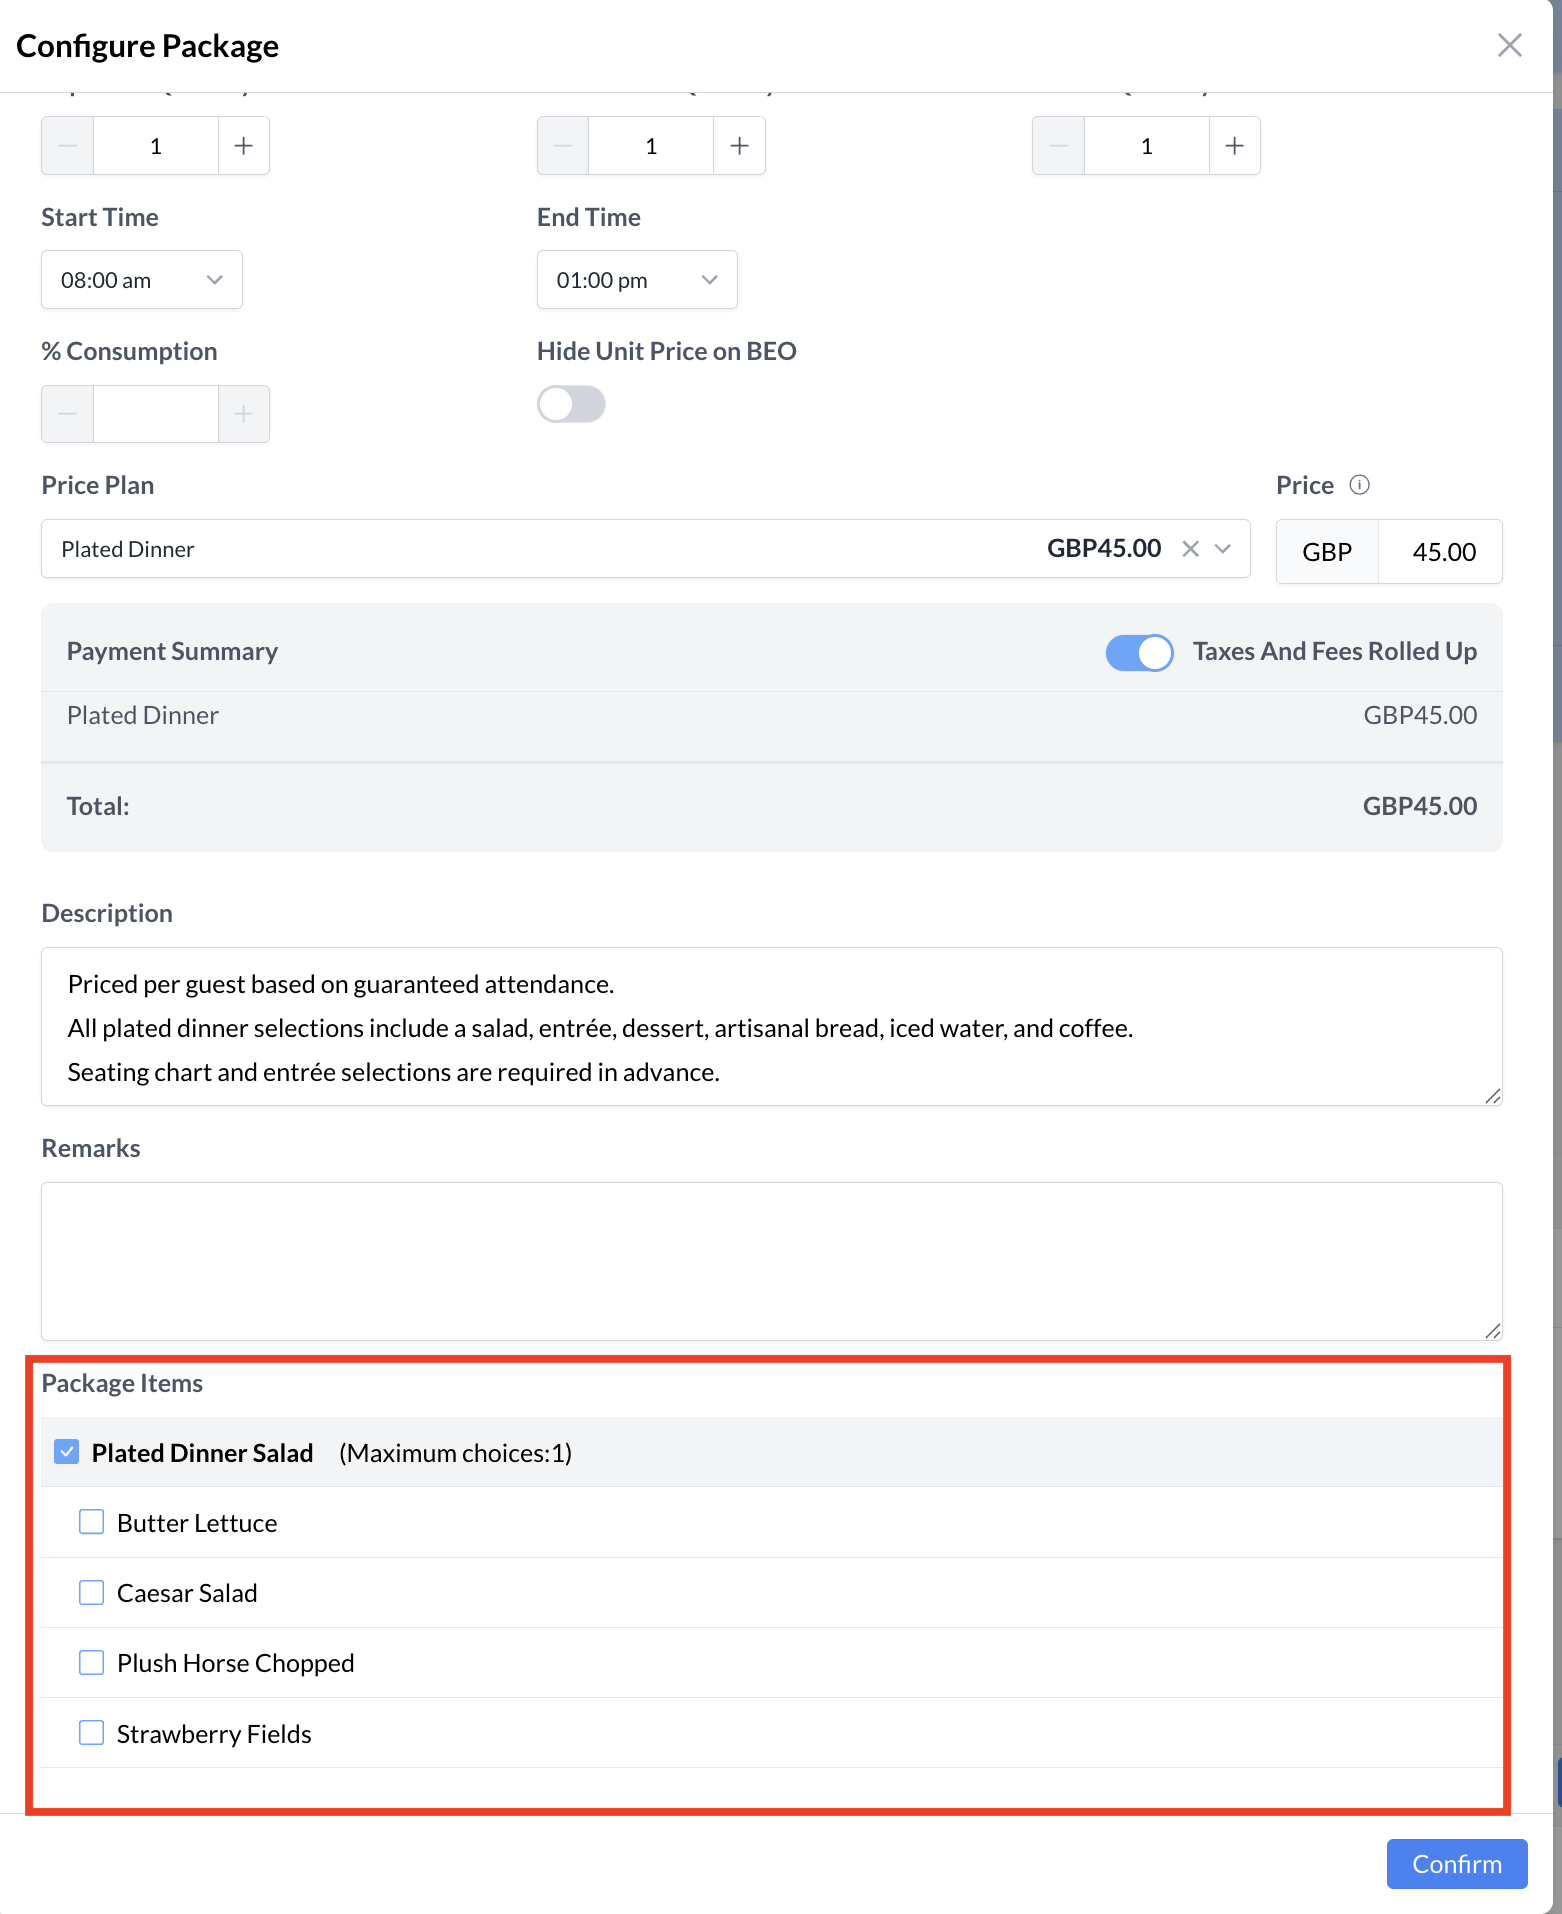
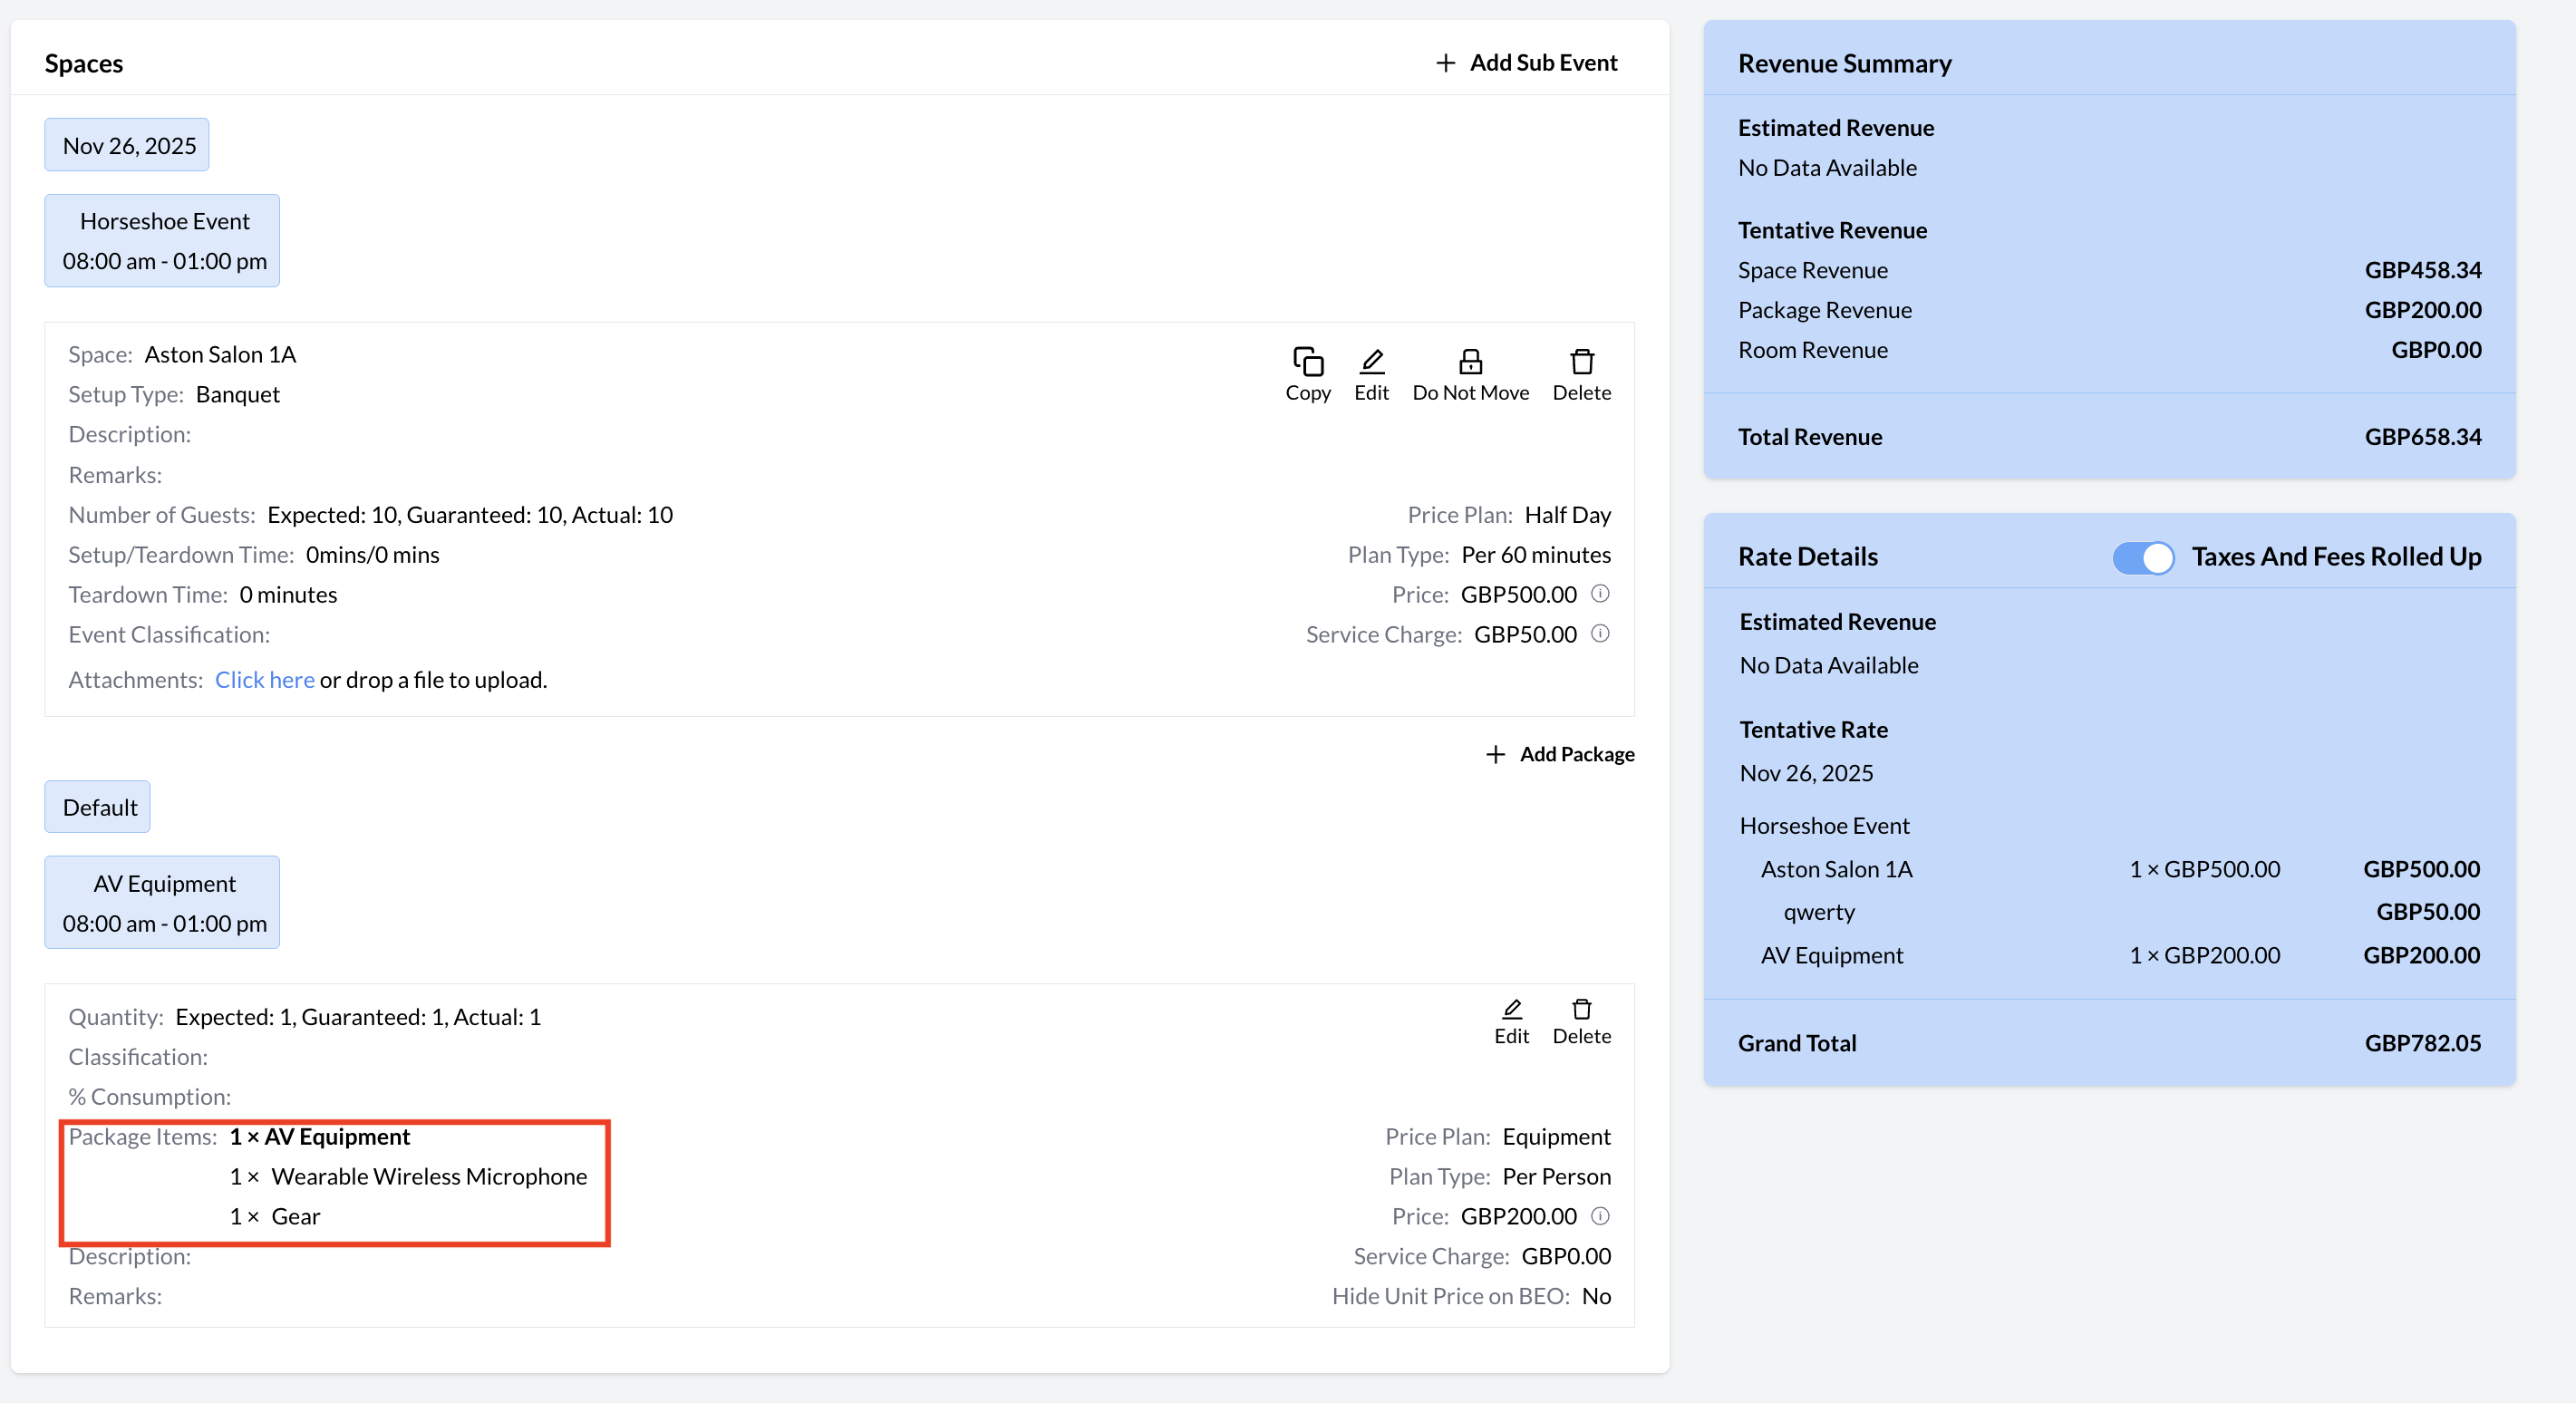
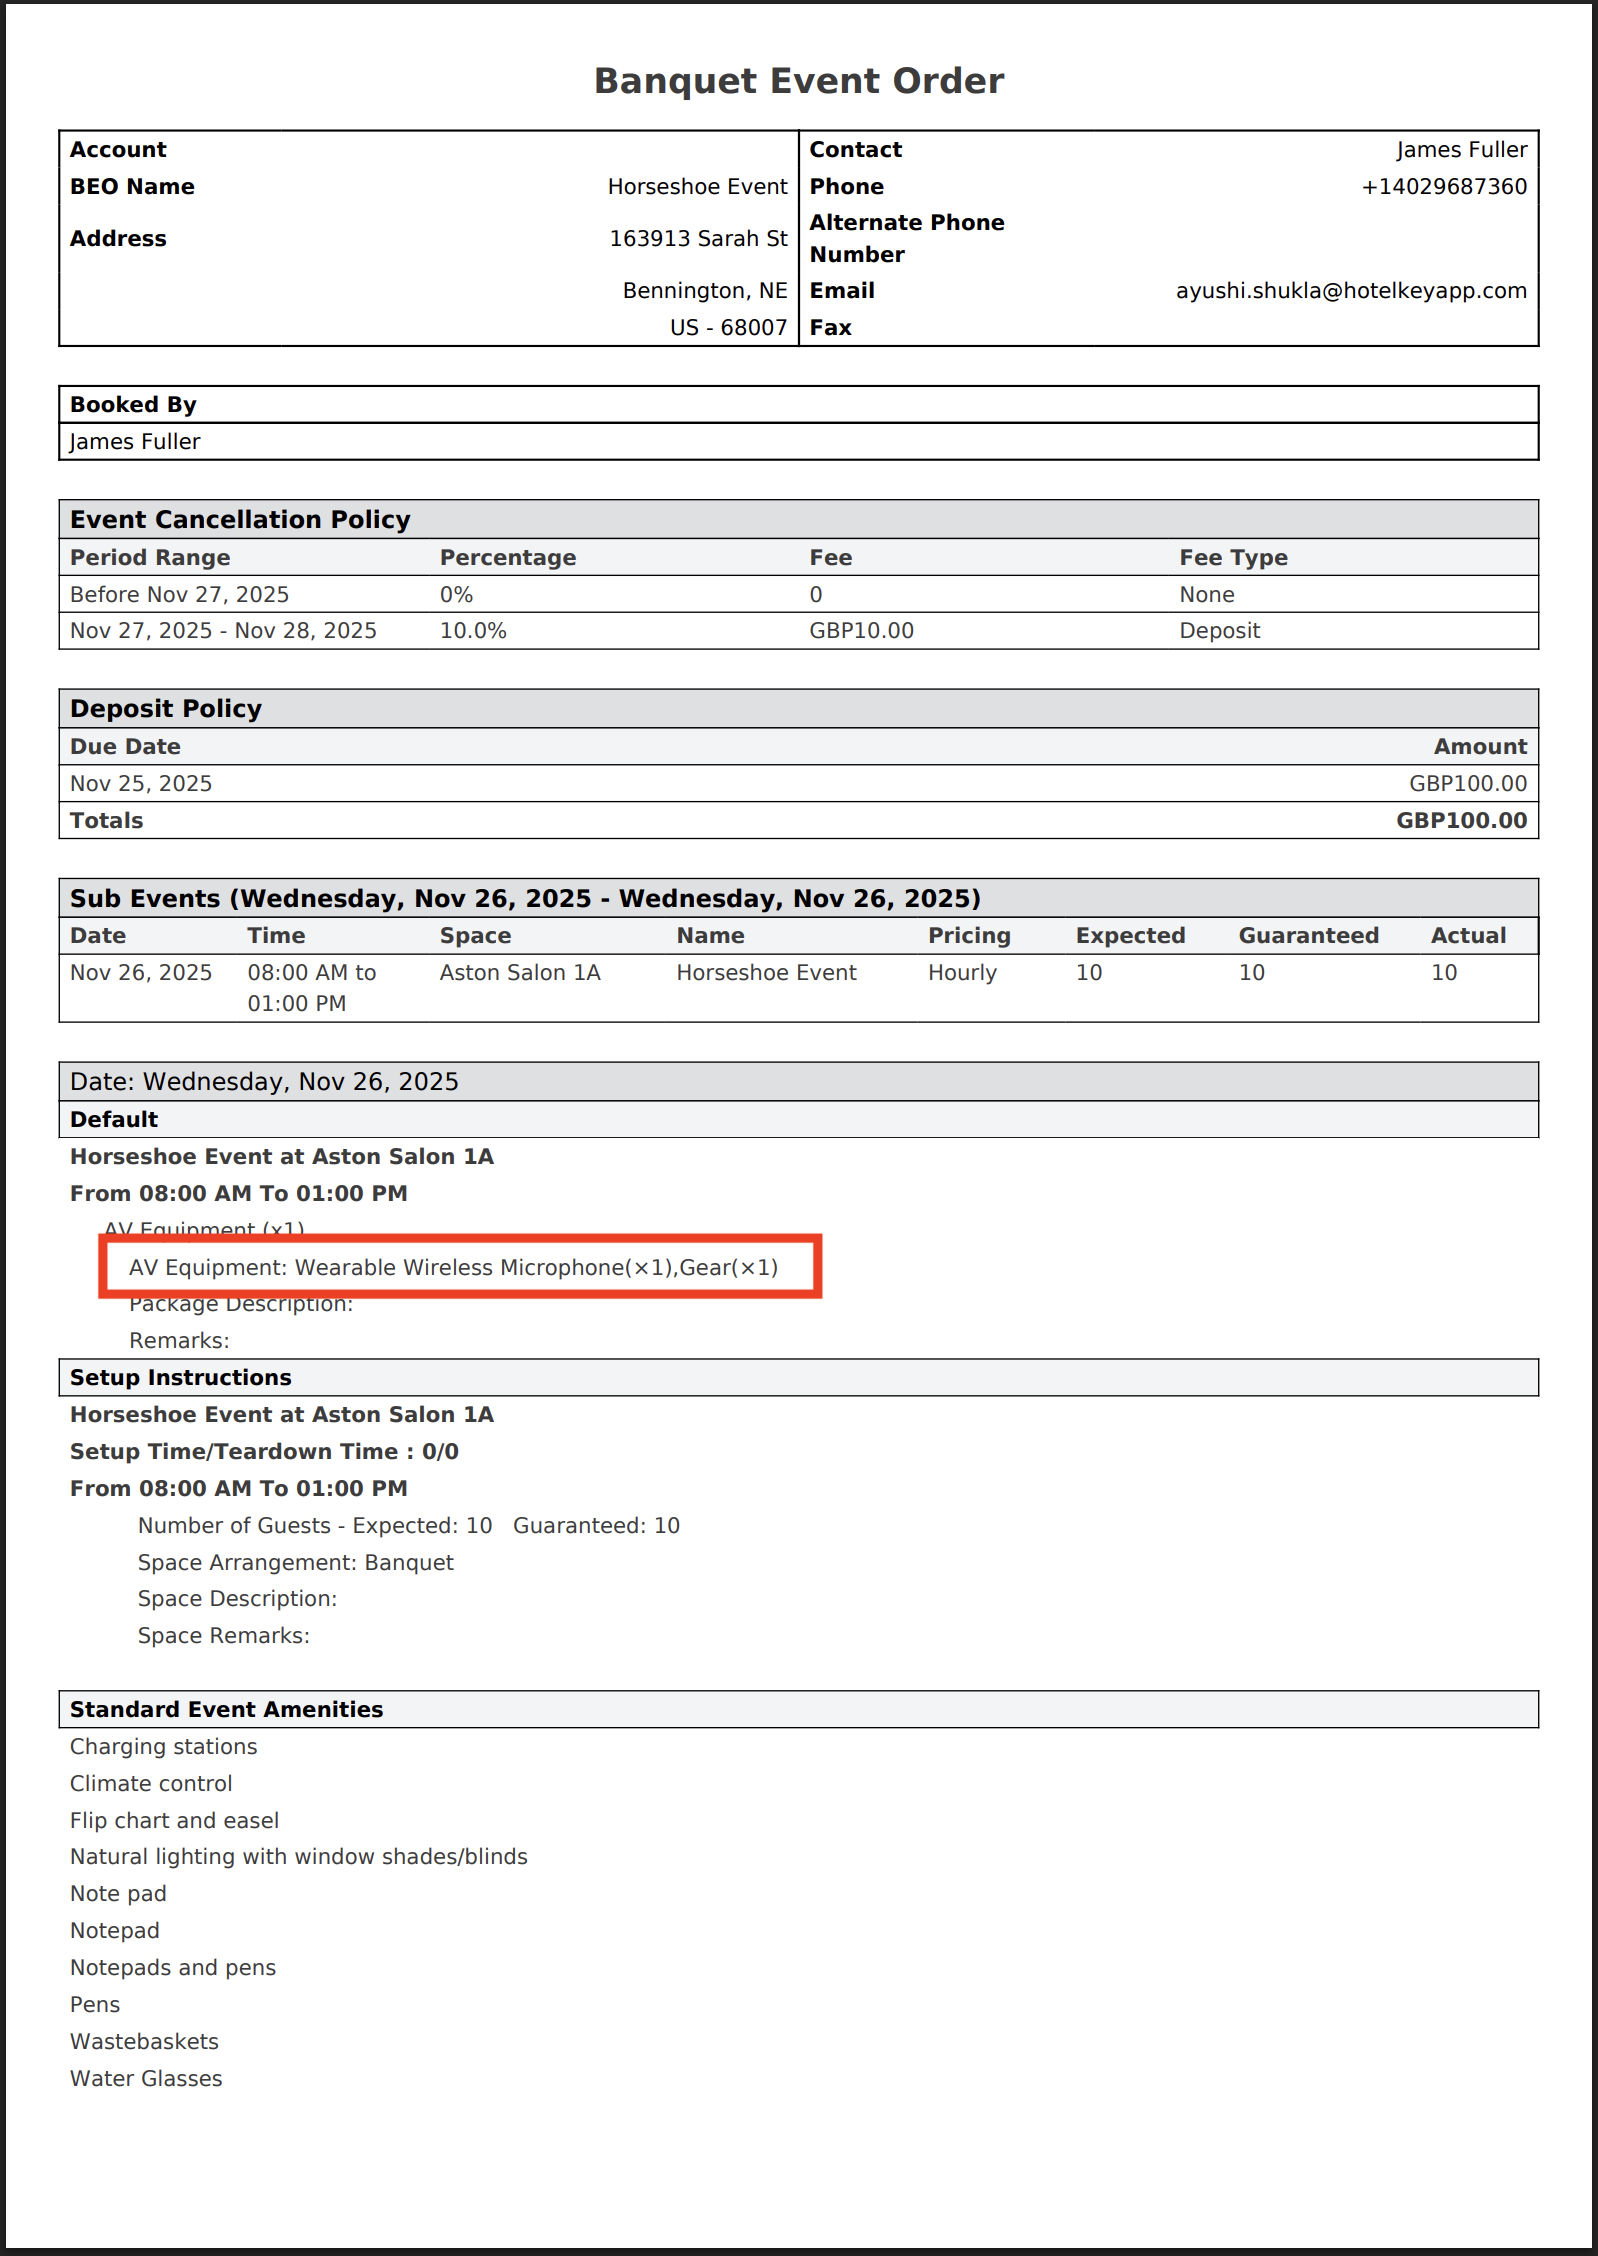
🖥️ Where “Products” Appears in the User Interface (UI)

There are several locations within EventKey products will appear both in the UI & Reports. Below are a few more common examples:

Products_Package Creation.png

Products: When Attaching a Package to the Event

Products_Event Record.png

Products: Event Record

Products_BEO.png

Products: BEO

JavaScript errors detected

Please note, these errors can depend on your browser setup.

If this problem persists, please contact our support.