
📆 Revision Date:
|
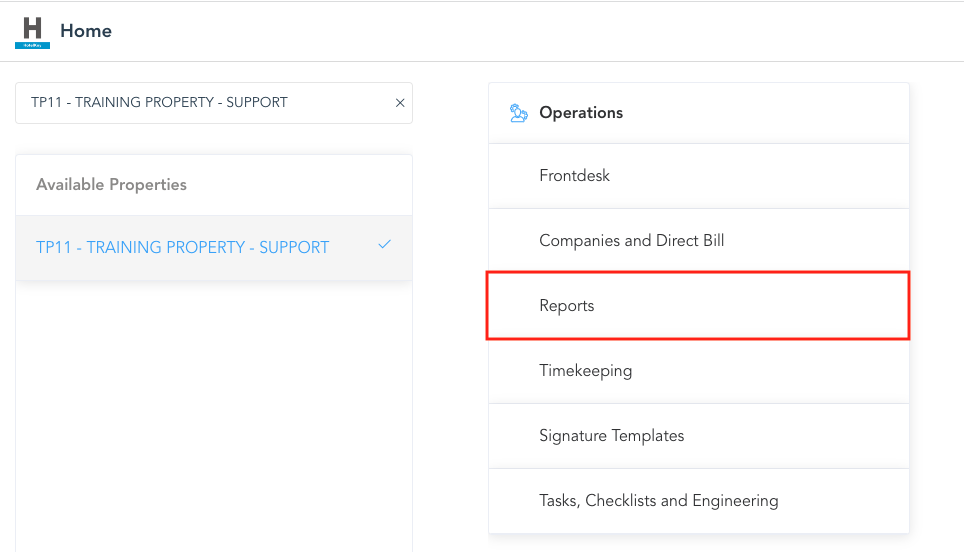
Select the property from HK Home and then select Reports. |
|
|
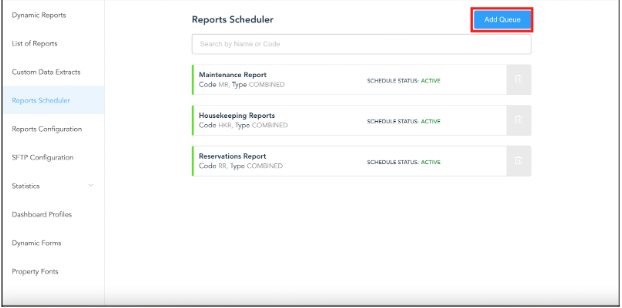
The Reports page loads. Select Report Scheduler. |

|
|
Select Add Queue to add a new scheduled report queue. |
|
|
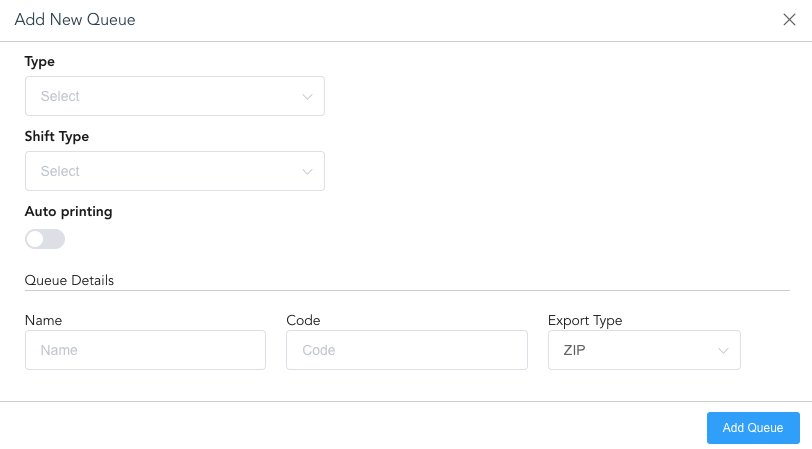
The Add New Queue page loads.
|
|
|
Report Scheduler screen open. Select the report |
|
|
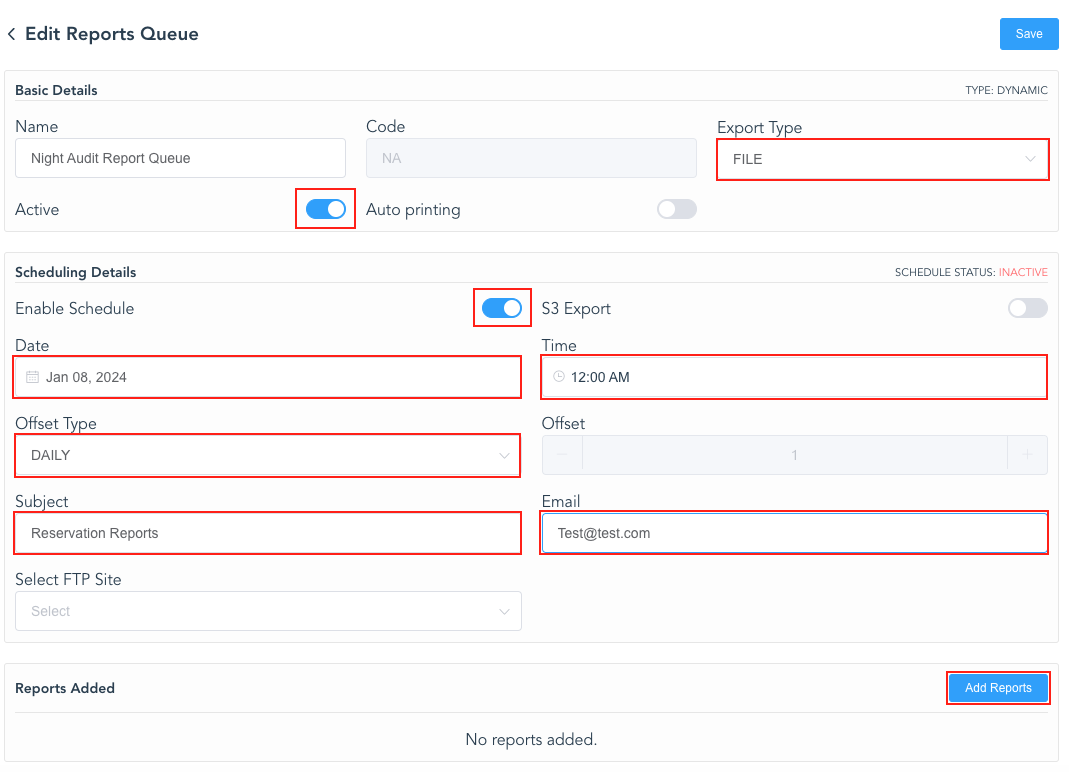
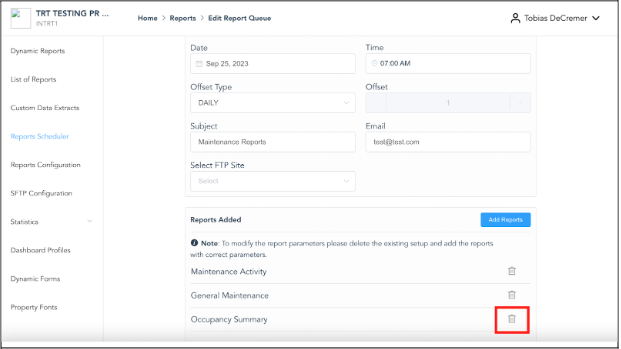
On the Edit Reports Queue page, select the parameters you desire for this scheduler.
|
|
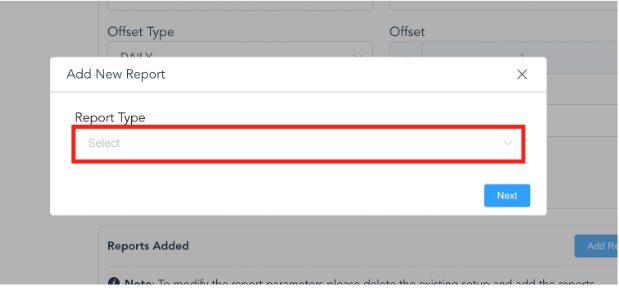
|
The Add New Report page loads.
If you choose Combined Reports, an option to choose report type will display. Select applicable report type.
(If not, see the next slide.) |
|
|
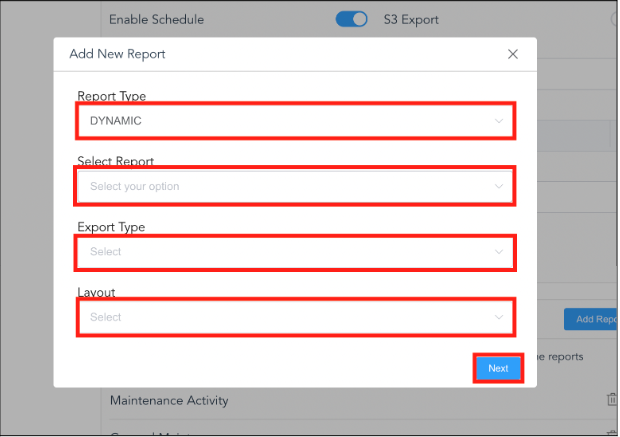
Select the applicable type of Report Type, Report, Export Type, and Layout associated for the report you desire.
When completed, select Next |
|
|
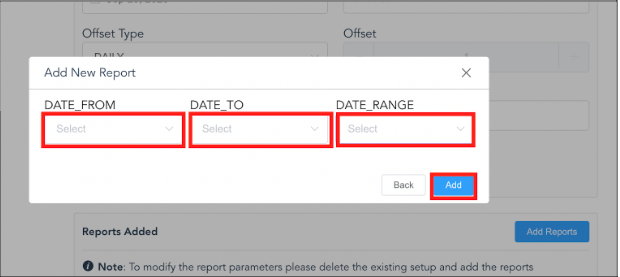
Select date ranges for the report and select Add. The report will then be added to the respective report. |
|
|
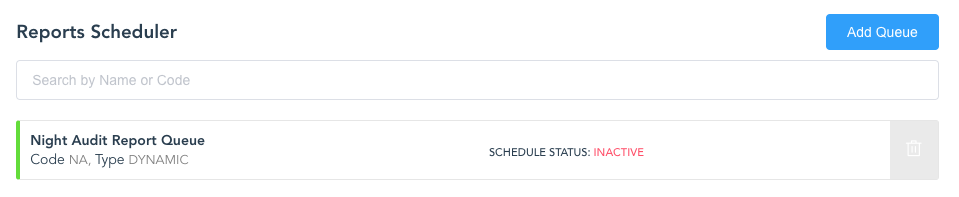
Selected reports for scheduled queue will show at the bottom. You can delete any reports at any time by selecting the trash icon next to the desired report. |
|