
Create a Space
📆 Revision Date:
Select the property on HK Home and click on EventKey Administration | .png?inst-v=4c60977c-ebad-4689-924a-3a93145b9f1d) |
Hover on the Spaces menu placed at the top, then select the option Spaces Select the Add New tab. | 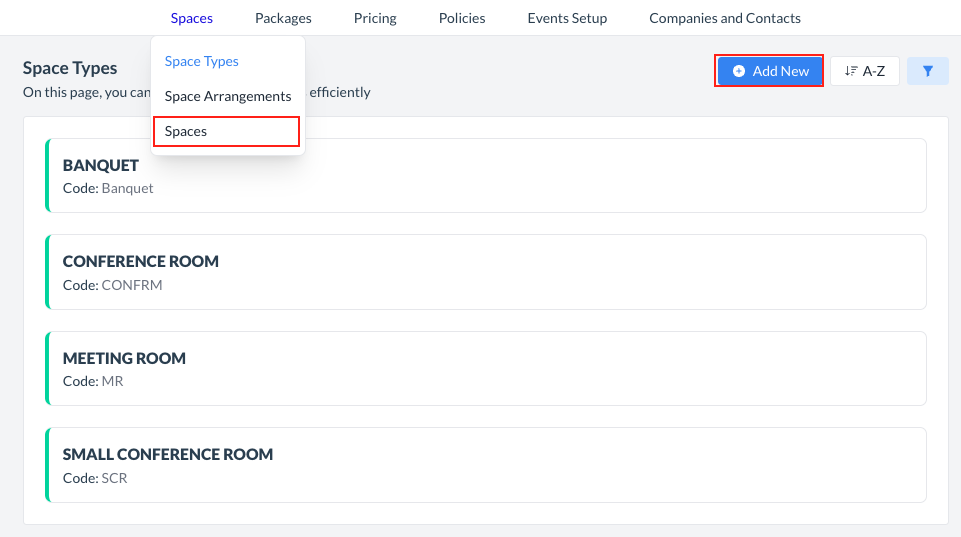 |
The Add Space wizard opens. Start adding the Basic Data.
Note: Linked Spaces allows for multiple selections.
Click on Next to proceed | 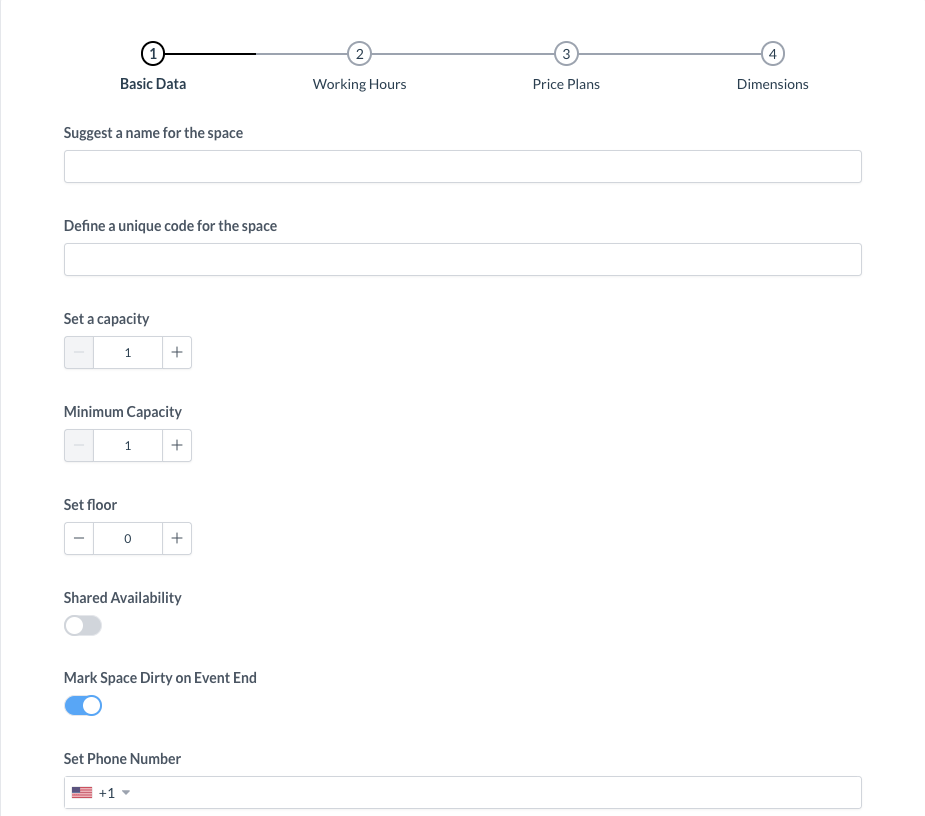 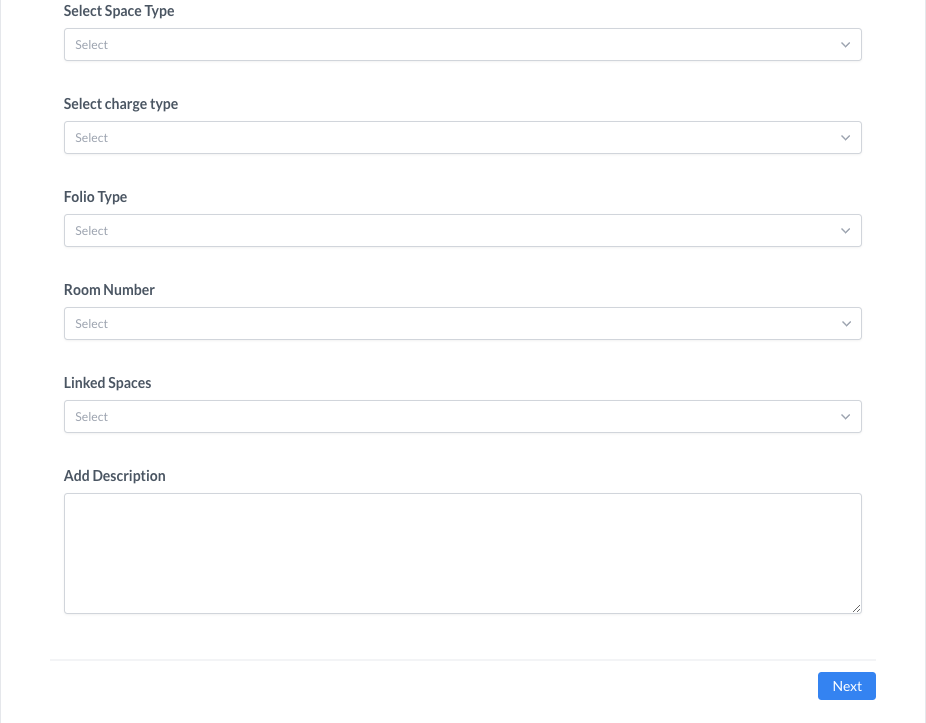 |
Step 2, Working Hours. Add the working hours for each day or simply select the option 24 hours.
| 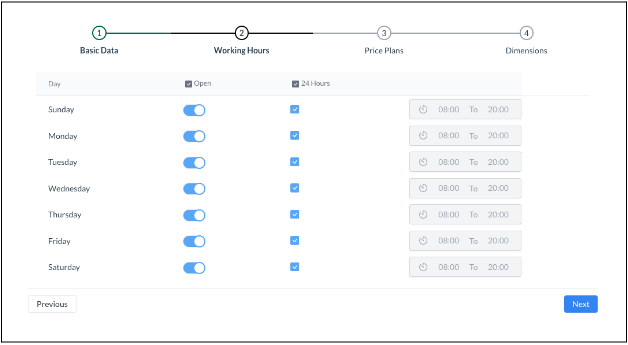 |
Select 24 Hours in the header row to set Working Hours for the new space to 24/7/365. Note: When this selection is made, Open is toggled on for every day of the week and the fields for specific hour selection are disabled. | 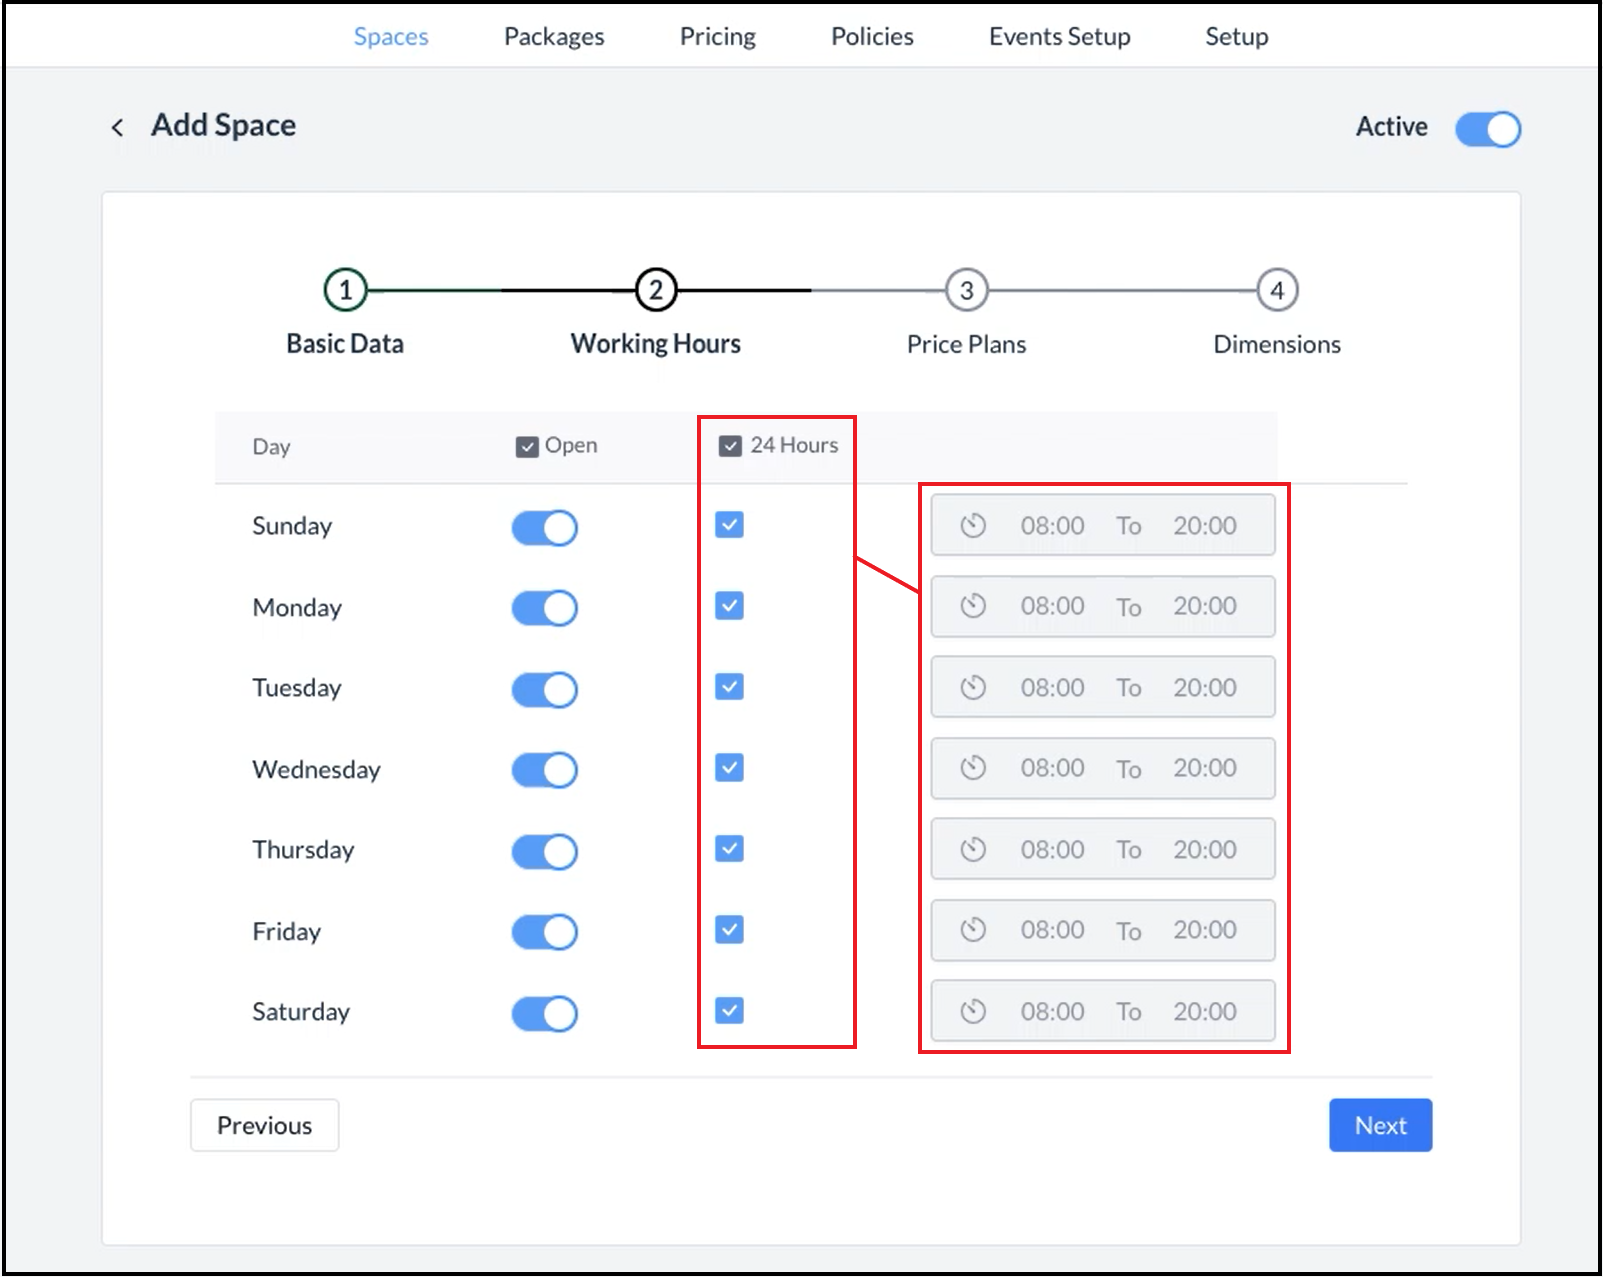 Working Hours - 24 Hours Selection |
Use the hour selection widgets to set specific Working Hours for each day. To set specific Working Hours for one day of the week and then assign those same hours for all days of the week, after setting the specific hours for the first day select the Set All link for that day. | 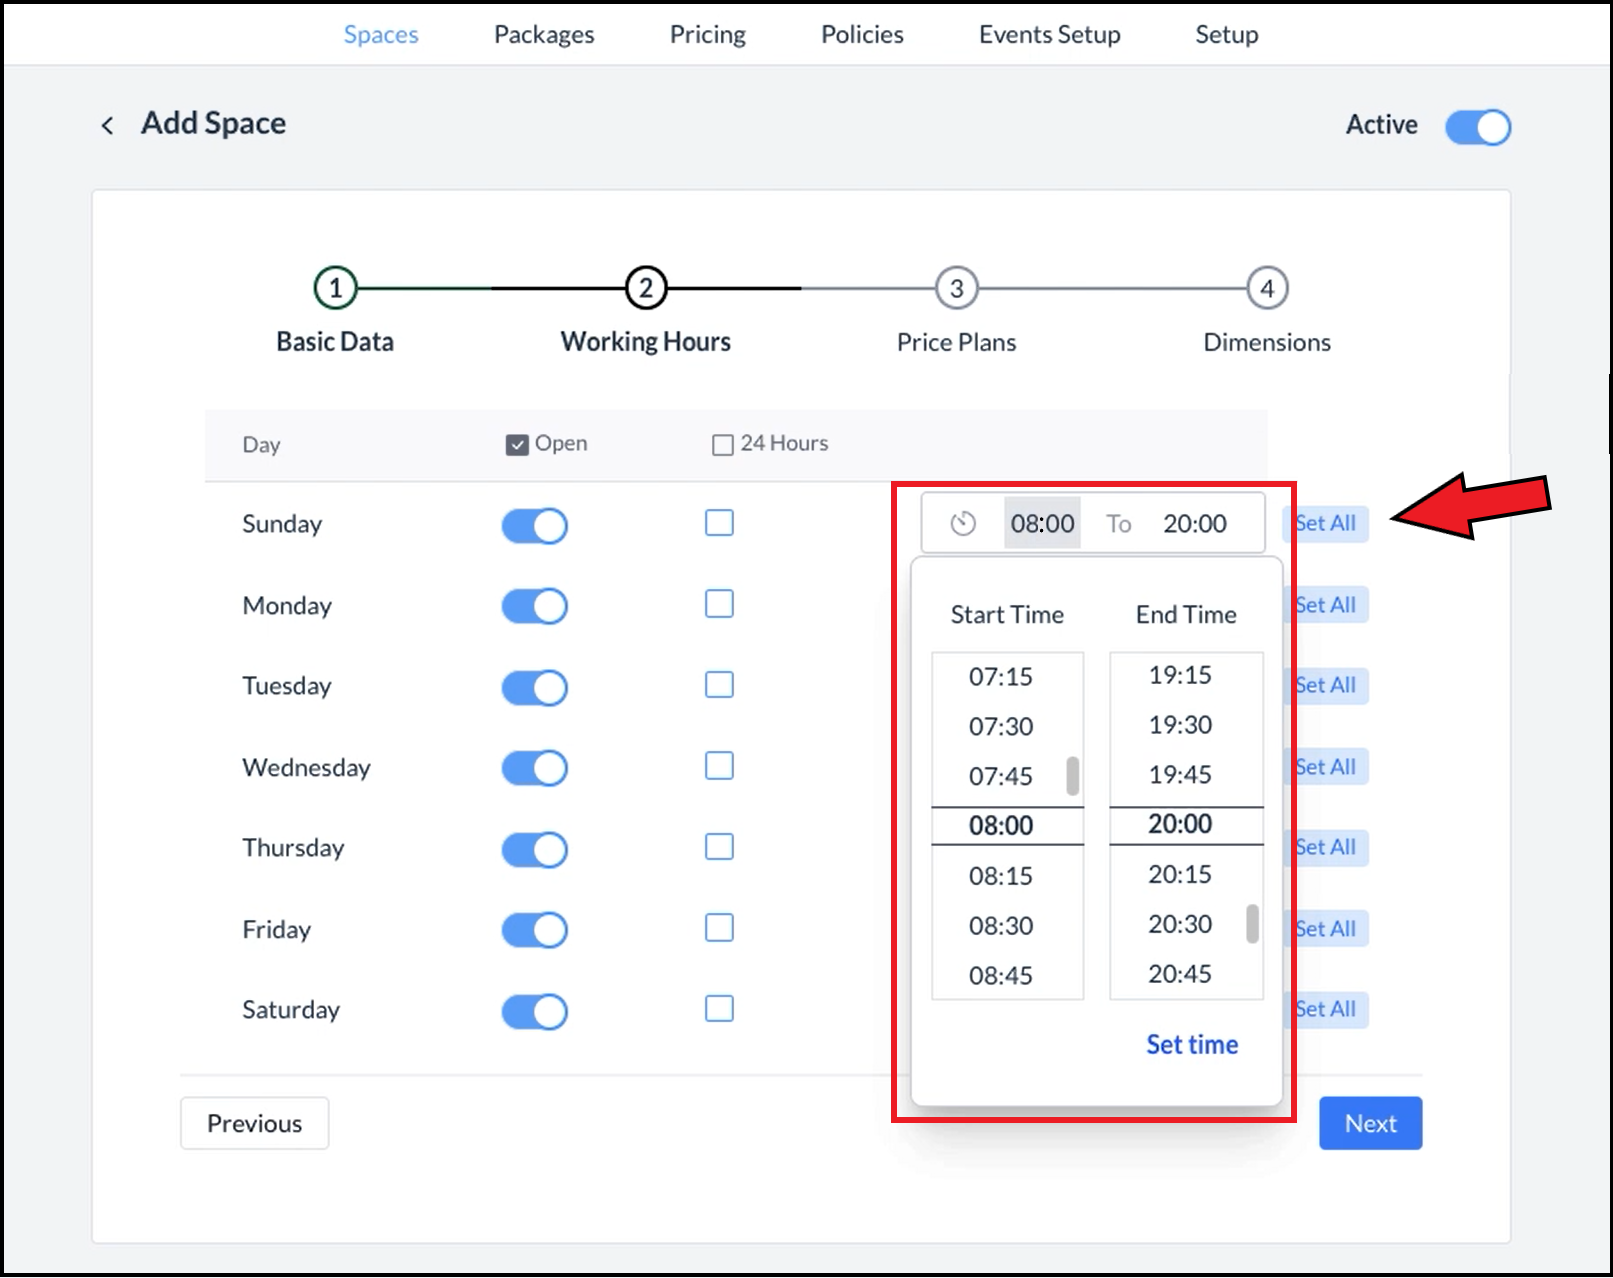 Working Hours - Hours Selection, Set All Link |
Note: Selection of the 24 Hours field overrides any specific hours previously set using the hour selection widgets. | 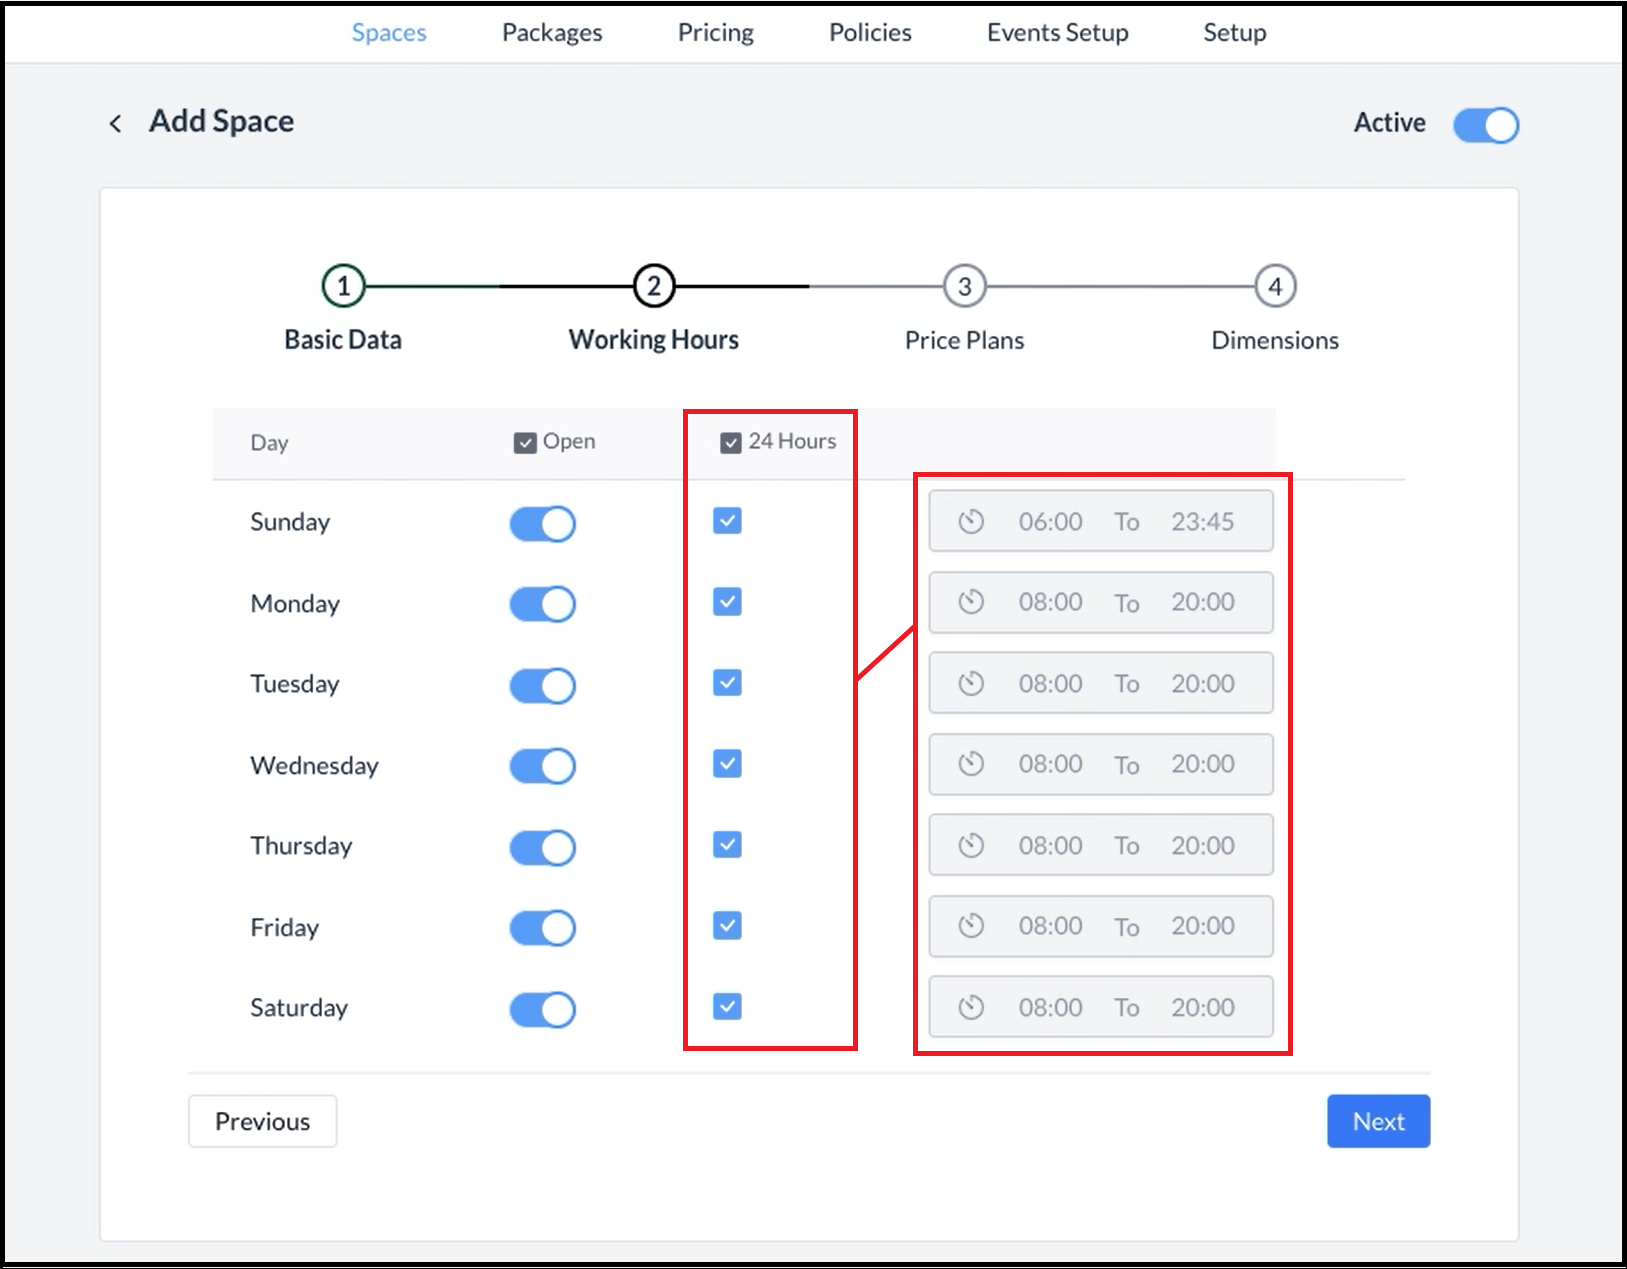 Working Hours - 24 Hours Selection Override |
After Working Hours are set, select Next. | 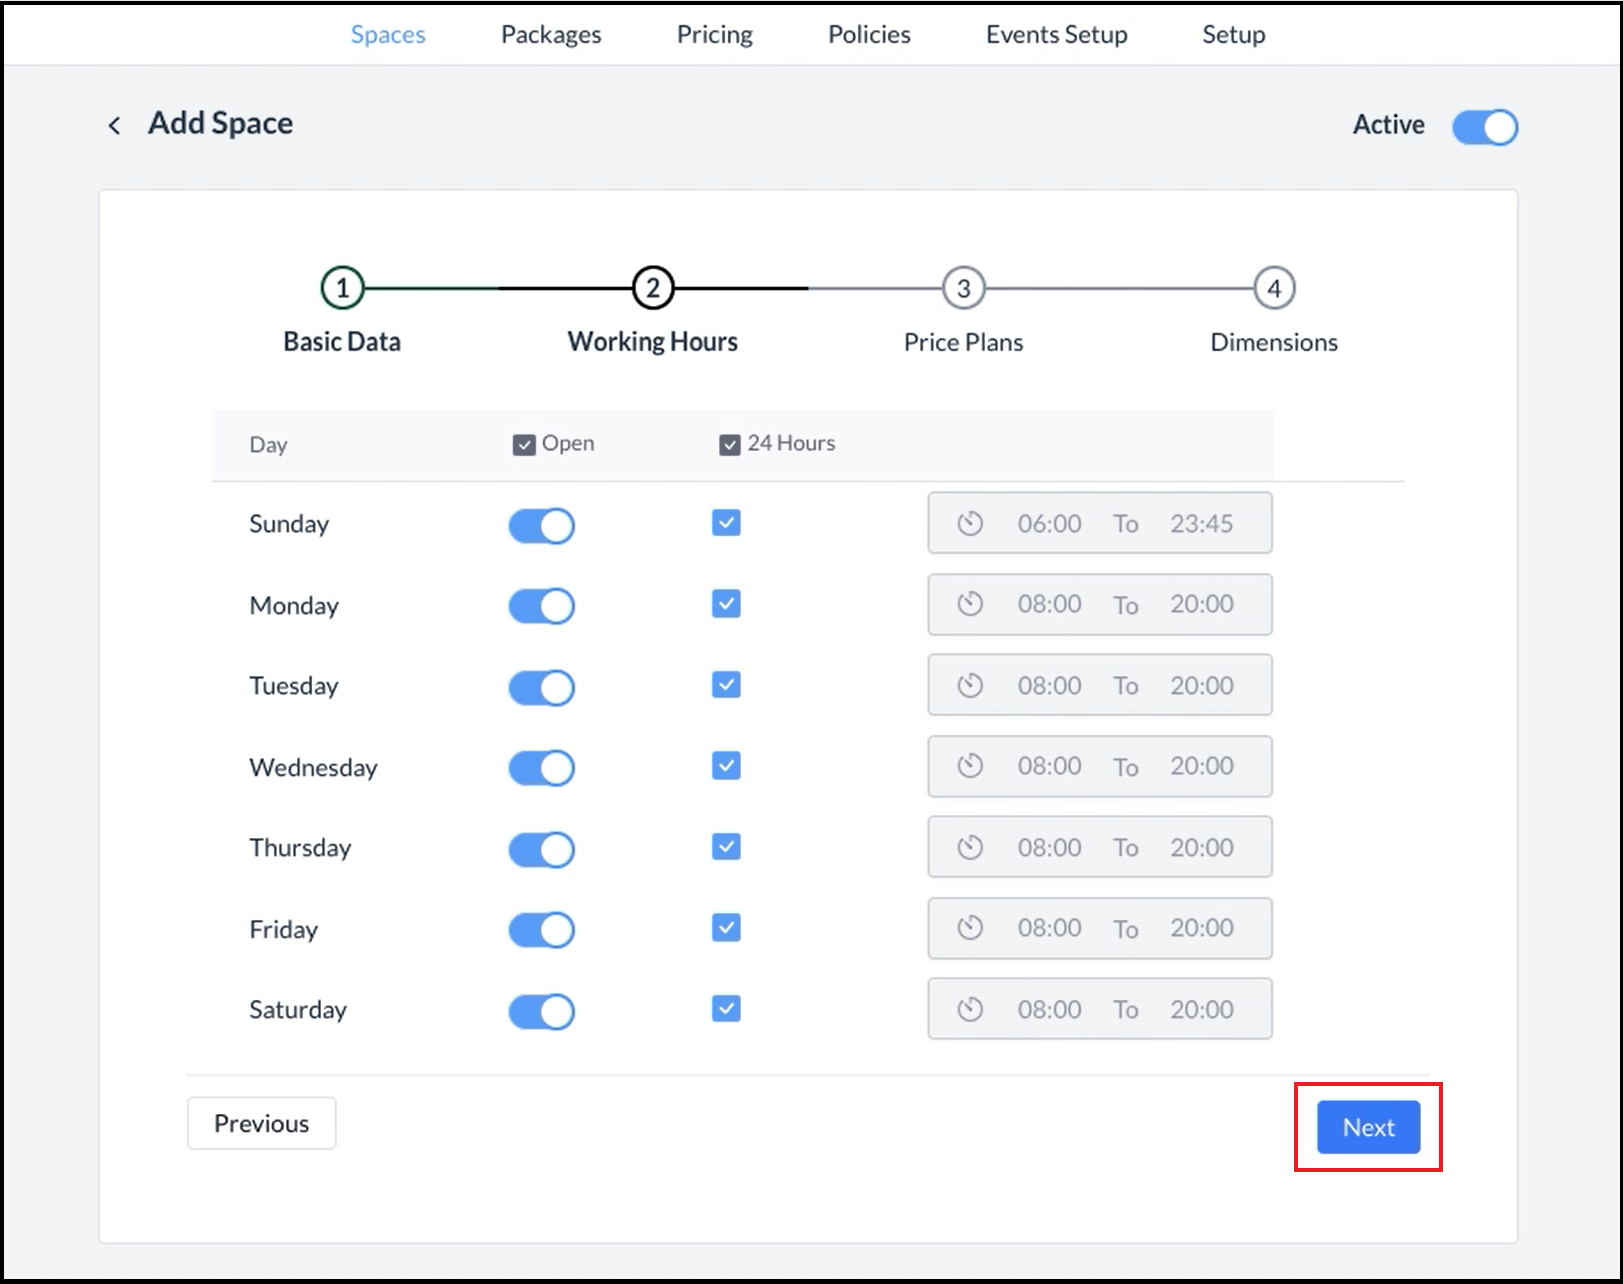 Working Hours - Complete |
Step 3, Price Plans. Select the Price Plans applicable to the new space. Select Next. | 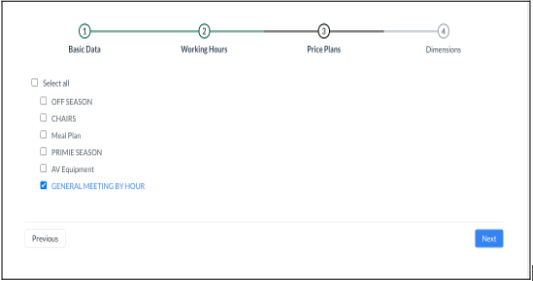 |
Step 4, Dimensions.
Select Save | 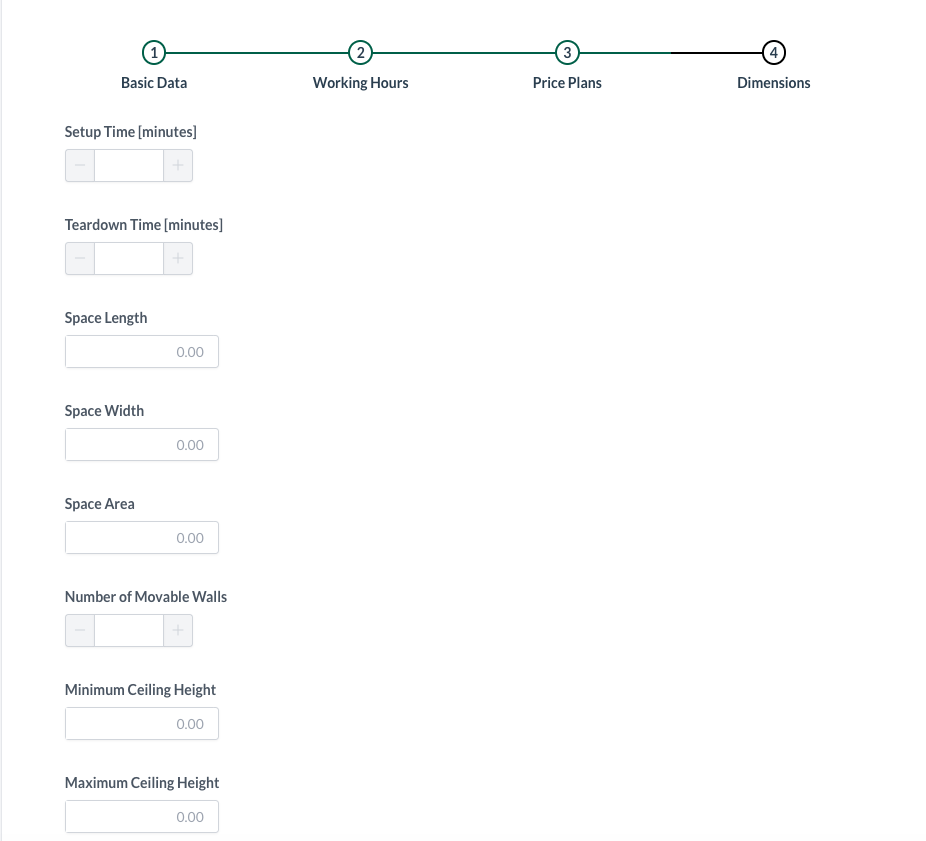 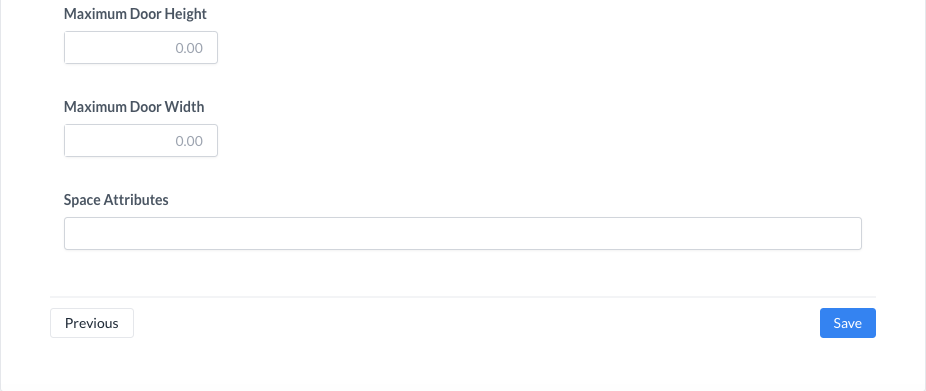 |
The popup will close and a success message will be displayed, indicating that a new Space has been added to the list. | 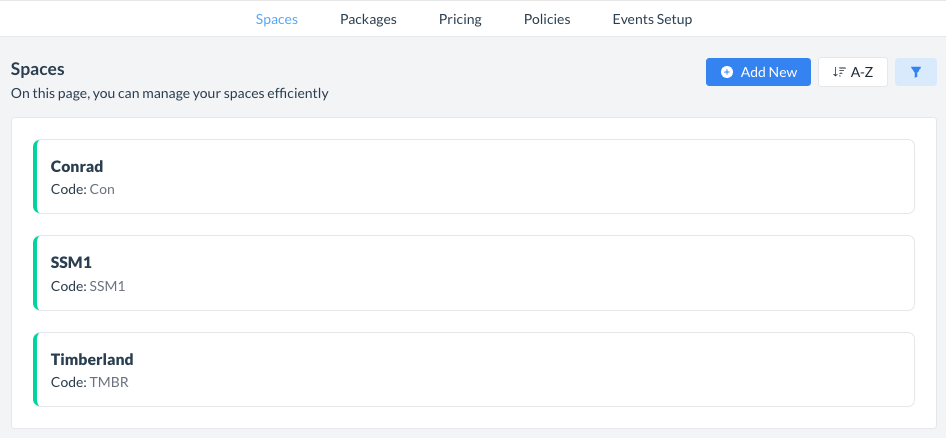 |