Skip table of contents

Space Types

📆 Revision Date:

Space Types

In EventKey, Space Types act as a bridge between individual event spaces (like meeting rooms or ballrooms) and Event Types (such as weddings, meetings, or conferences).

Rather than linking each space directly to an event type, the system uses a structured relationship:

Space ➝ Space Type ➝ Event Type

Here’s how it works:

  • Spaces (e.g., "Ballroom A", "Conference Room 1") are assigned to a Space Type (e.g., "Large Meeting Room", "Boardroom").

  • Each Space Type is then linked to one or more Event Types.

  • If an Event Type (e.g., "Corporate Meeting") is associated with a Space Type, then all individual spaces under that space type will automatically be available for selection or reservation when that event type is chosen.

This approach streamlines configuration, reduces duplication, and makes managing space availability more efficient.

🛑 Prerequisites
Before creating any Space Types, ensure that the Event Type setup has been completed.

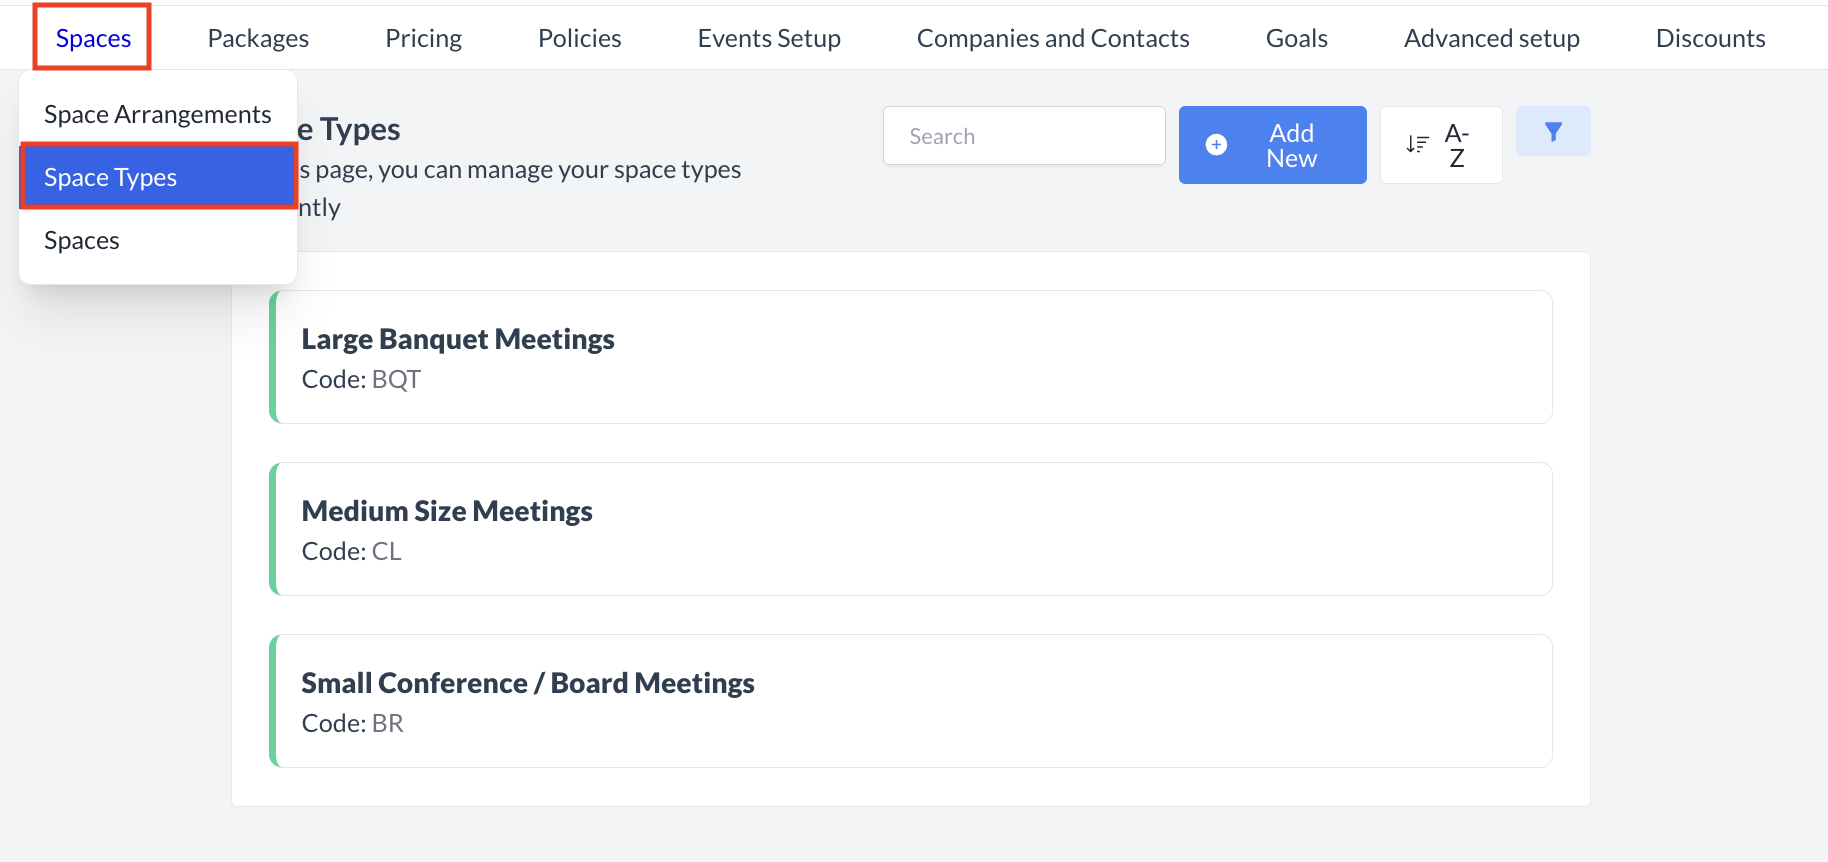
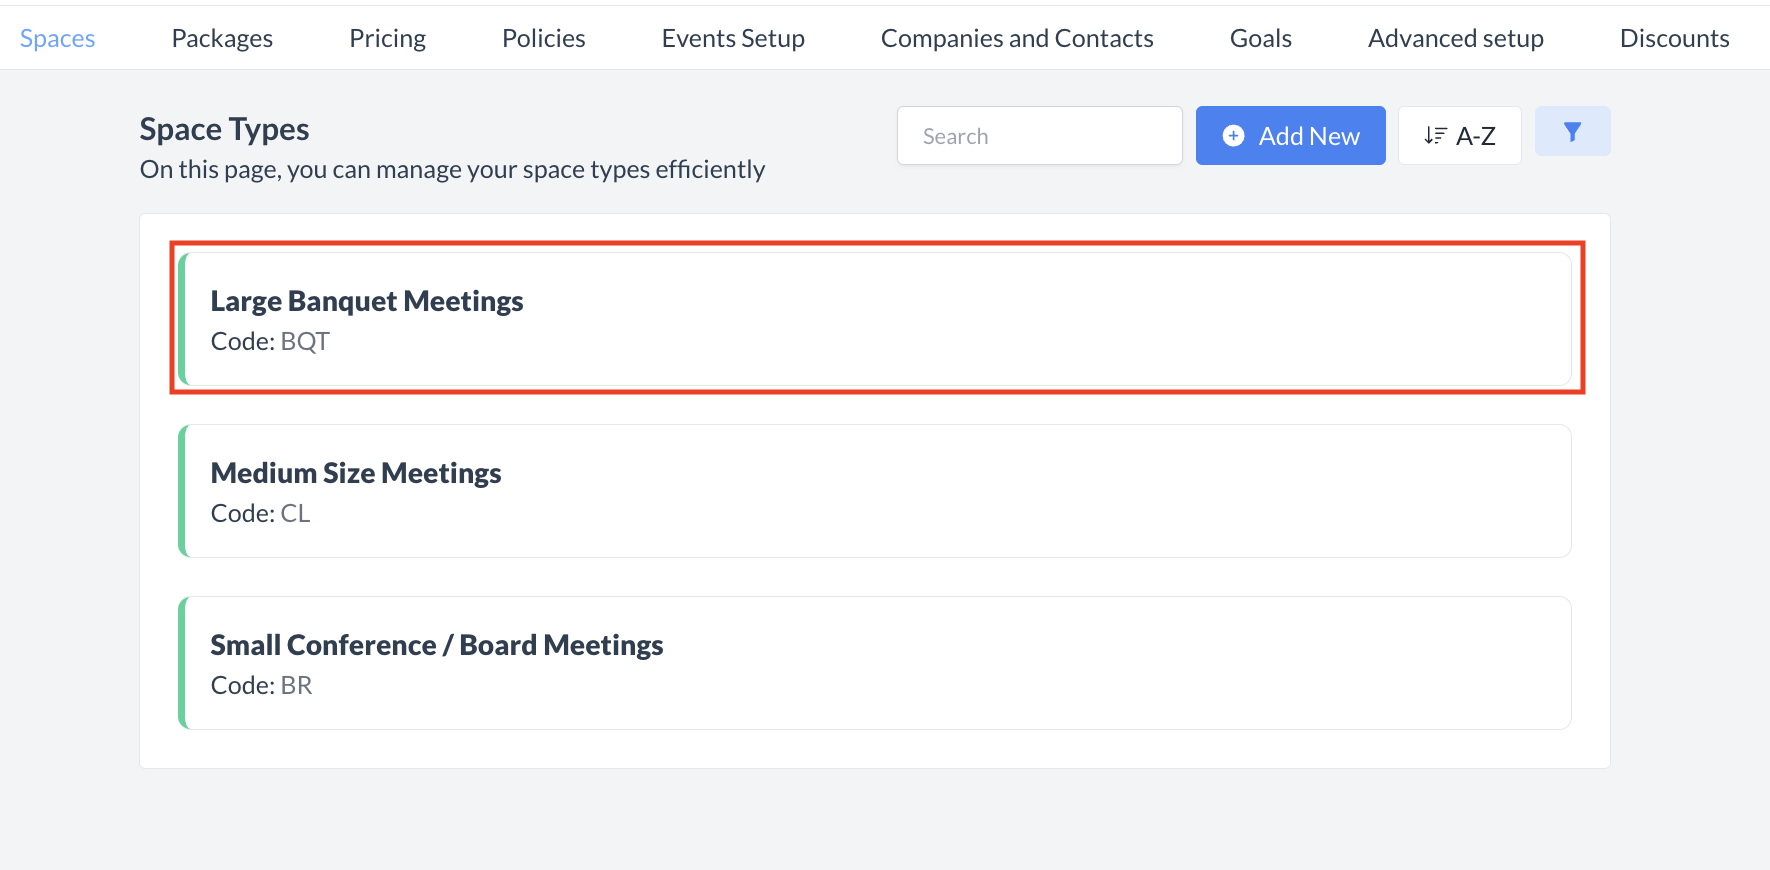
Navigate to Home > Event Administration > Spaces > Space Types

Space_Space Types.png

Spaces > Space Types

Accessing and Creating Space Types

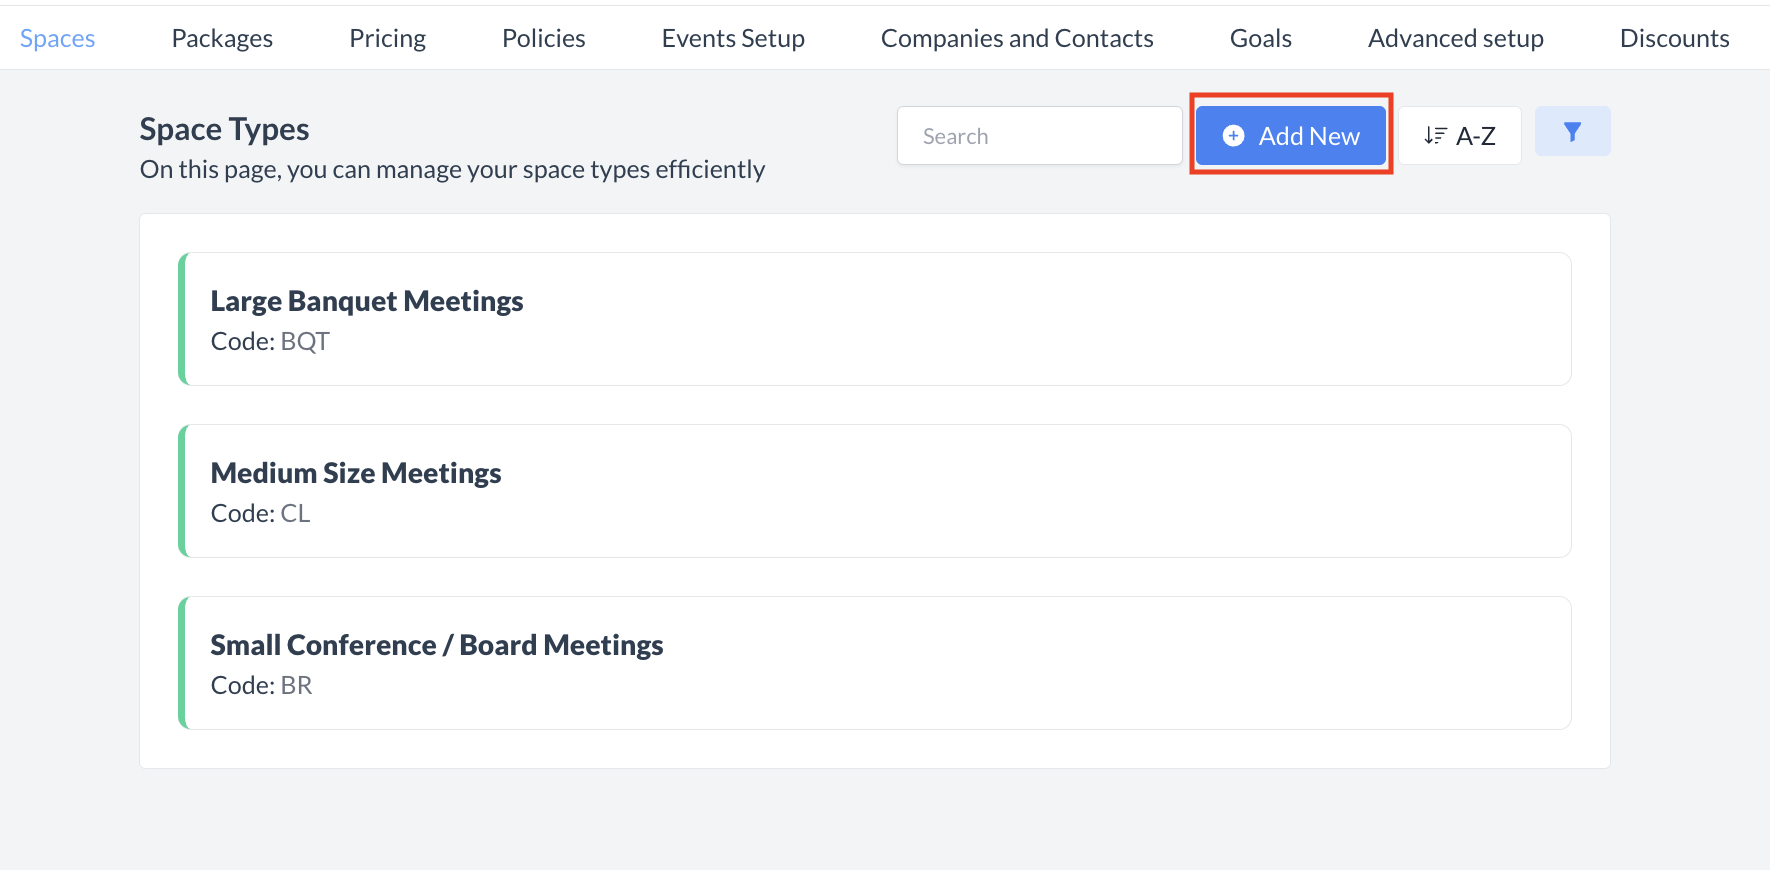
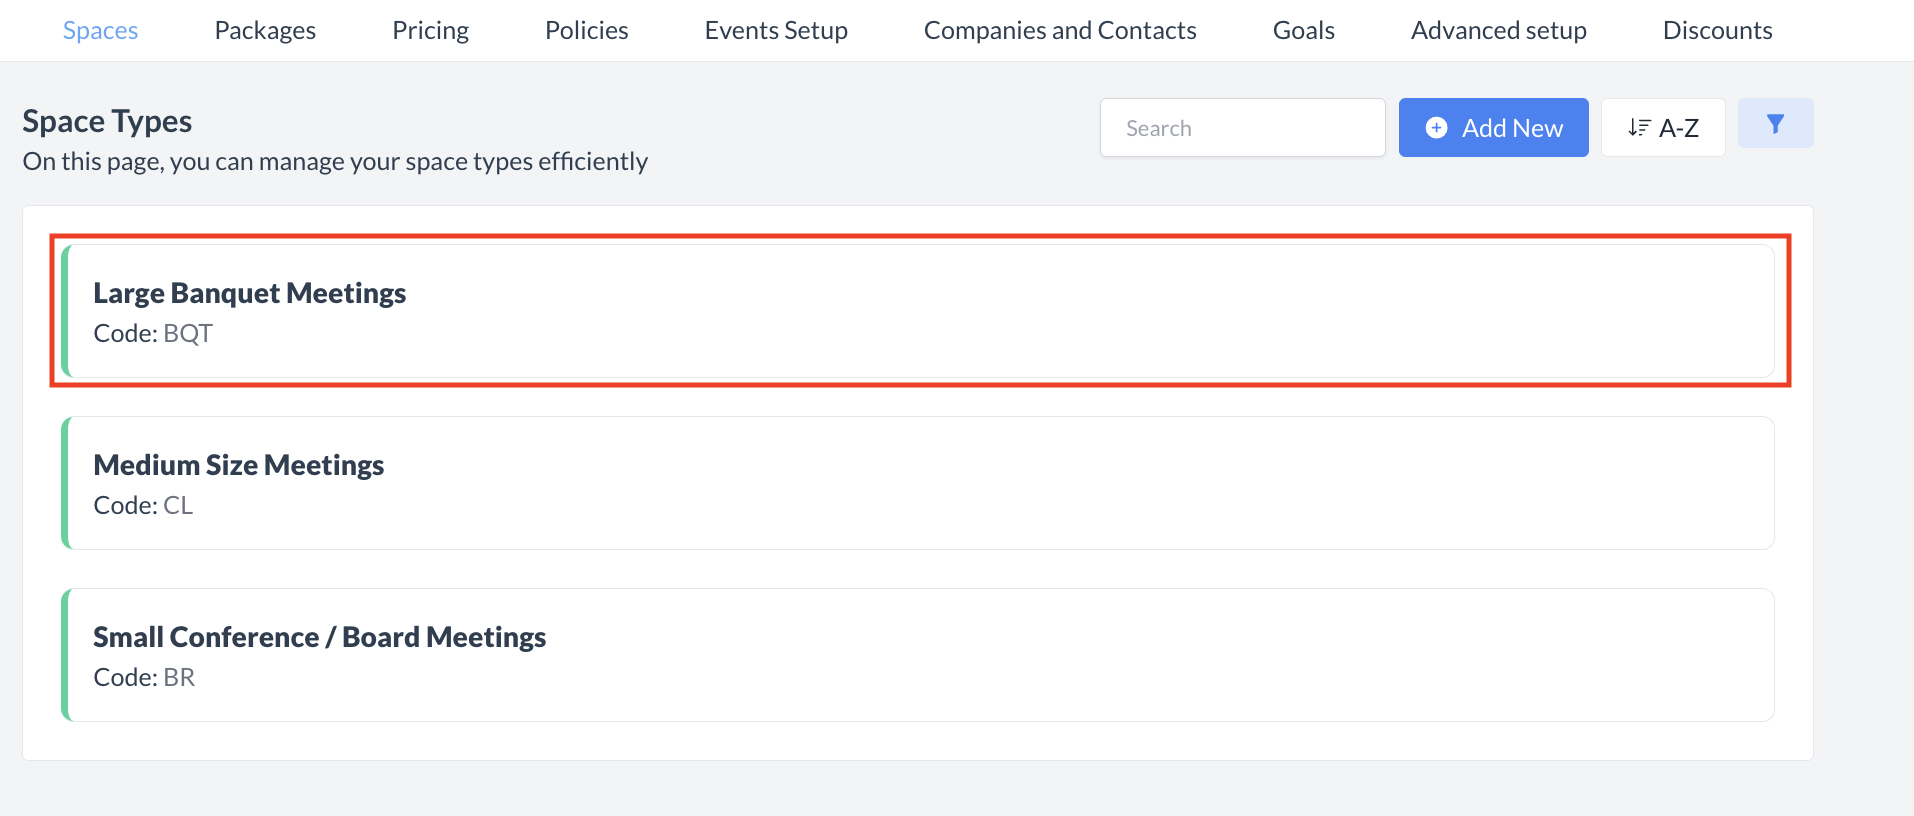
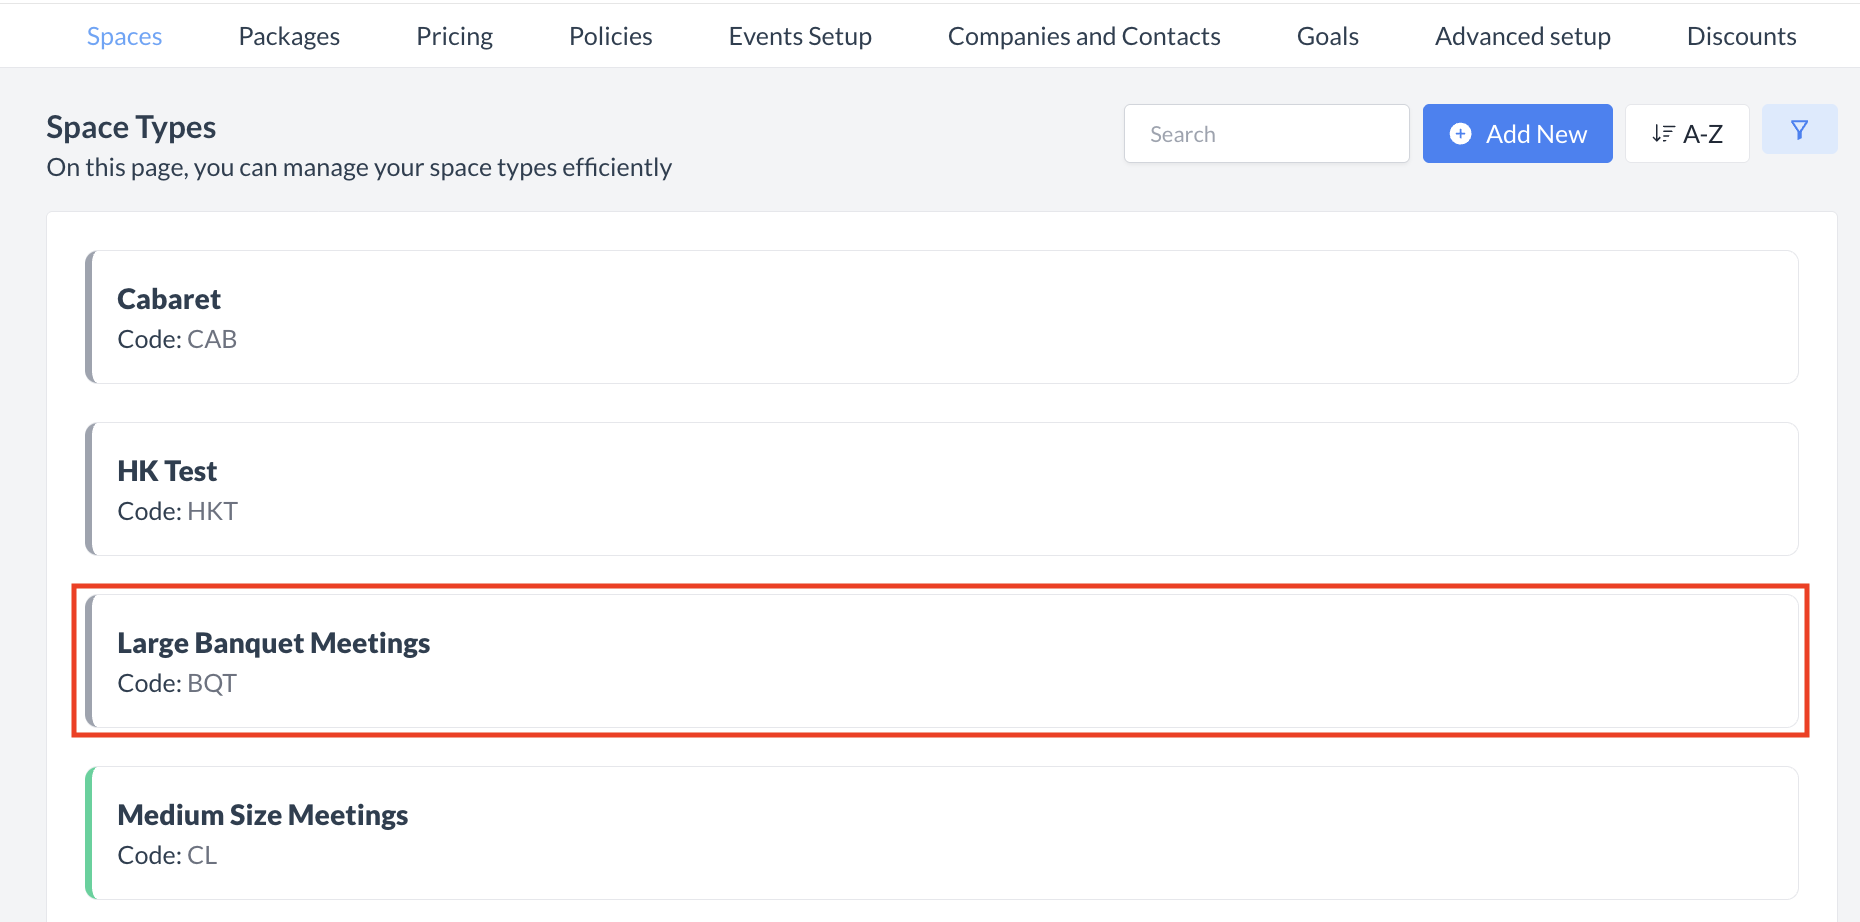
The Space Types screen displays a list of all existing active space types available..

To create a new space type:

  1. Navigate to the Space Types screen.

  2. Click the blue Add New button in the top-right corner to begin creating a new space type.

Space Types_Create New.png

Space Types: Create New

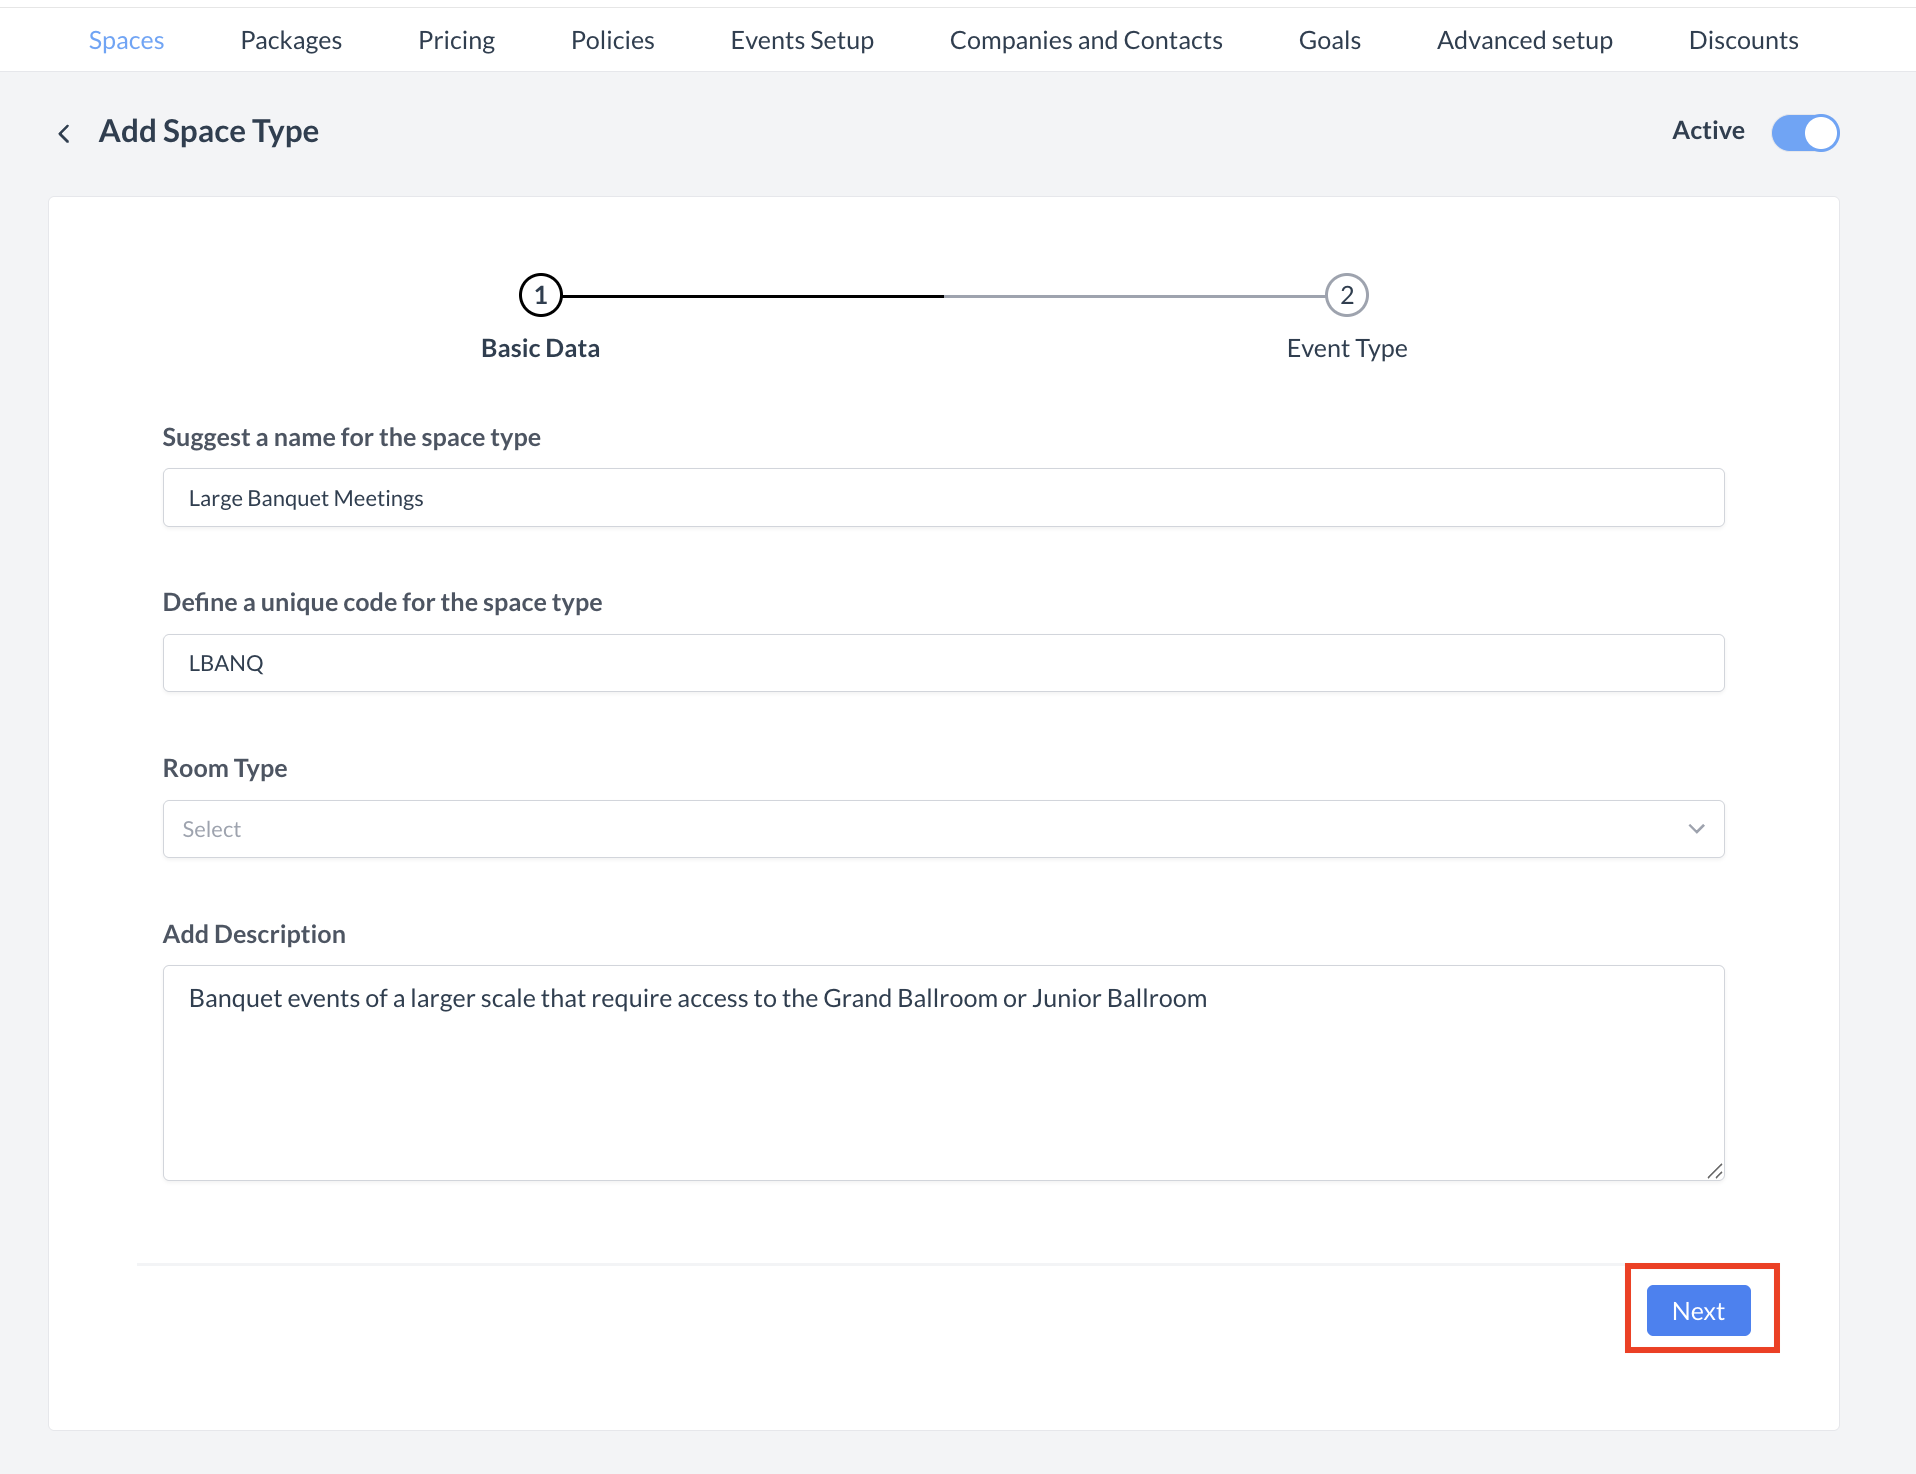
Step 1: Enter Basic Information for the Space Type

When the Add Space Type screen appears, begin by completing the Basic Data section as follows:

  • Name: Enter a clear and descriptive name for the space type. It's common to categorize event spaces by size or function, such as Large Events, Medium Events, or Small Events.

  • Code: Provide a unique code or identifier for the space type. This should be concise and easy to recognize.

  • Room Type: Leave this field blank. This option is no longer in use.

  • Description: Add a brief summary explaining the purpose or usage conditions for this space type.

Once all required fields are completed, click the blue “Next” button to continue to the next step in the setup process.

Add Space Type_ Basic Data.png

Space Types: Basic Data

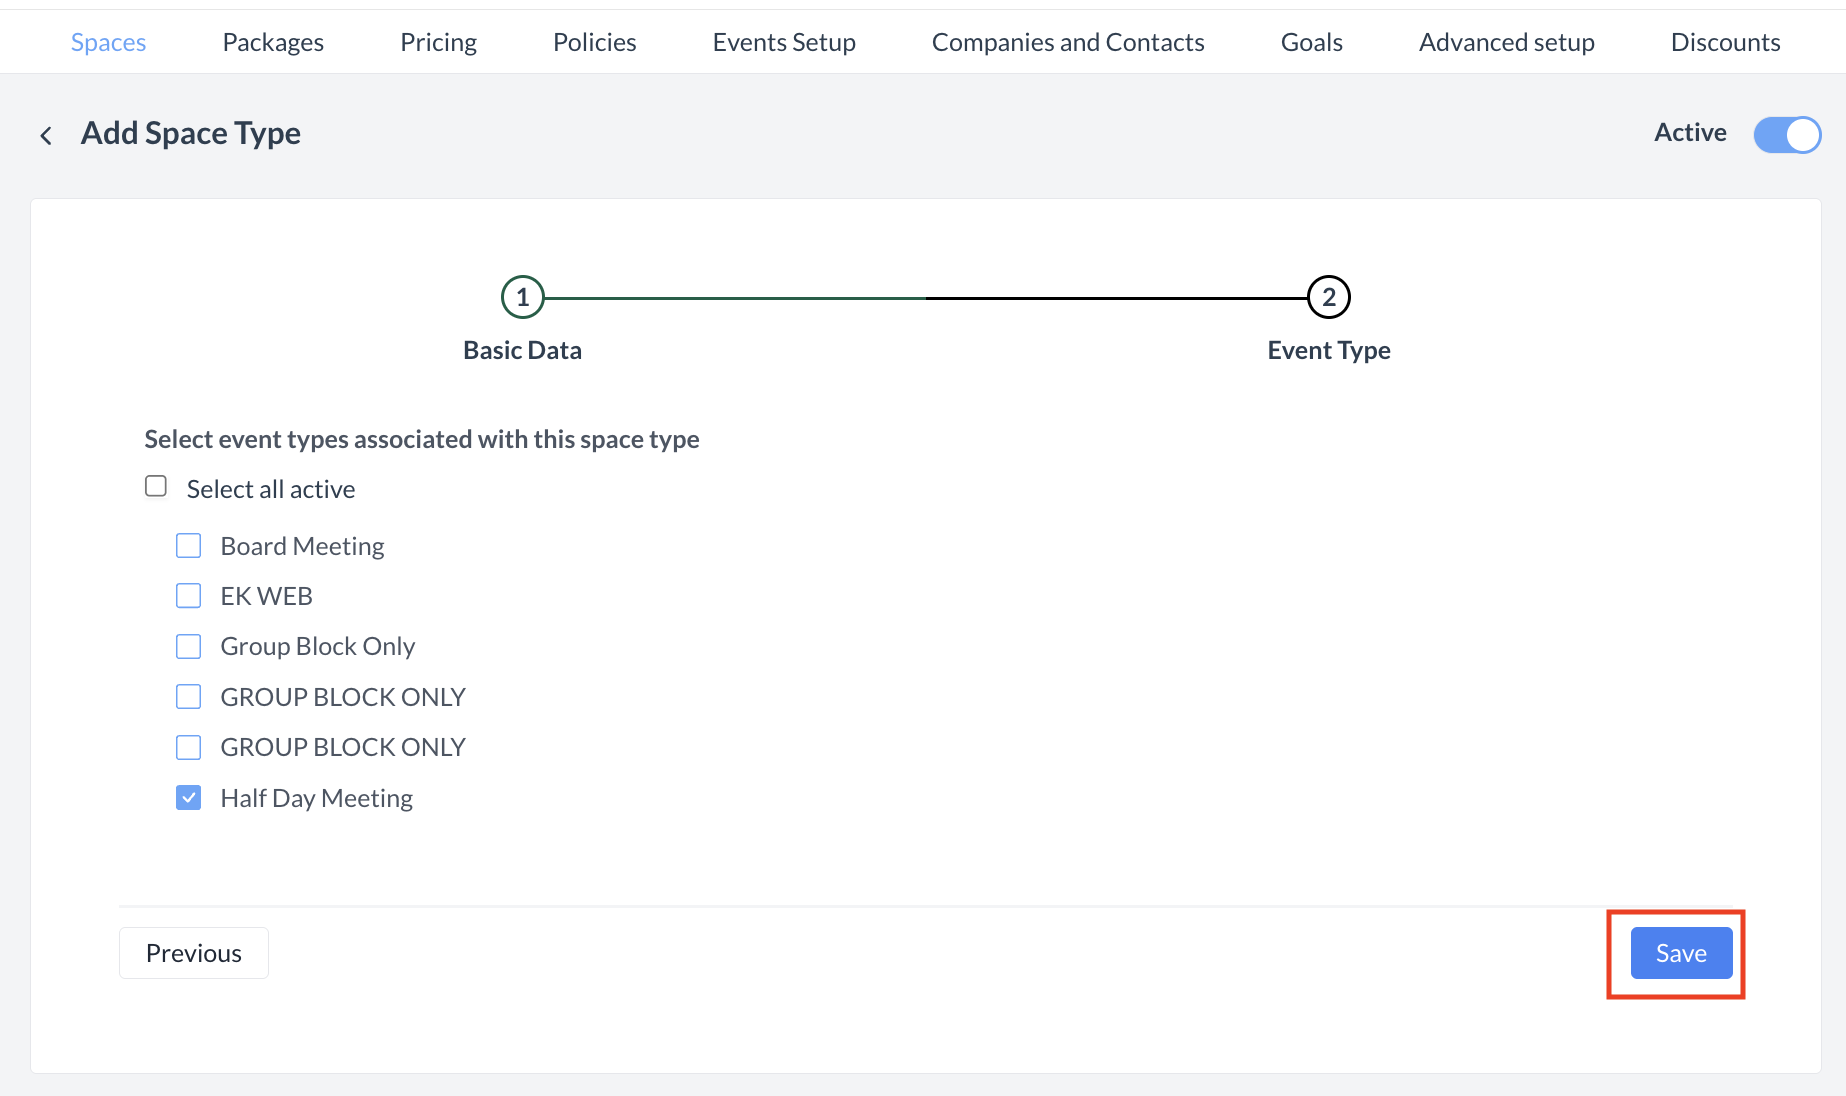
Linking Space Types to Event Types

In this step, you’ll link the Space Type to one or more Event Types—this is a critical part of setup.

Here’s how it works:

  • When you create a space (such as a meeting room), you assign it to a Space Type (e.g., Large Banquet Meetings).

  • Then, you link that Space Type to specific Event Types (e.g., Half Day Meeting).

This setup controls what spaces are available when booking an event.

Example:
If a meeting room is assigned to the Large Banquet Meetings space type, and that space type is only linked to the Half Day Meeting event type, then that room will not be available when booking a different event type, such as Board Meeting.

🔑 Important: The spaces you see during event creation depend entirely on how Space Types are linked to Event Types. Be sure to link them carefully to ensure availability aligns with your operational needs.

Once all fields are complete, click the blue Save button to apply the cancellation period.

Space Types_Event Type.png

Space Type: Link Event Type

Confirmation

After saving, you will be returned to the Space Types listing screen.
Your newly created space type will now appear in the list.

Spact Type_Confirmation of Creation.png

Space Types: New Space Type Created

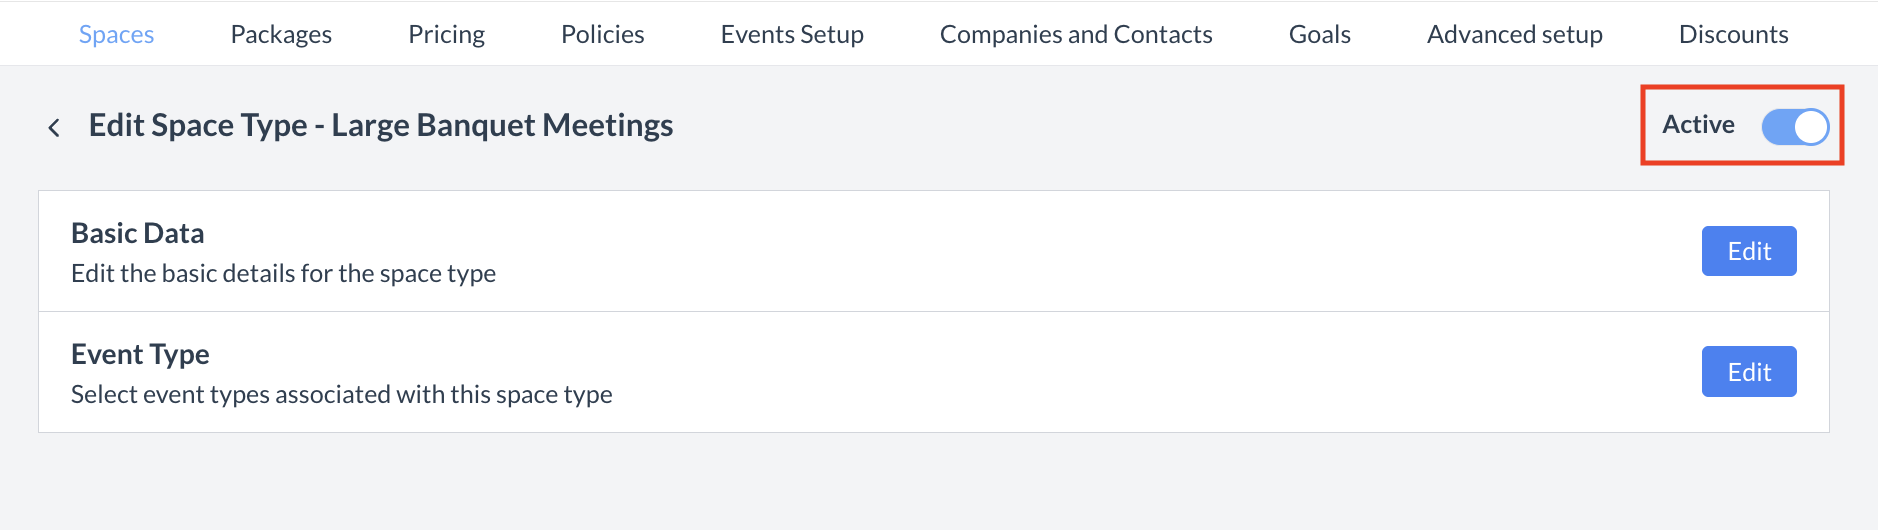
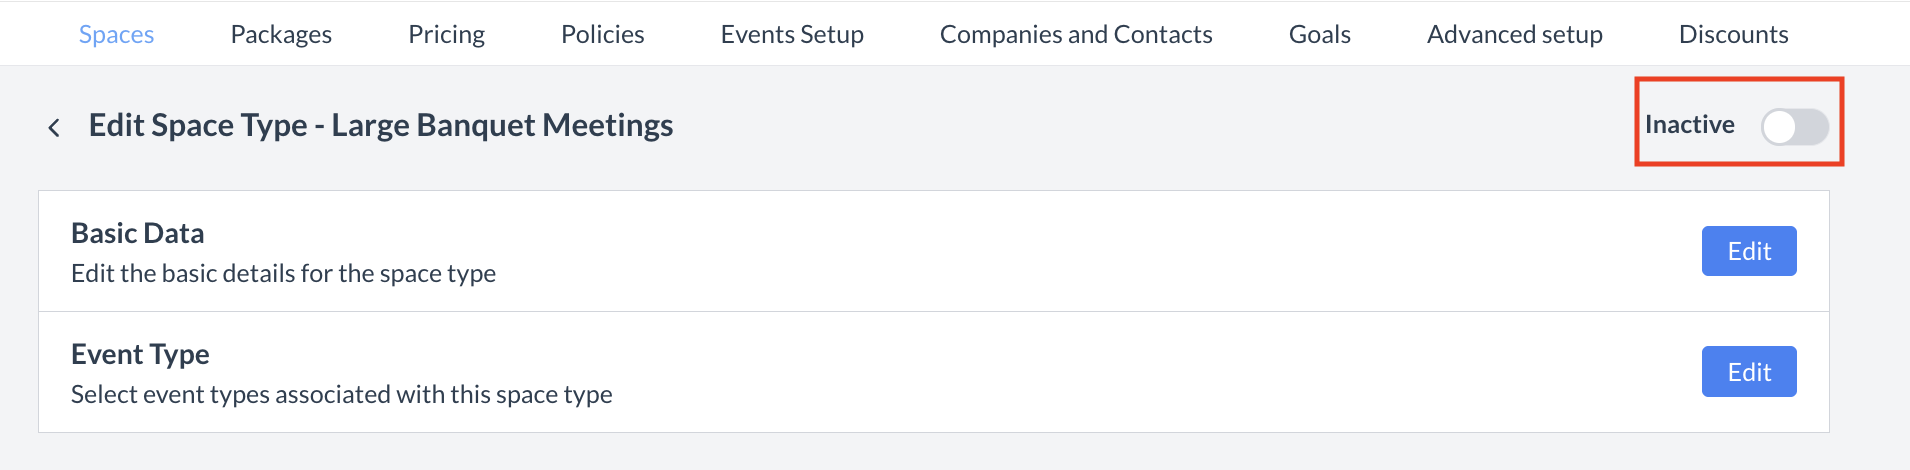
🔄 Inactivating a Space Type

To deactivate a space type:

  1. From the space type listing screen, locate and select the space type you wish to inactivate.

  2. In the policy header, click the Active toggle to switch it off.

Once inactivated, the space type will no longer appear in the Space Type listing.

⚠️ Important:
If you inactivate a Space Type, be sure to review the configuration of any spaces (meeting rooms) that were linked to it. If a meeting room was only associated with the now-inactive Space Type, it may no longer be available for booking. To avoid issues, reassign affected spaces to an active Space Type if needed.

Space Type_Space Type Remove.png

Select Space Type to Inactivate

Space Type_Active .png

Space Type: Active Toggle

Space Type Removed from Active List

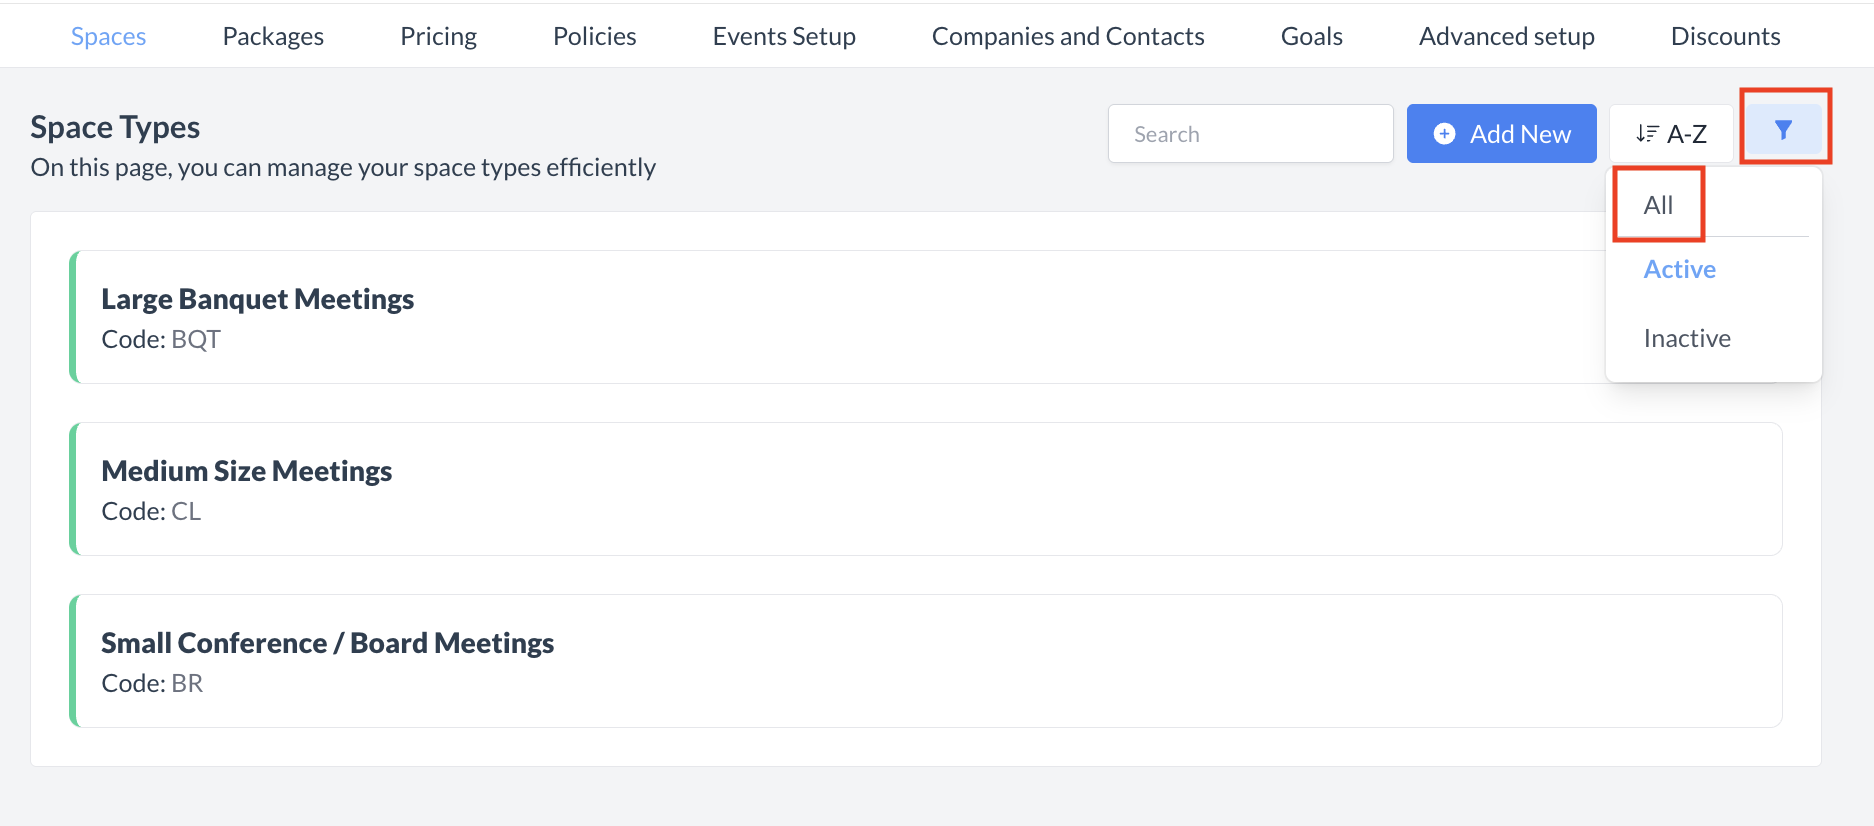
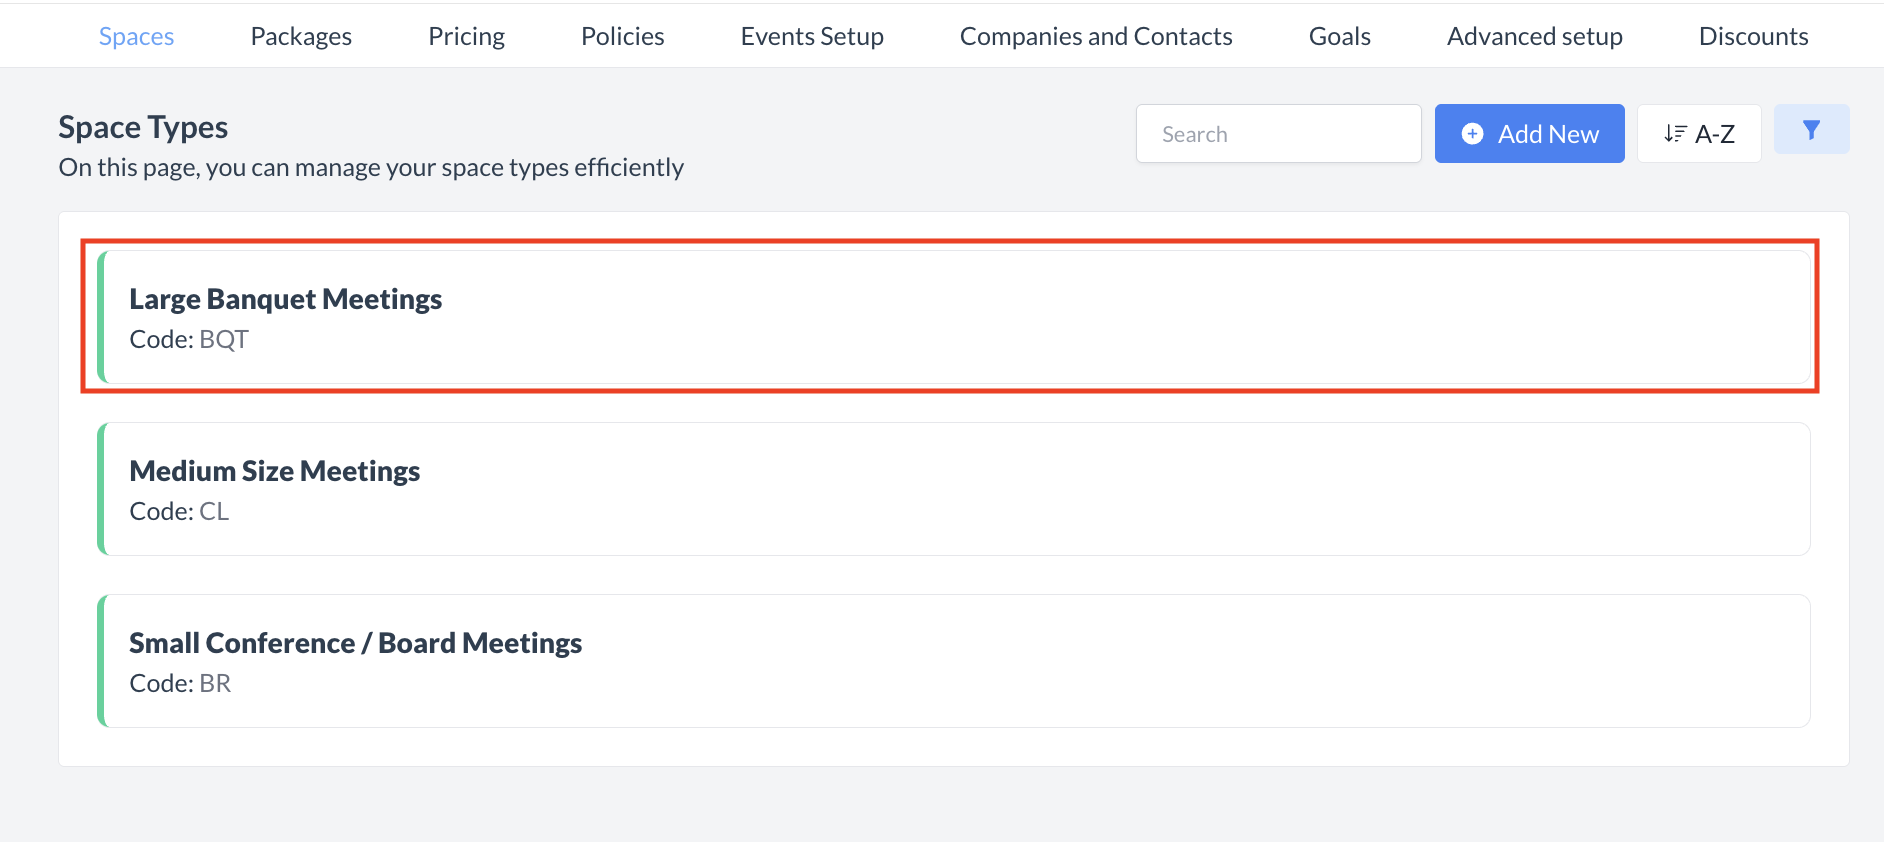
🔁 Reactivating an Inactive Space Type

To reactivate a space type:

  1. Navigate to the Space Type listing screen.

  2. Use the filter option to display All or Inactive policies.

    • Active space types are marked with a green sidebar.

    • Inactive space types are marked with a grey sidebar.

  3. Locate the space type you wish to reactivate and click to open it.

  4. In the policy header, toggle the Inactive switch to ON.

The space type is now reactivated and will appear in the main Space Type listing screen.

⚠️ Important:
Be sure to review the configuration of any spaces (meeting rooms) that should be re-linked to the space type.

Space Types_Filter.png

Space Types Listing Screen: Filter Menu

Space Types_Reactivate.png

Select Inactive Space Type

Space Type_Inactive.png

Inactive Toggle

Space Types_Large Meeting Reactivated.png

Space Type Returned on Active List

⏭️ What’s Next
Once you’ve created a new Space Type, go to Spaces > Basic Data and update the Space Type field so your changes appear on all relevant spaces.

🖥️ Where “Space Types” Appears in the User Interface (UI)

Space Types do not appear in the user interface; they are configured in the back end.

JavaScript errors detected

Please note, these errors can depend on your browser setup.

If this problem persists, please contact our support.