Skip table of contents

Tasks

📆 Revision Date:

Tasks

Tasks help sales and catering teams stay organized by assigning specific follow-ups, deadlines, or reminders. They can be manually created for custom actions or automatically generated by the system based on triggers such as event cut-offs, account activity, or inquiry updates.

Navigate to Home > Event Management > Tasks

⚠️ Note: If you have tasks due today, a red outline will appear around this button to draw your attention.

Tasks.png

Event Management > Tasks

Daily Task Management Screen

The Daily Task Management screen is divided into two sections:

  • Assigned: Tasks that have been assigned to you.

  • Created: Tasks that you have created.

By default, the system opens on the Assigned tab and displays only the tasks assigned to you.

Filter Options

The task management screen includes the following filters to help you find and organize tasks:
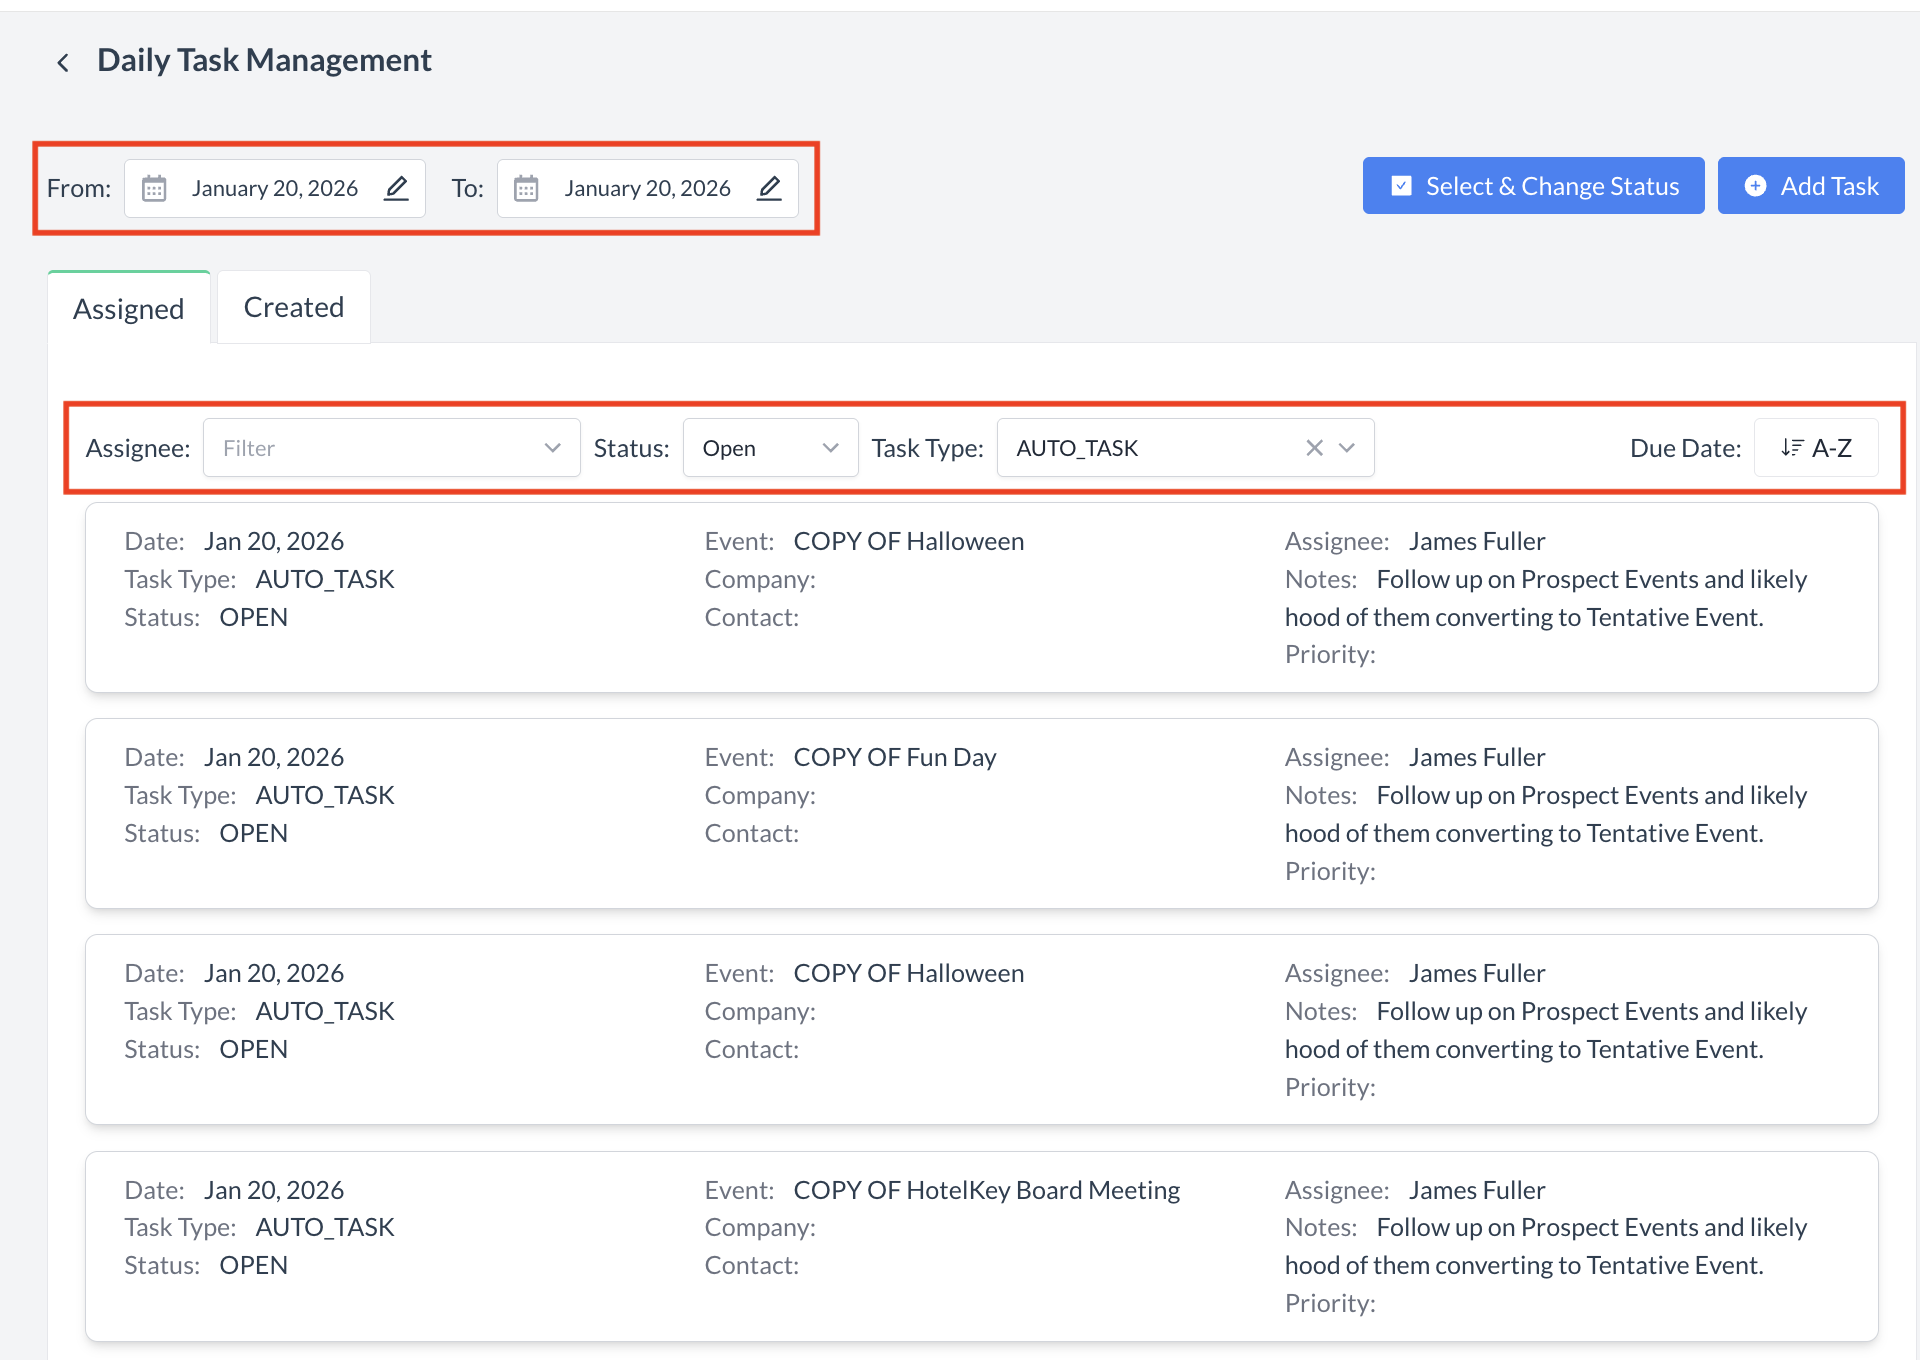
  • From Date / To Date: Filter tasks within a specific date range.

  • Assignee: Select one or more assignees to view tasks assigned to them. Note: You must have Admin permissions to view tasks assigned to others.

  • Status: By default, only Open tasks are displayed. Use the dropdown to select All or Closed tasks.

  • Task Type: Filter by specific task types, such as Deposit Follow-Up tasks.

  • Due Date: Sort tasks by their due date for easier prioritization.

Task Management Screen.png

Daily Task Management Screen

Viewing Tasks

Once you apply your filter options, the list of tasks will appear on the screen. The task list includes the following columns:
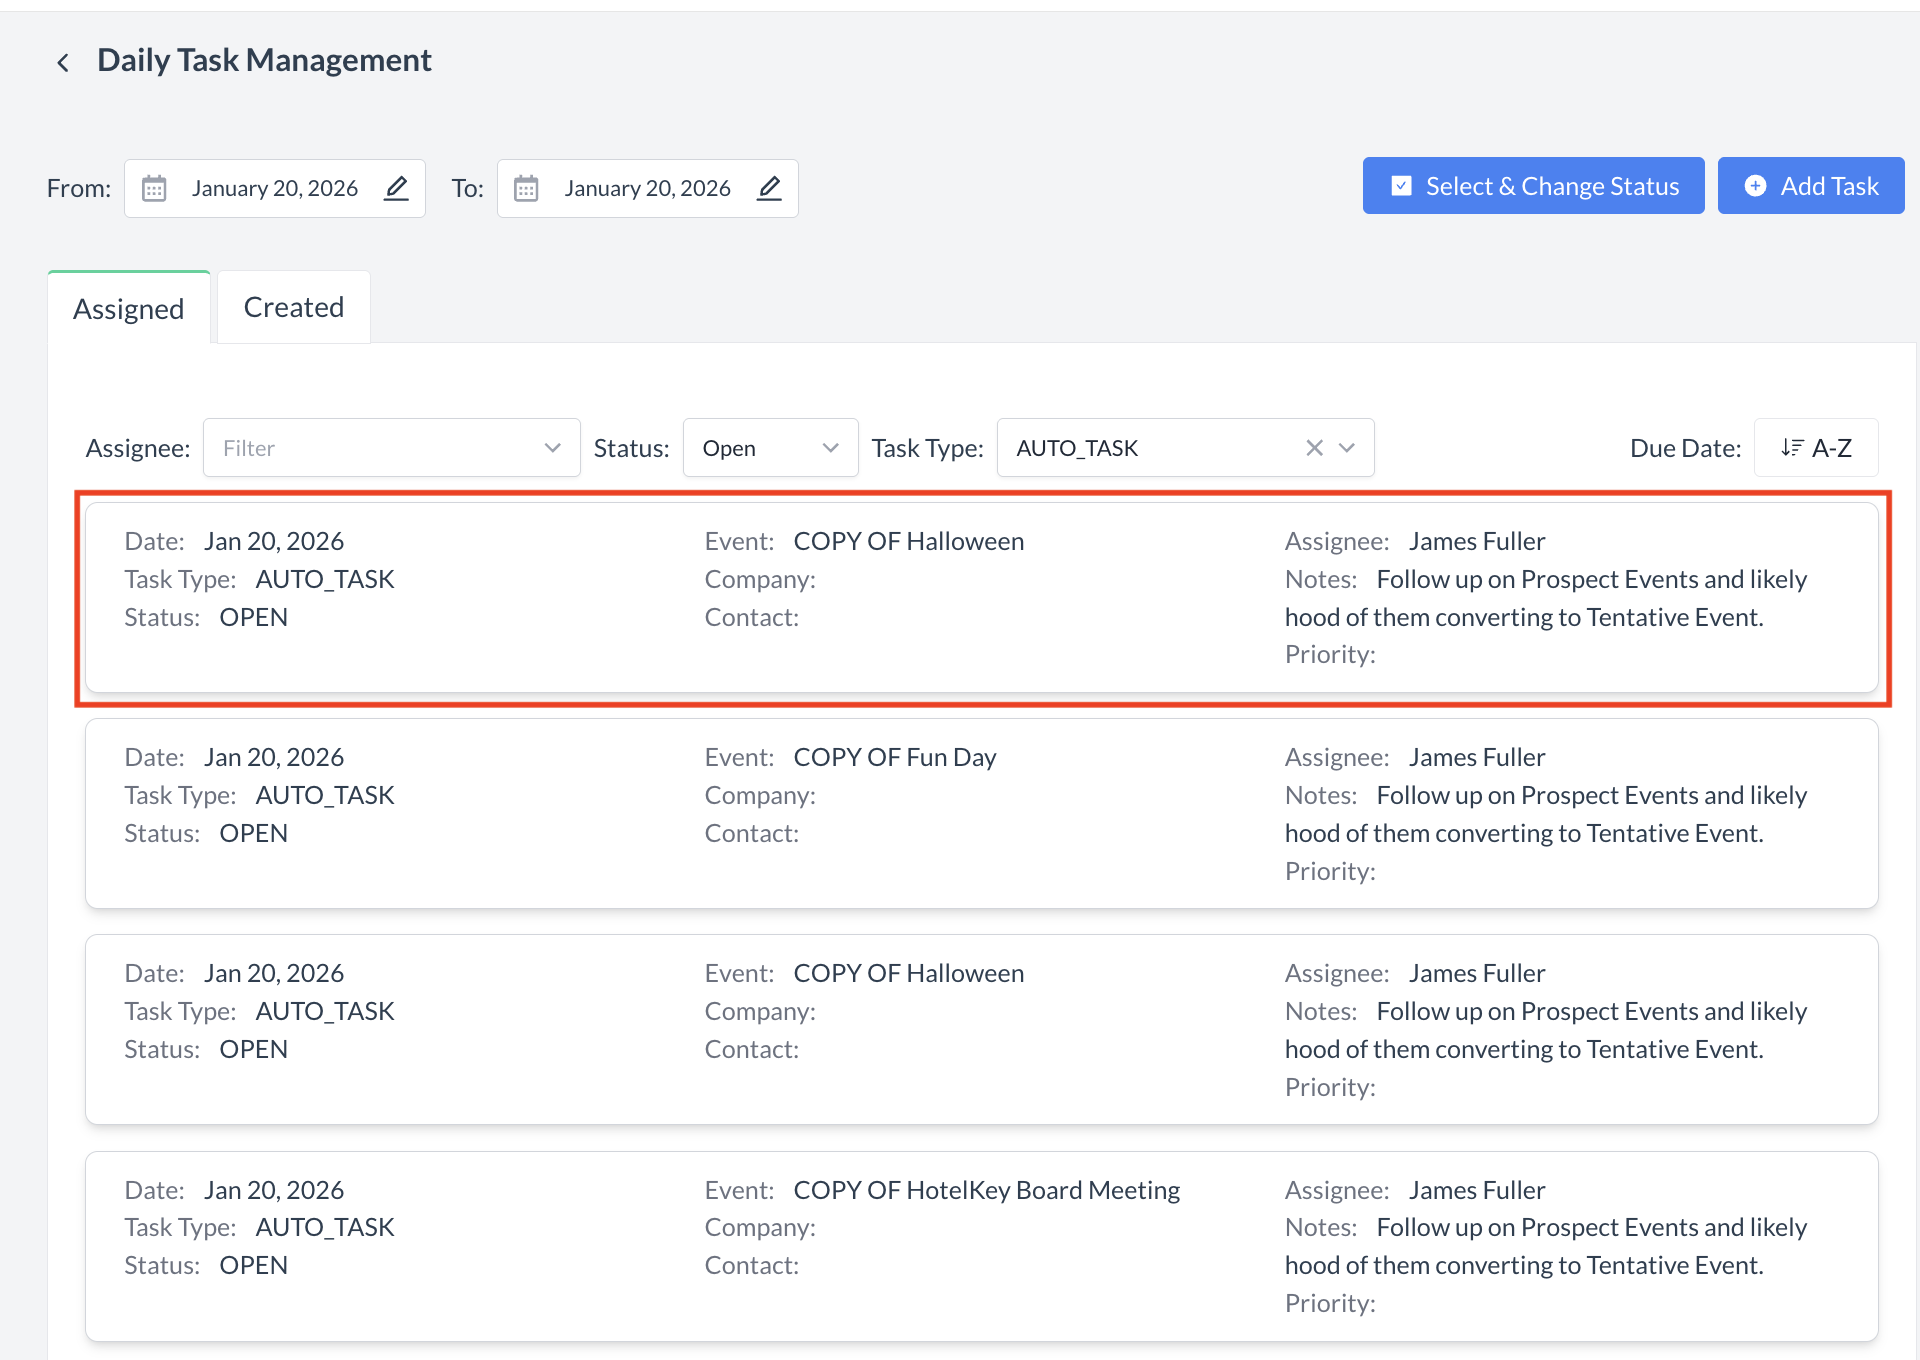
  • Date: The due date of the task, also referred to as the Action Date.

  • Task Type: The type of task, such as Deposit Follow-Up. Note: Task types are defined by each property and may vary by location.

  • Status: The current status of the task (e.g., Open or Closed).

  • Event: The name of the event if the task is associated with one.

  • Company: The name of the company if the task is linked to a company.

  • Contact: The contact (booker) if the task is associated with a contact.

  • Assignee: The person the task is assigned to.

  • Notes: Details of the action to be completed or a reminder about the task.

Tip: To view additional details or update a task, click on the task to open it.

Task Management.png

Tasks

Task Details Screen

The Task Details screen allows you to view and manage all aspects of a task.
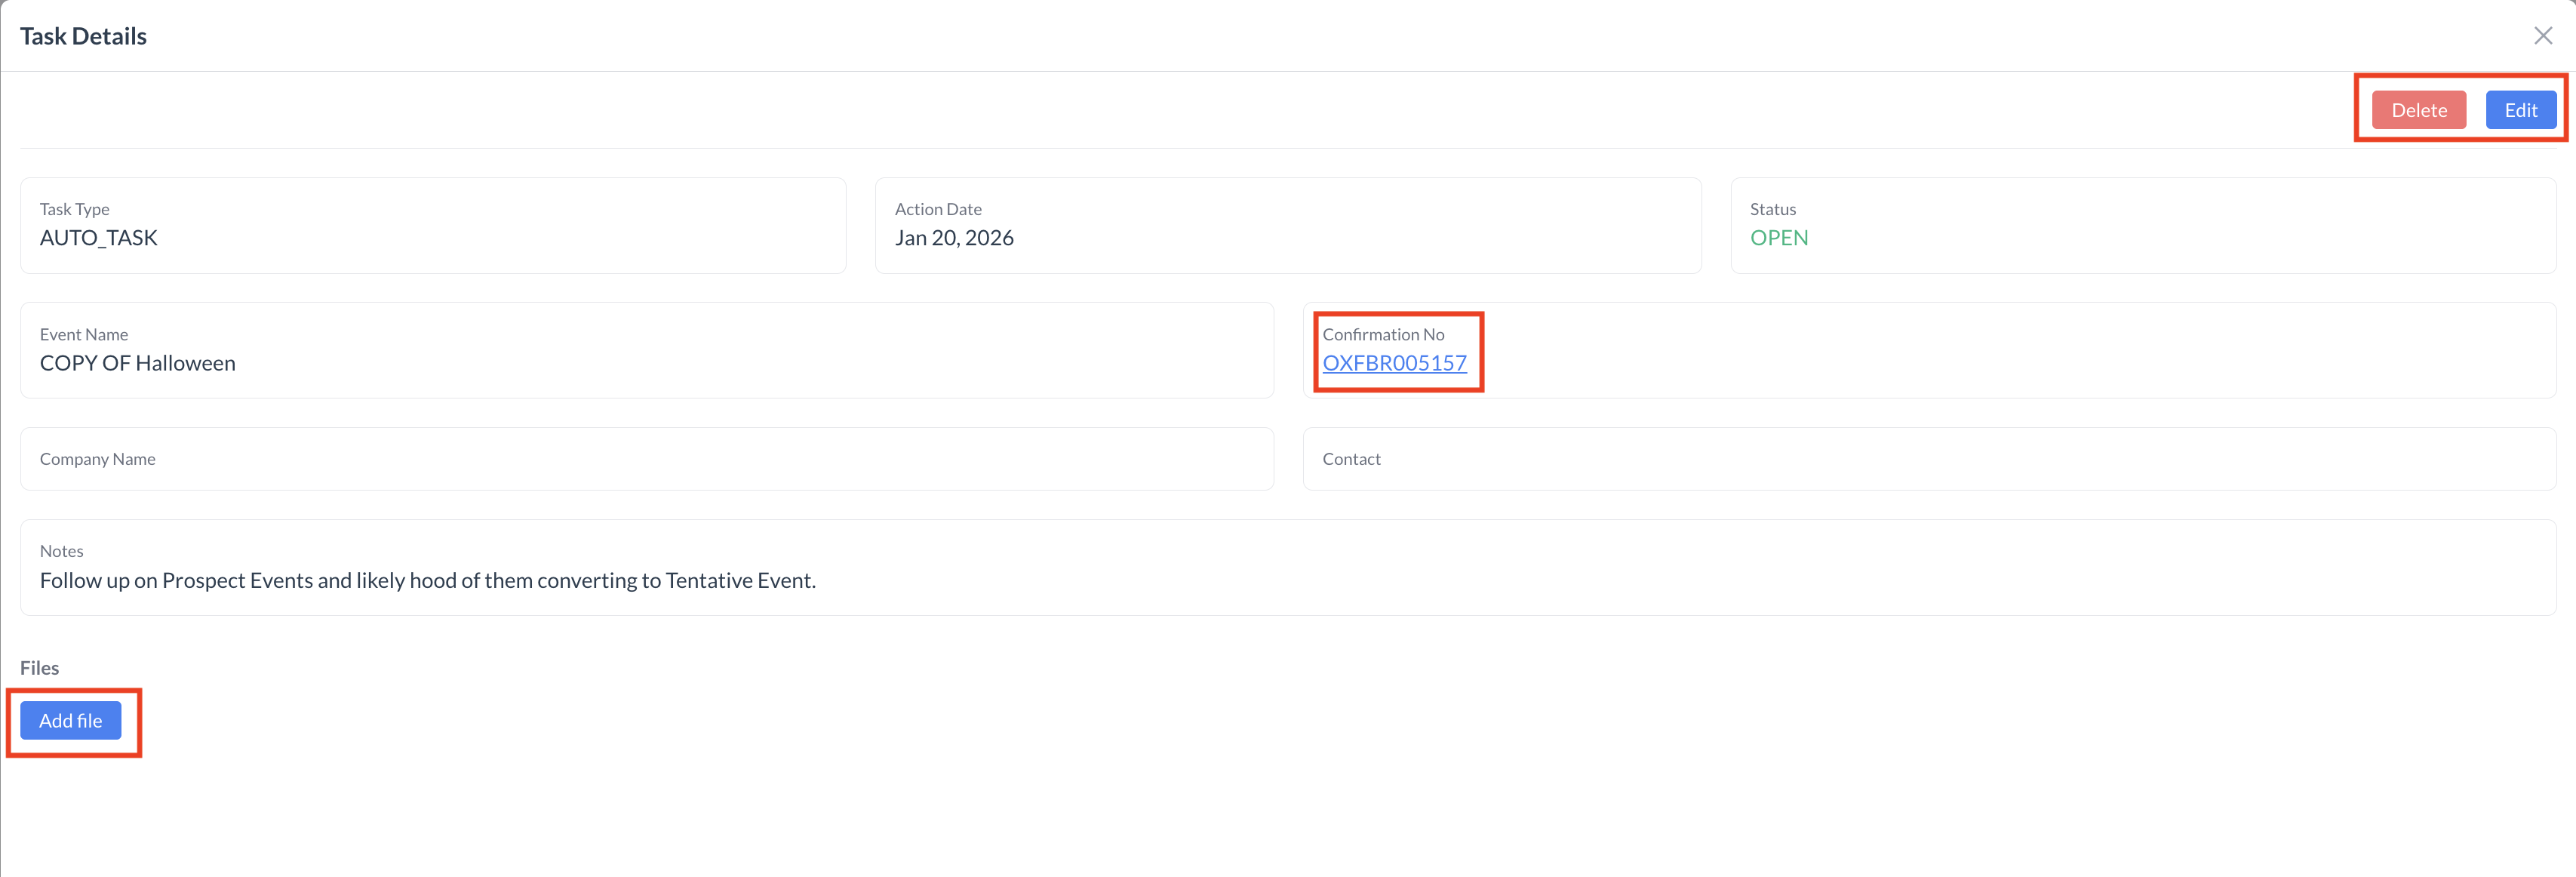
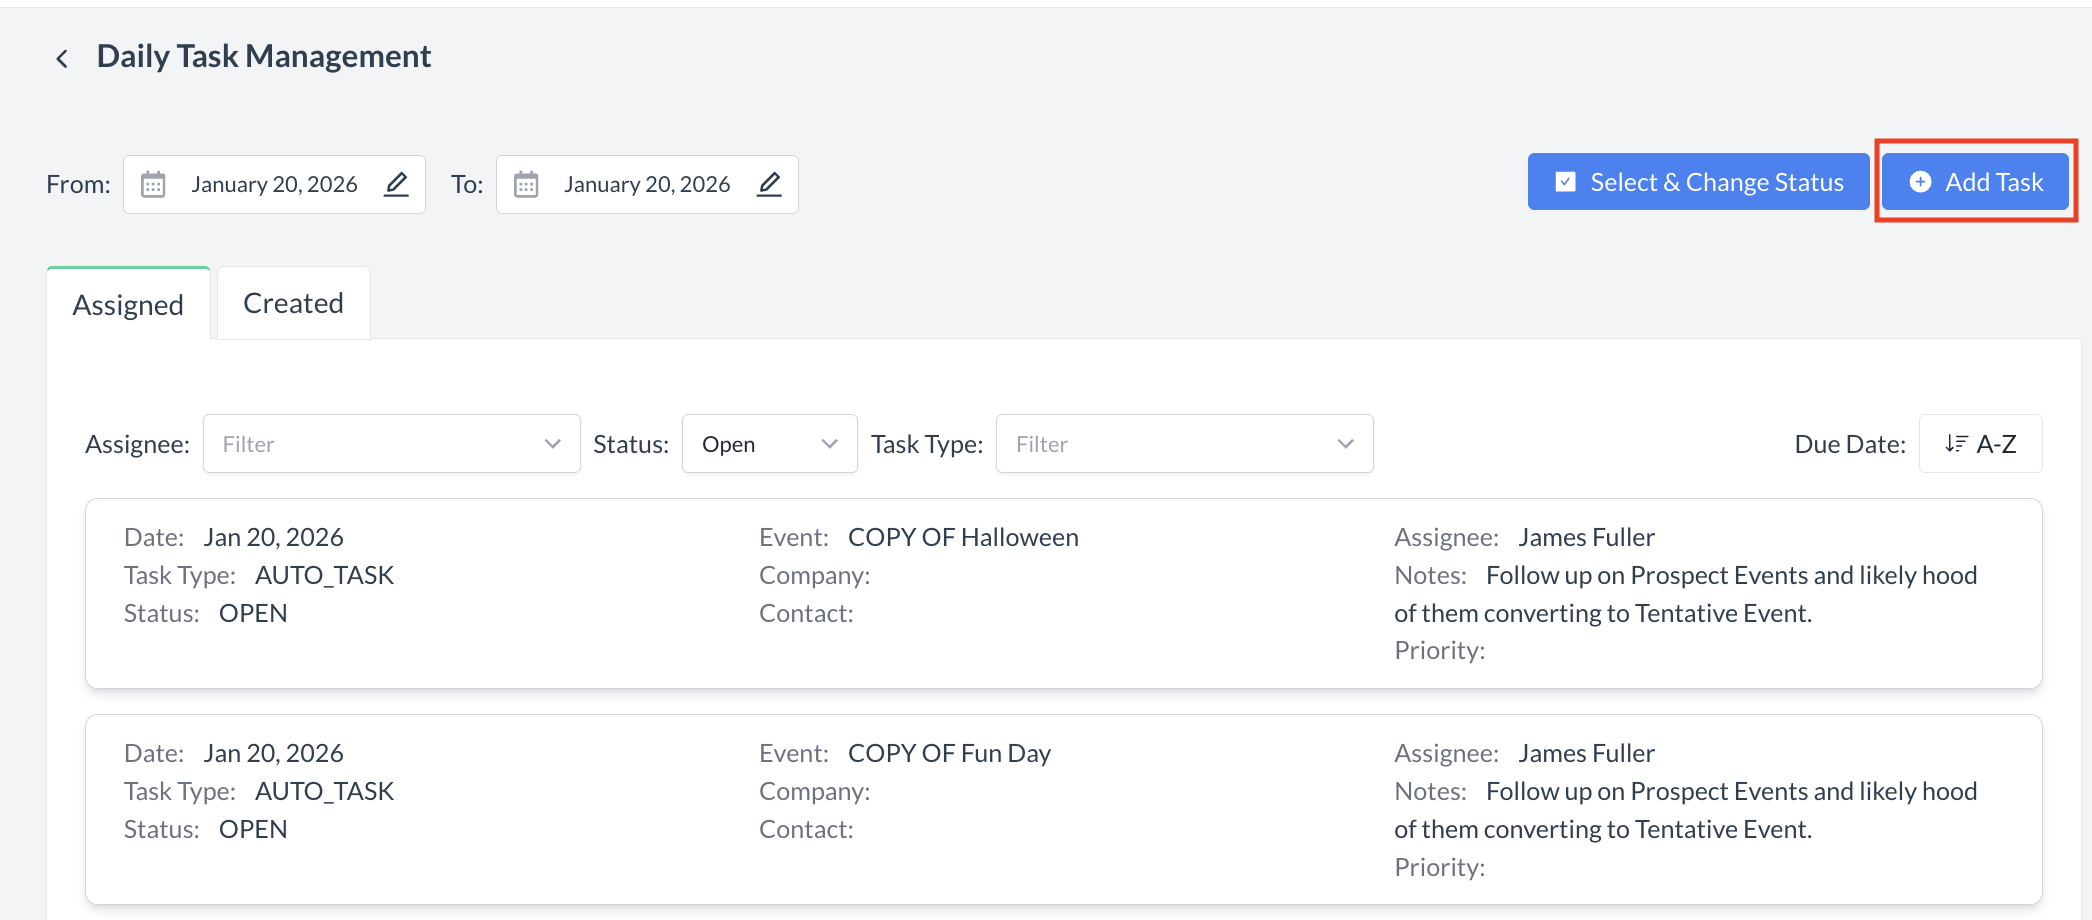
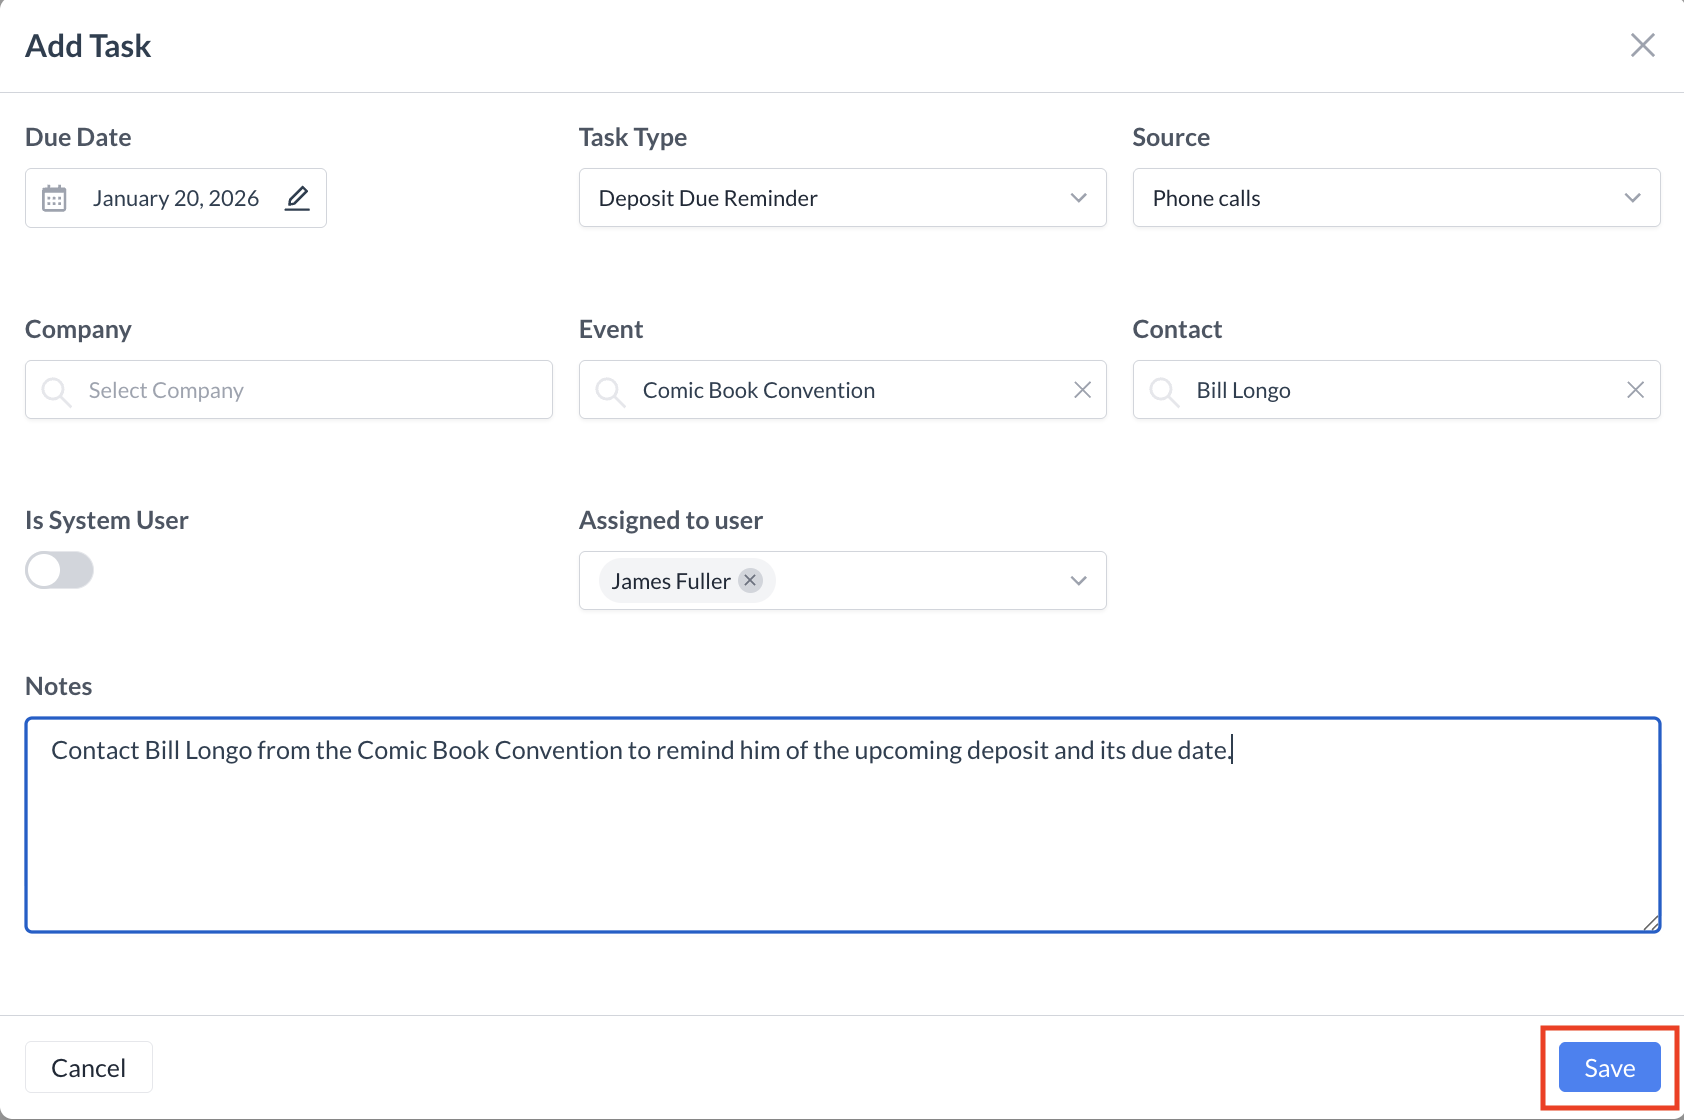
  • Click the blue “Add File” button to attach files or documents to the task.

  • Click the blue “Edit” button in the upper-right corner to open the task and update any of its fields listed on the task details screen.

  • If the task is associated with an event, the Event Confirmation Number is displayed. This number is a clickable link that opens the corresponding Event Record directly.

  • Click the red “Delete” button in the upper-right corner to remove the task.

Task Details.png

Task Details Screen

Creating a New Task

To create a new task, click the blue “Add Task” button in the upper-right corner of the screen.

The Add Task screen will appear. Complete the following required fields:

  • Due Date: The date by which the task should be completed.

  • Task Type: The type of task, such as Deposit Follow-Up. Note: Task types are defined by each property and may vary by location.

  • Source: How the task will be completed (e.g., Phone, Email).

  • Assignee: The person the task is assigned to.

  • Notes: Details of the action to be completed or a reminder about the task.

Optional Fields

If the task is associated with a Company, Event, or Contact, complete the following fields. These are not required for task creation:

  • Event: The name of the event associated with the task.

  • Company: The company linked to the task.

  • Contact: The contact (booker) associated with the task.

Once all necessary fields are completed, click the blue “Save” button to create the task.

Add Task.png

Create a New Task

Add Task Screen.png

Add Task Configuration Screen

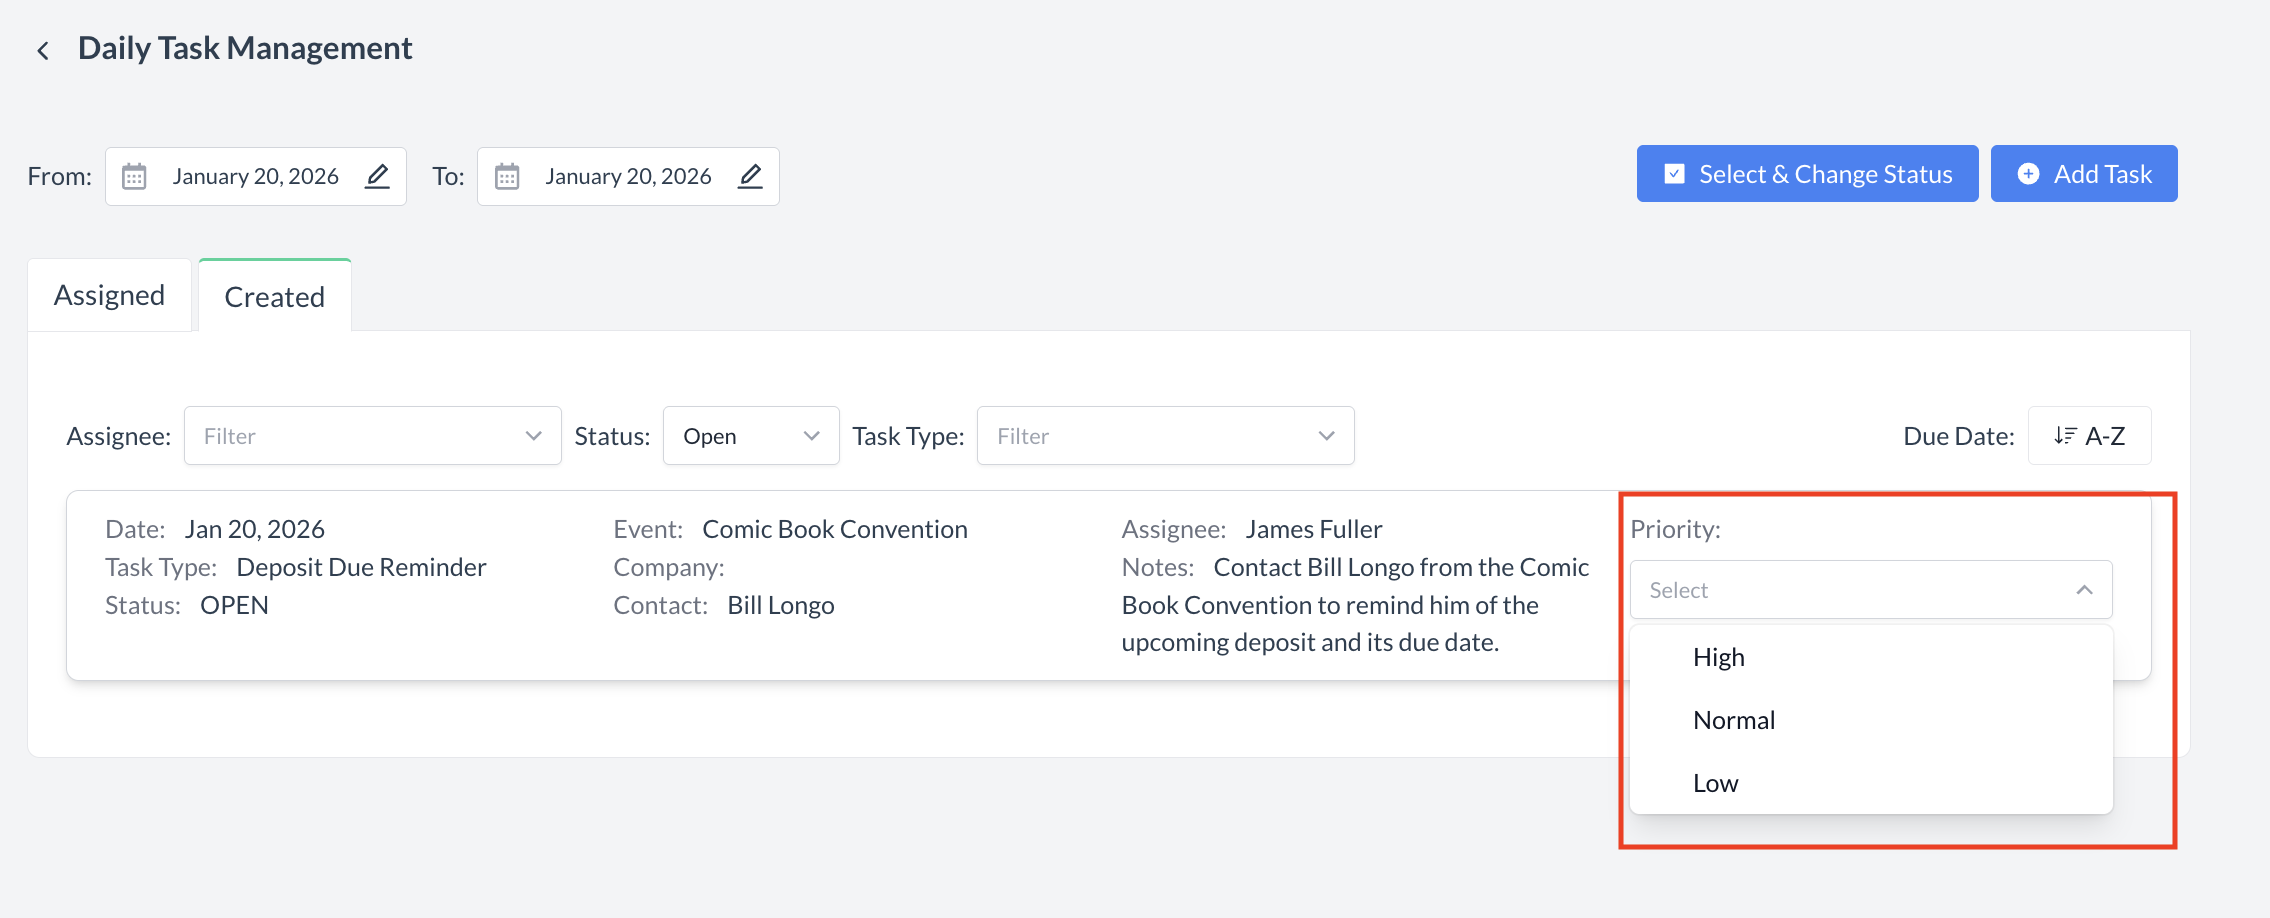
Managing Tasks You Created

To manage tasks you have created, click the Created tab.

From this tab, you can:

  • Open a task to view details or make any necessary changes.

  • Set a task priority directly from the listing screen. Using the dropdown, choose High, Normal, or Low.

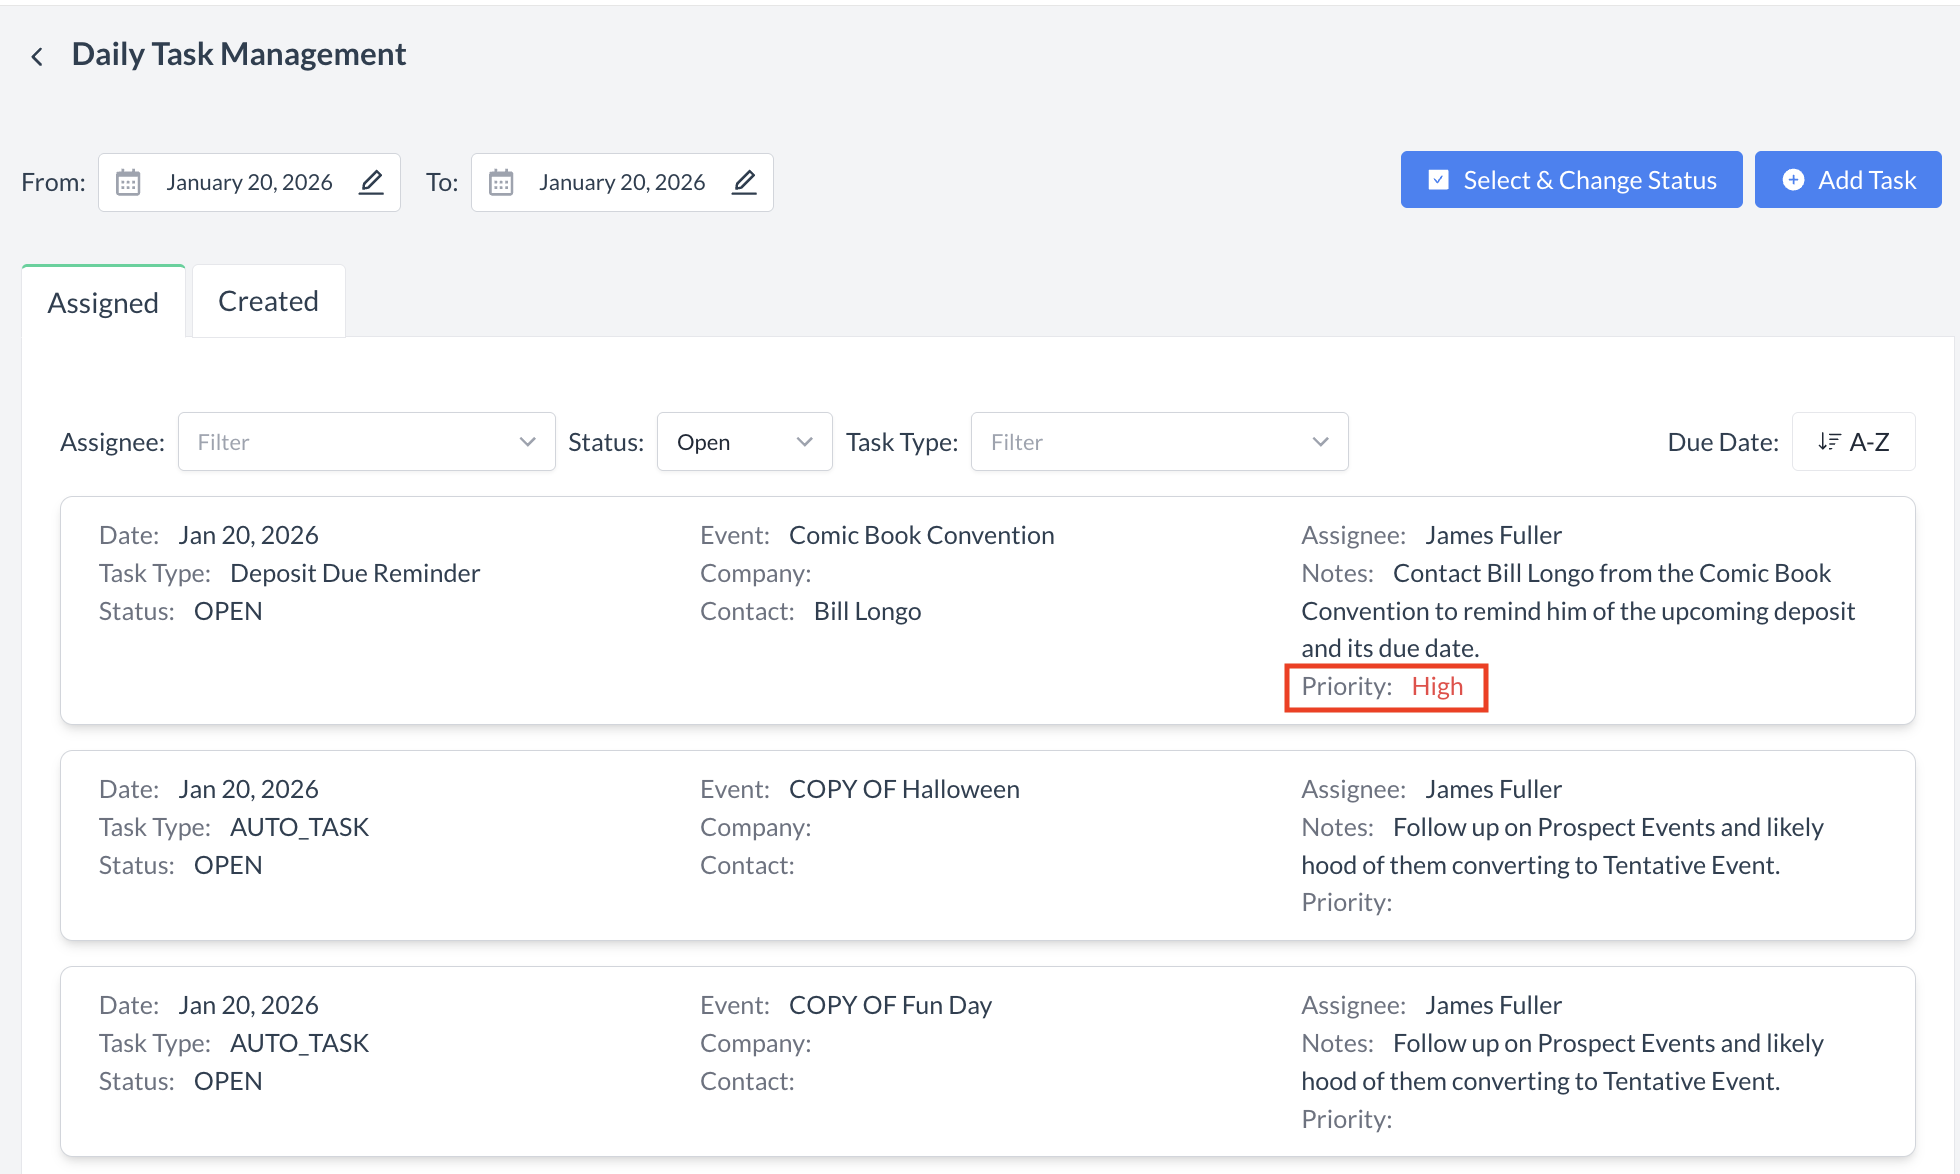
Setting task priorities is a useful way to:

  • Organize your workload for the day based on importance.

  • Help admin users highlight high-priority tasks for the team to action first.

Once a task is marked as High Priority, it will automatically move to the top of your task list for easy visibility.

Task Priority.png

Task Priority

Task Priority Listing Screen.png

Task Priority Listing Screen

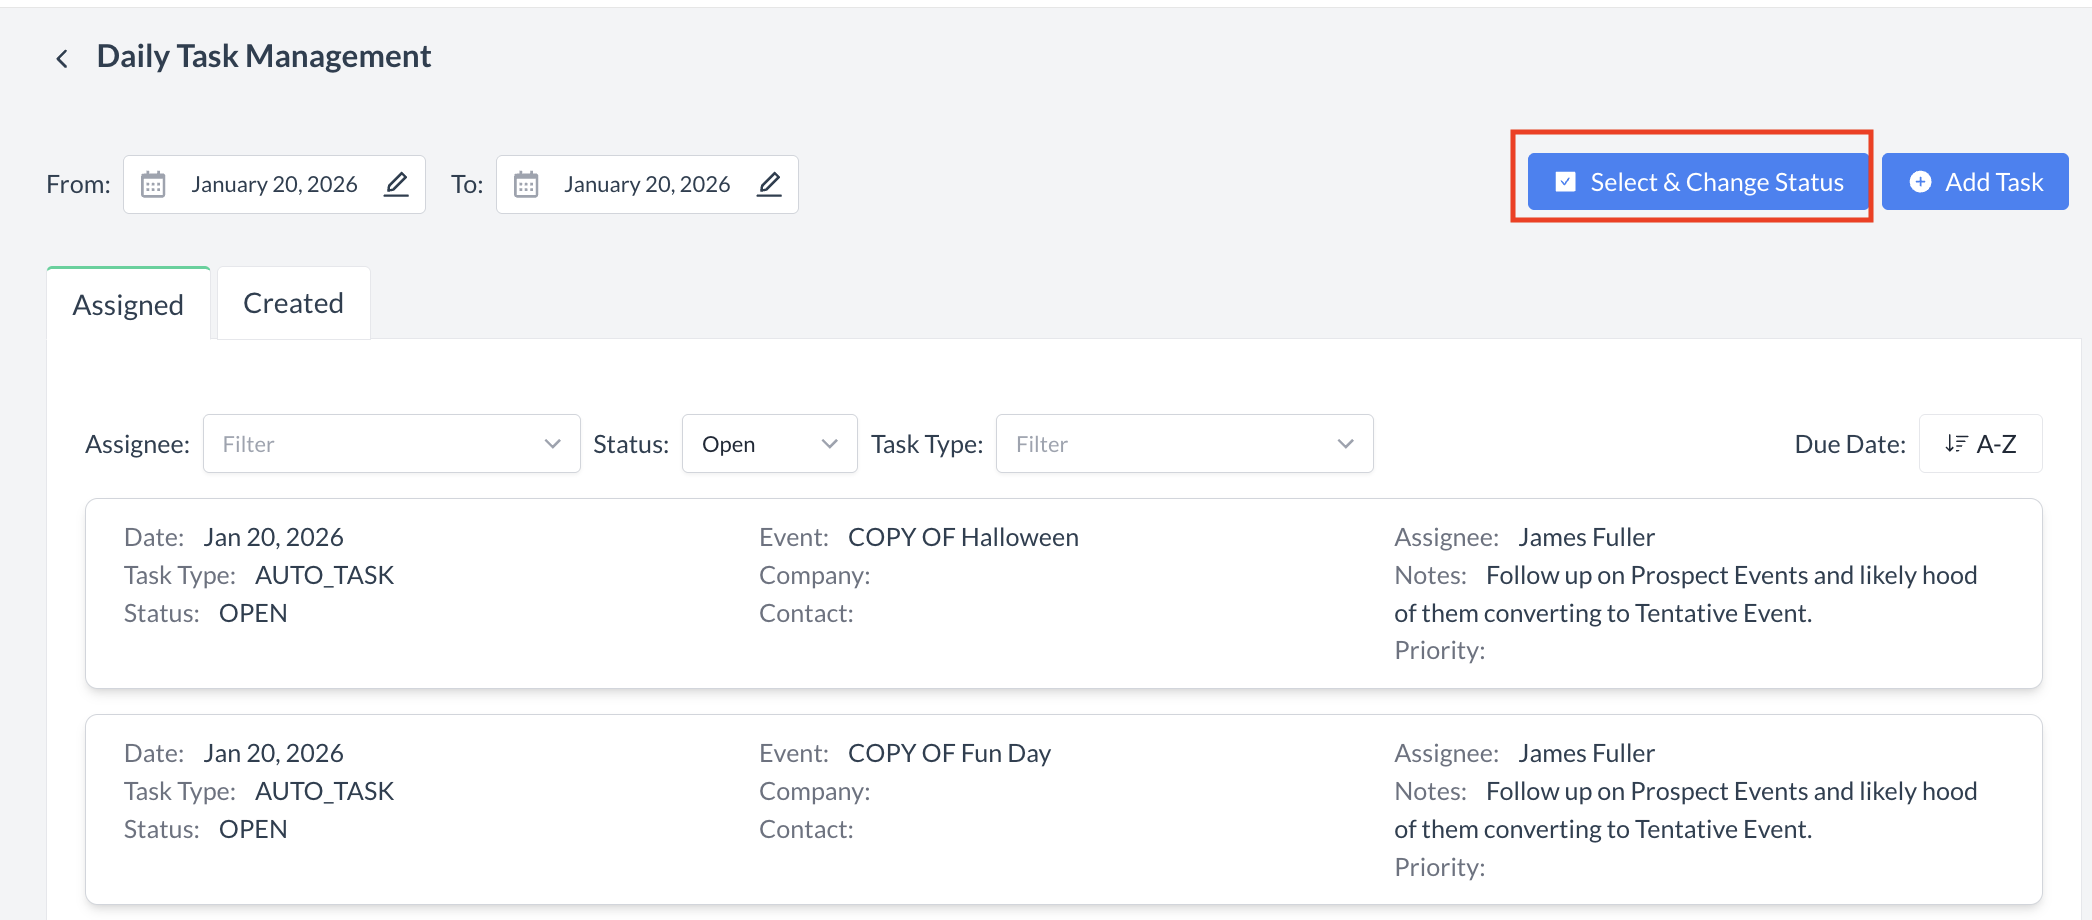
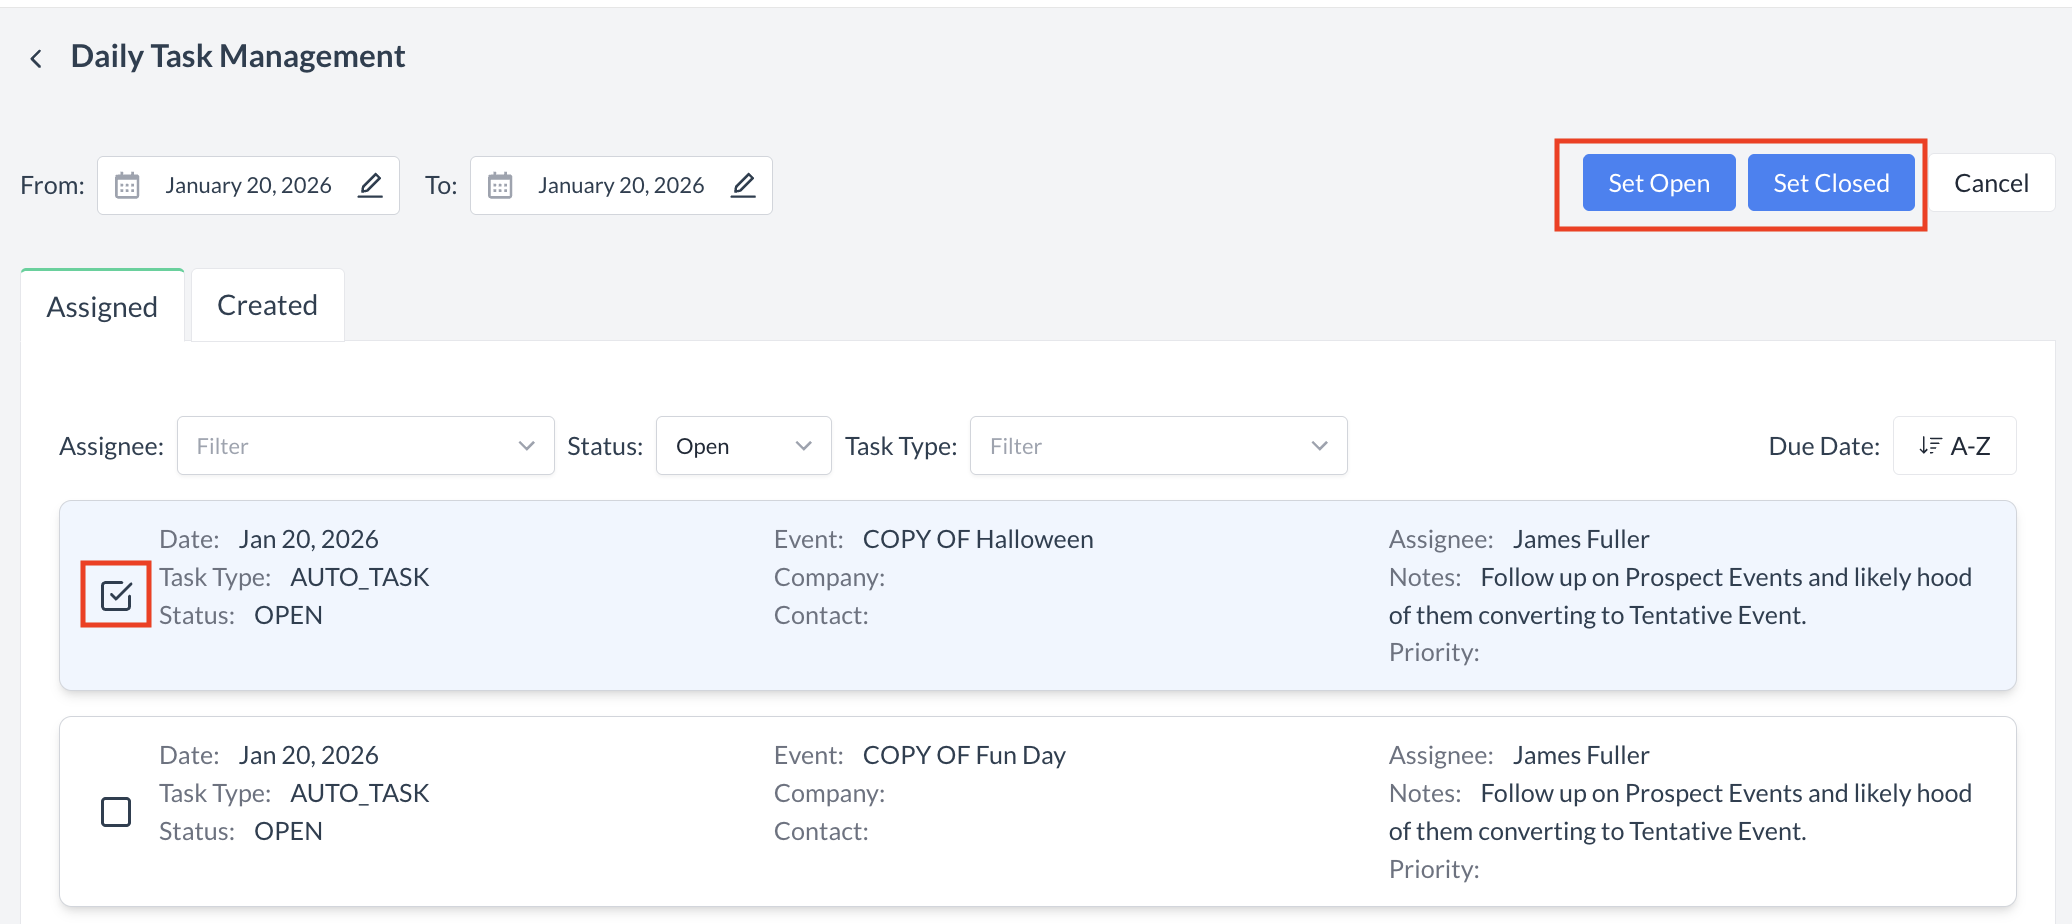
Changing Task Status

To update the status of one or more tasks, click the blue “Select & Change Status” button in the upper-right corner.

  1. Checkboxes will appear next to each task. Select the tasks you want to update.

  2. After selecting your tasks, choose the new status:

    • Set Closed: Use this when an open task has been completed.

    • Open: Use this to reopen a task that was previously closed and requires further action.

Tip: Once a task is set to Closed, it will no longer appear in your default task list. Use the Status filter to view All or Closed tasks as needed.

Select & Change Status.png

Select & Change Status

Change Status to Open or Closed.png

Set Status to Open or Closed

JavaScript errors detected

Please note, these errors can depend on your browser setup.

If this problem persists, please contact our support.