Skip table of contents

Tracking Contacts on an Event

📆 Revision Date:

Overview: Tracking Contacts on an Event

In Sales and Catering, accurately tracking contacts associated with an event is essential for clear communication, seamless coordination, and exceptional service delivery. Events often involve multiple stakeholders, each playing a unique role—such as the person who booked the event, the main point of contact during the event, or a third-party vendor like a contract singer.

Here’s why it’s important to document each contact type:


1. Clear Roles and Responsibilities

  • Leader: Typically the booker, who is responsible for negotiating the event, managing billing and sometimes signing the BEO or event contract.

  • Onsite Contact: The person present during the event, responsible for day-of decisions and coordination with the venue.

  • Signer Contacts: Typically responsible for signing the BEO and or event contract.

Tracking these roles ensures that the right person is contacted for the right task—avoiding confusion or delays.

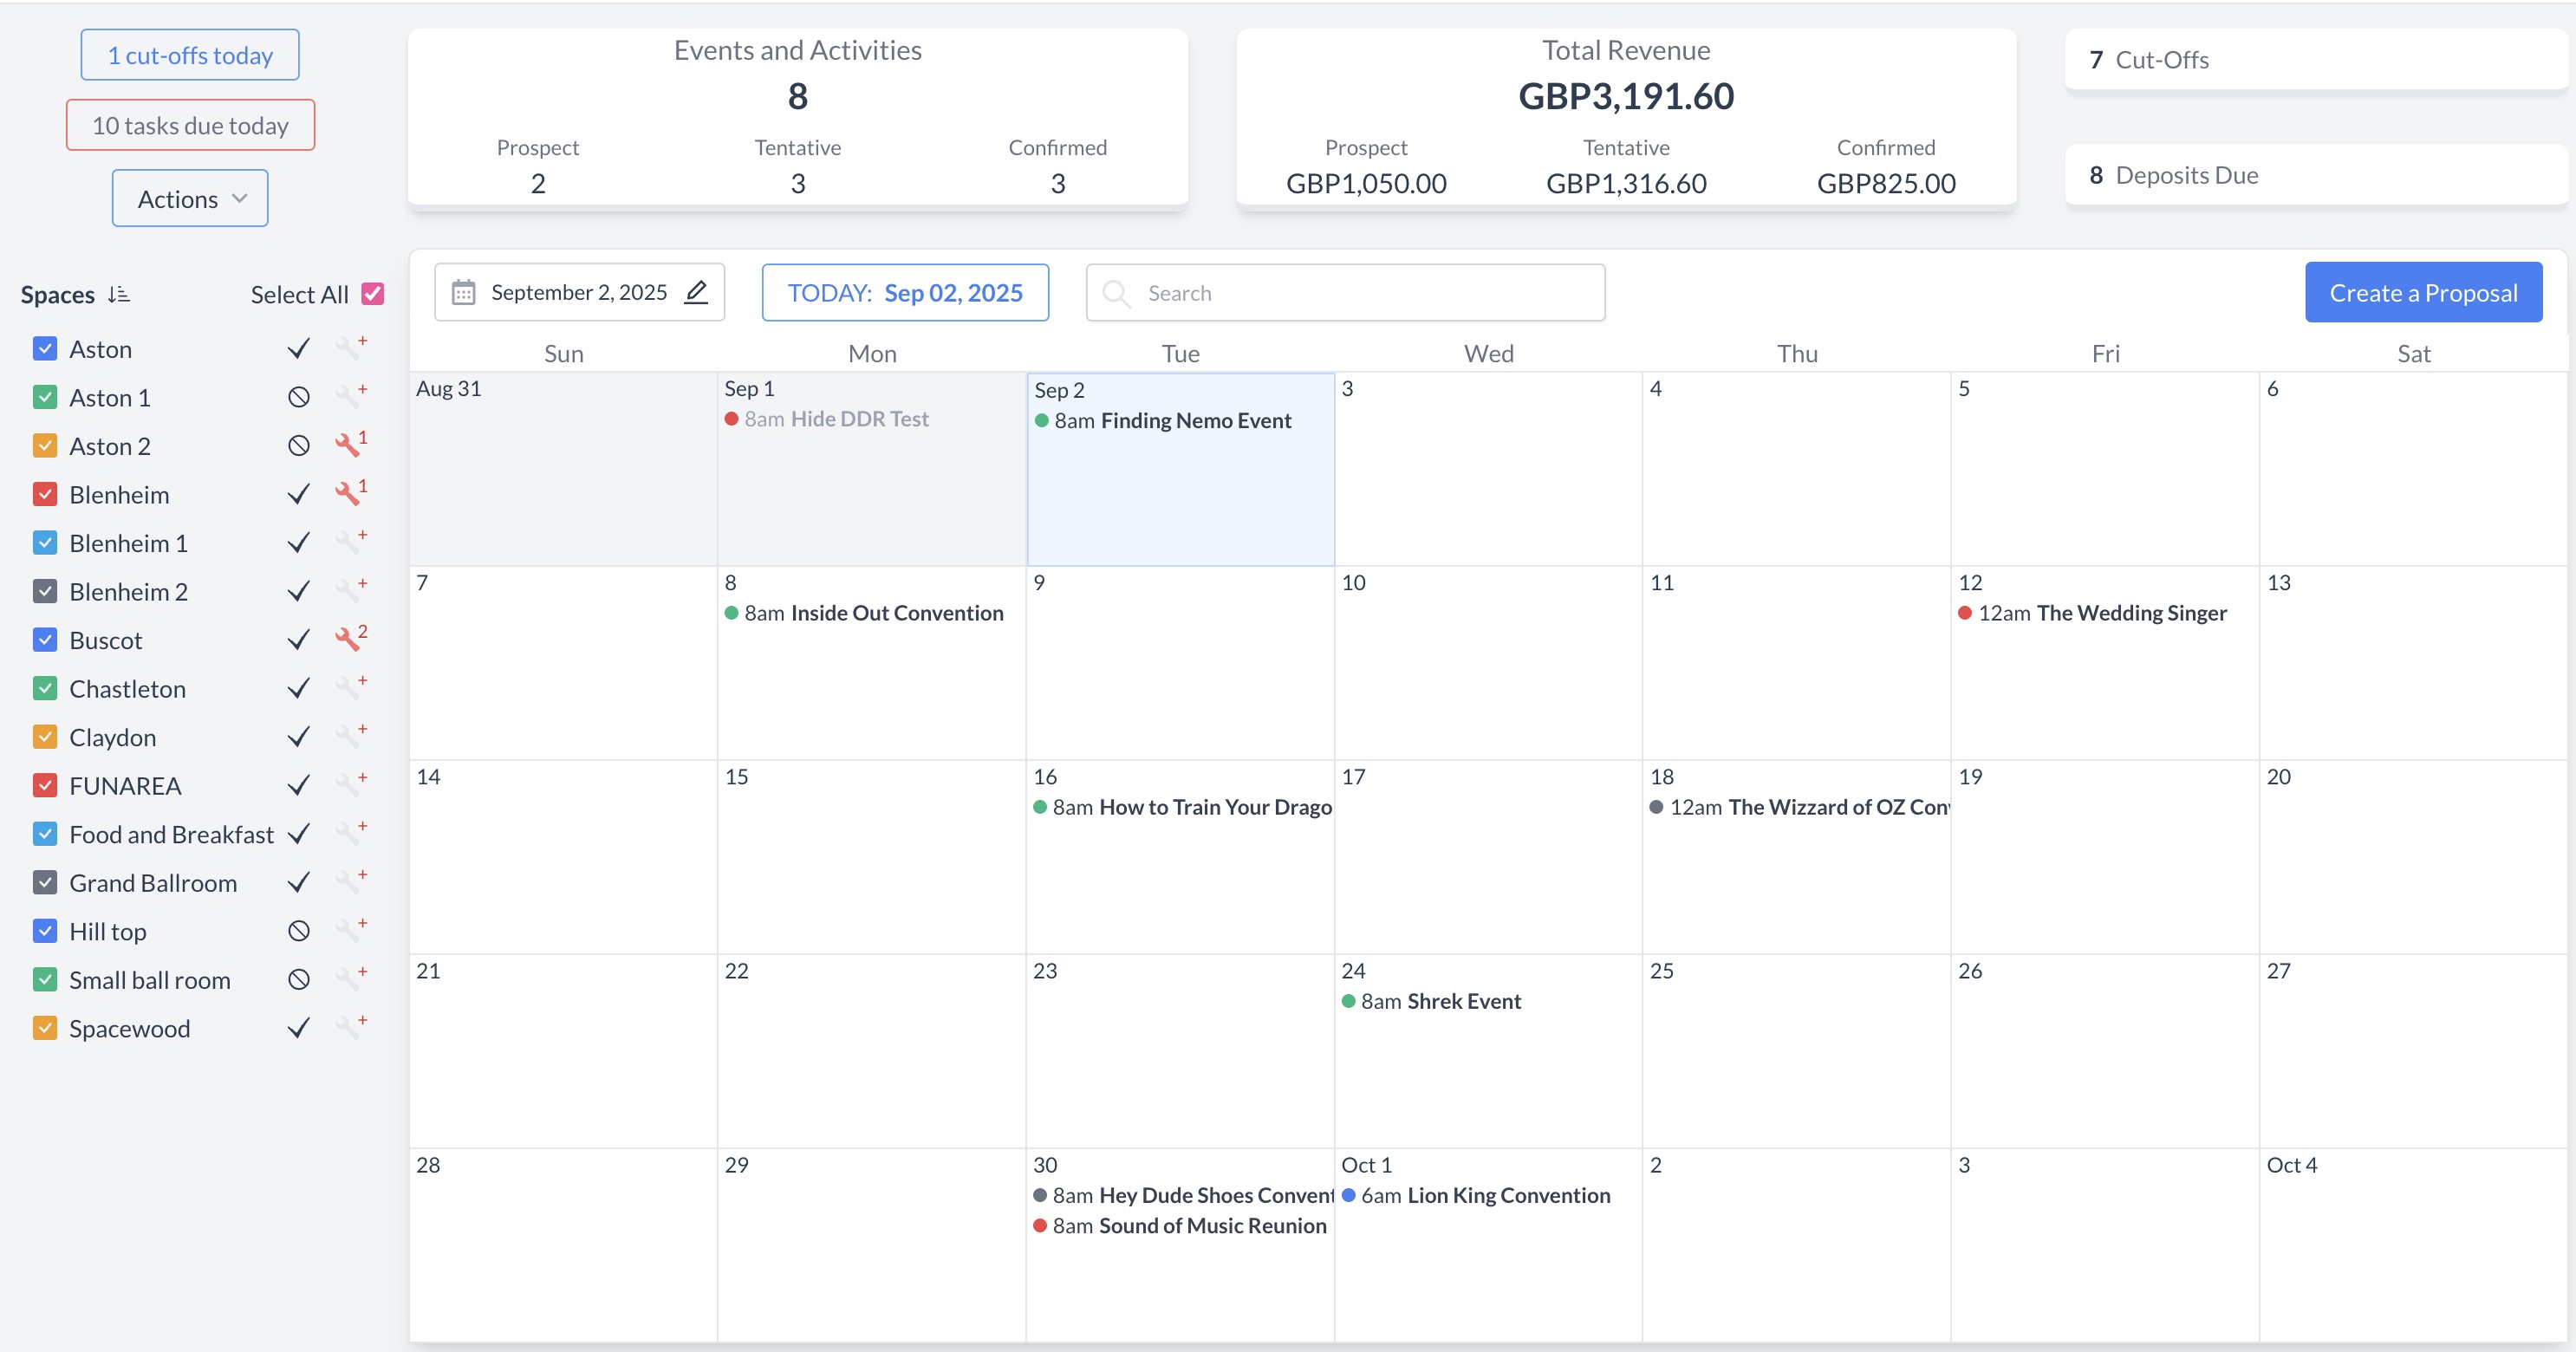
Navigate to Home > Event Management

EventKey Dashboard (Home Screen)

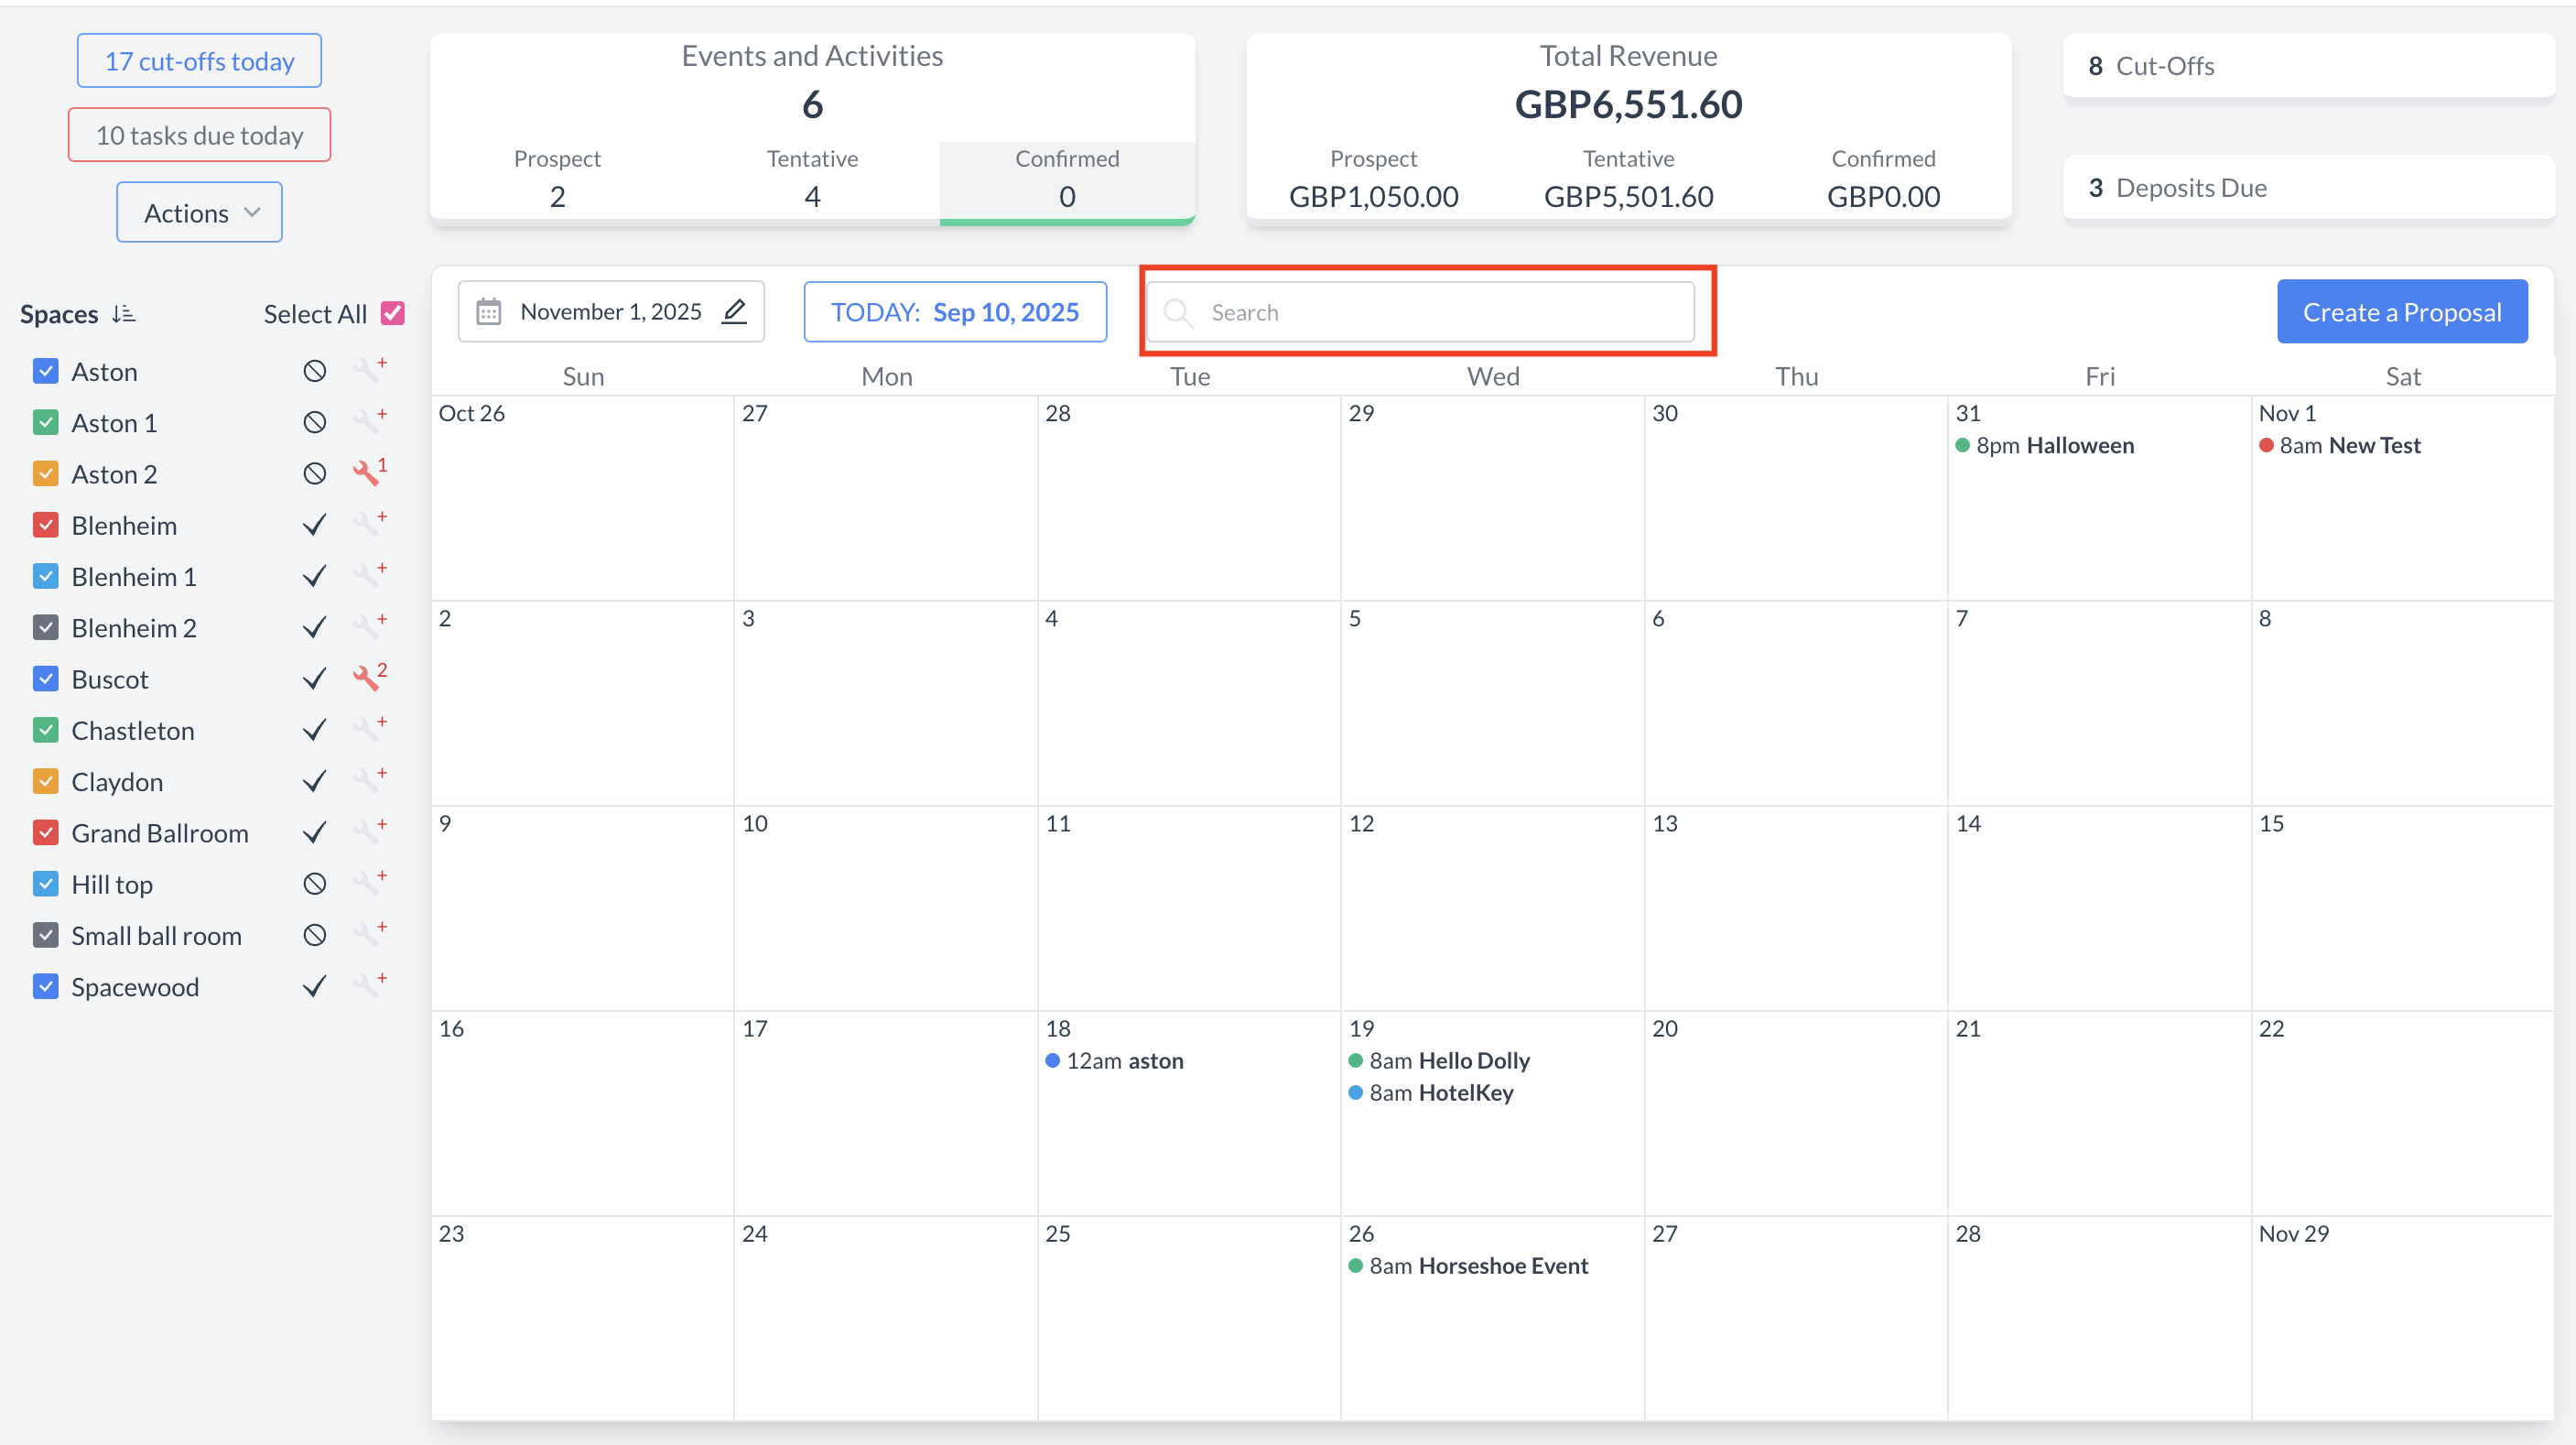
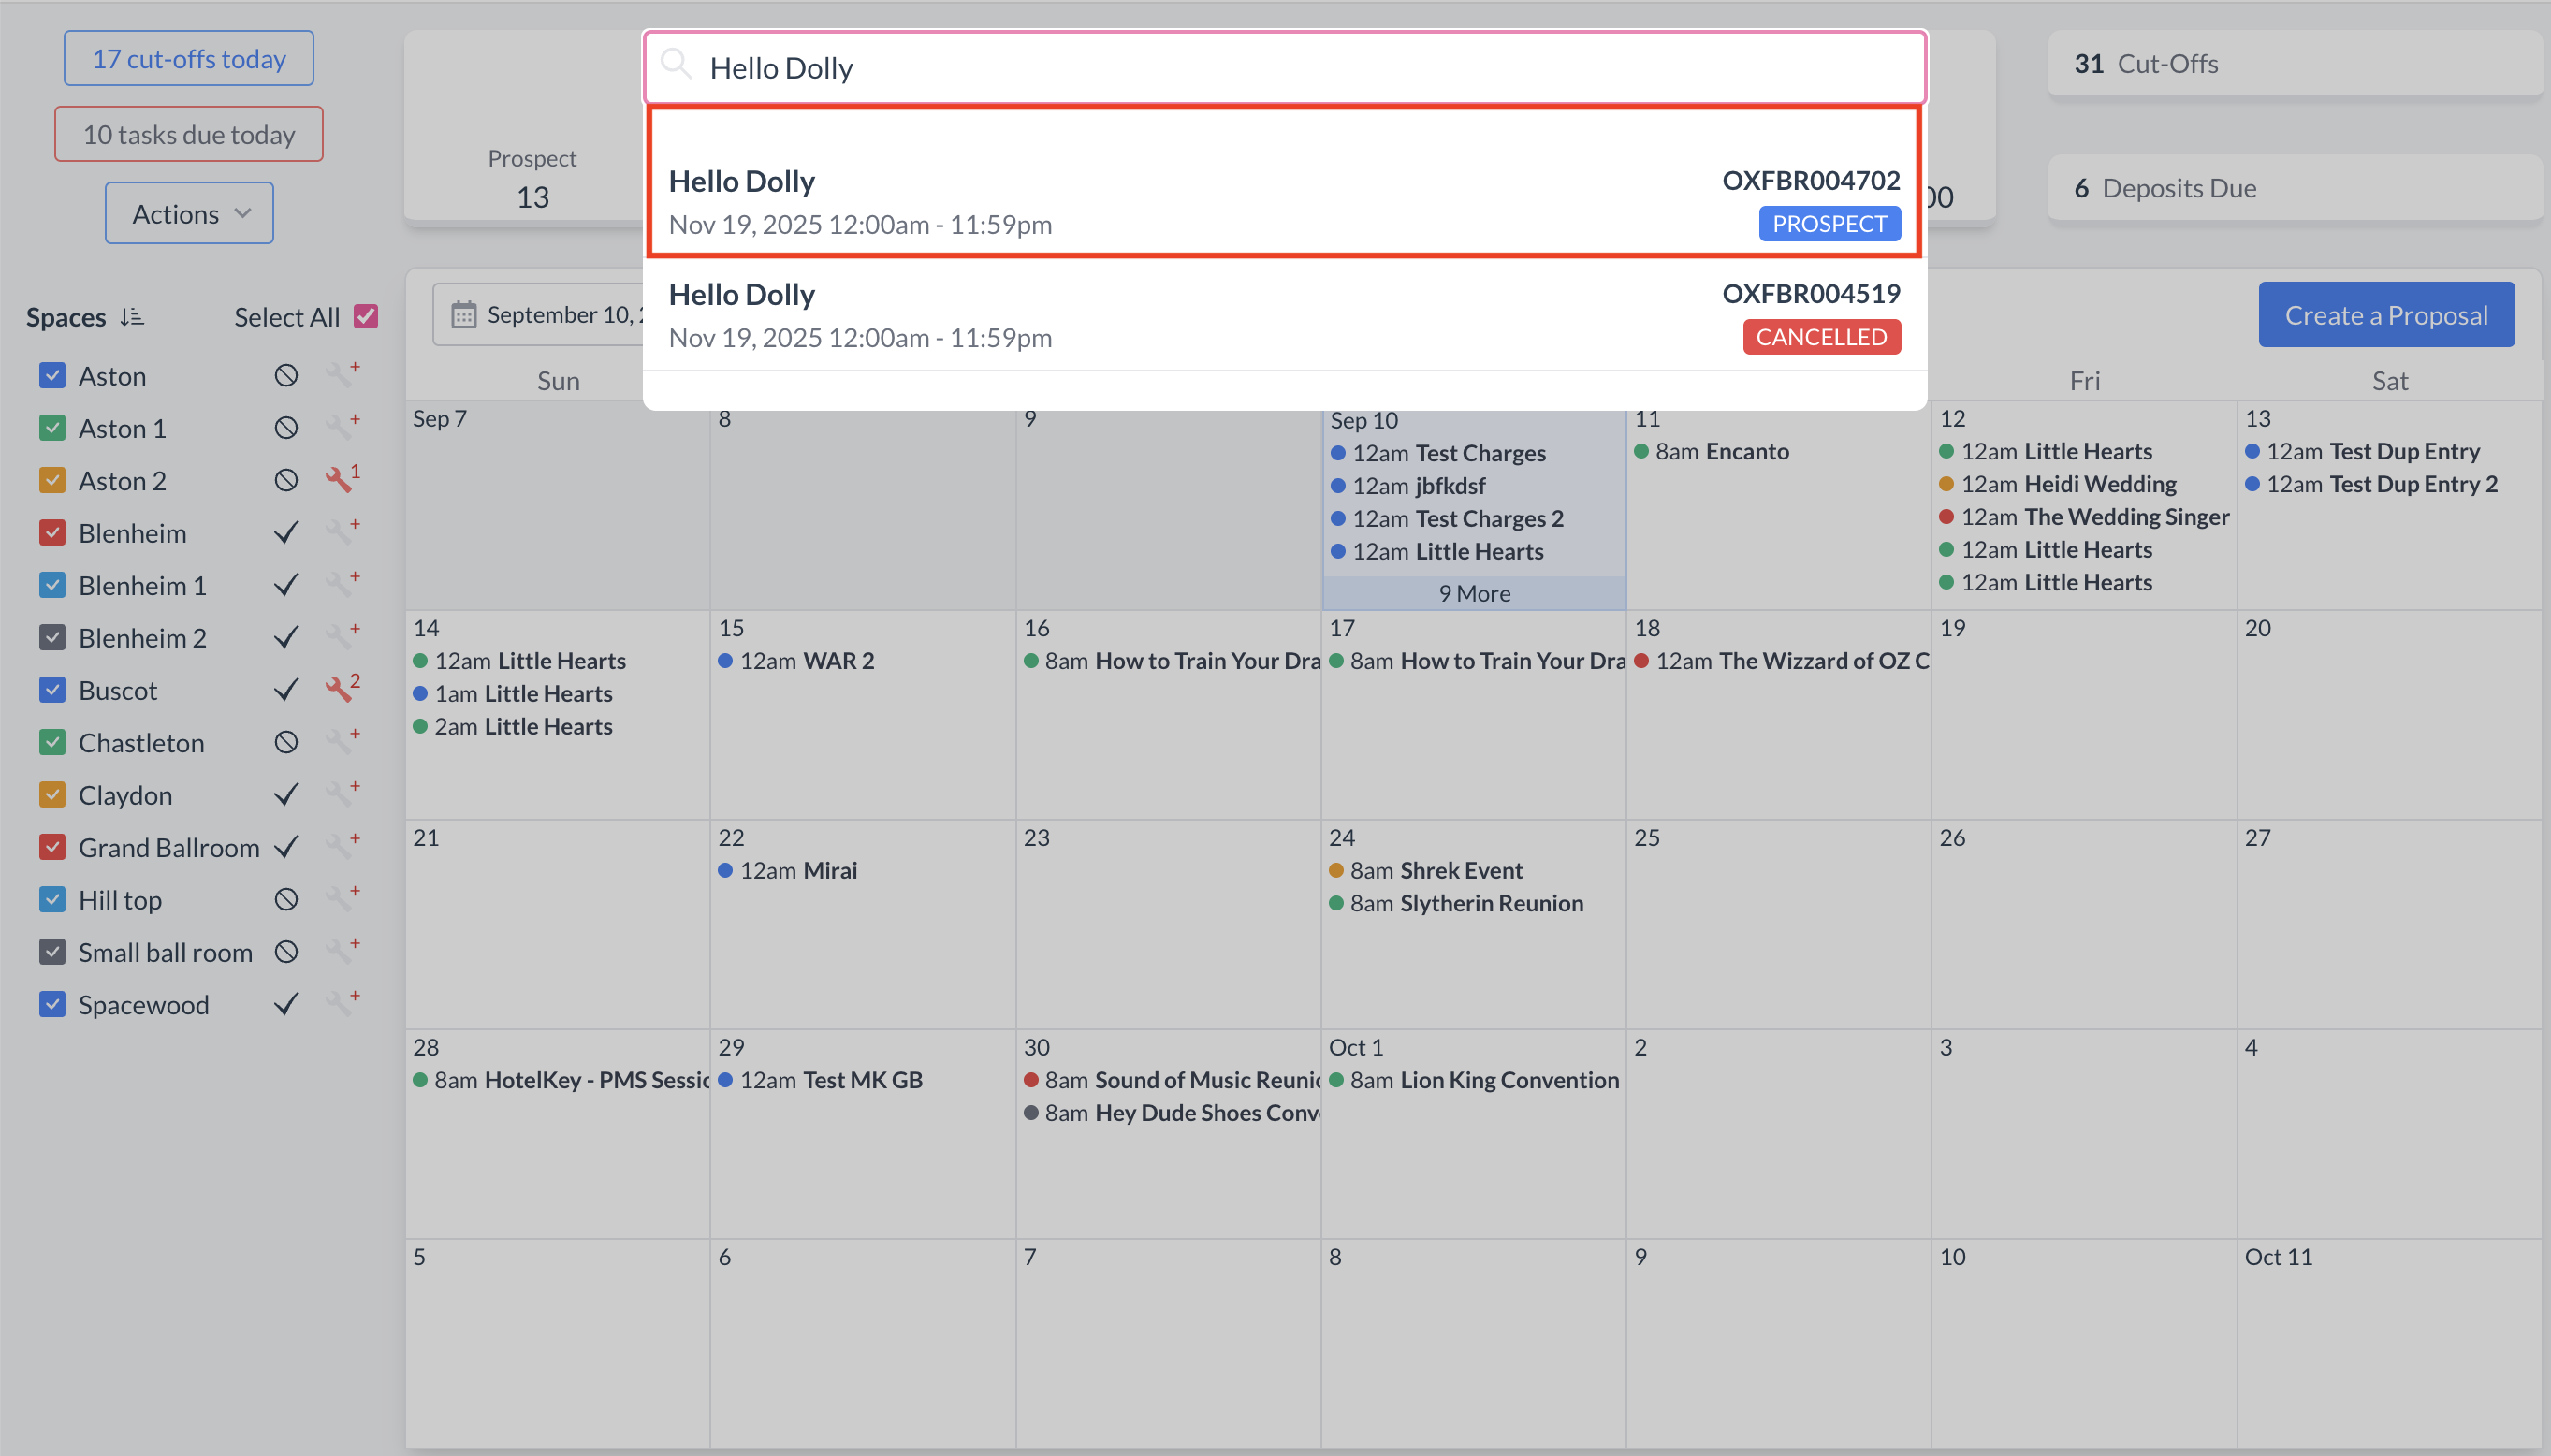
To begin, navigate to the Dashboard and use the Search box to locate the event.

Enter the full or partial Event Name into the search field. The system will display a list of matching events, or, if there is an exact match, it will appear directly.

Once you’ve identified the correct event, simply click on the event name to open it.

Event Search Field

Event Search Results

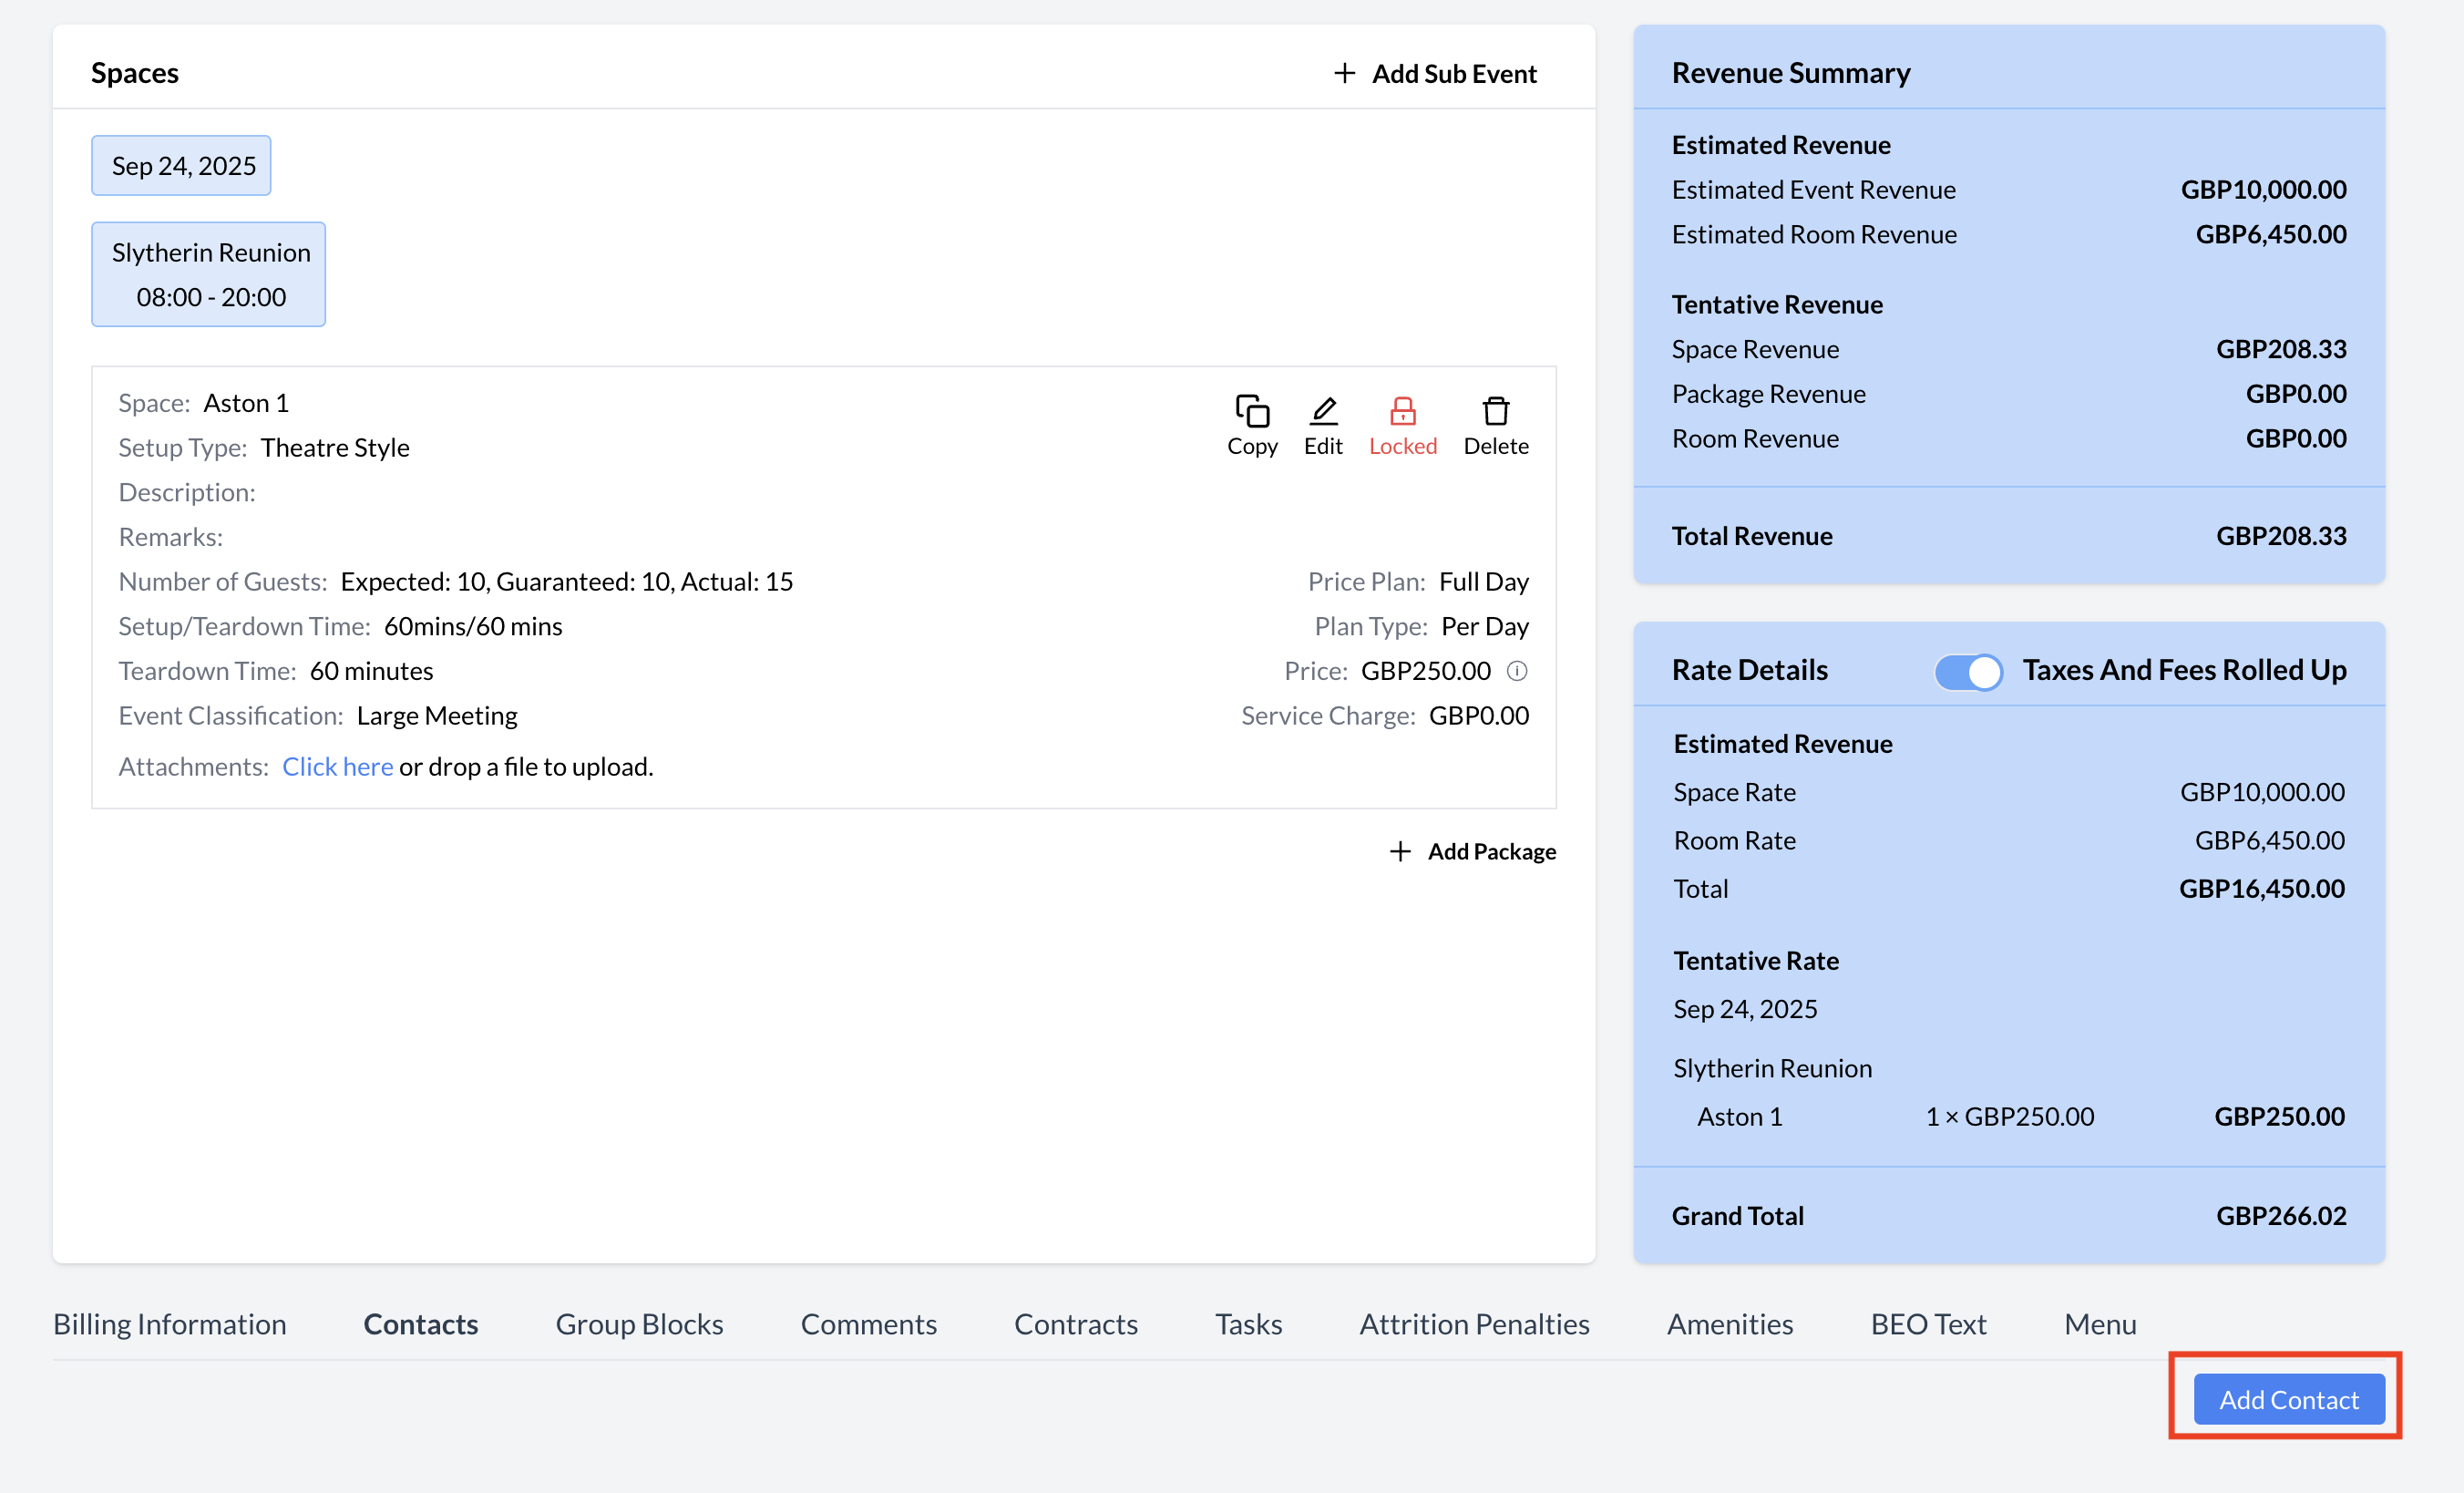
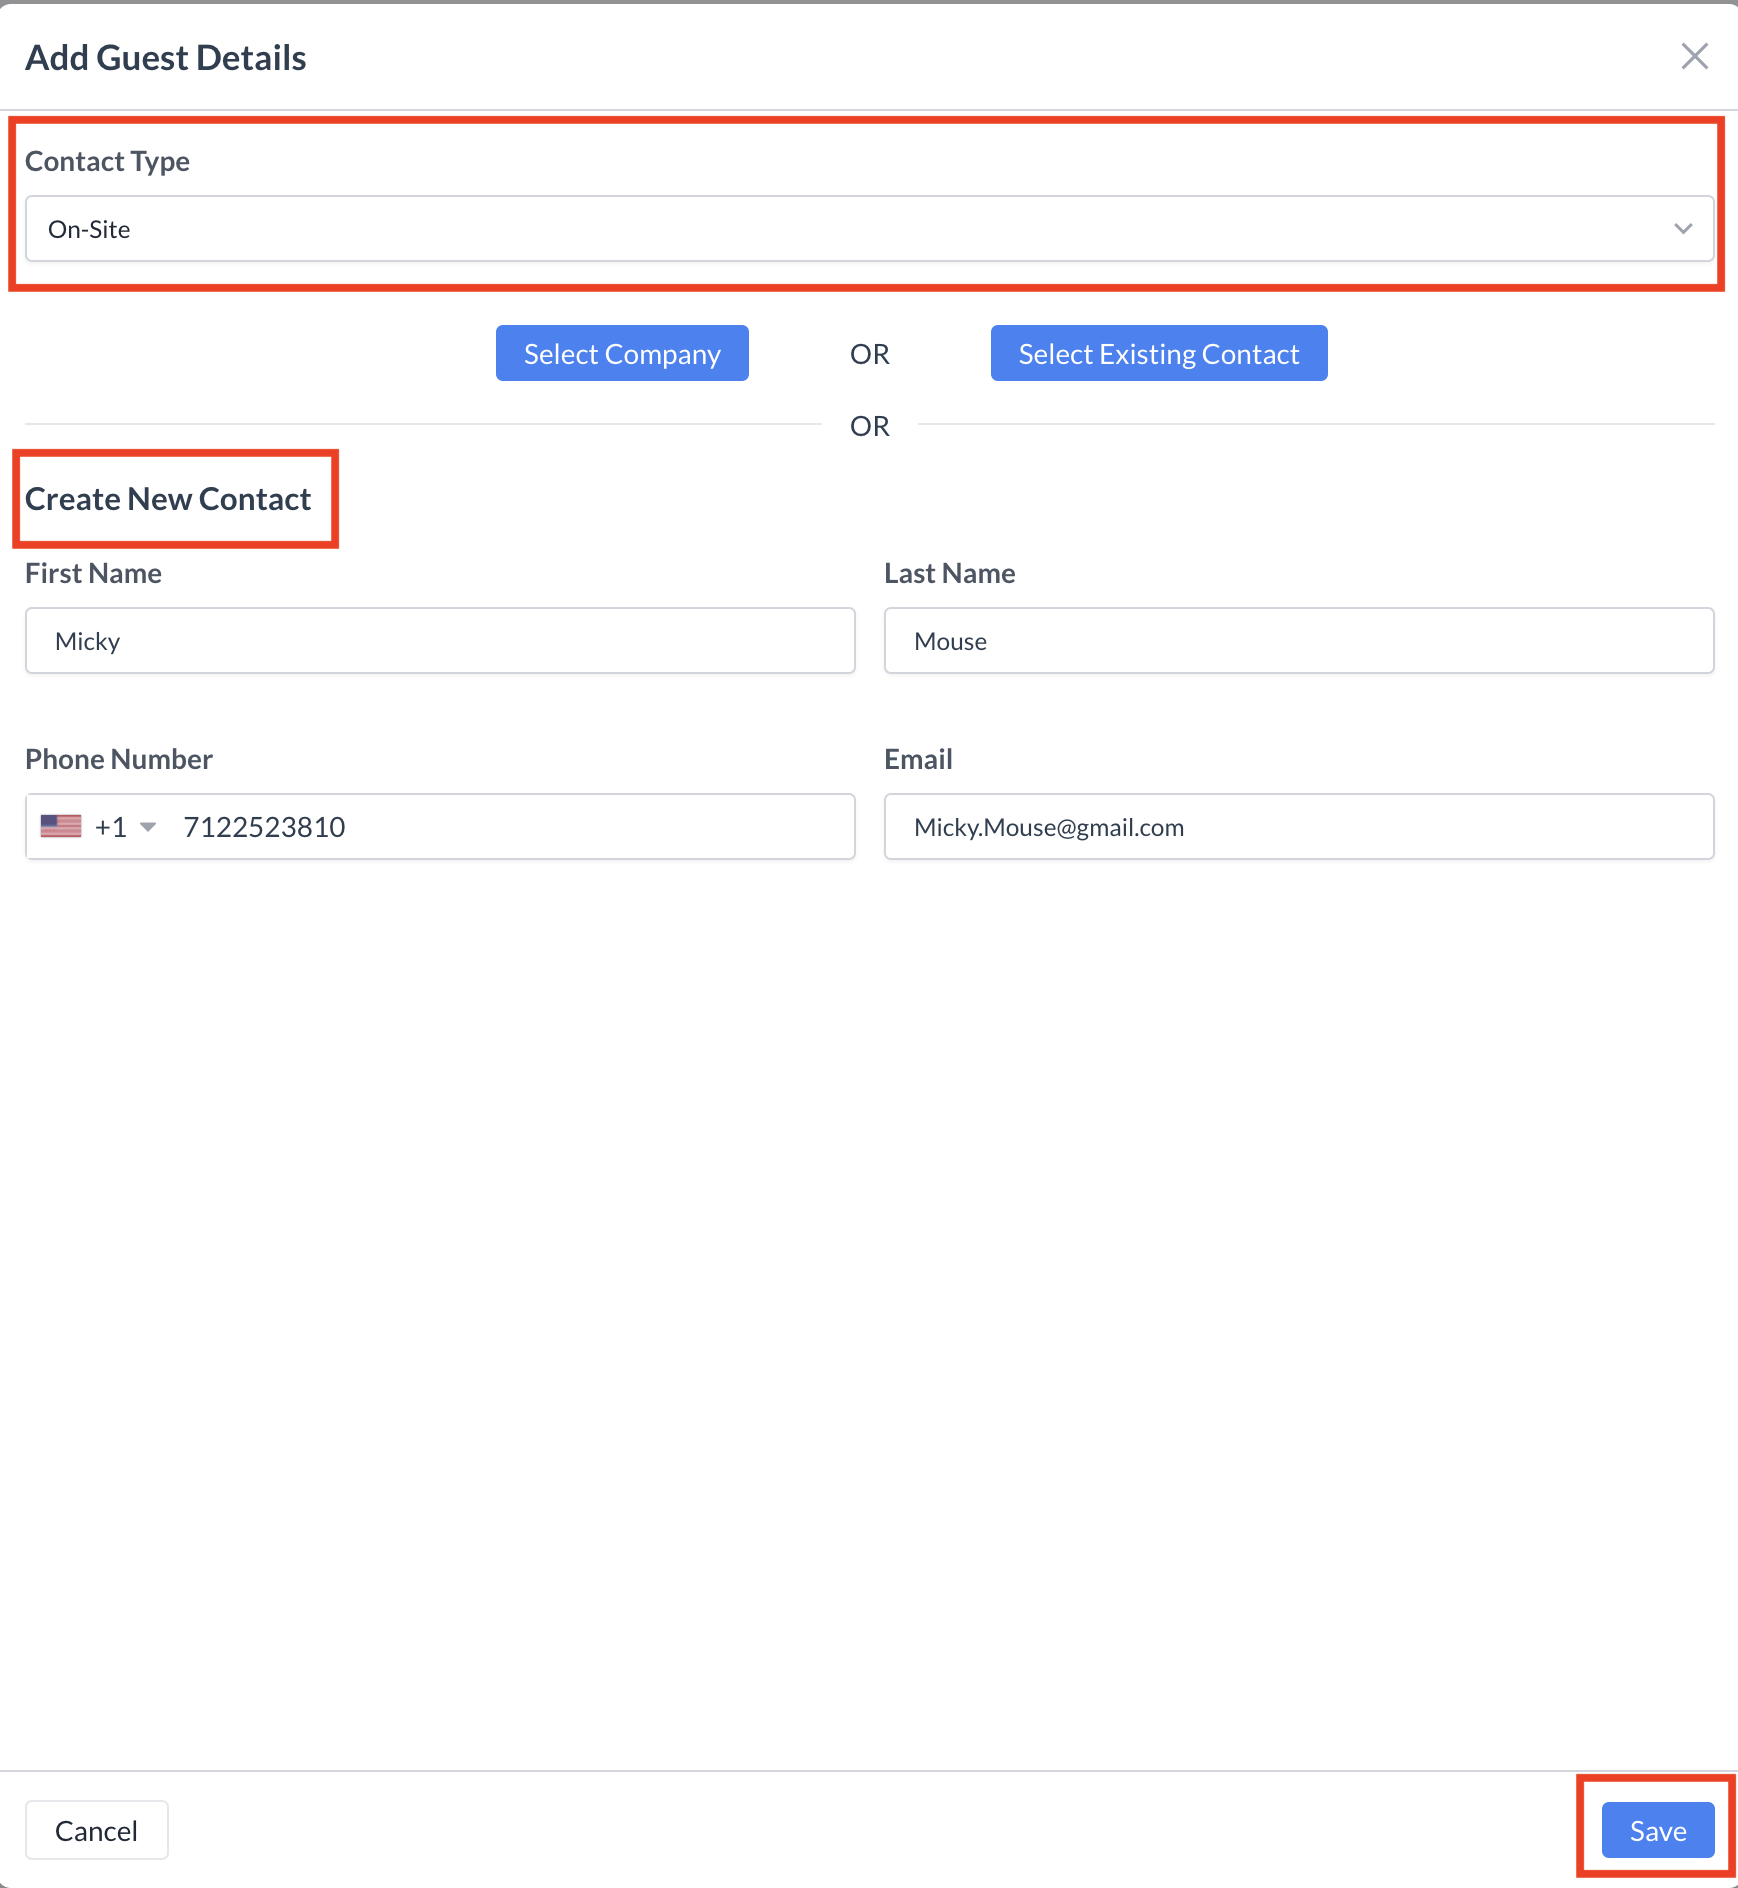
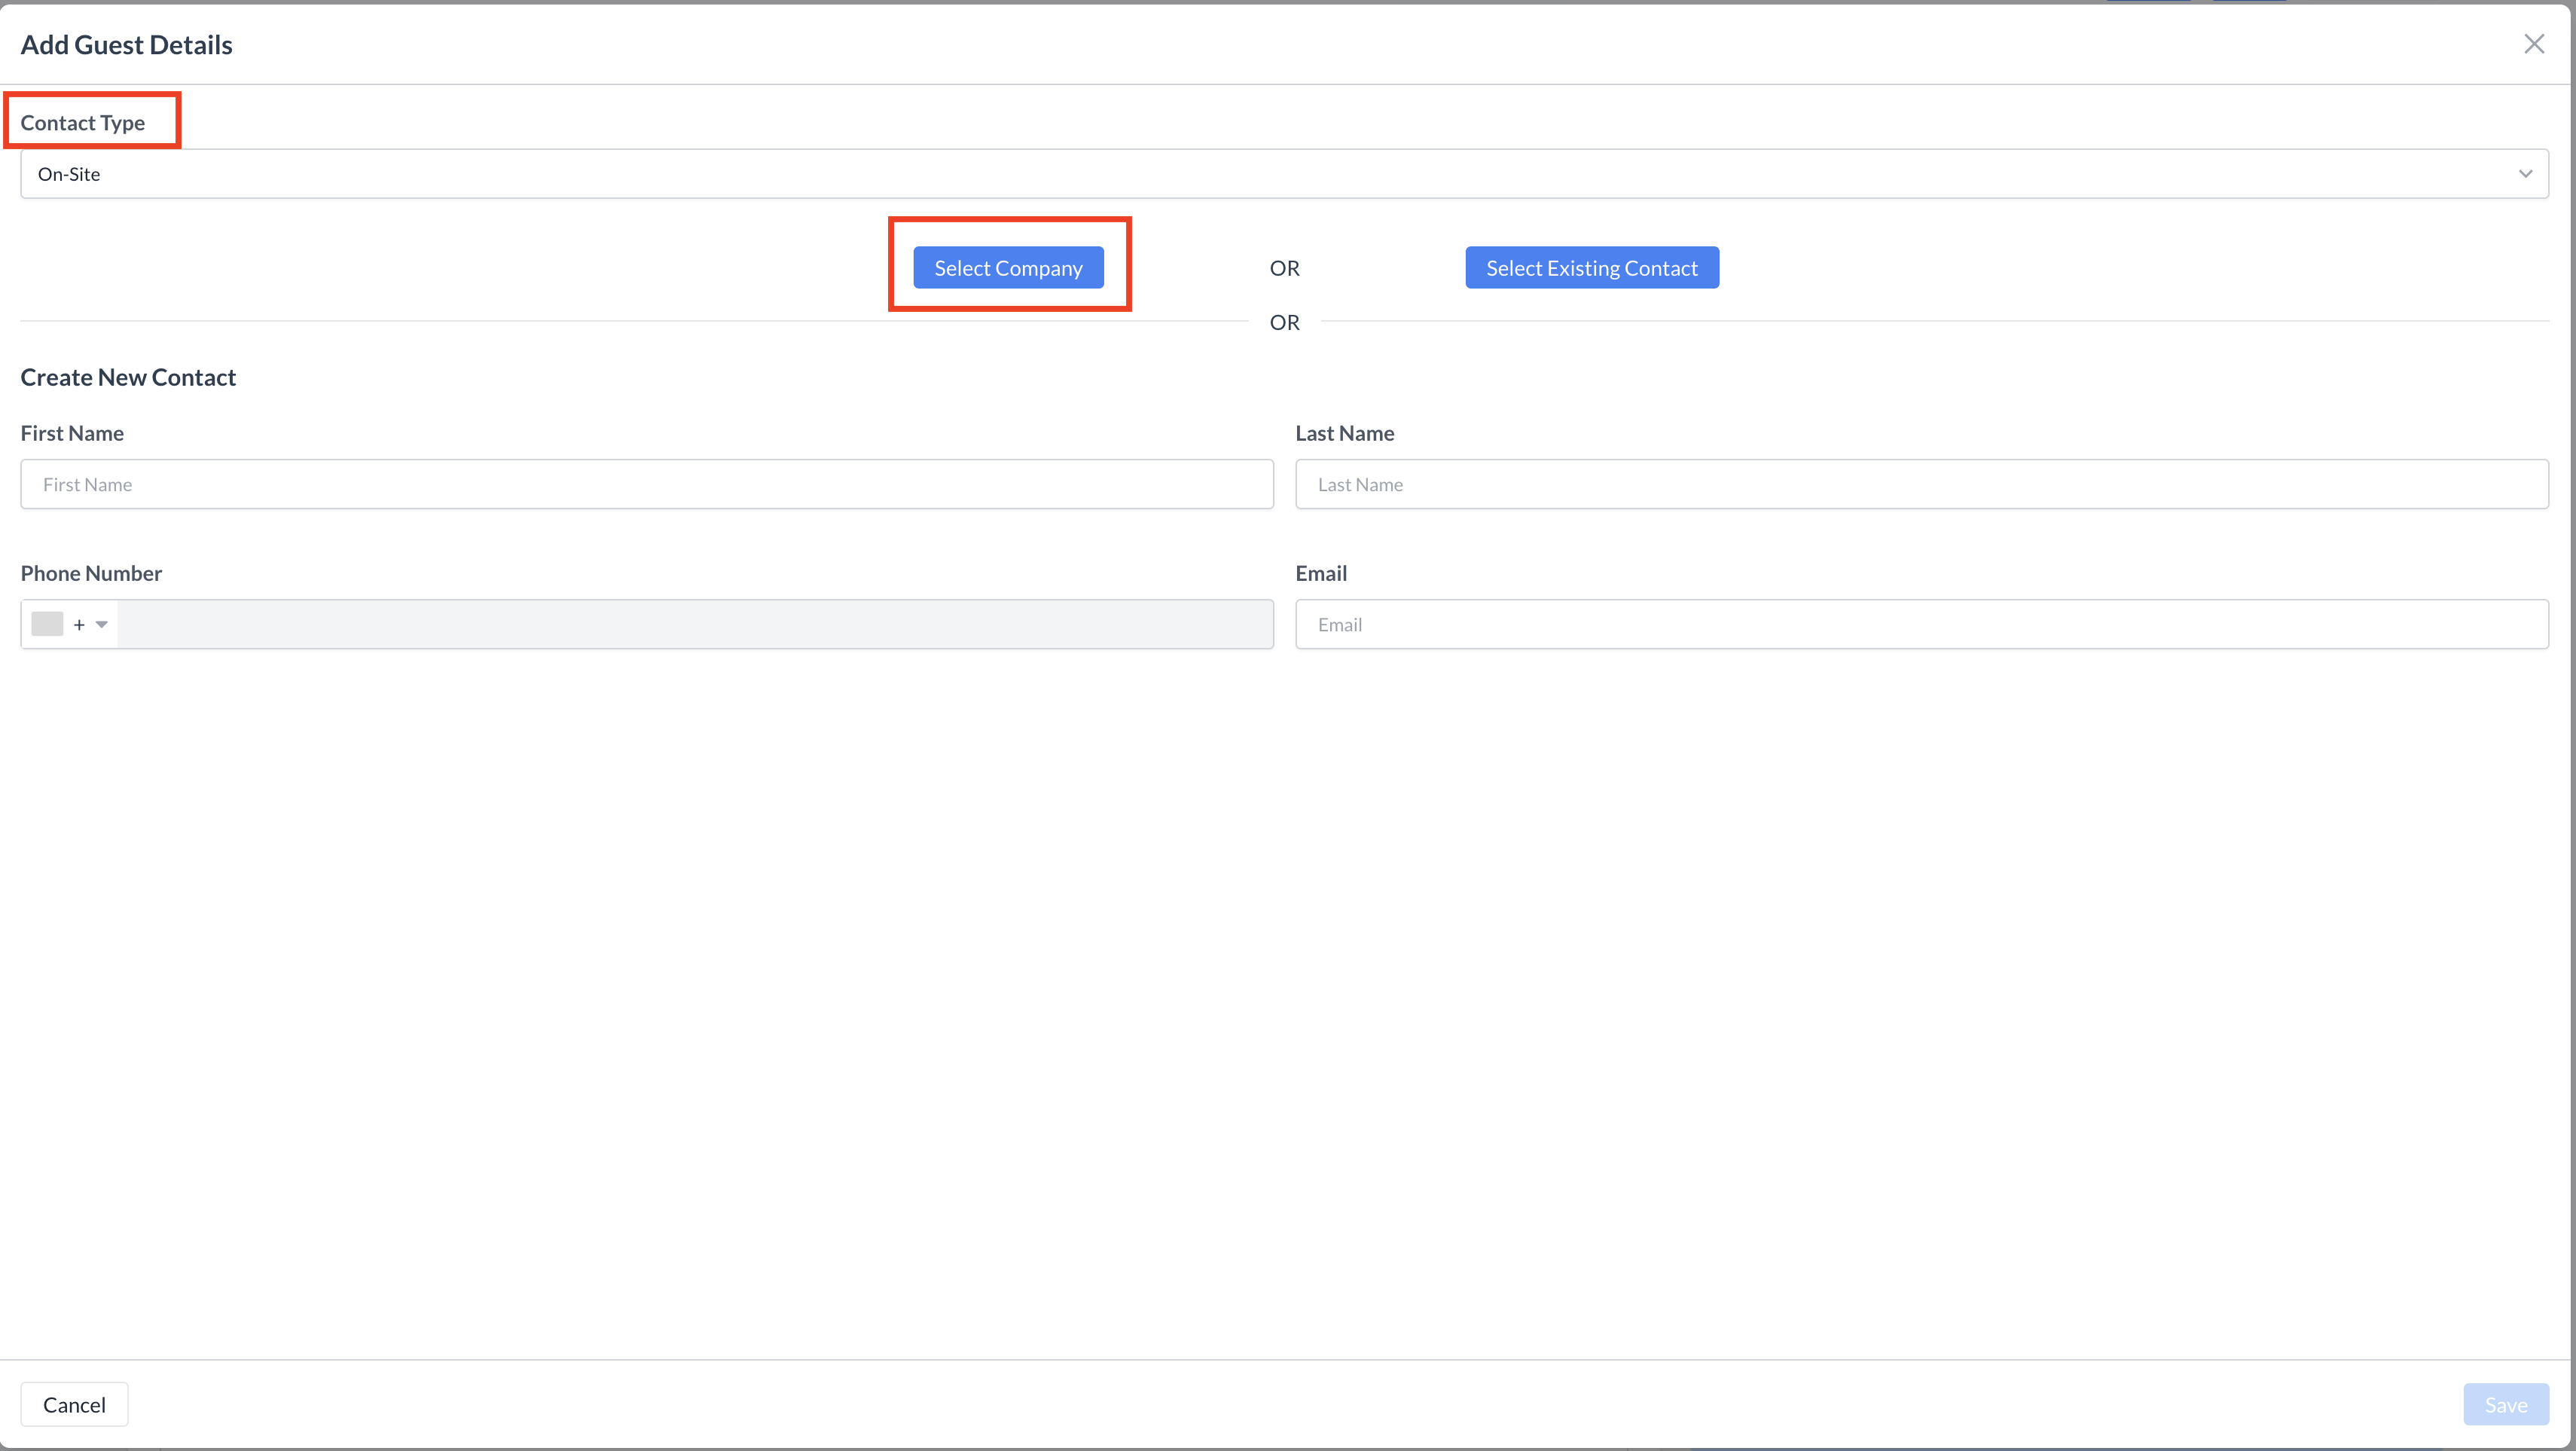
Adding a Contact to an Event

To add a contact to the Event Record:

  1. Scroll to the bottom of the Event Record (Reservation) screen.

  2. Click on the “Contacts” section to expand it (if it's not already open).

  3. Click the blue “Add Contact” button to begin entering contact details.

Add a Contact to the Event

Creating a New Contact

To create a new contact for the event:

  1. In the Contact Type field, use the dropdown menu to select the appropriate role:

    • Leader (Primary contact or event booker)

    • Onsite (Main contact present during the event)

    • Signer (Authorized to sign contracts or agreements)

  2. Enter the contact’s First Name, Last Name, Phone Number, and Email Address in the corresponding fields.

  3. Click the blue "Save" button to add the contact to the event.

Tip: Make sure the contact information is accurate—this ensures the right people receive important event updates and communications.

New Contact - Creating New Contact

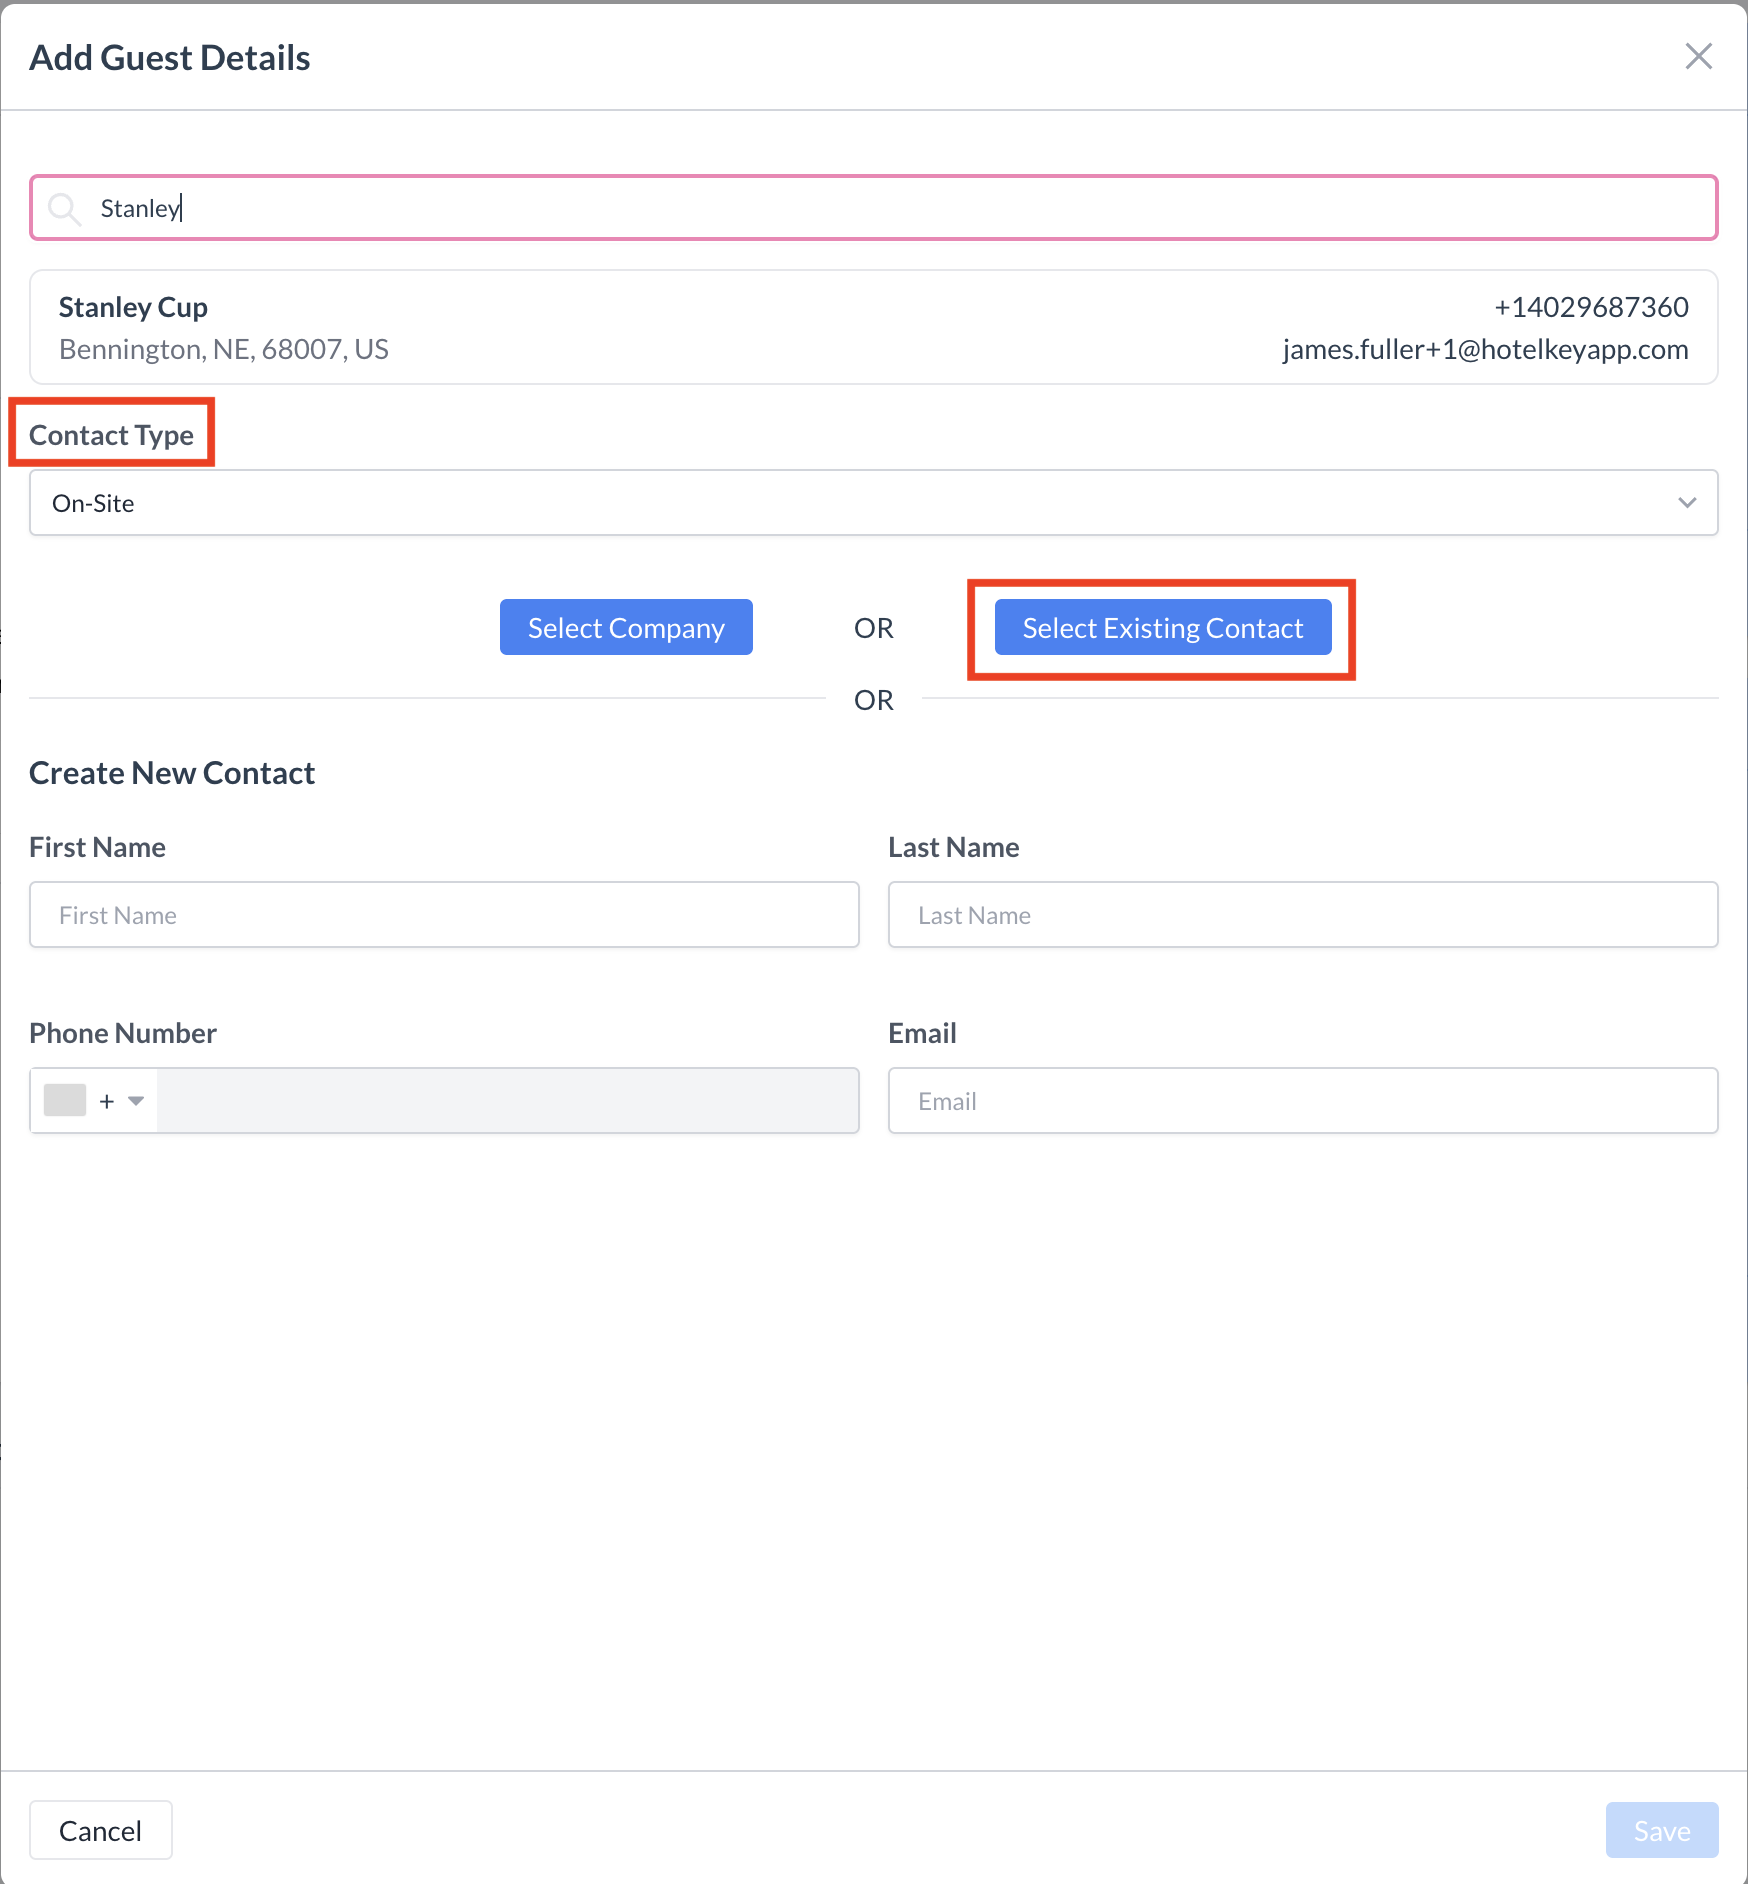
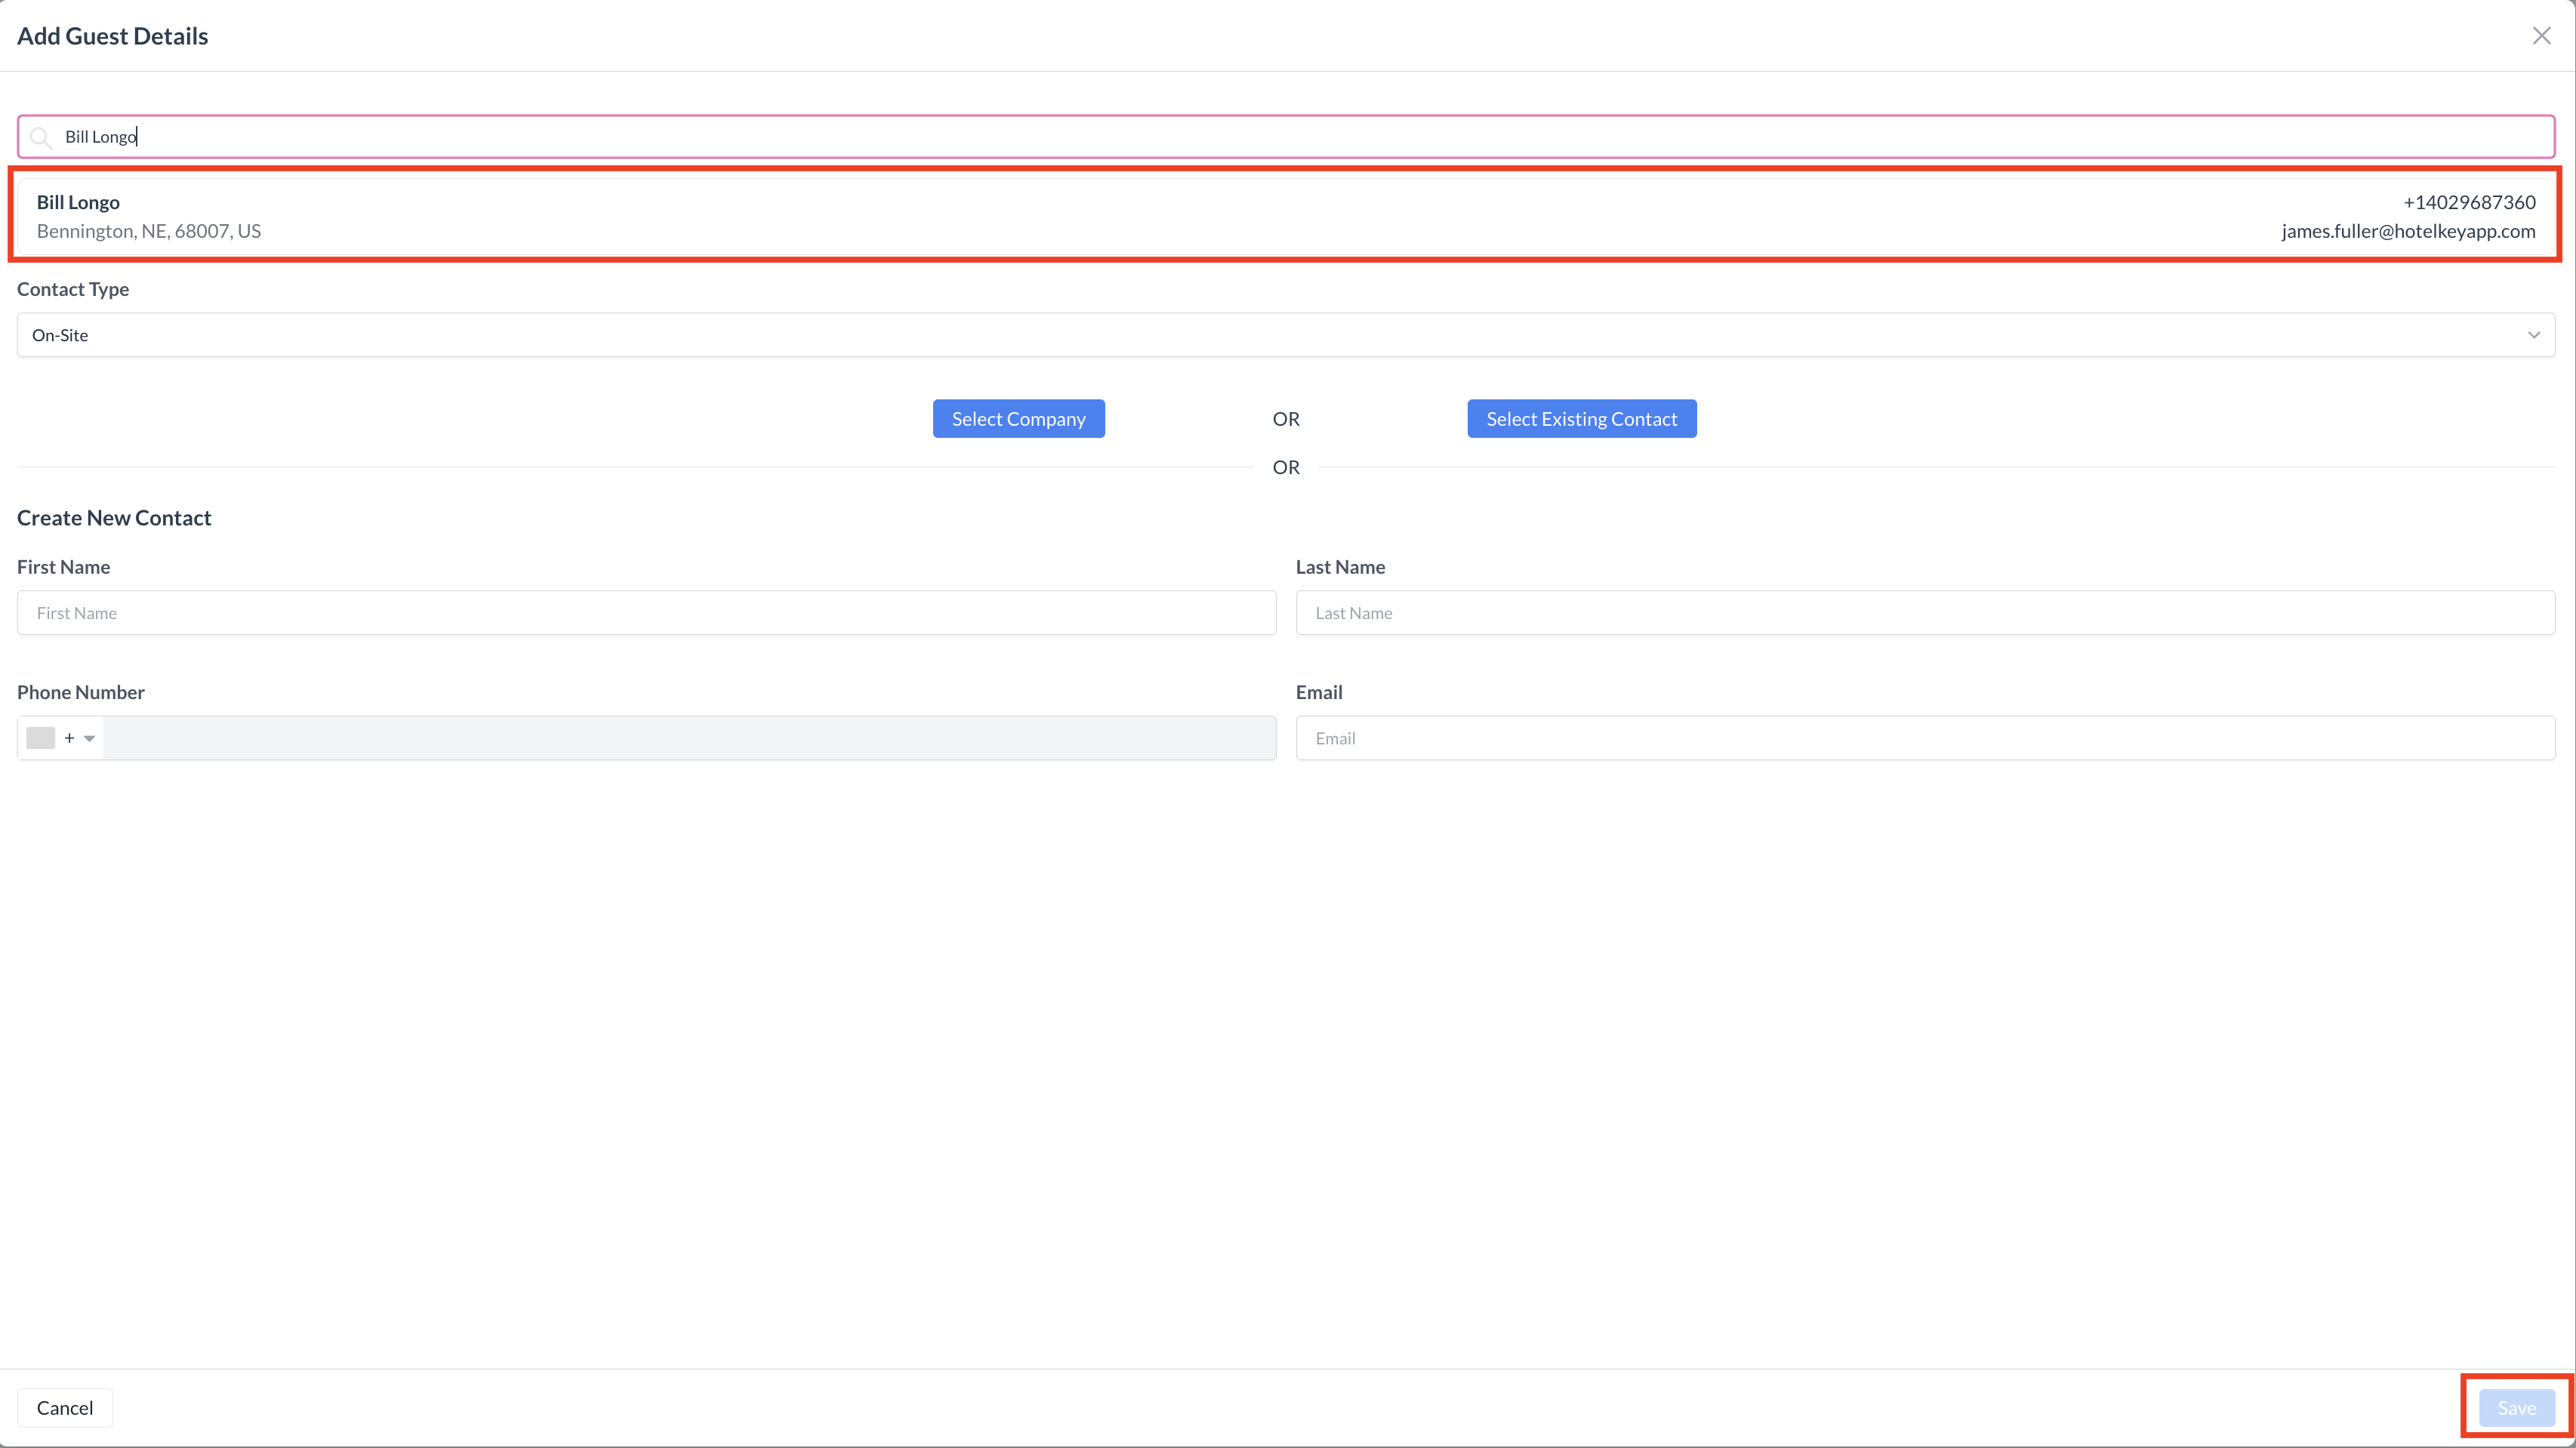
Using an Existing Contact

If the contact you wish to add has been used in a previous event, you can easily select them without re-entering their information.

Steps to Use an Existing Contact:

  1. In the Contact Type field, use the dropdown menu to select the appropriate role:

    • Leader – Primary contact or event booker

    • Onsite – Contact who will be present during the event

    • Signer – Person authorized to sign contracts or agreements

  2. Click the blue "Select Existing Contact" button.

  3. A search box will appear at the top of the screen.

    • Enter the contact’s first name, last name, or both.

    • A list of matching contact records will be displayed.

  4. Click on the contact record you wish to use. the blue Save button will enable once a record is selected.

  5. You’ll be taken to the Add Guest Details screen with the selected contact’s information automatically populated.

  6. Review the details, then click the blue "Save" button to add the contact to the event.

Tip: Always confirm that the contact details are current before saving. If updates are needed, you can edit the contact record after selecting it.

New Contact - Select Existing Contact

Search for Existing Contact Onsite.png

Search Existing Contact

Select Existing Contact - Save

Using an Existing Company

If the contact you wish to add is affiliated with a company, you can easily select them without re-entering their information.

Steps to Use an Existing Company:

  1. In the Contact Type field, use the dropdown menu to select the appropriate role:

    • Leader – Primary contact or event booker

    • Onsite – Contact who will be present during the event

    • Signer – Person authorized to sign contracts or agreements

  2. Click the blue "Select Company" button.

  3. A new Select Company screen with a search box at the top of the screen will appear.

    • Enter the name of the company.

    • A list of matching company records will be displayed.

  4. Click on the company you wish to use.

  5. You’ll be taken to the Add Guest Details screen with the selected contact’s associated with the company automatically populated.

  6. Click on the company contact you wish to use.

  7. Click the blue "Save" button to add the company and contact to the event.

New Contact - Select a Company

Company Profile Search

Select Company Contact

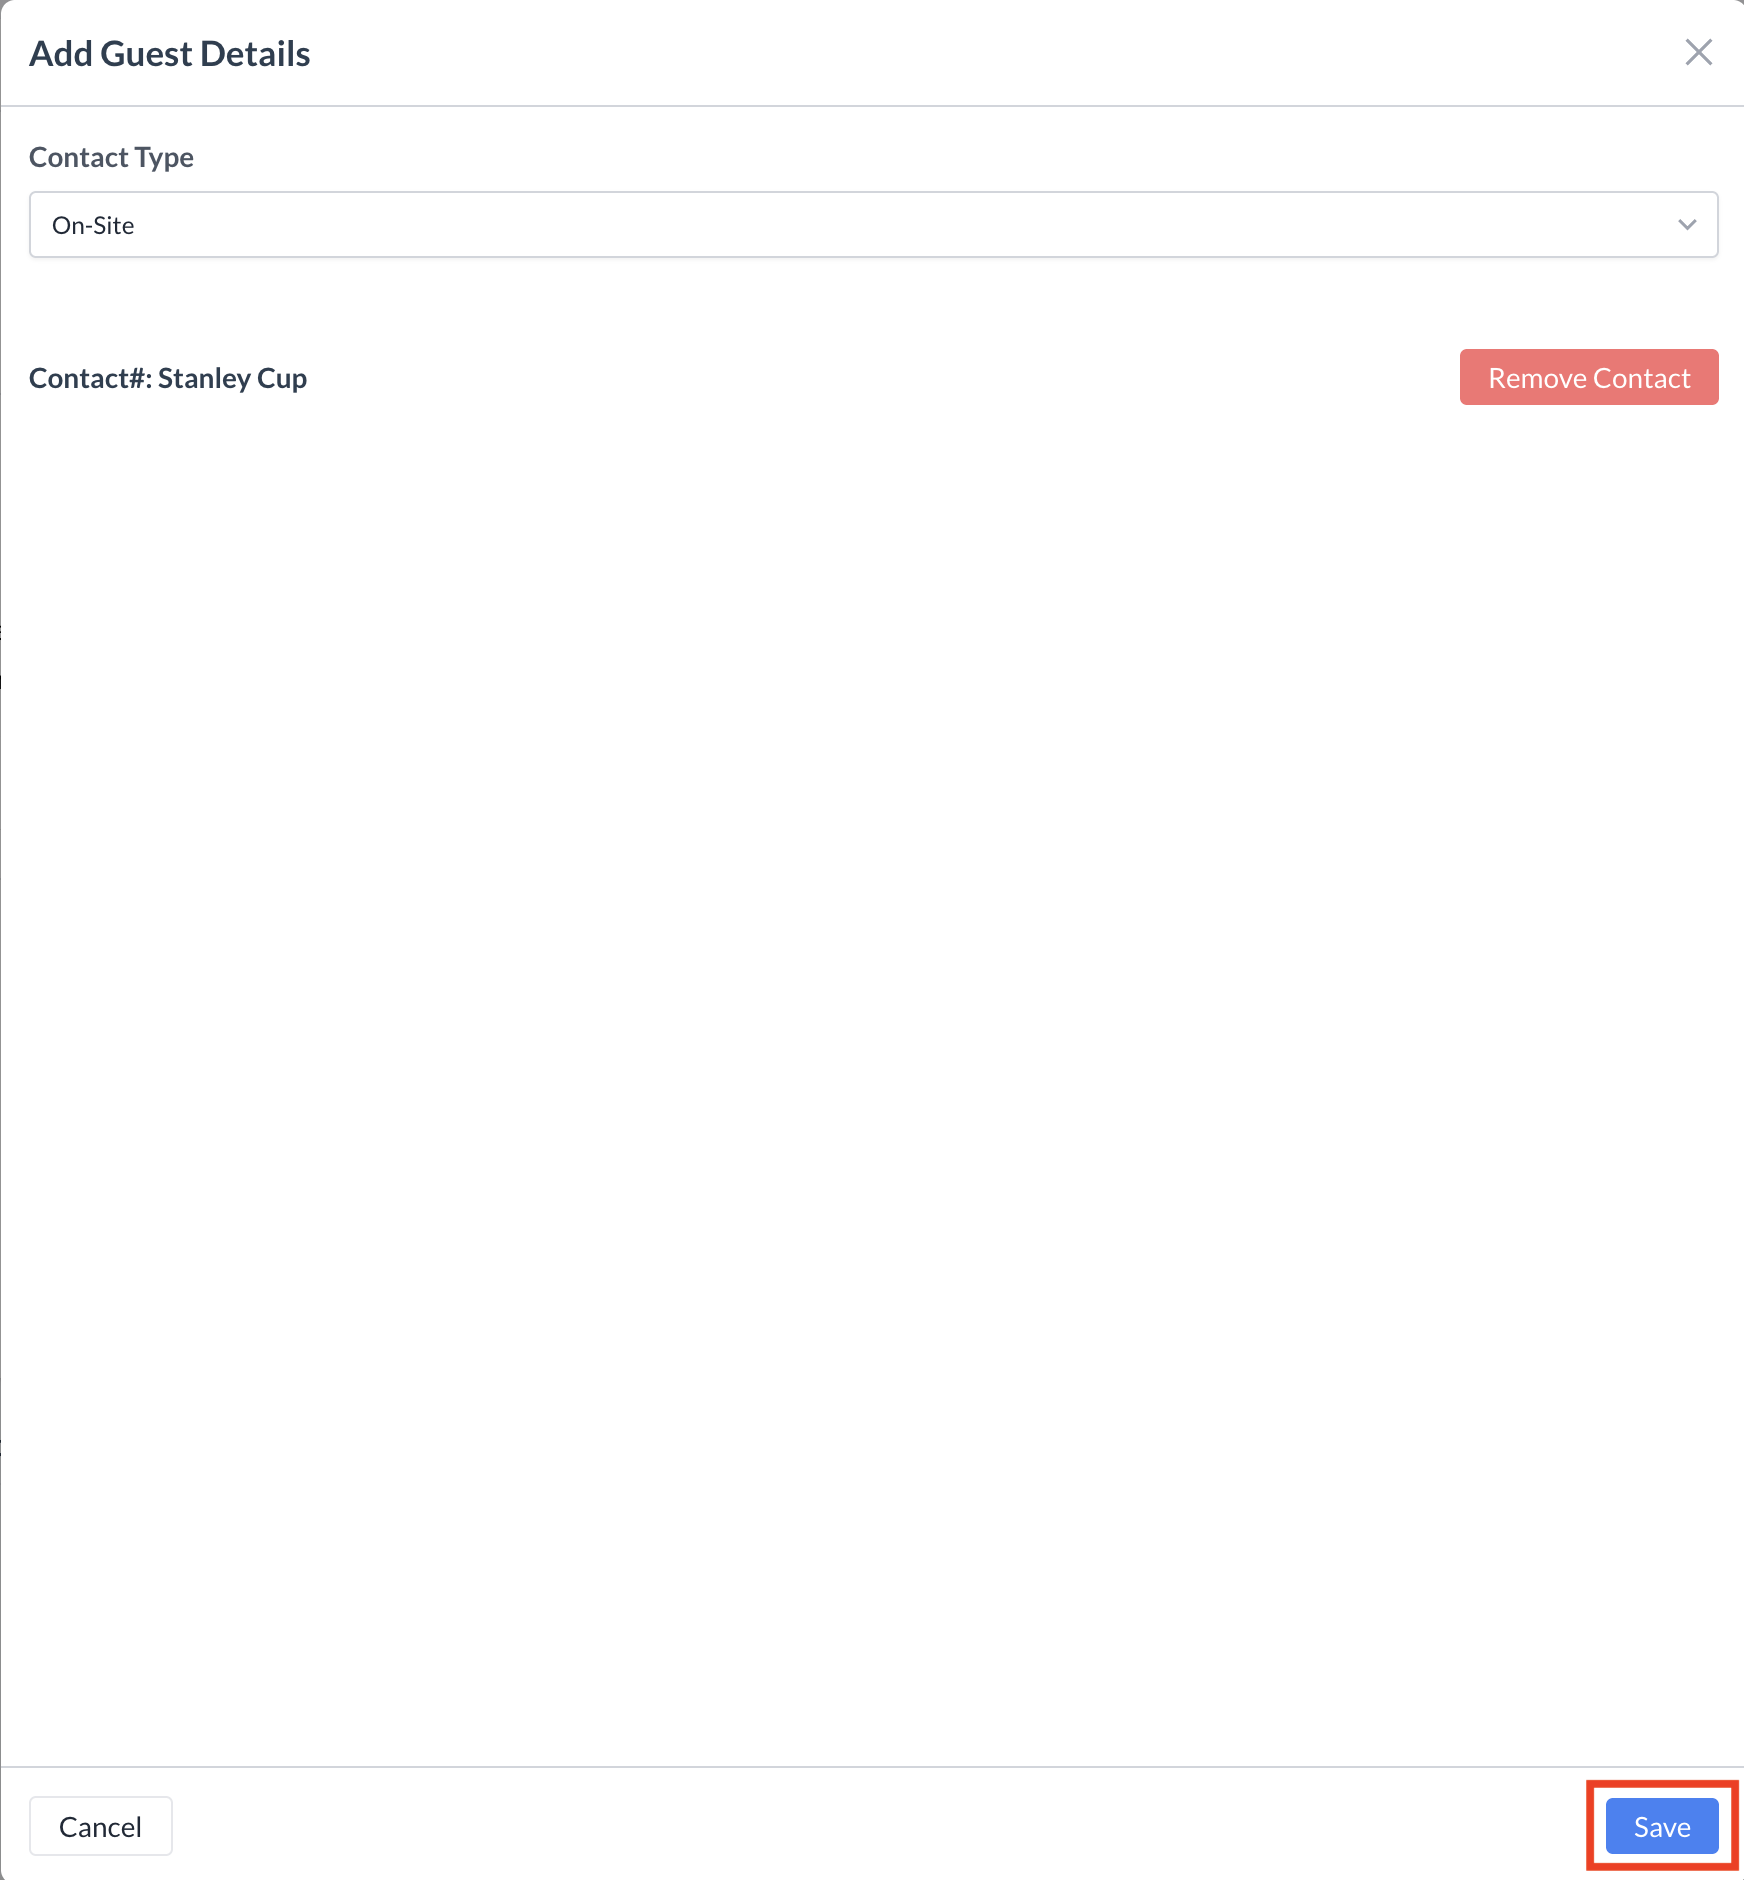
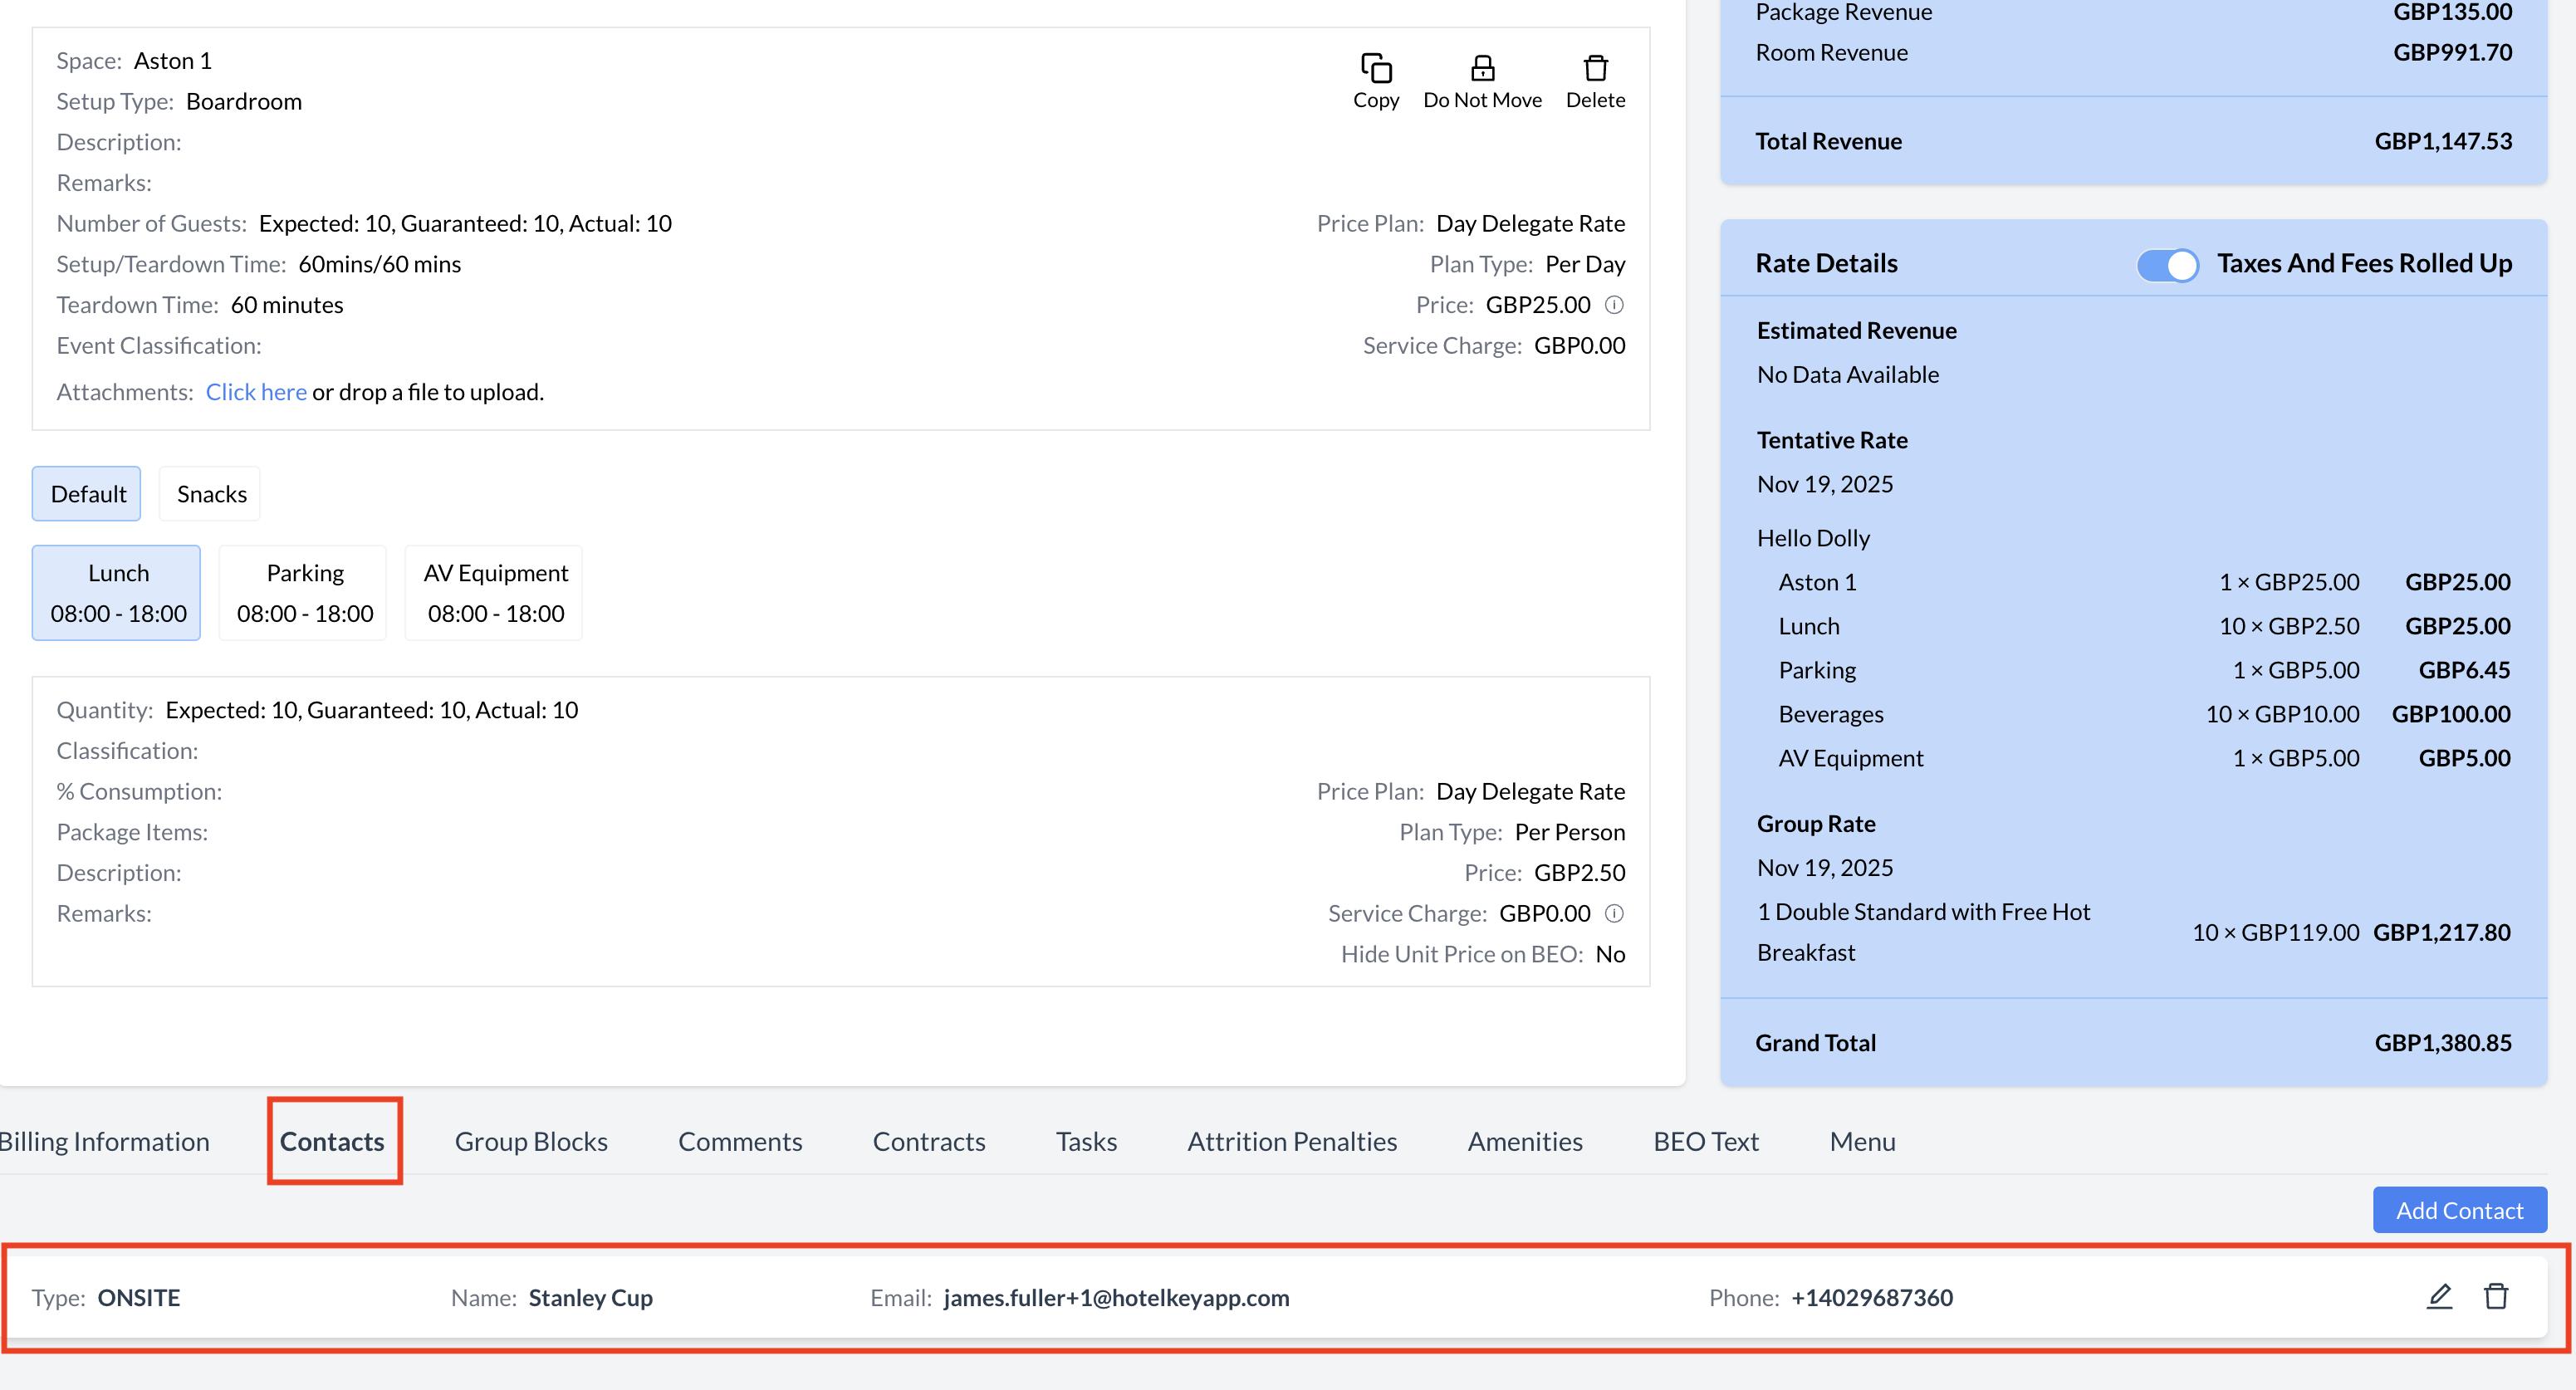
After saving the contact, you’ll return to the Event Record (Reservation) screen.
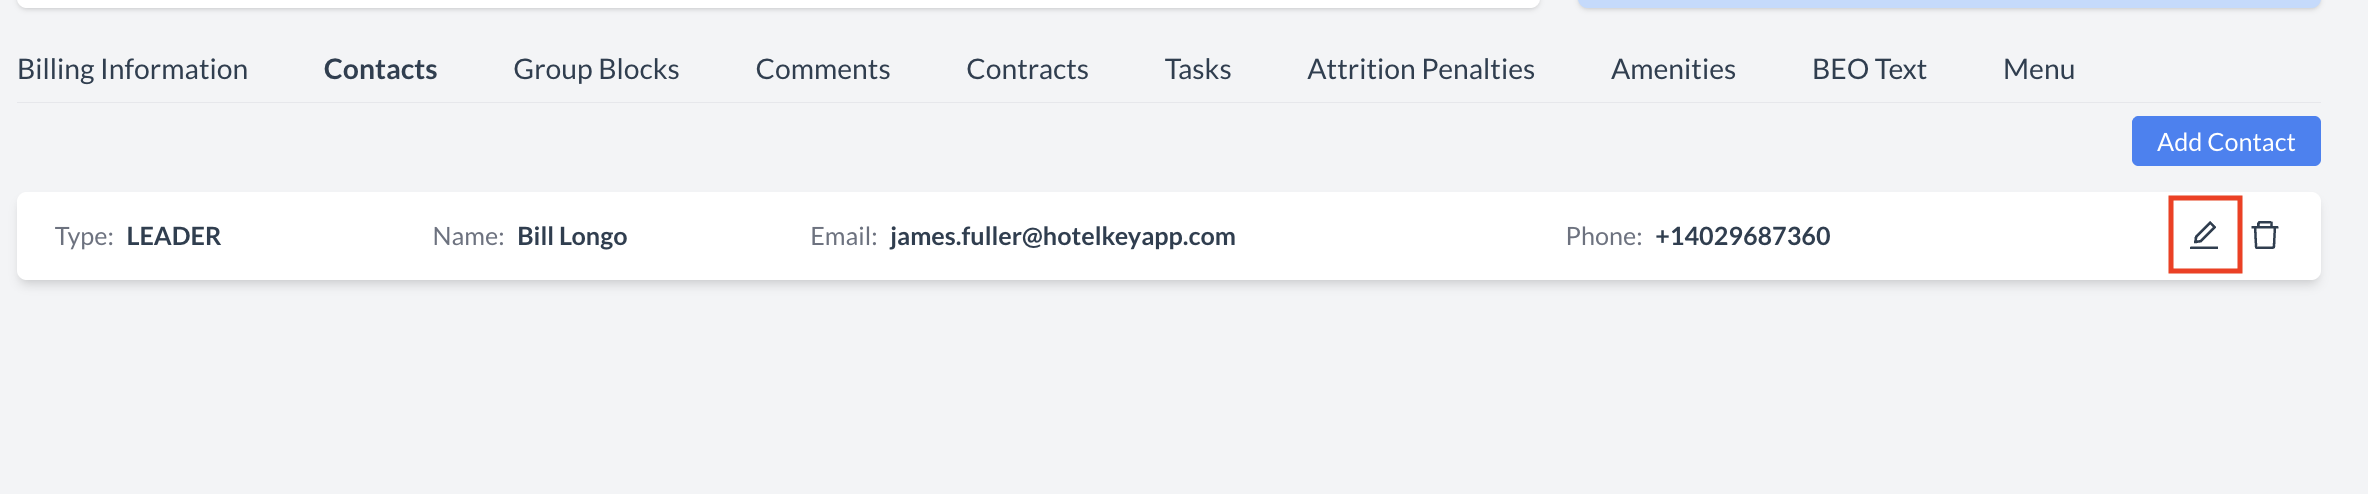
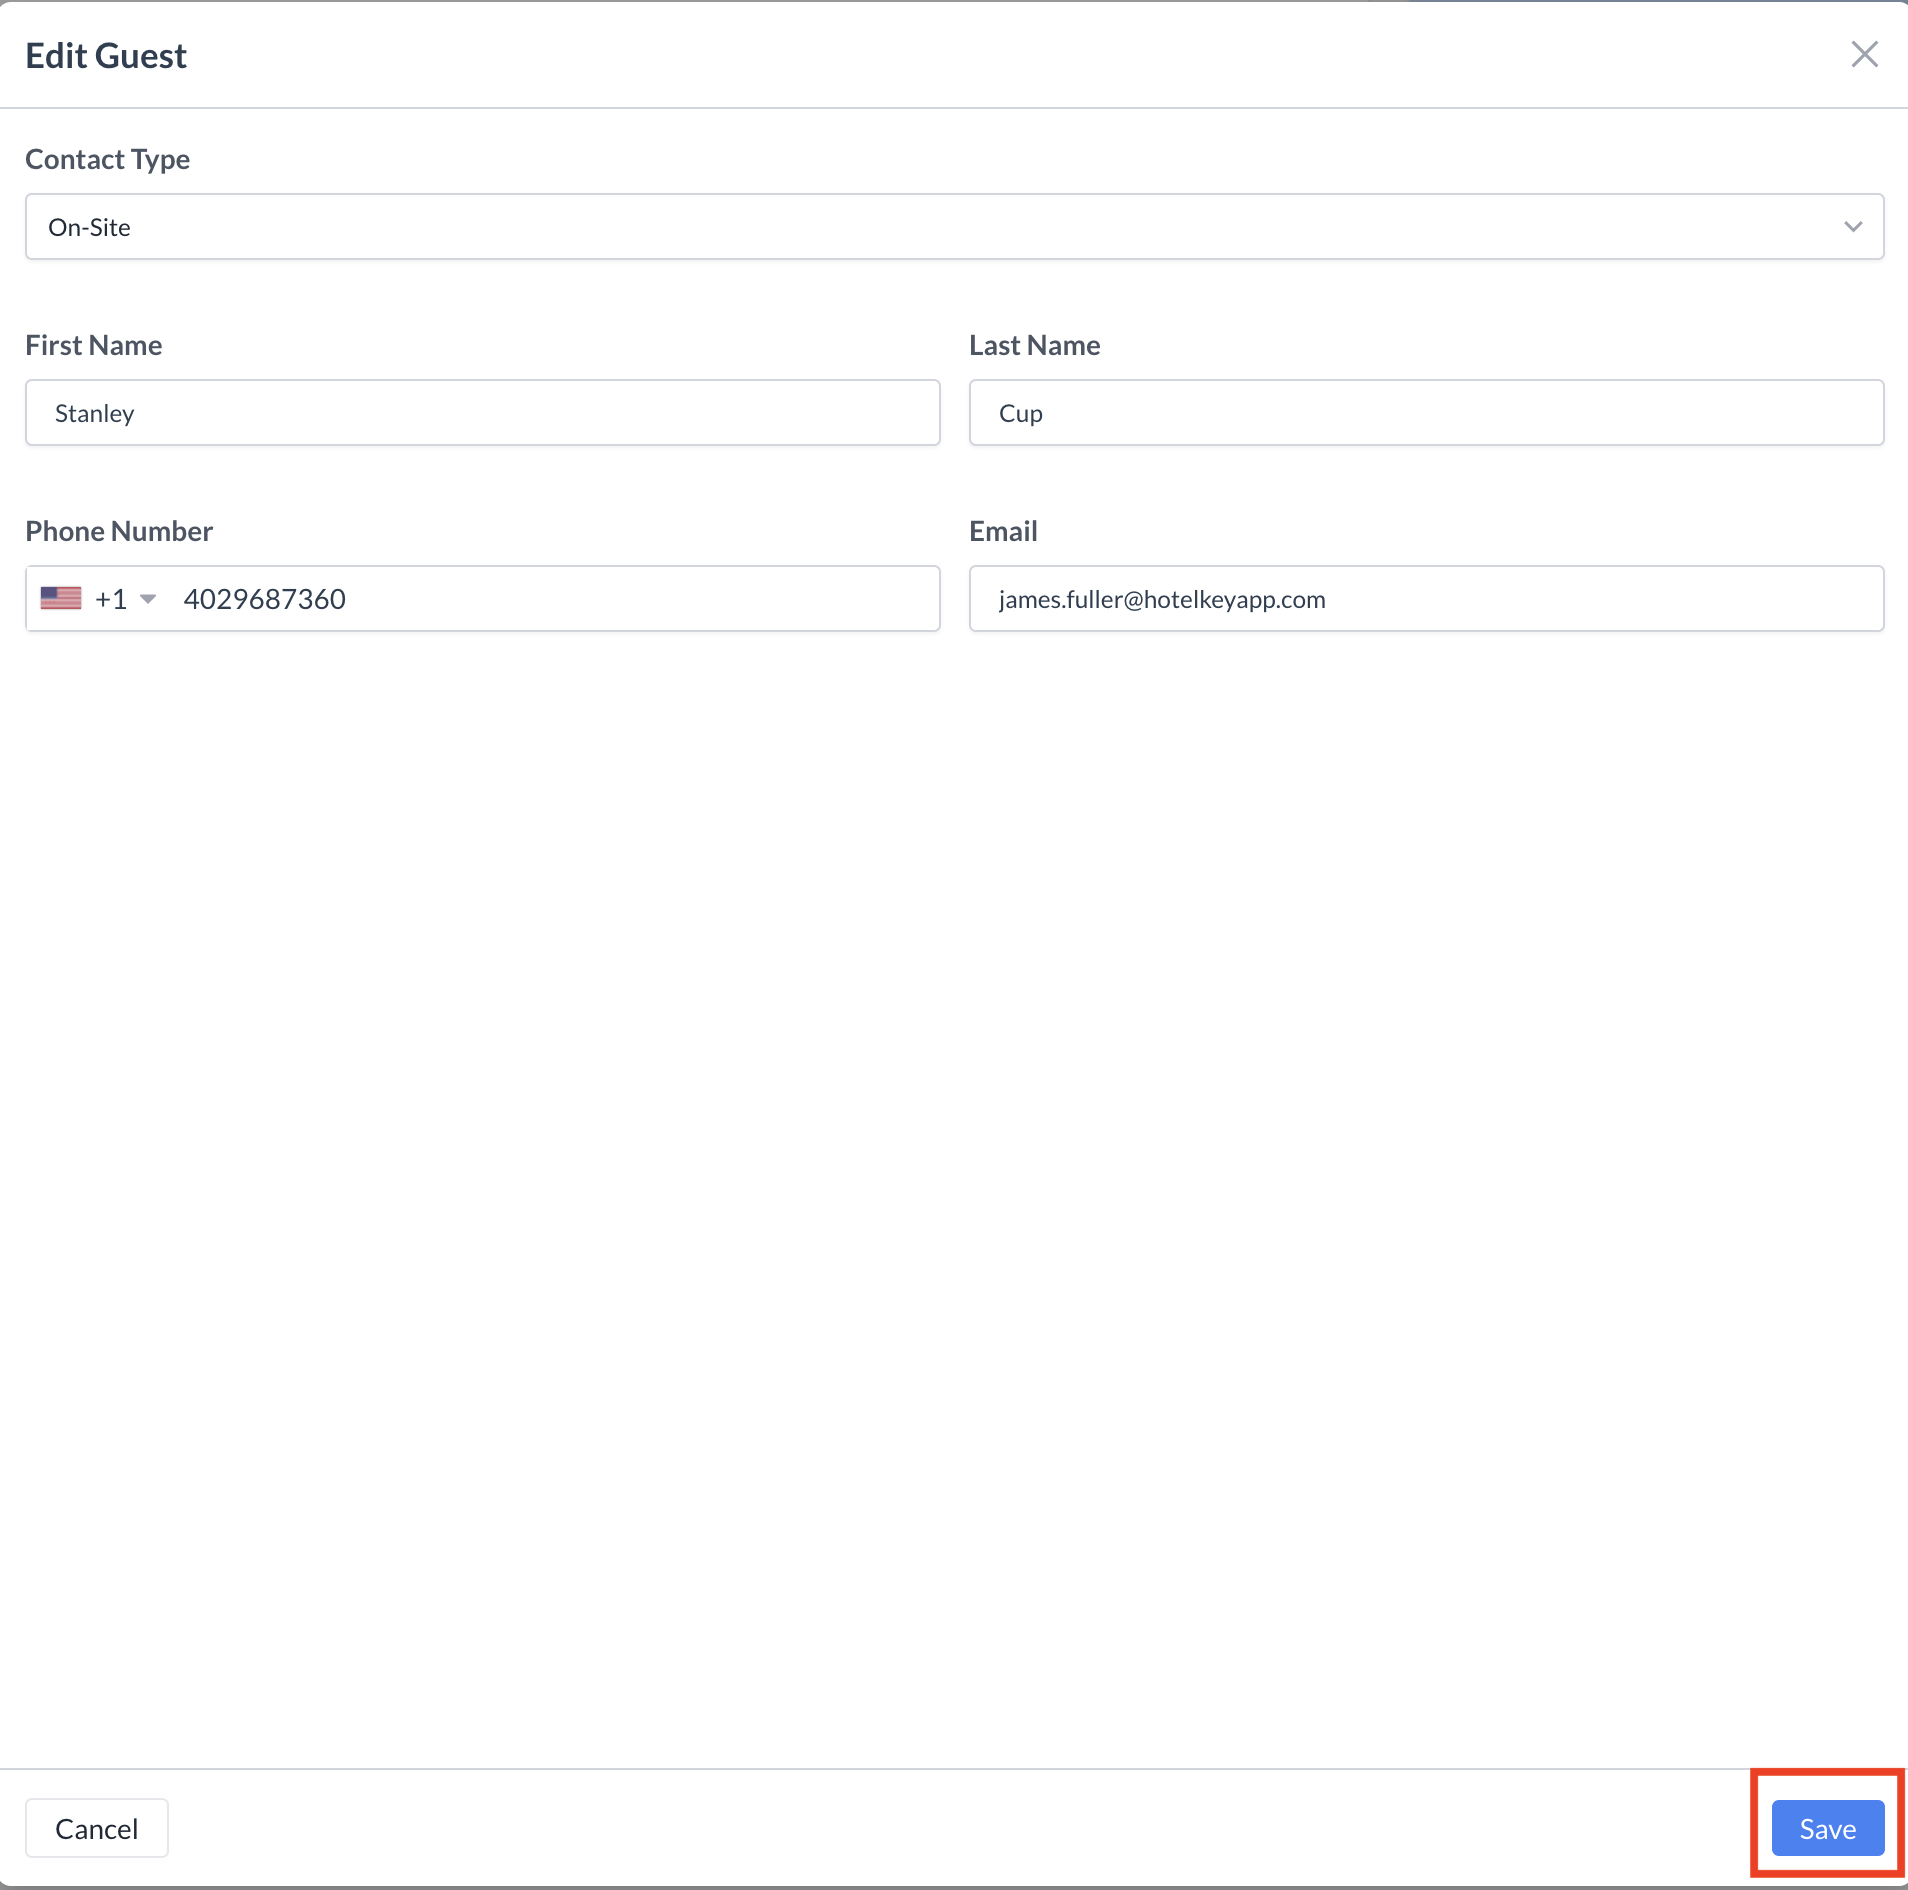
  1. Scroll to the bottom of the Event Record.

  2. Click on the “Contacts” section to expand it (if it's not already open).

  3. You will now see a list of all attached contacts associated with the event, including their assigned roles.

Tip: You can edit or remove a contact from this section if updates are needed.

Event Contacts Screen

Editing a Contact

From the Contacts section of the Event Record, you can view and manage all contacts associated with the event.

To edit a contact:

  1. Locate the contact you wish to update in the list.

  2. Click the “Edit” icon (pencil) next to the contact’s phone number.

  3. Make any necessary changes to:

    • Contact Type (e.g., Leader, Onsite, Signer)

    • Contact Details (Name, Phone Number, or Email Address)

  4. Click the blue "Save" button to apply your changes.

Tip: Keeping contact information accurate ensures timely communication with the right individuals before and during the event.

Add Contact Edit Button.png

Contact Screen - Edit Contact Button

Edit Contact Screen

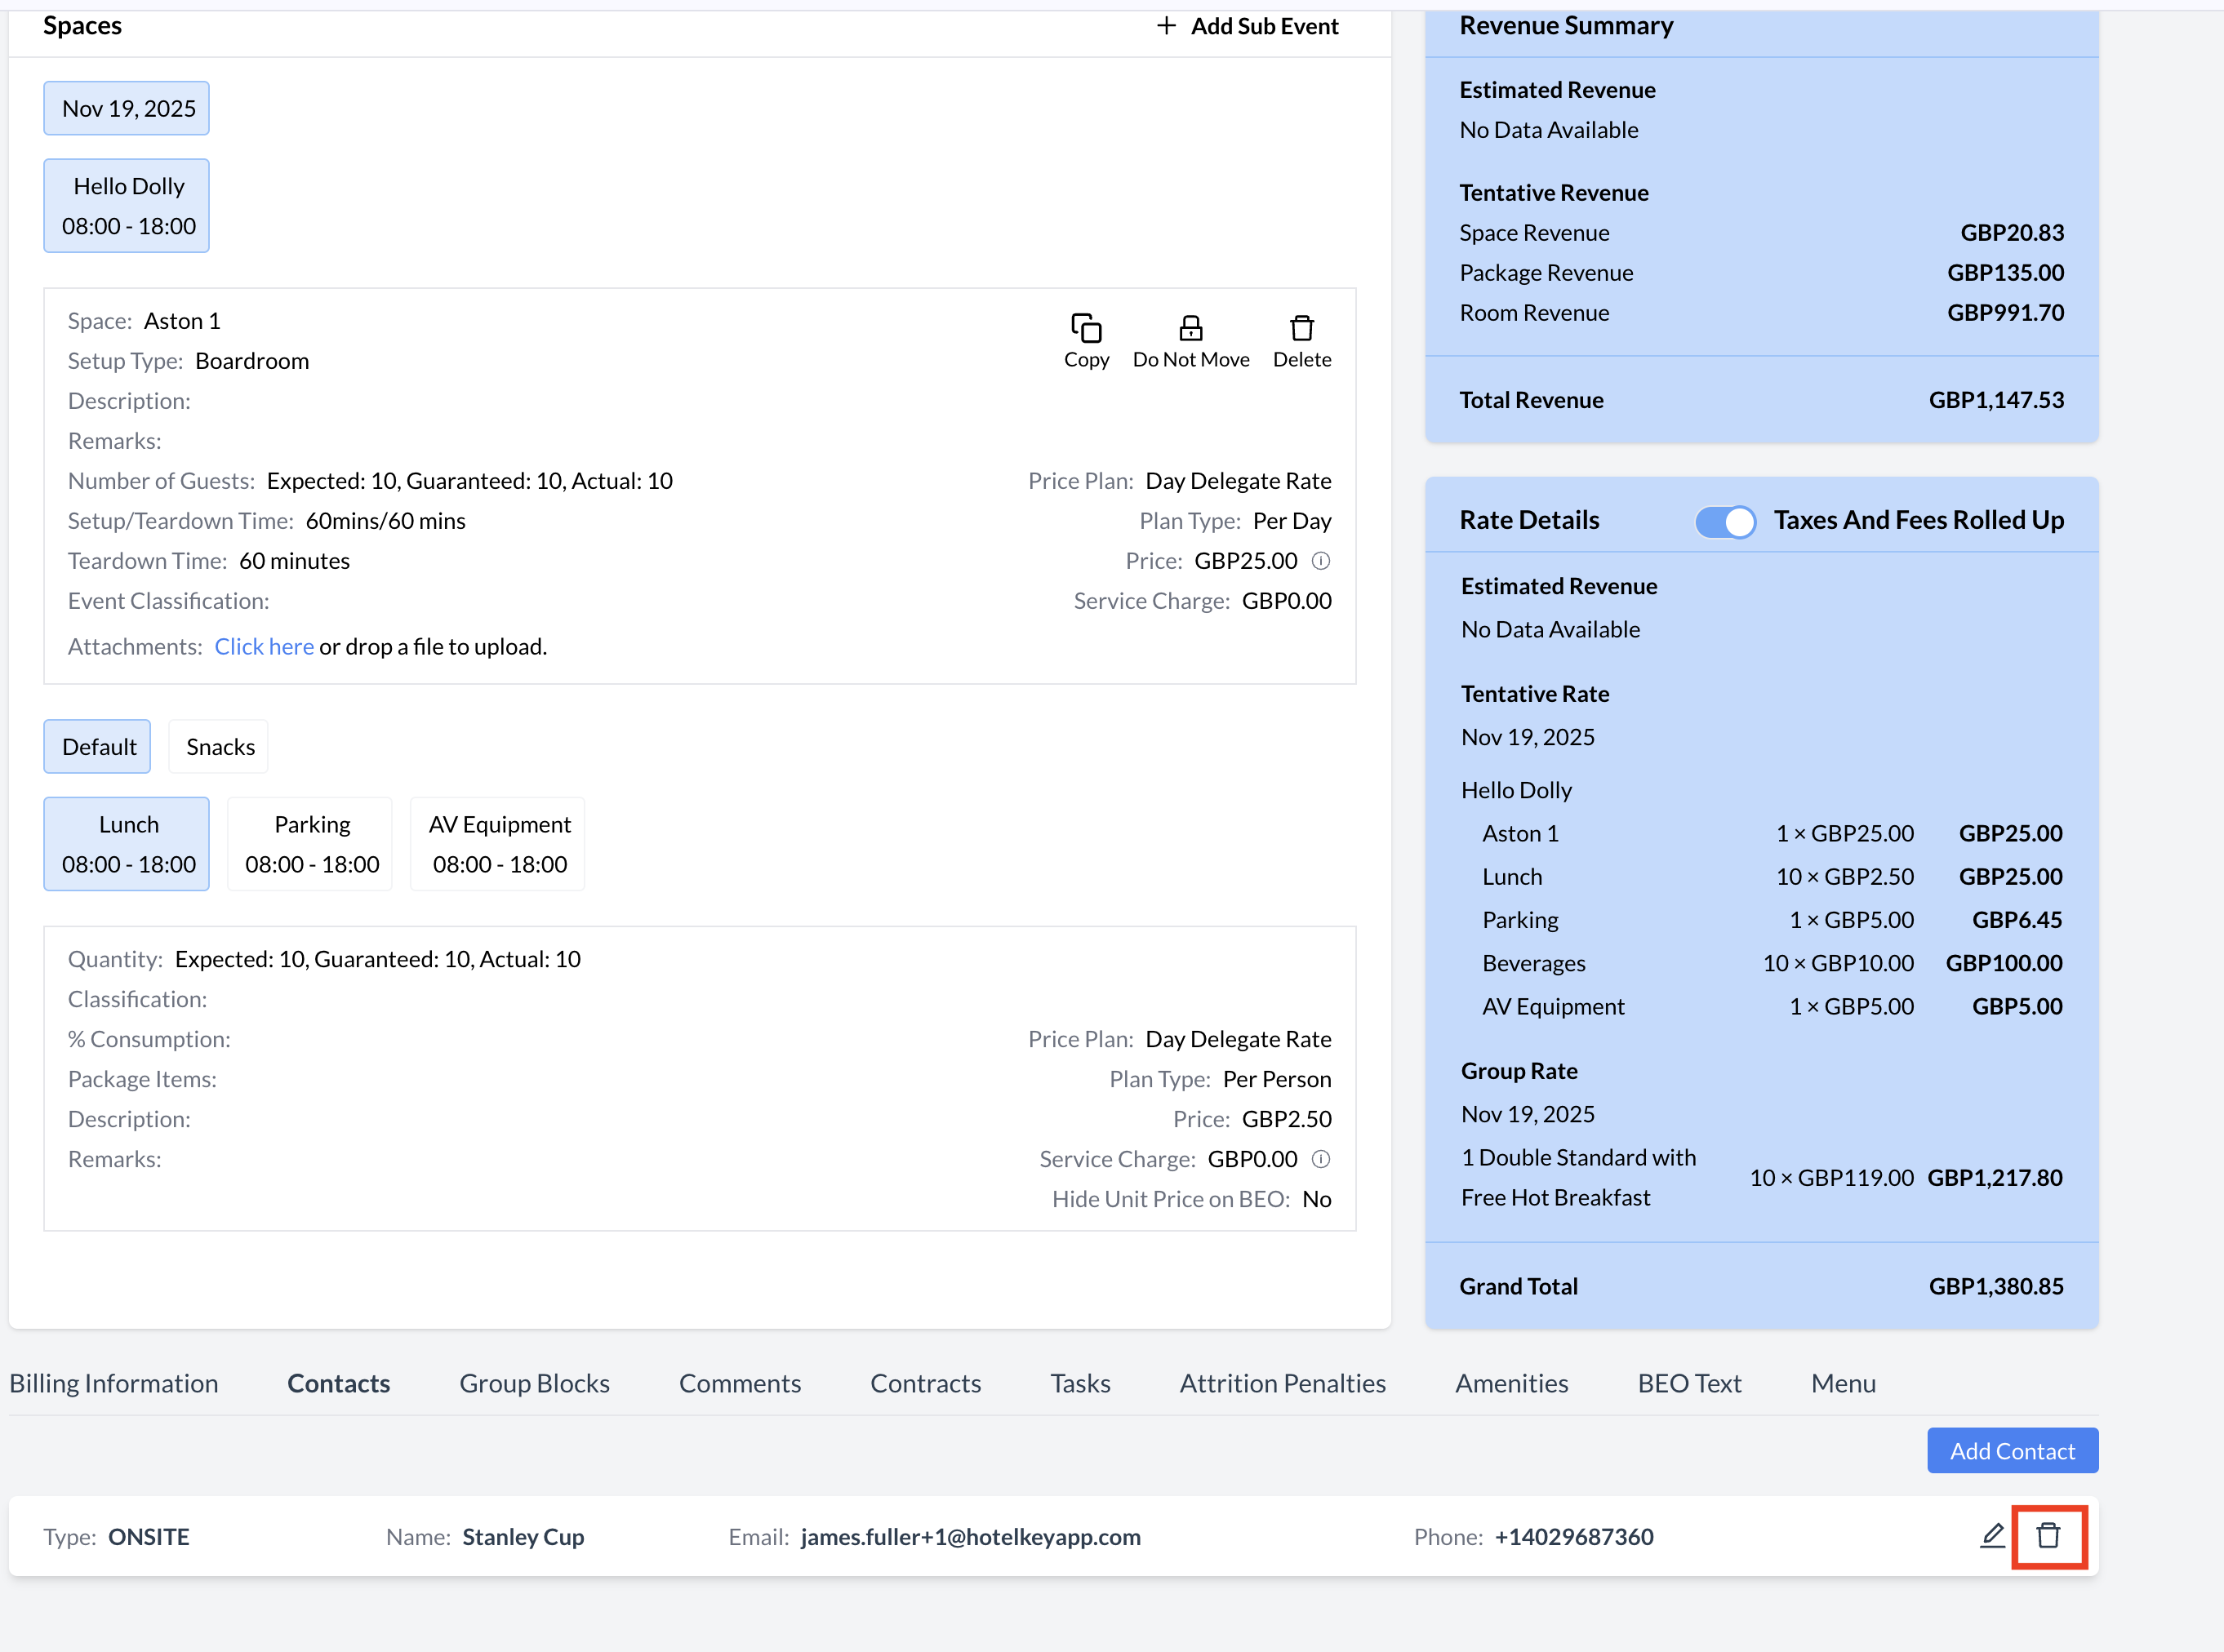
Deleting a Contact from an Event

The Contacts section of the Event Record allows you to view, manage, and remove contacts associated with the event.

To delete a contact:

  1. Scroll to the Contacts section of the Event Record.

  2. Locate the contact you wish to remove.

  3. Click the trash can icon next to the contact’s phone number.

  4. A Remove Guest confirmation screen will appear.

  5. Click the red "Delete" button to confirm the removal.

The contact will be immediately removed from the event.

Tip: Deleting a contact only removes them from this event—it does not delete them from the system entirely.

Delete an Event Contact

Remove Guest Screen

JavaScript errors detected

Please note, these errors can depend on your browser setup.

If this problem persists, please contact our support.