
📆 Revision Date:
Follow the steps below to check a guest in for their stay. Steps are included for reservations with the room number pre-assigned and reservations with no room number assigned.
|
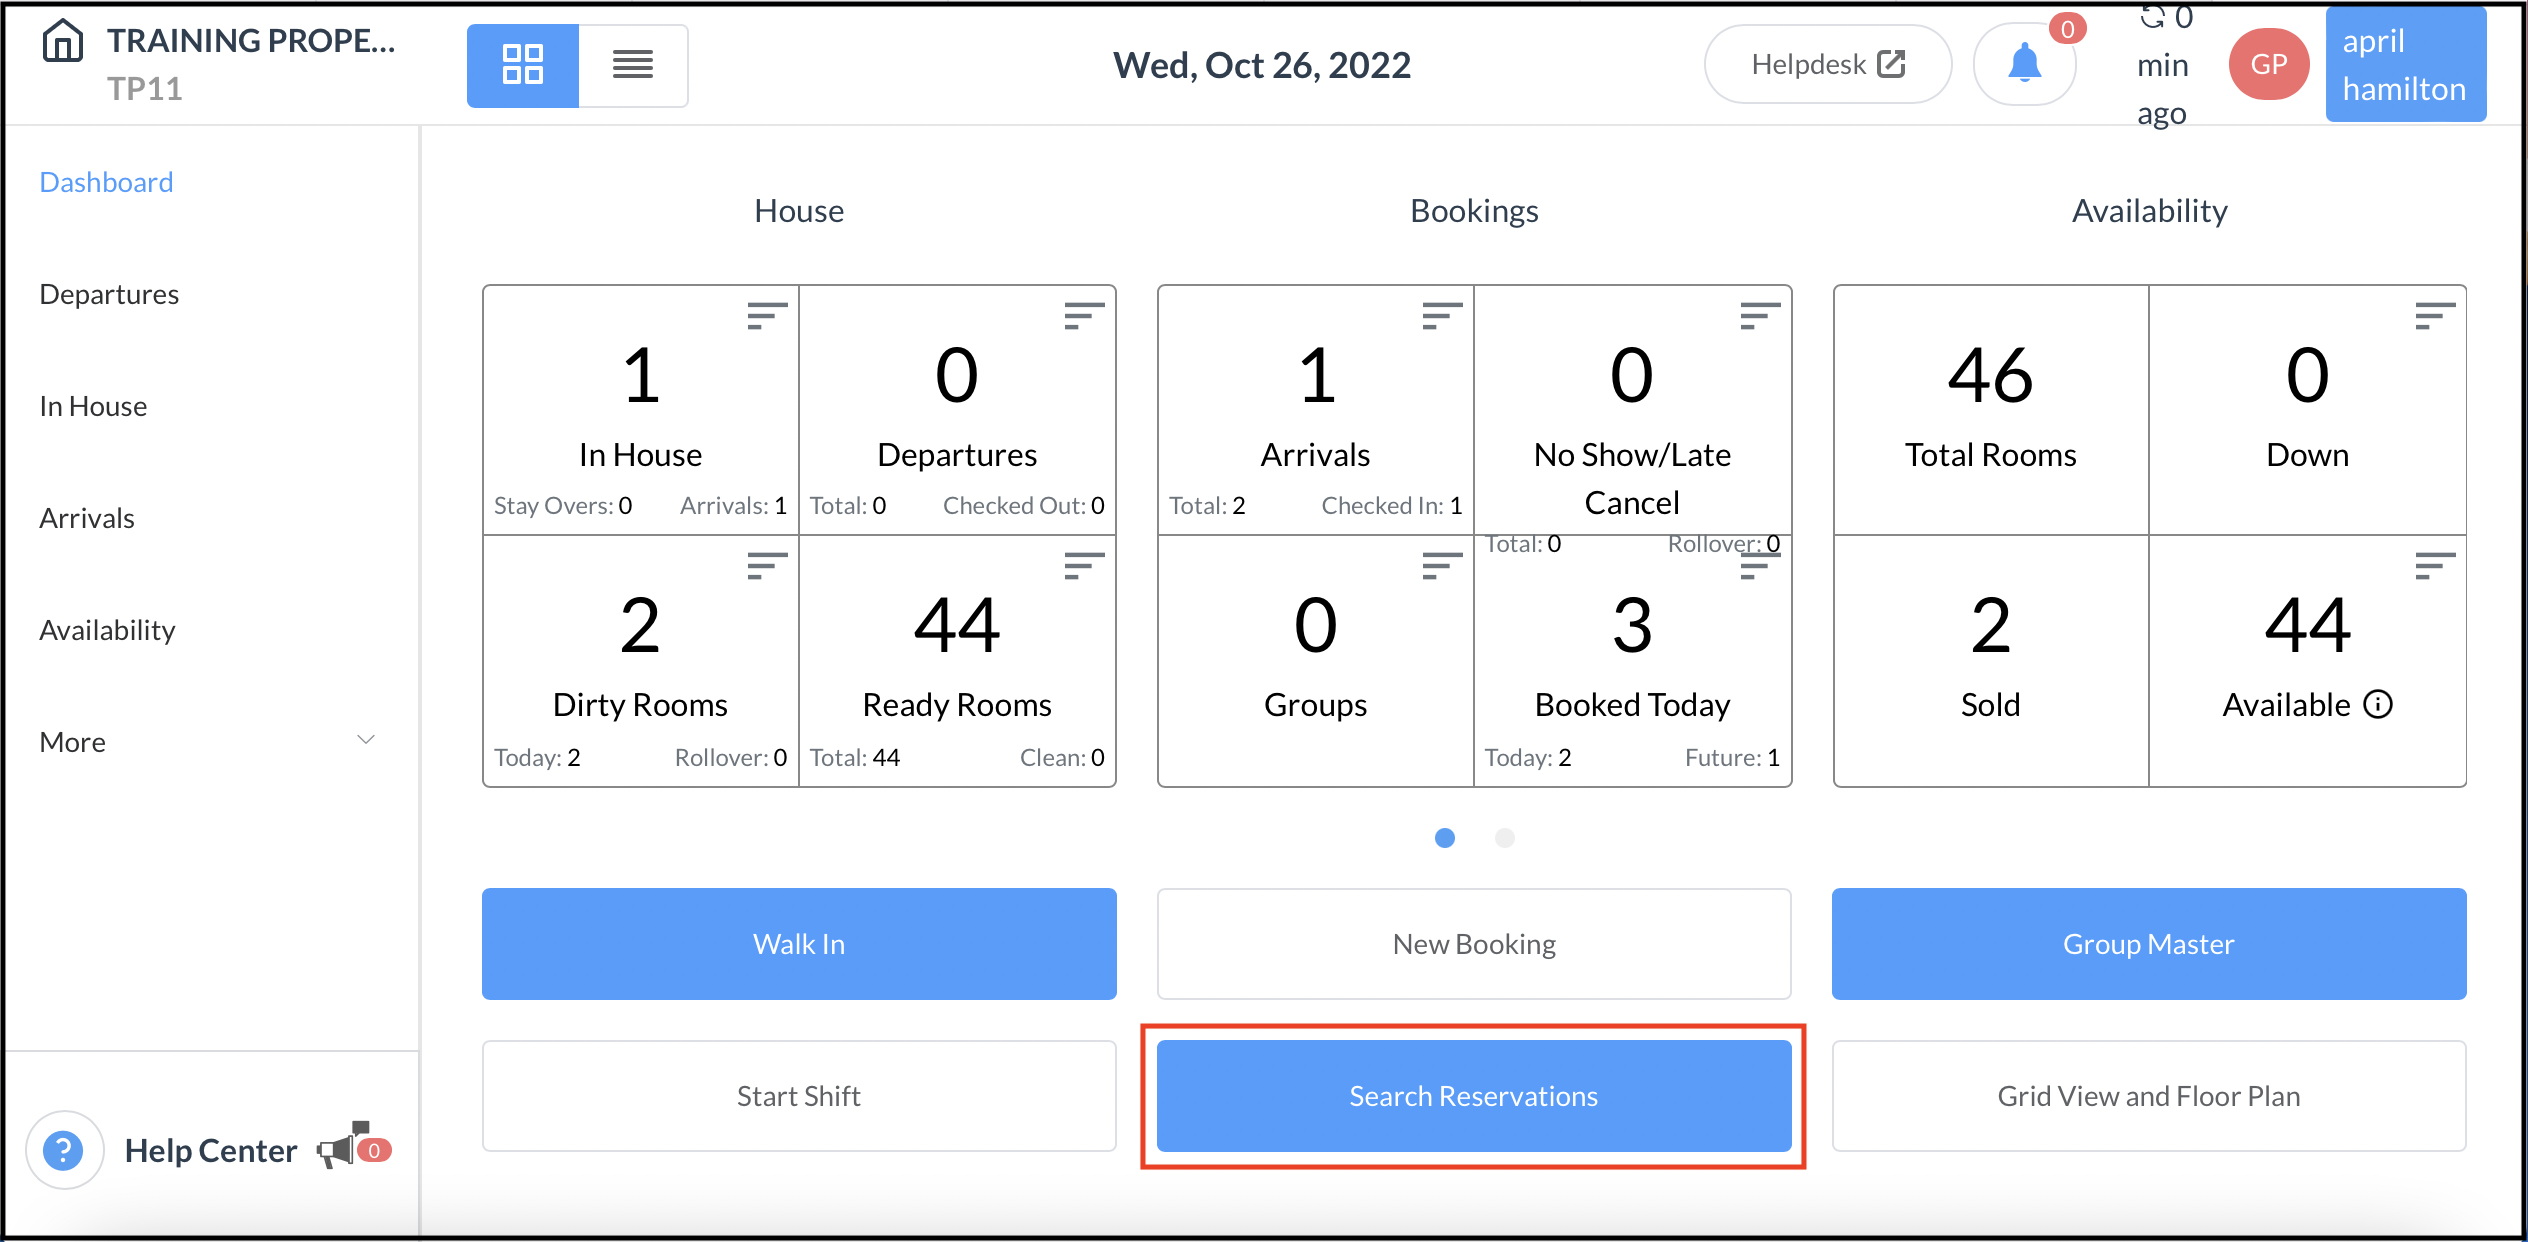
Select Search Reservations on the Dashboard.
|
|
|
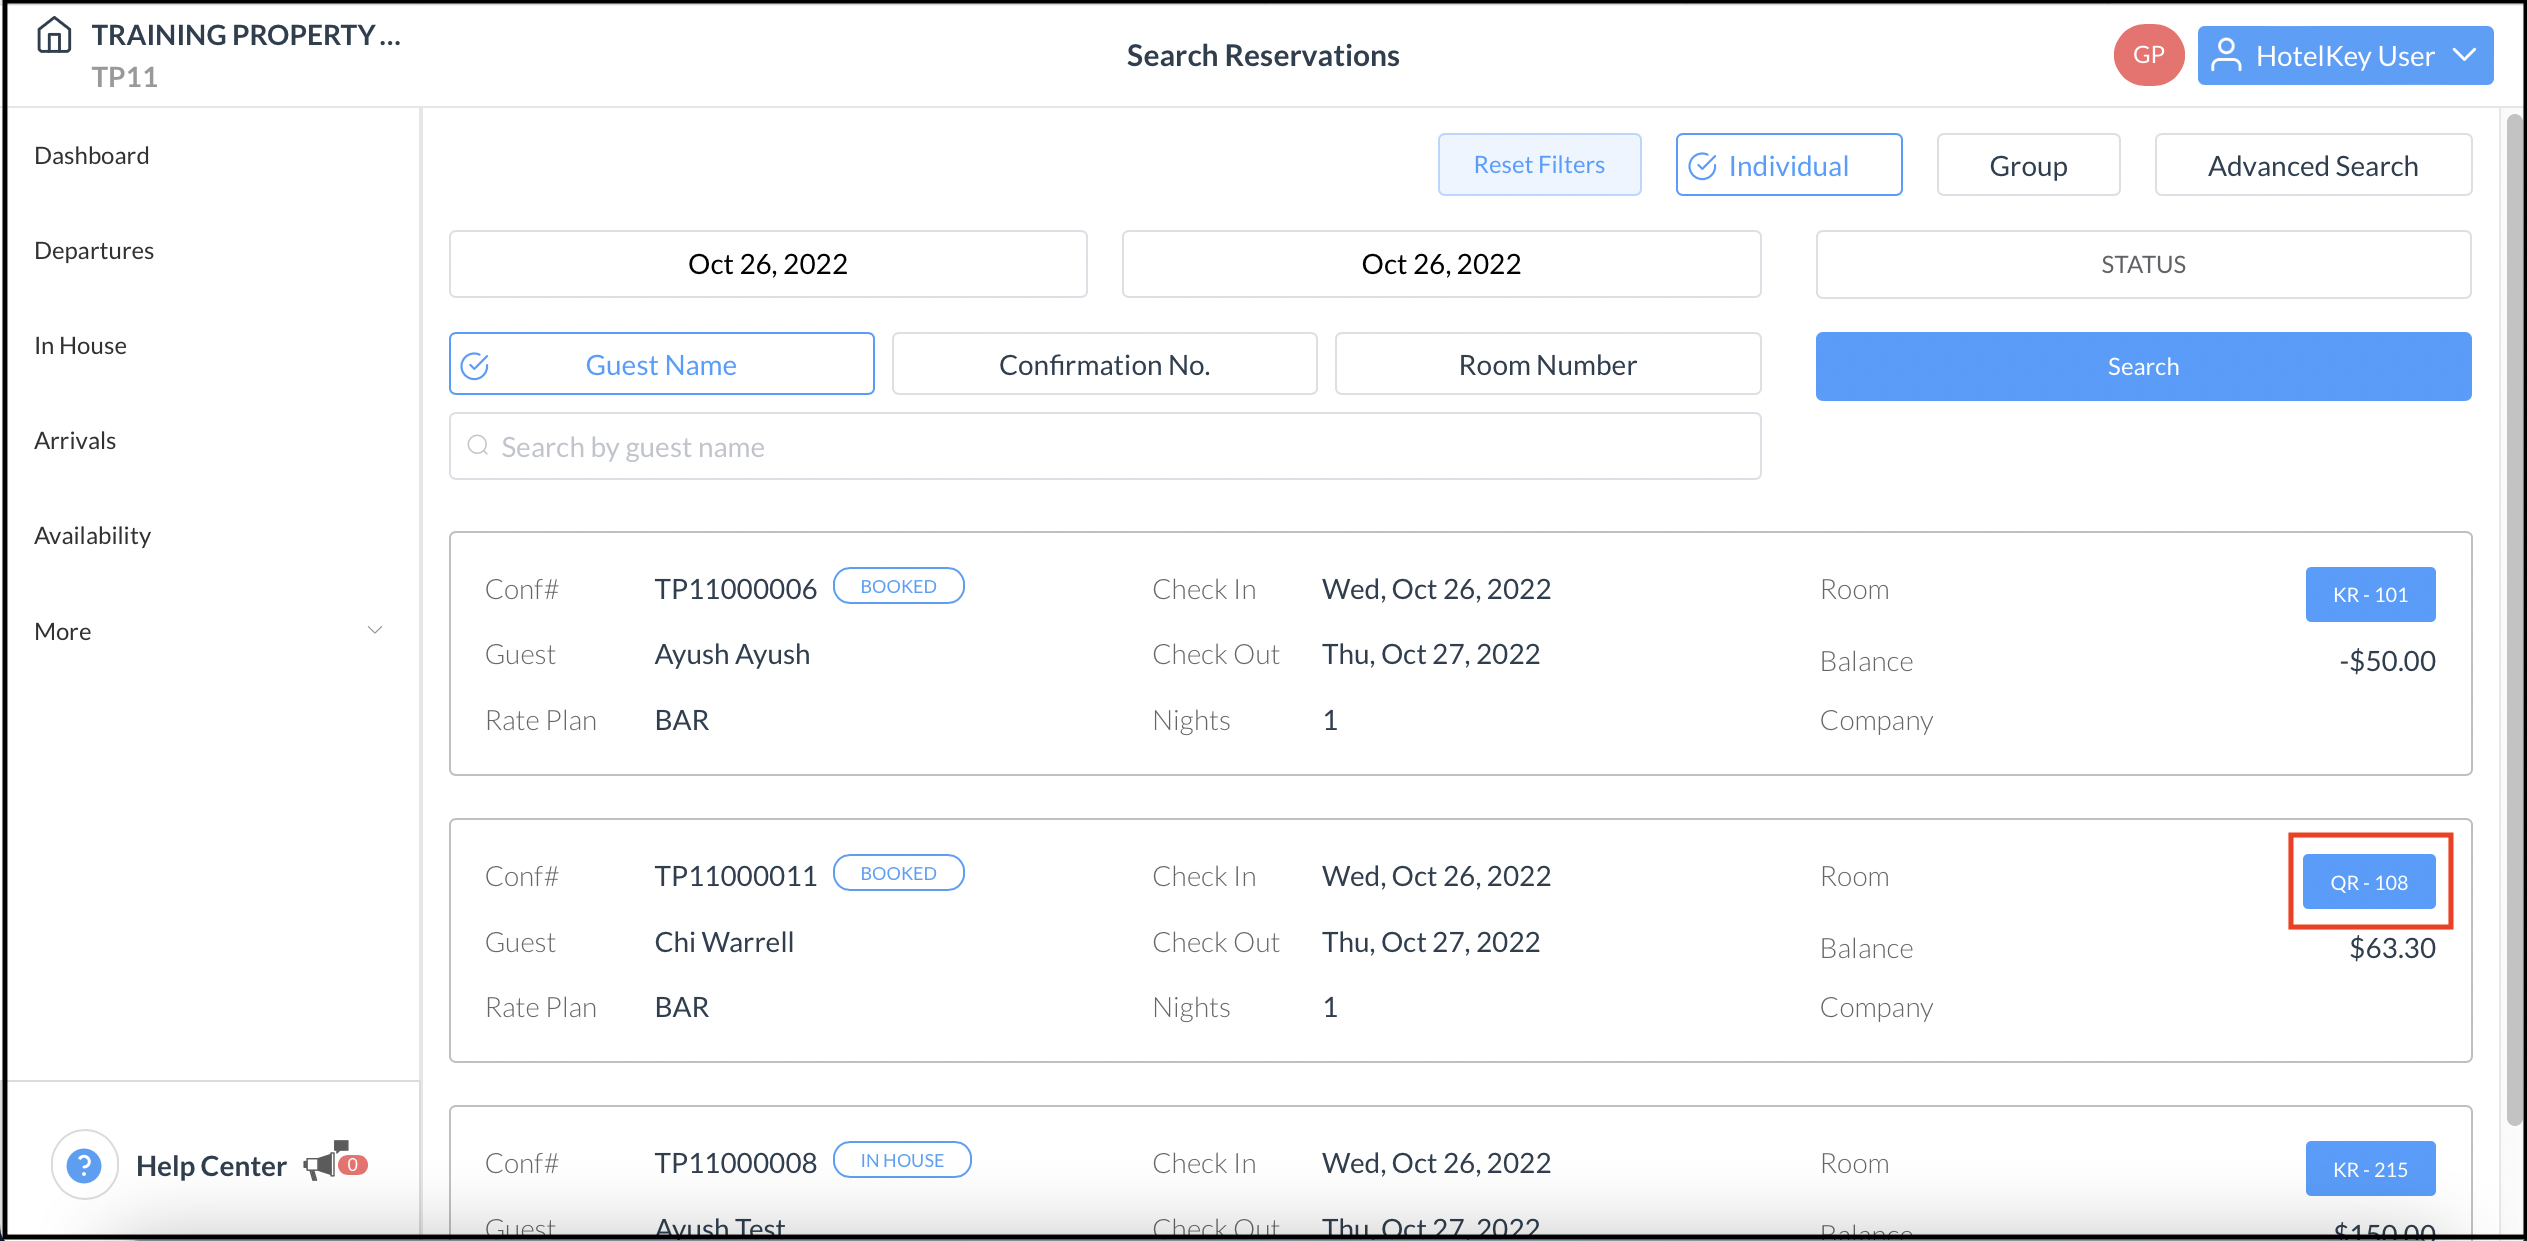
Locate the applicable reservation in the search page and select its blue booking details link. |
|
|
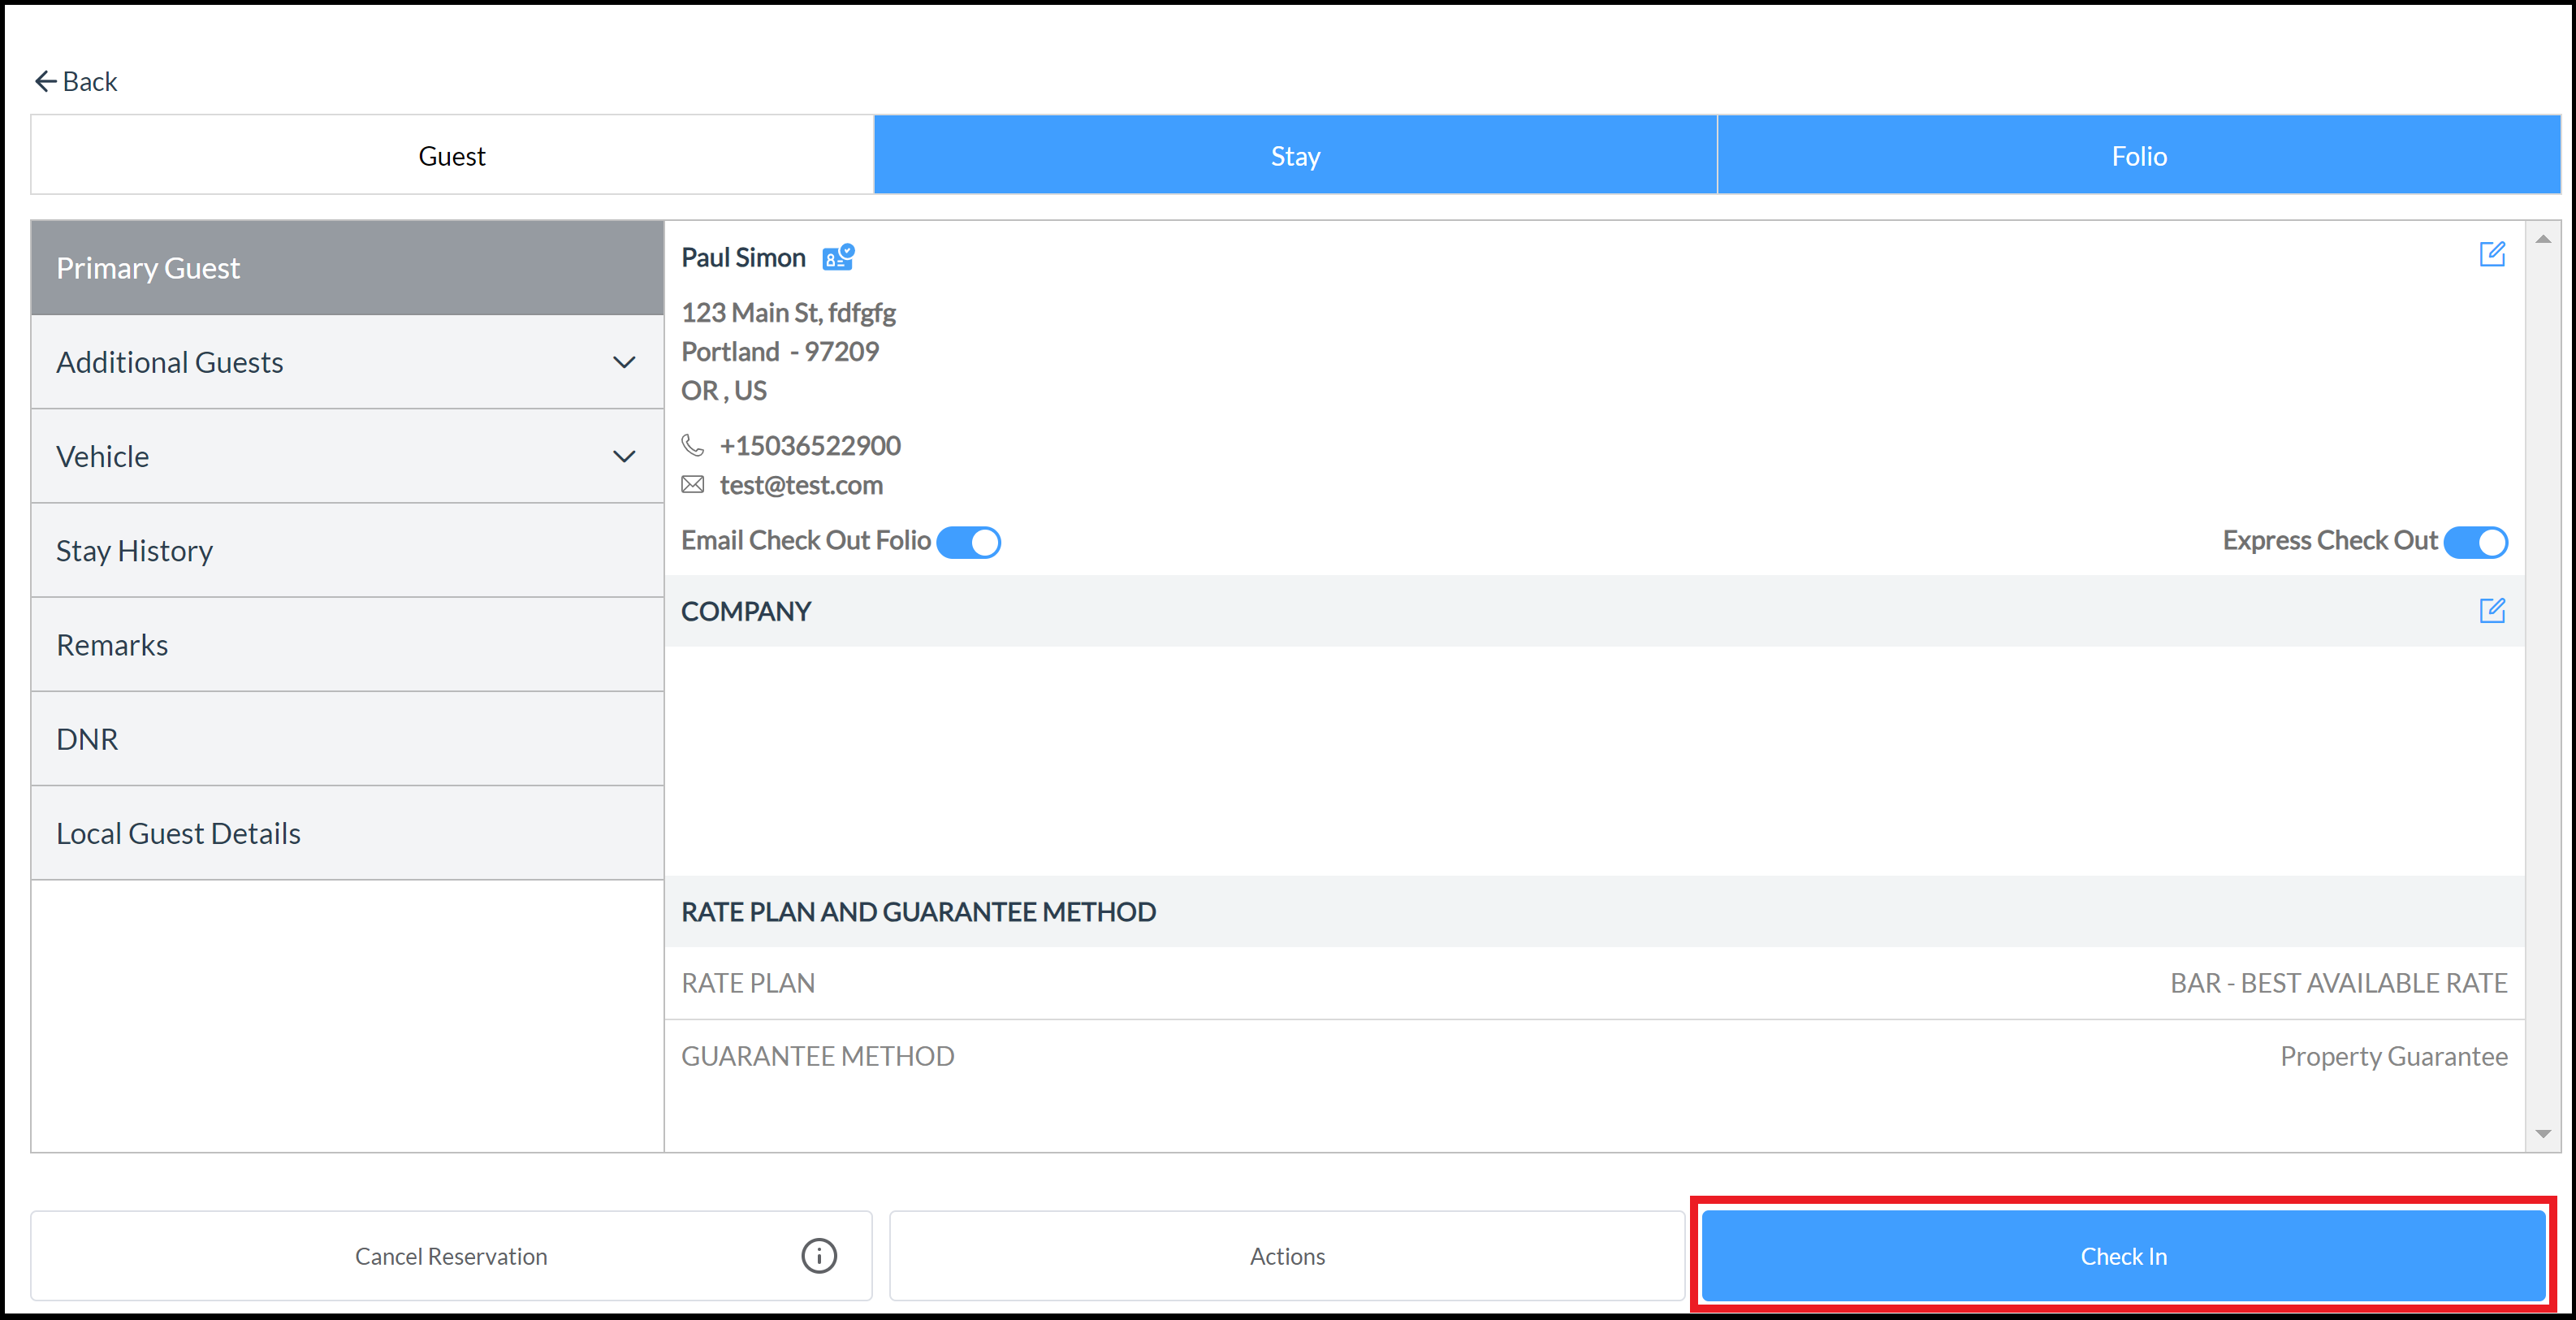
The booking details page loads with the Guest tab selected by default. If a room number is already assigned for the reservation, as shown in the example at right, Select Check In and skip ahead to continue with check in steps. Otherwise, go to the next step to assign a room.
|
|
|
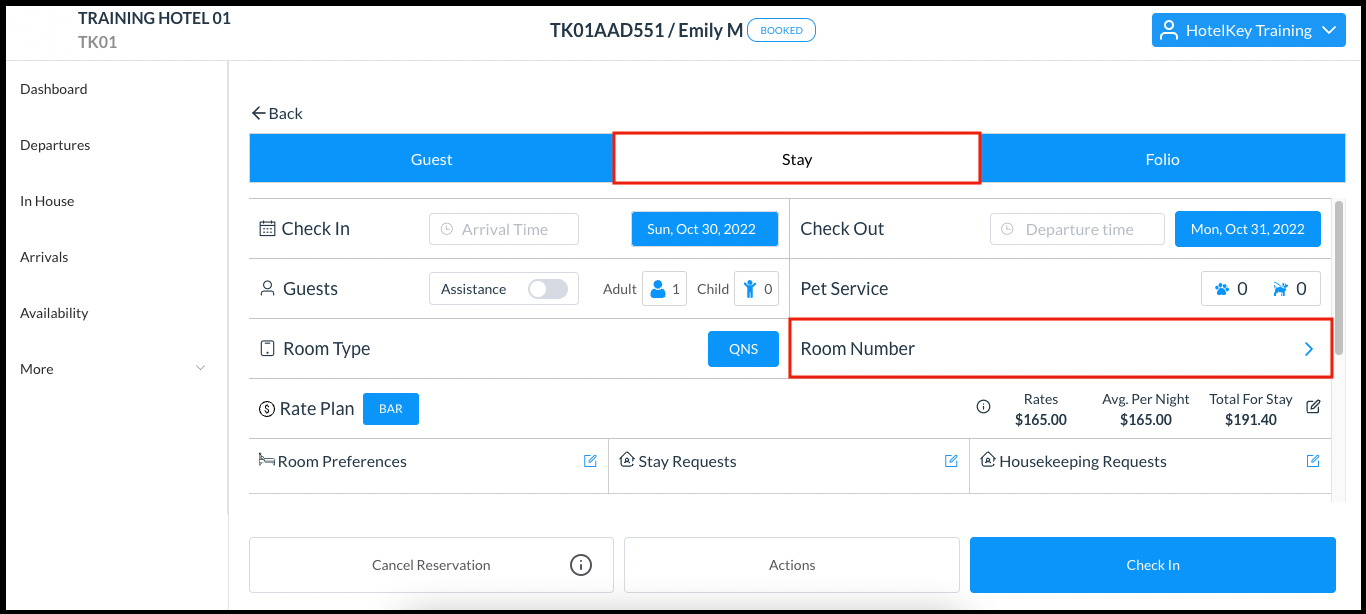
Assign the room number - Select the Stay tab and Select Room Number |
|
|
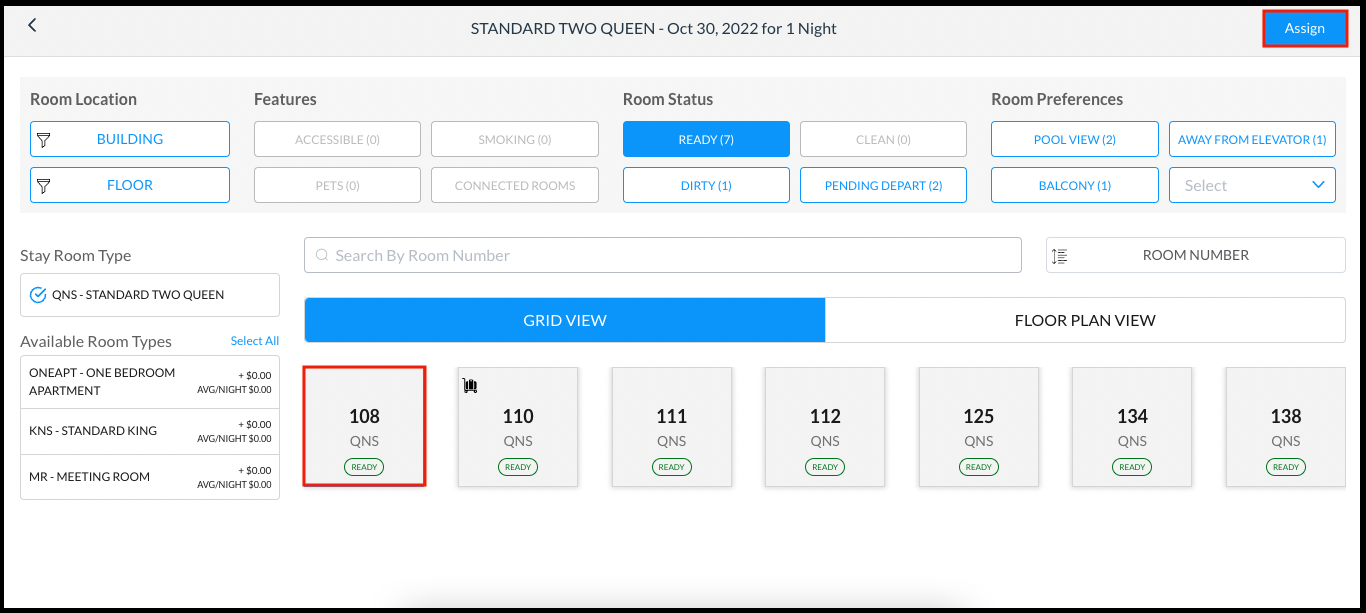
Select the applicable room number from the list of rooms, then select Assign. |
|
|
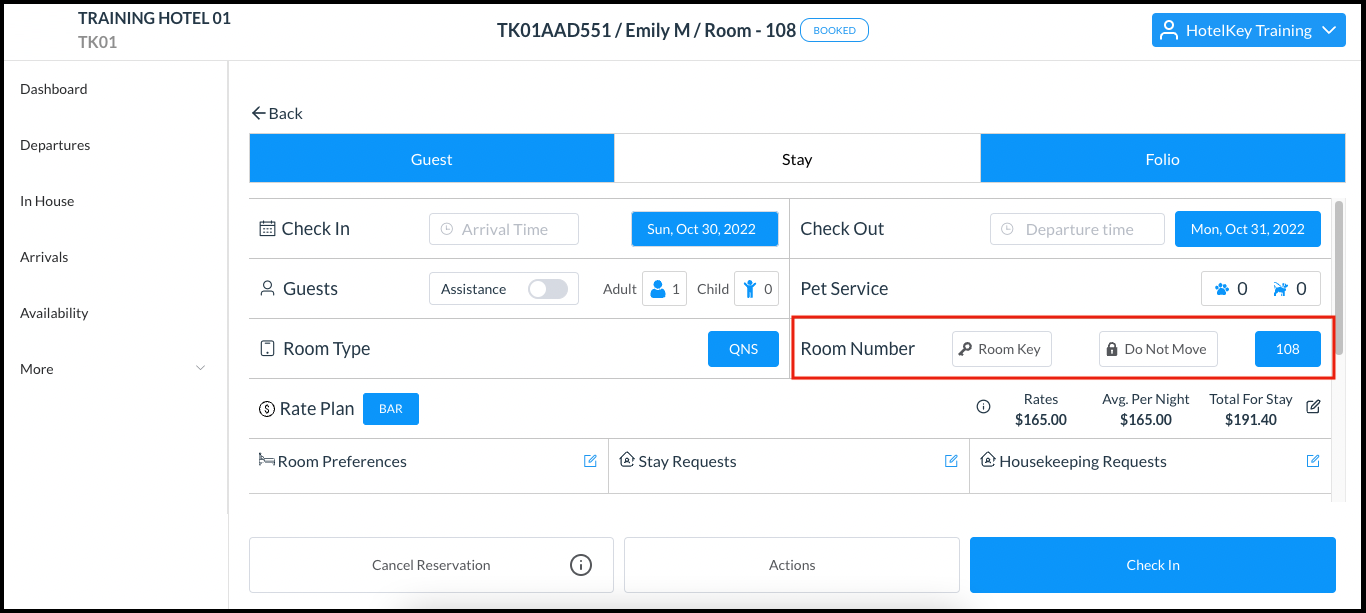
The room number is assigned on the reservation. Select Check In.
|
|
|
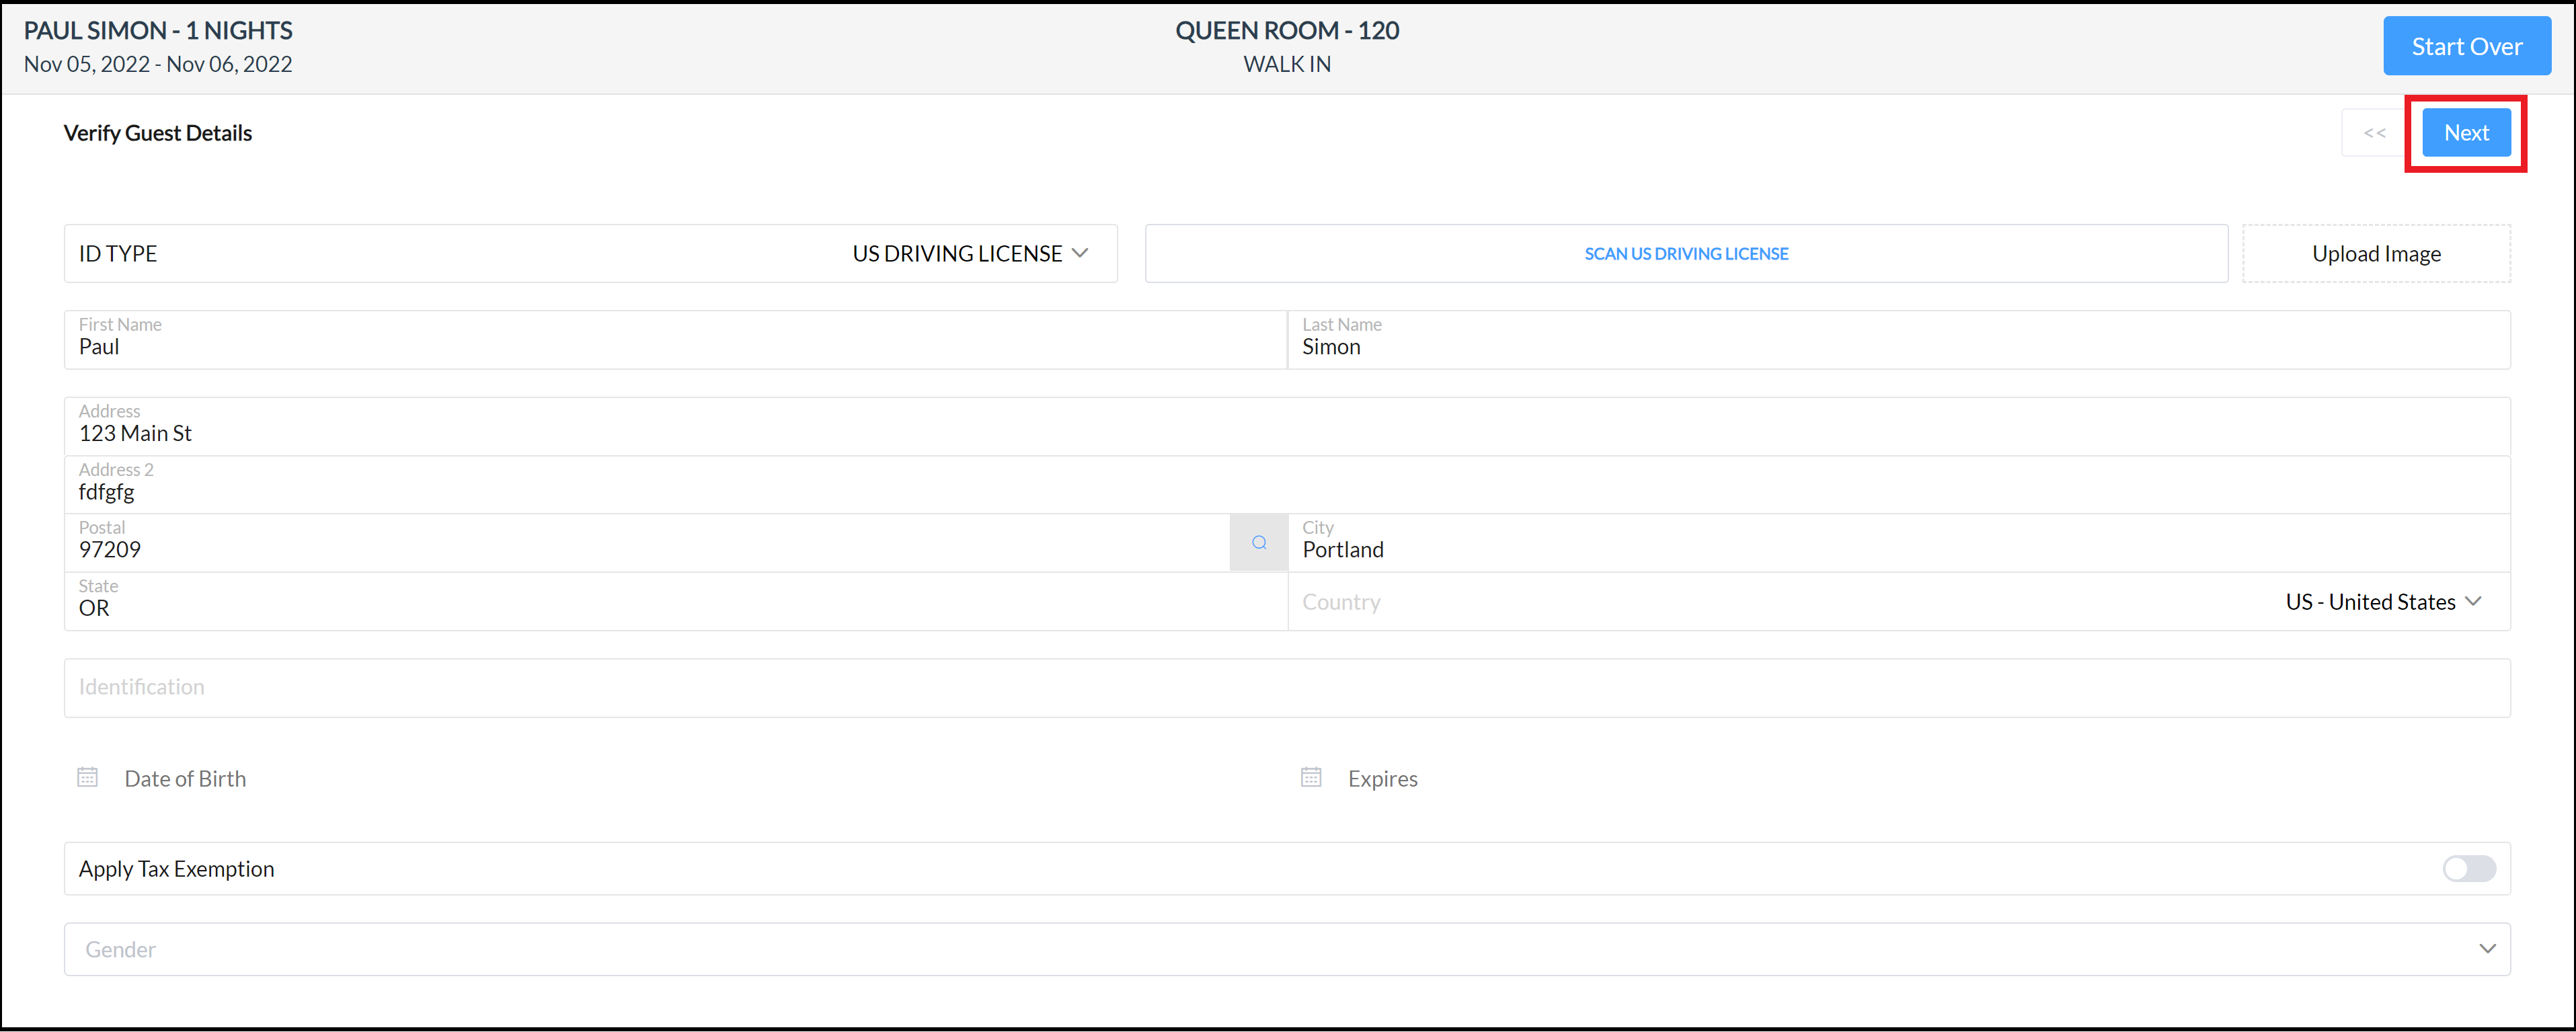
The Verify Guest Details panel loads. Confirm guest details and update as necessary. When changes are complete select Next. |
|
|
The Contact Info panel loads. Confirm contact details and update as necessary. When changes are complete select Next. |

|
|
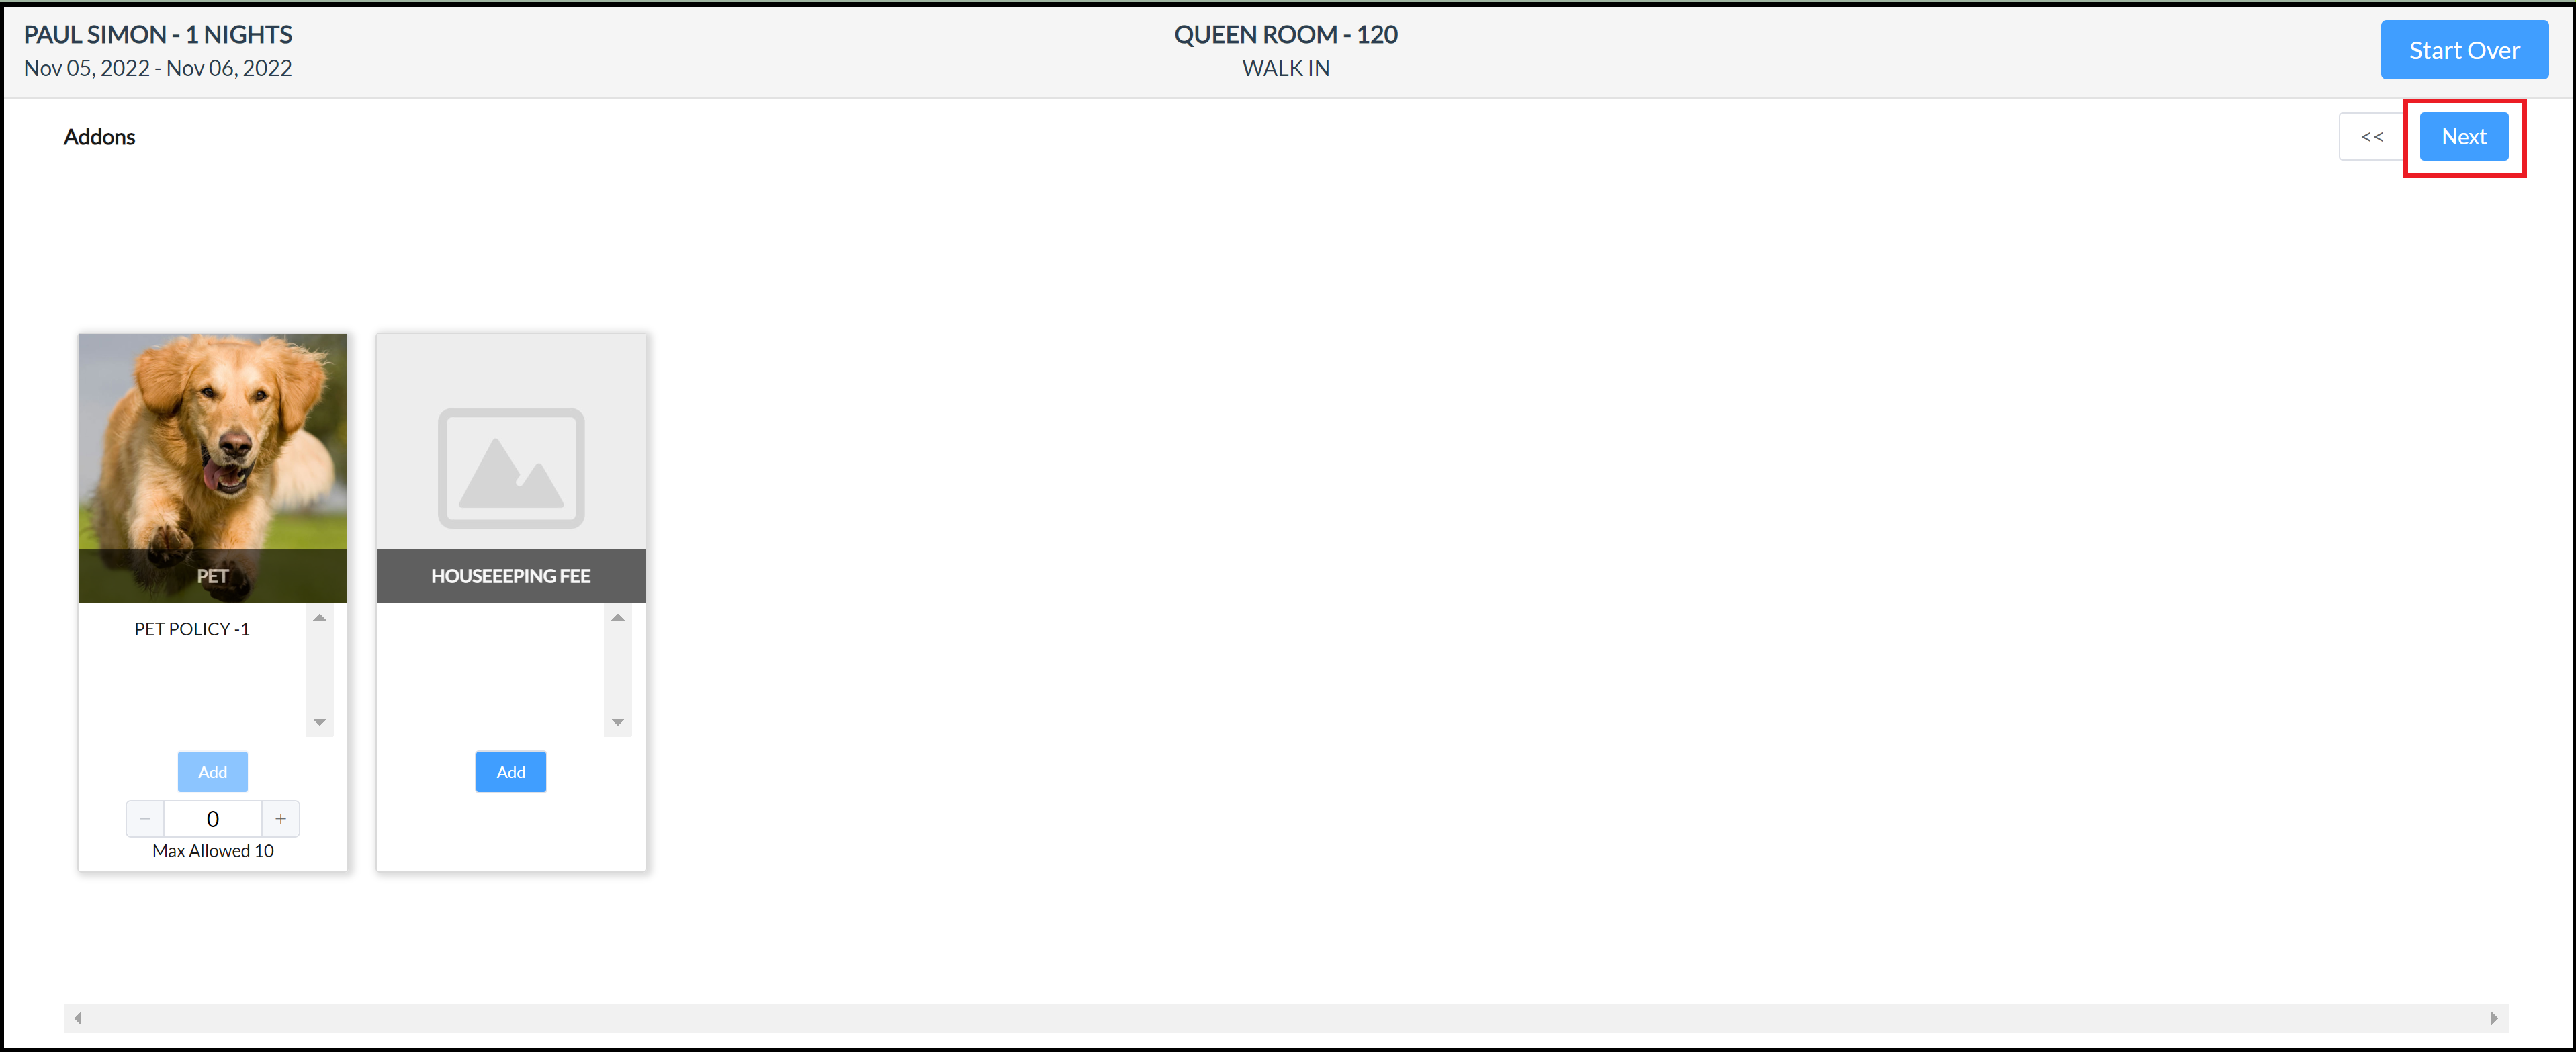
The Addons panel loads (where applicable). Review add on items with the guest and make any necessary changes. When changes are complete select Next. |
|
|
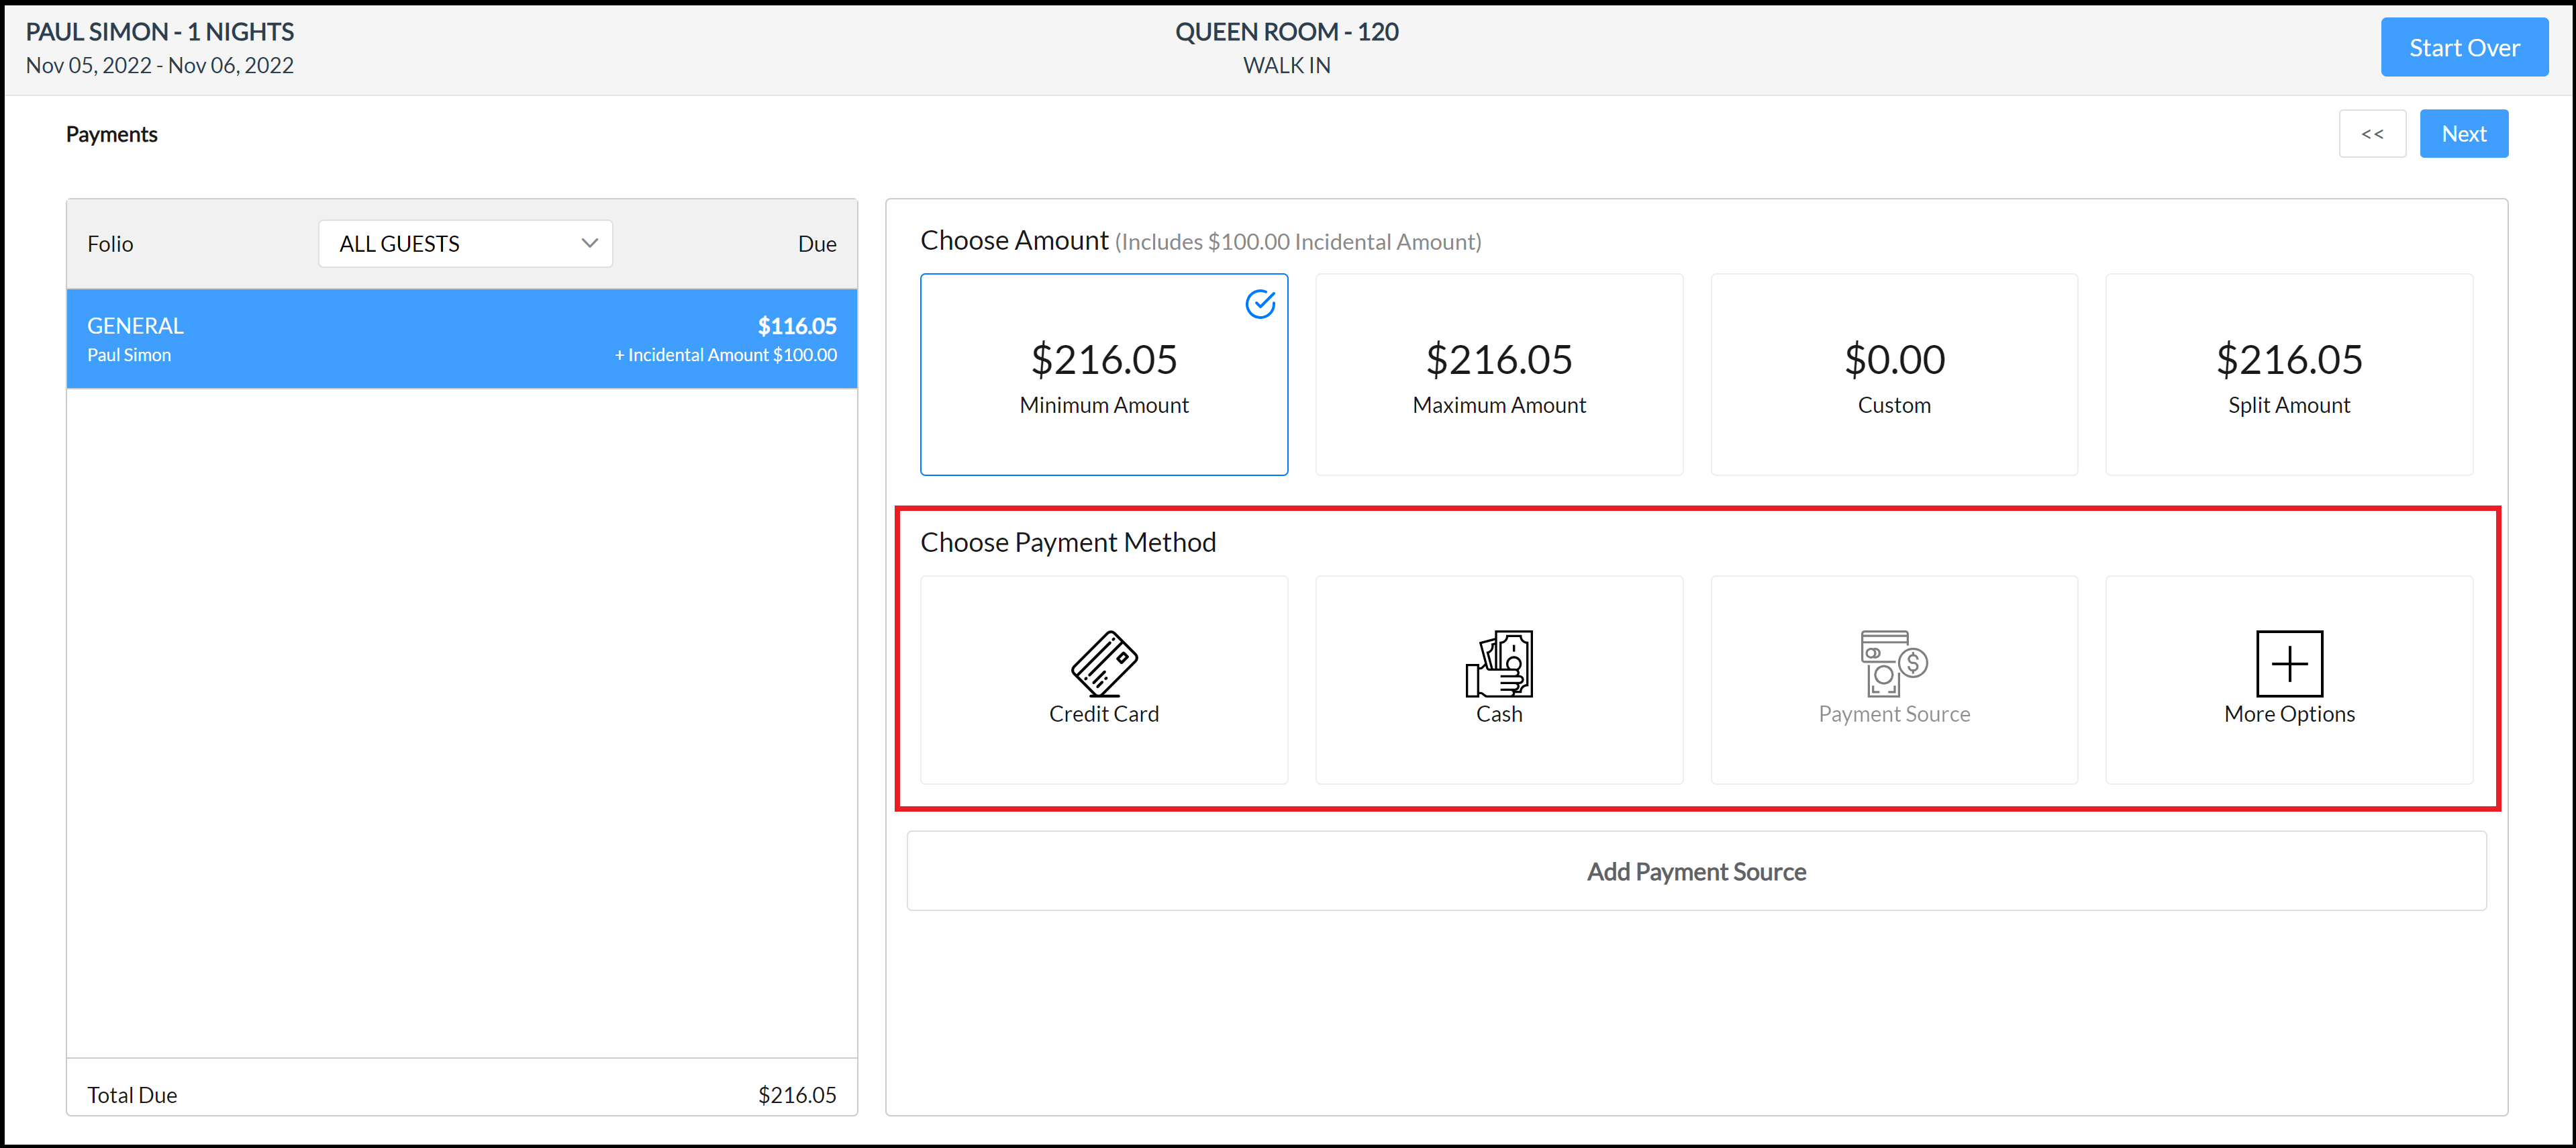
The Payments panel loads. If an amount due is shown for the reservation, as in the example at right, payment must be collected. Select the applicable payment type in the Choose Payment Method section.
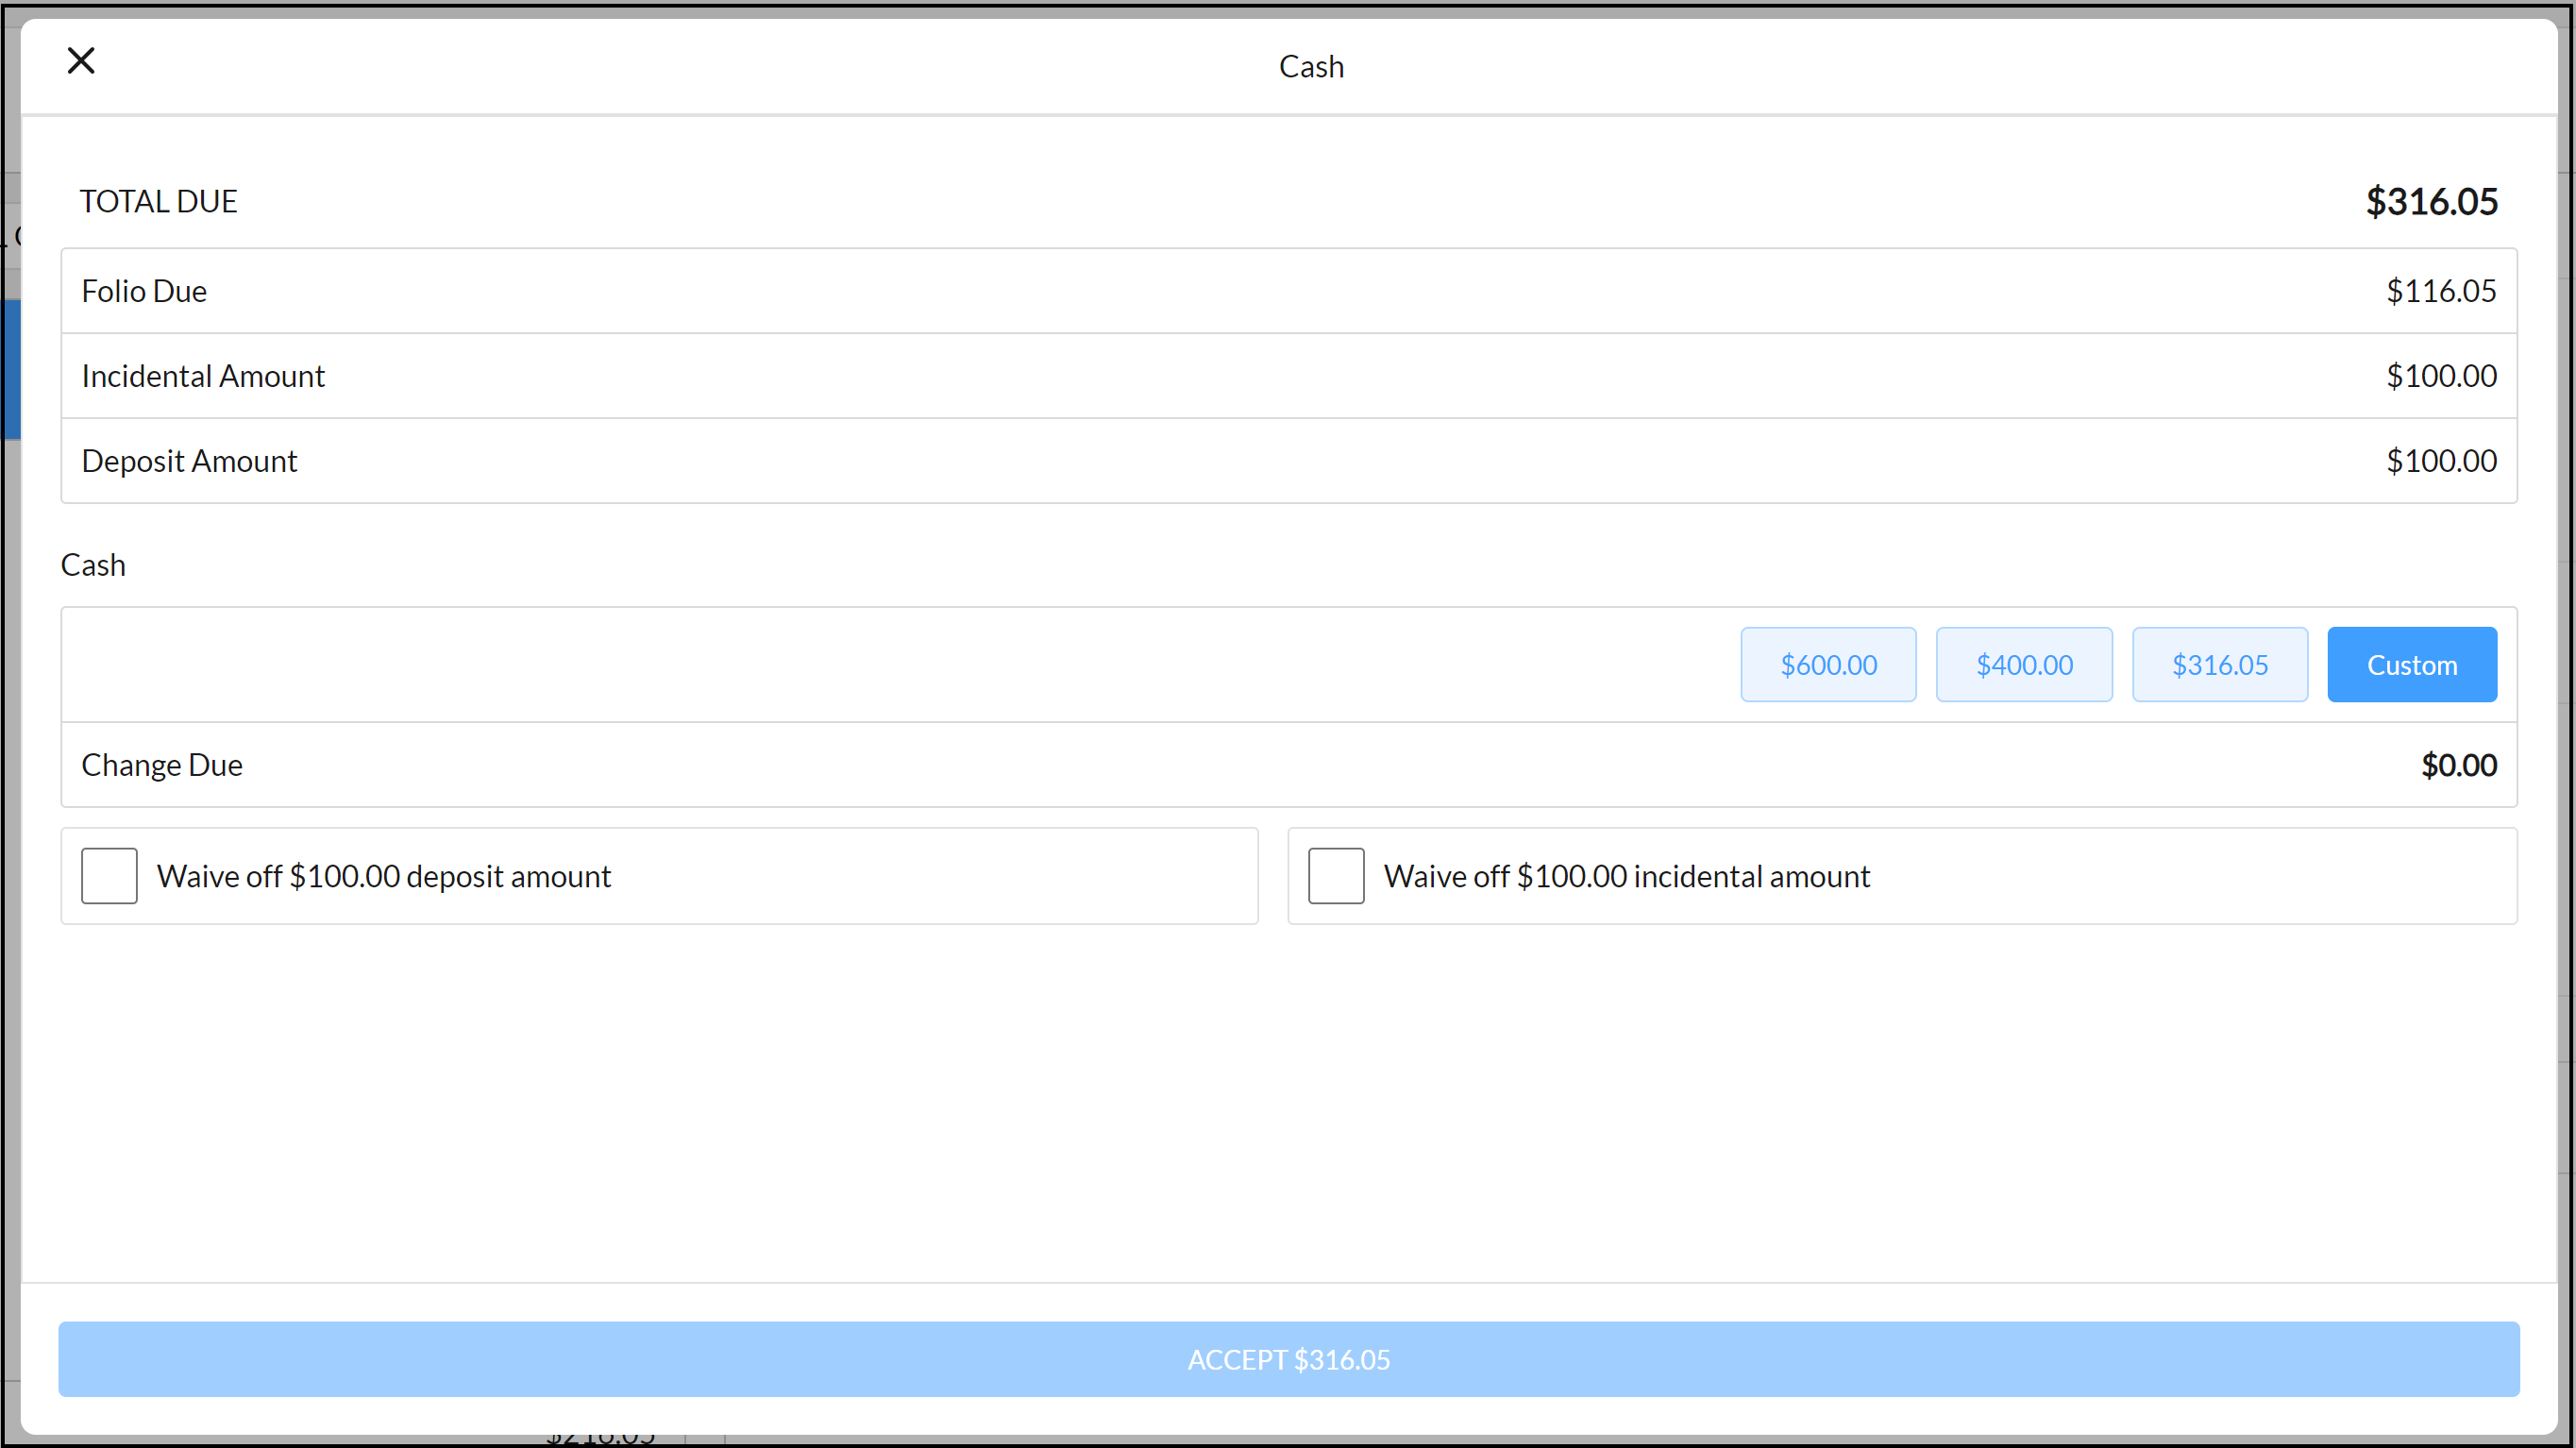
A popup activates for entry of payment details. Complete the popup and select ACCEPT [dollar amount].
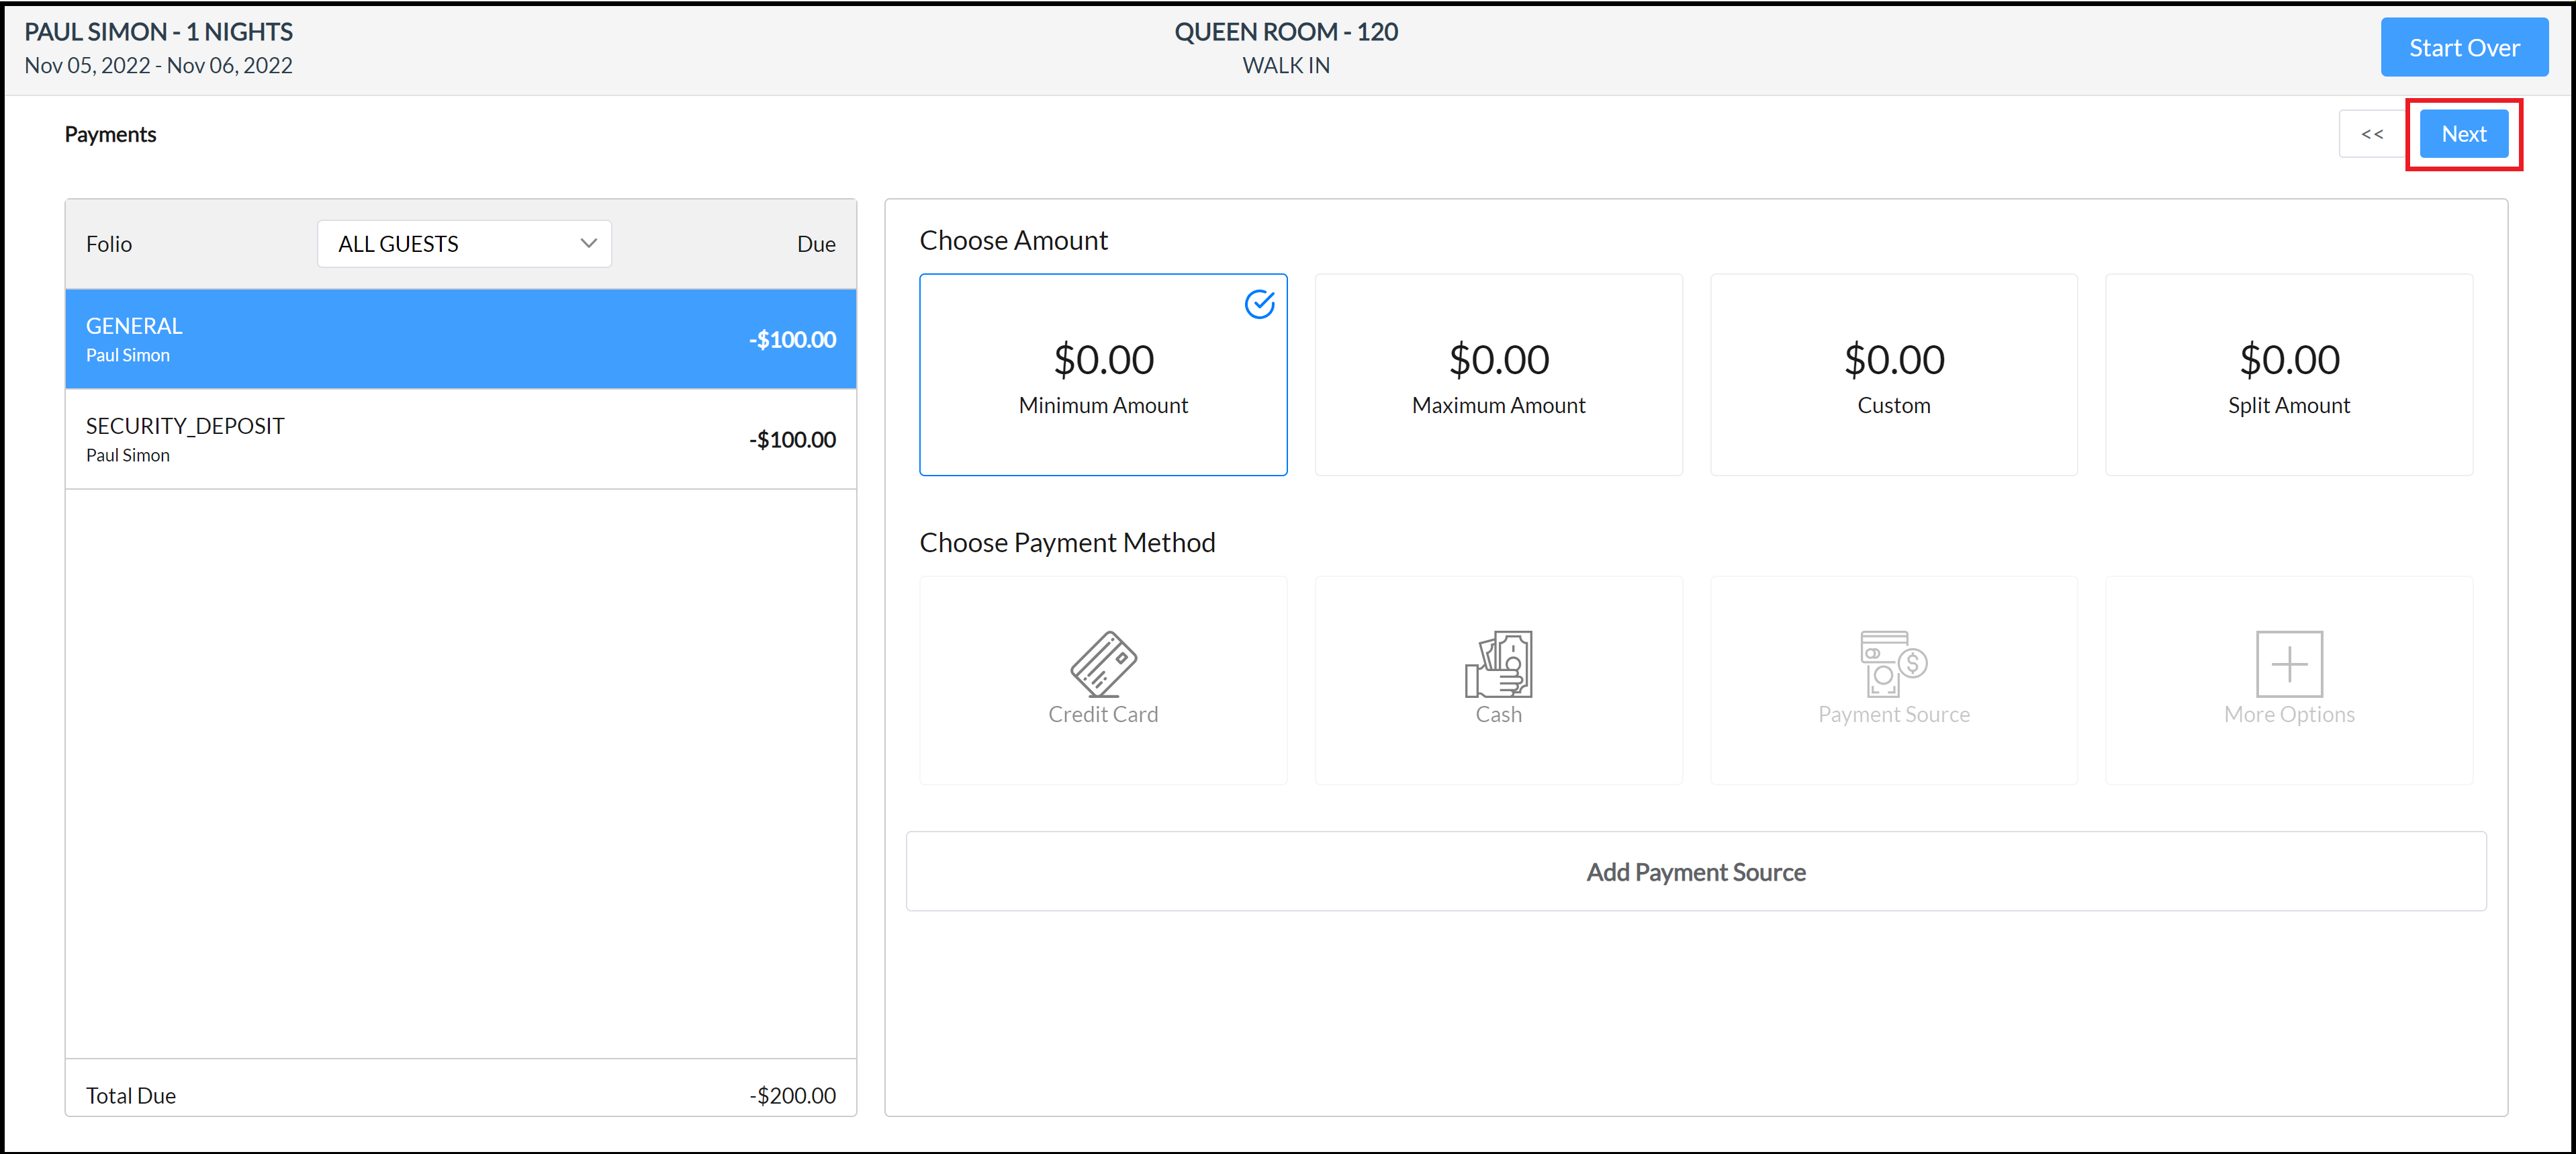
The payment is applied and the popup closes. Select Next. |
|
|
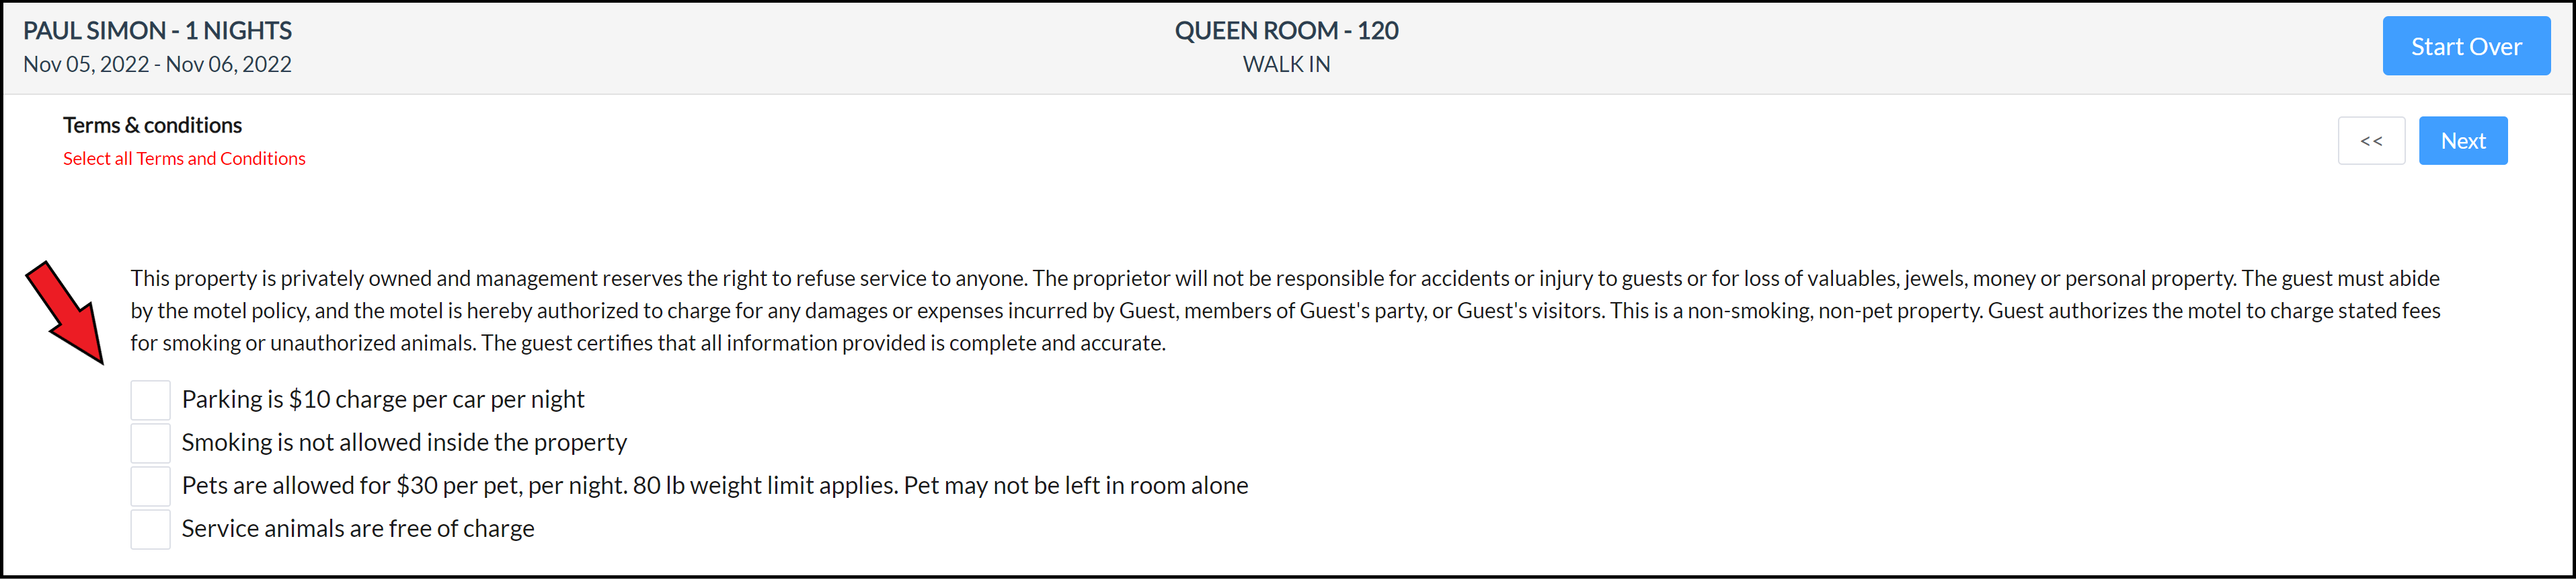
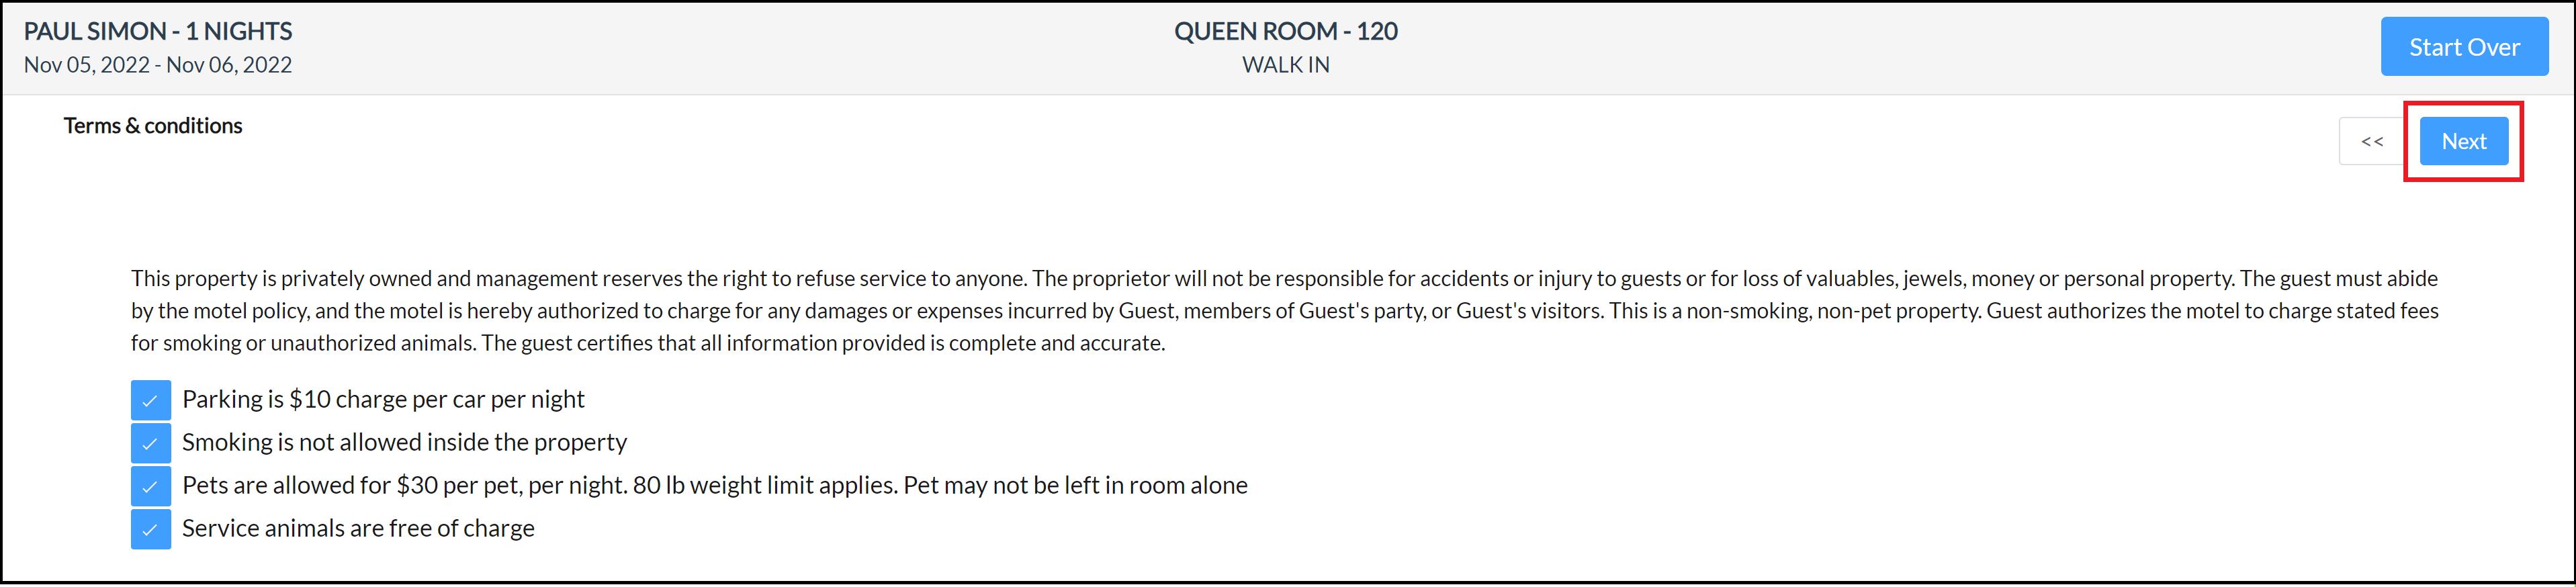
The Terms & conditions panel loads. Ask the guest to review the terms and conditions item and select each box to confirm agreement with each item. When all items are selected, select Next.
|
|
|
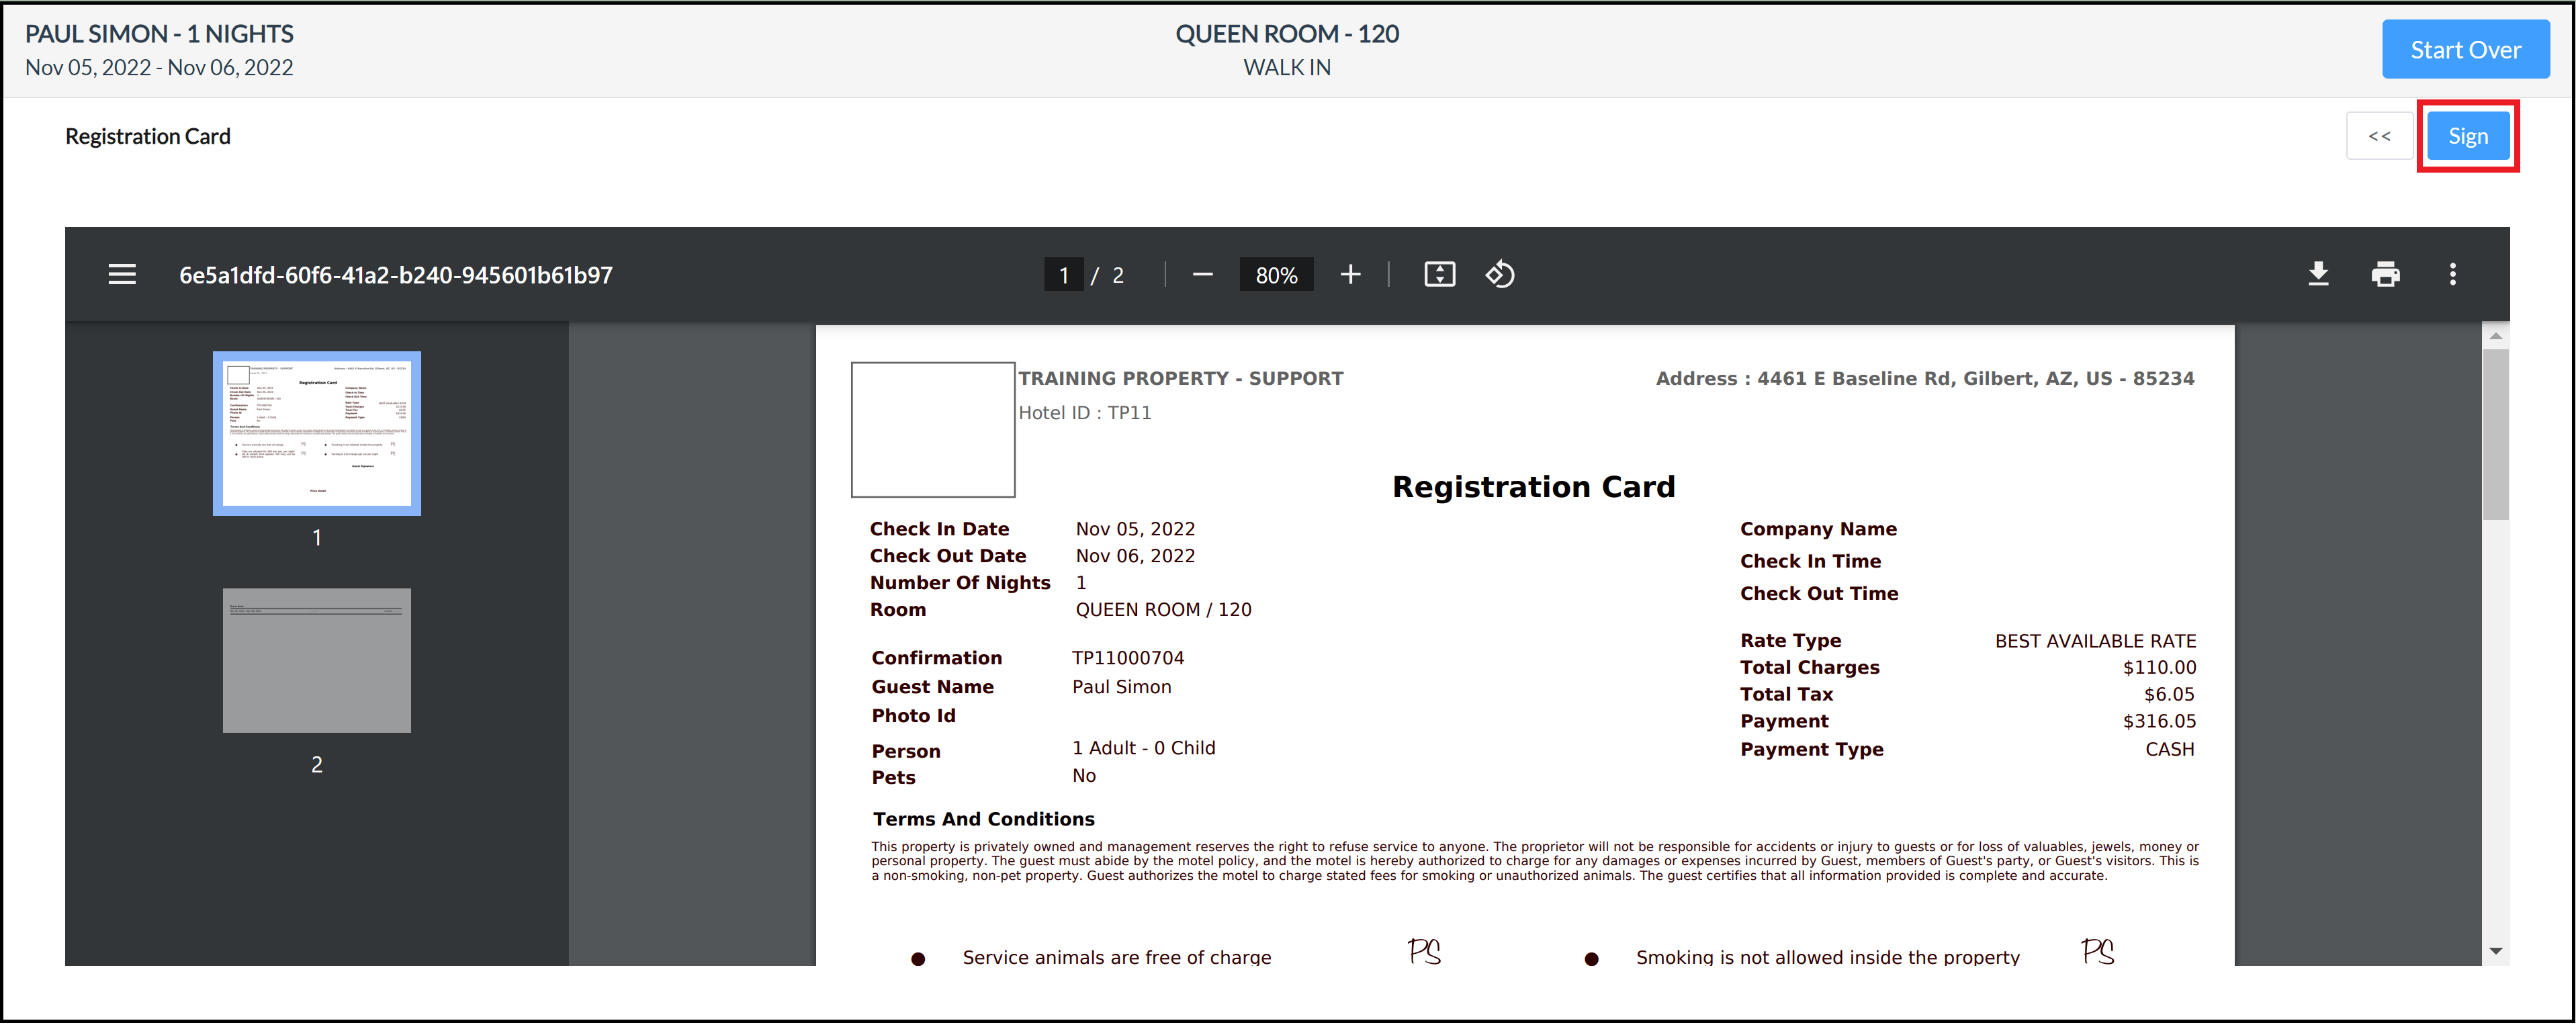
The Registration Card panel loads. Review registration details with the guest. Select Sign. |
|
|
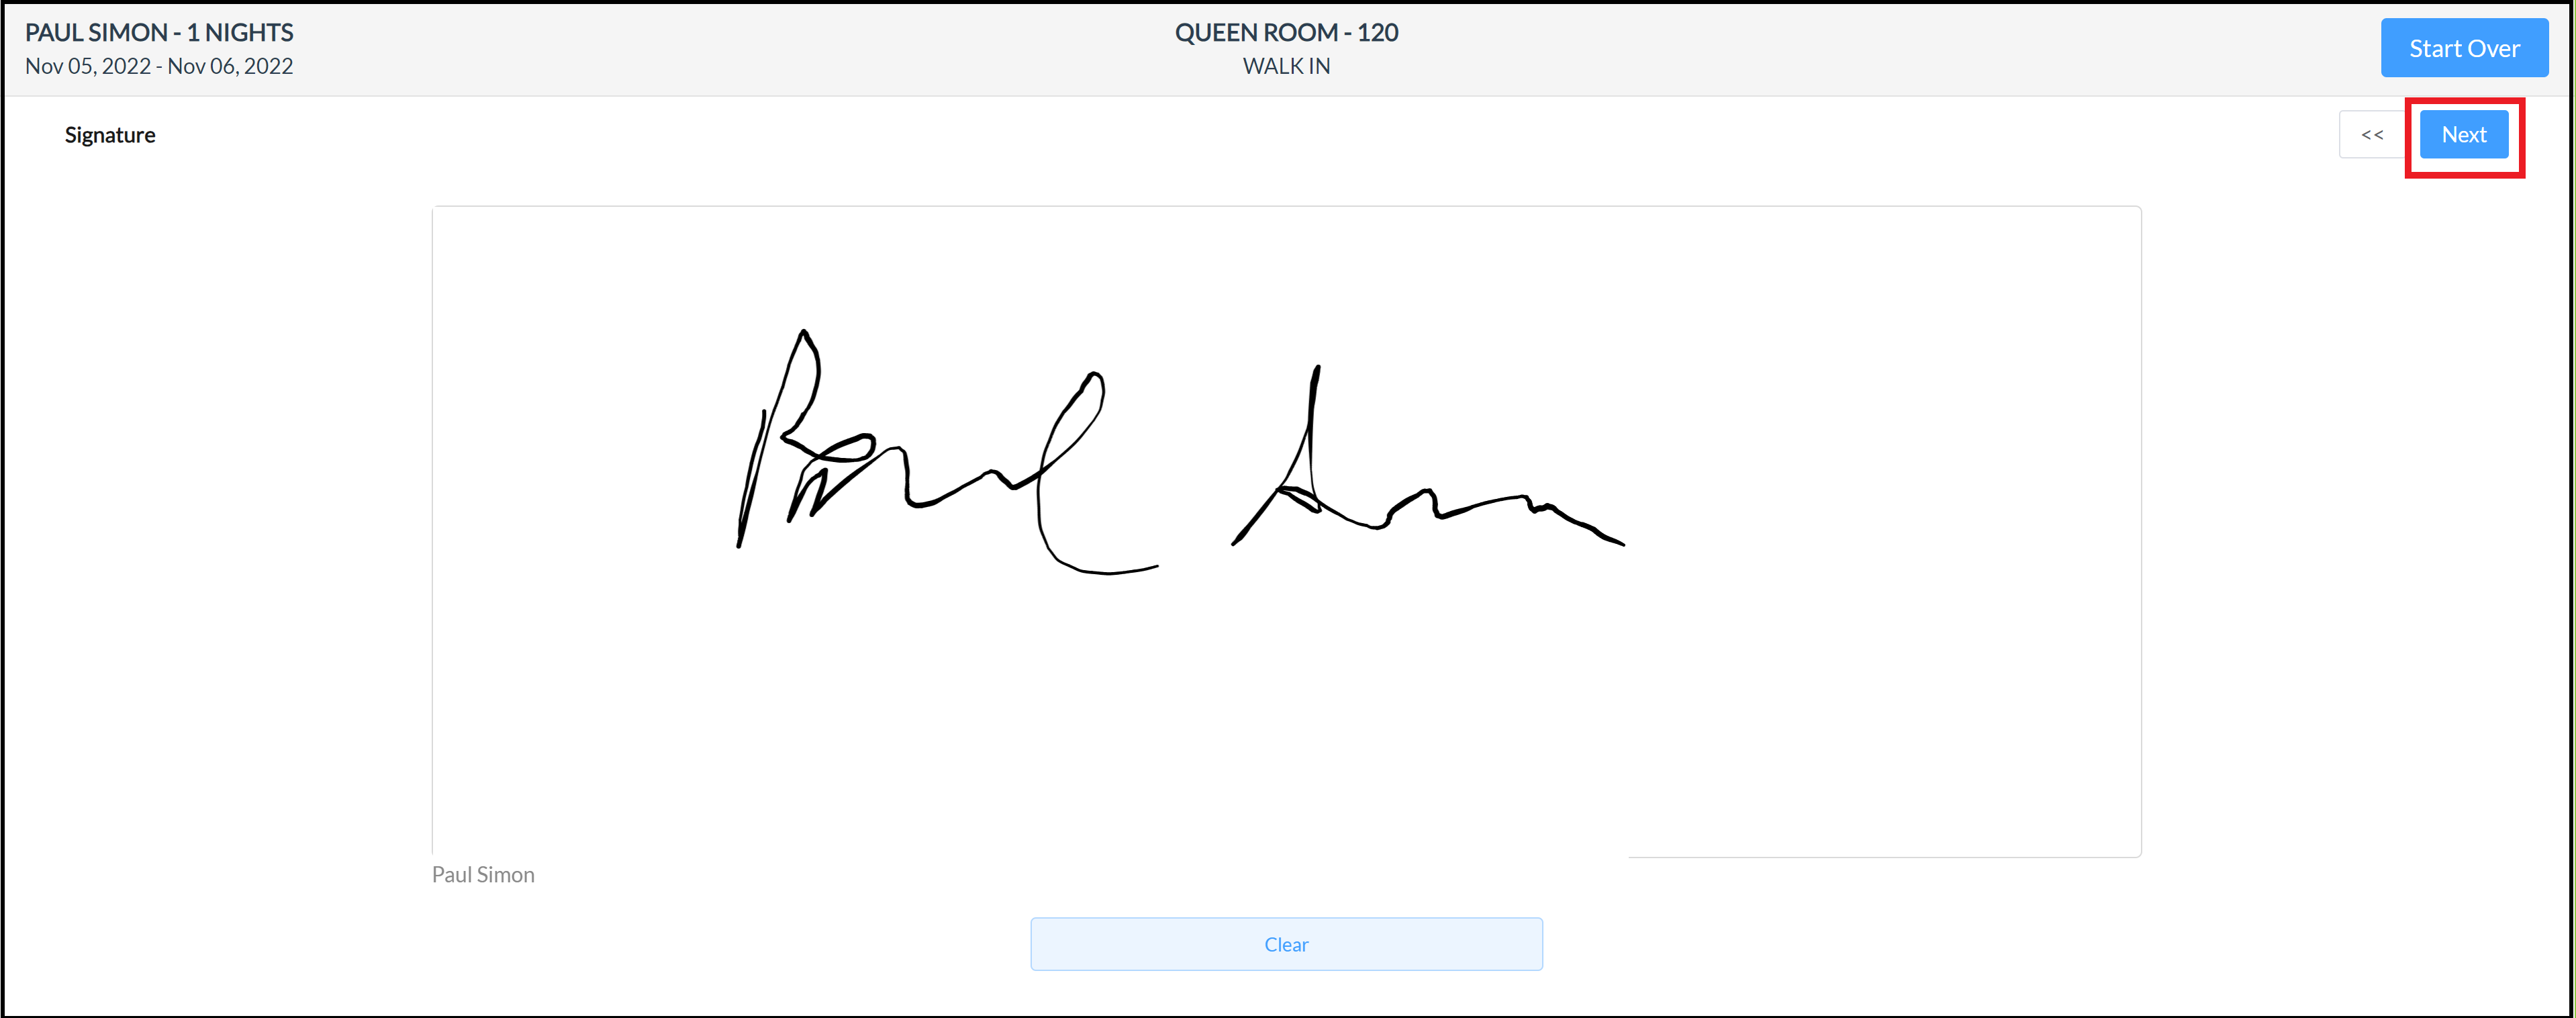
A Signature panel loads. Ask the guest to sign in the signature box. Select Next. |
|
|
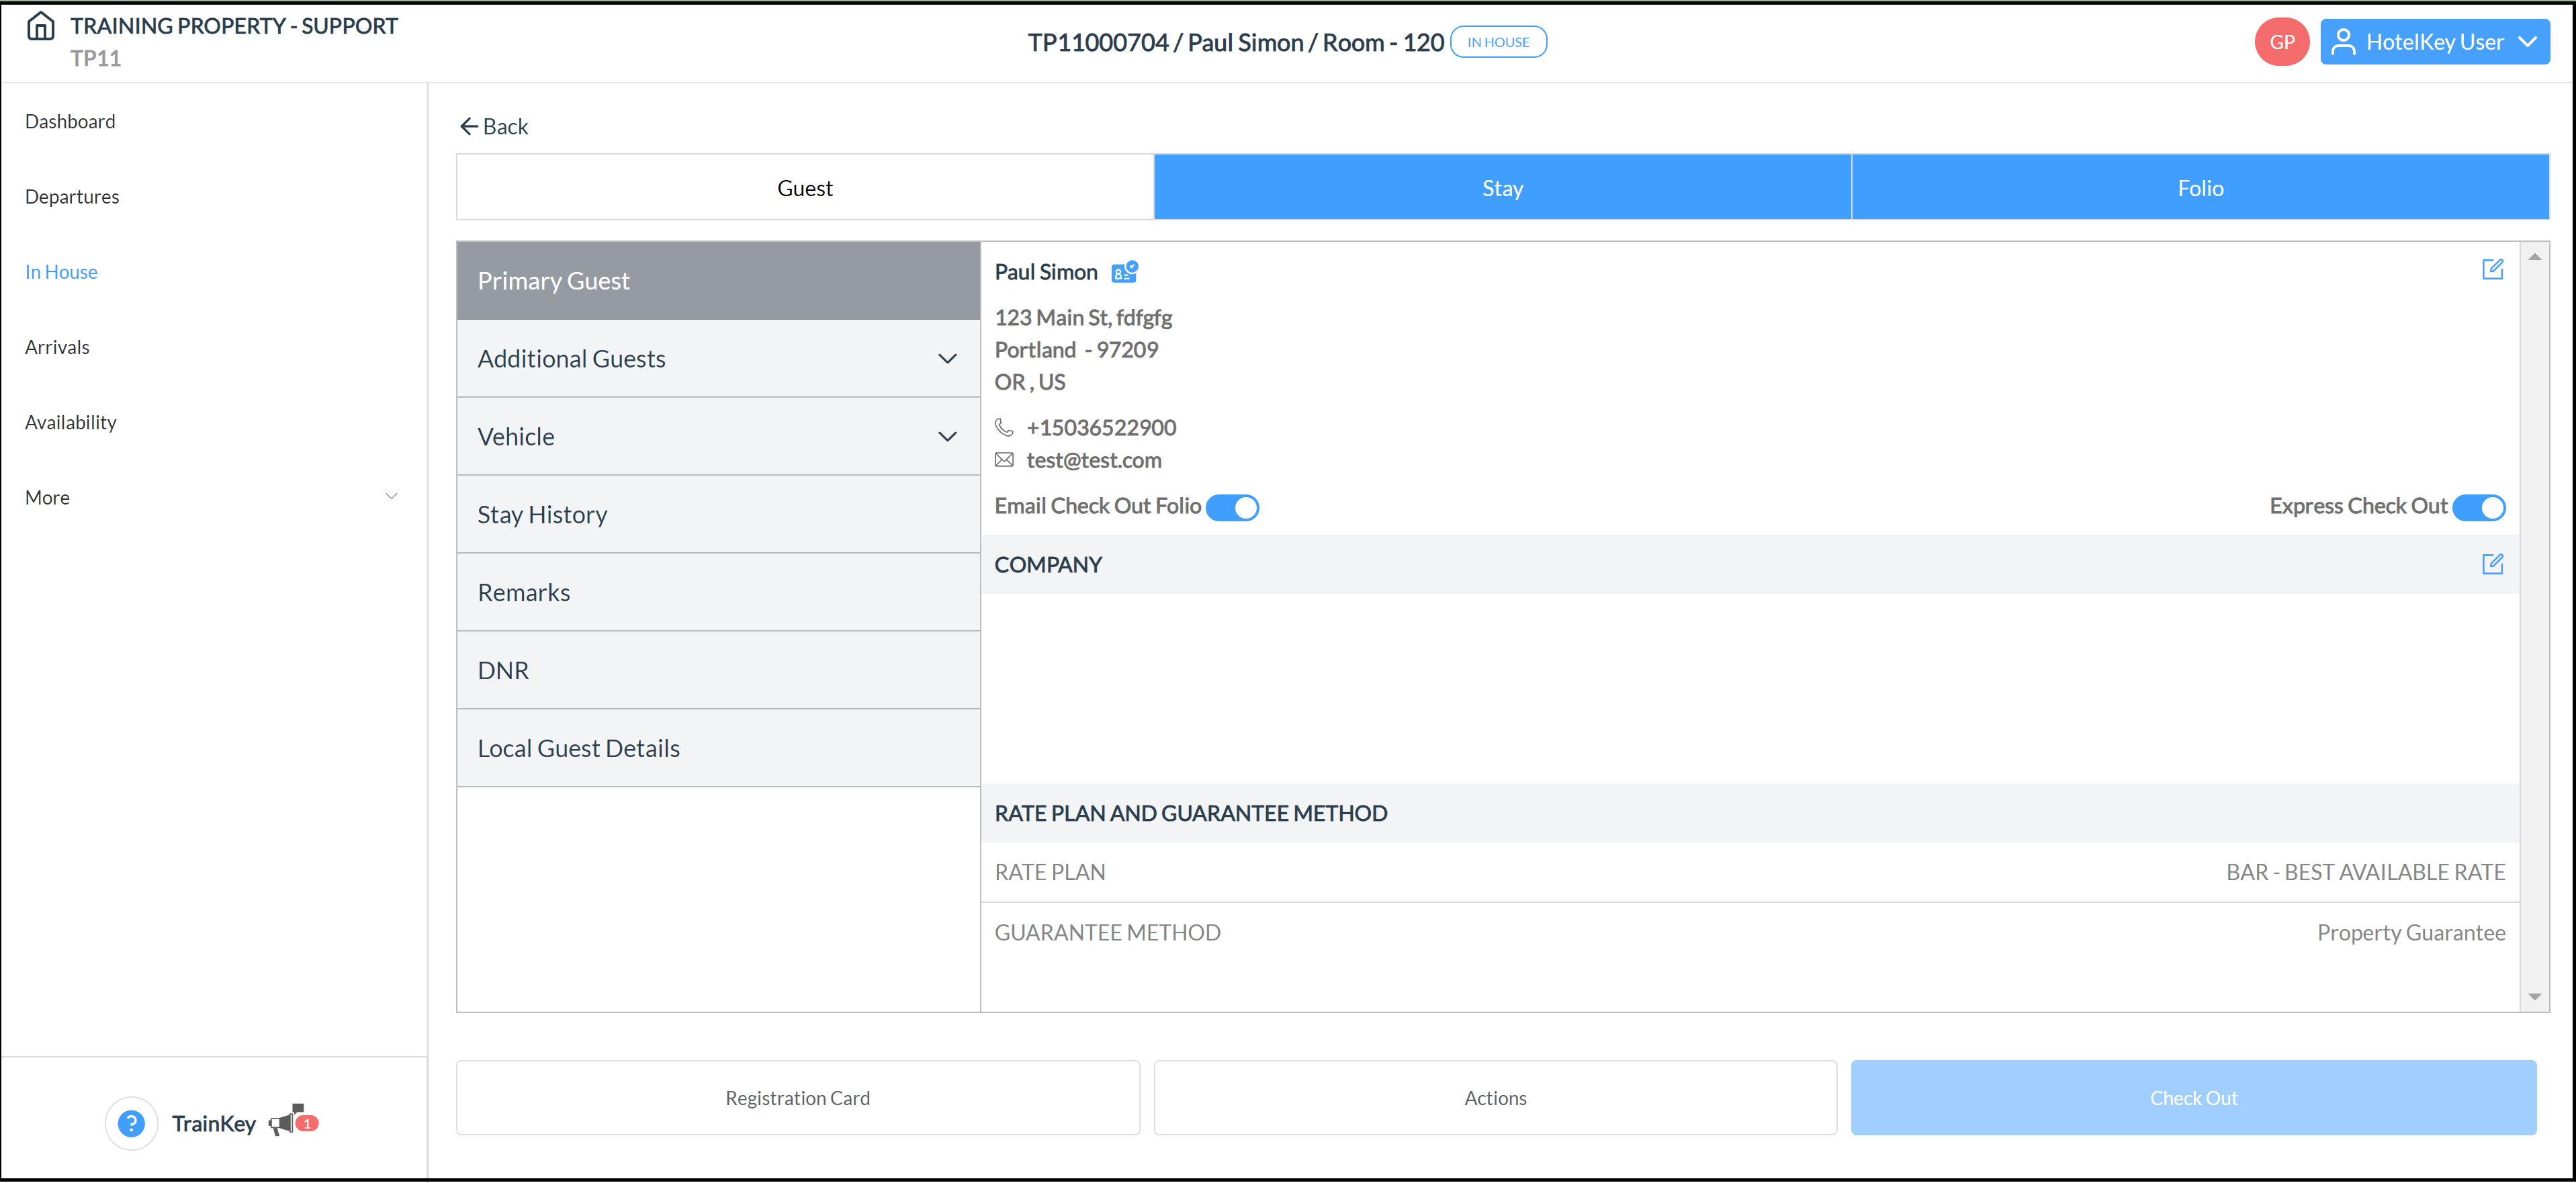
The signature panel closes. The guest is now checked in.
|
|