Occupancy / Revenue Notifications - Add and Remove
📆 Revision Date:
The overall process of configuring and managing notifications is the same, whether the notification is for occupancy or revenue. Where there are differences a separate image is provided for each type of notification.
Jump to Remove Notification
Add a new notification.
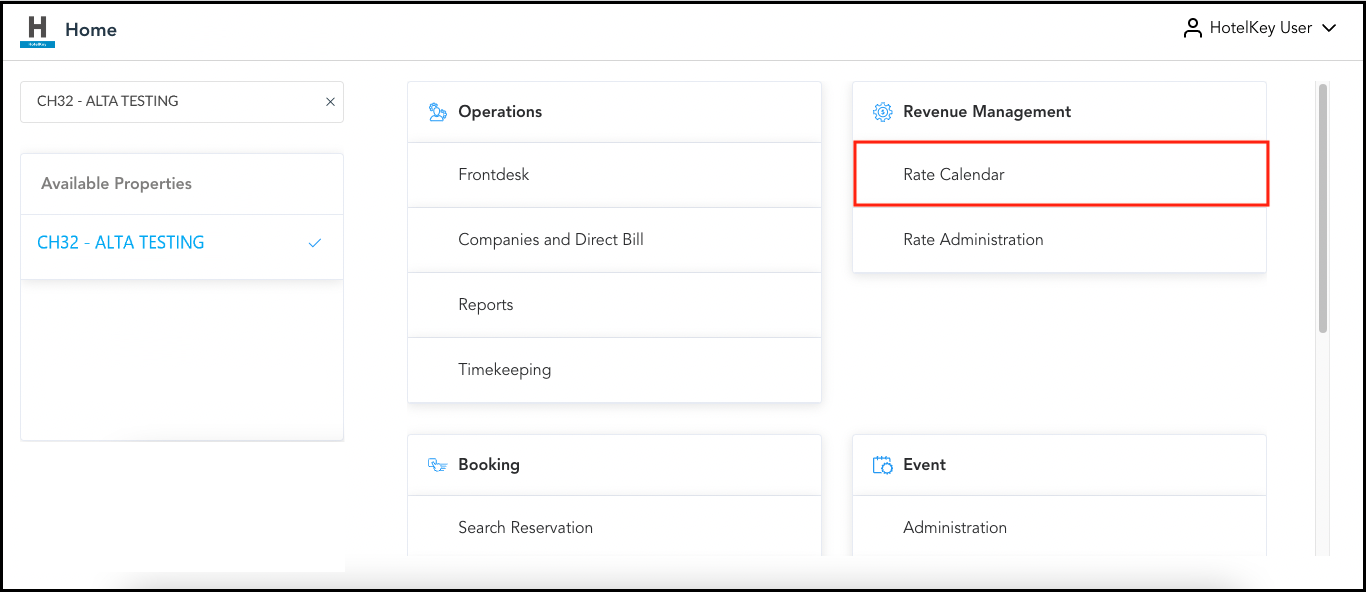
On the HK Home page, select Rate Calendar. |  HK Home - Rate Calendar Link |
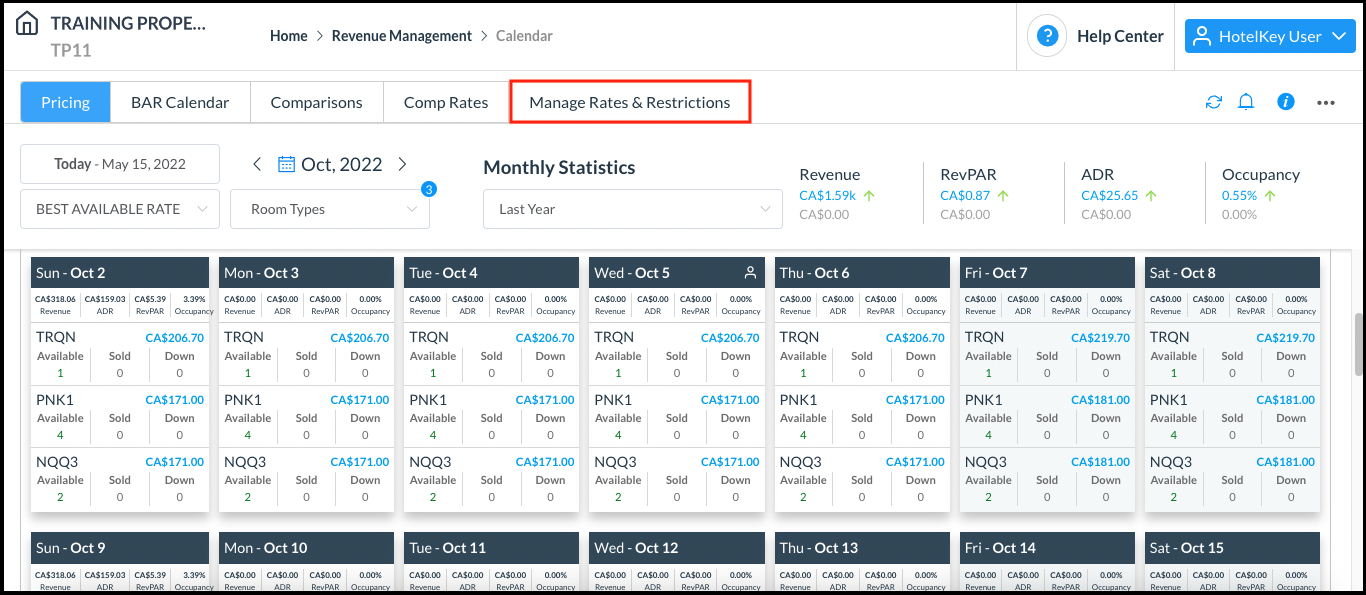
The Rate Calendar page loads. Select Manage Rates and Restrictions. |  Rate Calendar Page |
Select the Seasons & Notifications menu, choose Notifications & Rules |  |
Select the type of notification to be set up and then select Create New. The top example shows a Revenue selection, the bottom example shows an Occupancy selection. |  Revenue Notification  Occupancy Notification |
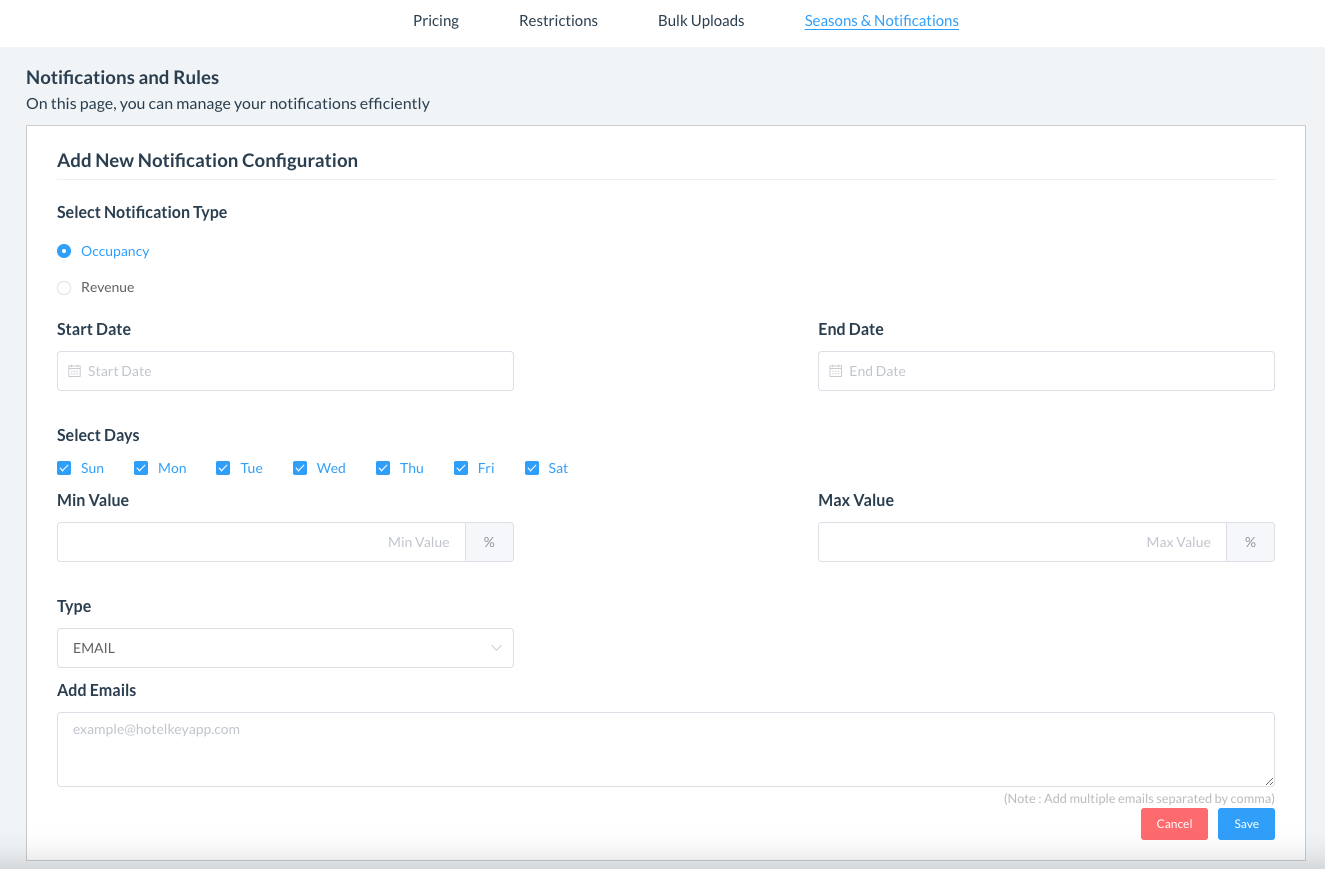
An Add New Notification Configuration form loads. Enter the applicable Start Date, End Date, Min Value and Max Value. Enter recipient email address(es) in the Add Emails field. Select Save to save changes and close the form. |  |
The notification is created, and included in the list in the Notifications and Rules panel. The top example shows a Revenue Notification, the bottom example shows an Occupancy Notification. |  Revenue Notification  Occupancy Notification |
Remove Notification
On the HK Home page, select Rate Calendar. |  HK Home - Rate Calendar Link |
The Rate Calendar page loads. Select Manage Rates and Restrictions. |  Rate Calendar Page |
Select the Seasons & Notifications menu, choose Notifications & Rules |  |
Locate the notification to be removed and select its View and Add Actions link. |  |
The Modify Notification panel loads. Select Remove. The notification is deleted, and removed from the list in the Notifications and Rules panel. |  |
