
📆 Revision Date:
Group Blocks (v2) & PMS Sync
Welcome to the Group Blocks (v2) management section. This module is designed to streamline your workflow by seamlessly connecting your sales efforts with front-desk operations. In this section, you will learn how to create and configure Group Blocks (v2) within the EventKey Sales & Catering System, ensuring all room allocations, rates, and inventory are accurately captured. More importantly, we will guide you through the automated synchronization process that instantly transmits the finalized block data directly to HotelKey Property Management System (PMS). By the end of this guide, you will be able to confidently build blocks that eliminate manual double-entry and keep both systems perfectly in sync.
|
There are two ways to add Group Blocks to your event in the EventKey Sales & Catering System. This section covers the first method, which integrates block creation directly into your initial sales workflow to ensure your room inventory is secured from the very beginning. Method 1: During the Event Proposal Creation Flow
Follow these steps to build a Group Block while simultaneously generating an event proposal:
💡 Note: Creating the block during this flow ensures that the tentative room inventory is linked directly to the proposal document sent to your client. |

|
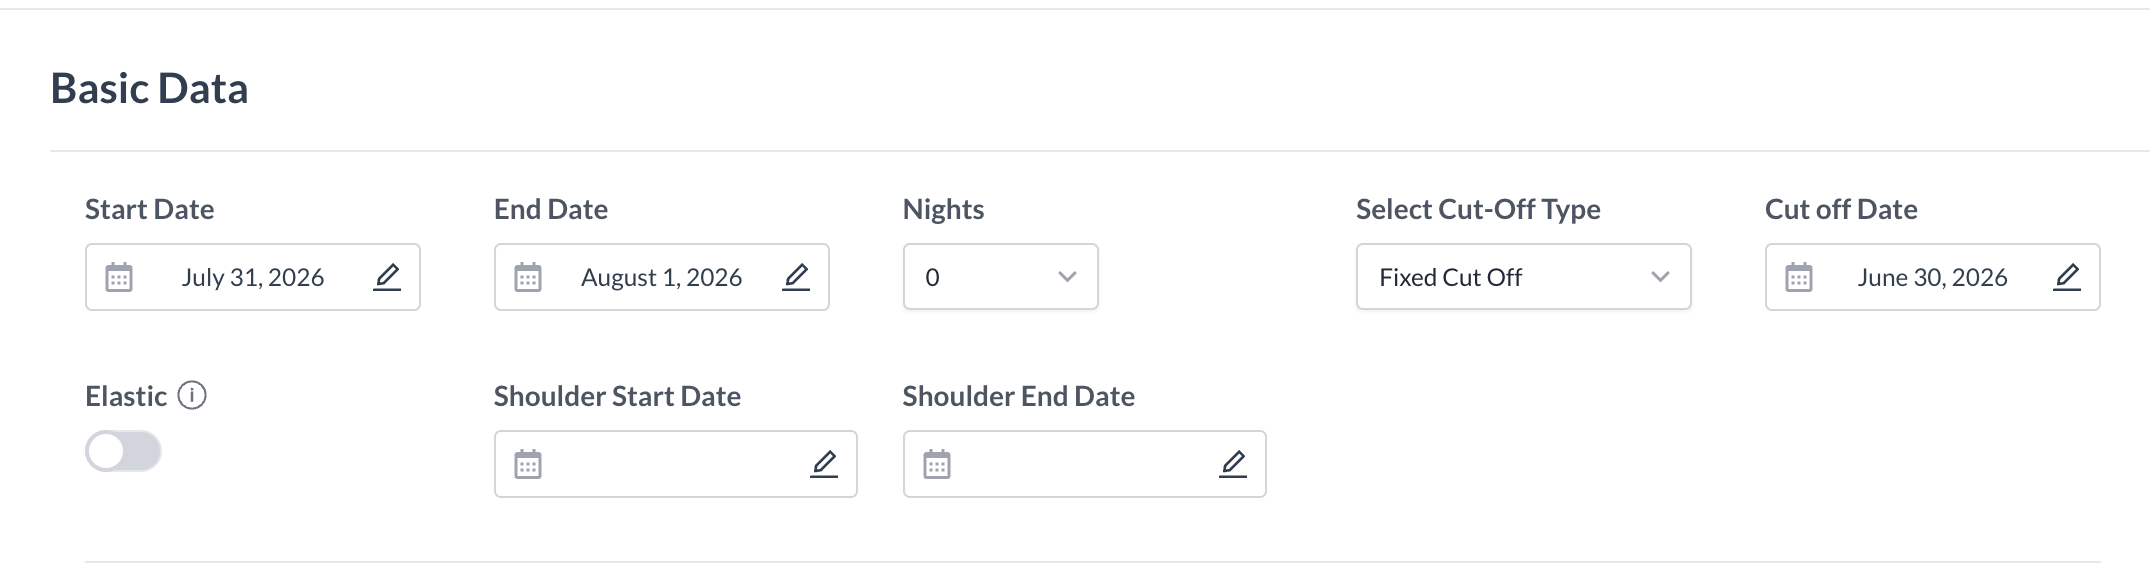
Step 1: Basic Data
The first phase of creating a Group Block (v2) requires establishing the foundational parameters of the booking. This data forms the core profile that will eventually sync with your PMS. Required Actions & Field Definitions
To complete the Basic Data setup, fill out the following primary fields on the initial screen: ⚠️ Important: Required Fields are indicated with a red dot 🔴 1a. Stay Dates & Extensions
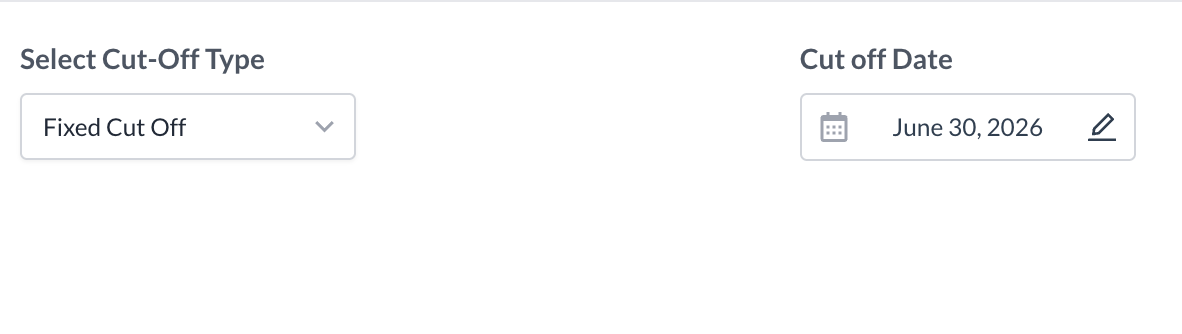
1b. Cut-Off Type Configurations
The Cut-Off Type defines how and when unsold rooms held in the block are automatically released back into the hotel's general inventory. Select one of the following options from the dropdown menu:
|

.png?cb=5ef5ca0093db4e135955515f684bf163)
.png?cb=c85f5090baedbca12a36f179b95a47f1)
|
|
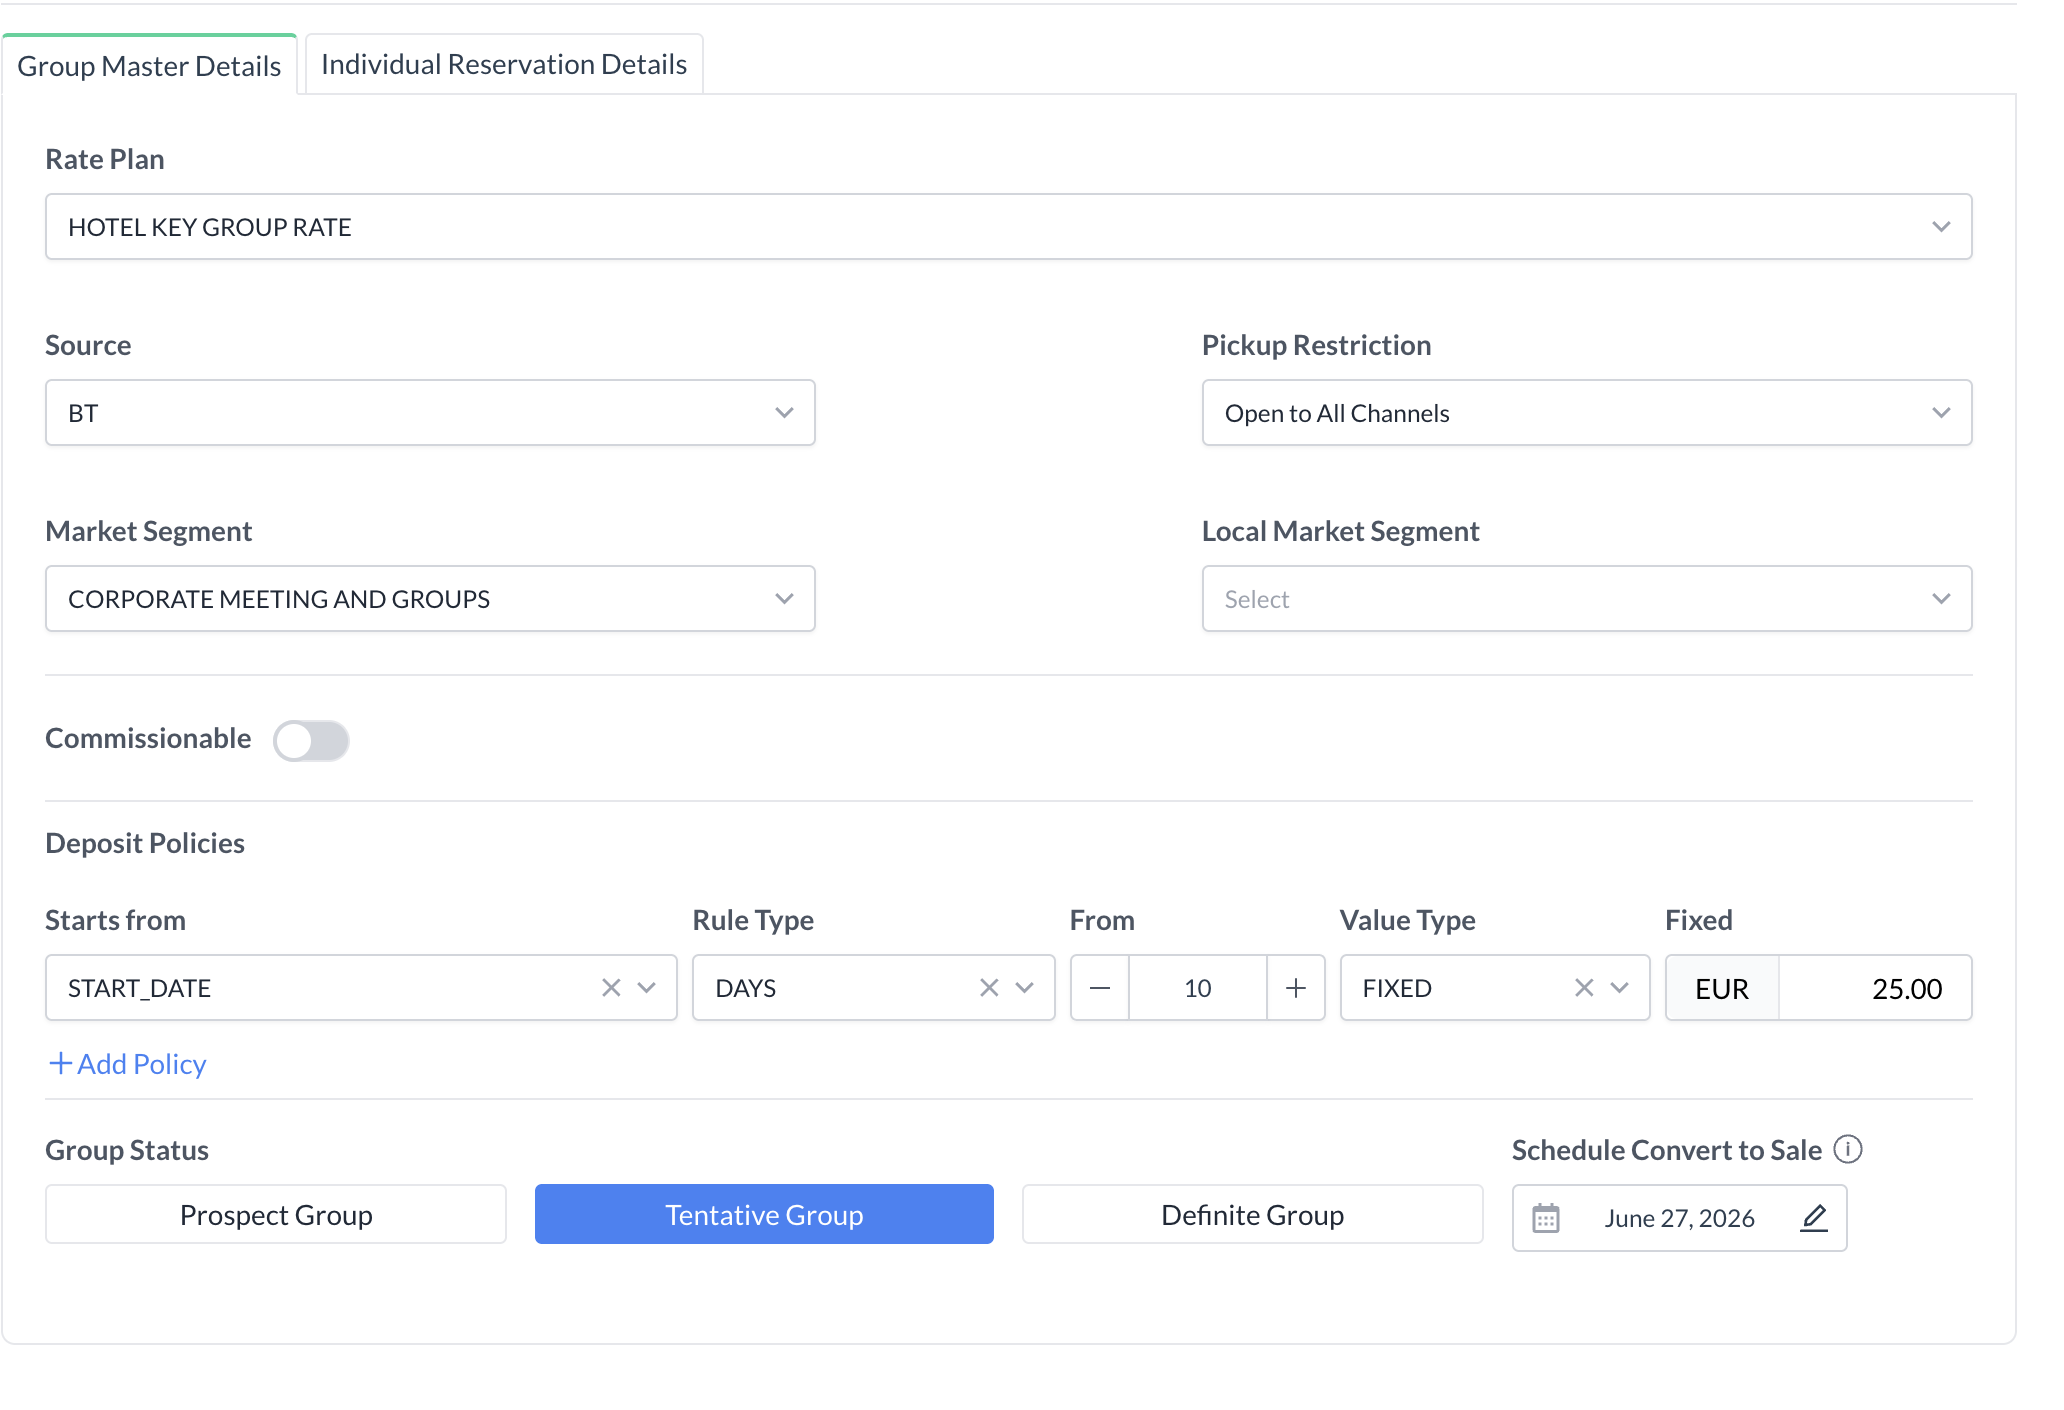
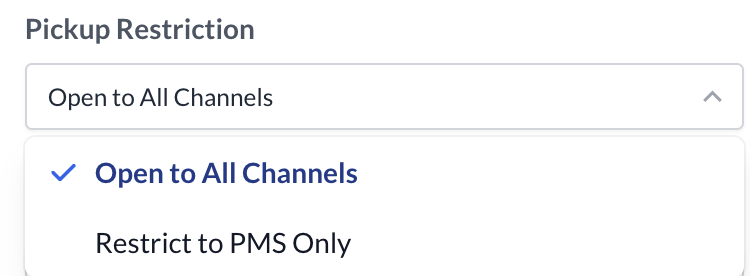
After setting up your stay dates and cut-off rules, scroll down to configure the booking source, restrictions, financial policies, and tracking metrics for the group block. 1c. Rate, Source, & Pickup Channels
1d. Market Segments
Use these fields to ensure accurate corporate and local revenue tracking:
1e. Deposit Policies
The system allows you to configure automated financial rules to secure the block. You can add up to three separate deposit policies per block by defining the following criteria:
📑 Deposit Example: To require a $100 deposit two weeks out, configure the policy to collect a Fixed Amount of $100 exactly 14 days prior to the Start Date of the group master. ⚠️ System Integration Note: If your property is connected to a central guest reservation system, updates are automatically synced. This will activate the deposit requirement and overwrite any previous manual values in the system. 1f. Commission & Block Status
Reviewing the Summary Sidebar
Throughout the creation process—from Step 1 through Step 5—the Group Summary Details sidebar on the right side of the screen will dynamically update. Use this pane to verify your progress, check configured room types, and ensure that your Stay Details (such as the selected Rate Plan and Source) are accurate before advancing. Once all required fields in this section are complete, click the navigation buttons at the bottom of the window to proceed to Step 2: Inventory & Pricing. |
.png?cb=48f482e021f8621c2632259608887c49)


.png?cb=667a2fa10df7fb5824525e7fcf5248f6)
.png?cb=e5650d3aac29a3856a1aeba3b7d830b8)
|
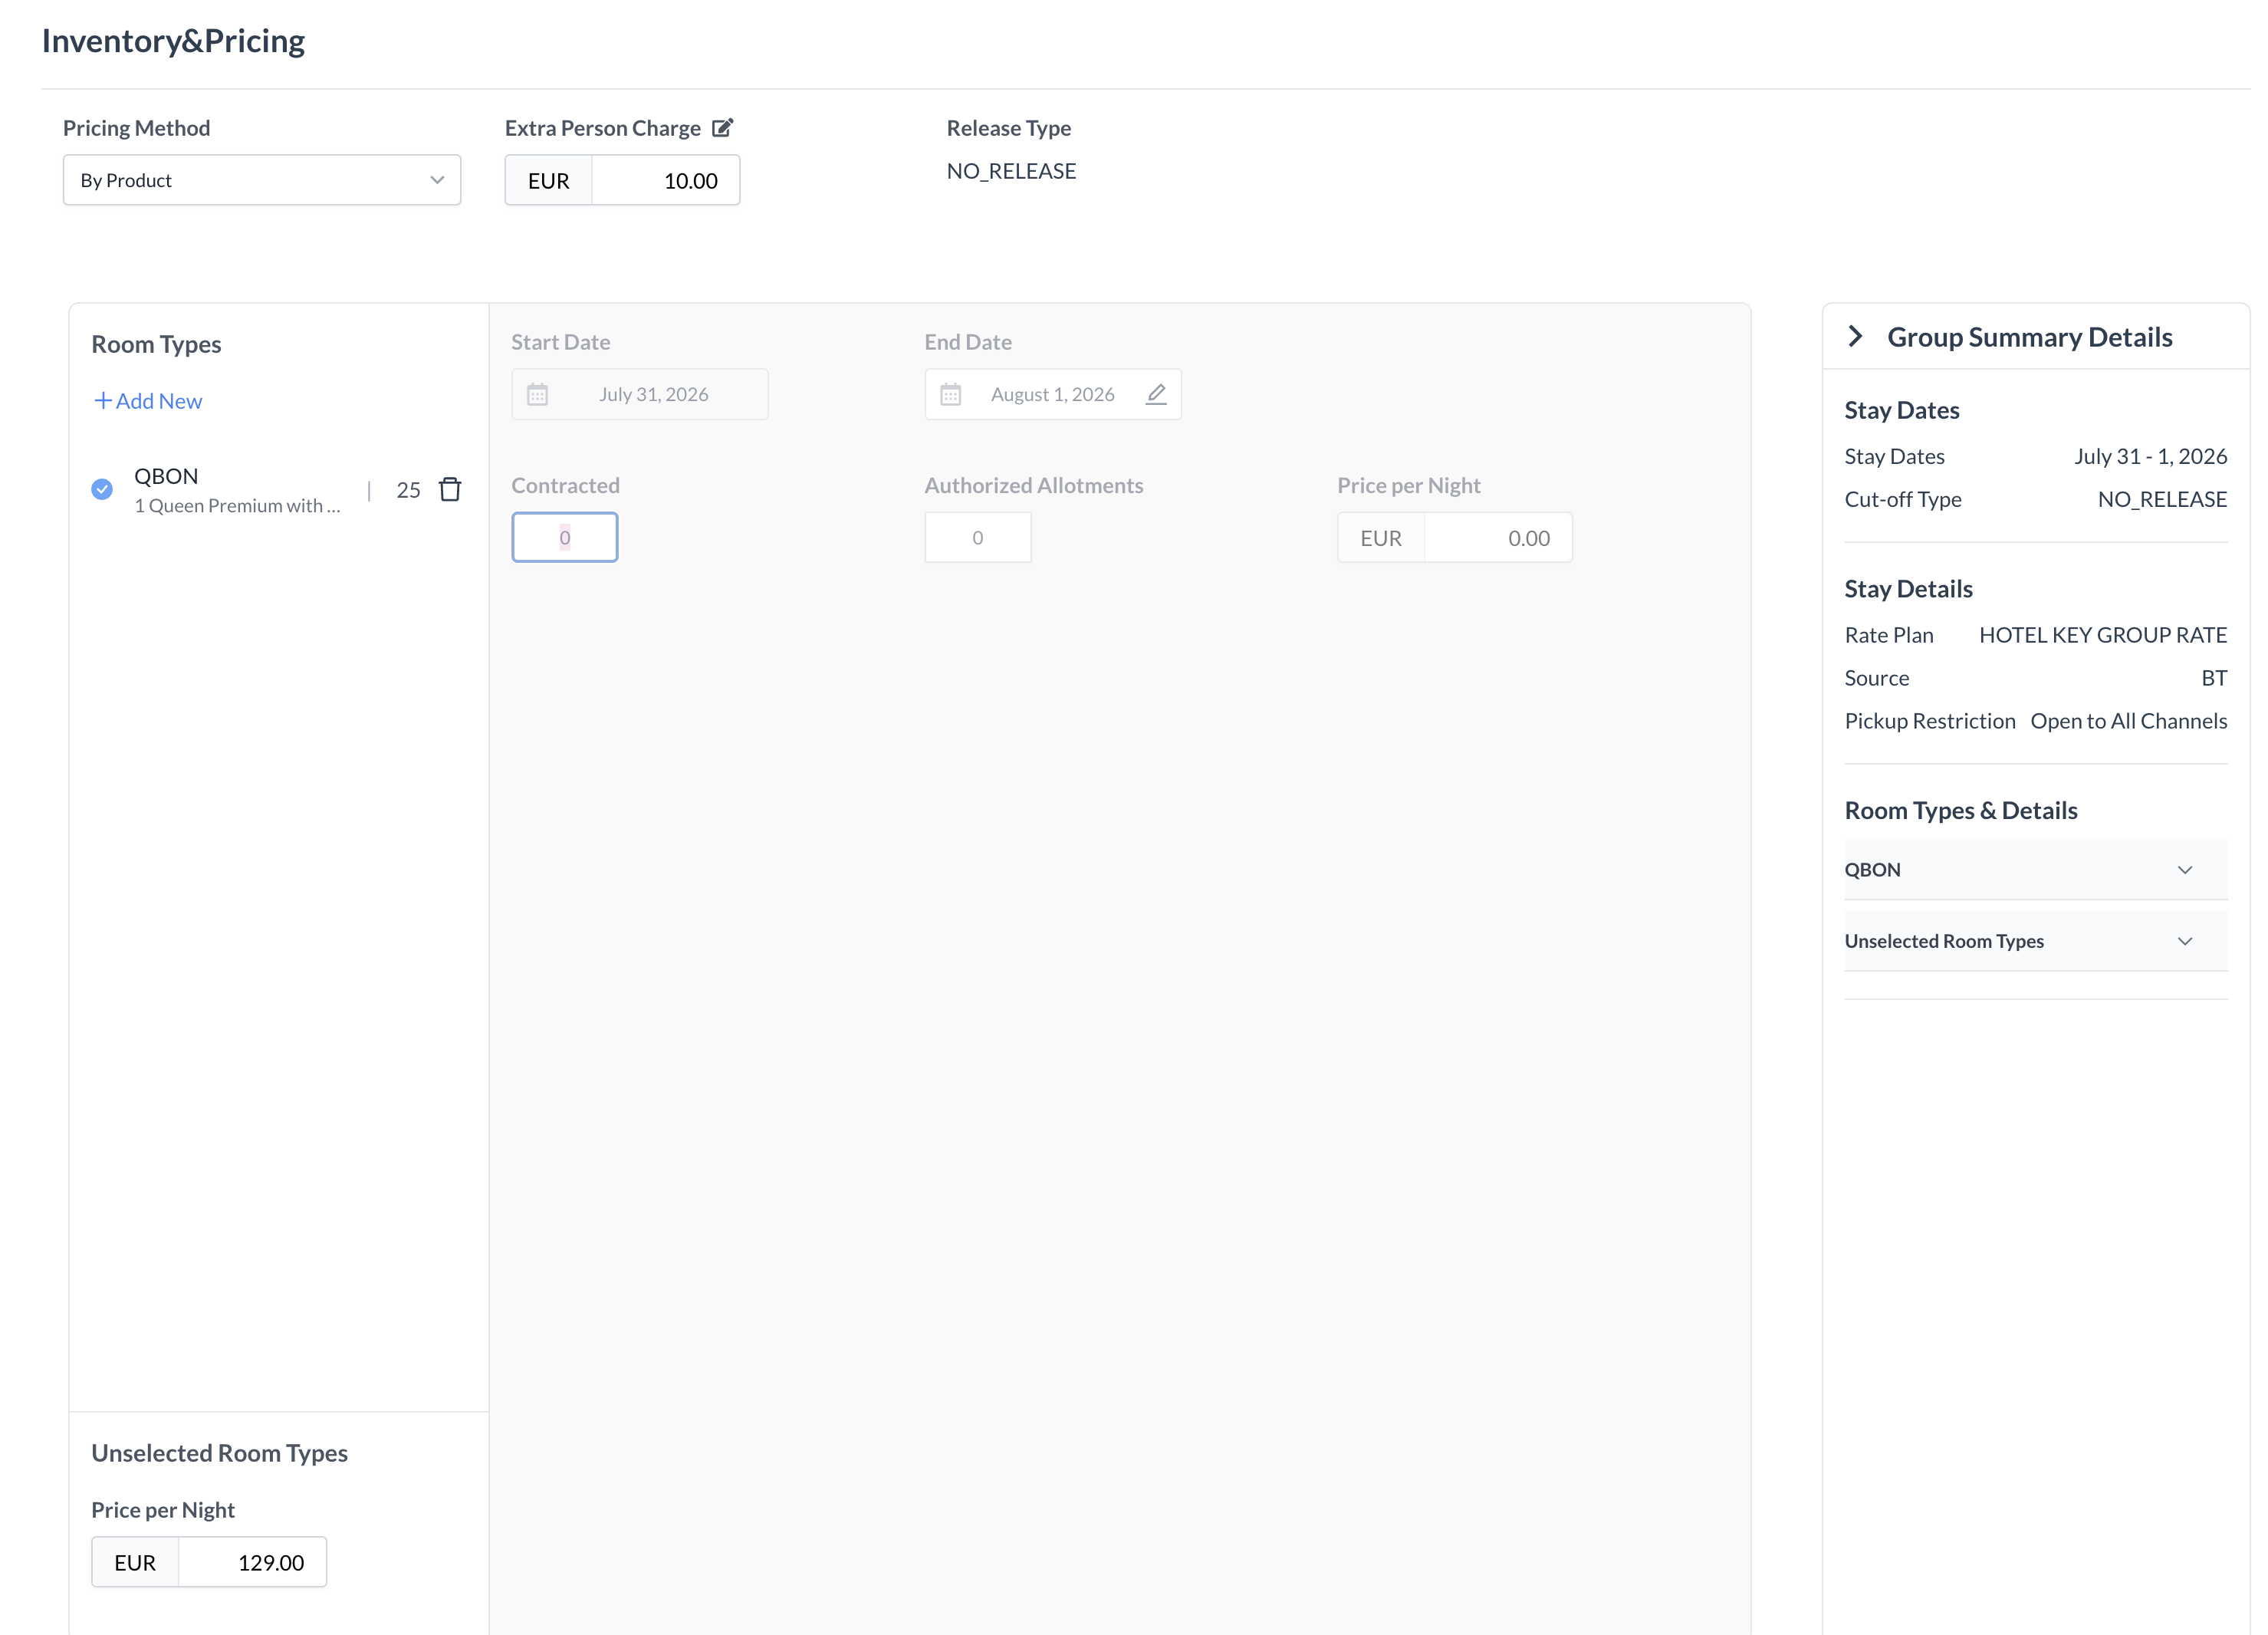
Step 2: Inventory & Pricing
After establishing your basic data, you will define how your room rates are structured, choose your contracted room types, and allocate your inventory for the block. 2a. Selecting the Pricing Method
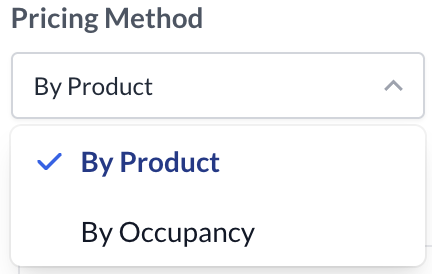
The system allows you to choose how rates are calculated based on your property's commercial strategy. Select one of the two pricing methods:
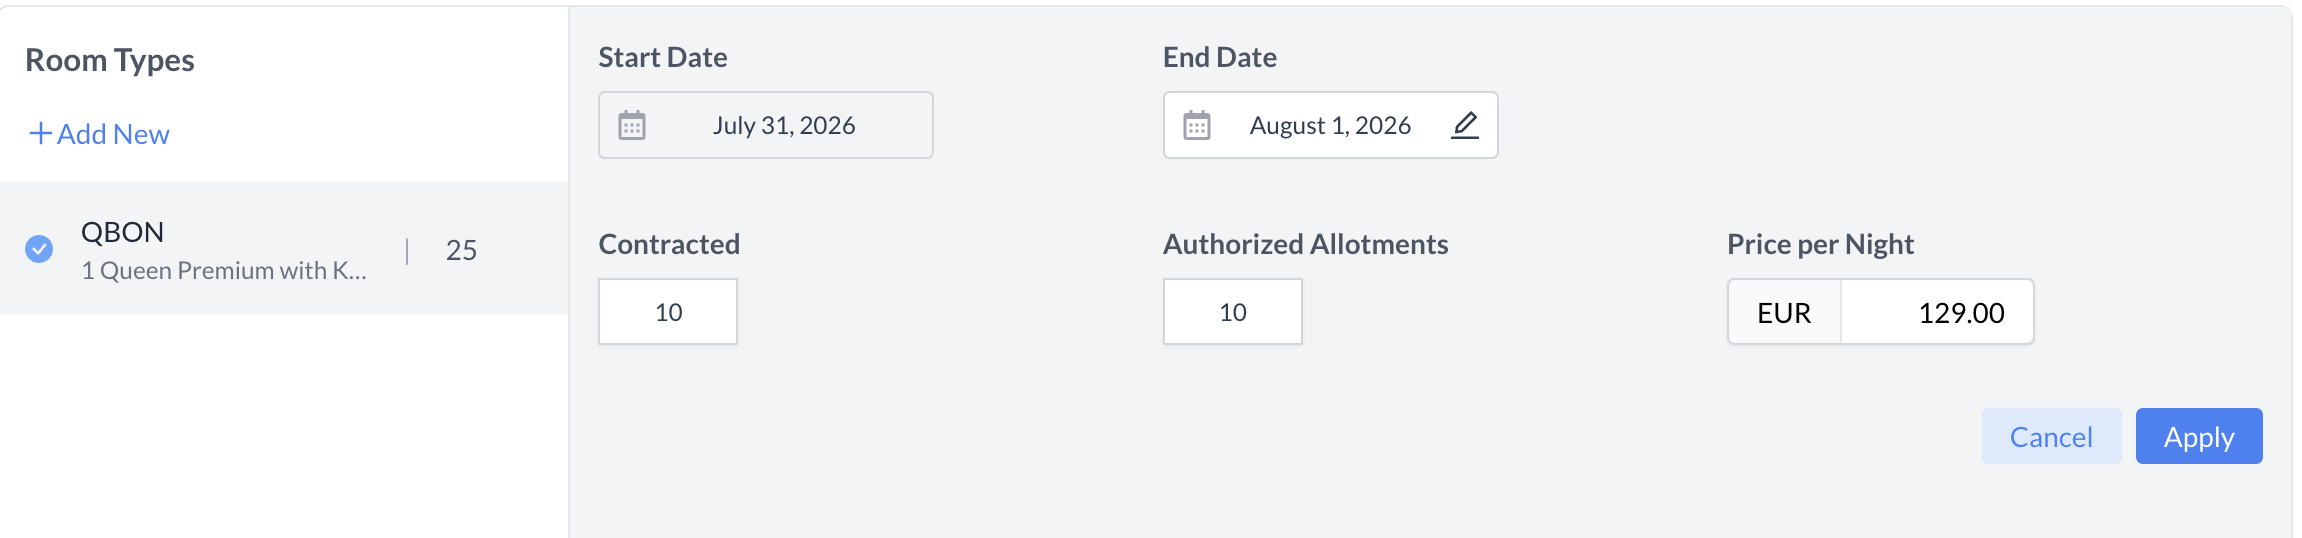
2b. Allocating Room Types & Allotments
Select the room types required for the group block from the available inventory checklist, then define their constraints:
🛠️ Efficiency Tip: You can select multiple room types simultaneously to apply identical allotments and pricing across them at once, or configure each room type individually to support tiered pricing. Click Apply to save your distribution. 2c. Handling Unselected Room Types
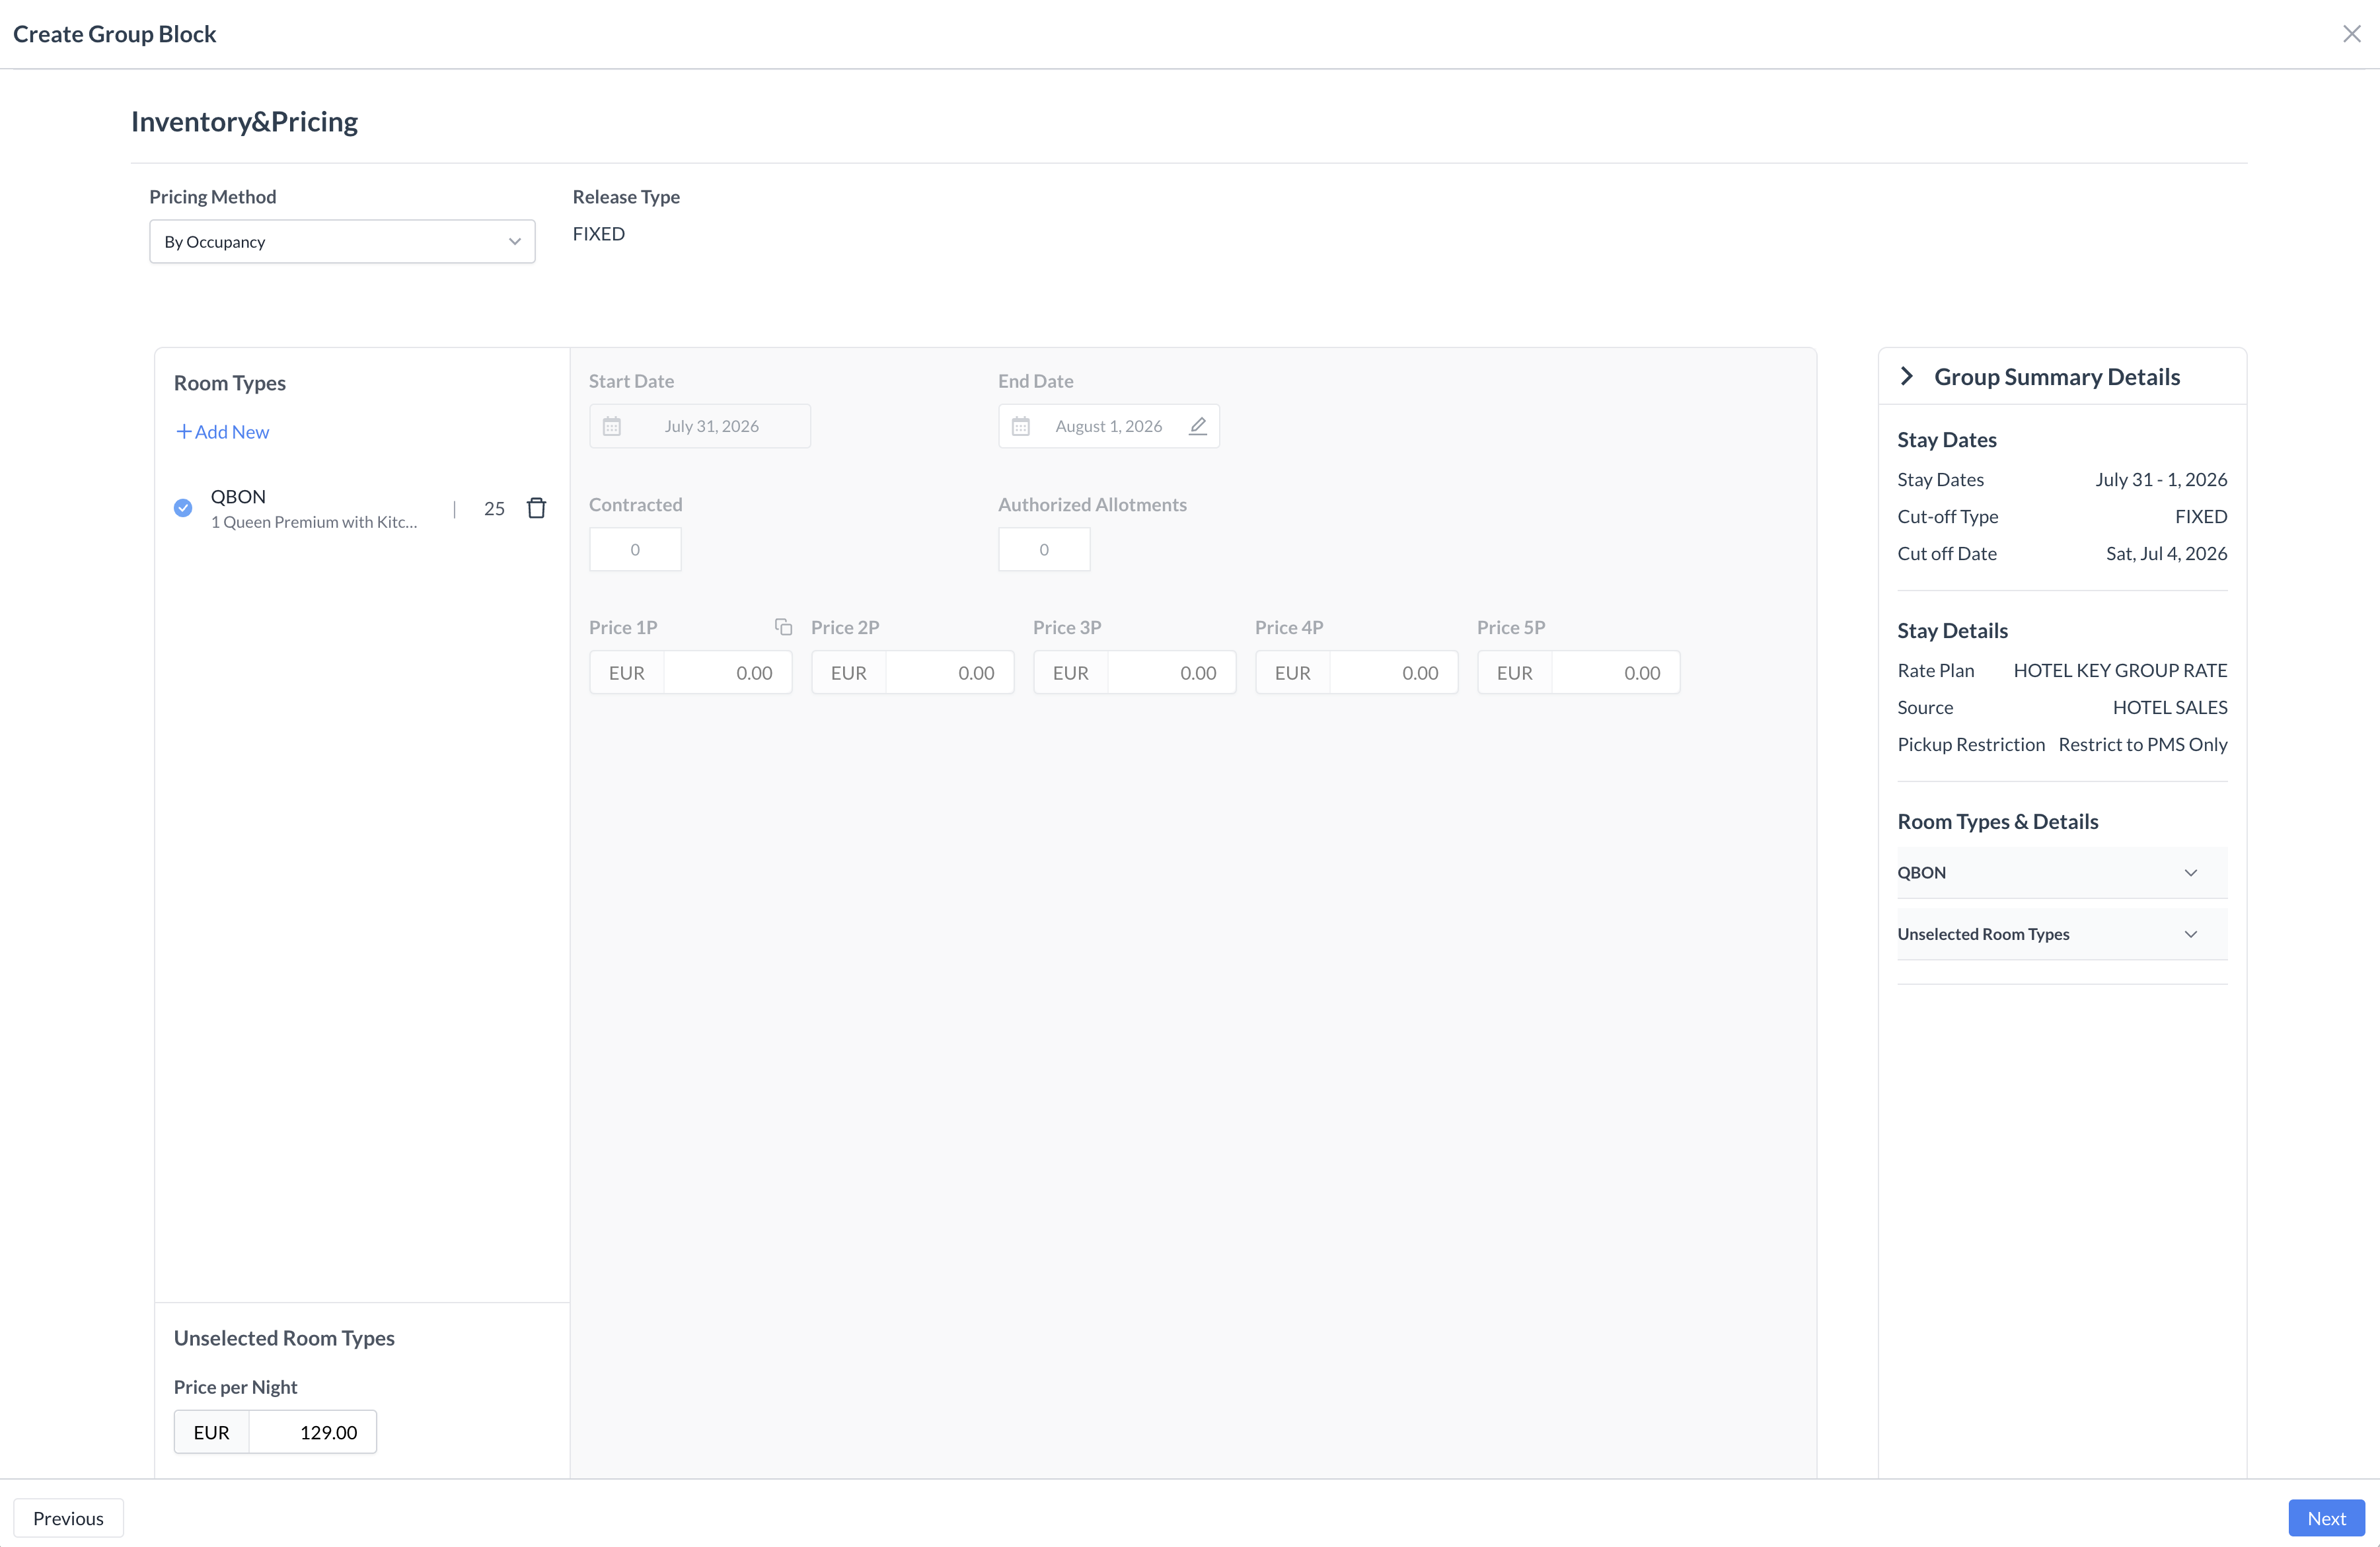
Step 2 Alternative: Inventory & Pricing via the "By Occupancy" Method
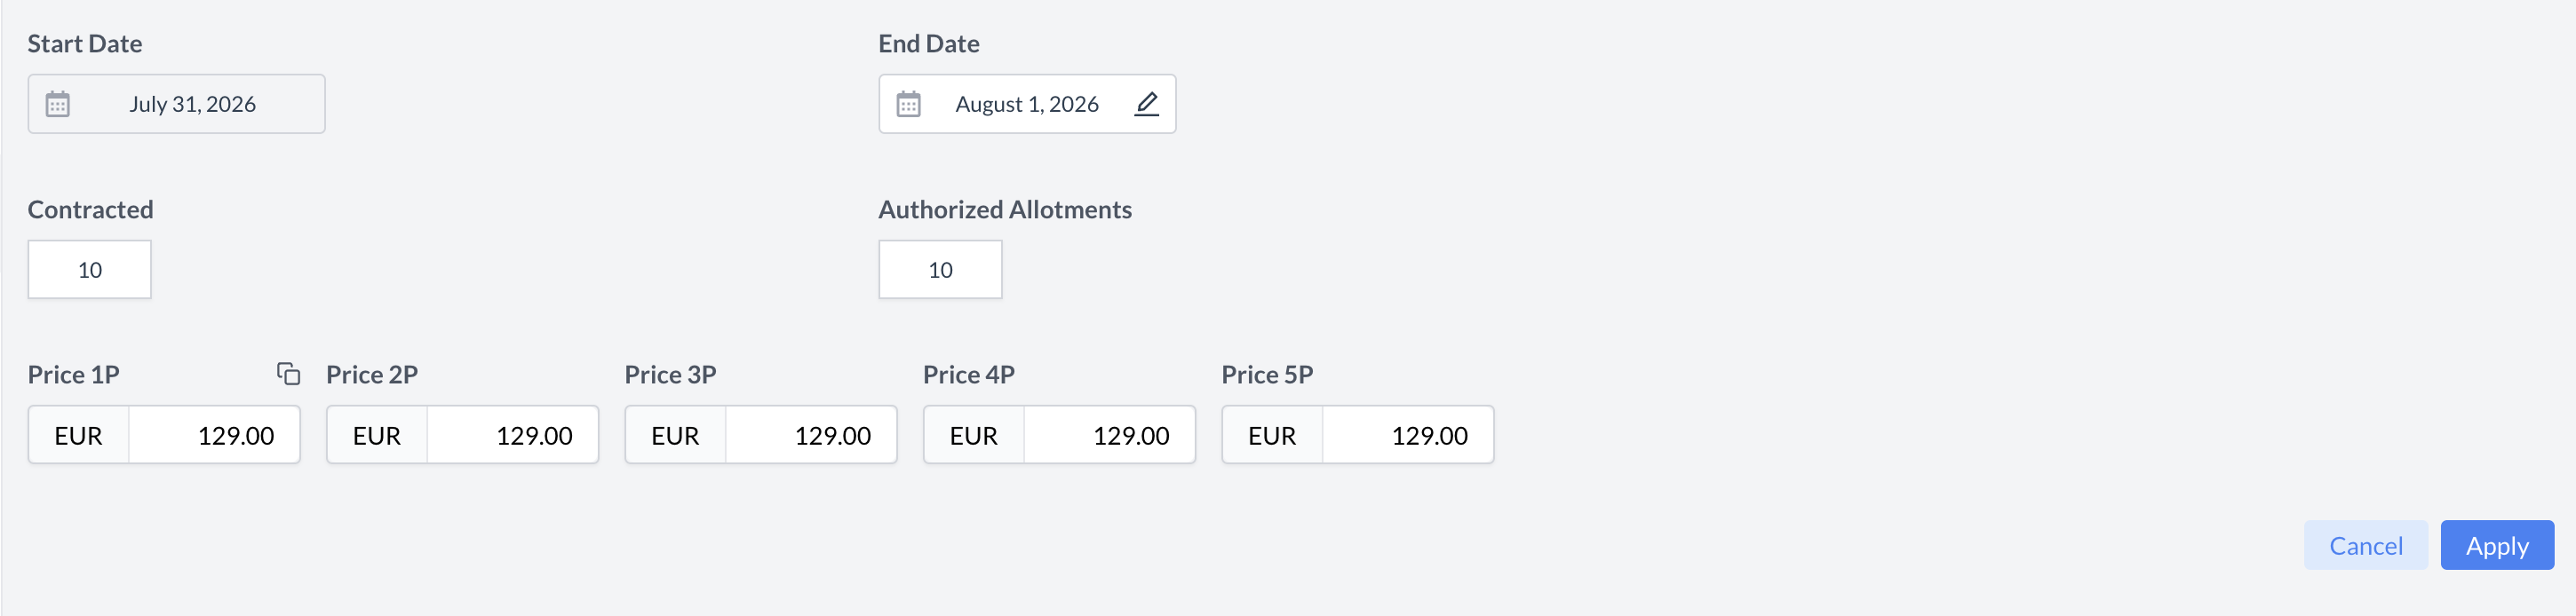
If your property utilizes the By Occupancy pricing structure instead of the default By Product method, follow these steps to configure your room counts and tiered guest pricing. 2a. Allocating Room Types & Allotments
Select the room types required for the group block from the available inventory checklist, then define their constraints:
2b. Setting Occupancy-Based Rates
Unlike the flat-rate product method, you must define specific pricing for each individual guest configuration within the selected room types:
📑 Occupancy Pricing Example: For a standard double room, your tiered pricing grid might look like this:
Once your inventory counts and occupancy rates are entered, click Apply to save and distribute the matrix. 2c. Handling Unselected Room Types
Once all inventory counts and tiered rates are successfully applied, click the navigation buttons at the bottom of the screen to advance to Step 3: Inventory & Pricing Overview. |
.png?cb=7762c81e6c632244f8c83d327240d270)
.png?cb=d590eb725a46f8781b710e259ba3a149)
|
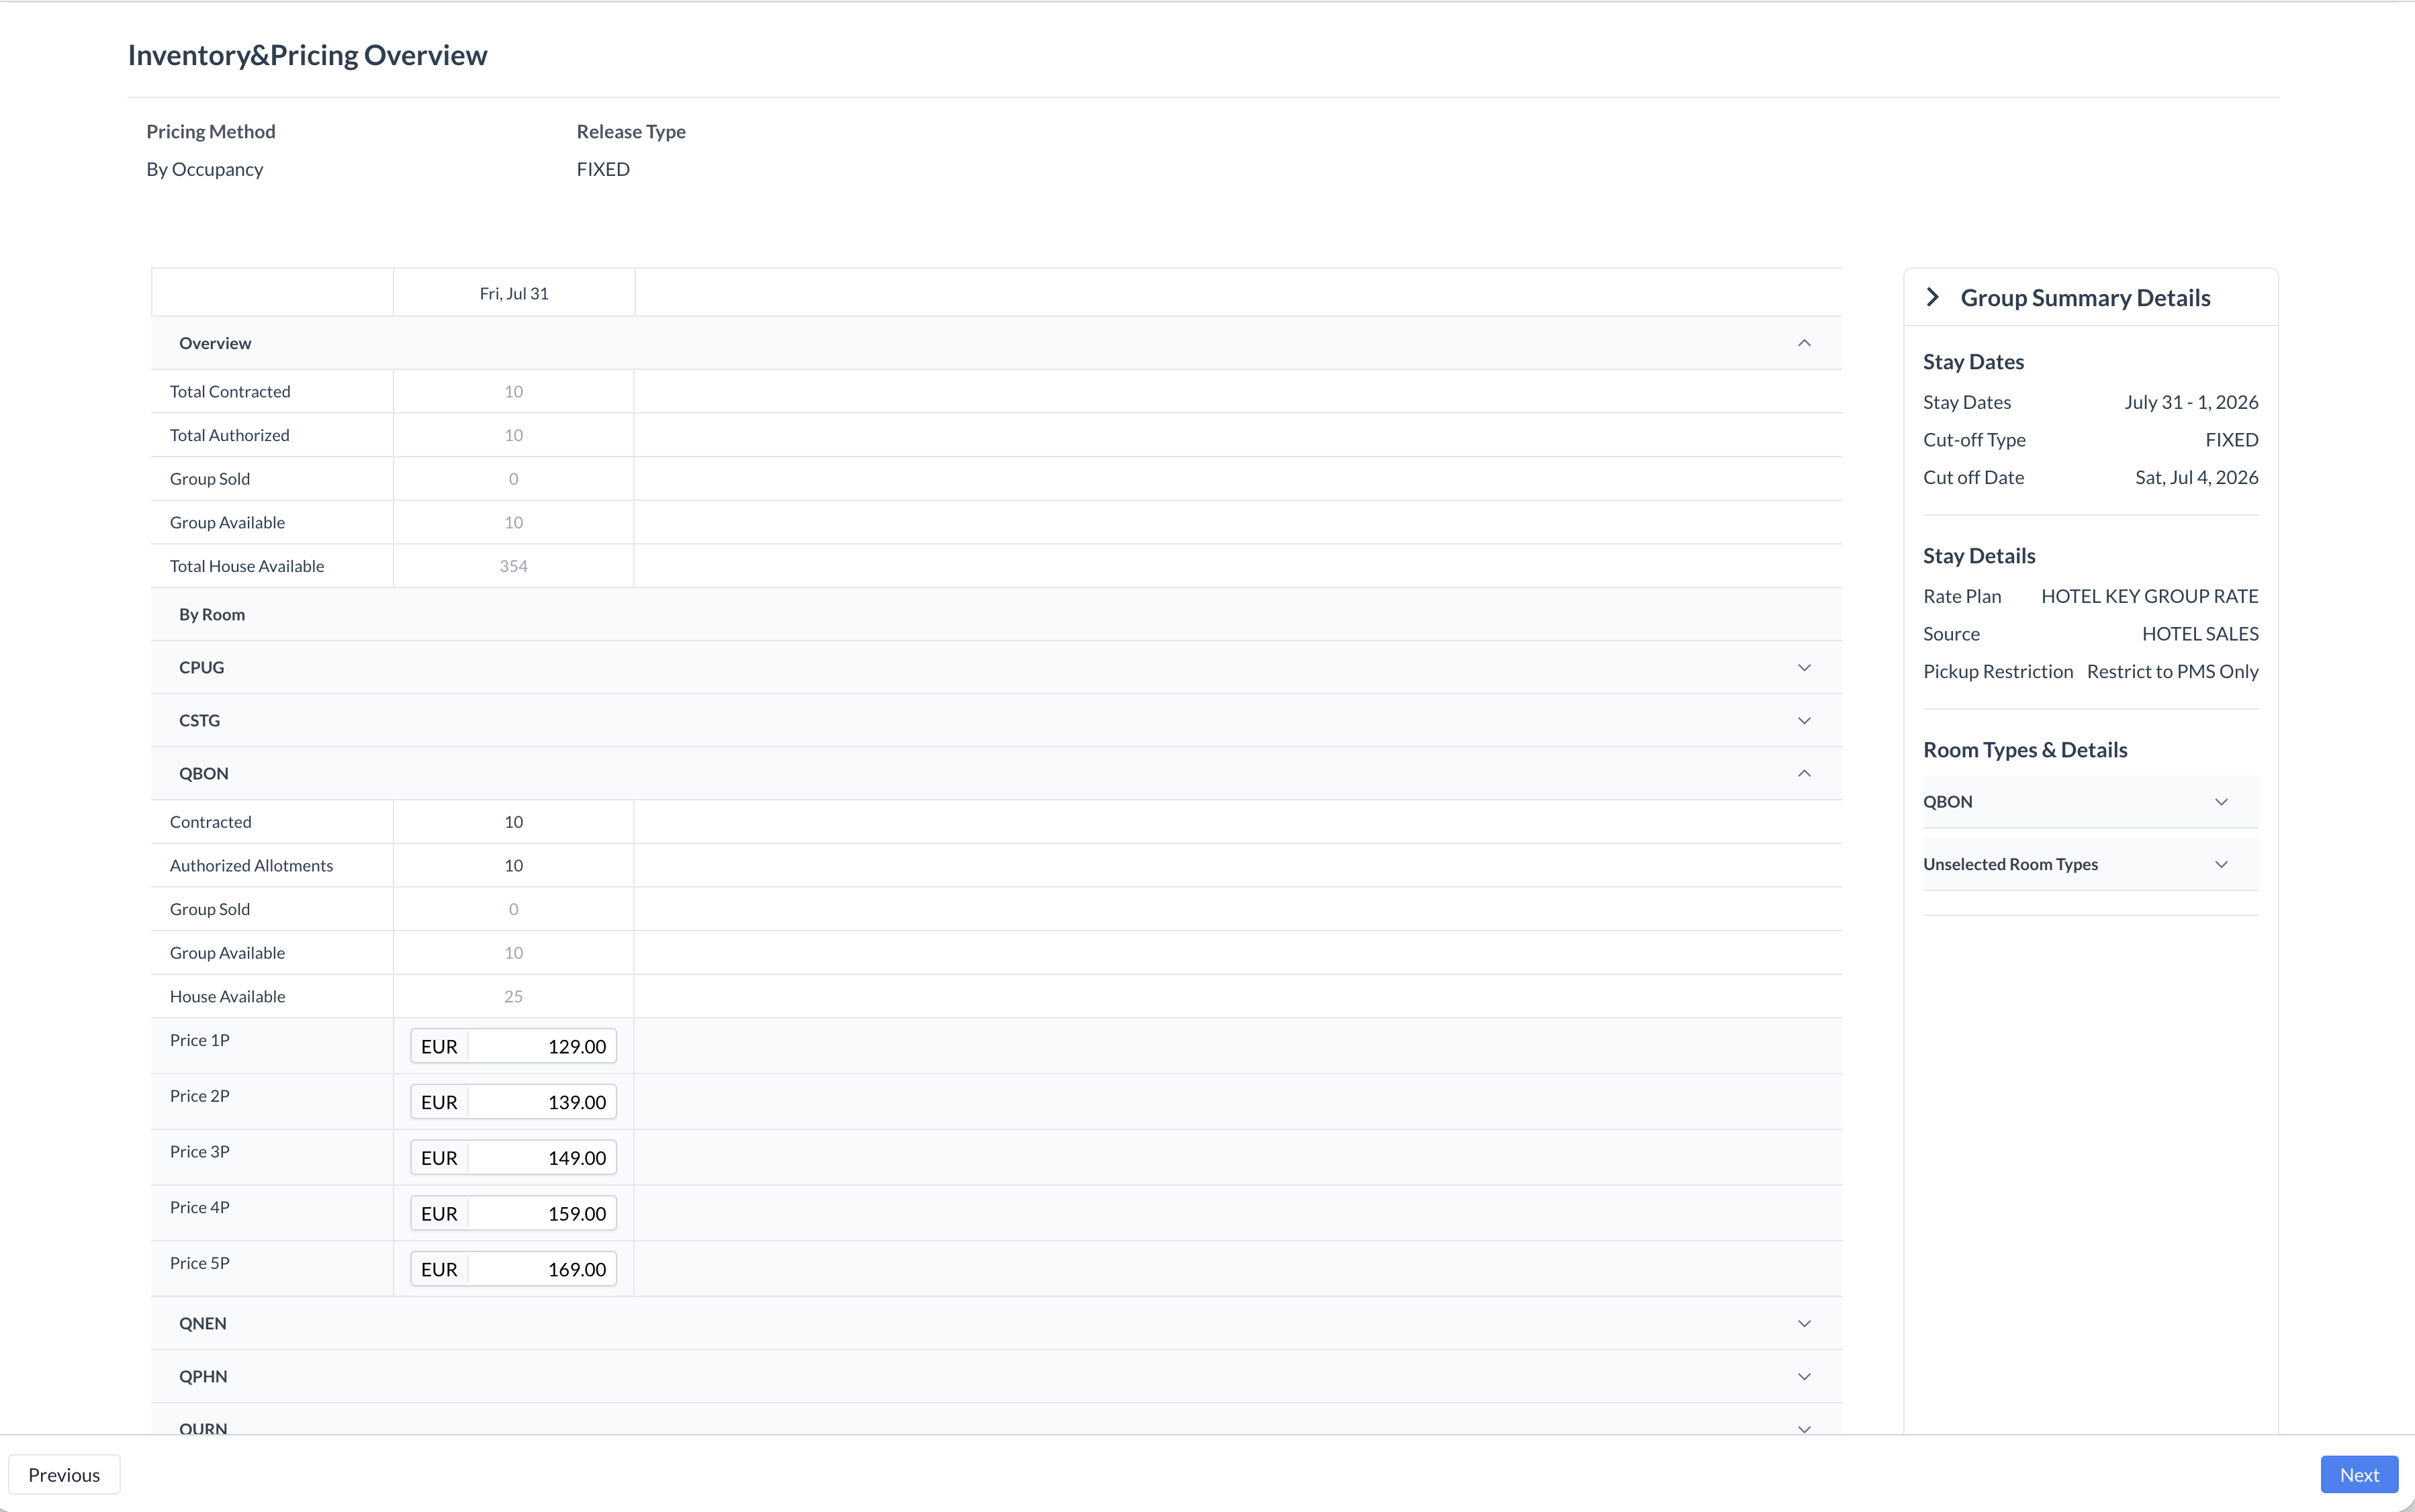
Step 3: Inventory & Pricing Overview
The Inventory & Pricing Overview screen acts as your master verification dashboard. Before moving forward, use this page to audit your daily room allocations, cross-reference house availability, and review your pricing structures. 3a. High-Level Block Summary
The primary information card at the top of the screen provides a consolidated, real-time matrix of your property's total inventory metrics across the entire date range of the block:
3b. Selected Room Types Breakdown
Directly below the summary card, your explicitly selected room types are listed first. Click on any individual room type row to expand its detailed nested view, which displays:
3c. Unselected Room Types Breakdown
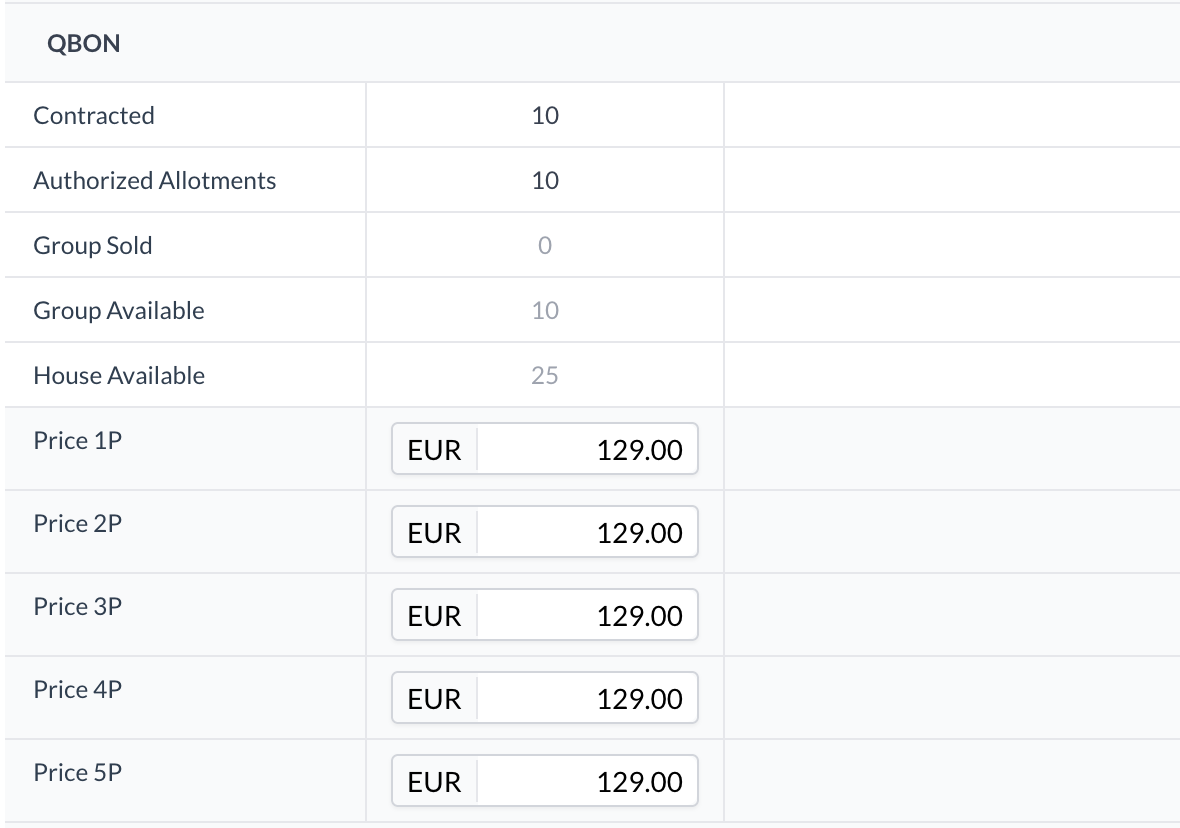
Scroll to the bottom of the page to review the Unselected Room Types section. This area displays the property’s remaining room types that were left out of the active block setup. 🔍 What to look for: Unselected room types will automatically display a value of 0 for Contracted, Authorized, and Picked Up (Sold) counts. However, they will display the baseline fallback Room Rate you assigned to them during Step 2. Verify that this fallback price is correct in case these room types need to be utilized later. Once you have verified that all figures, rates, and inventory counts are accurate, click the blue NEXT button at the bottom right of the screen to advance to Step 4: Guarantee Information. |
|
|
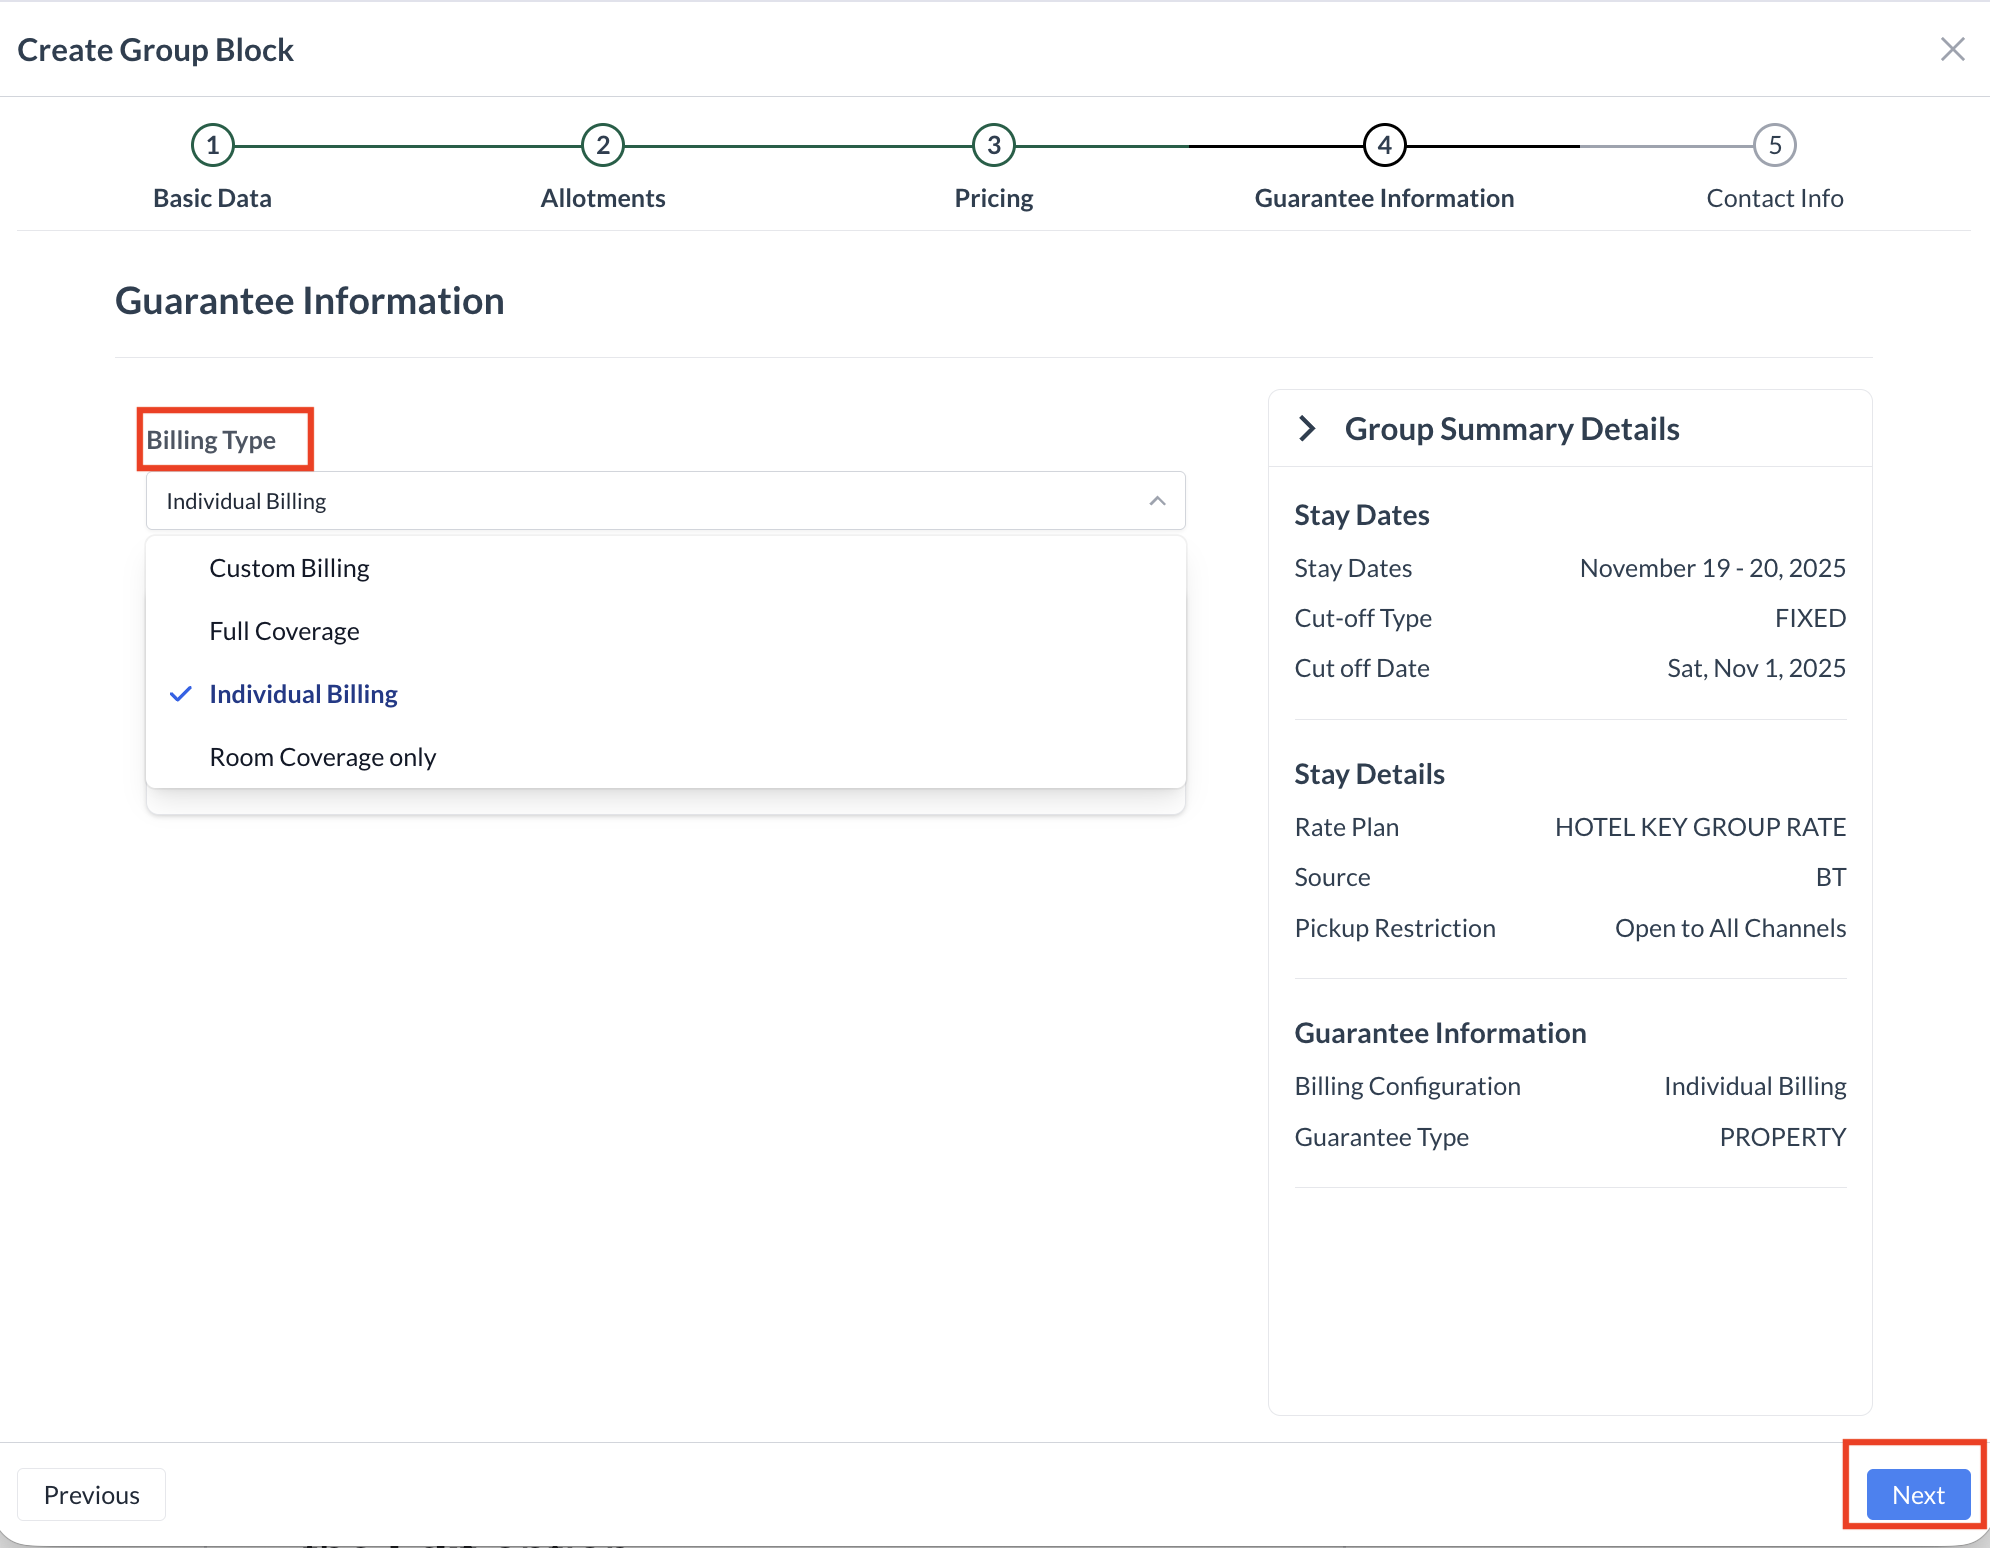
Step 4: Guarantee Information Screen In this step, you will select the Billing Type for the group block. This determines who is responsible for which charges—the group or the individual guests. Use the Billing Type dropdown menu to select one of the following options: Custom Billing
Allows for a combination of charges split between the group and the guest.
Full Coverage
The group is responsible for all charges, including accommodations, incidentals, and any additional services. Individual Billing
Each guest is responsible for all charges, with no charges billed to the group. Room Coverage Only
The group pays for Room Accommodations only. Guests are responsible for all other charges (e.g., meals, parking, incidentals). 📌 Note: Once the group block is created and reservations are made, you can manage or override the billing type for individual reservations within the PMS, if needed. When finished, click the blue “Next” button to continue. |
|
|
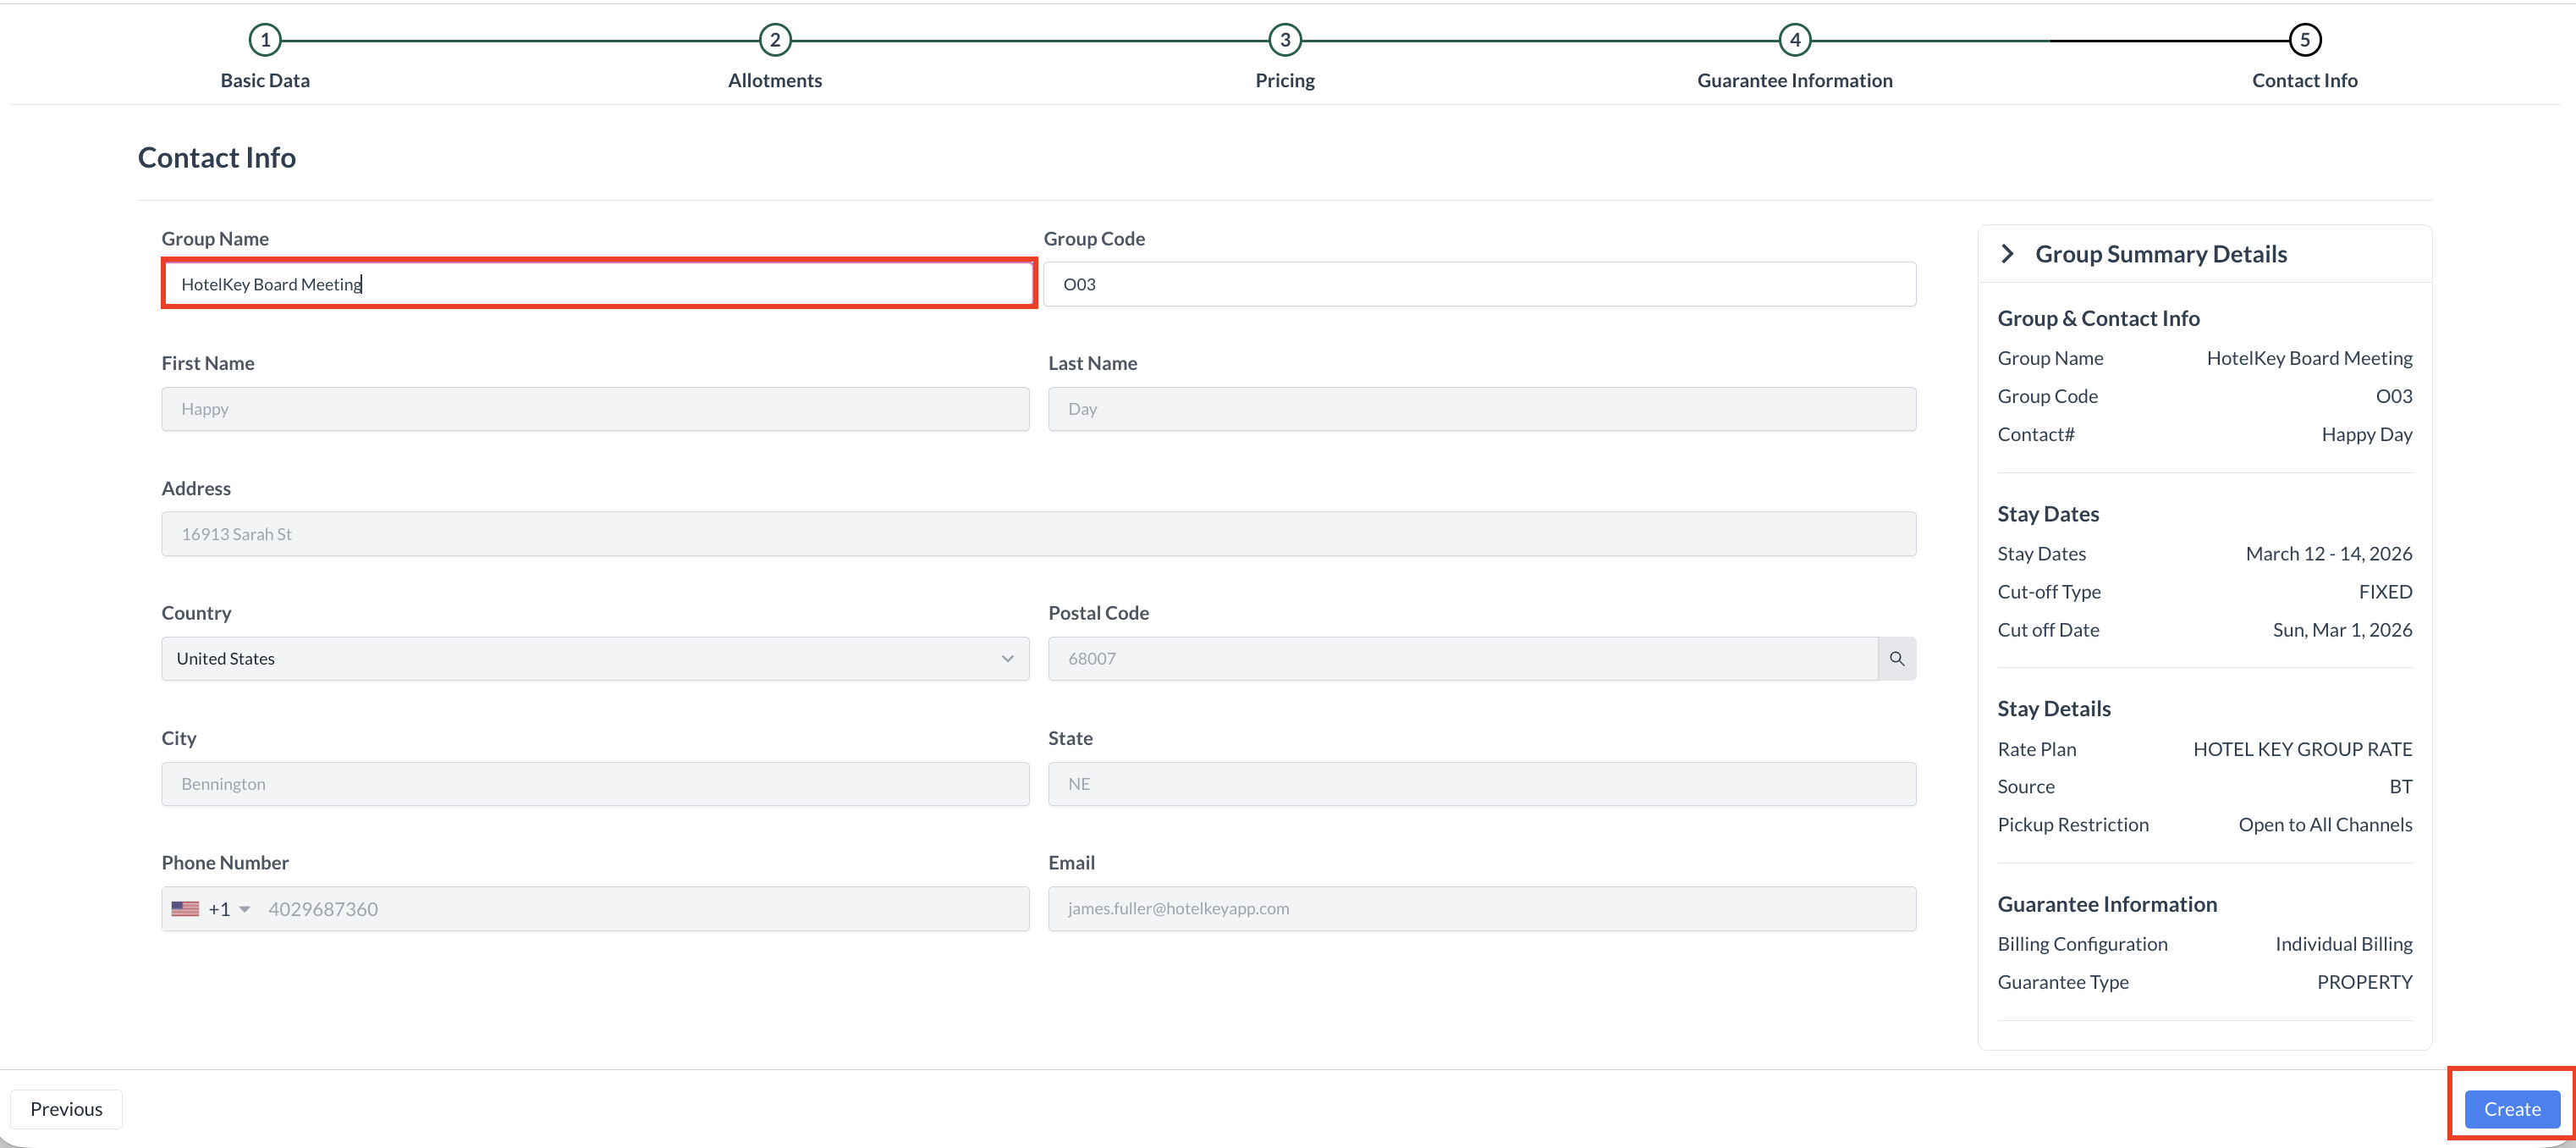
Step 5: Contact Information Screen In this step, you’ll enter the final group details before creating the block in the PMS. 5a. Group Contact Information
The Group Contact is automatically populated based on the Booker or Contact selected during Step 2 of the event setup.
📌 No additional action is required. You can change this information once the block is created in the PMS. 5b. Enter the Group Block Name
Enter the Group Block Name — this is the name guests will reference when calling to make a reservation (e.g., "Smith Wedding Block", "ABC Corporation Conference"). 5c. Enter or Confirm the Group Code
📌 Important Notes:
5d. Create the Group Block
Once all information has been entered, click the blue “Create” button. This action will write the Group Block to the PMS, completing the setup process. |
|
|
Step 6: Review Screen The Group Block has now been successfully created in the PMS. On the Review Screen, you’ll see a summary of the key details related to the group block, including:
🔄 If Changes Are Needed
If you need to start over for any reason, you can click the red “Cancel and Create New Group Block” button to discard the current block and begin a new one.
✅ Continue Event Setup
In most cases, you’ll simply click the blue “Next” button to continue building the rest of your Event. |
.png?cb=6f0d260ddcb8b880b10375f4e50b6663)
|
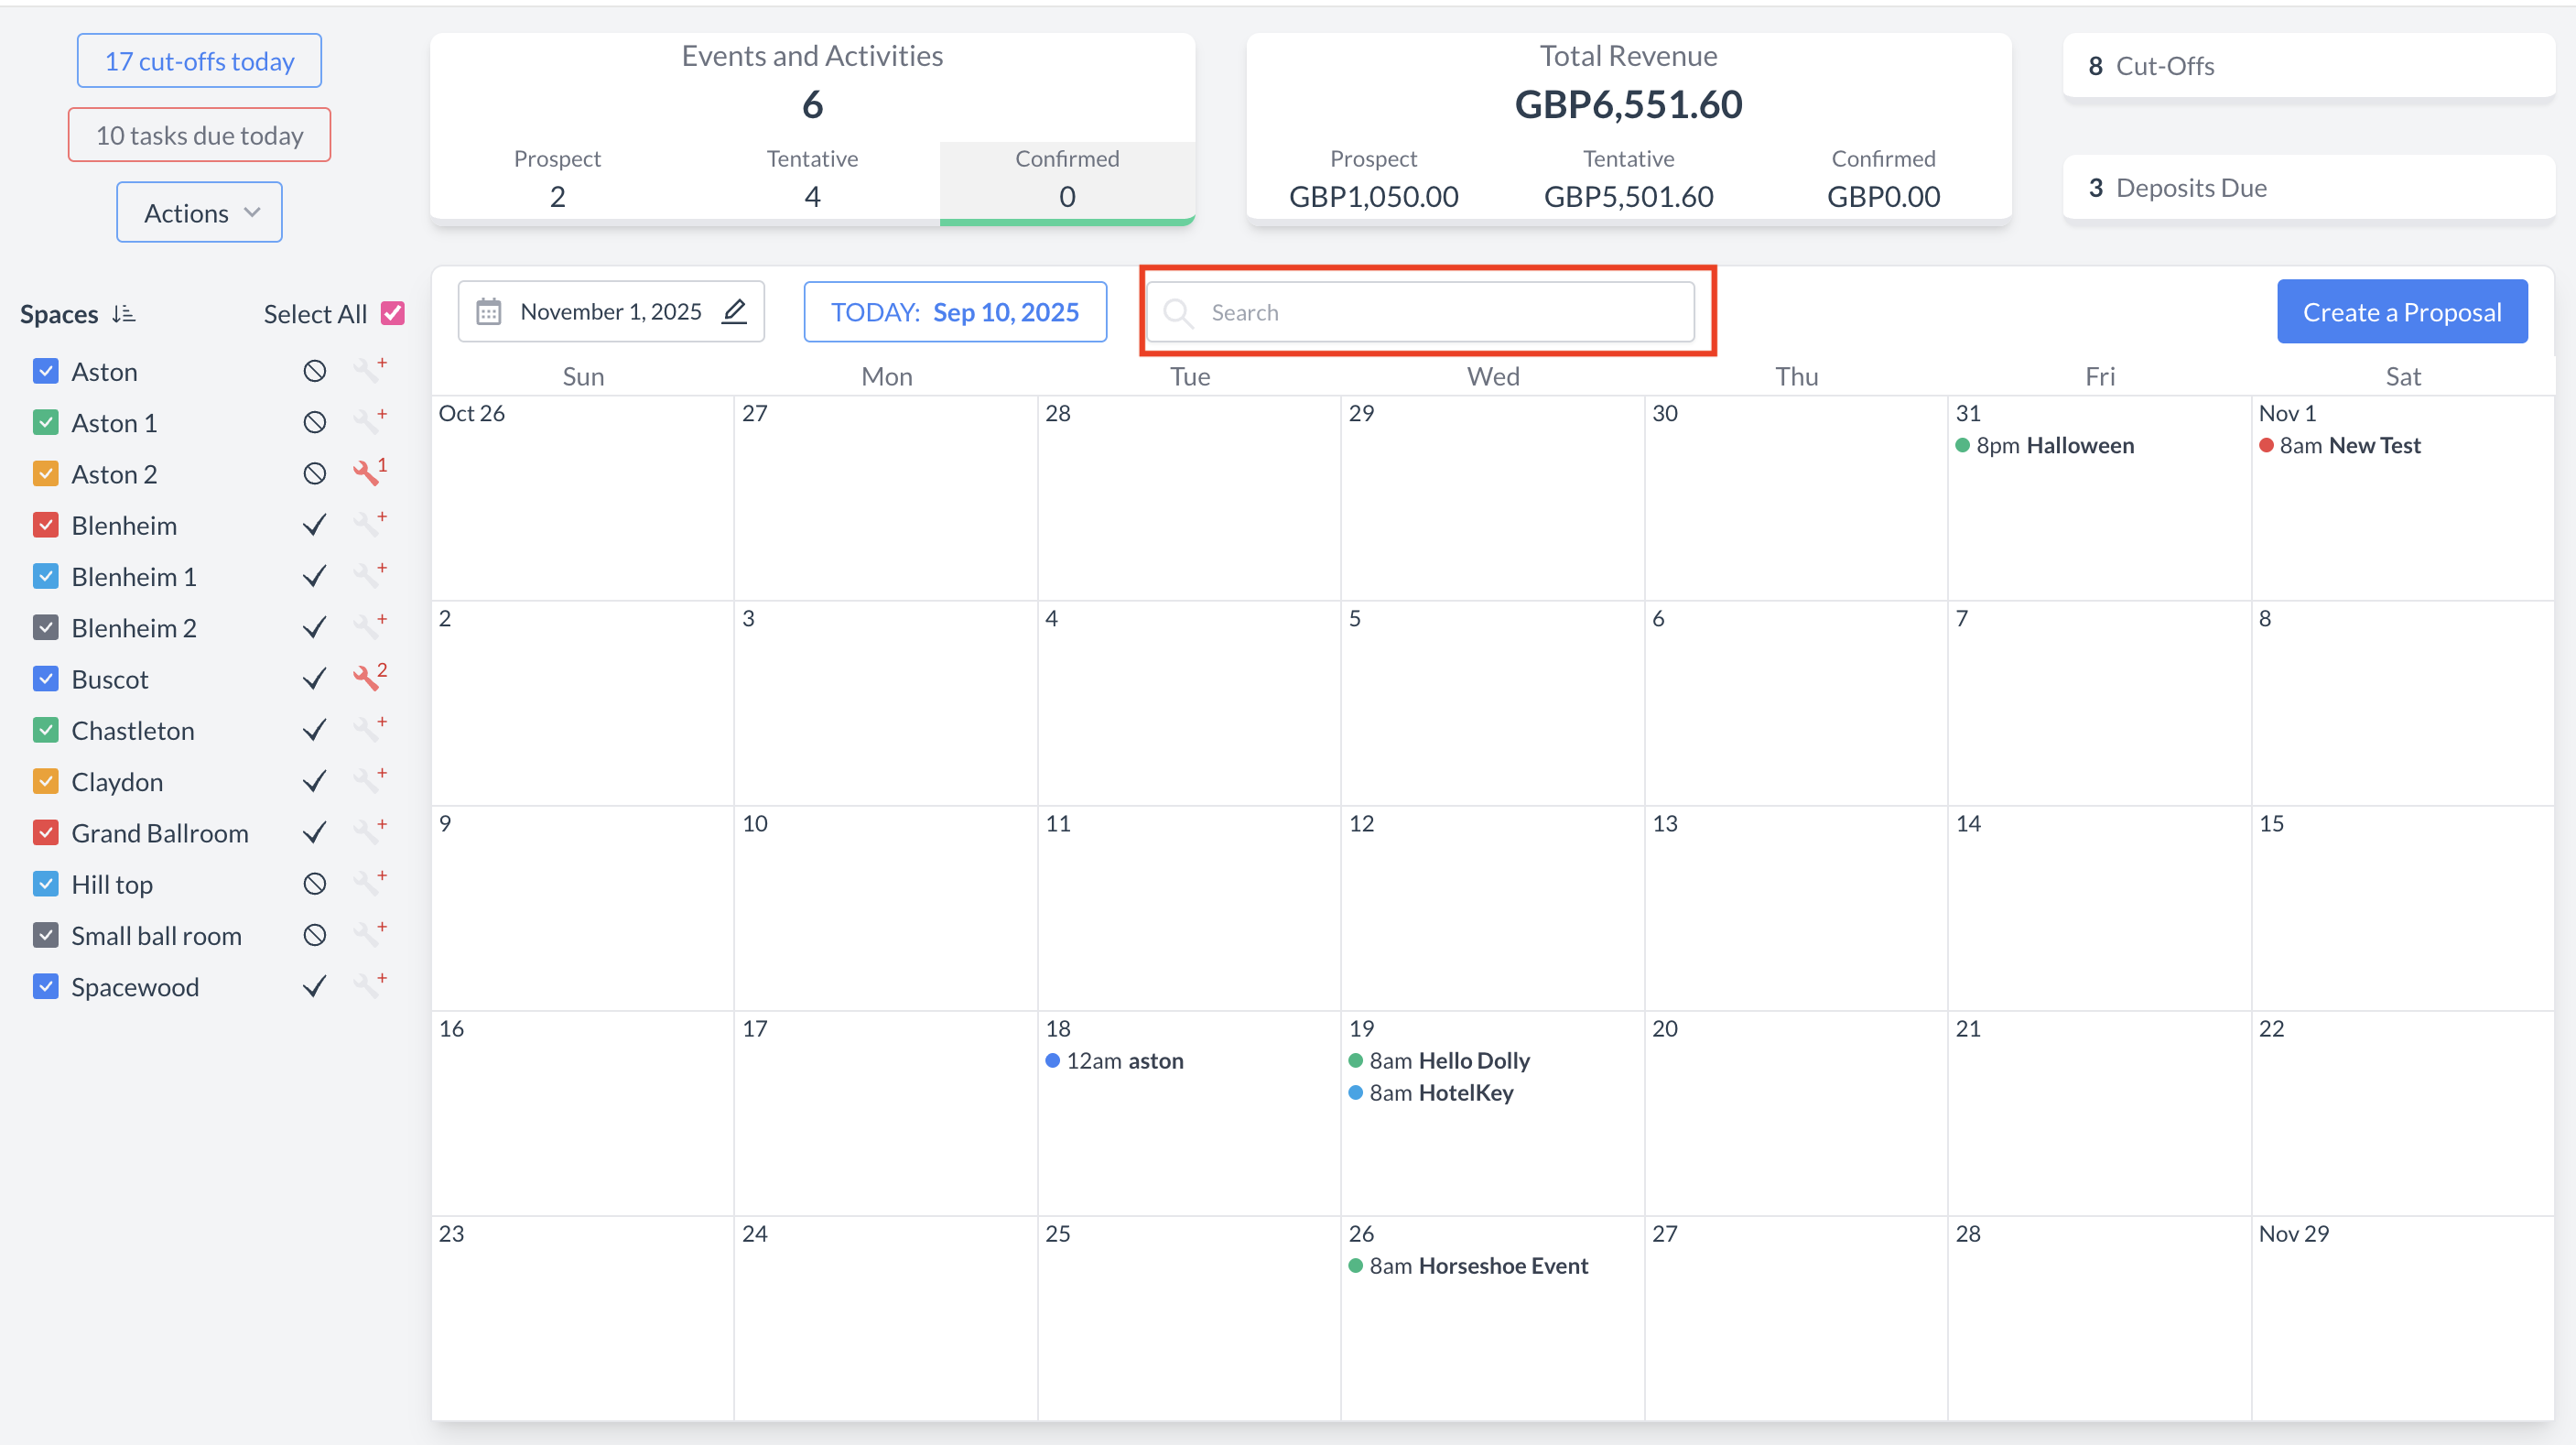
Method 2: Post Event Creation
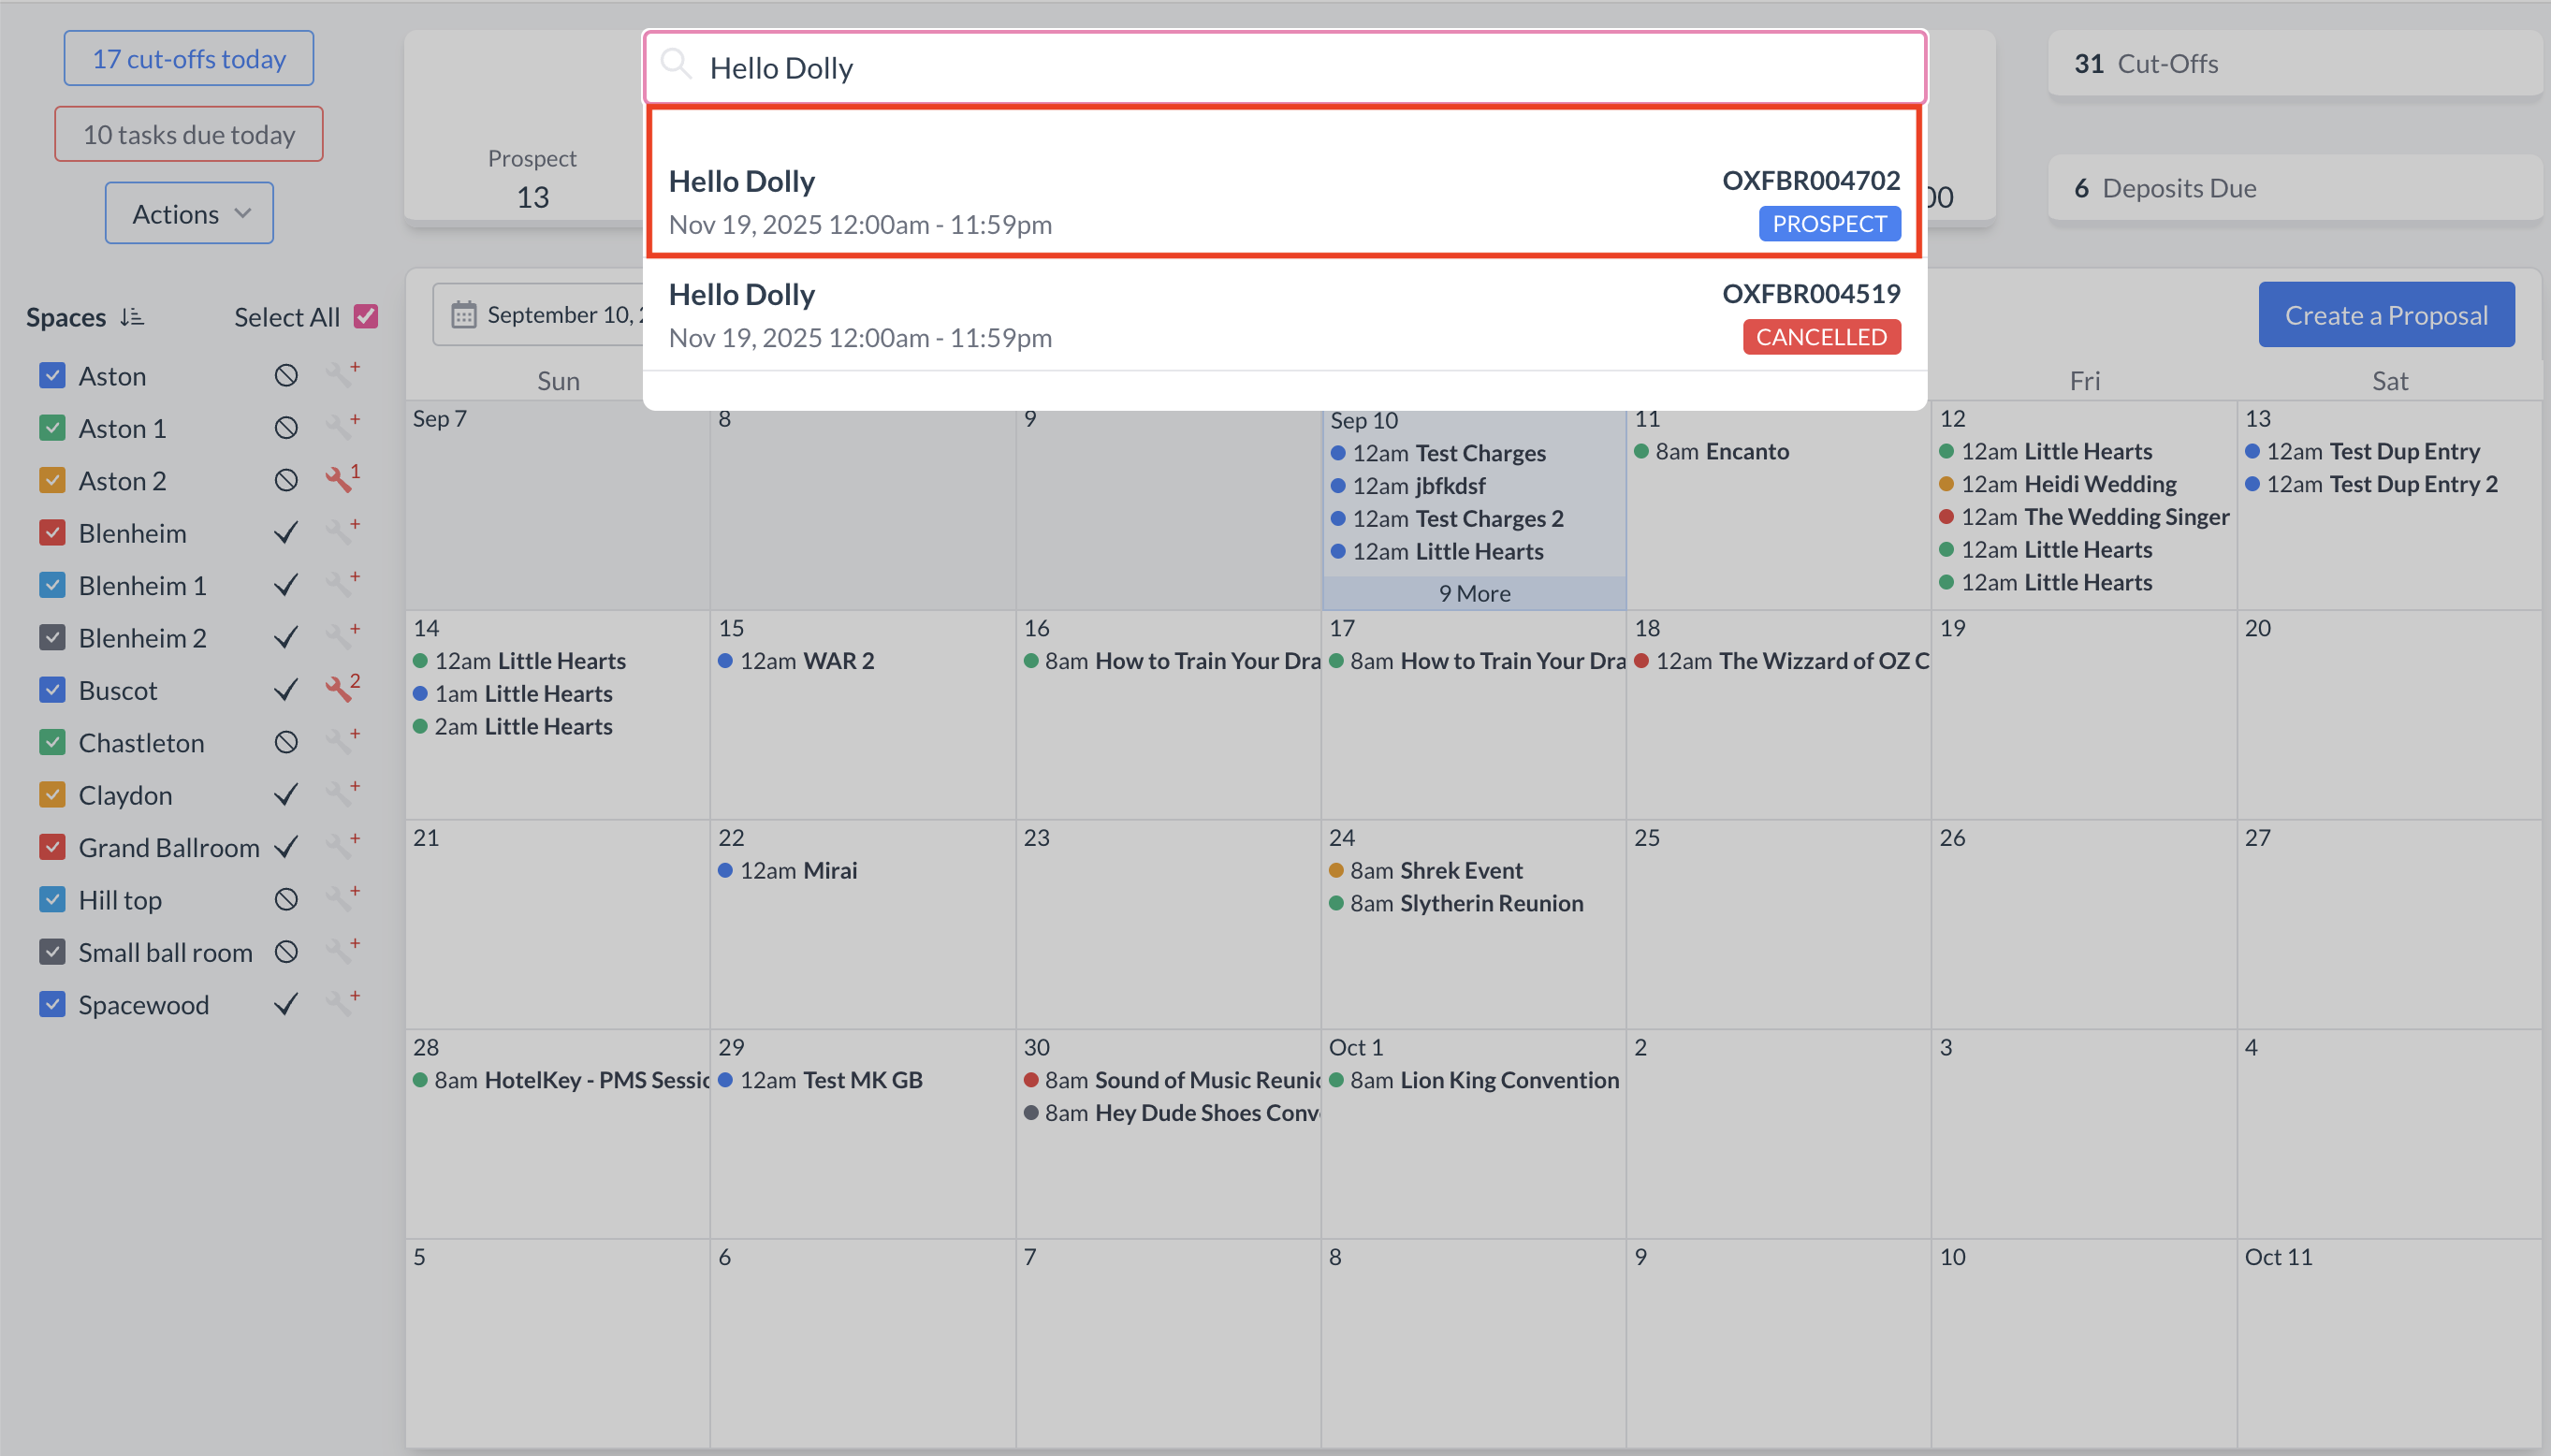
To begin, navigate to the Dashboard and use the Search box to locate the event. Enter the full or partial Event Name into the search field. The system will display a list of matching events, or, if there is an exact match, it will appear directly. Once you’ve identified the correct event, simply click on the event name to open it. |
|
|
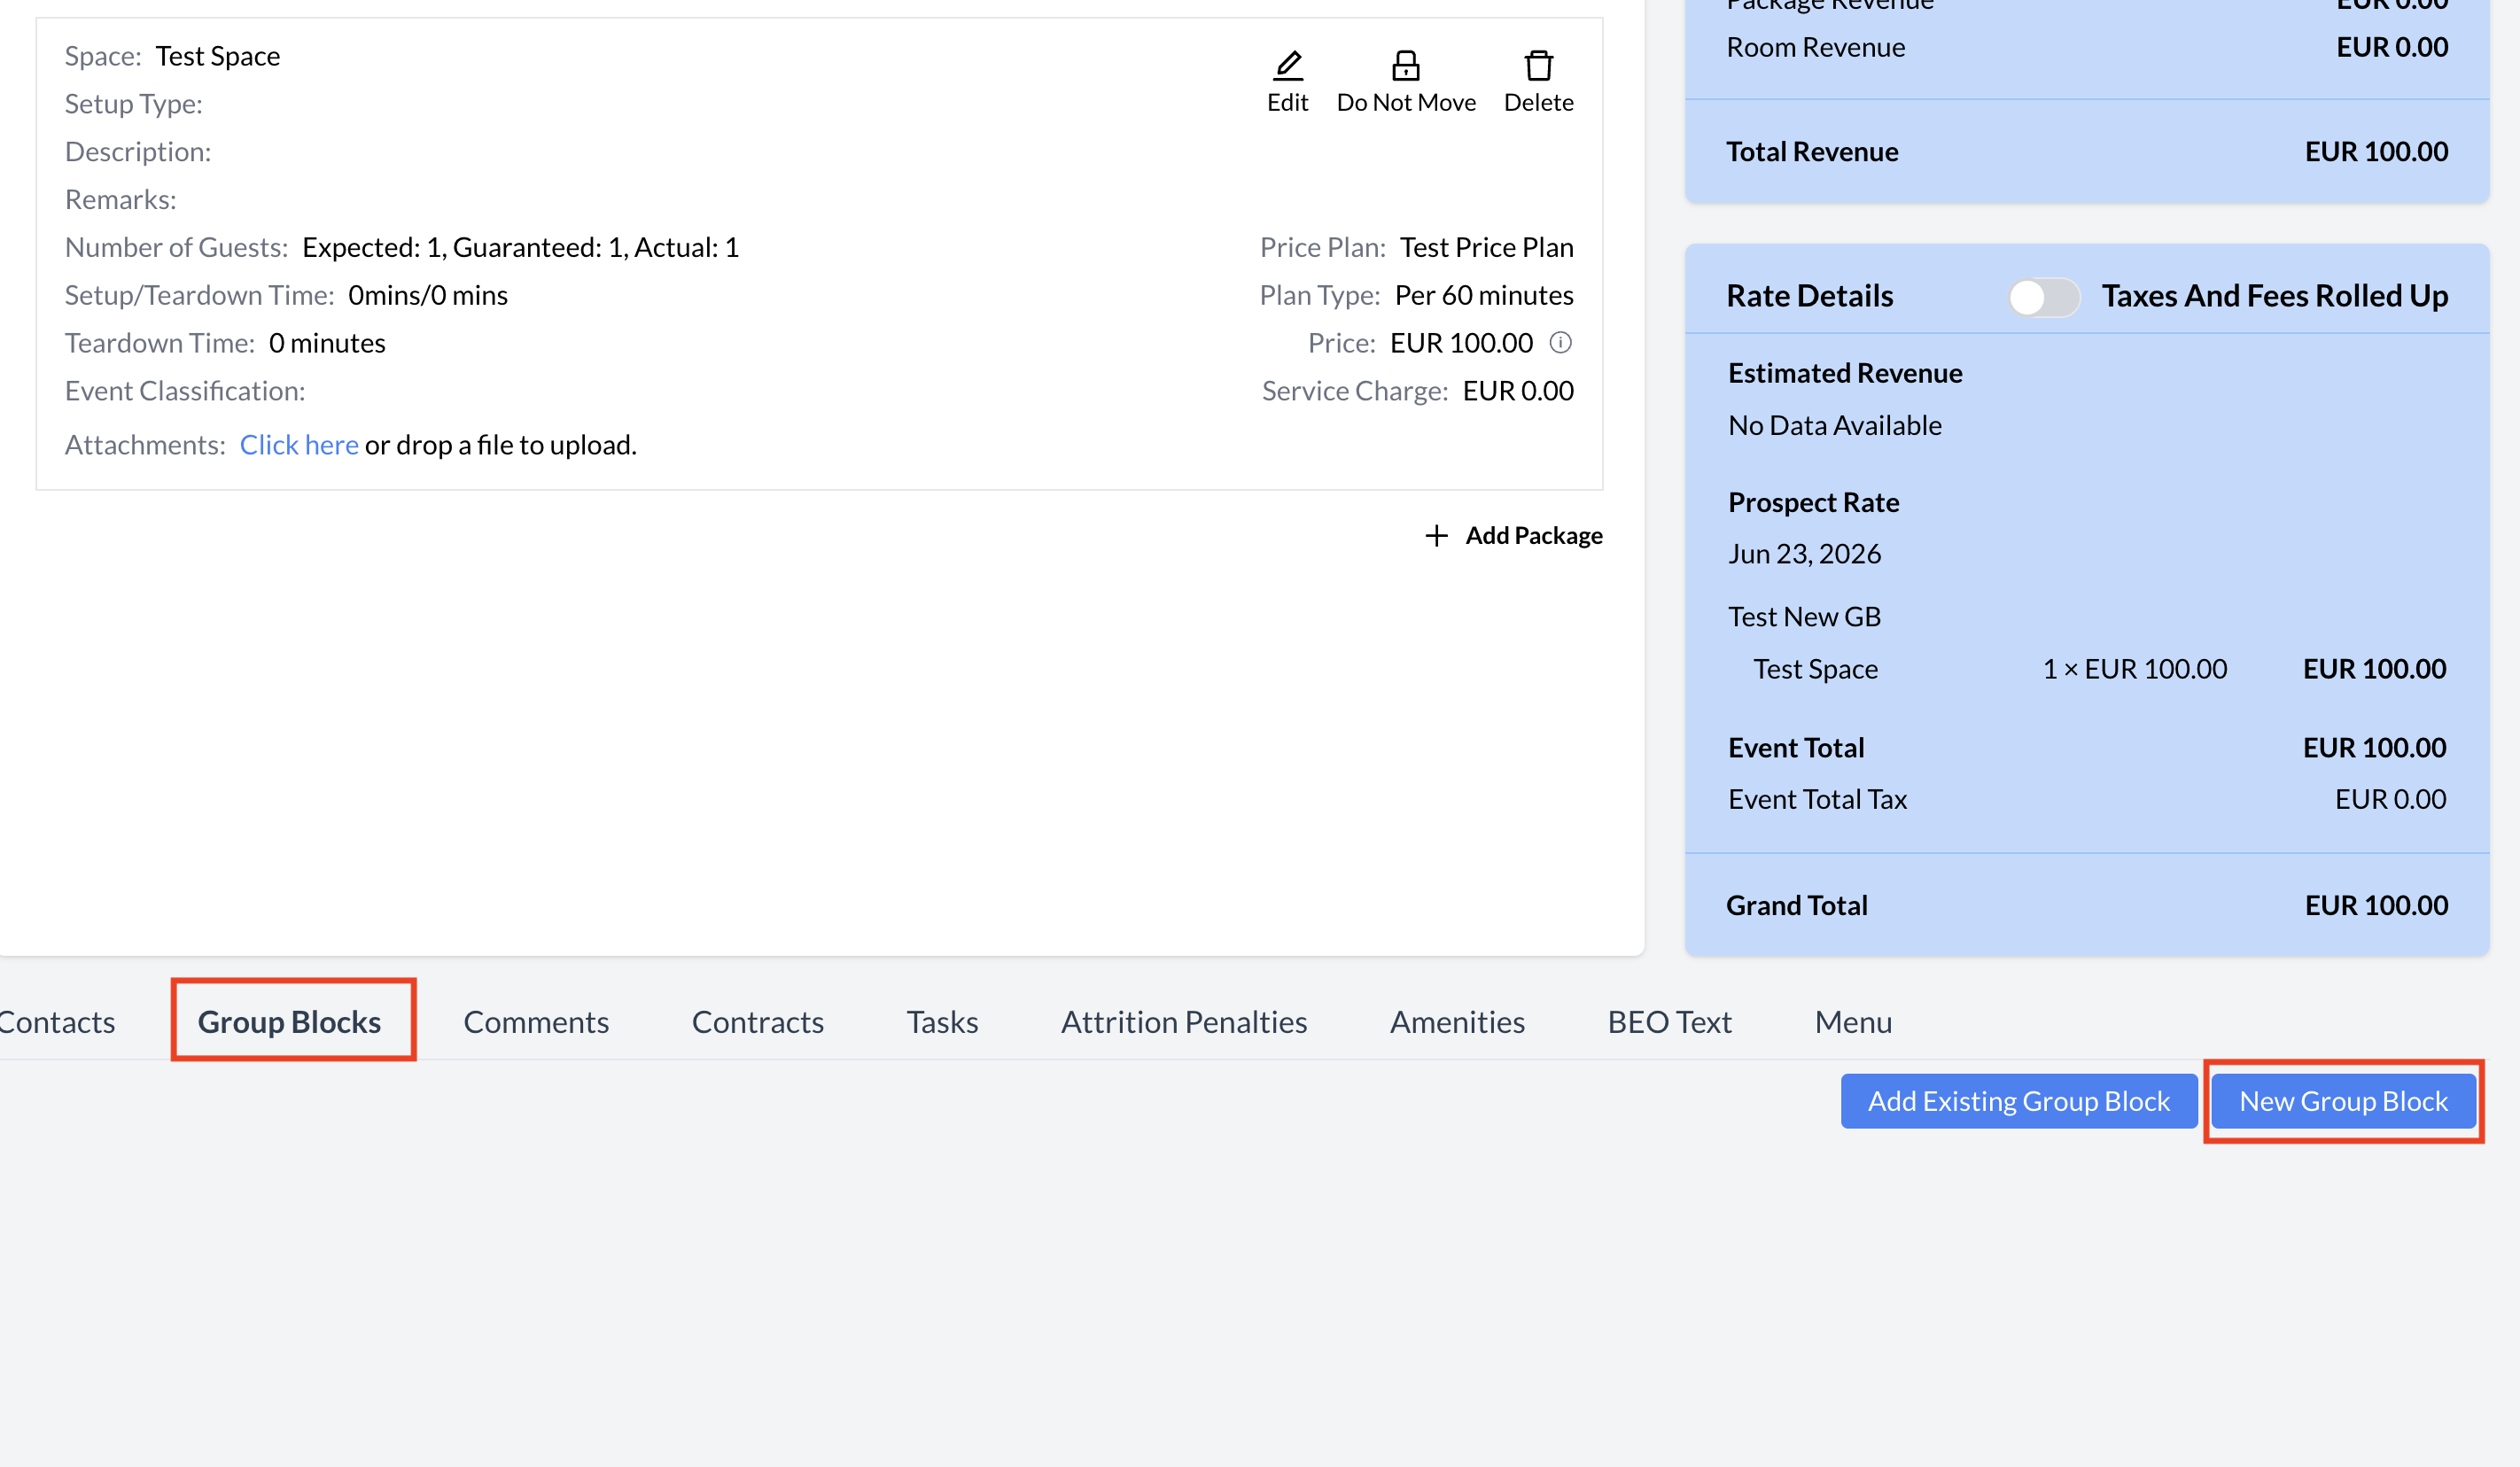
To create a new group block associated with an event:
⚠️ Next: To ensure accurate setup and a successful PMS sync, follow the Method 1 steps above sequentially, beginning with Step 1: Basic Data from this point forward. |
|
[Closing text, if any, goes here.]