Sending and Signing BEOs & Contracts Electronically
📆 Revision Date:
Overview: Electronic Document Sending in EventKey
EventKey, includes a built-in feature that allows users to send Banquet Event Orders (BEOs) and Contracts electronically—directly from within the system. This streamlined process enables event bookers to review, sign, and return documents digitally, eliminating the need for printing, scanning, or emailing PDFs.
Once a document is signed, a copy is automatically stored on the Event Record, ensuring all documentation is centrally located and easily accessible by the team.
This functionality not only improves efficiency and turnaround time but also enhances the client experience by providing a fast, secure, and convenient way to manage event documents.
Navigate to Home > Event Management
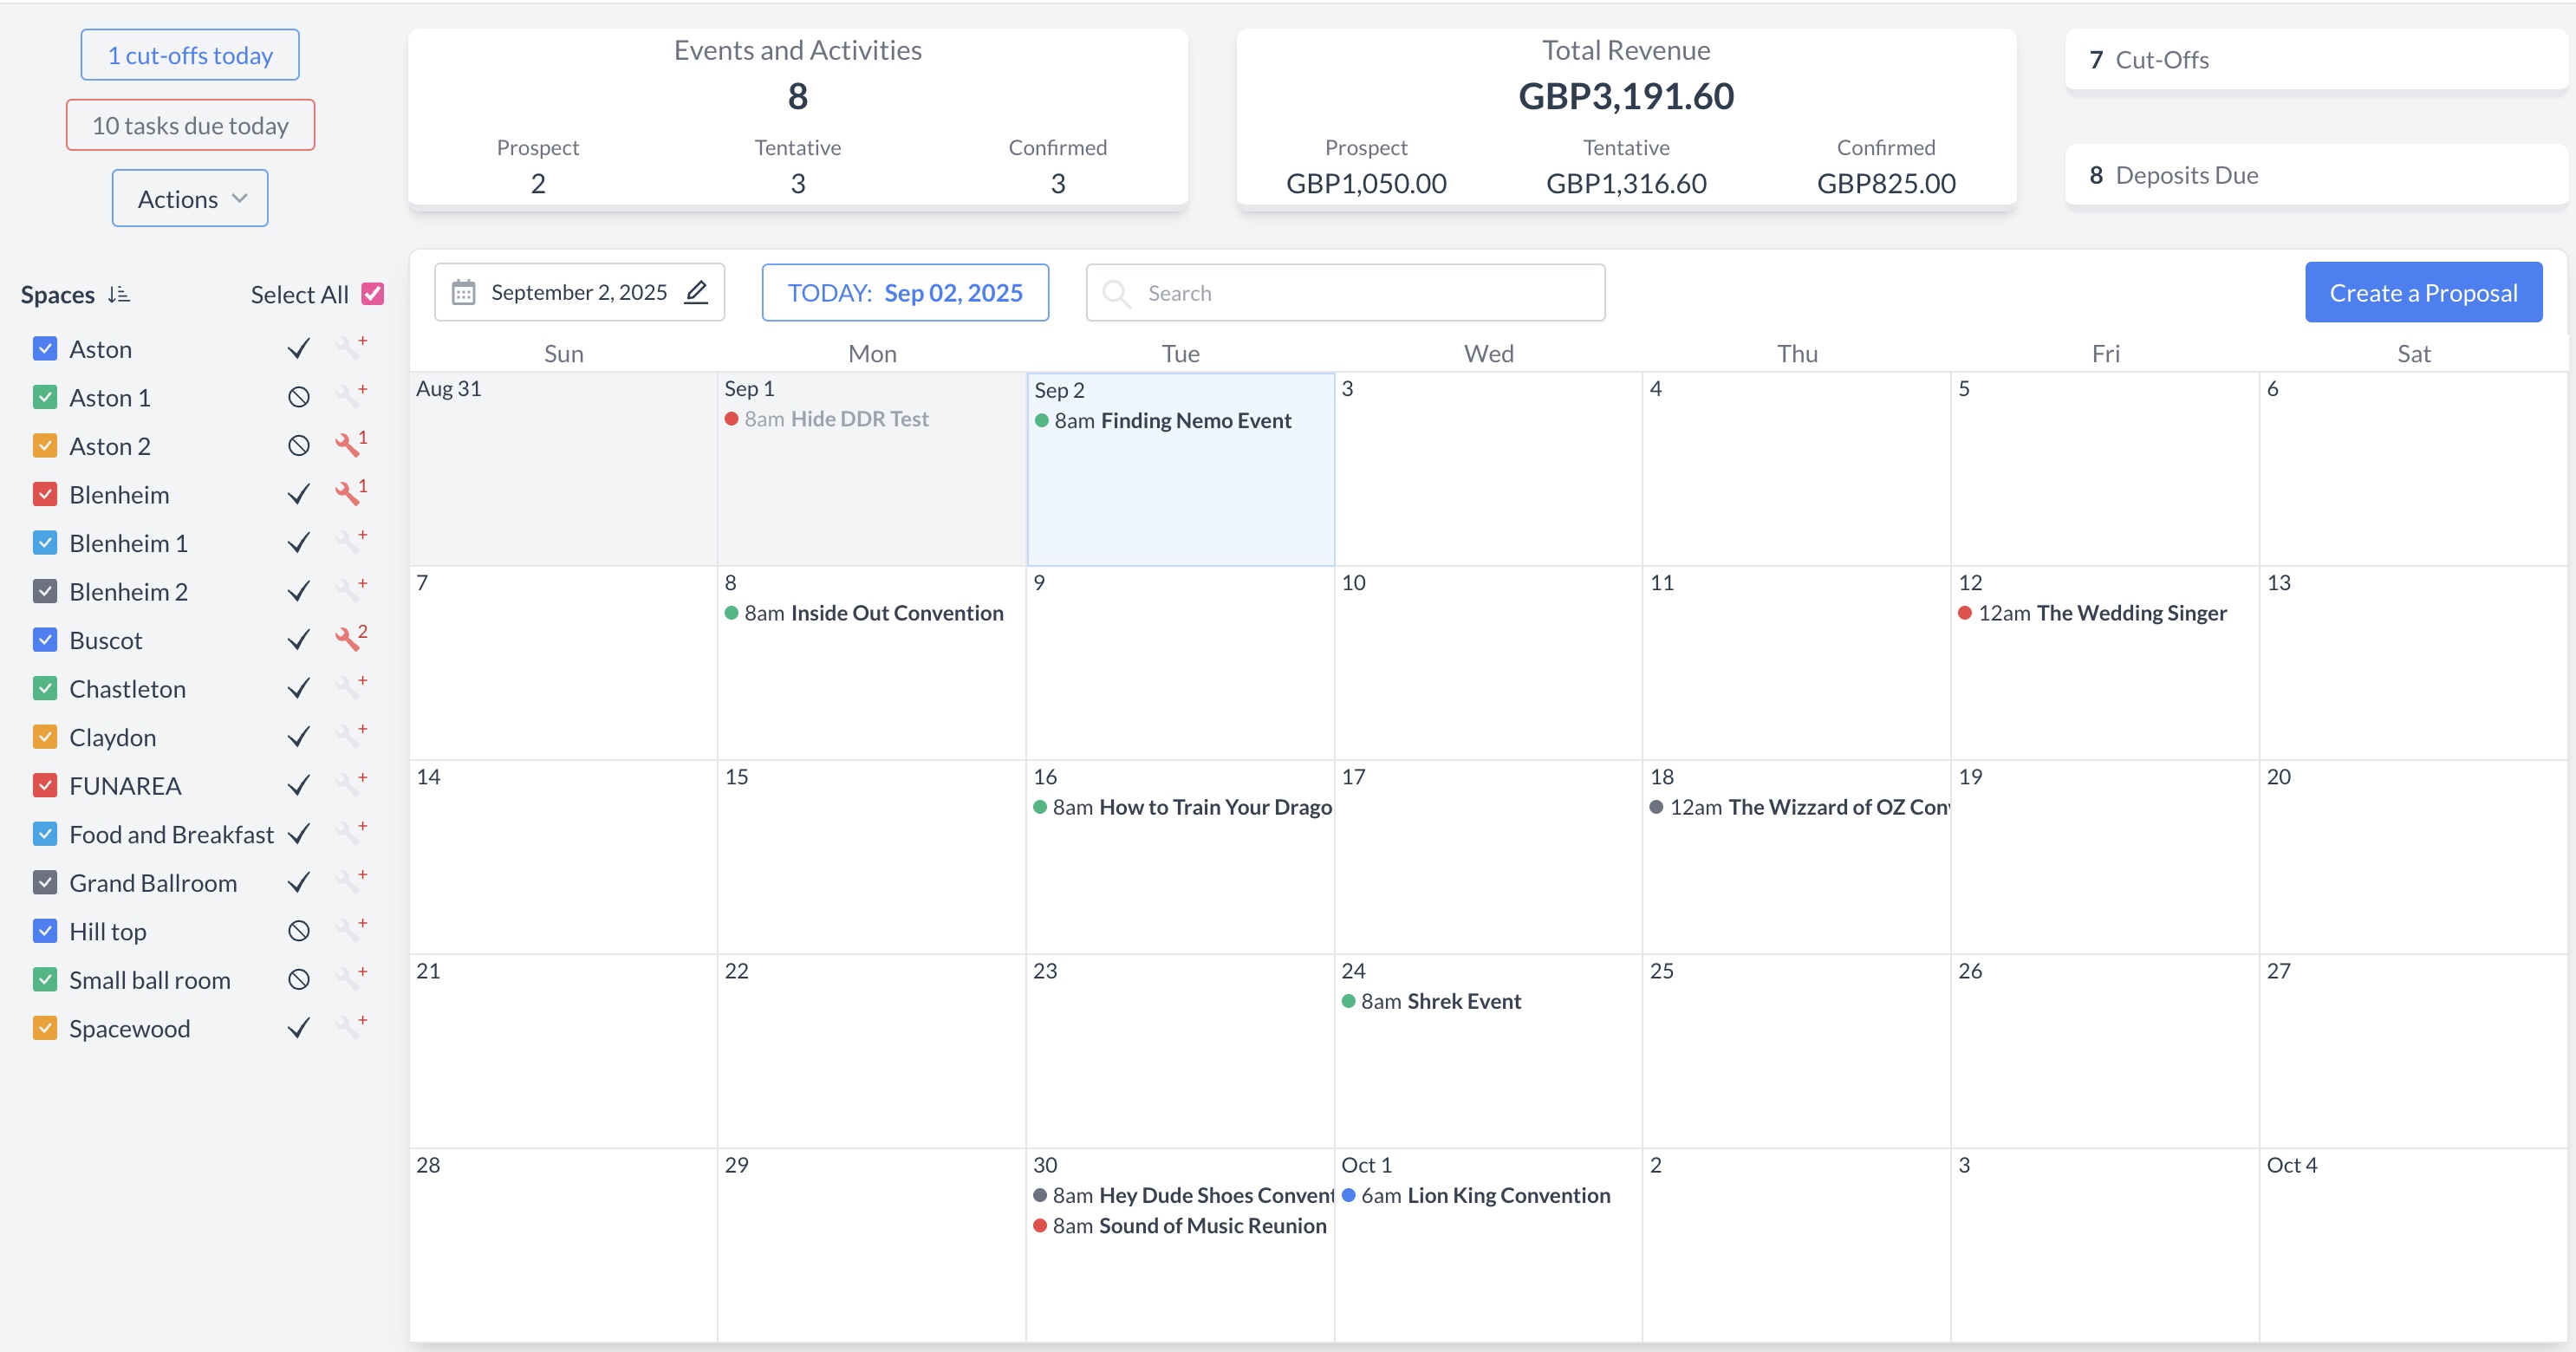
EventKey Dashboard (Home Screen)
To begin, navigate to the Dashboard and use the Search box to locate the event.
Enter the full or partial Event Name into the search field. The system will display a list of matching events, or, if there is an exact match, it will appear directly.
Once you’ve identified the correct event, simply click on the event name to open it.
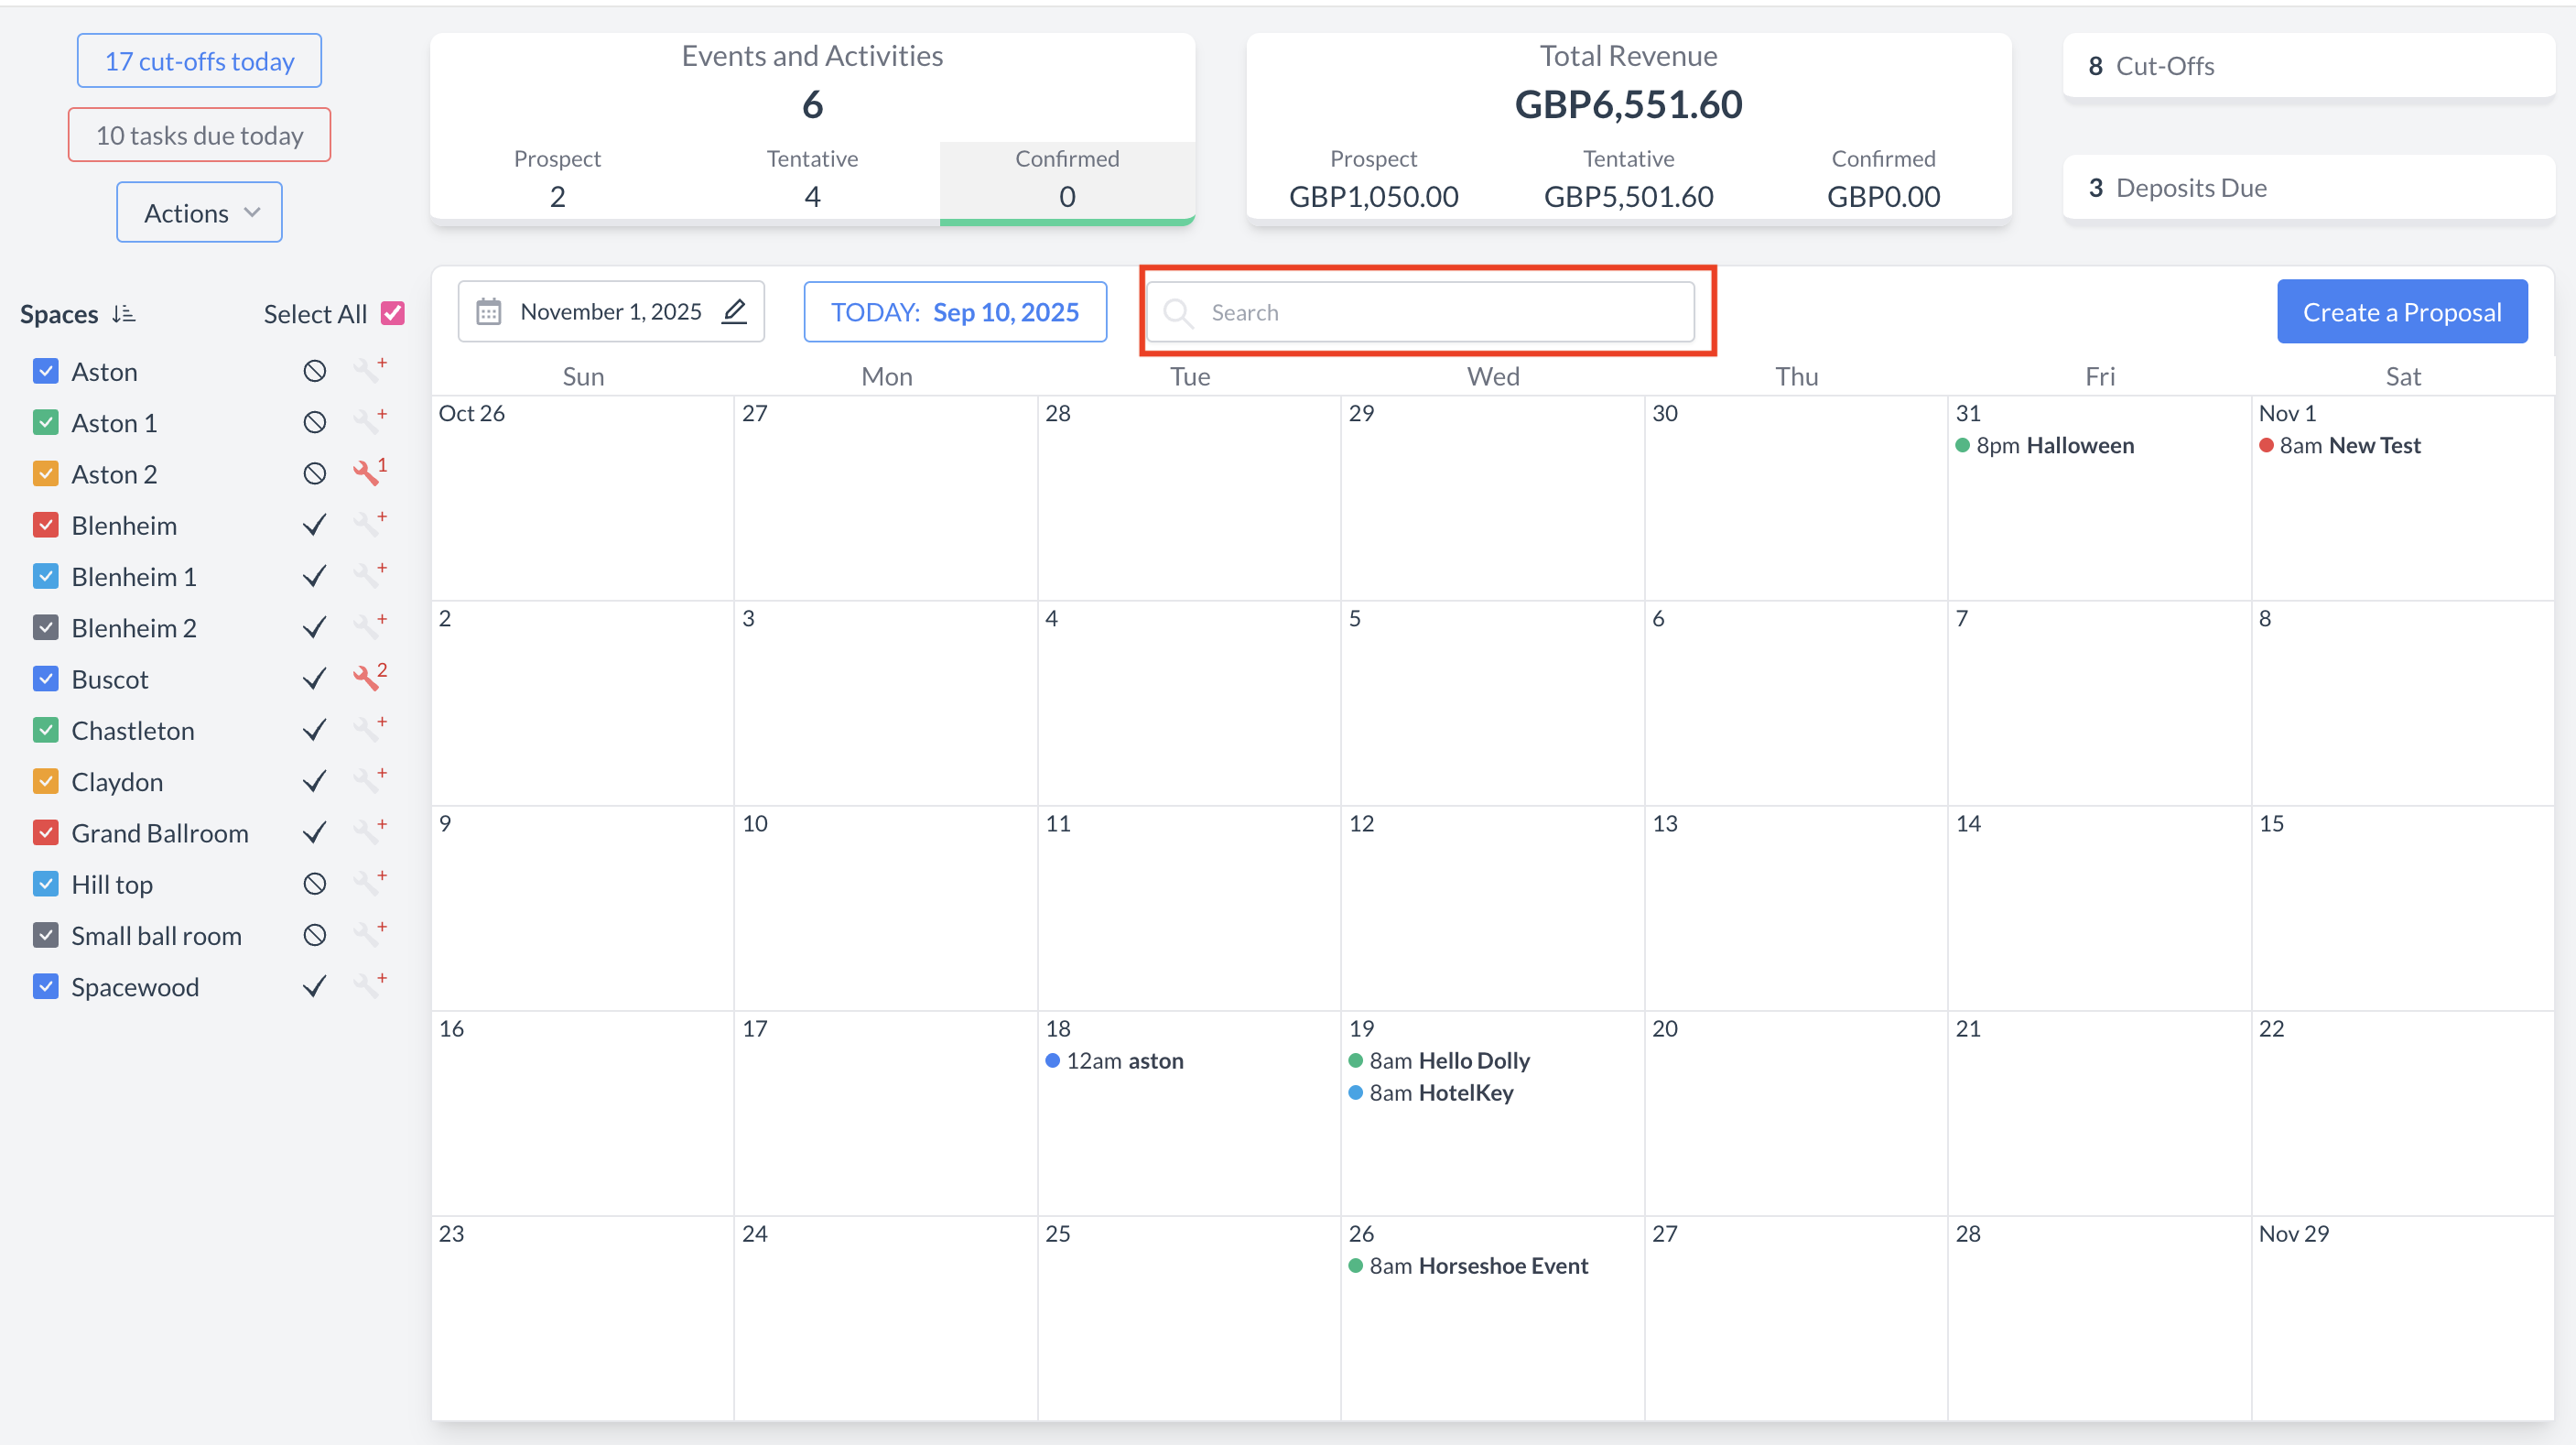
Event Search Field
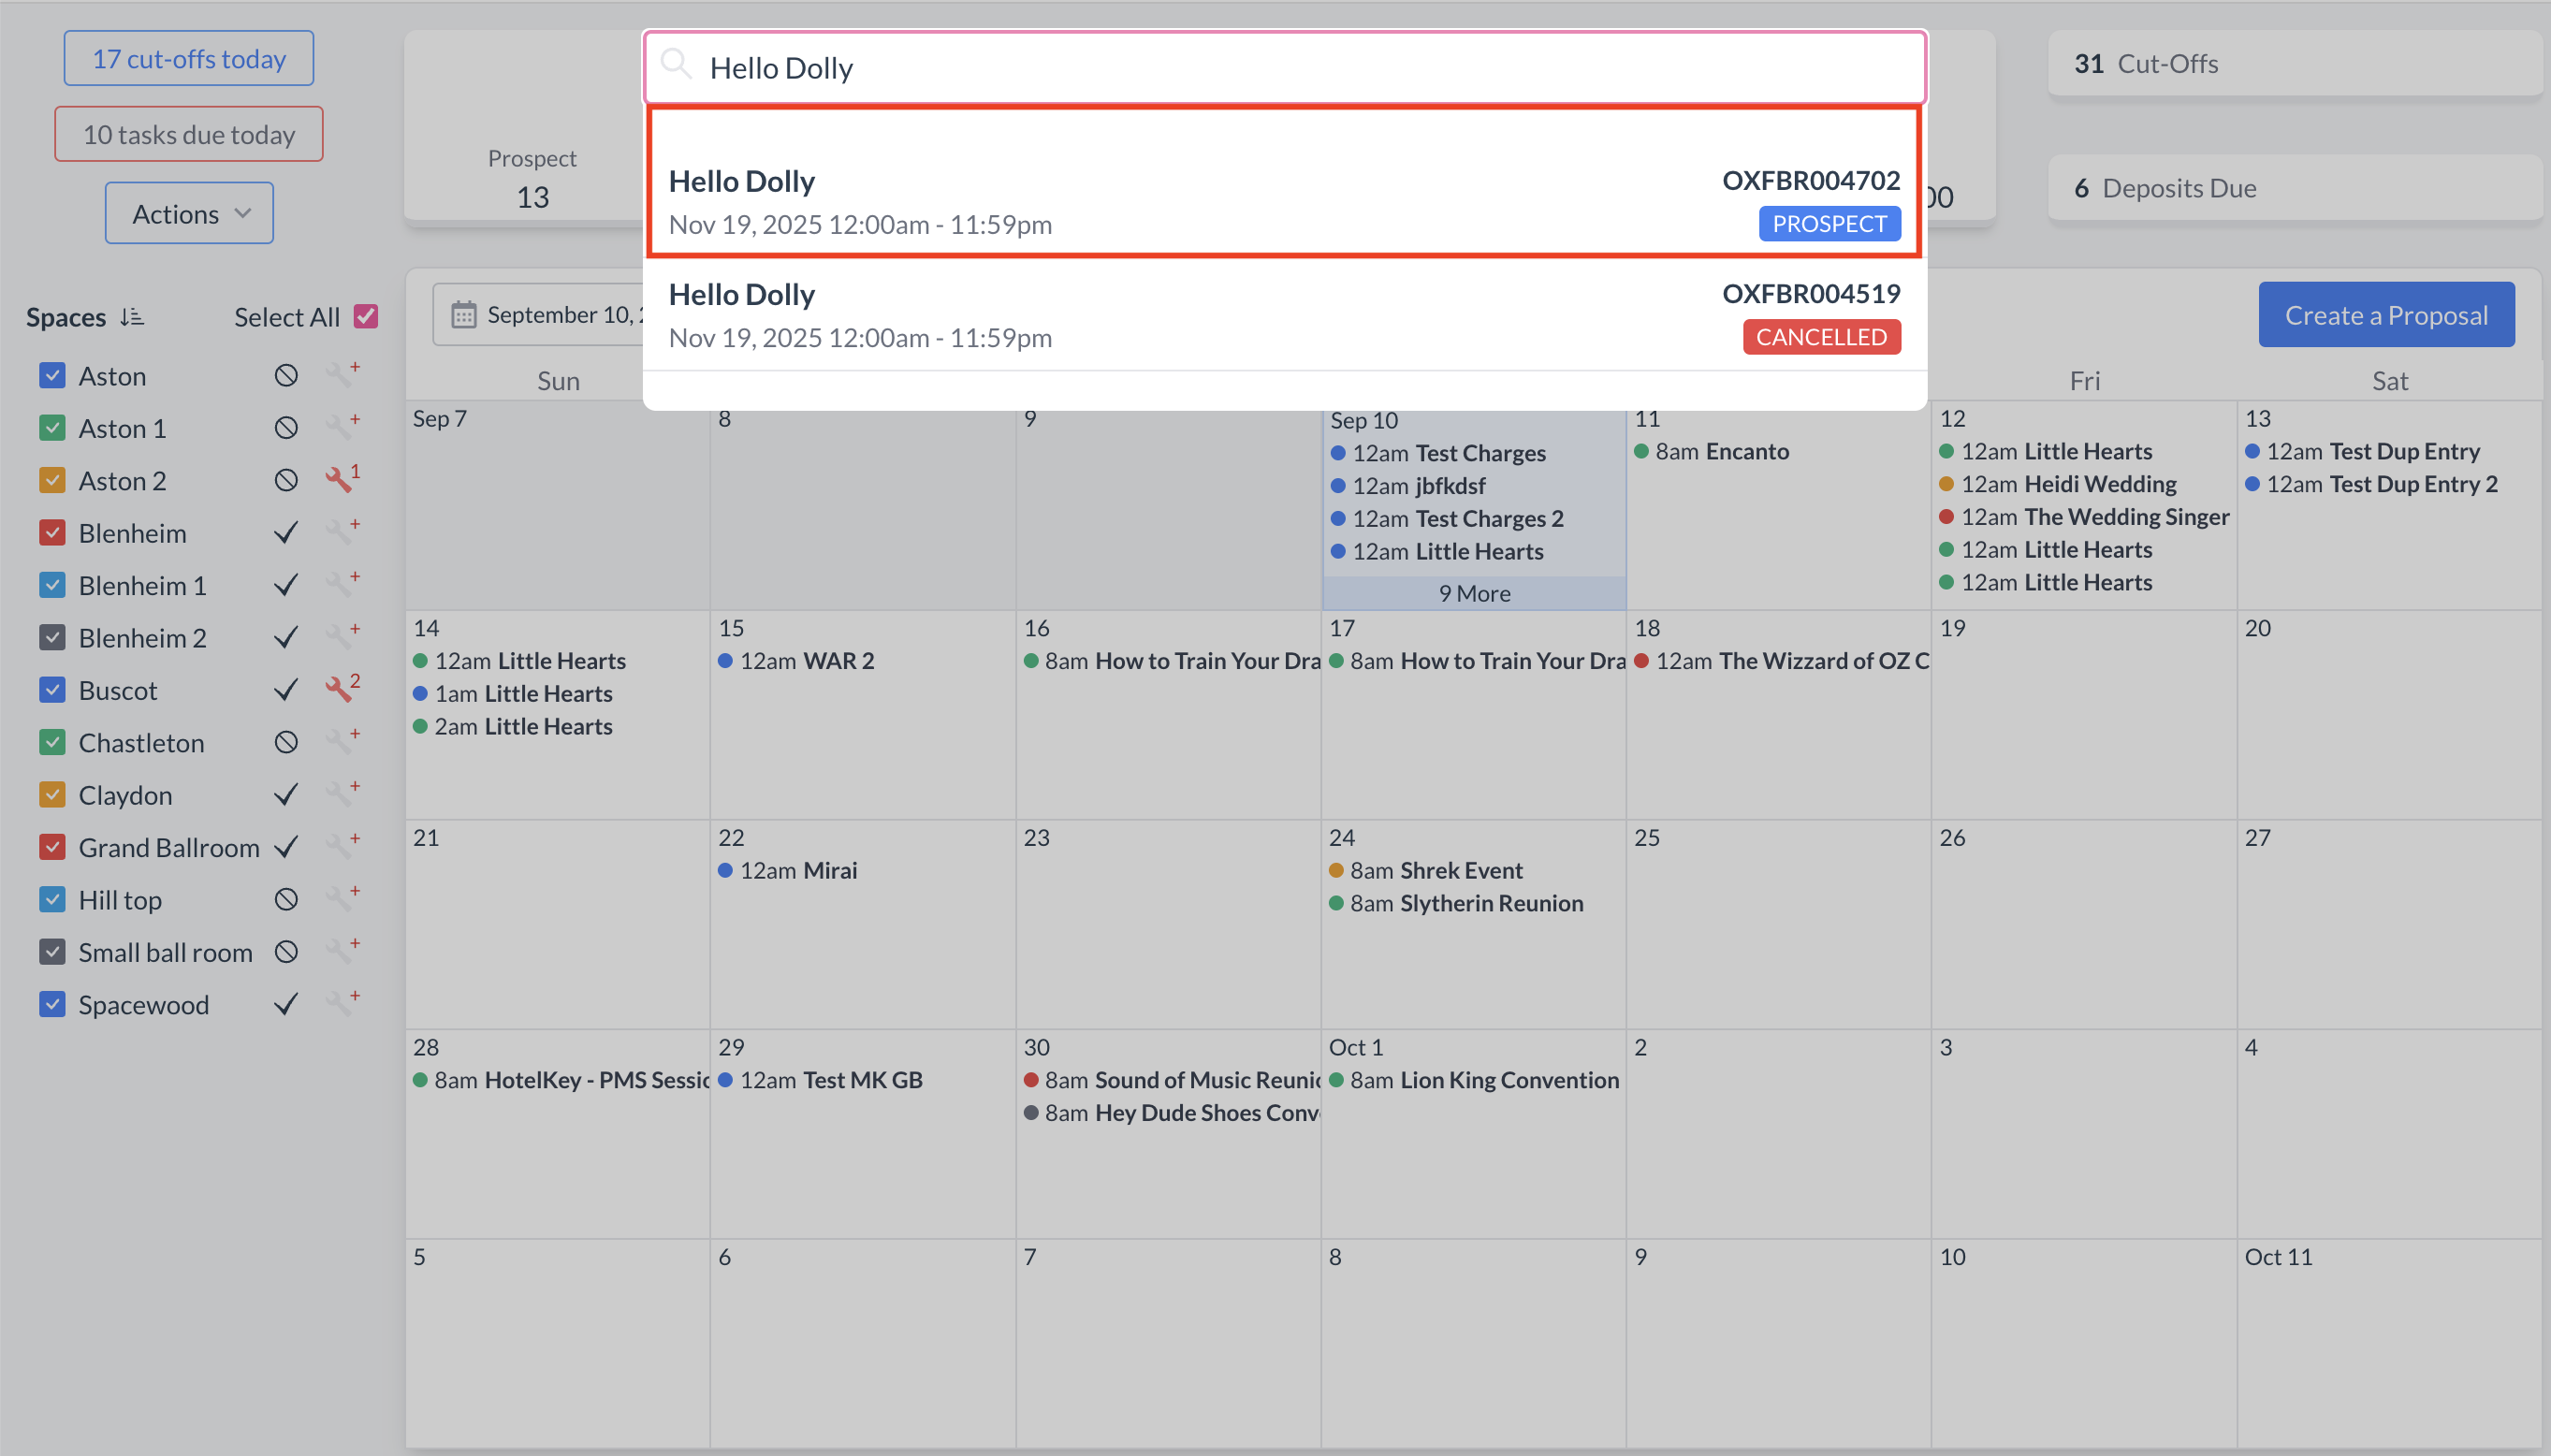
Event Search Results
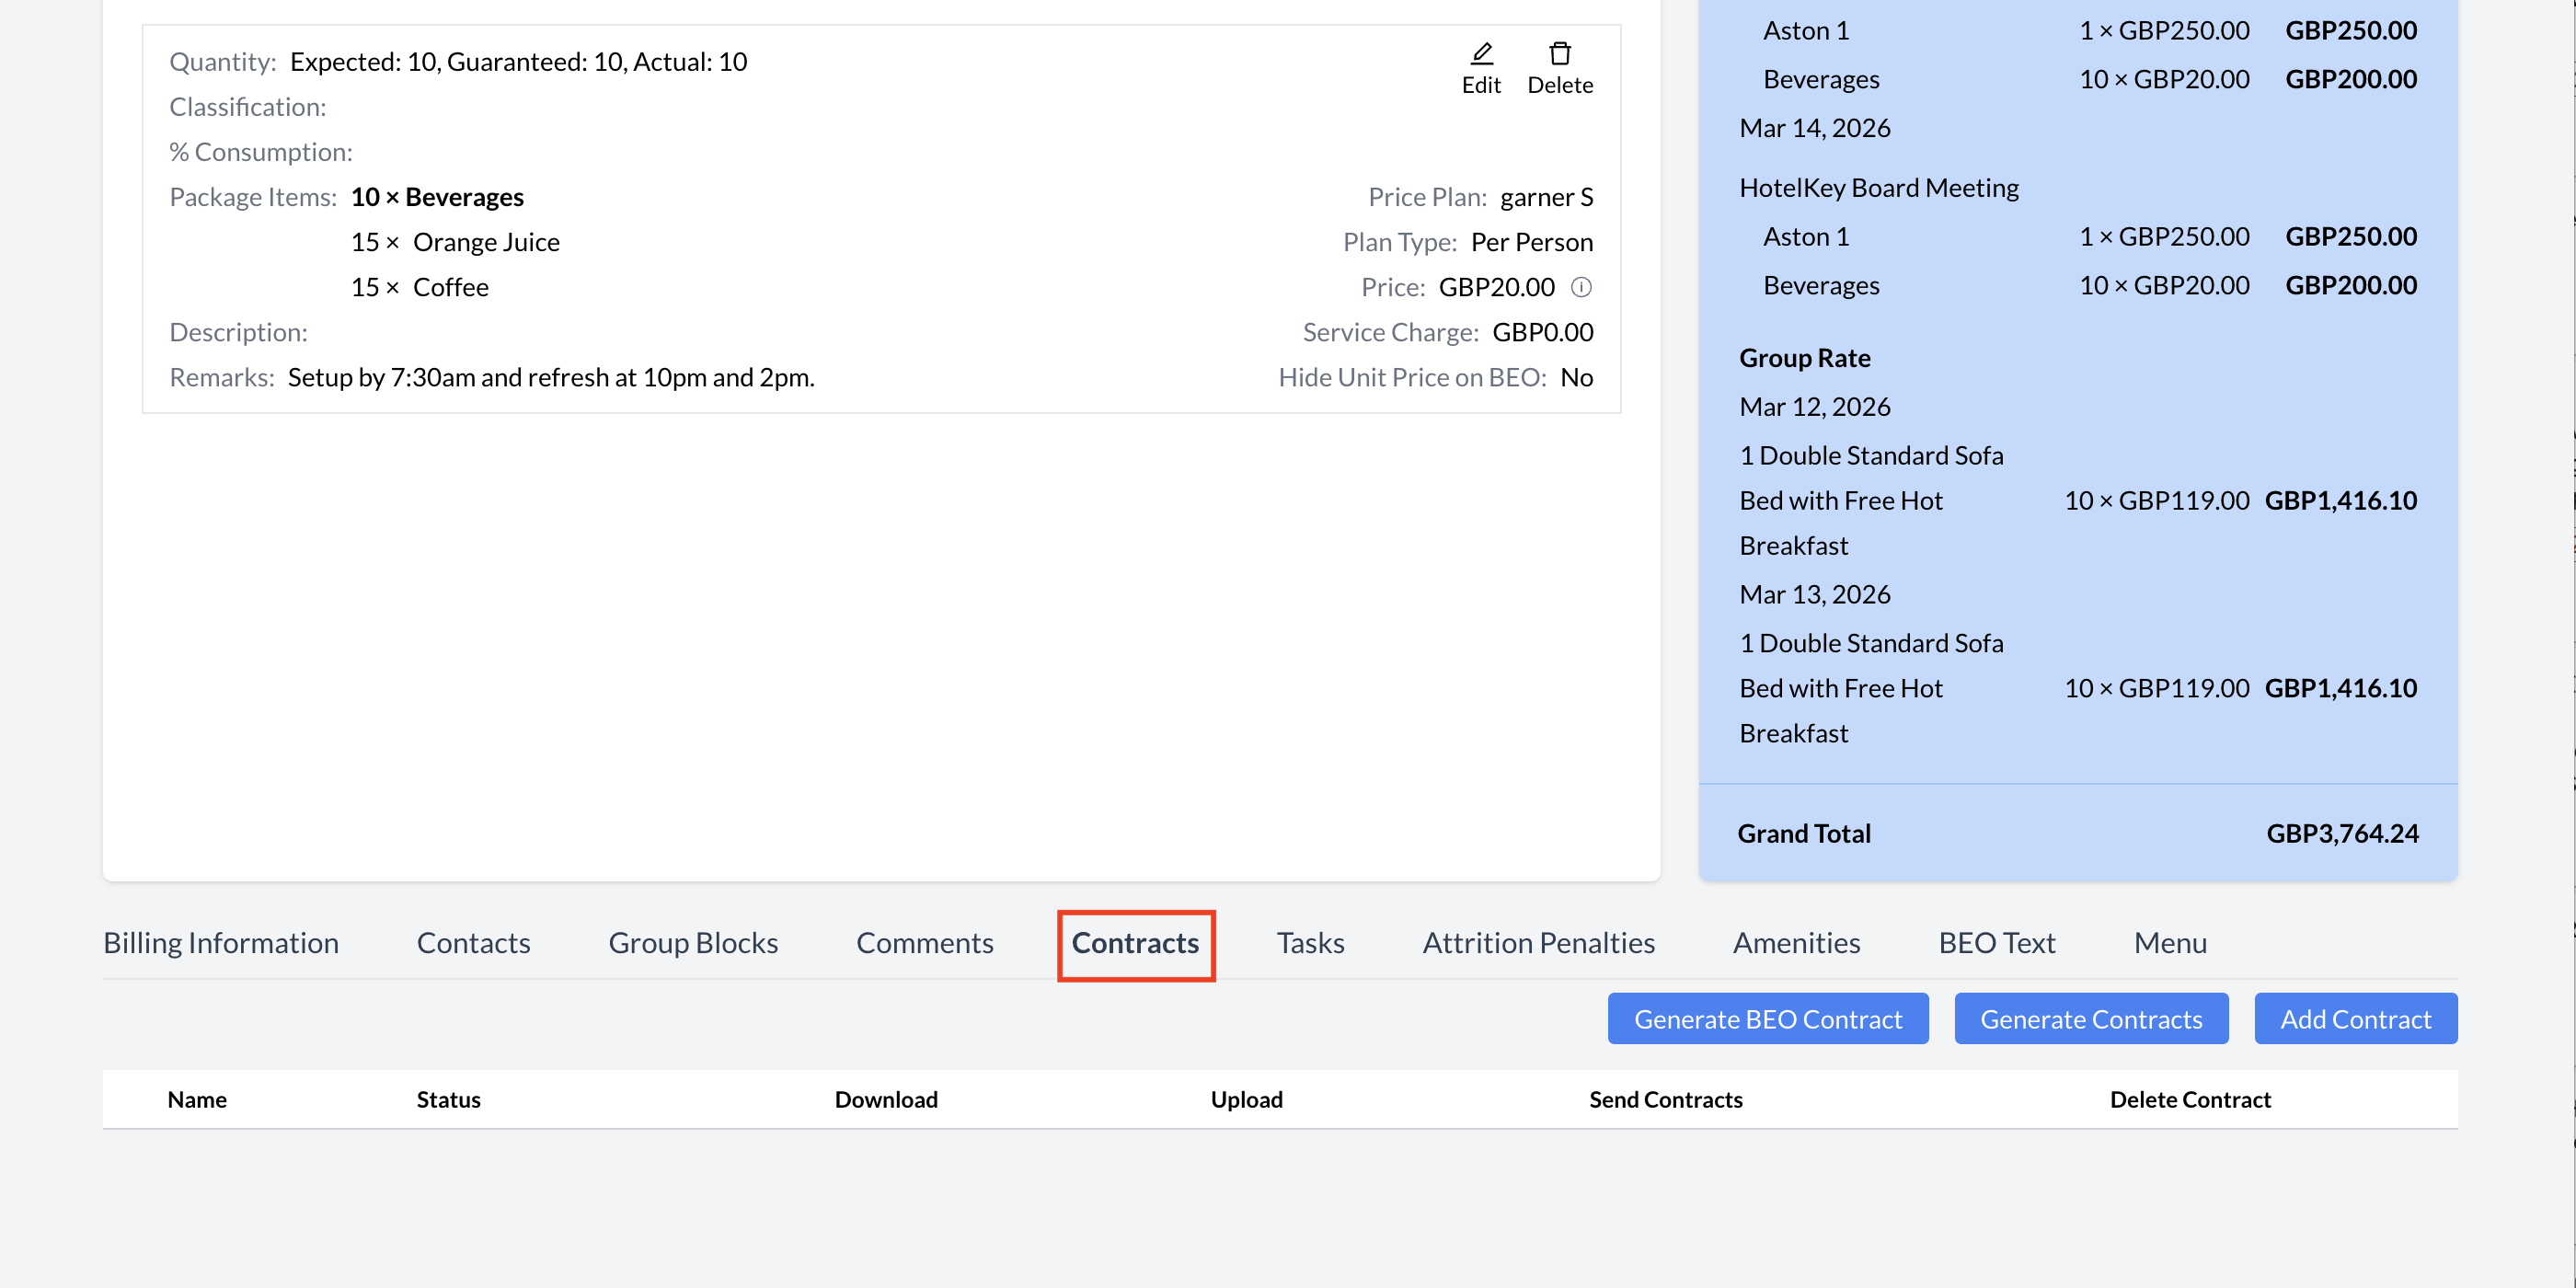
Accessing the Contracts Section
On an Event Record (Reservation):
Scroll to the bottom of the Event Record page.
Locate the Contracts section.
Click on "Contracts" to expand and open the section.
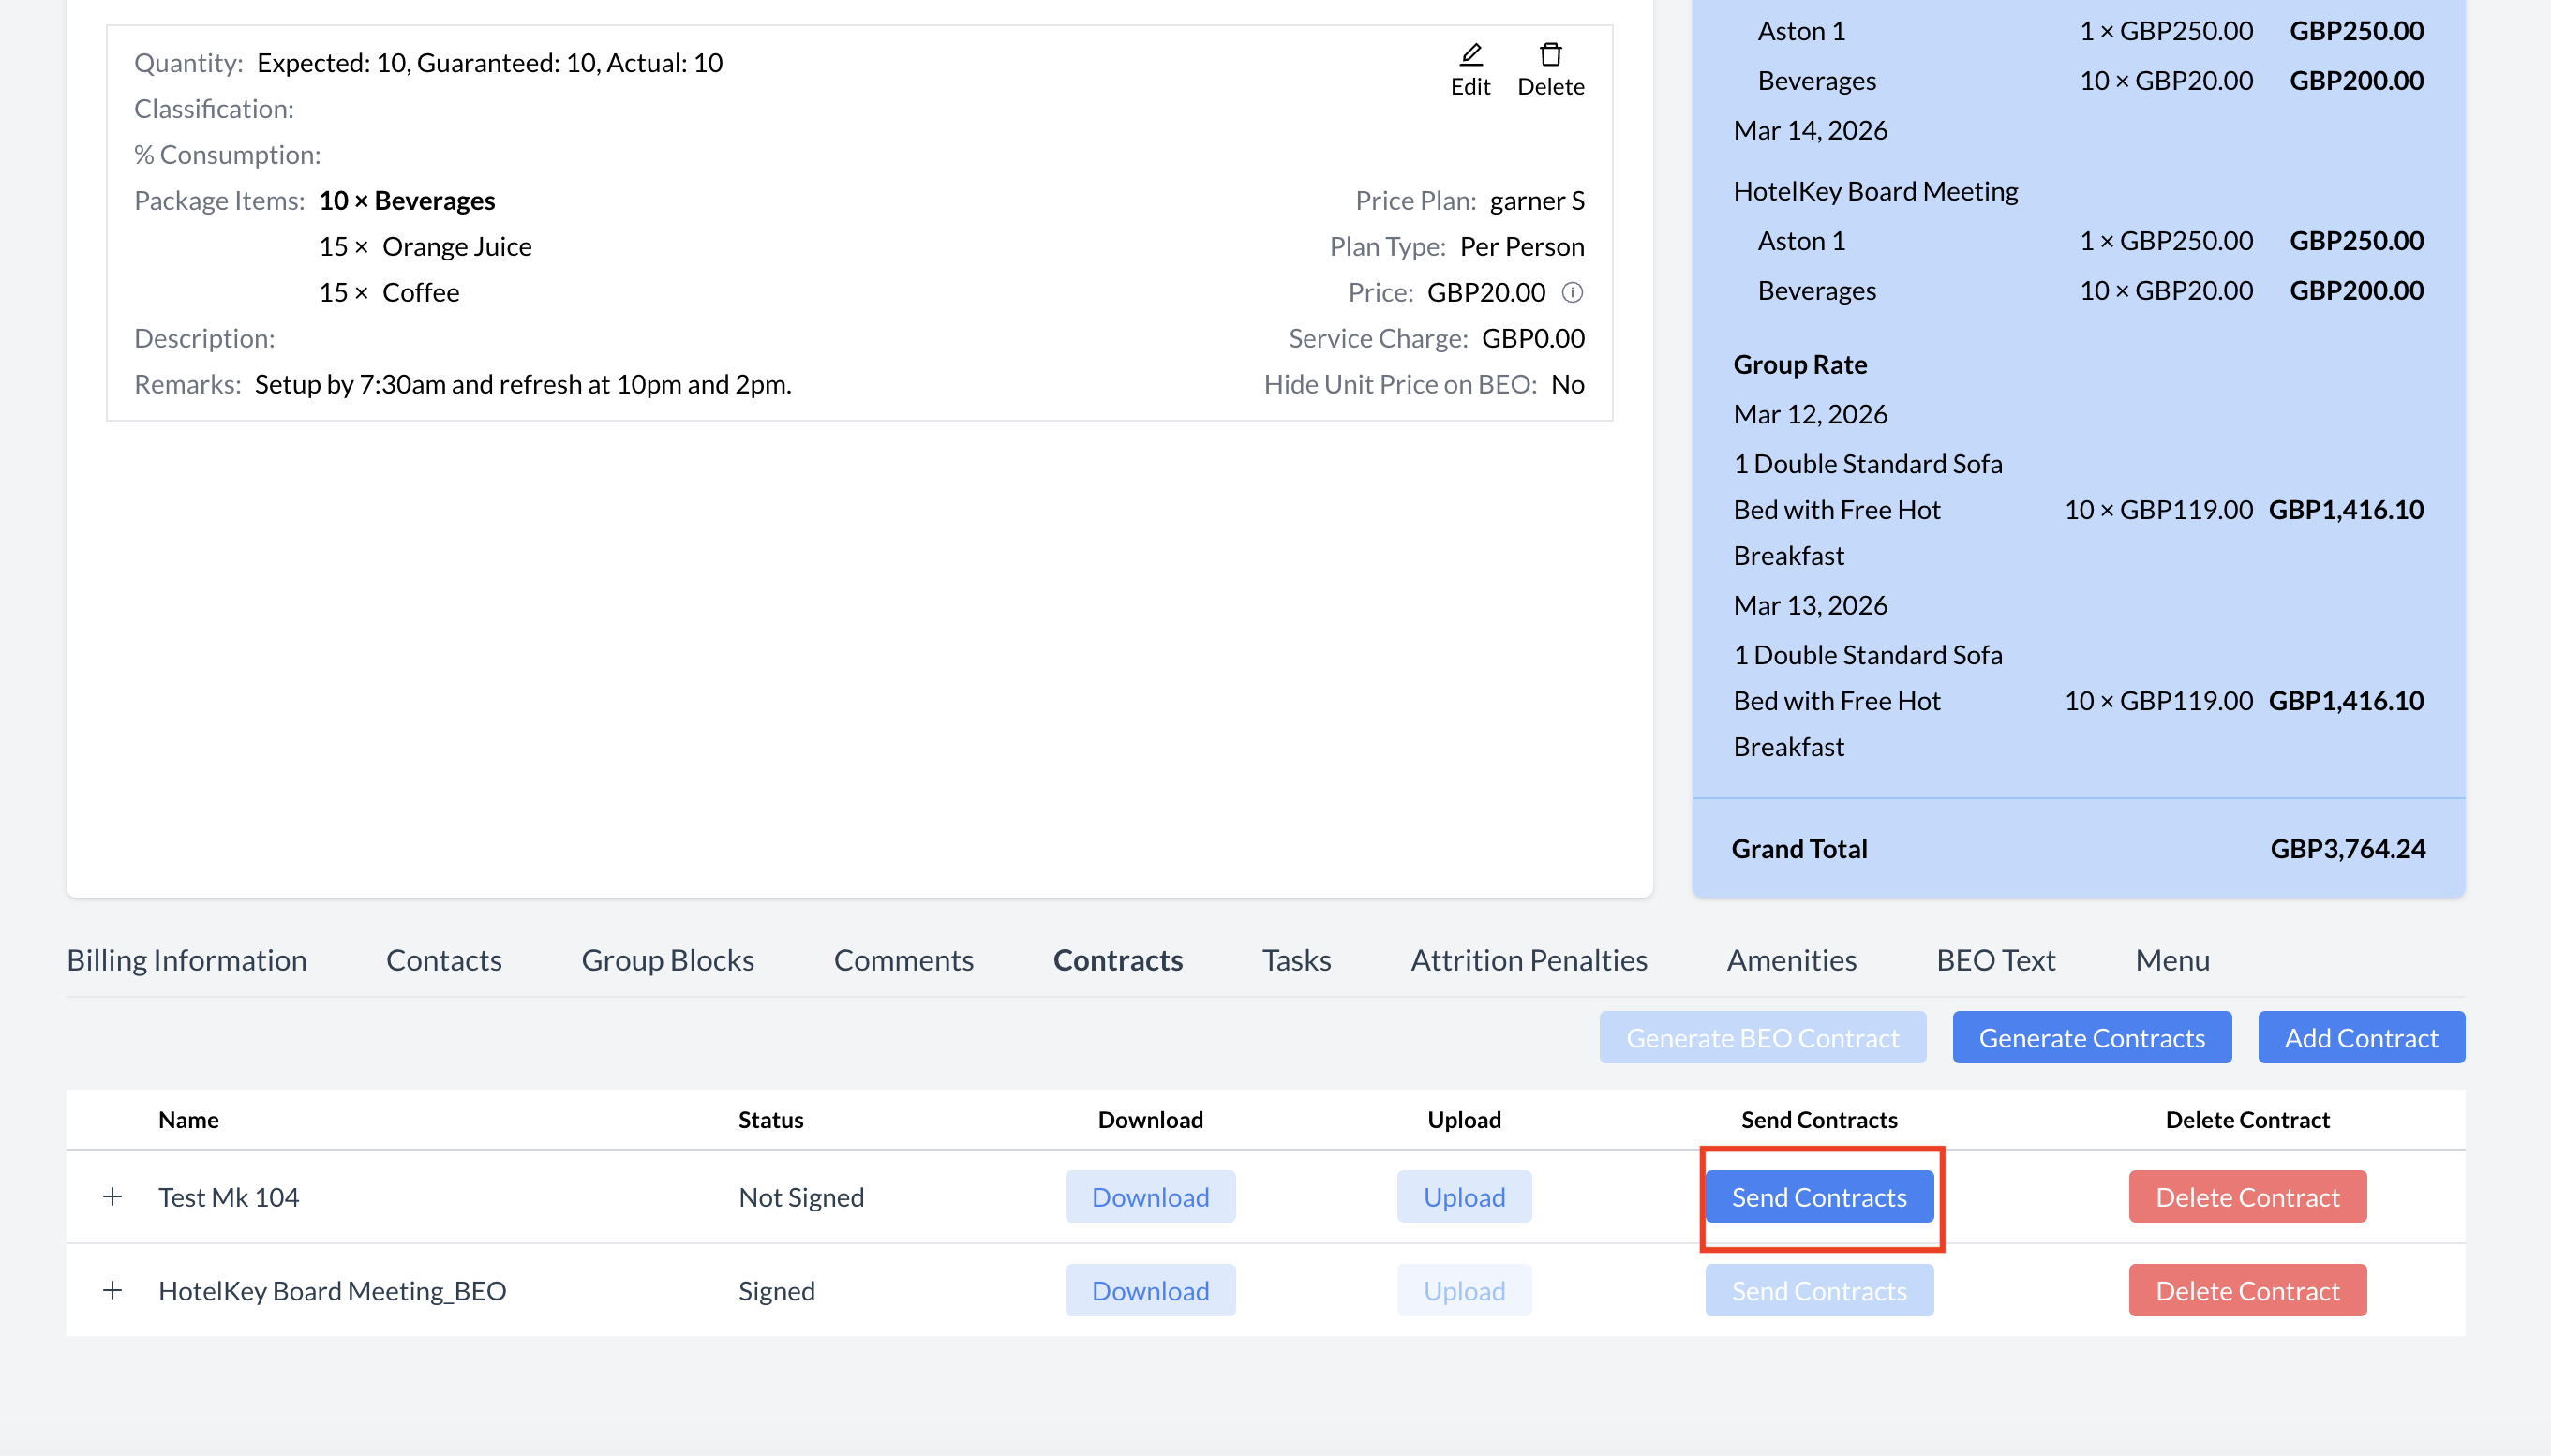
Once opened, you can view existing sent BEO’s or contracts, send new BEO’s or contracts, view the signature process and download completed documents.
⚠️ Important: You will not be able to send a contract or BEO until the Event Record is in Tentative status unless configuration is turned on allowing BEO and contract generation in Prospect status.
Event Reservations - Contracts
Generating and Sending a BEO Contract
To create and send a BEO Contract, follow these steps:
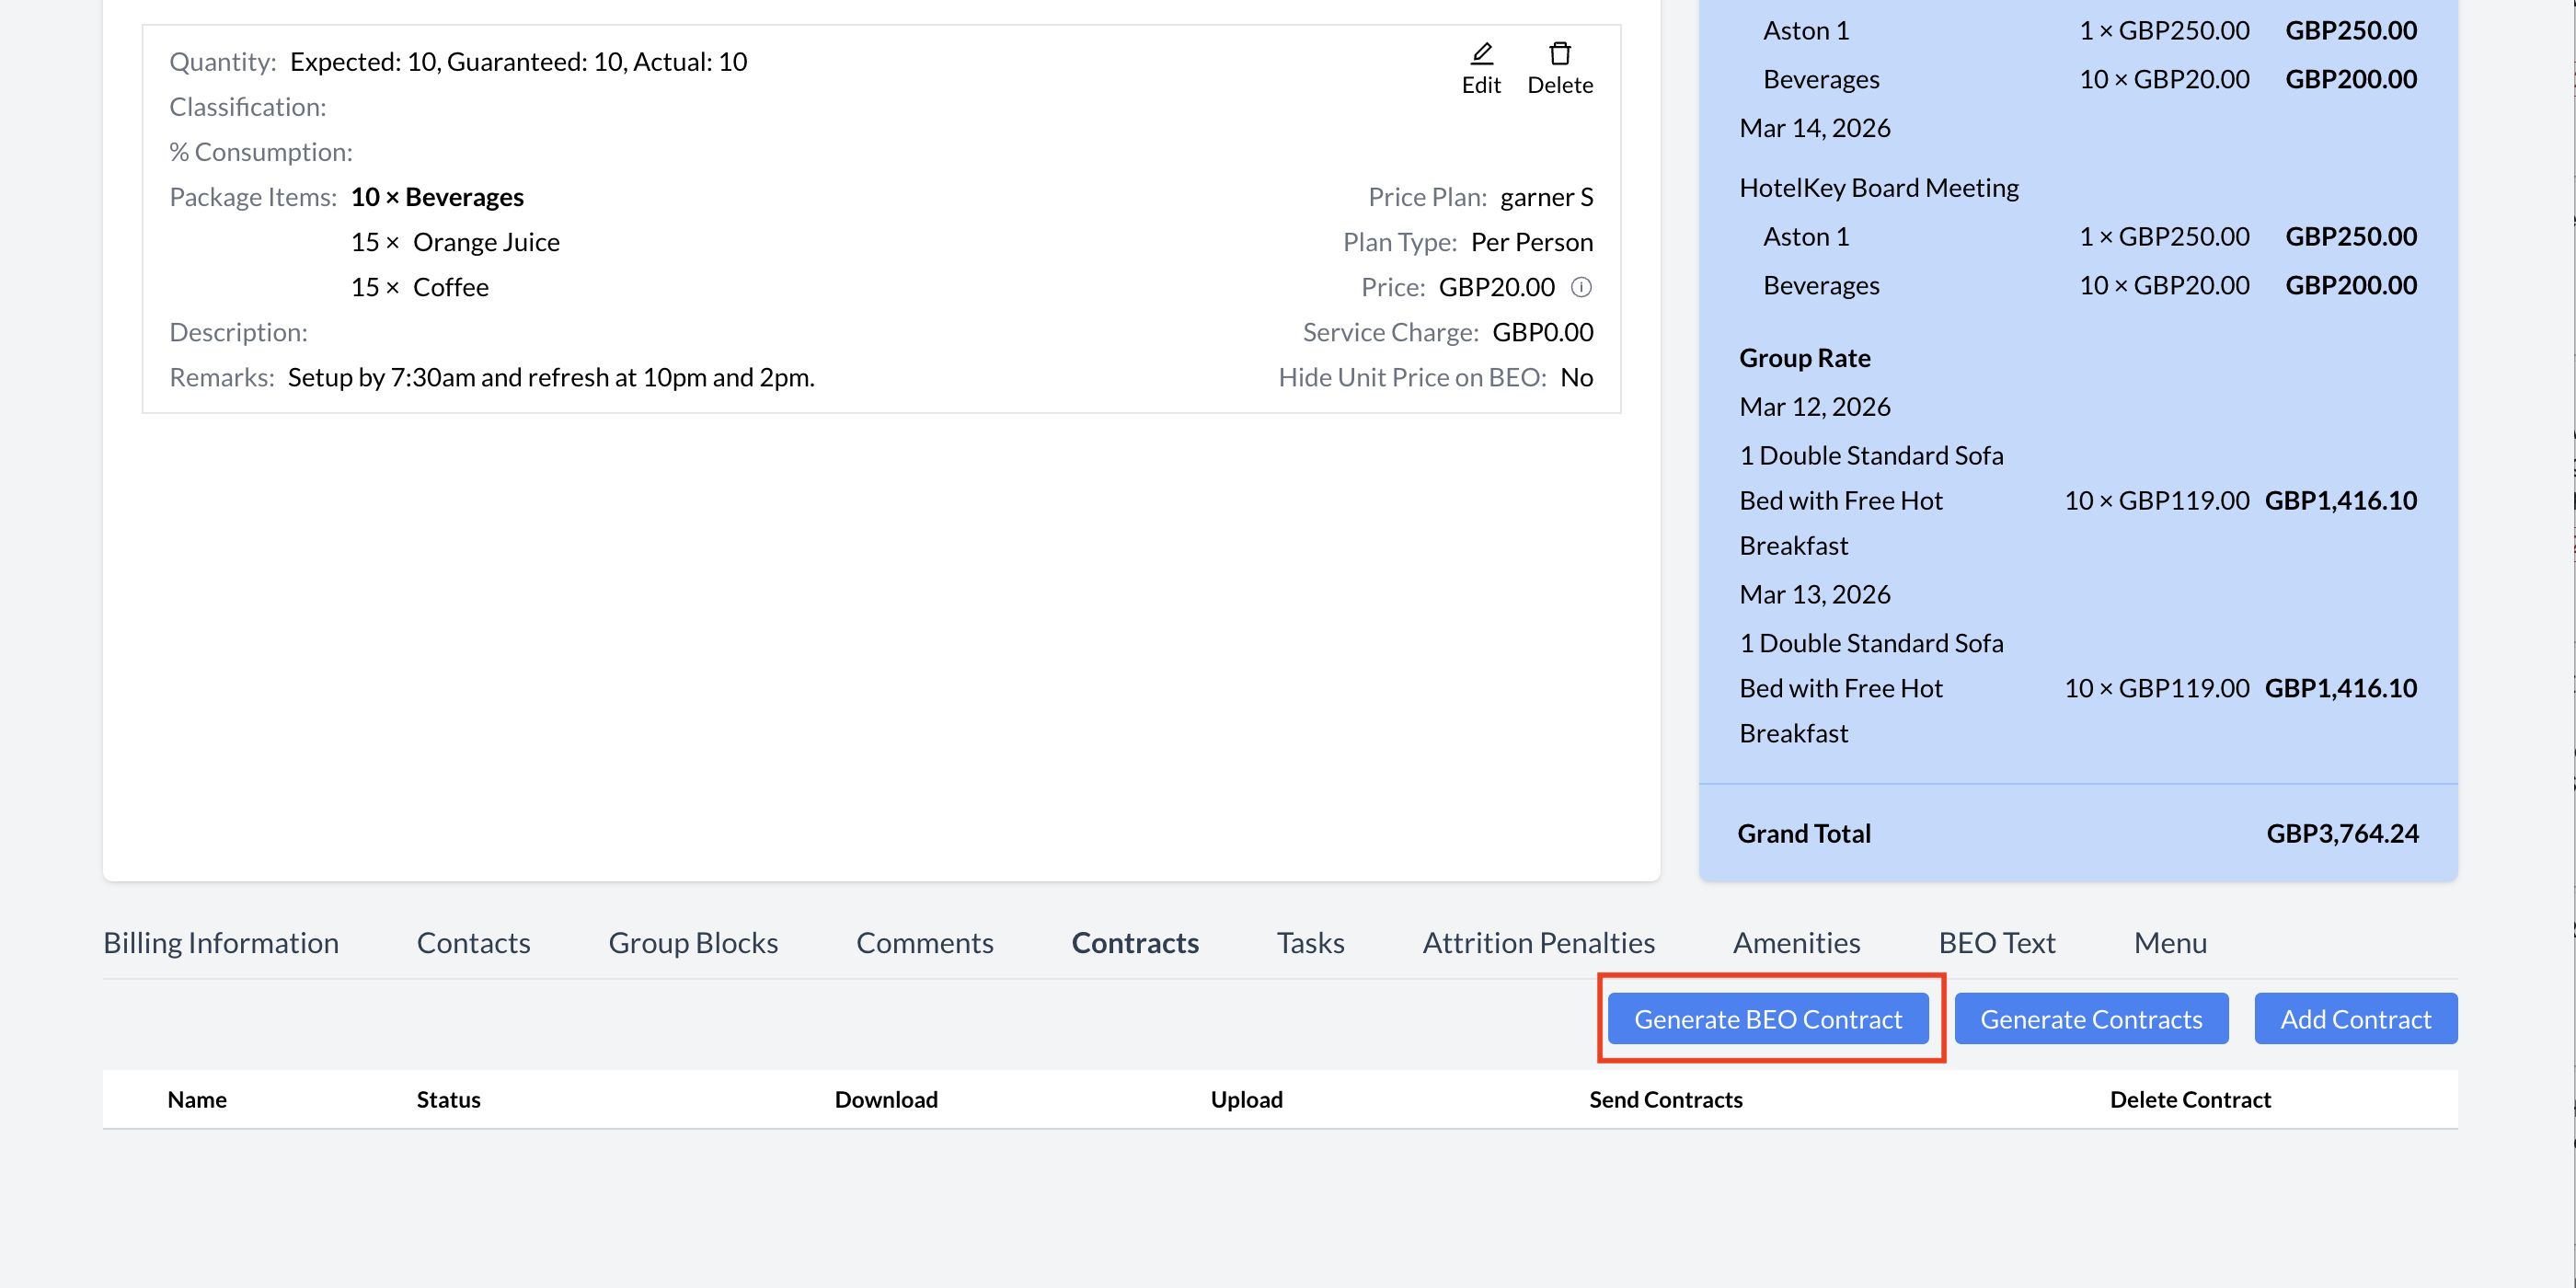
On the Event Record, click the blue "Generate BEO Contract" button.
After clicking the button, the screen will refresh and return you to the Event Record.
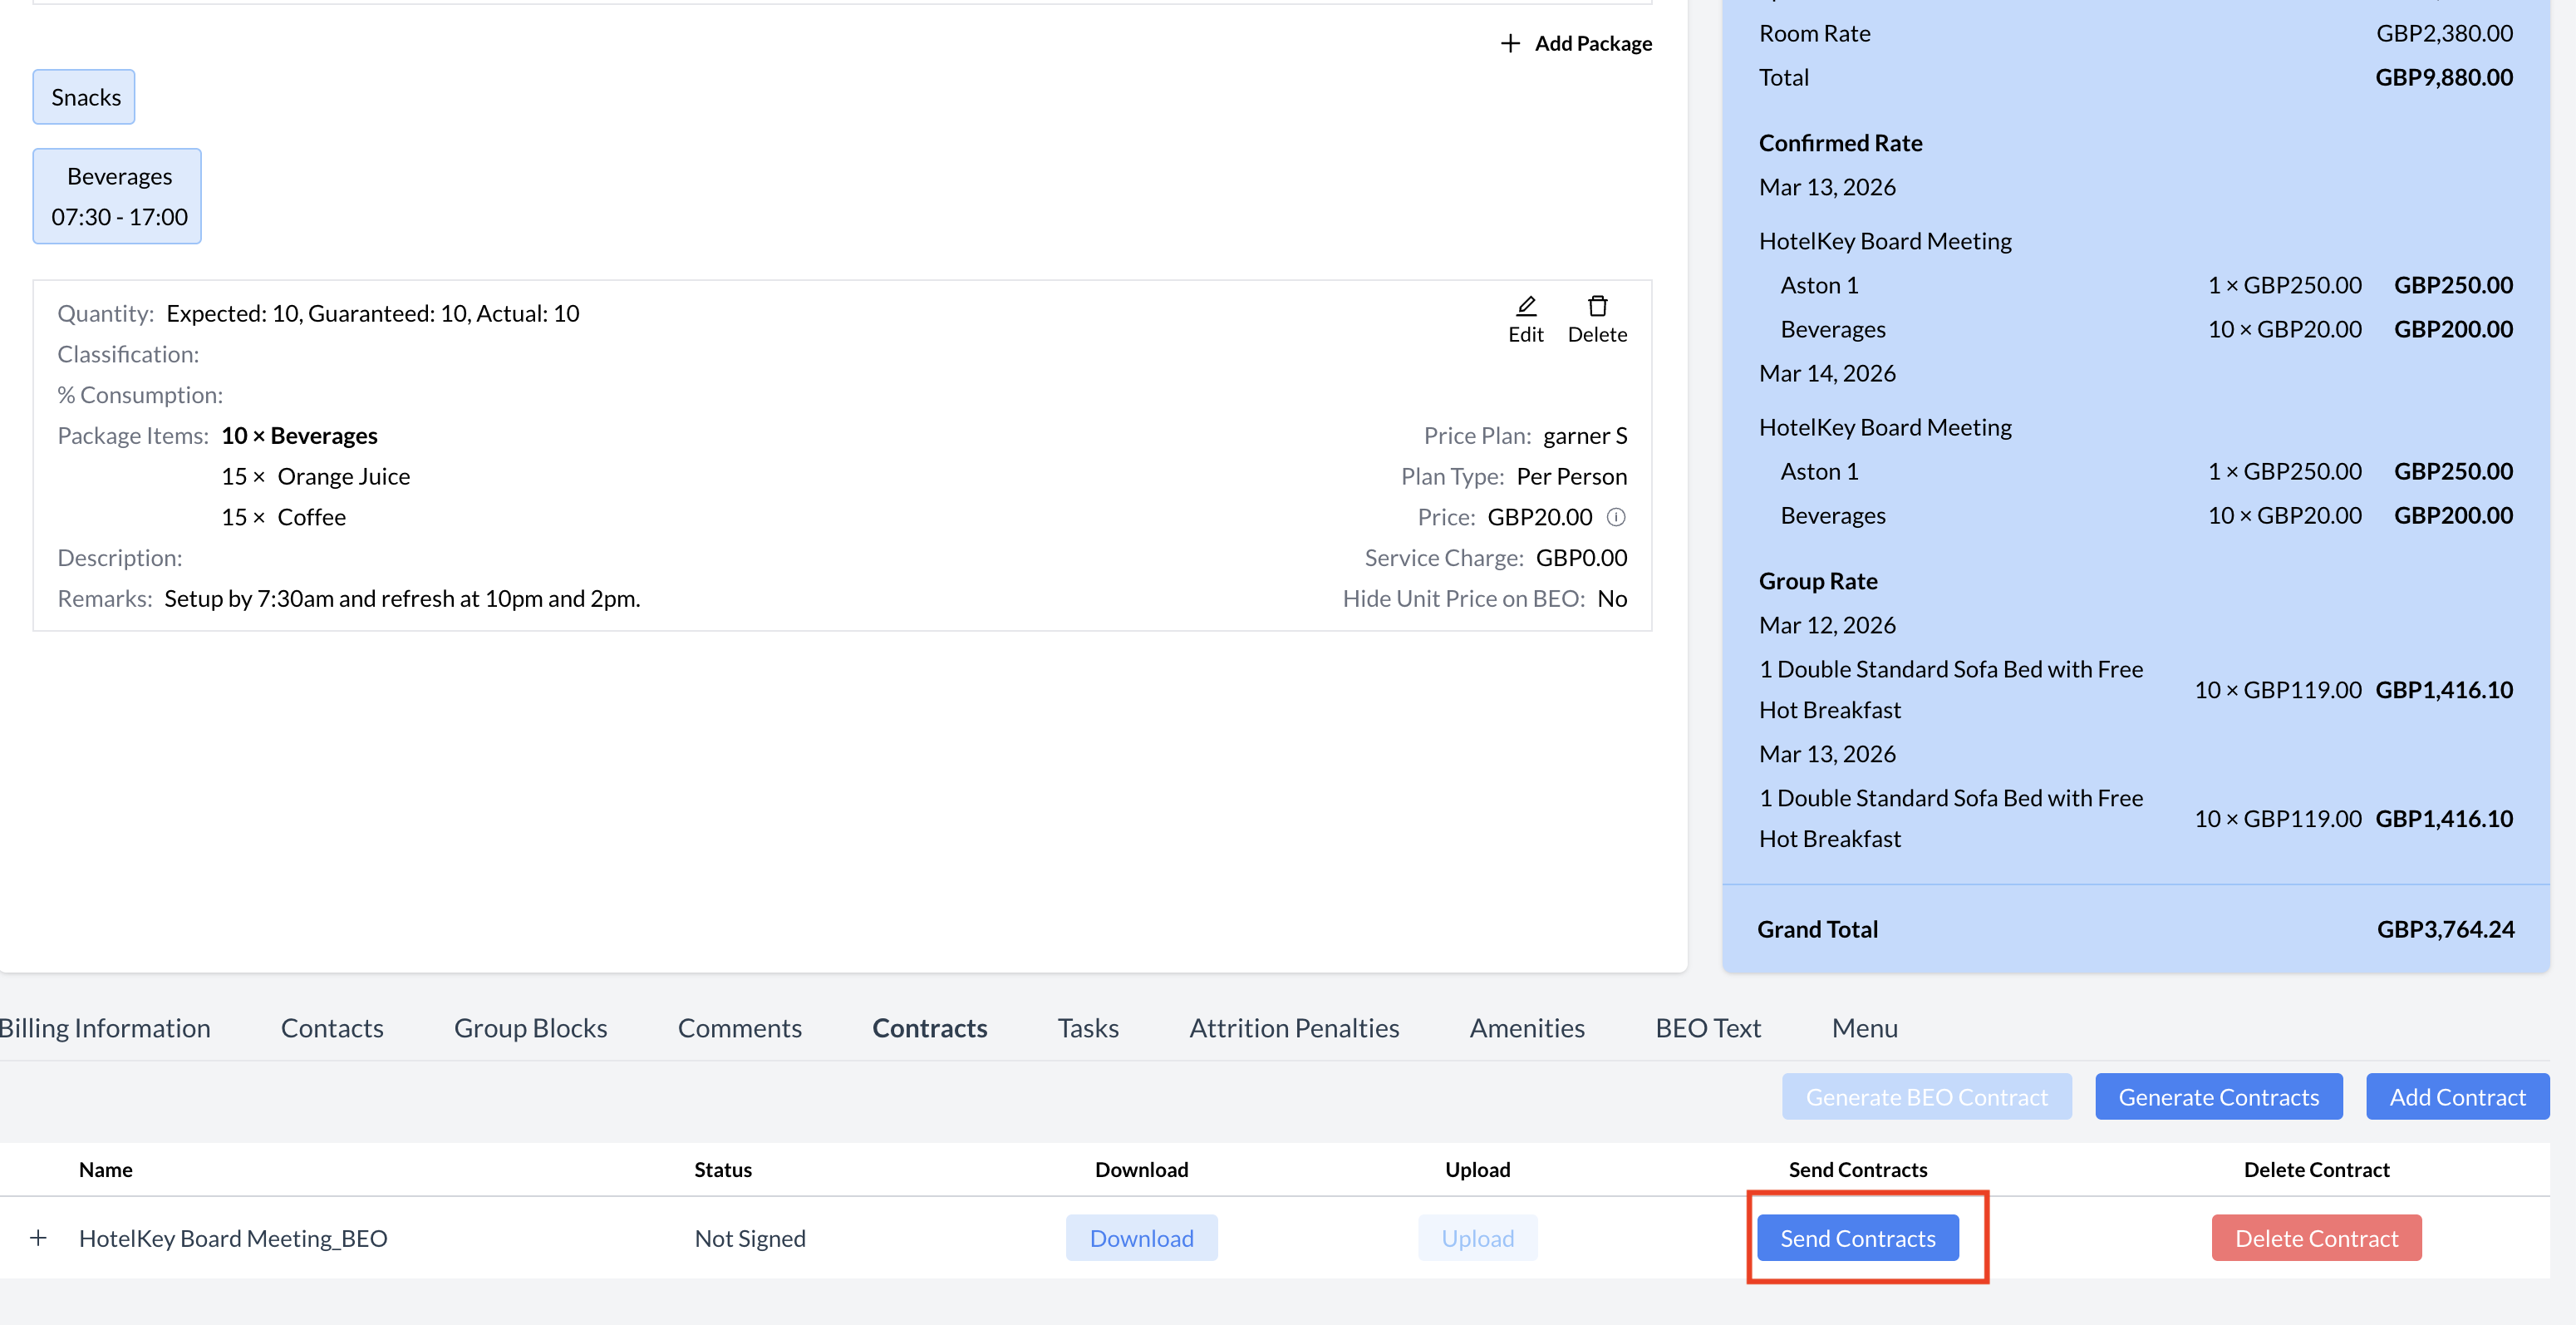
Scroll to the bottom of the Event Record and reopen the Contract section.
You will now see that the BEO has been generated for the event.
Click the blue "Send Contract" button. This will open the email configuration screen, where you can:
Review the recipient details
Make any necessary changes to the message
Send the BEO directly to the guest for electronic signature
💡 Tip: Be sure to double-check all event details before sending the BEO to ensure accuracy.
Contracts - Generate BEO Contract
Contracts - Sending a BEO
When sending a BEO for electronic signature, it’s important to follow these steps carefully to ensure the document is correctly configured and delivered.
🧾 Step-by-Step Instructions
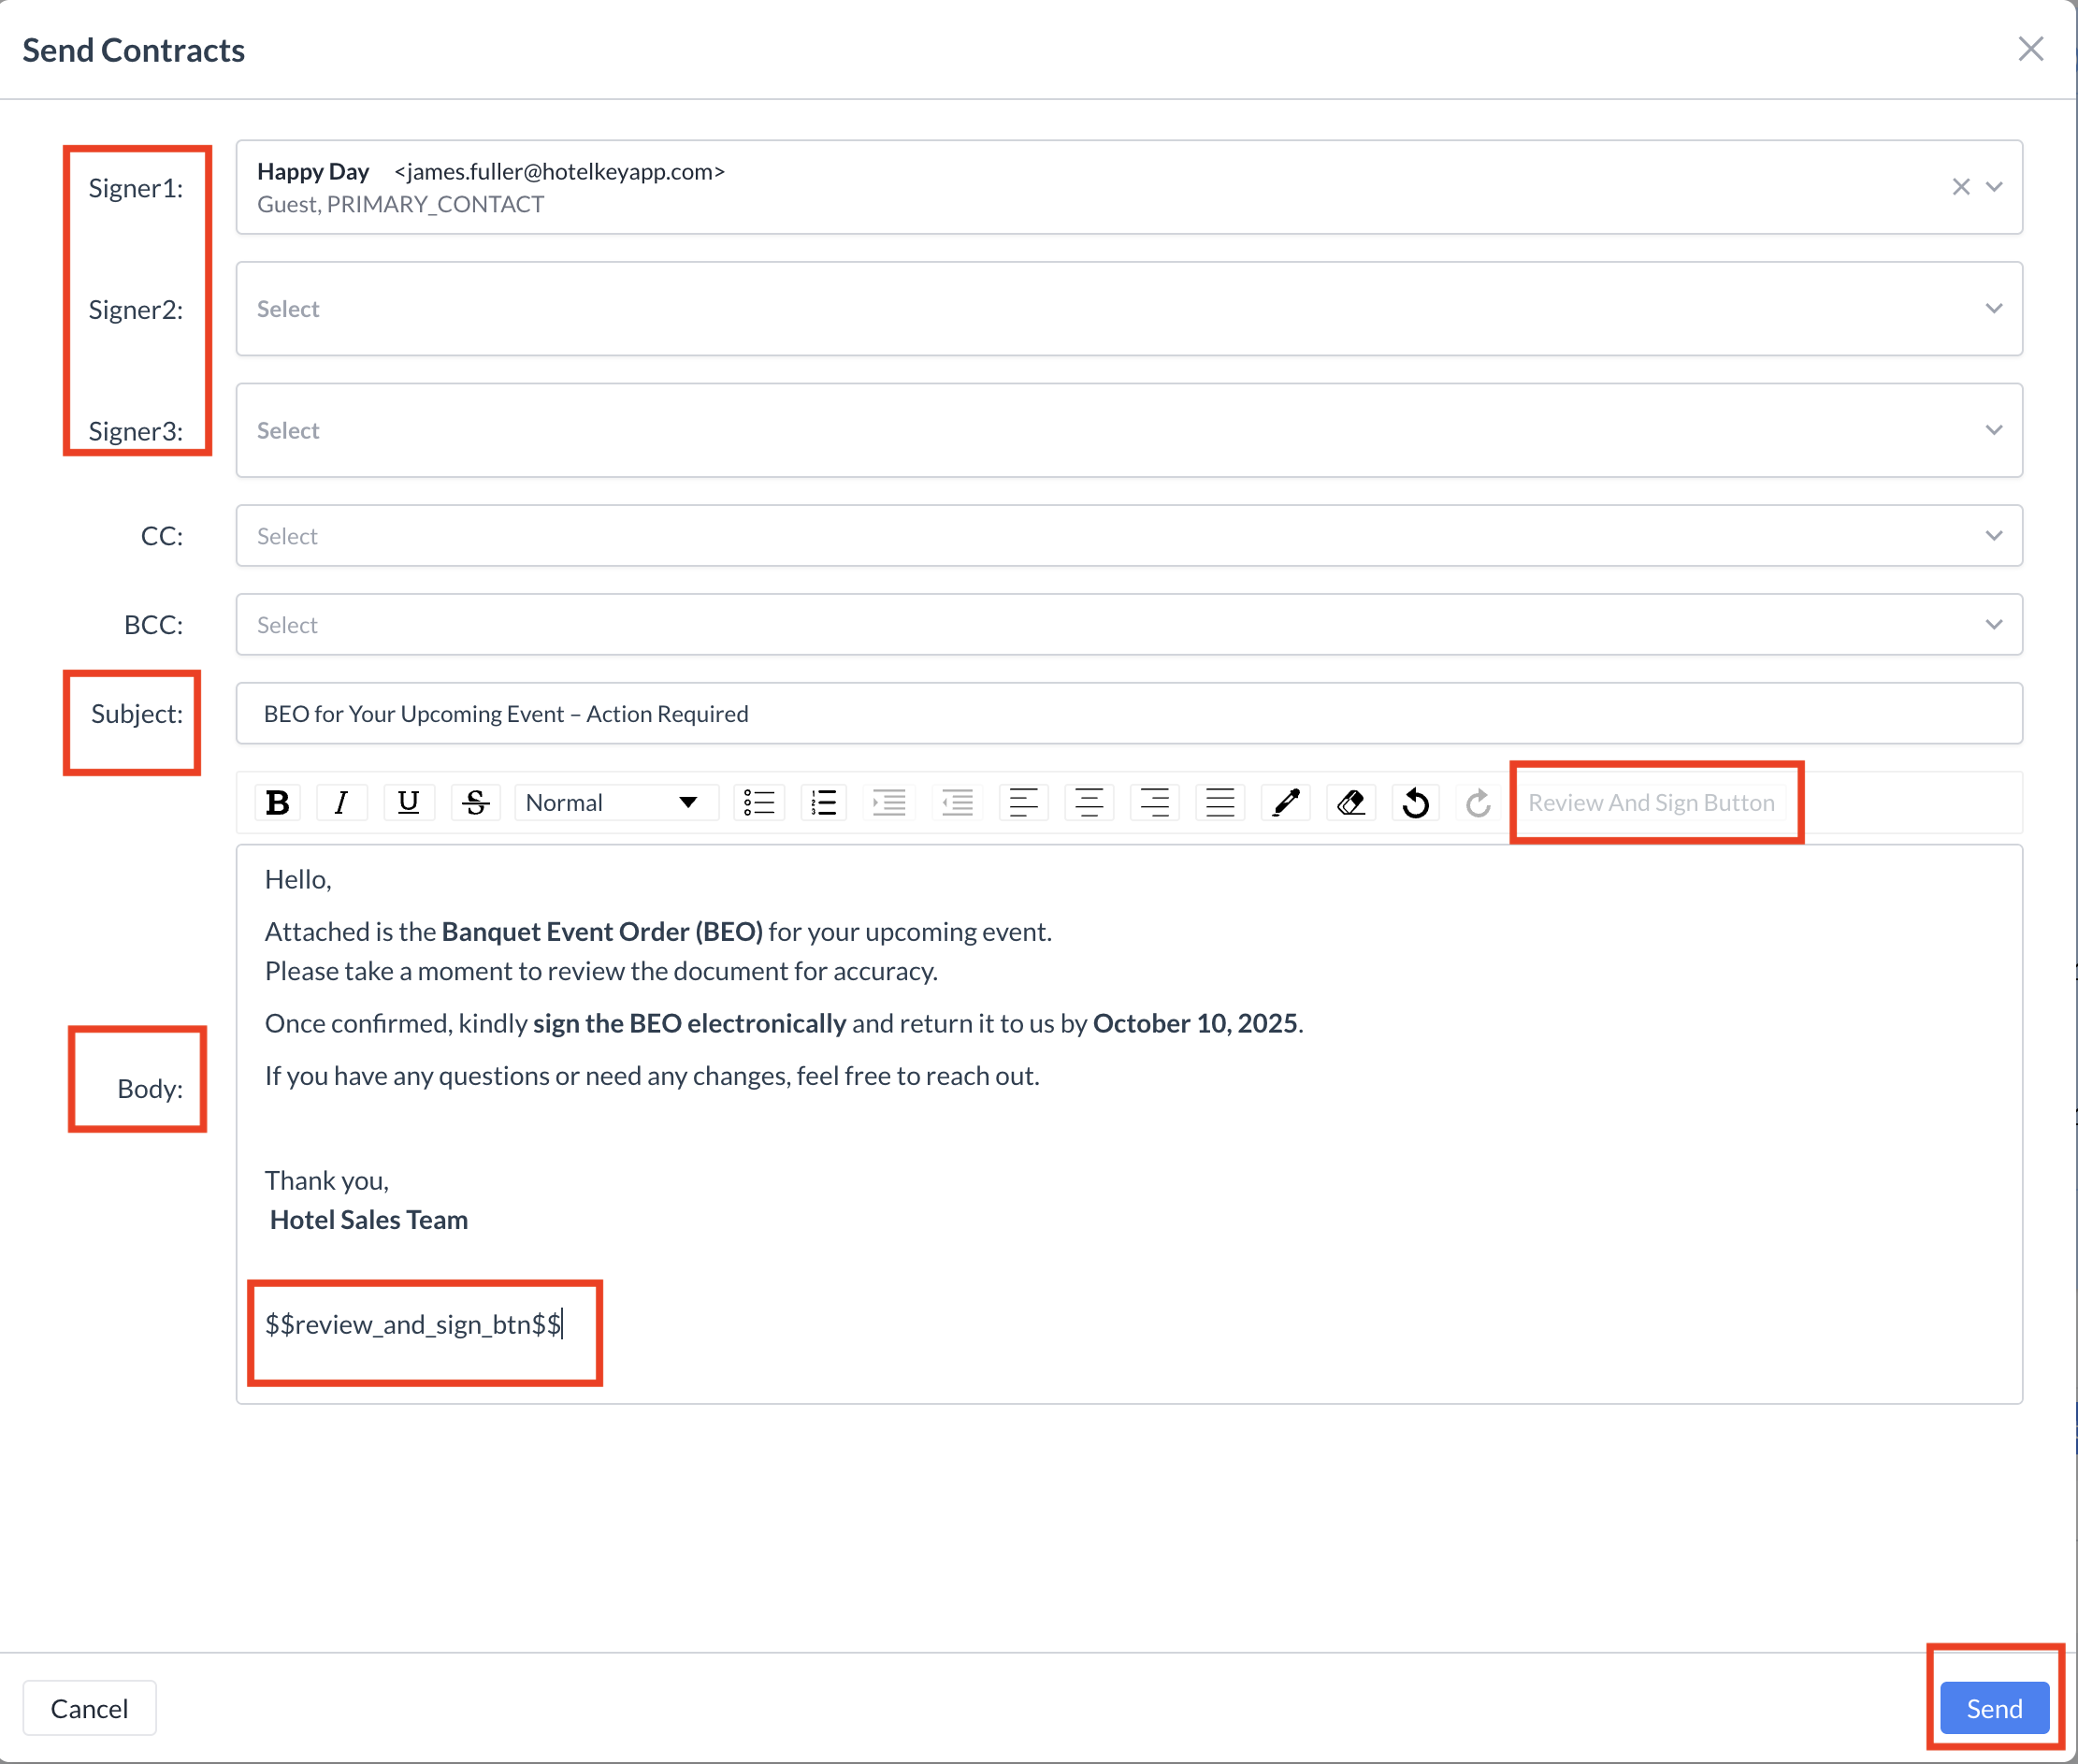
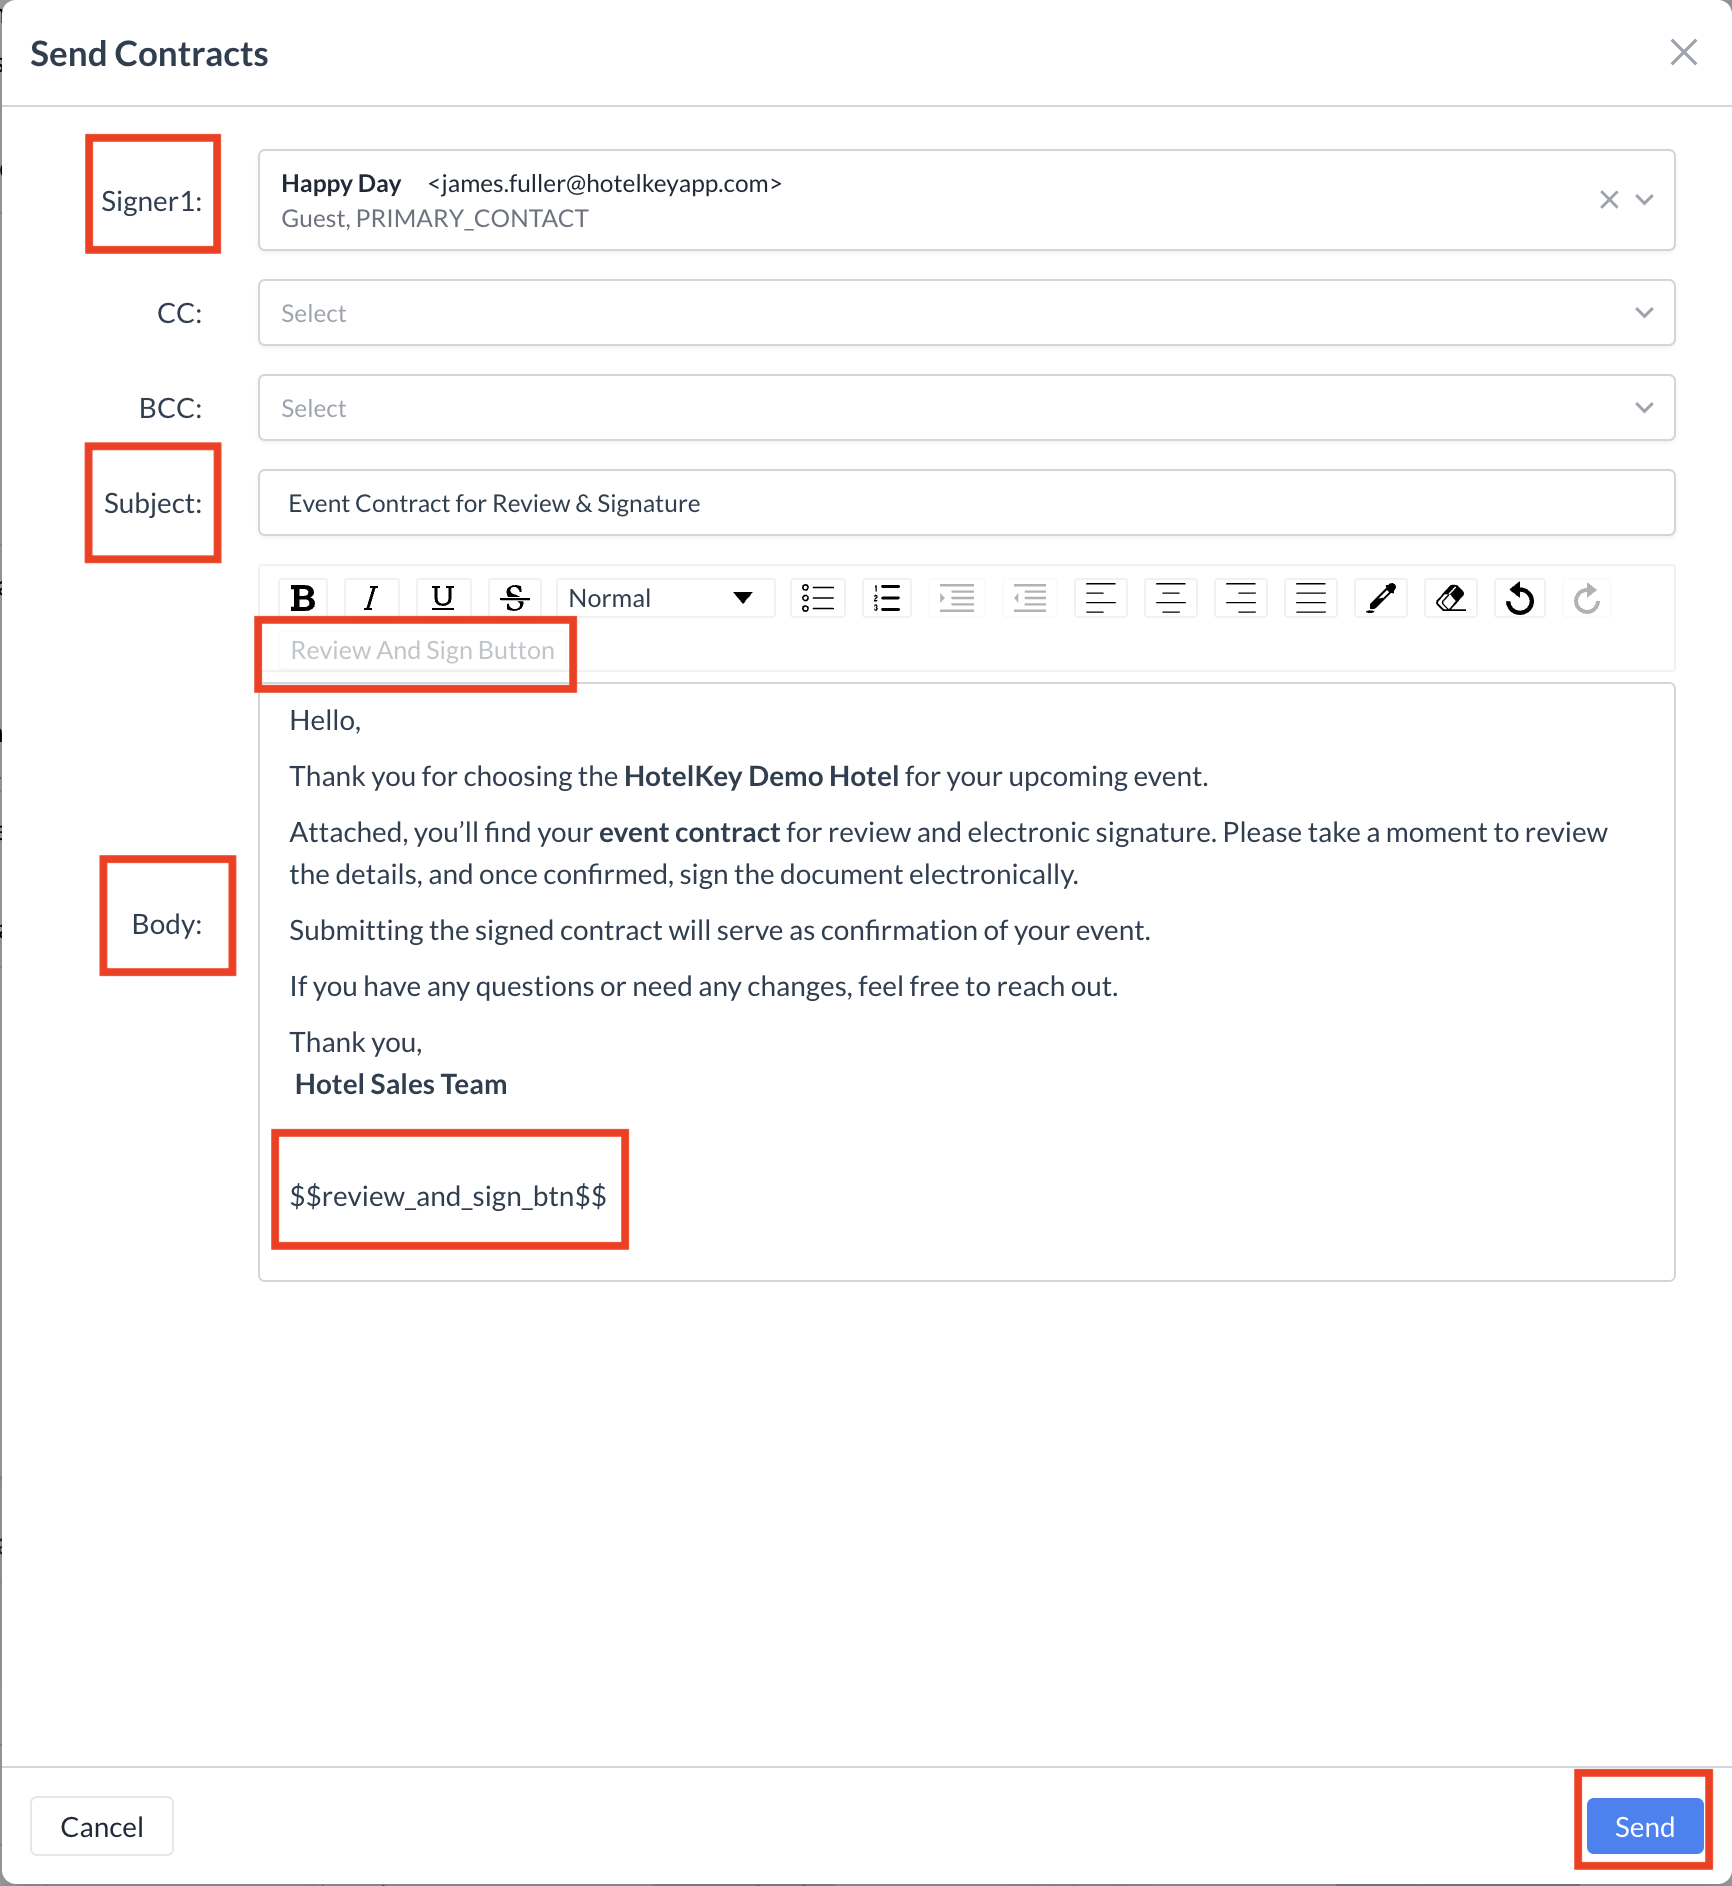
Assigning Signers
A BEO can be signed by up to three people. For example, you might require signatures from both the client and the Event Manager at the property.
Use the dropdown menu next to Signer 1 to select the client’s email address.
If additional signatures are needed, use the Signer 2 and Signer 3 dropdowns to select the corresponding email addresses.
Optional: Add CC or BCC
You may choose to CC or BCC other recipients on the email.
⚠️ Note: CC and BCC recipients will receive a copy of the email but will not be able to sign the document.
Enter the Email Subject Line
This will be the subject line your client sees in their inbox.
Compose the Email Body
Use the Rich Text Editor to enter your message.
You can format the email by adding bold text, italic text, bullet points, or links to customize your message.
Insert the "Review and Sign" Link (Required)
🔴 Important: You must include the "Review and Sign" link in the body of your email.
To do this, click the "Review and Sign" button located on the right-hand side, just above the Rich Text Editor box.
The placeholder text will appear in the body of your message—this is where the recipient will click to review and sign the BEO.
Send the BEO
Once everything is configured, click the blue "Send" button to email the BEO to your selected signers.
Contracts - Send Contract Email Configuration
Guest Experience: Receiving and Signing the BEO
Once the BEO is sent:
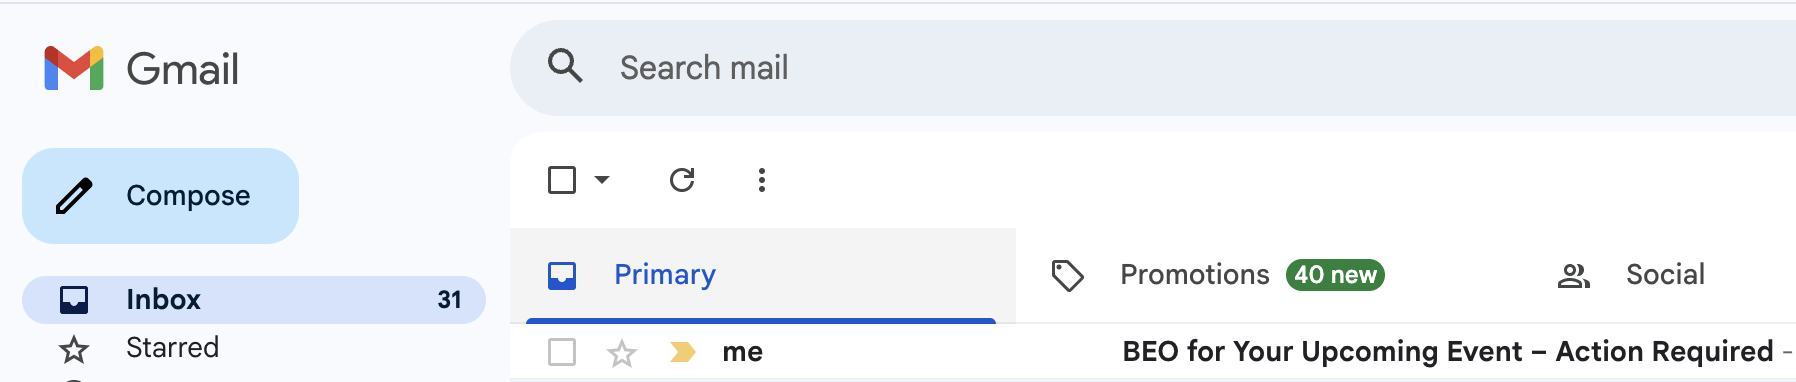
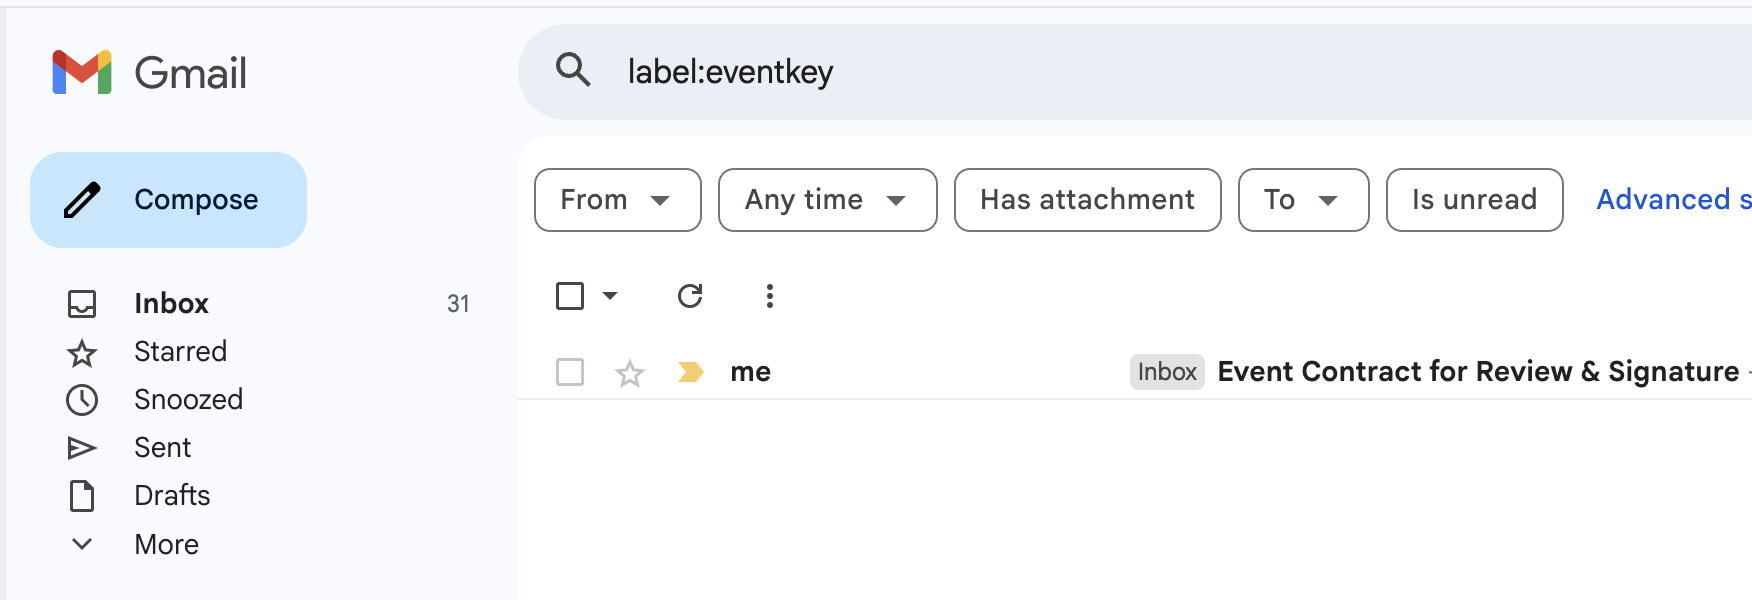
The signer(s) will receive an email with the BEO directly in their inbox.
Any recipients added as CC or BCC will also receive a copy of the email, but will not be able to sign the document.
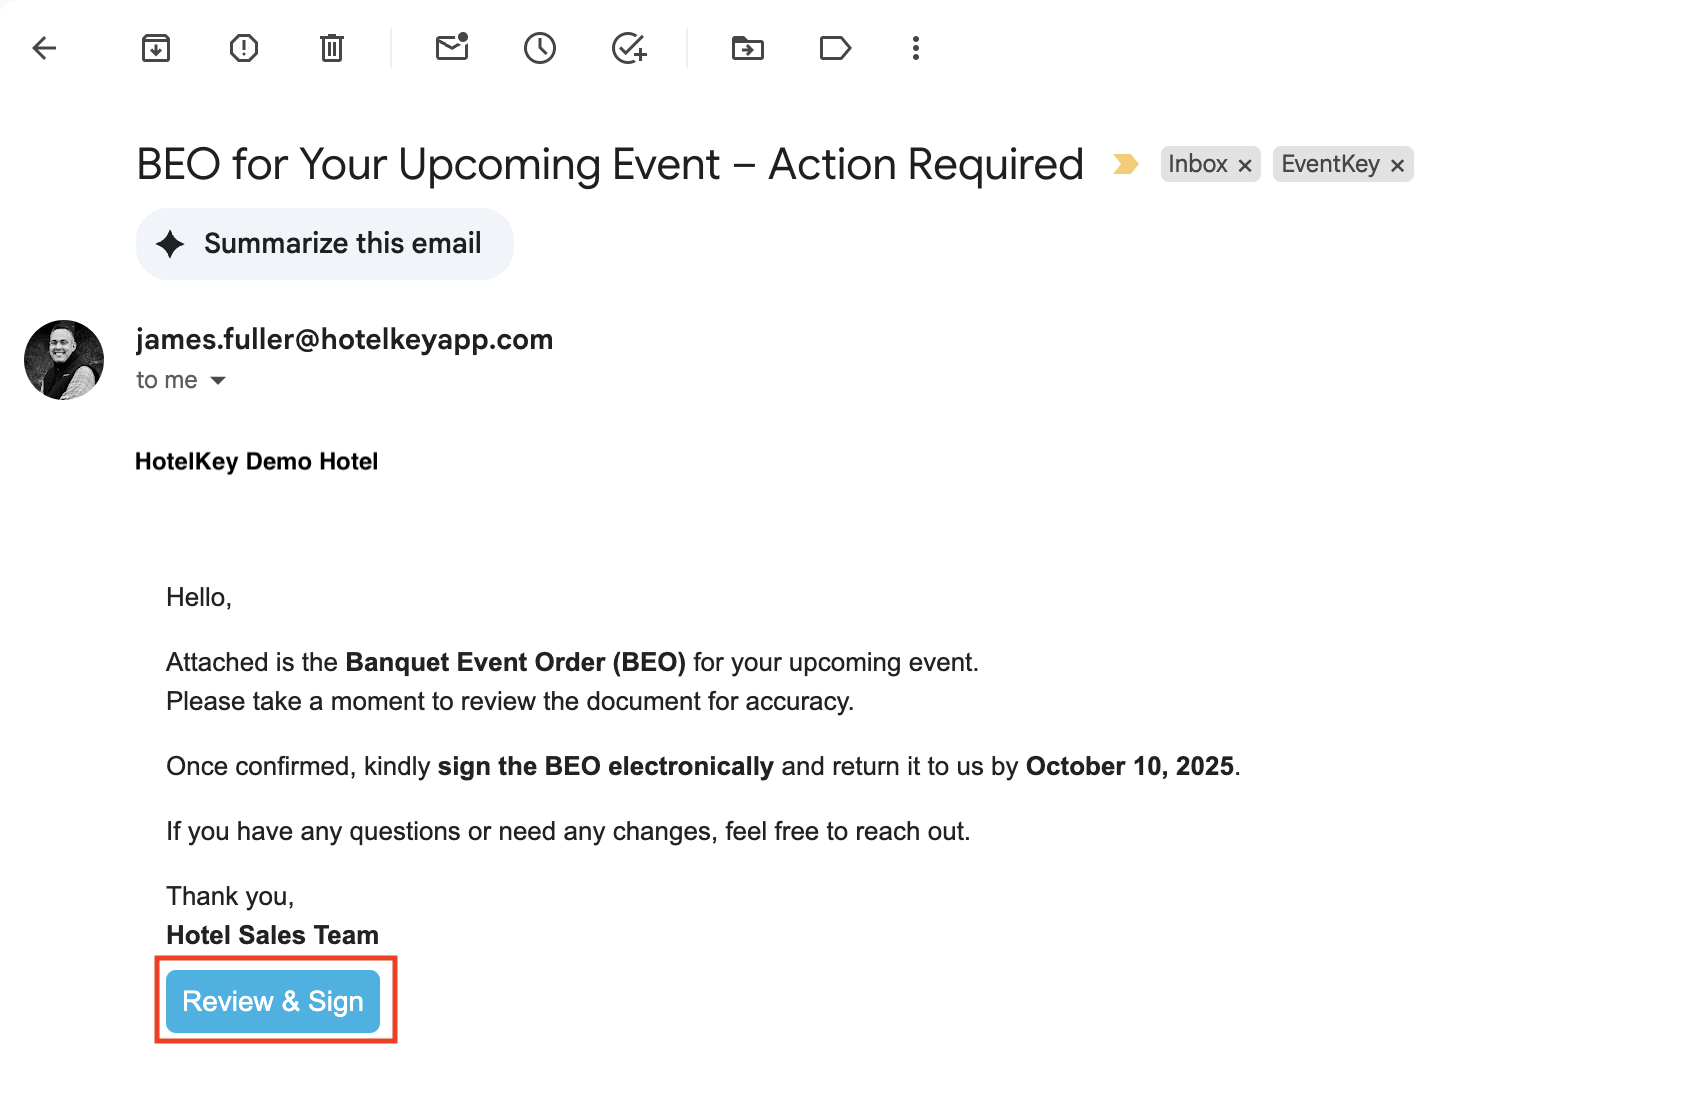
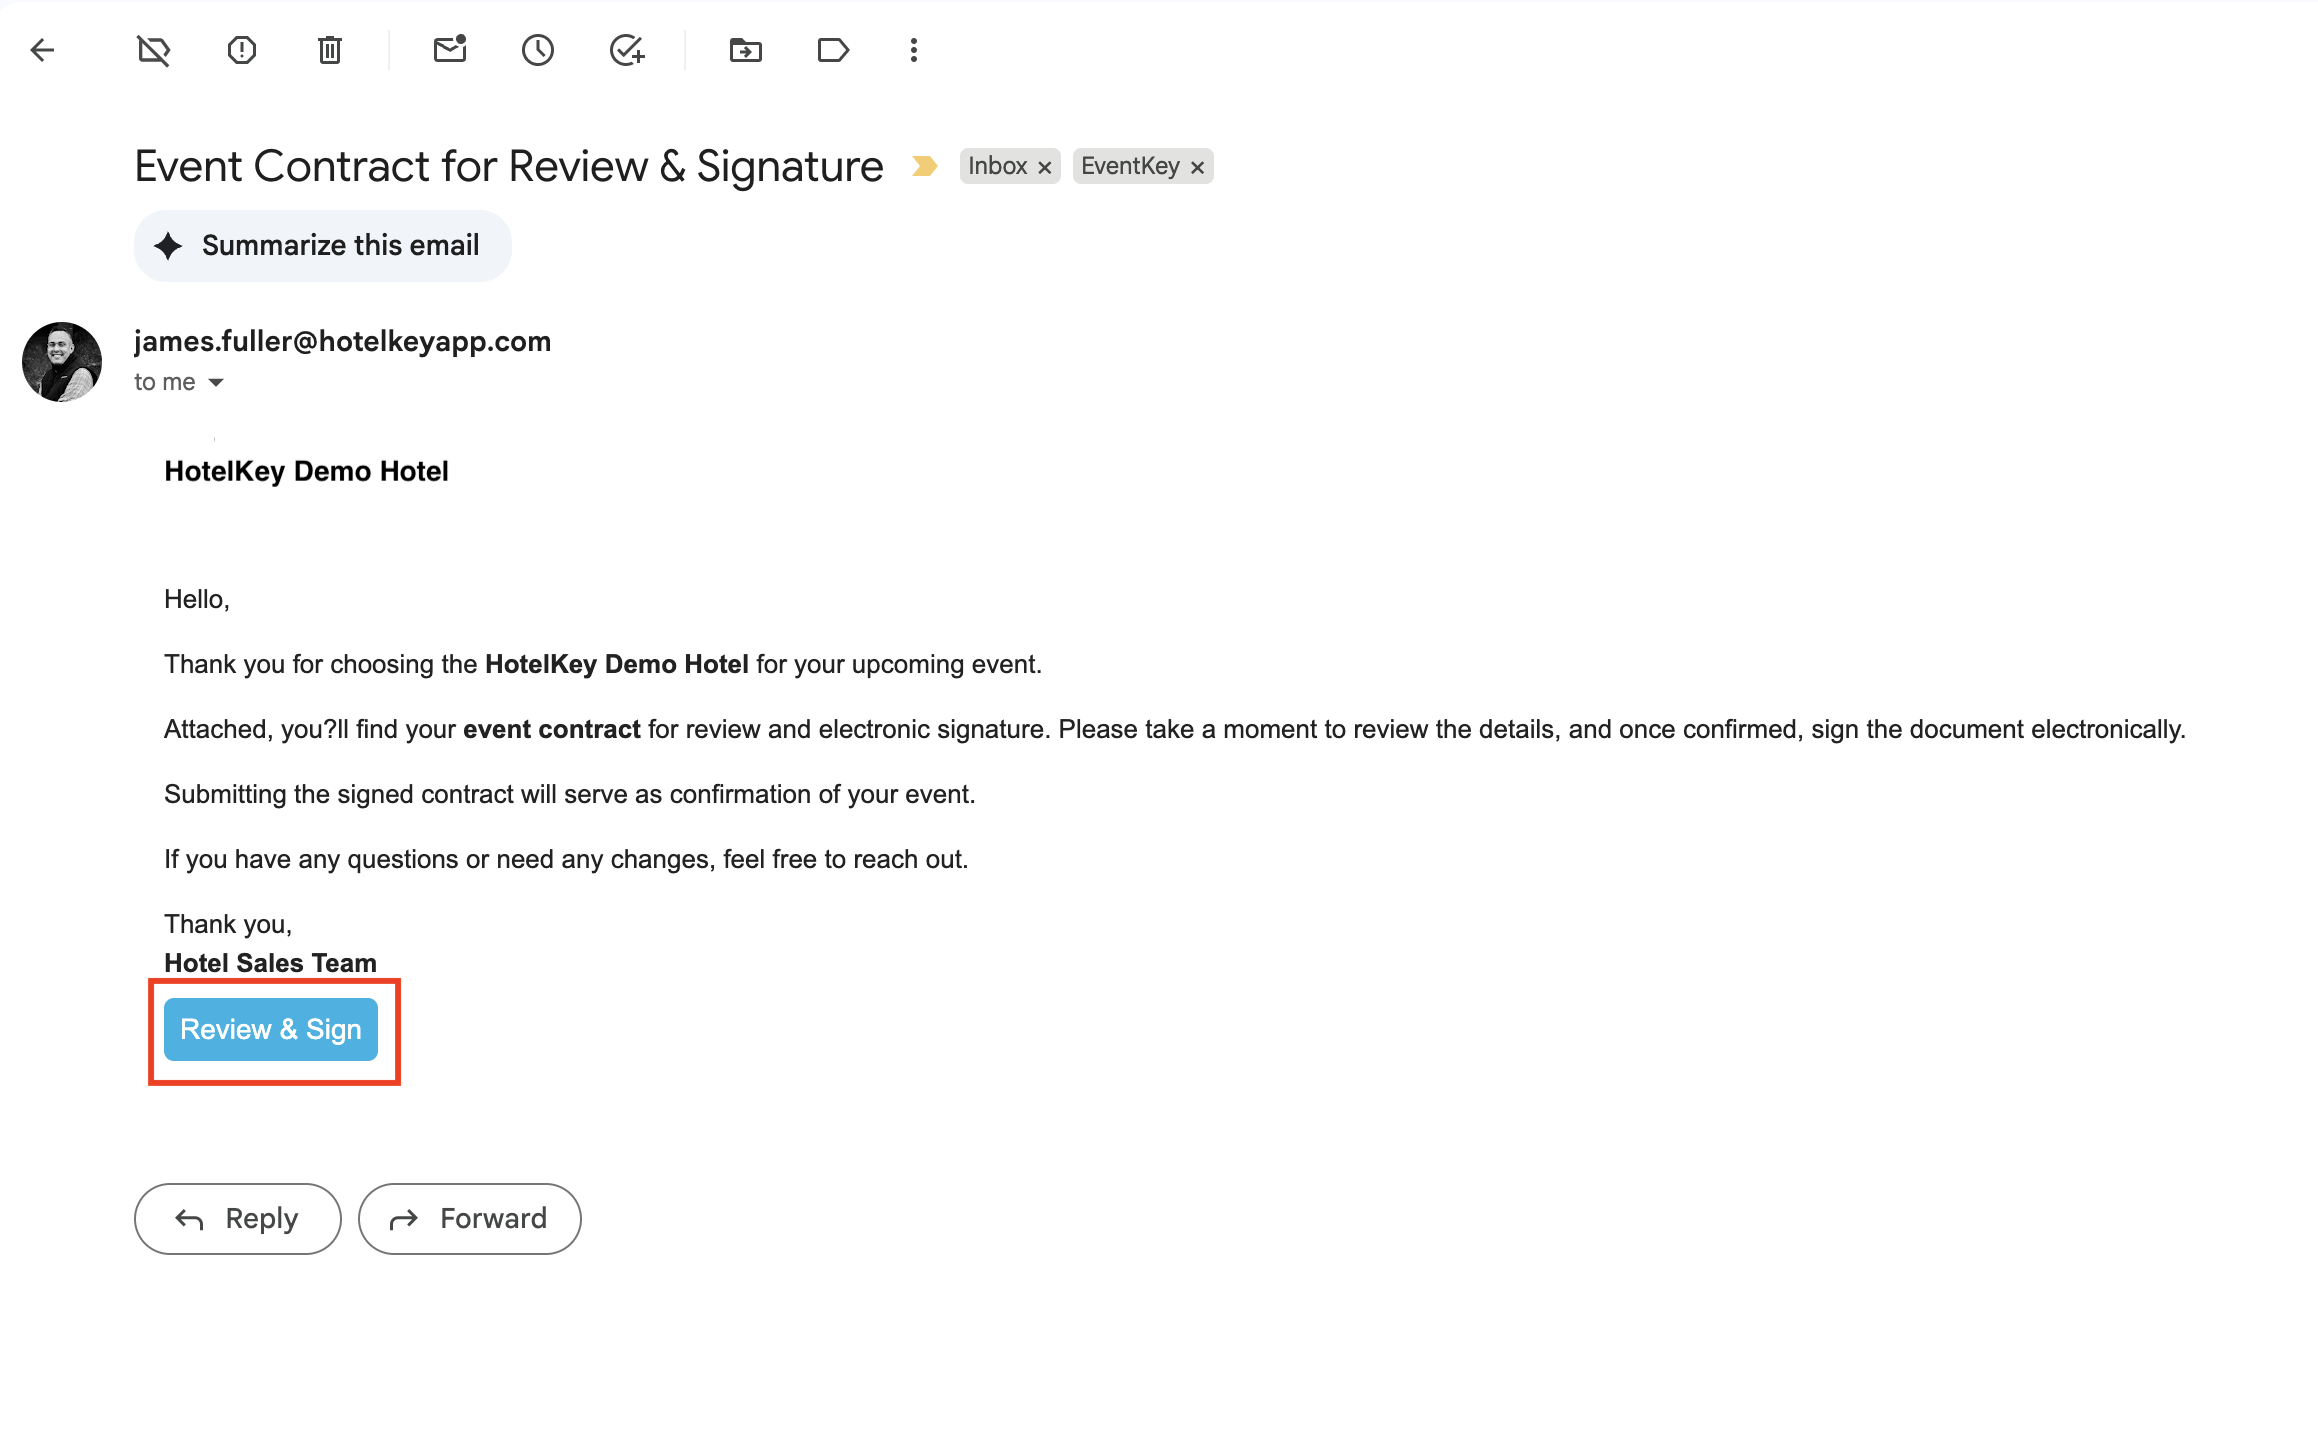
What the Signer Sees:
At the bottom of the email, the signer will see a blue "Review & Sign" button.
The signer must click the "Review & Sign" button to open the BEO.
This will launch a secure webpage where they can review the document and sign it electronically.
🔐 The electronic signature process is secure and time-stamped, providing a verified record of approval.
Guest Inbox
Example of Email
Signing the BEO: Guest Instructions
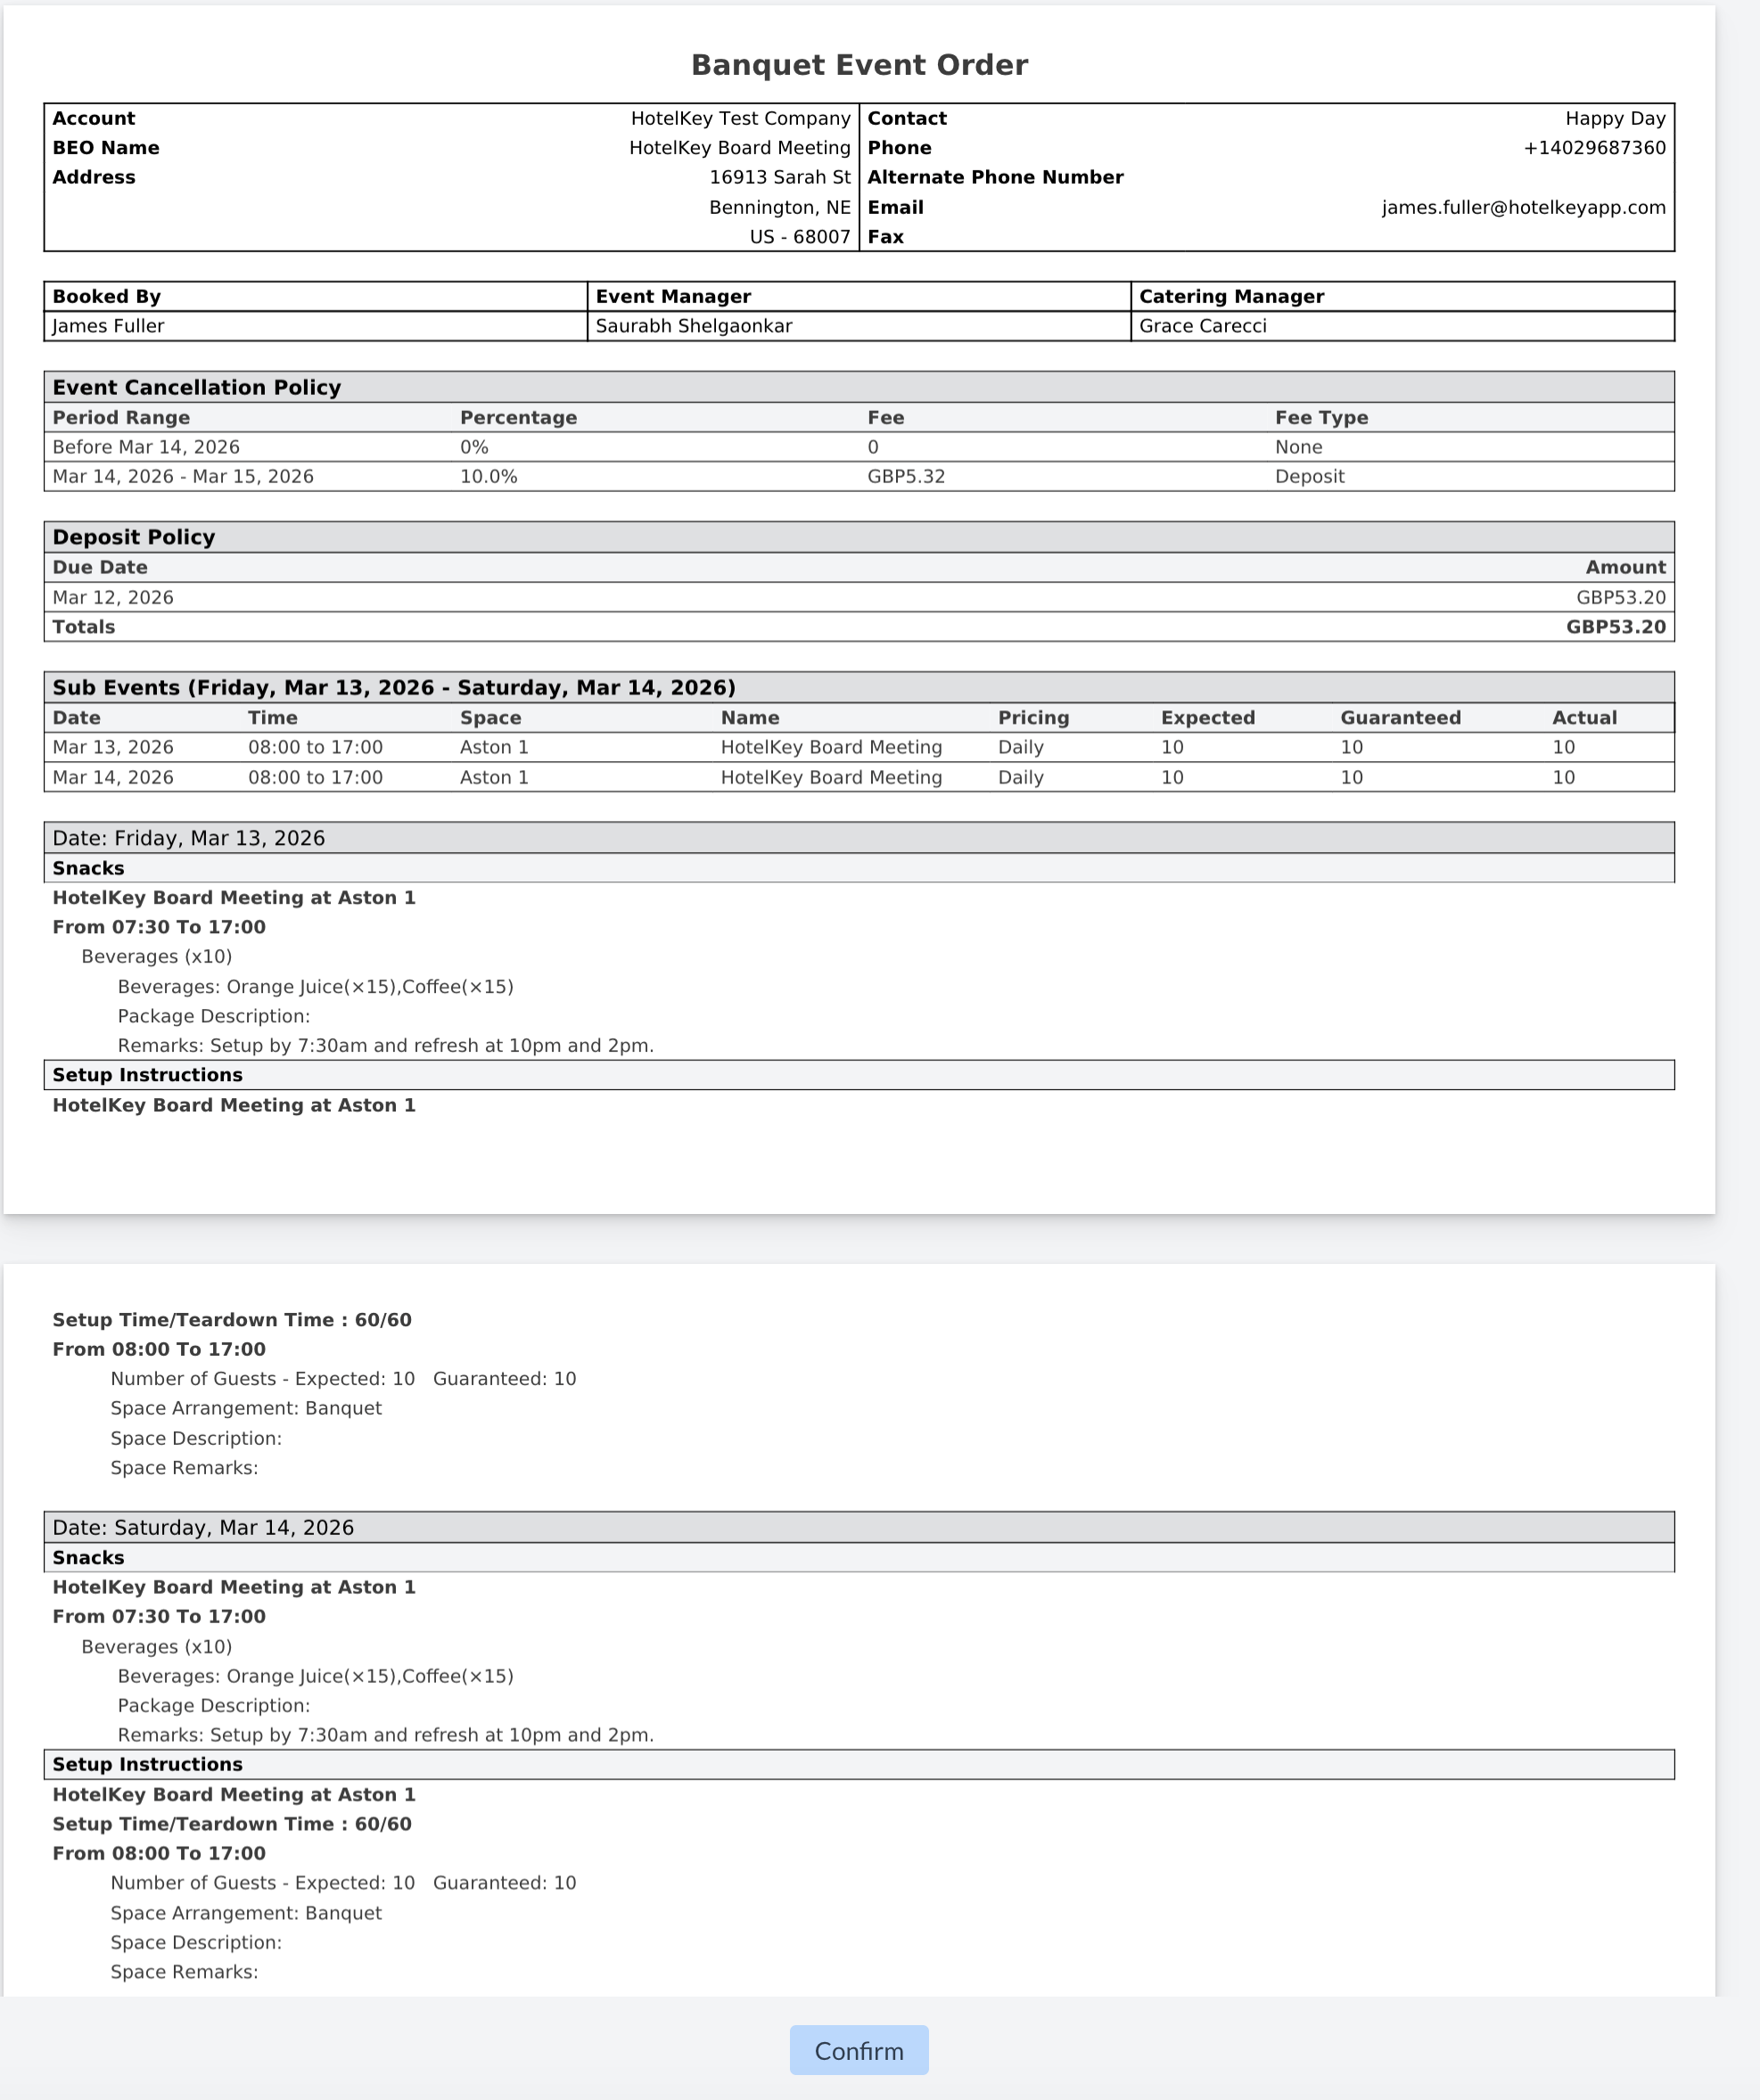
When the signer clicks the "Review & Sign" button in the email, the BEO will open in their web browser, starting on page 1.
Steps to Complete the Signature:
Review the BEO
The signer should scroll through the document, reviewing each page carefully.
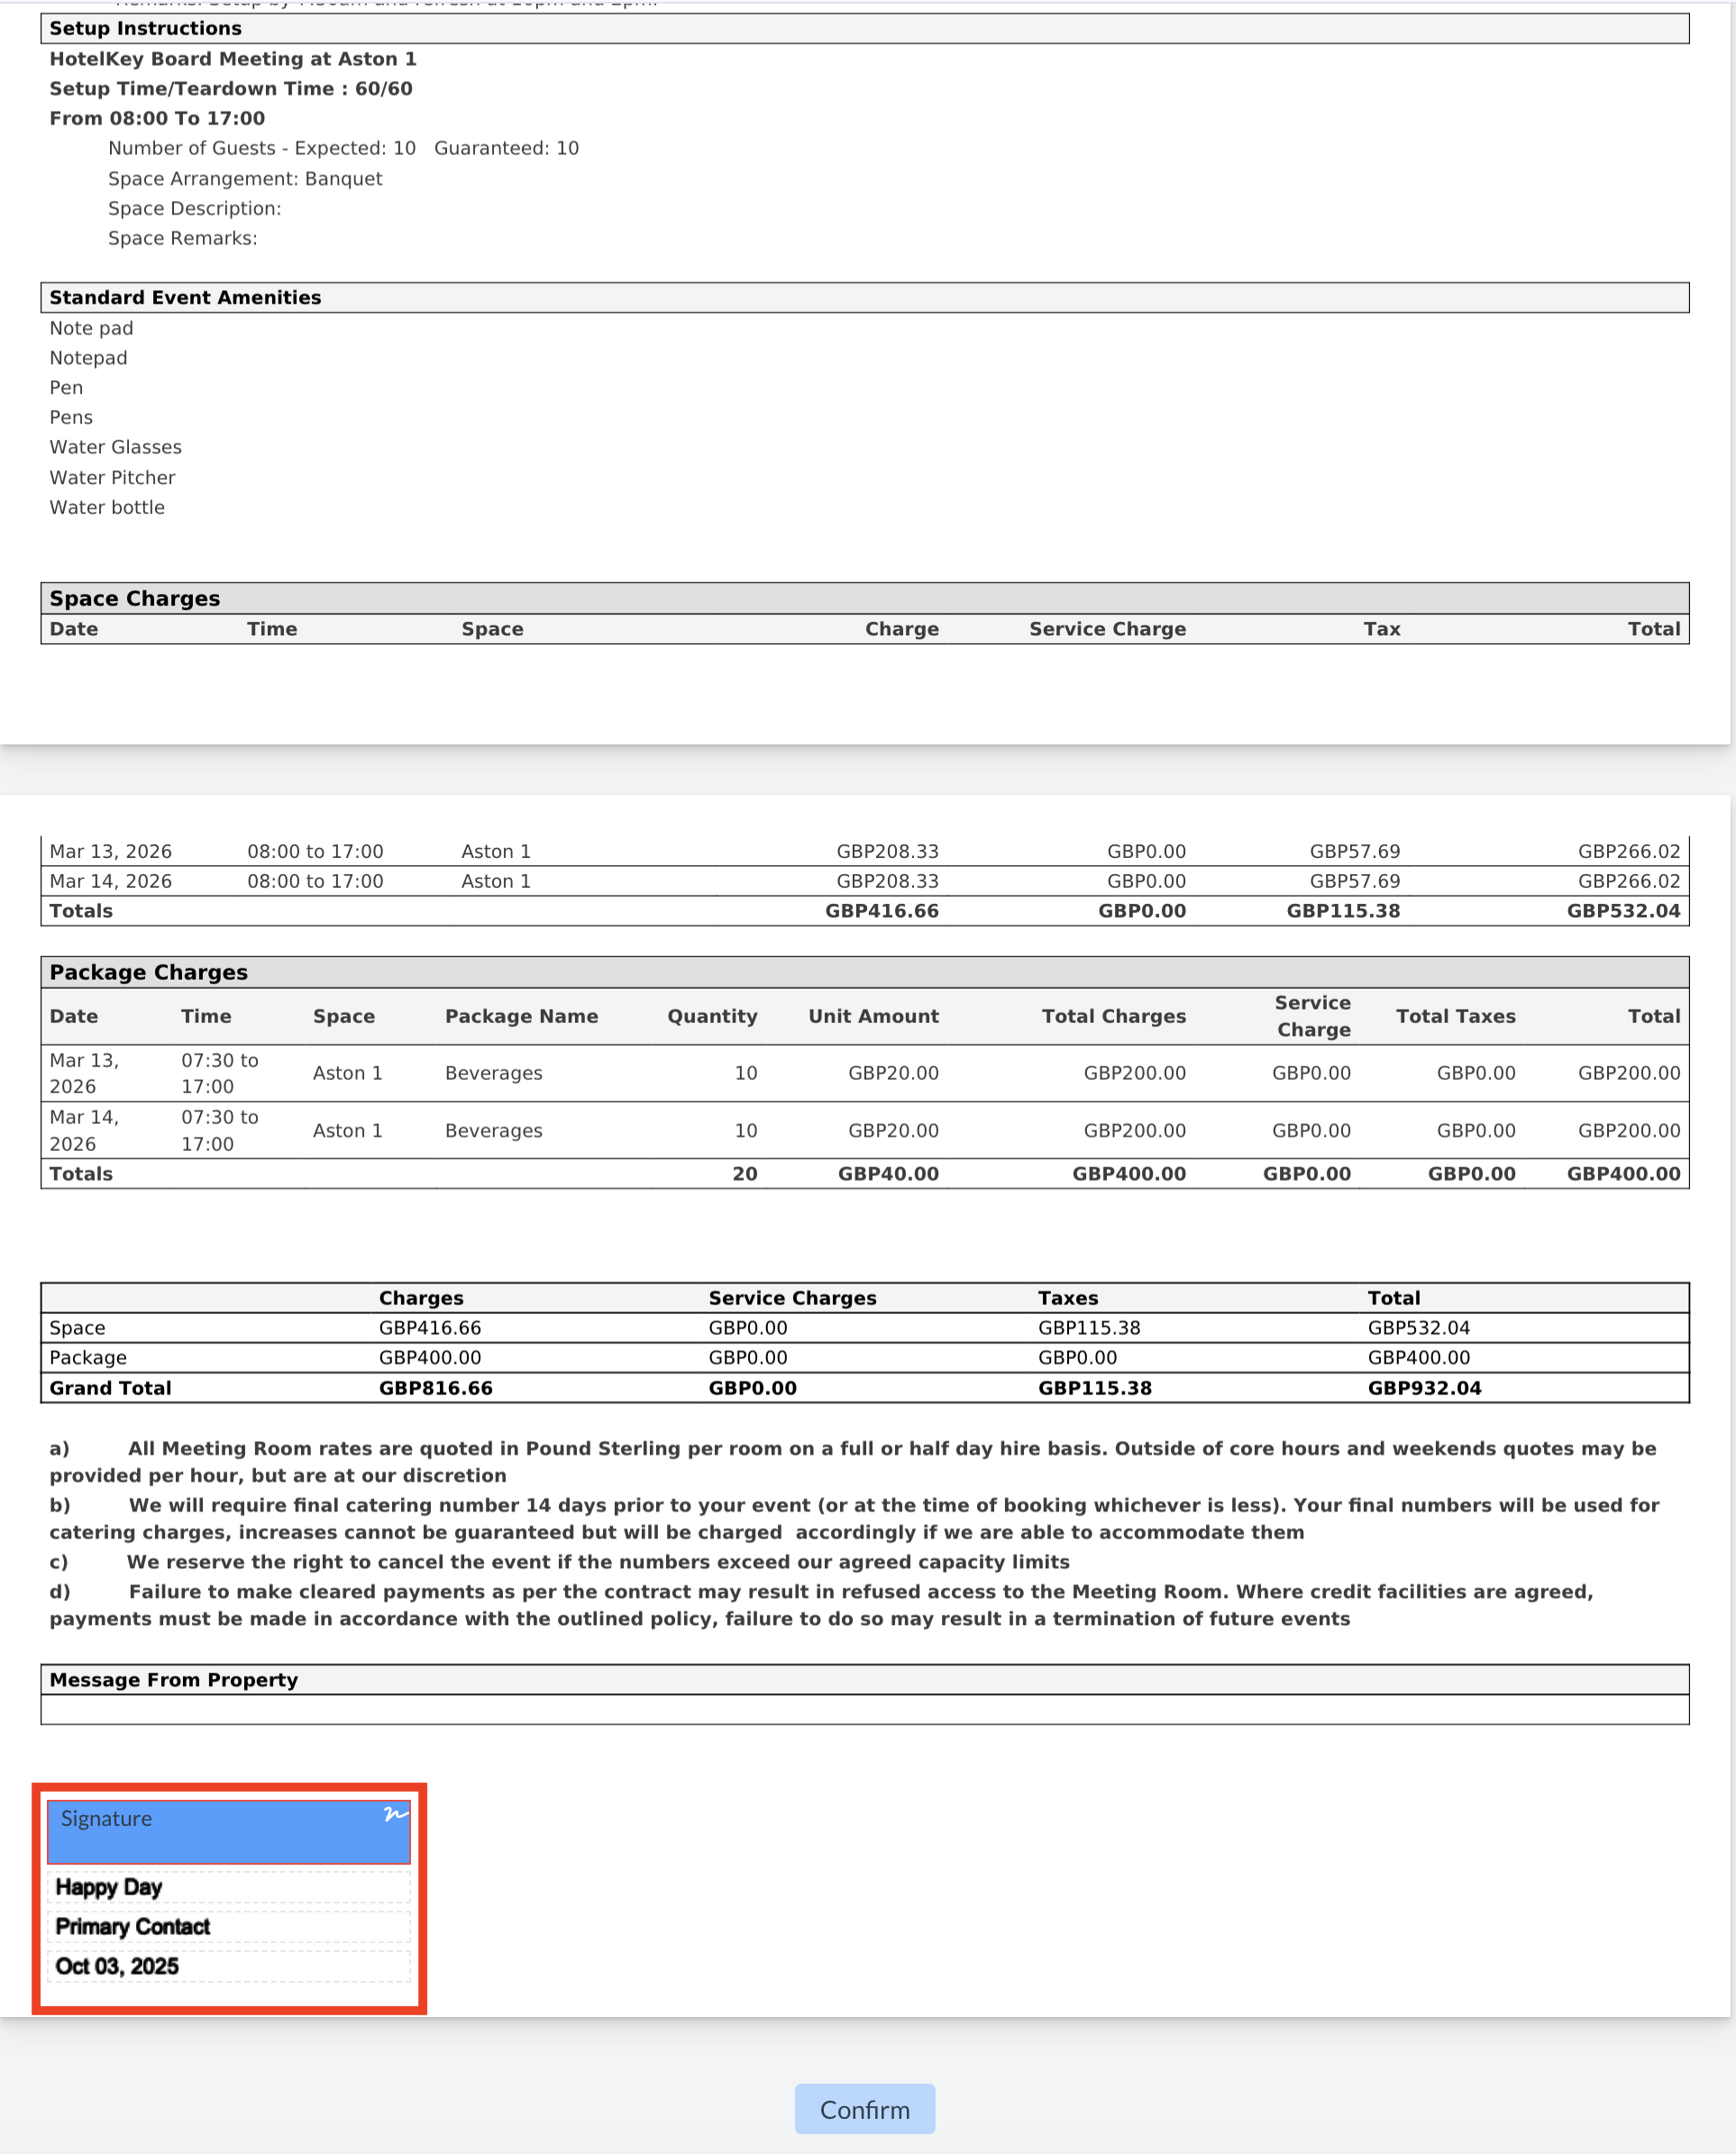
Locate the Signature Field
At the bottom of the final page, the signer will see a blue signature box.
Click to Sign
Clicking inside the blue signature box will open the Add Signature window.
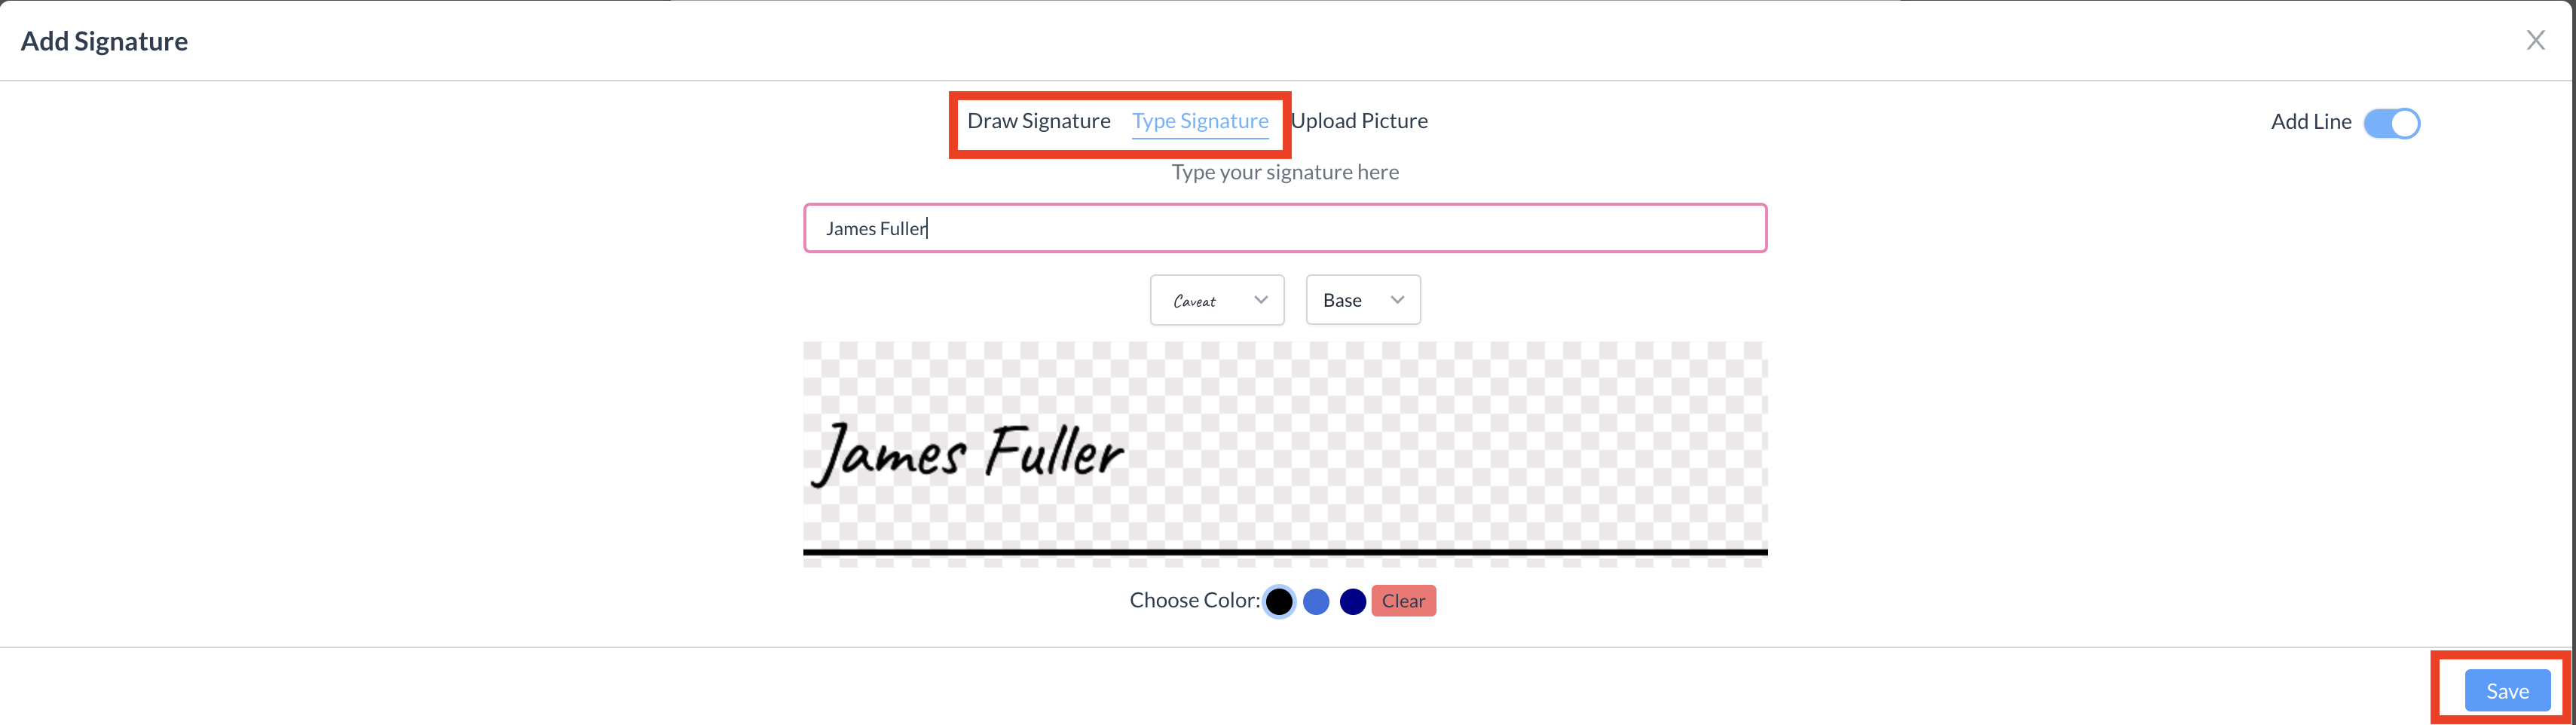
Add Signature
The signer can use their mouse or touchscreen to draw their signature.
✏️ Optional: In EventKey settings you can enable the signer to also type their name, which will serve as their electronic signature.
Save the Signature
After entering their signature, the signer clicks the blue "Save" button.
Confirm the Signature
The signer will be returned to the BEO, where their signature now appears in the signature box.
To complete the process, they must click the blue "Confirm" button at the bottom of the BEO.
✅ Once confirmed, the signed BEO is securely submitted and a copy is automatically stored in the Event Record.
BEO - Page 1
BEO - Review & Sign
BEO - Digital Signature
BEO - Submit Signed BEO
Accessing the Signed BEO
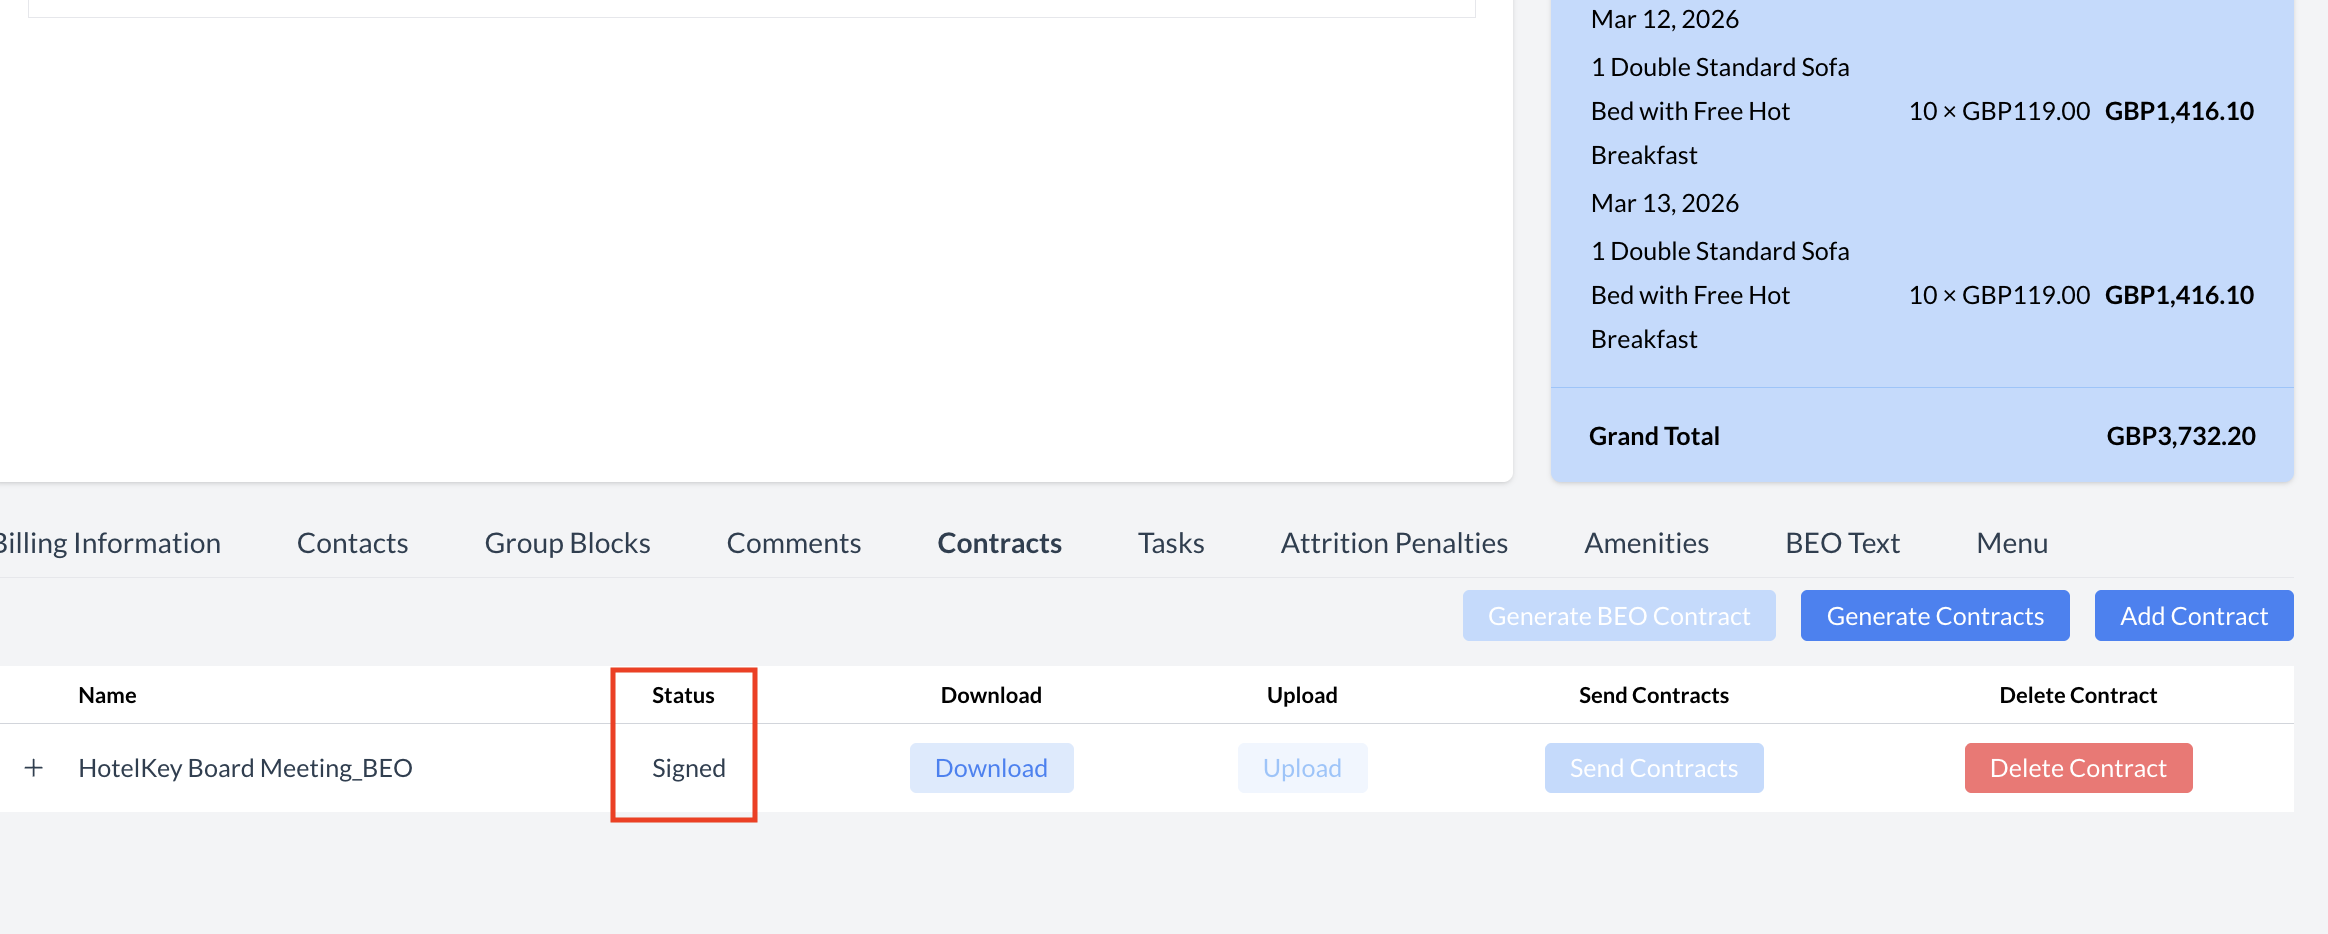
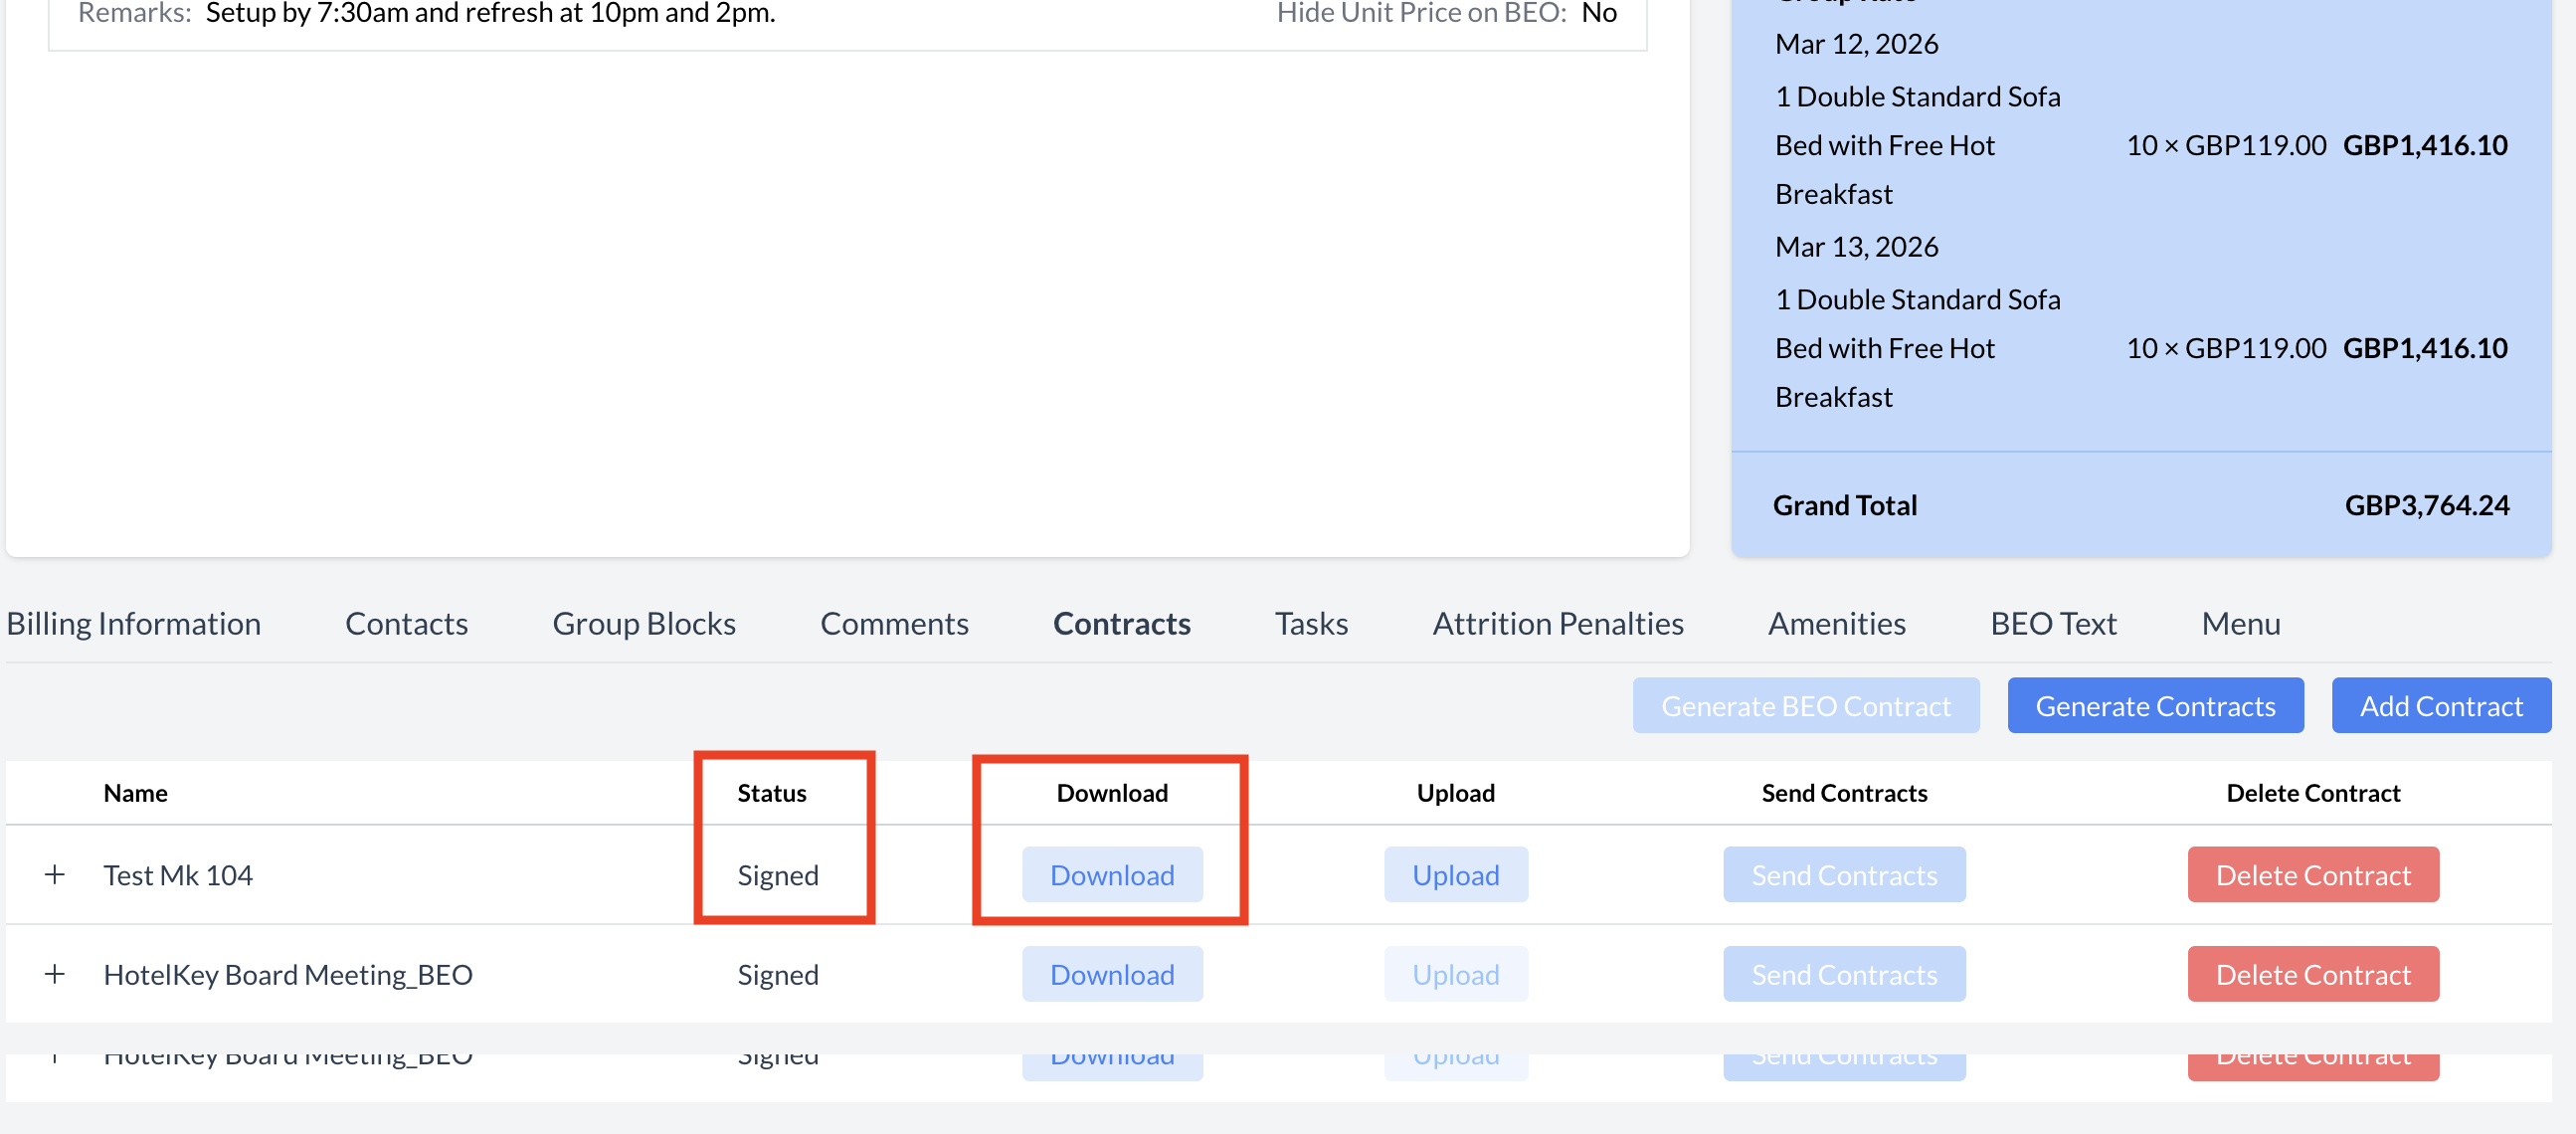
Once all designated signers have completed the electronic signature process, the BEO status will automatically update from "In Progress" to "Signed."
Downloading the Signed BEO:
Navigate to the Contract section of the Event Record.
Click the blue "Download" button.
The signed BEO will be downloaded to your computer as a PDF file.
📁 The PDF includes all signatures and is stored for easy access and record-keeping.
BEO - Signed Status
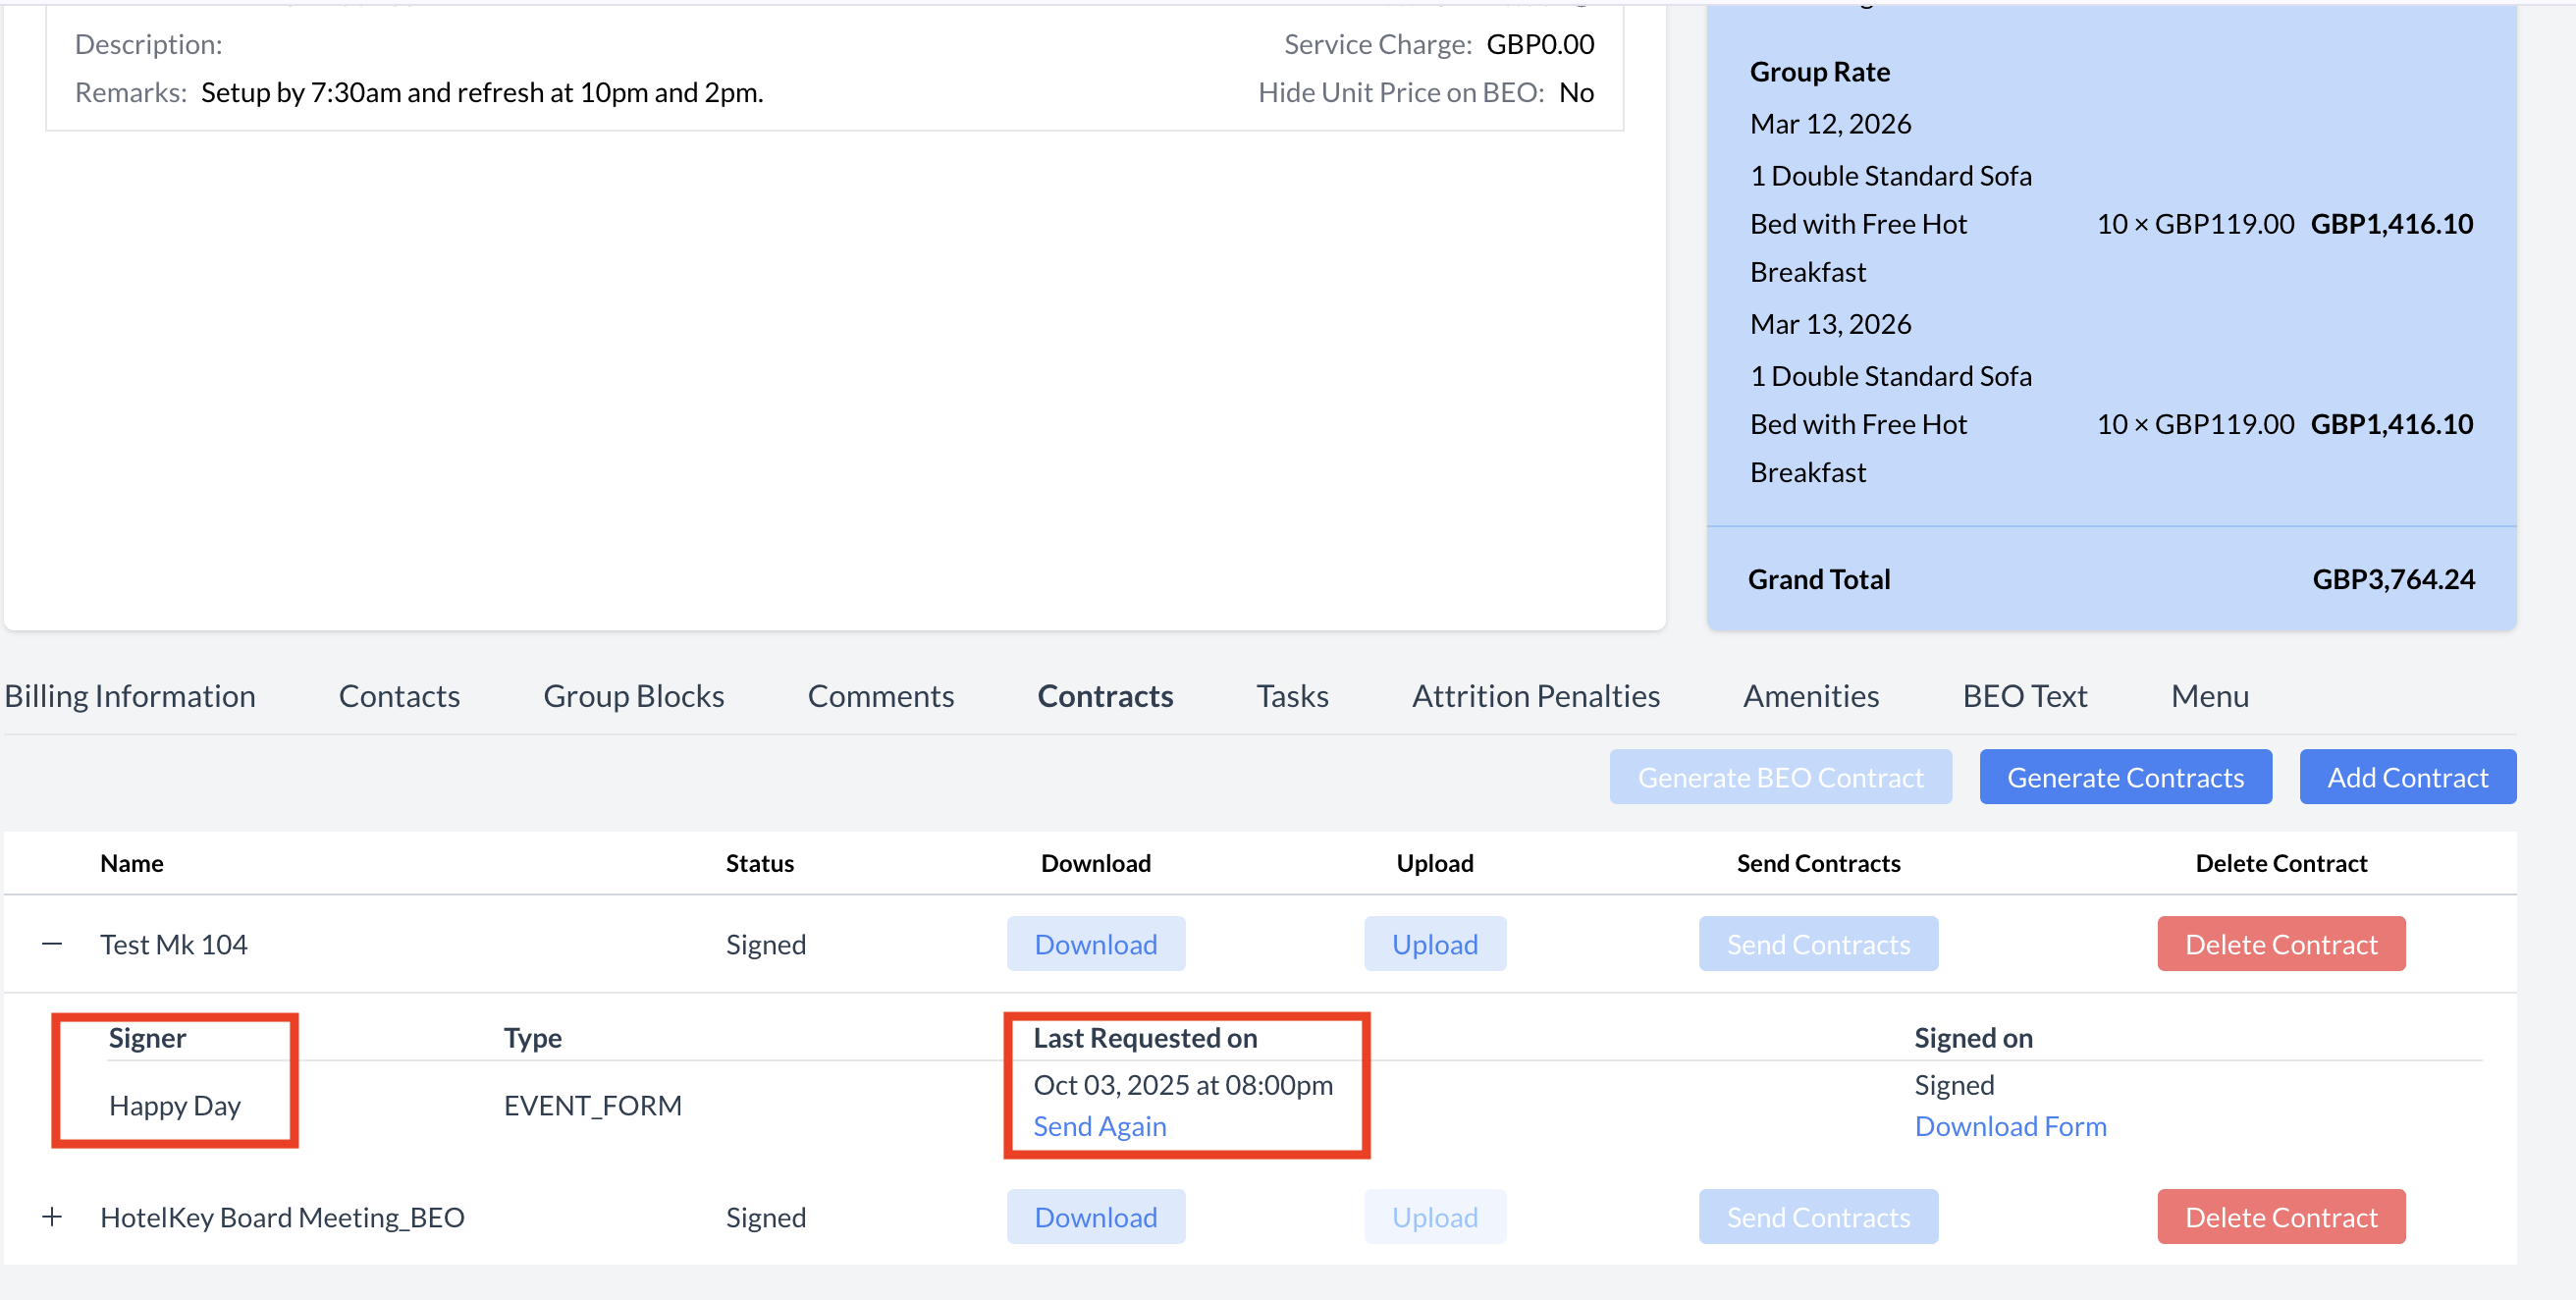
Viewing Signature Status for Multiple Signers
When a BEO is sent to multiple signers, you can easily track the status of each signature request.
How to View Signer Status:
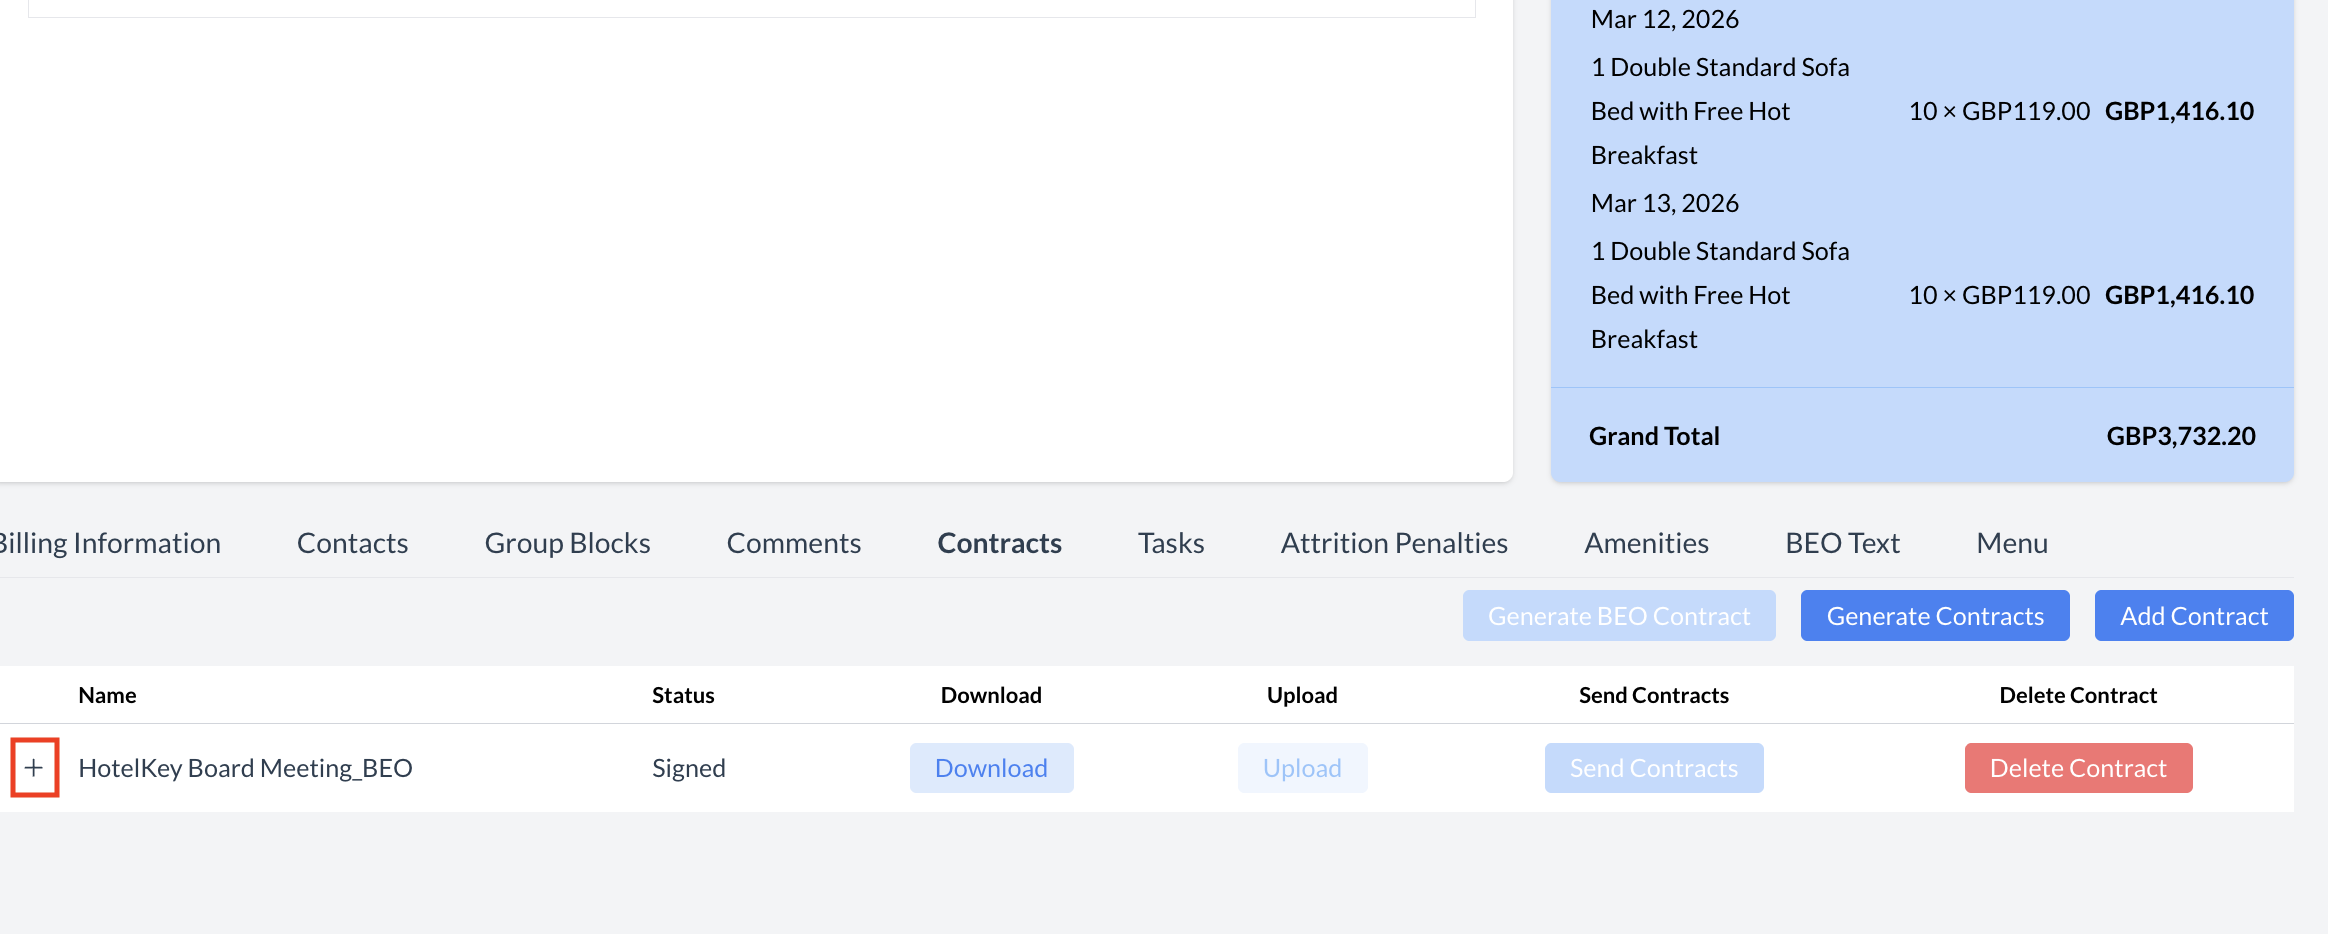
In the Contract section of the Event Record, locate the BEO.
Click the “+” icon to the left of the BEO name.
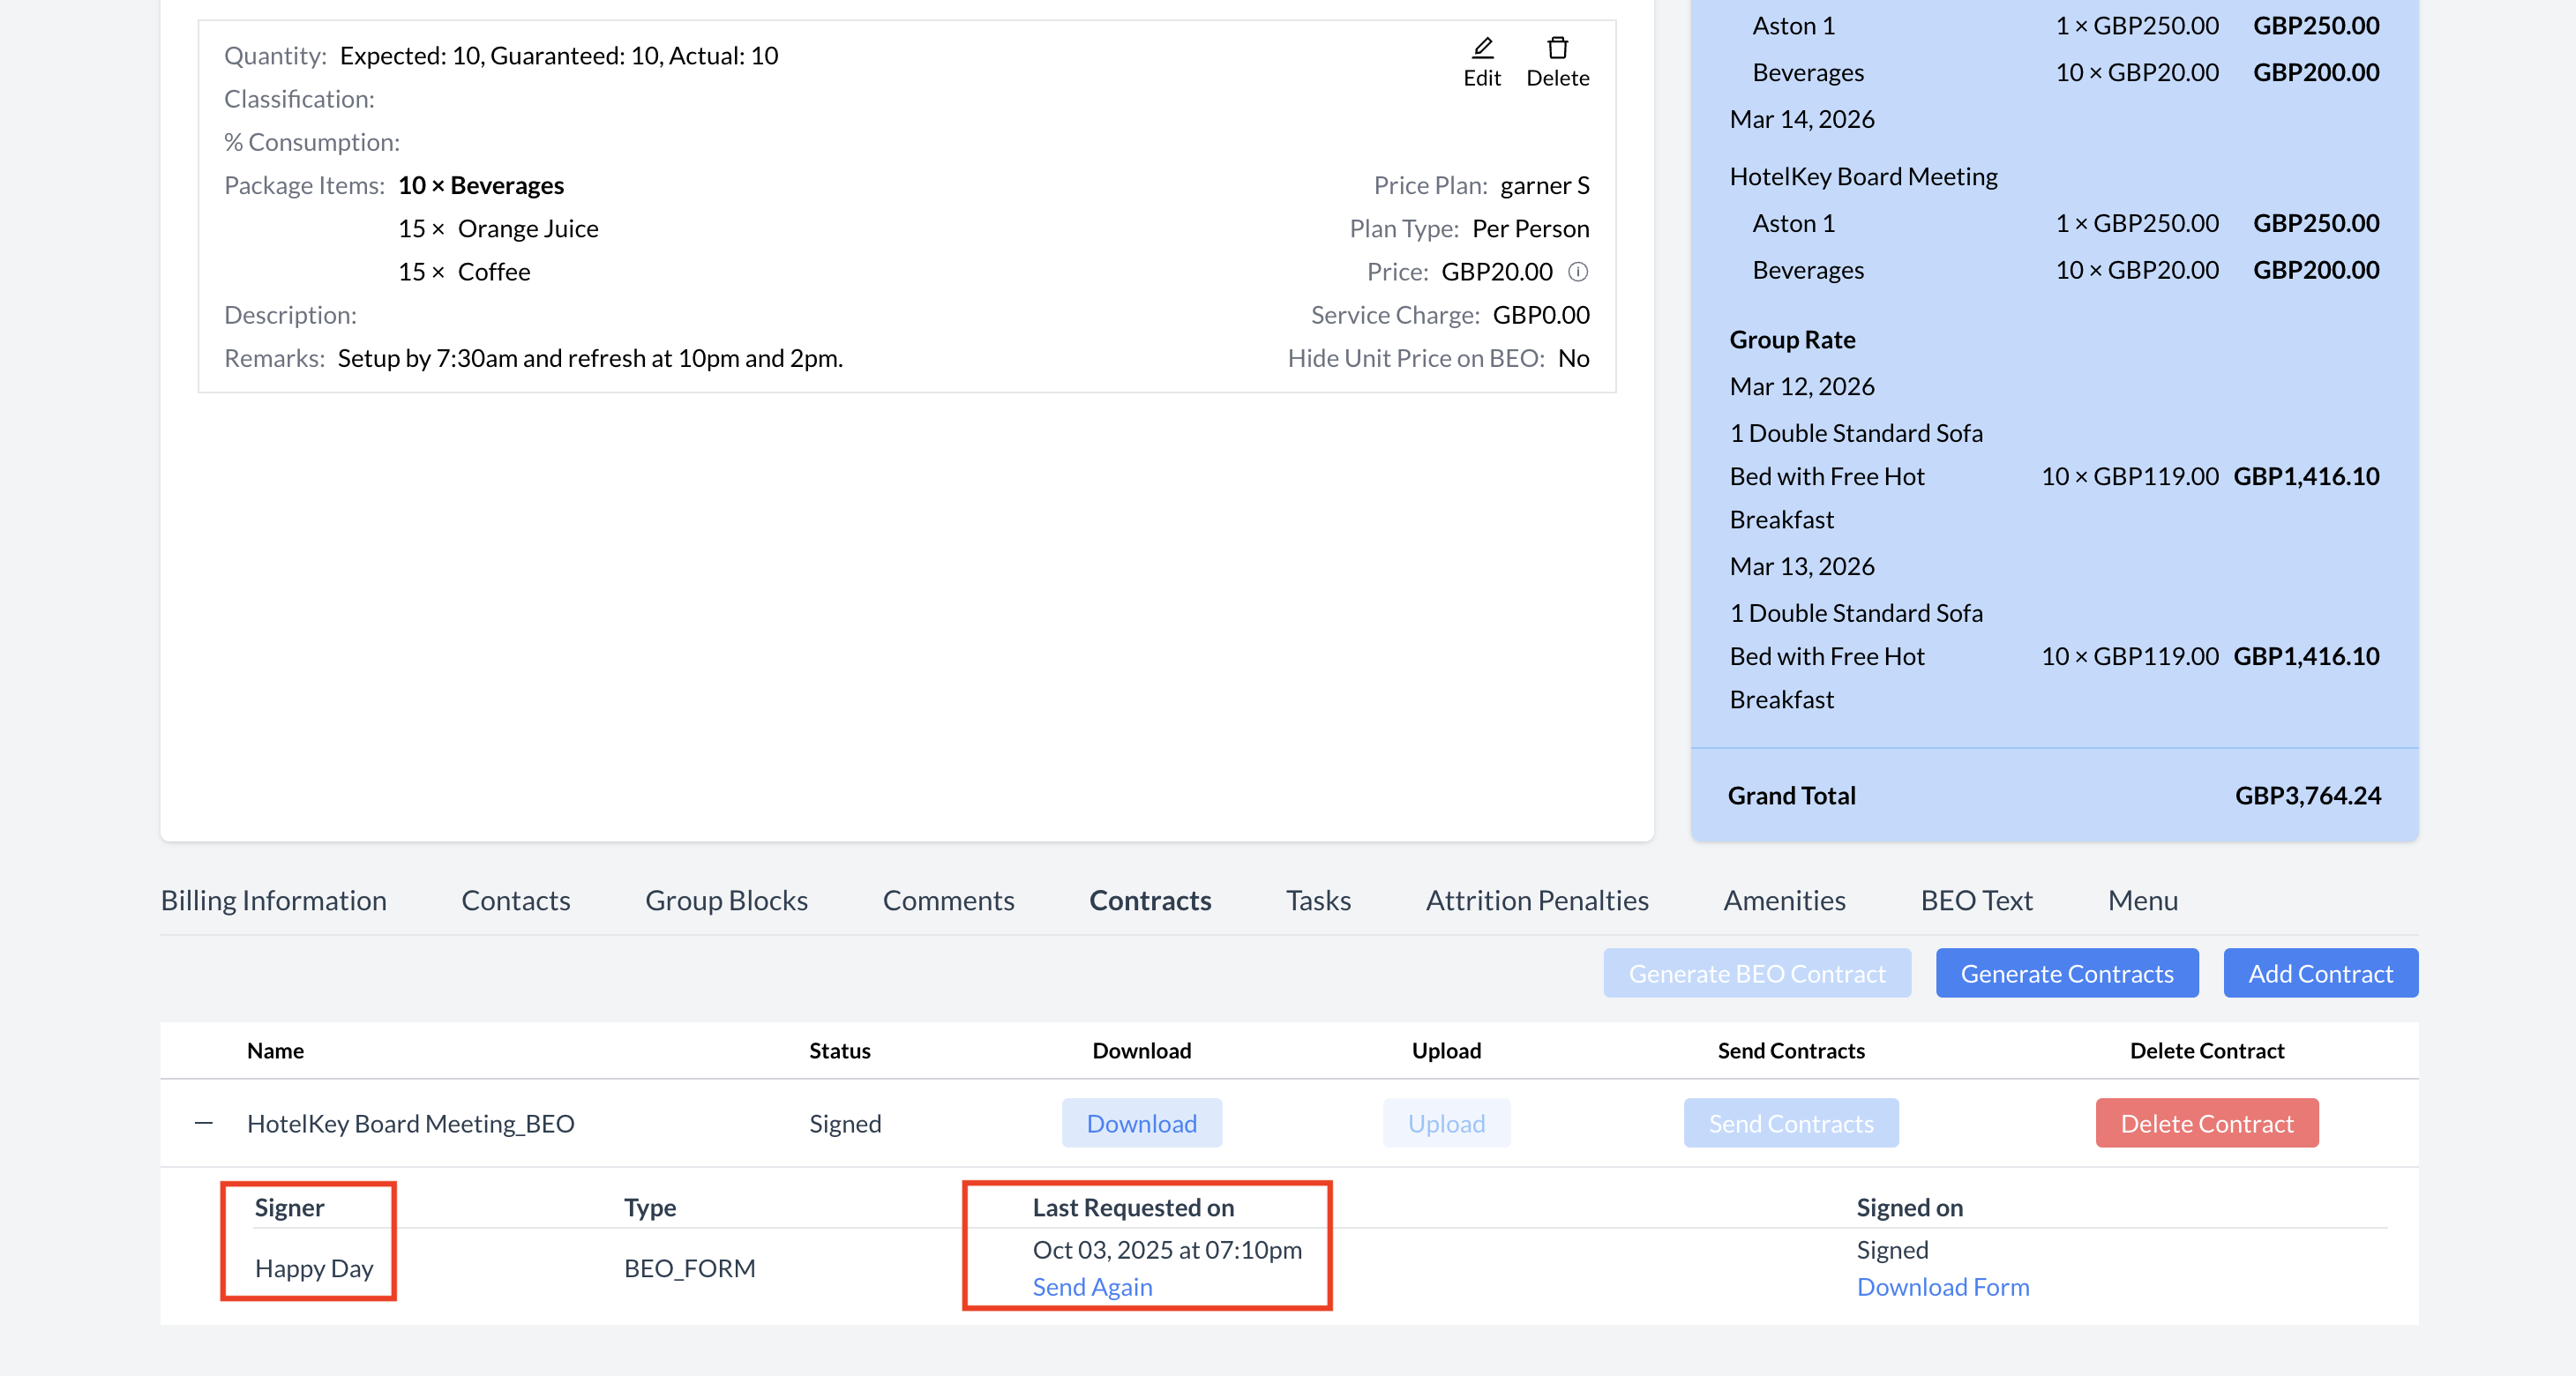
This will expand the view to display a detailed list of all signers, including:
Each signer’s name
The current signature status (e.g., Not Signed, Signed)
Resending to a Signer:
If a signer has not yet signed, you can click the blue “Send Again” button to resend the BEO.
📝 Tip: This expanded view is especially useful when managing BEOs with multiple signers, allowing you to monitor progress and follow up as needed.
BEO - Expand to see Signature Status
BEO - Individual Signature Status
Generating and Sending a Event Contract
To create and send a Event Contract, follow these steps:
On the Event Record, click the blue "Generate Contract" button.
After clicking the button, the screen will refresh and return you to the Event Record.
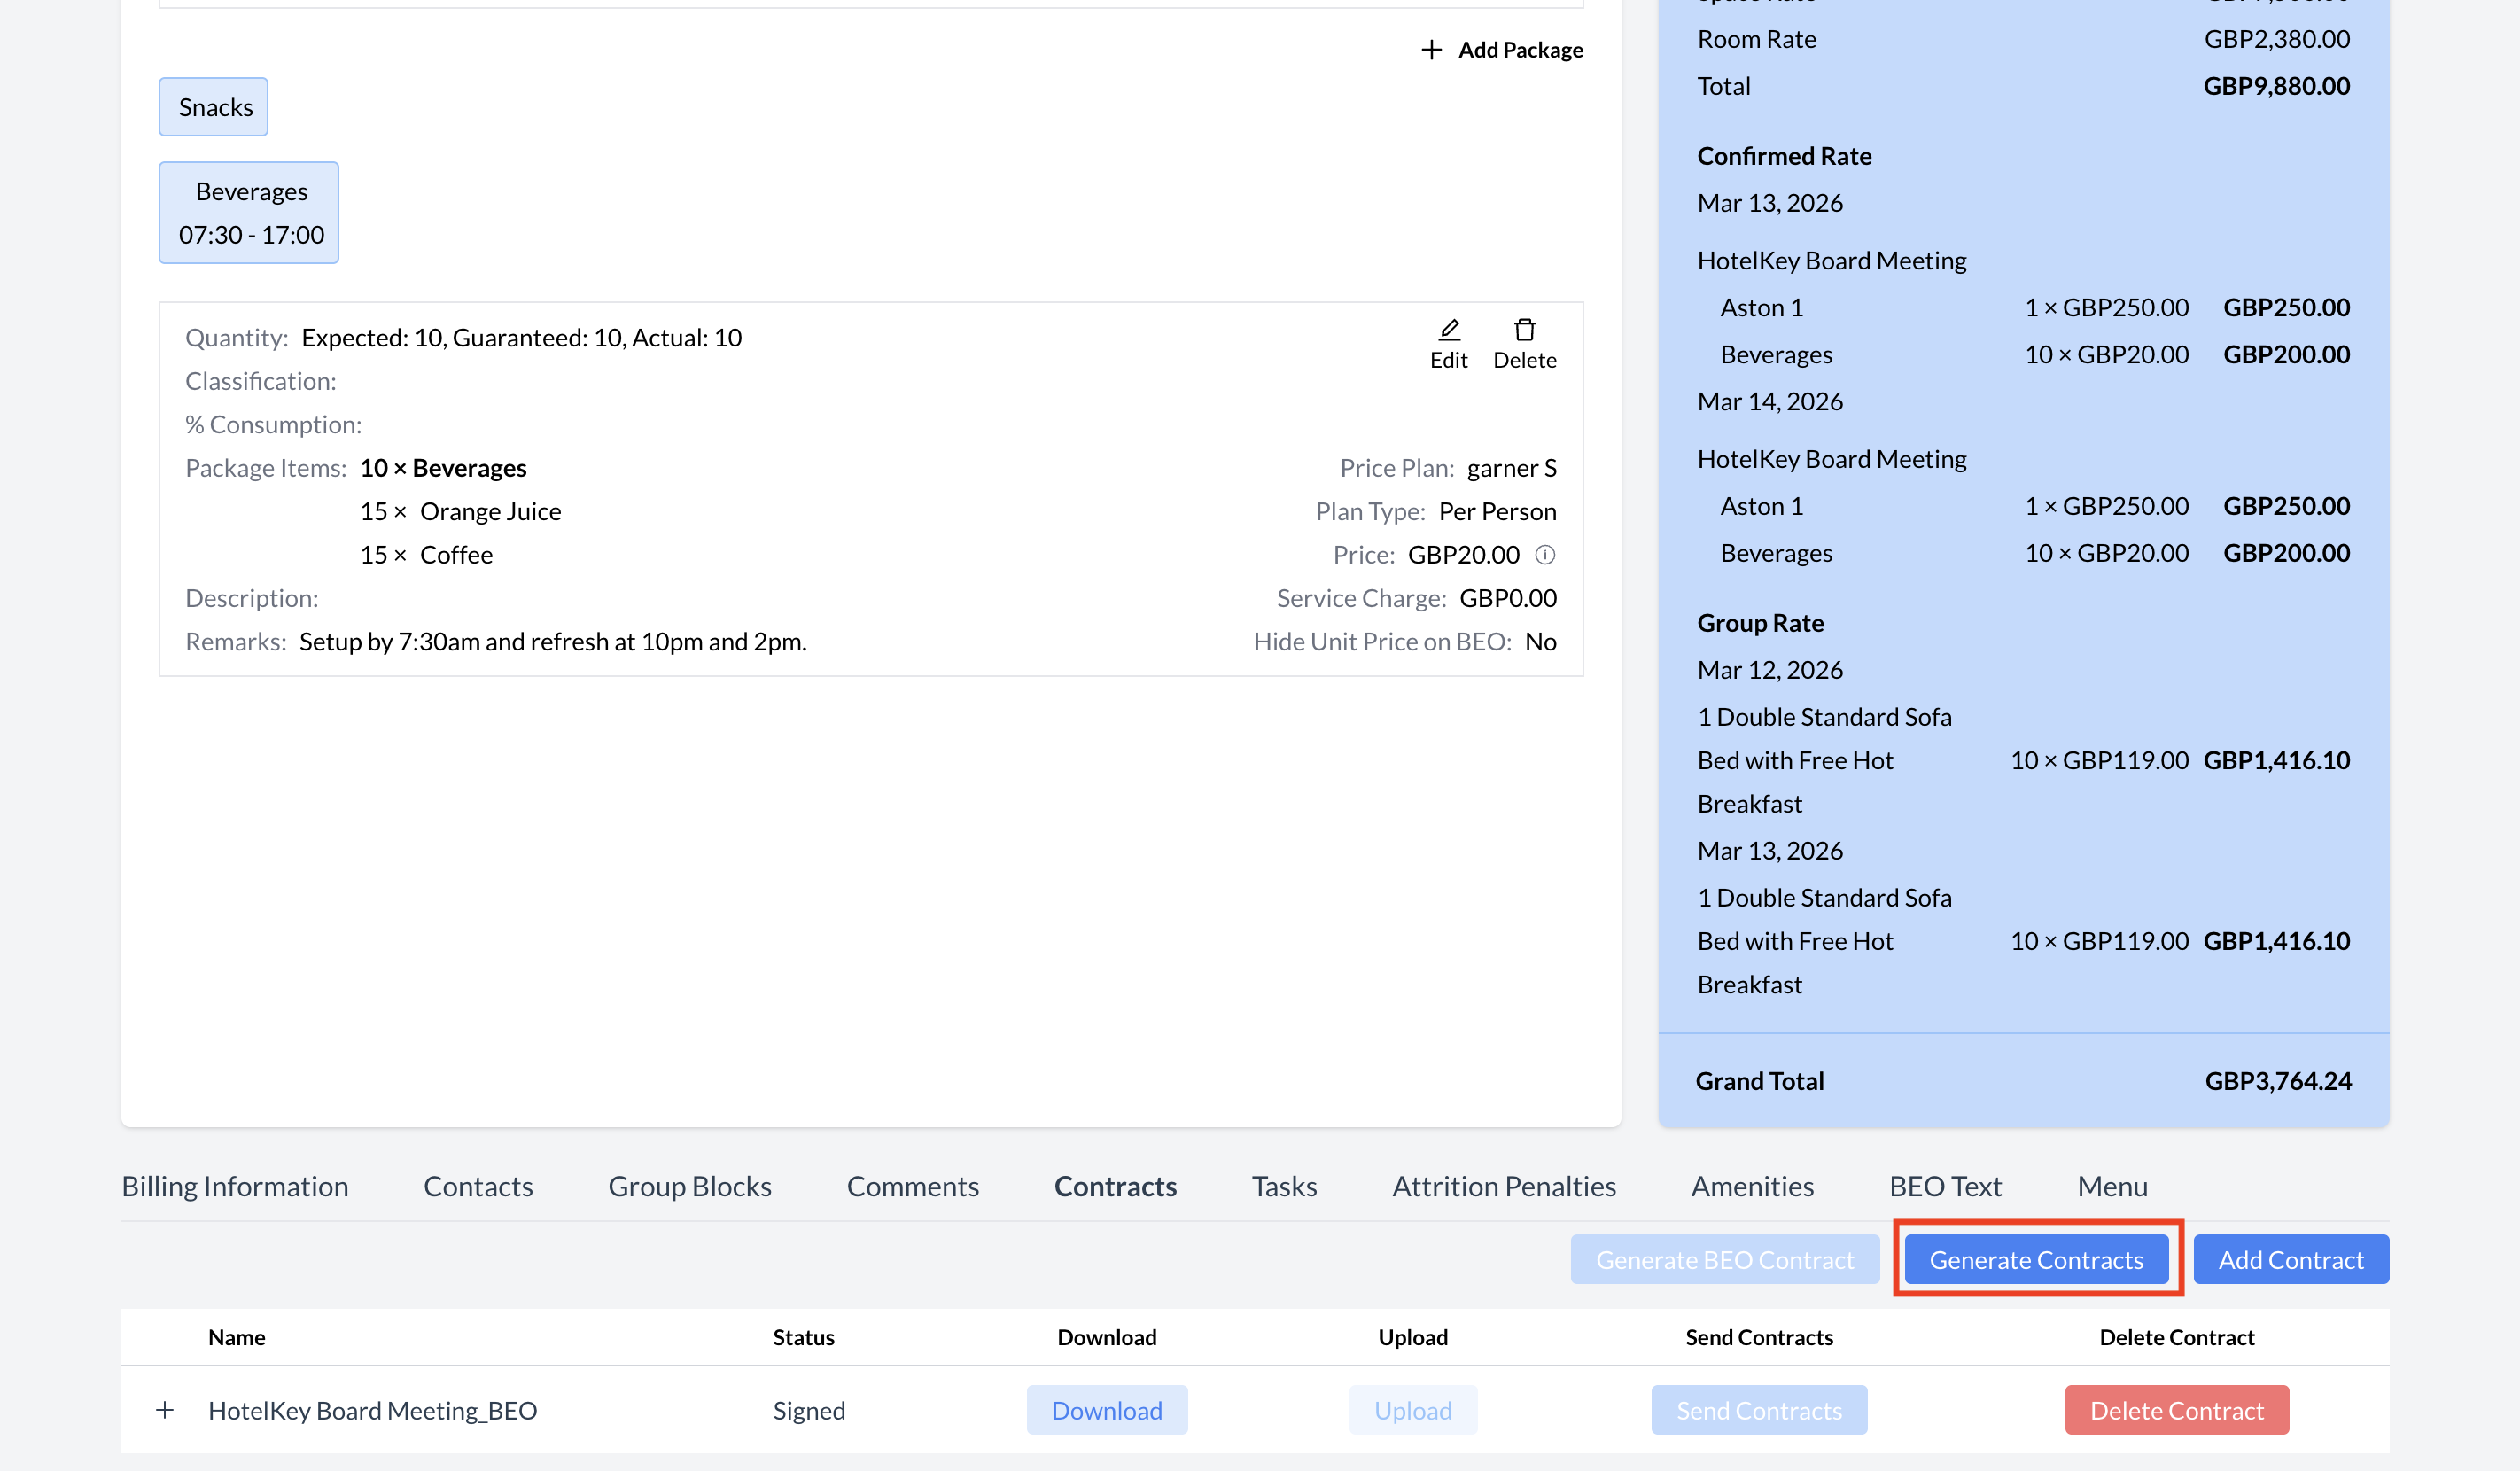
Scroll to the bottom of the Event Record and reopen the Contract section.
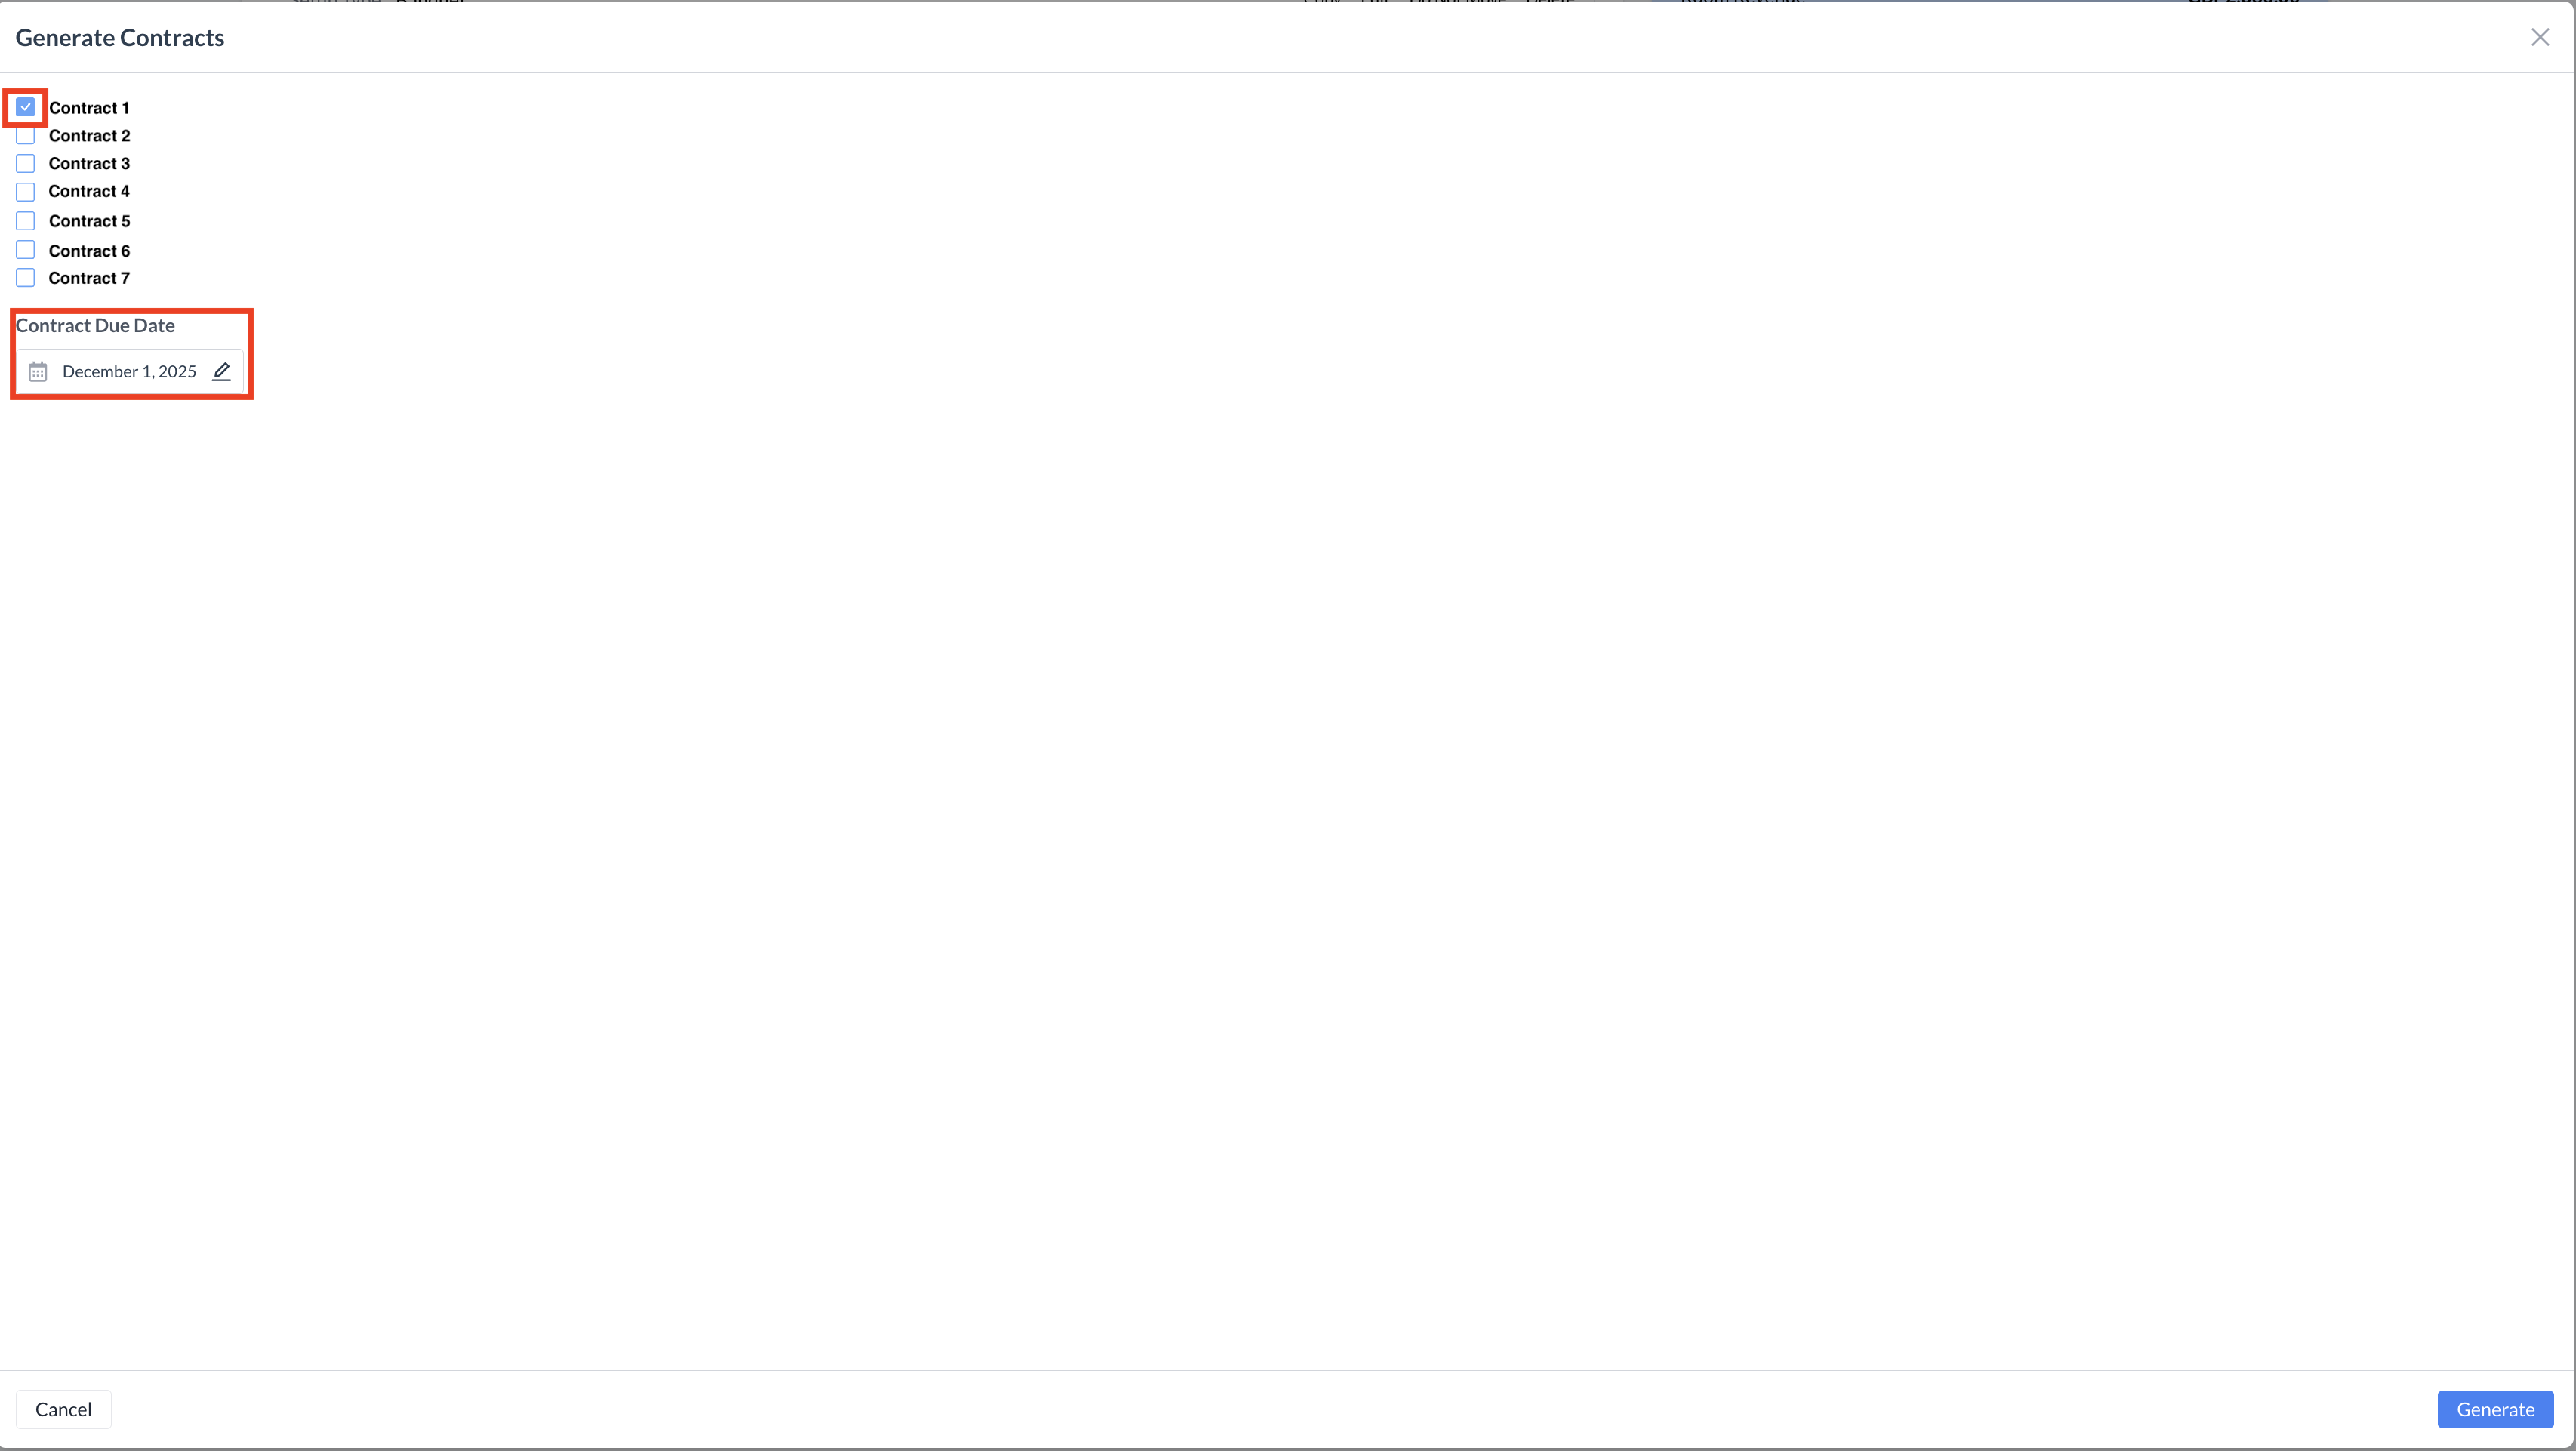
Click the blue “Generate Contracts” button.
You will now see the list of contracts available. Select the Contract to send to the booker and click the blue “Confirm” button.
You will now see that the Contract has been generated for the event.
Click the blue "Send Contract" button. This will open the email configuration screen, where you can:
Review the recipient details
Make any necessary changes to the message
Send the Contract directly to the guest for electronic signature
💡 Tip: Be sure to double-check all event details before sending the Contract to ensure accuracy.
Contracts - Generate Event Contract
Contracts - Select Contract to Send
Contract - Sending a Contract
When sending a contract for electronic signature, it’s important to follow these steps carefully to ensure the document is correctly configured and delivered.
🧾 Step-by-Step Instructions
Assigning Signers
A contract can be signed by the contract singer only.
Use the dropdown menu next to Signer 1 to select the client’s email address.
Optional: Add CC or BCC
You may choose to CC or BCC other recipients on the email.
⚠️ Note: CC and BCC recipients will receive a copy of the email but will not be able to sign the document.
Enter the Email Subject Line
This will be the subject line your client sees in their inbox.
Compose the Email Body
Use the Rich Text Editor to enter your message.
You can format the email by adding bold text, italic text, bullet points, or links to customize your message.
Insert the "Review and Sign" Link (Required)
🔴 Important: You must include the "Review and Sign" link in the body of your email.
To do this, click the "Review and Sign" button located on the right-hand side, just above the Rich Text Editor box.
The placeholder text will appear in the body of your message—this is where the recipient will click to review and sign the Contract.
Send the Contract
Once everything is configured, click the blue "Send" button to email the Contract to your signer.
⚠️ Important Note: Contracts must be submitted by each individual property.
While EventKey automatically pulls data into the contract—such as Event Name, Dates, Spaces, Rates, and more—the contract template itself must be provided by the property.
Contract - Send Contract Email Configuration
Guest Experience: Receiving and Signing the Contract
Once the Contract is sent:
The signer will receive an email with the Contract directly in their inbox.
Any recipients added as CC or BCC will also receive a copy of the email, but will not be able to sign the document.
What the Signer Sees:
At the bottom of the email, the signer will see a blue "Review & Sign" button.
The signer must click the "Review & Sign" button to open the contract.
This will launch a secure webpage where they can review the document and sign it electronically.
🔐 The electronic signature process is secure and time-stamped, providing a verified record of approval.
Guest Inbox
Example of Email
Signing the Contract: Guest Instructions
When the signer clicks the "Review & Sign" button in the email, the Contract will open in their web browser, starting on page 1.
Steps to Complete the Signature:
Review the Contract
The signer should scroll through the document, reviewing each page carefully.
Click to Sign
At the bottom of the final page, the signer will see a blue click to sign. Clicking the button will open the Add Signature window.
Add Signature
The signer can use their mouse or touchscreen to draw their signature.
✏️ Optional: In EventKey settings you can enable the signer to also type their name, which will serve as their electronic signature.
Save the Signature
After entering their signature, the signer clicks the blue "Save" button.
Confirm the Signature
The signer will be returned to the Contract, where their signature now appears in the signature box.
To complete the process, they must click the blue "Confirm" button at the bottom of the Contract.
✅ Once confirmed, the signed Contract is securely submitted and a copy is automatically stored in the Event Record.
Contract - Page 1 Example
Contract - Last Page Example
Contract - Digital Signature
Contract - Submit Signed Contract
Accessing the Signed Contract
Once the signer has completed the electronic signature process, the Contract status will automatically update from "In Progress" to "Signed."
Downloading the Signed Contract:
Navigate to the Contract section of the Event Record.
Click the blue "Download" button.
The signed Contract will be downloaded to your computer as a PDF file.
📁 The PDF includes all signatures and is stored for easy access and record-keeping.
Contract - Signed and Retured
Viewing Signature Status for Signer
You can easily track the status of the signature request.
How to View Signer Status:
In the Contract section of the Event Record, locate the Contract
Click the “+” icon to the left of the Contract name.
This will expand the view to display a detailed list for the signer, including:
Signer name
The current signature status (e.g., Not Signed, Signed)
Resending to a Signer:
If a signer has not yet signed, you can click the blue “Send Again” button to resend the Contract.
Contract - Individual Signature Status
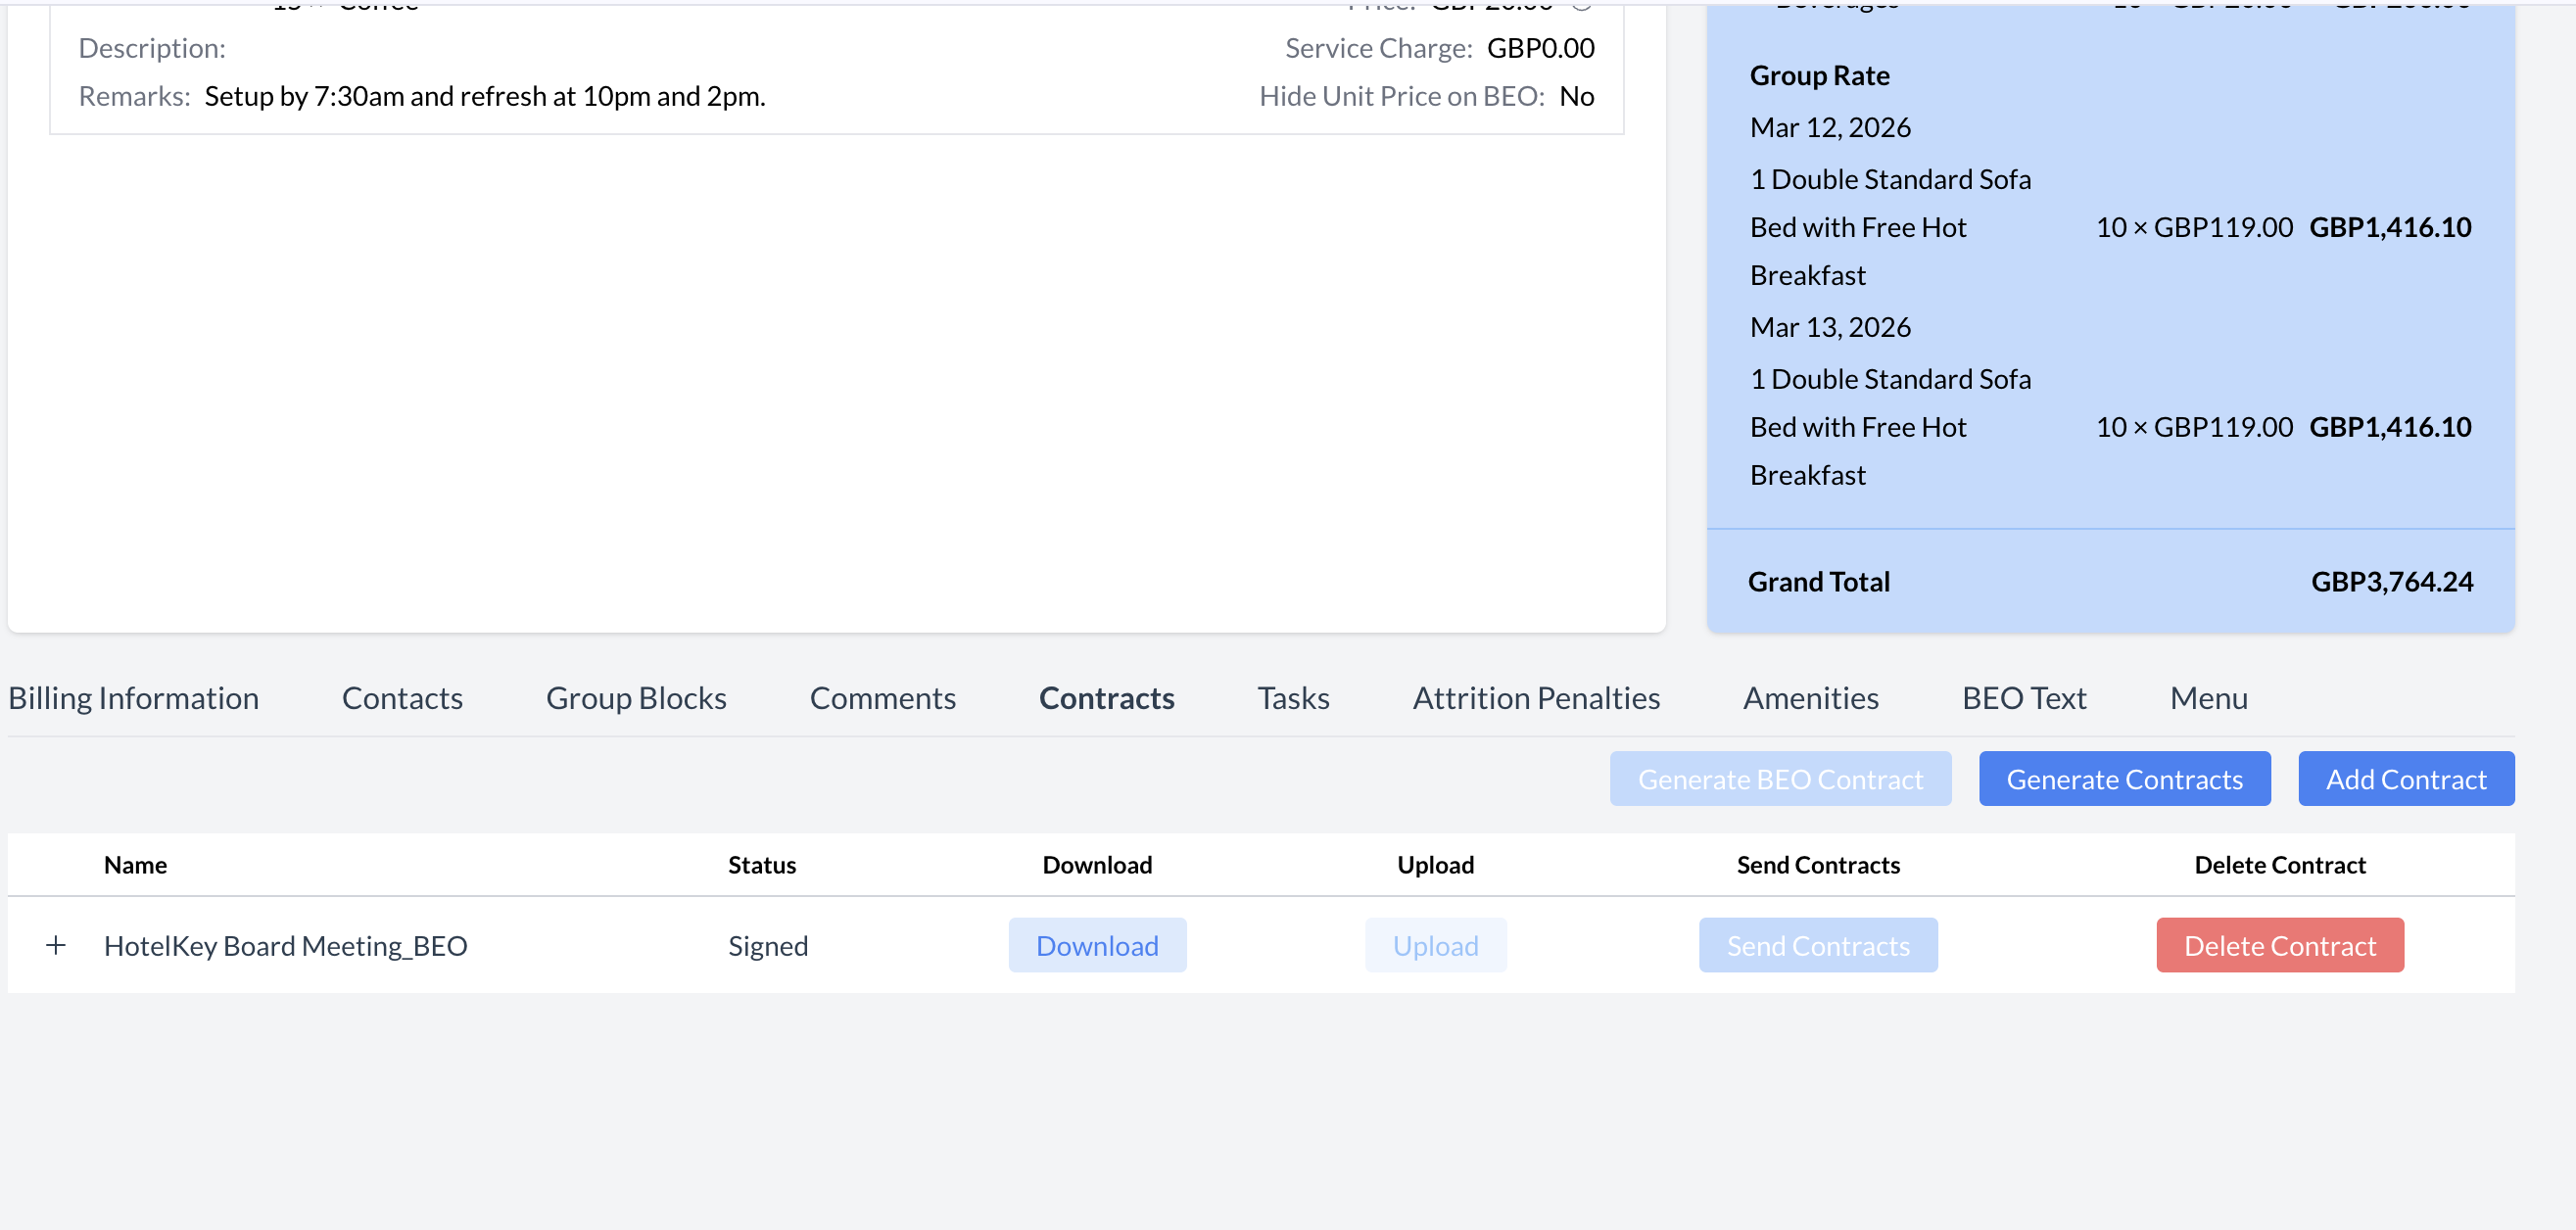
Deleting a BEO or Contract
You can delete a BEO or Contract at any time, even if the document has already been signed. This may be necessary if updates are required or an error needs correction.
Steps to Delete a BEO or Contract:
Go to the Contract section of the Event Record.
Locate the BEO or Contract you wish to delete.
Click the red "Delete Contract" button next to the document.
A confirmation window will appear. Click the red "Delete" button to confirm.
Once deleted, the BEO or Contract will be permanently removed from the Event Record.
Next Steps:
You can now either end the process, or
Generate a new BEO or Contract and resend the updated document to the client for review and signature.
📝 Note: Deleting a document does not affect the overall event record or any other associated data.

.png?cb=bb53721f387a405940f46a0b20428581)
.png?cb=39fcc776f92e941b9a2ff44af11bdc55)

.png?cb=b391389a5033dff18c2cb116fbc0103a)
.png?cb=89c5a15542080ad410a5049d09fdfc22)
.png?cb=1fcce98ab73a822731fe61212784a5ae)