In EventKey, Priority Levels provide a structured ranking framework to triage incoming event inquiries, evaluate commercial opportunities, and optimize catering sales response times. By categorizing event leads and tentative bookings into distinct tiers (such as High Value Opportunity, Medium Value Opportunities, Standard Requests, and Urgent Requests), sales leadership can ensure team resources are directed toward the highest-impact business. System administrators can define standardized priority codes, establish customized display and sort sequences, designate default status settings, manage active/inactive visibility, and ensure priority indicators seamlessly populate across event inquiry queues, sales pipelines, and executive conversion dashboards.
Configuration Guide: Creating a Priority Level
System Navigation Path
Home > Event Administration > Events Setup > Priority Levels > + Add New
Step
Action
Platform Guidance & Operational Details
Access Priority Levels
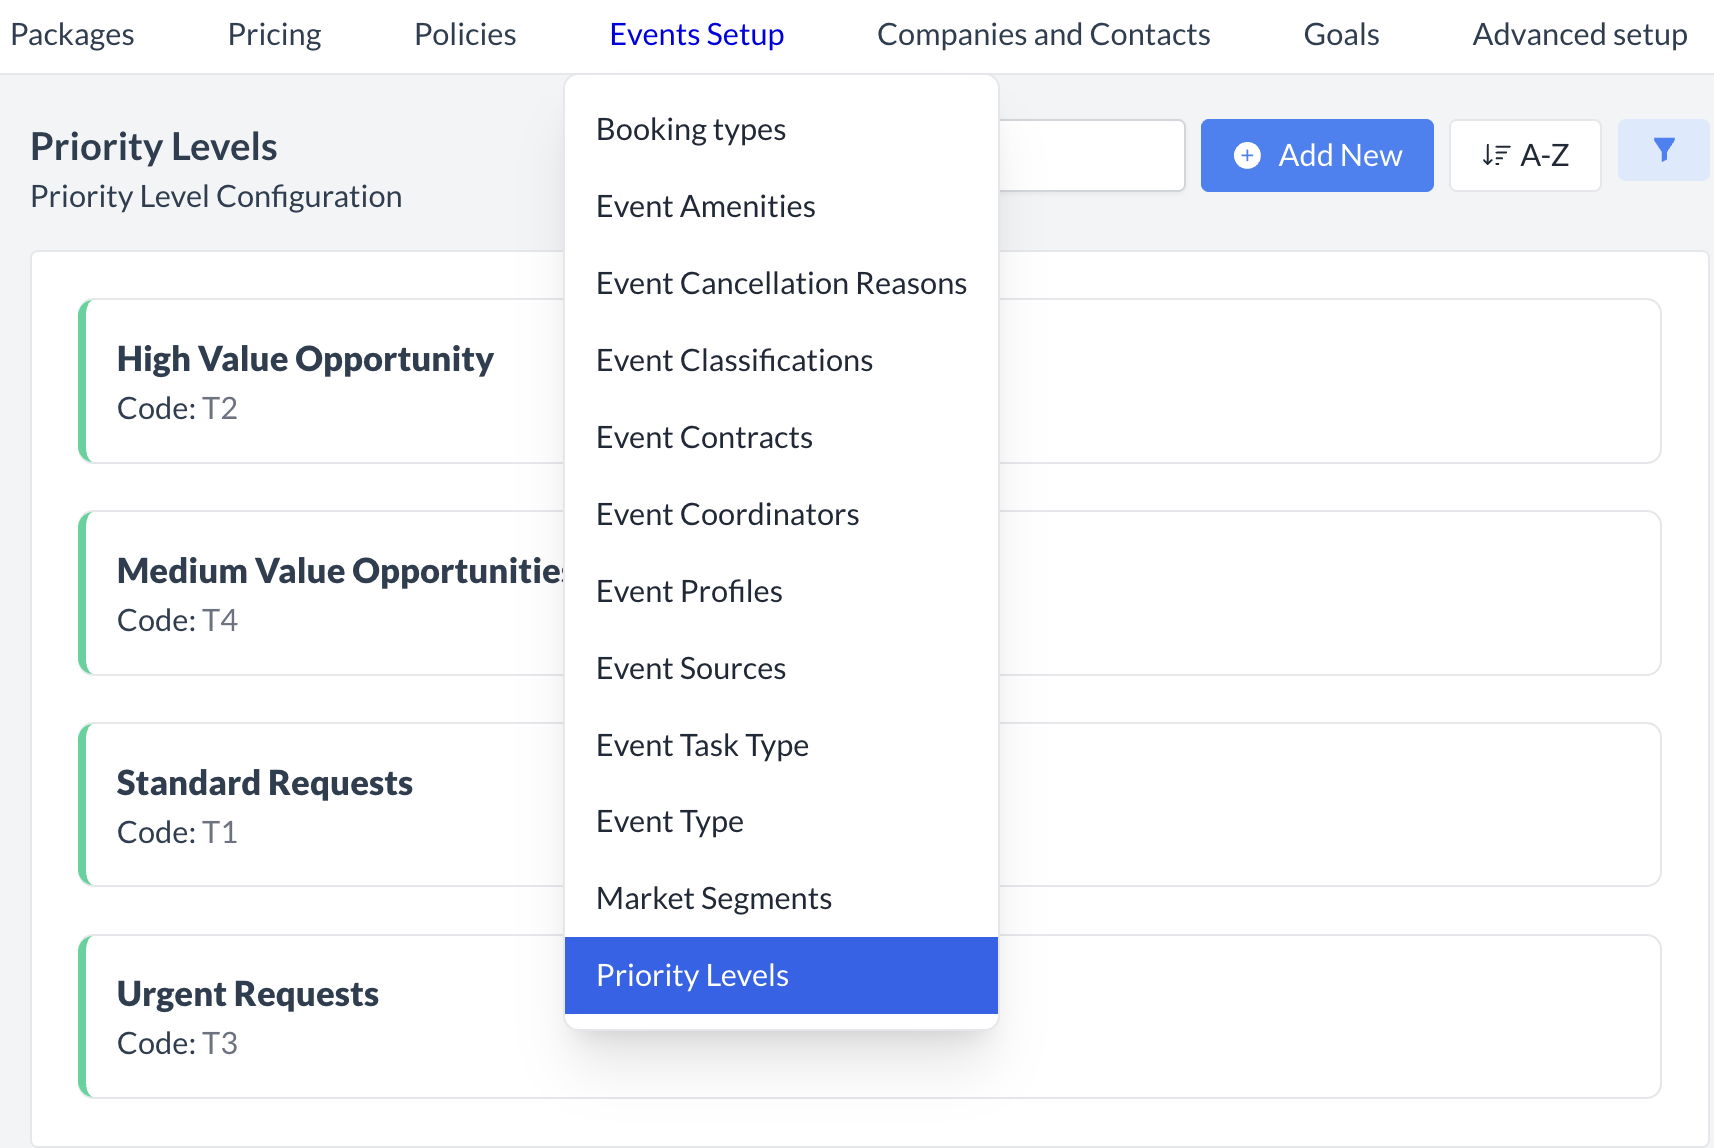
In EventKey Administration, hover over the Events Setup tab in the main navigation menu and select Priority Levels from the dropdown menu.
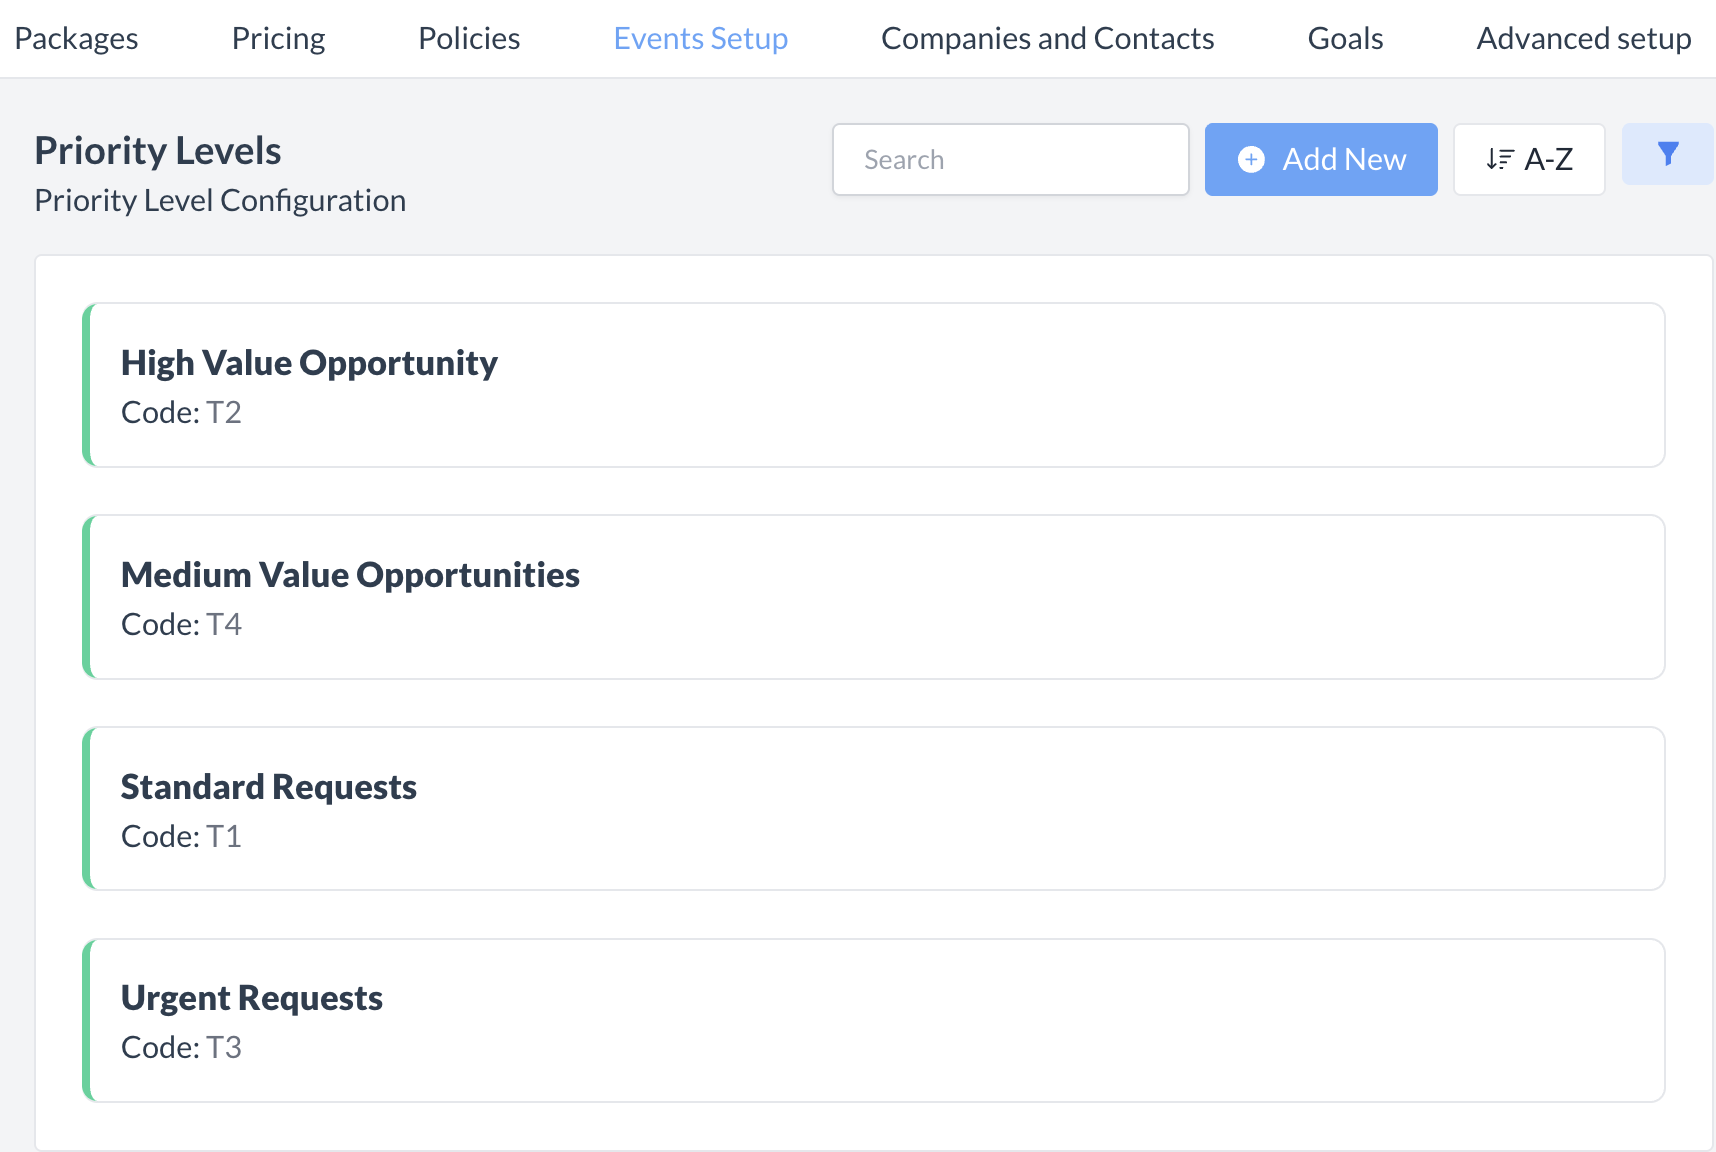
Opens the Priority Levels directory displaying existing priority tiers, tracking codes, search bar, sort options, and action controls.
Initiate Creation
Click the blue + Add New button located in the upper-right corner next to the search query bar and sort control.
Opens the Add Priority Level configuration form with the Active toggle enabled in the header by default.
Enter Priority Level Name
In the Name input field, type the descriptive title for the priority tier (e.g., Medium Value Opportunities).
Establishes the display title presented in inquiry intake forms, event booking headers, and sales tracking logs.
Assign Priority Code
In the Code field, enter a unique alphanumeric code or internal shorthand identifier (e.g., T4).
Assigns the system tracking code used for database filtering, reporting rollups, and integration mapping.
Configure Default Status
Review the Default toggle switch.
Leave OFF unless this tier should be automatically pre-selected whenever a new inquiry or event is created without an explicit priority assignment.
Set Display Sort Order
In the Sort Order field, adjust the numeric value using the - and + stepper buttons (or type directly) to set the ranking position (e.g., 4).
Determines the relative priority sequence and dropdown placement on operational intake screens.
Save & Deploy
Click the blue Save button in the lower-right corner of the configuration card.
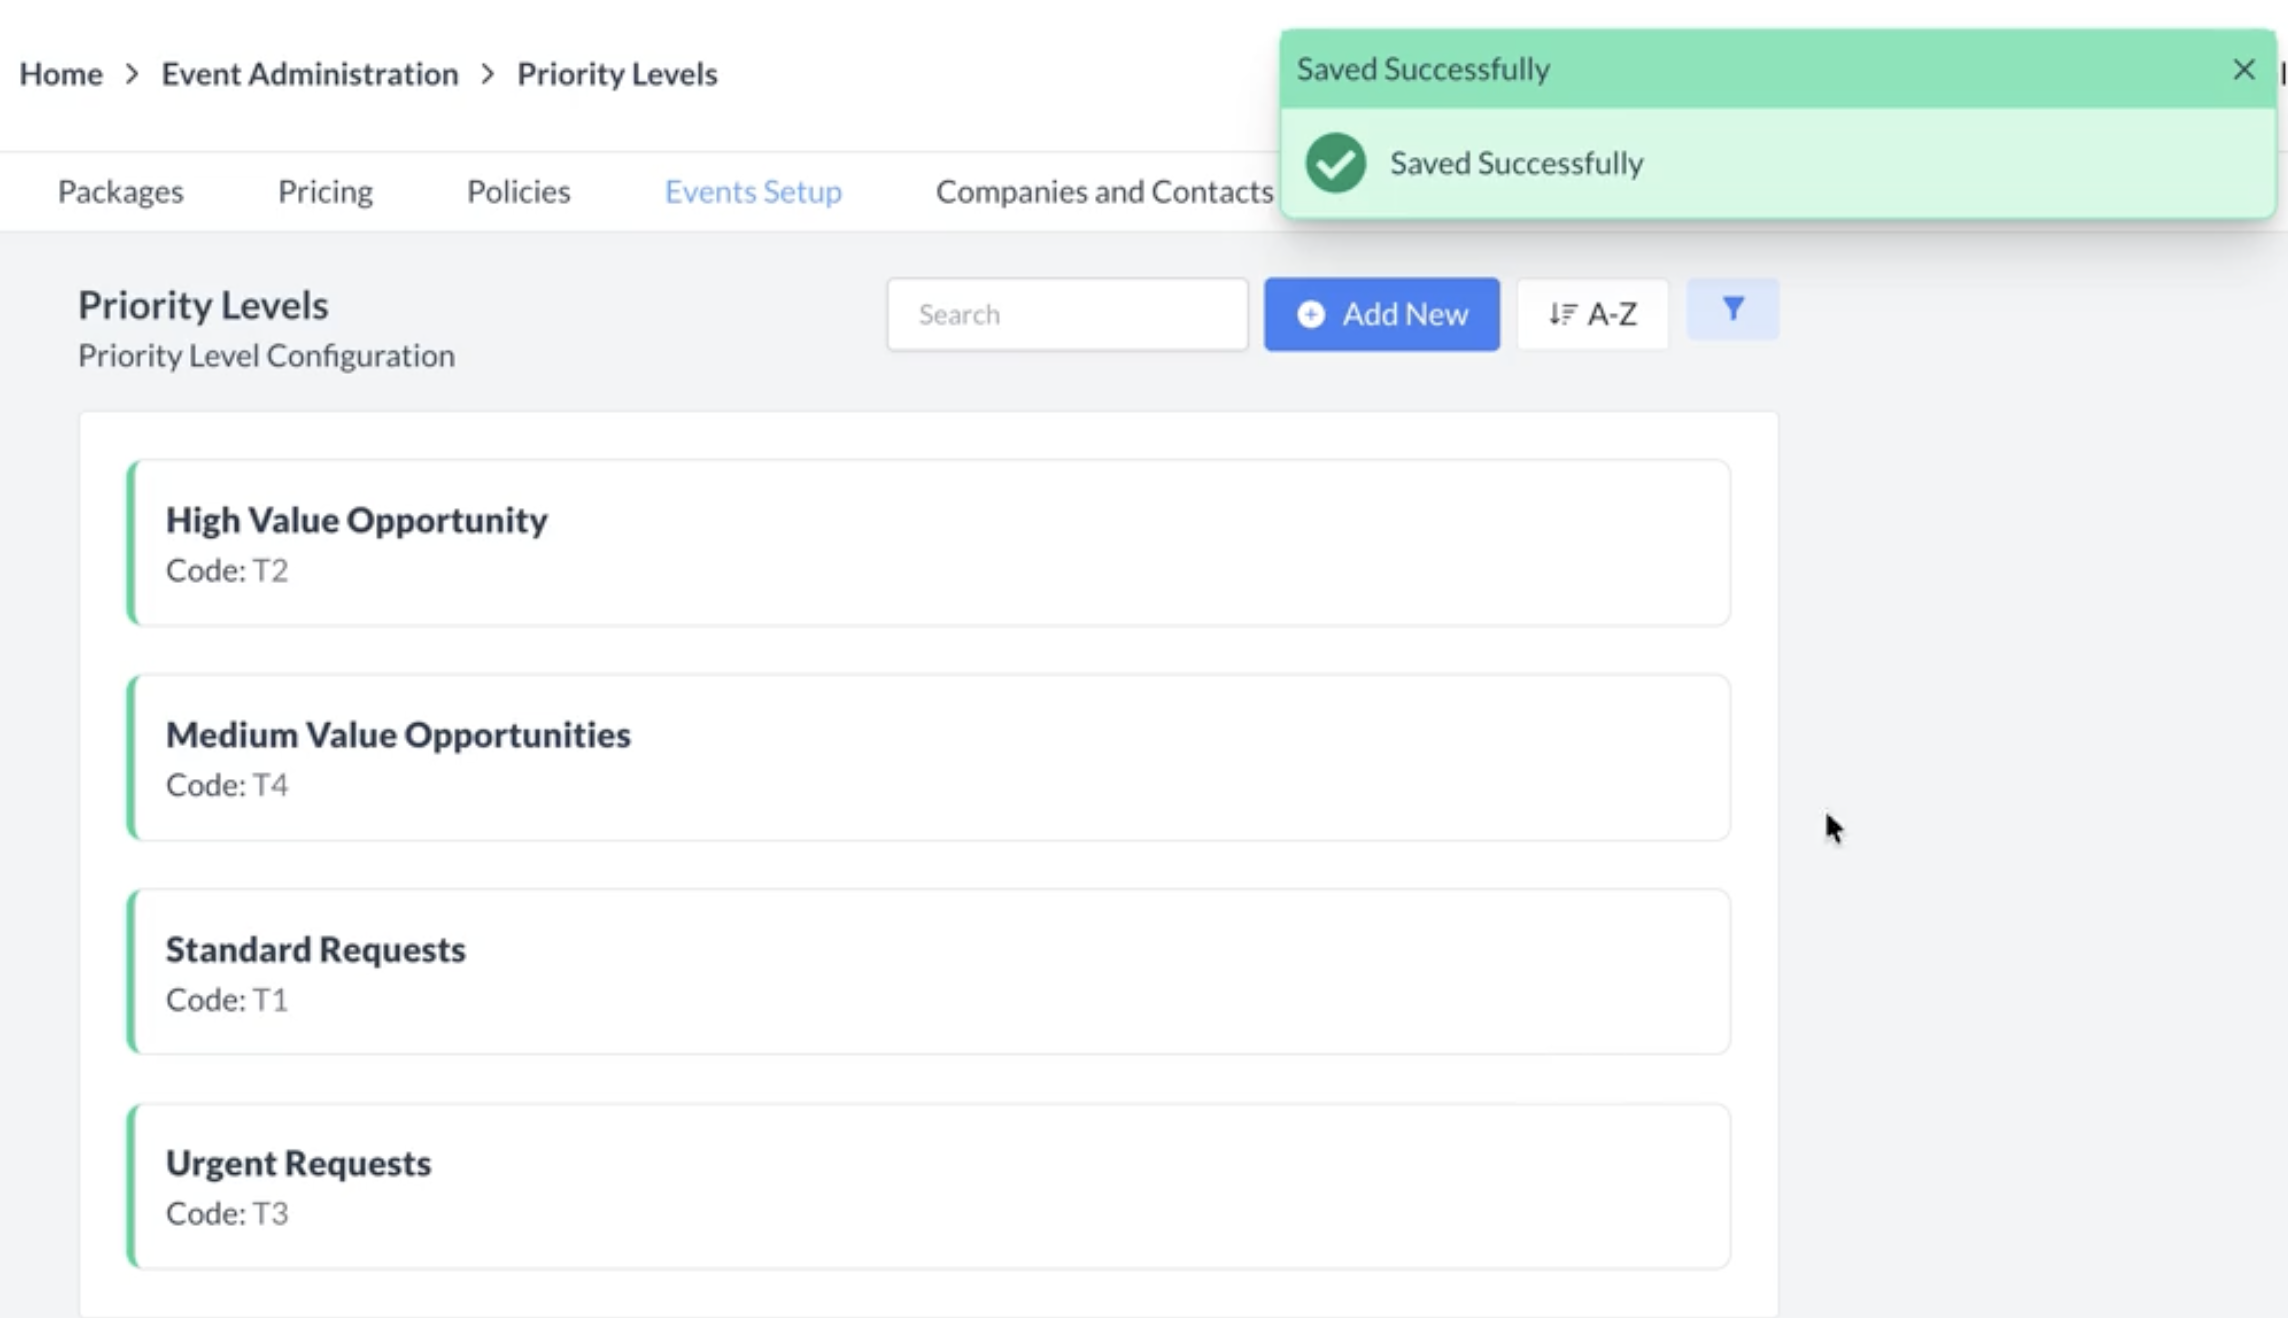
Validates inputs, displays a green notification banner (Saved Successfully: Saved Successfully), and publishes the priority tier to the active directory.
📷 VISUAL CALLOUT:
Events Setup Dropdown & Priority Levels Directory
(Left) The Events Setup navigation dropdown menu displaying Booking Types, Event Amenities, Event Cancellation Reasons, Event Classifications, Event Contracts, Event Coordinators, Event Profiles, Event Sources, Event Task Type, Event Type, Market Segments, and Priority Levels; (Right) The Priority Levels catalog featuring existing cards (e.g., High Value Opportunity, Standard Requests, Urgent Requests), search field, sort controls (A-Z), and the blue + Add New button.
Events Setup Navigation Dropdown
Priority Levels Catalog
Detailed Screen & Field Breakdown
1. Add / Edit Priority Level Screen Parameters
Breadcrumb Navigation: Displays system context (< Add Priority Level) with an interactive back arrow to exit without saving.
Active Status Toggle: Located in the upper-right corner; controls whether the priority tier is immediately selectable in booking intake workflows.
Name Field*: Required single-line text input capturing the formal display title of the priority tier (e.g., Medium Value Opportunities, High Value Opportunity, Urgent Requests).
Code Field*: Required alphanumeric identifier used for system tracking and reporting (e.g., T1, T2, T3, T4).
Default Toggle: When toggled ON, the system automatically assigns this priority tier to newly initiated event records and inquiries. Only one priority level should be designated as the active default.
Sort Order Counter (- / +): Numerical ranking determining the position of the priority level in dropdown selectors and grid views.
Save Button: Blue action button that commits the configuration and returns to the updated directory.
📷 VISUAL CALLOUT:
Add Priority Level Configuration Walkthrough
Form screen displaying the Name input populated with Medium Value Opportunities, Code populated with T4, Default toggle set to OFF, Sort Order stepper set to 4, and the blue Save button.
Add Priority Level Configuration Walkthrough
2. Directory Catalog & Utility Controls
Search Field: Interactive text box (Search) enabling instant real-time lookup of priority levels by keyword or code.
Alphabetical Sort Toggle (A-Z / Z-A): Reorders priority cards alphabetically in ascending or descending sequence.
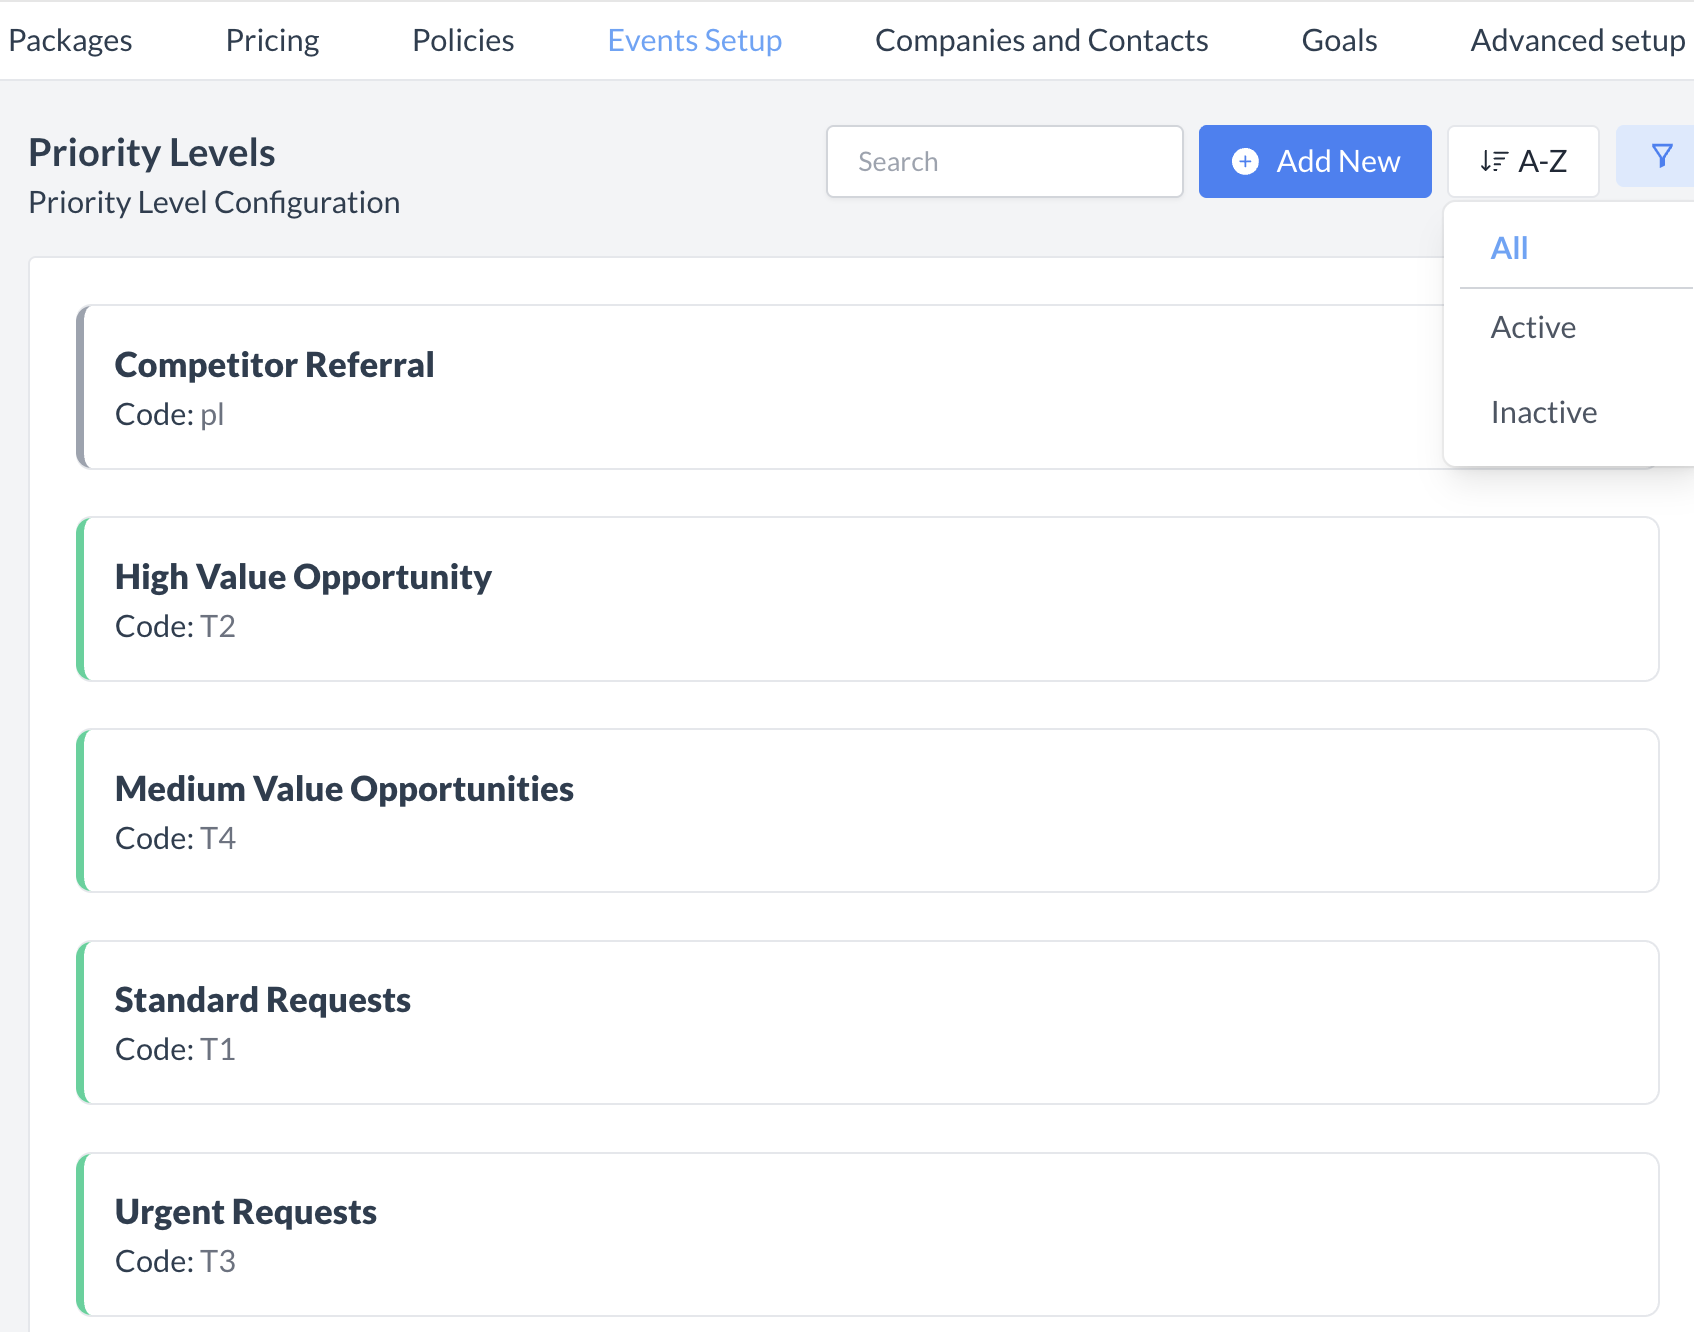
Filter Dropdown: Top-right filter control allowing operators to isolate All, Active, or Inactive priority tiers.
Priority Level Cards: Renders the tier name, assigned code tag (e.g., Code: T4), and a vertical status indicator bar (Green = Active; Grey = Inactive).
Listing screen showing the green top notification banner (Saved Successfully: Saved Successfully) above the updated directory displaying Medium Value Opportunities (Code: T4) alongside existing active cards with green vertical sidebar indicators.
If an operational tier is phased out, merged, or temporarily retired, administrators can deactivate it without impacting existing event records or historical reporting metrics:
Workflow
Step-by-Step Procedure
System Impact
Deactivating a Priority Level
Navigate to Events Setup > Priority Levels.
Click directly on the target priority card to open edit mode.
In the upper-right corner, toggle the Active switch from ON to OFF.
The update saves automatically. The tier receives a grey indicator bar and is removed from active booking dropdowns, while existing events retain their historical priority tag.
Reactivating a Priority Level
In the Priority Levels directory, click the status filter dropdown in the top-right header and select Inactive (or All).
Locate the inactive tier (marked with a grey sidebar) and click to open.
Toggle the status switch to Active (ON).
Instantly restores the priority tier with a green sidebar indicator, returning it to active selection menus on inquiry intake forms and event creation screens.
📷 VISUAL CALLOUT:
Active vs. Inactive Status Controls & Filter Menu
Listing screen comparing active priority levels (green vertical sidebar) against inactive priority levels (grey vertical sidebar), alongside the top-right status filter dropdown (All, Active, Inactive).
Active priority levels (green vertical sidebar) and Inactive priority levels (grey vertical sidebar)
Downstream UI & Operational Touchpoints
Once configured and activated, Priority Levels integrate across several key operational workflows in EventKey:
Event Creation & Inquiry Intake: During initial event booking or lead intake, sales coordinators select the appropriate tier from the Priority Level dropdown, ensuring time-sensitive or high-value inquiries are flagged immediately.
Sales Pipeline Management: Event sales teams can filter open leads and tentative holds by priority level to focus outreach, contract drafting, and follow-ups on the highest-yield opportunities.
Task Management & Turnaround Times: Integrates with Event Task workflows, allowing automated operational tasks and deposit reminders to be assigned tighter turnaround deadlines for higher-priority events.
Sales & Conversion Reporting: Enables leadership to evaluate conversion ratios, average lead response times, and revenue capture across different priority classifications.